Painted Bathroom Vanity: Cabinet Painting Guide
Tired of looking at outdated, worn-out bathroom cabinets every day? A simple refresh can make your entire bathroom feel brand new without the high cost of a full renovation.
Painting bathroom cabinets is one of the easiest and most affordable DIY upgrades you can make at home.
The results are stunning, and the process is simpler than you think.
A freshly painted bathroom vanity can completely transform your space, updating the color, style, and overall feel in just a few days.
From choosing the best paints and tools to step-by-step instructions, common mistakes to avoid, and expert tips, everything you need for a flawless finish is covered below.
Why Paint Your Bathroom Vanity and Cabinets?
Painting bathroom cabinets is an affordable way to give your space a fresh look without replacing them.
A painted bathroom vanity can completely transform the style of your bathroom, updating colors and finishes to match your decor.
Compared to installing new cabinets, painting saves money, reduces waste, and lets you achieve a custom, professional-looking finish.
With proper preparation and quality paint, a painted bathroom vanity can last for years, making it a practical and stylish solution.
Tools and Materials You’ll Need
Before you begin, gather everything on this list to ensure a smooth, uninterrupted painting process.
| Tools | Materials |
|---|---|
| Scrubbing pad | TSP (Trisodium Phosphate) cleaner |
| Heat gun | Shellac-based primer |
| Sandpaper (220-grit and fine-grit) | Eggshell-finish paint |
| Tack cloth | Silicone sealant (optional, for faucet area) |
| Paintbrush | New hardware |
| Paint roller | New vanity top (optional, if replacing ) |
| Painter’s tape | New faucet (optional, if replacing) |
| Drill | Liquid deglosser (optional, if skipping sanding) |
Types of Paint for Bathroom Vanity Cabinets
Choosing the right paint for your bathroom vanity ensures a durable, long-lasting finish that withstands humidity, moisture, and daily wear.
- Semi-Gloss and Satin Finishes: Ideal for bathroom vanities, offering durability, easy cleaning, and strong resistance to moisture and staining.
- Chalk Paint for Matte Look: Creates a vintage, matte appearance but requires a topcoat to protect against moisture and ensure durability.
- Oil-Based Paint Durability: Offers a tough, resistant coating but dries slowly and produces strong fumes during application.
- Water-Based Paint Convenience: Dries quickly, has less odor, and cleans easily, making it ideal for DIY projects in smaller spaces.
- Eggshell-Finish Paint: Strikes the perfect balance between a subtle sheen and durability, making it a practical and stylish choice for bathroom vanities.
Quick Takeaway: When painting a bathroom vanity, always choose a moisture-resistant finish eggshell, satin, or semi-gloss to ensure durability, easy cleaning, and a long-lasting result in humid conditions.
What Type of Vanity/Cabinets Can Be Painted?
Not all bathroom vanities are suitable for painting.
The table below shows common materials and how well they take paint.
| Material | Paint Suitability | Tips |
|---|---|---|
| Solid Wood | Excellent | Sand lightly and use primer for best adhesion. |
| MDF/Particleboard | Good | Seal the edges to prevent moisture-related swelling. |
| Laminate | Moderate | Use a bonding primer before painting. |
| Melamine | Moderate | Clean thoroughly and apply a primer designed for slick surfaces. |
| PVC/Plastic | Low | Special plastic primers are required; may not hold long-term. |
Step-By-Step Guide to Painting a Bathroom Vanity Cabinet
Follow the steps below to cover everything from prep and priming to painting, reassembly, and finishing touches.
Step 1: Prep the Vanity for Painting
Remove hardware, drawers, and the vanity top if replacing it. Clean surfaces with TSP and a scrubbing pad, then rinse thoroughly.
Sand wood with 220-grit sandpaper to remove gloss and ensure paint adhesion. For melamine or thermofoil, ensure the film is securely bonded or remove it with a heat gun.
Step 2: Prime the Surfaces
Apply a coat of primer to the vanity, especially if working with challenging materials like melamine. Use a shellac-based primer for strong adhesion.
Let it dry, then sand it smooth with fine-grit sandpaper and wipe off dust with a tack cloth. A well-primed surface ensures better paint adhesion and a smoother, longer-lasting finish.
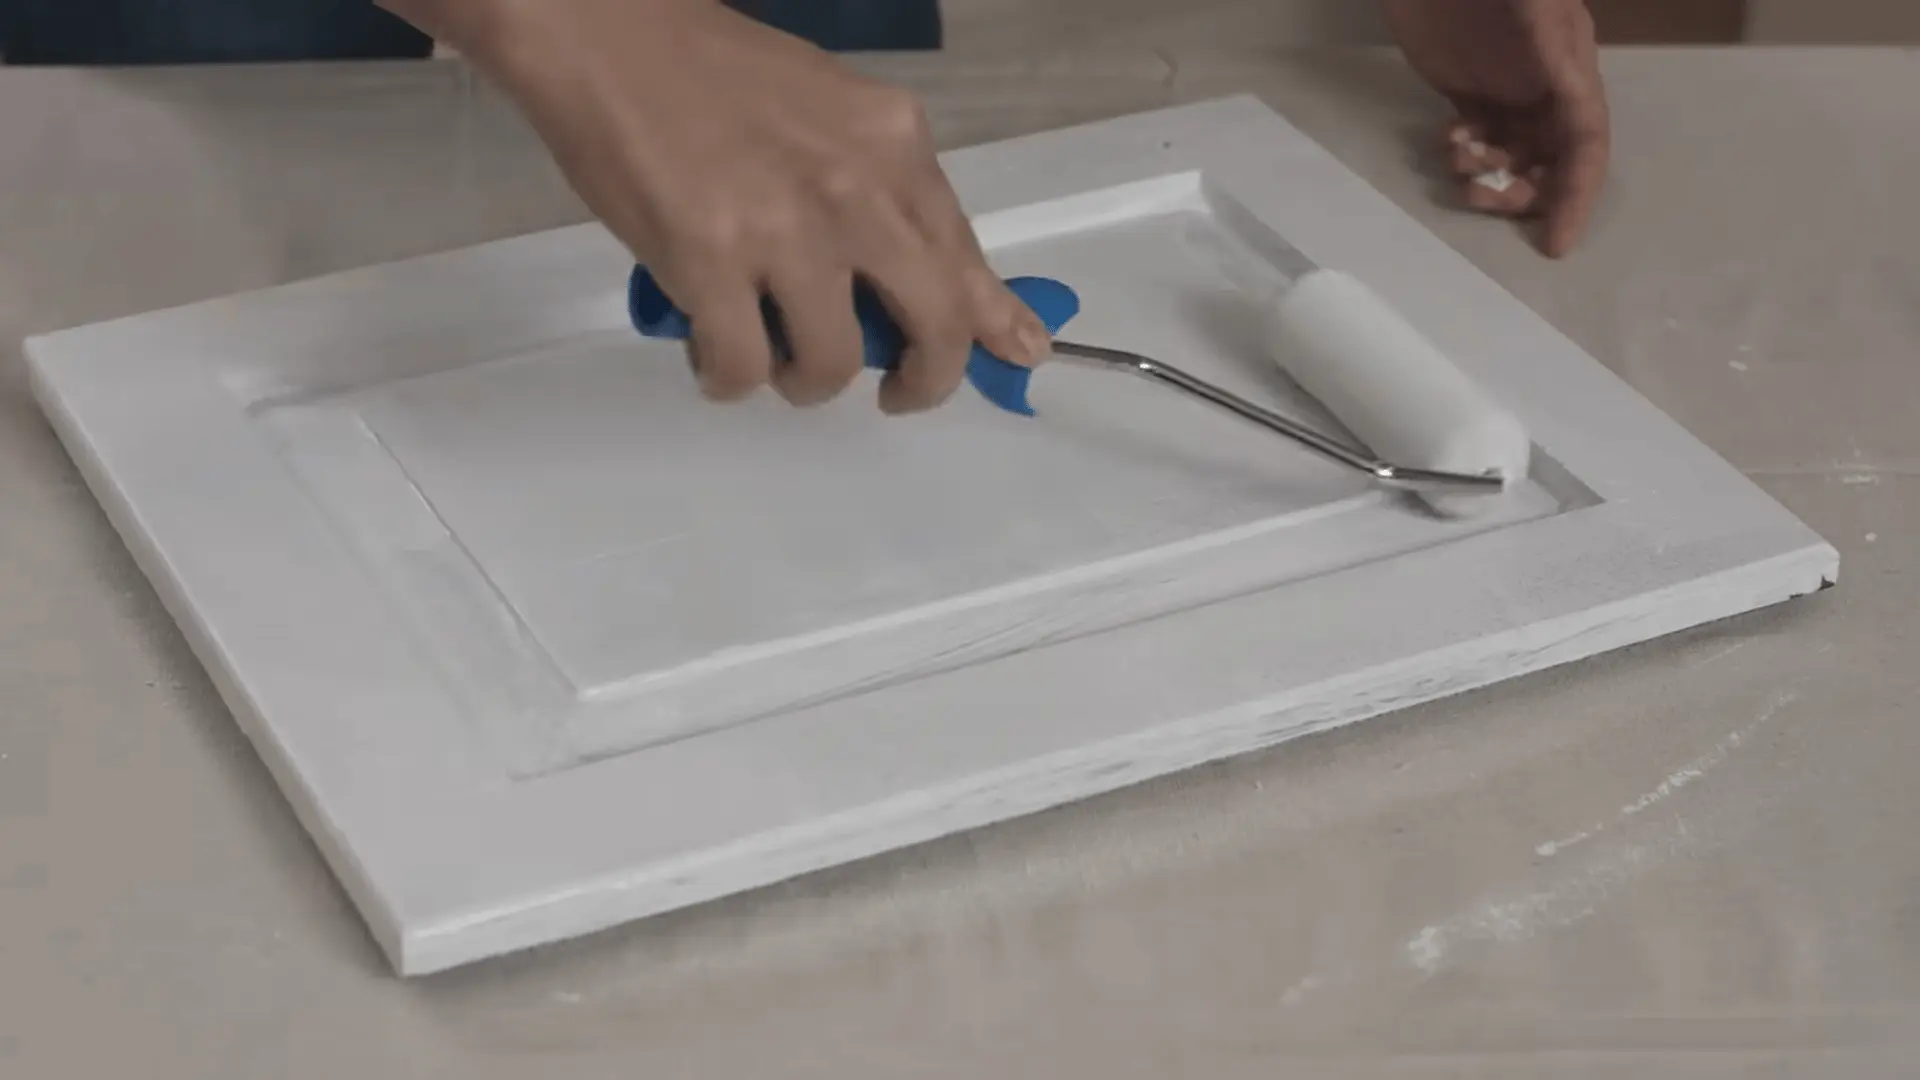
Step 3: Paint the Vanity
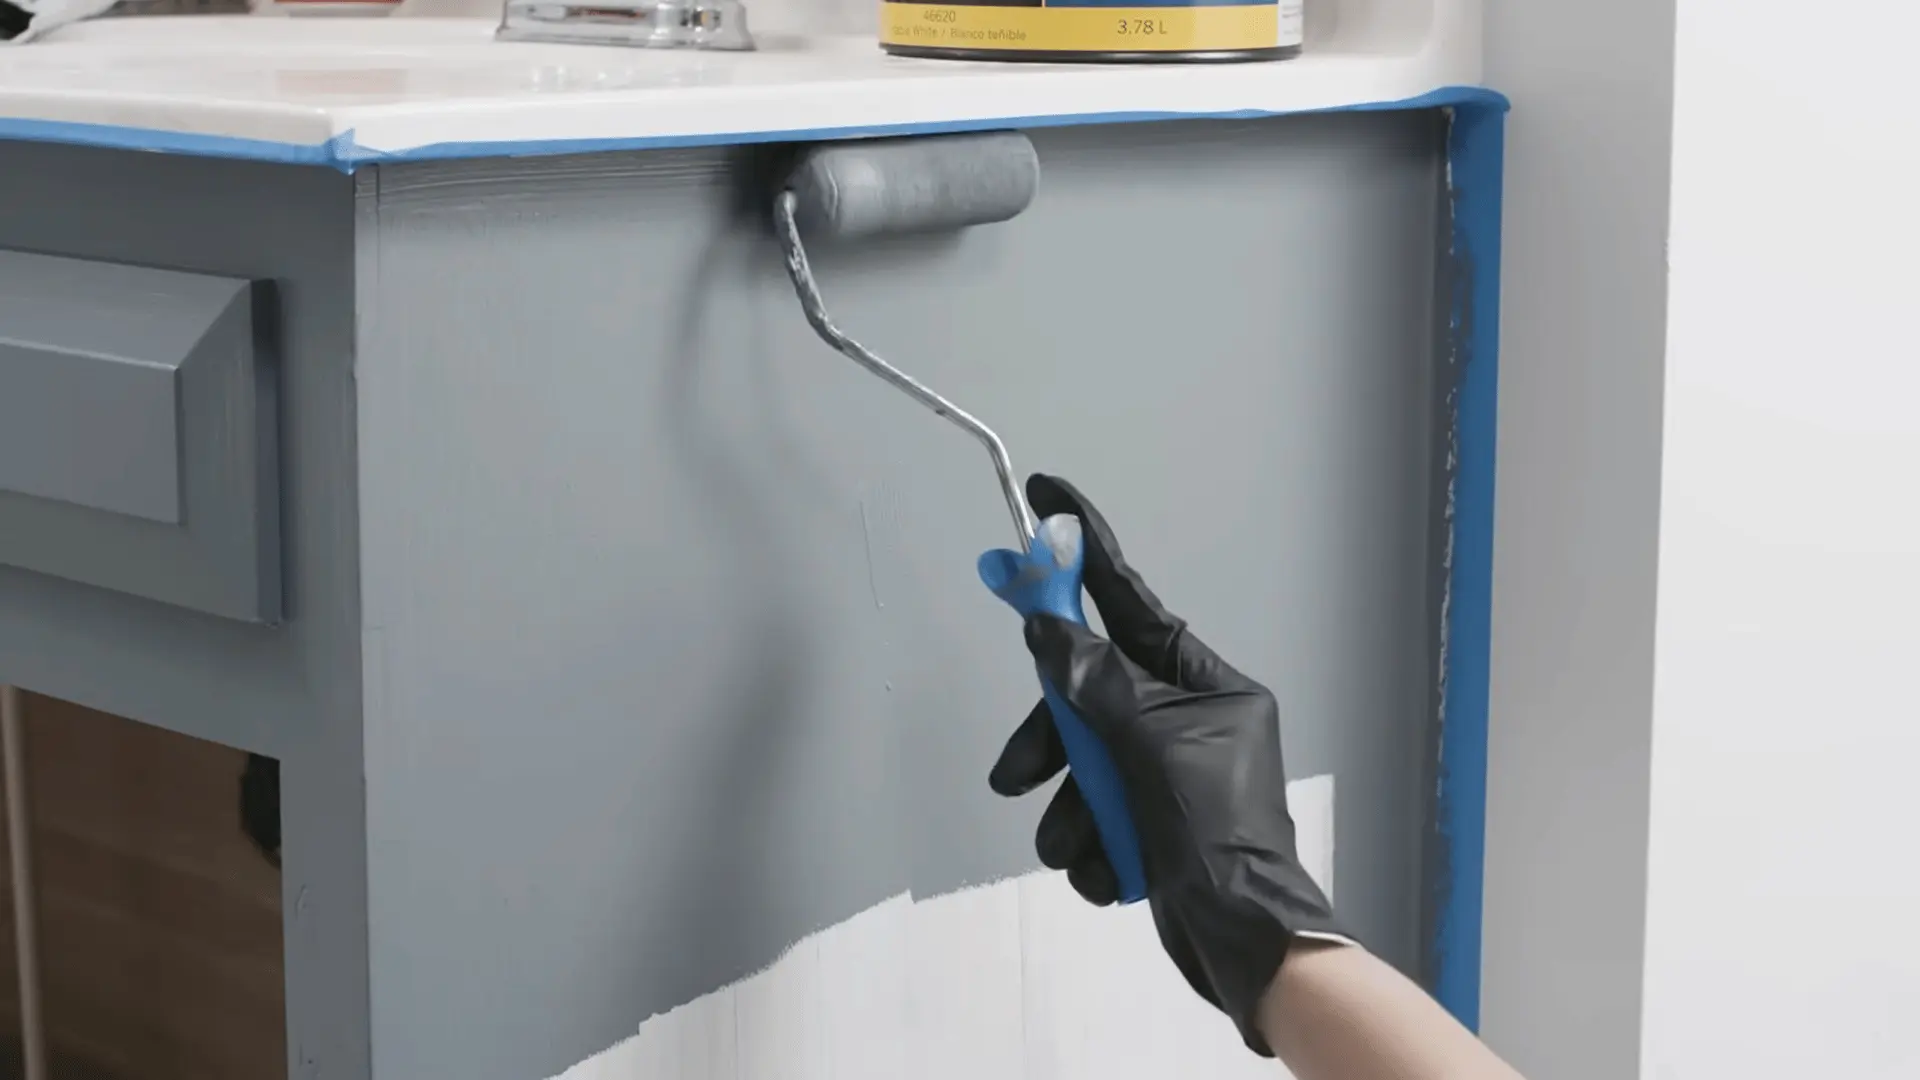
Apply eggshell-finish paint using a brush or roller. Let it dry fully between coats, adding two additional coats for even coverage.
Ensure a smooth, even finish by sanding lightly between layers if needed. Allow the final coat to dry completely.
Step 4: Reassemble the Vanity
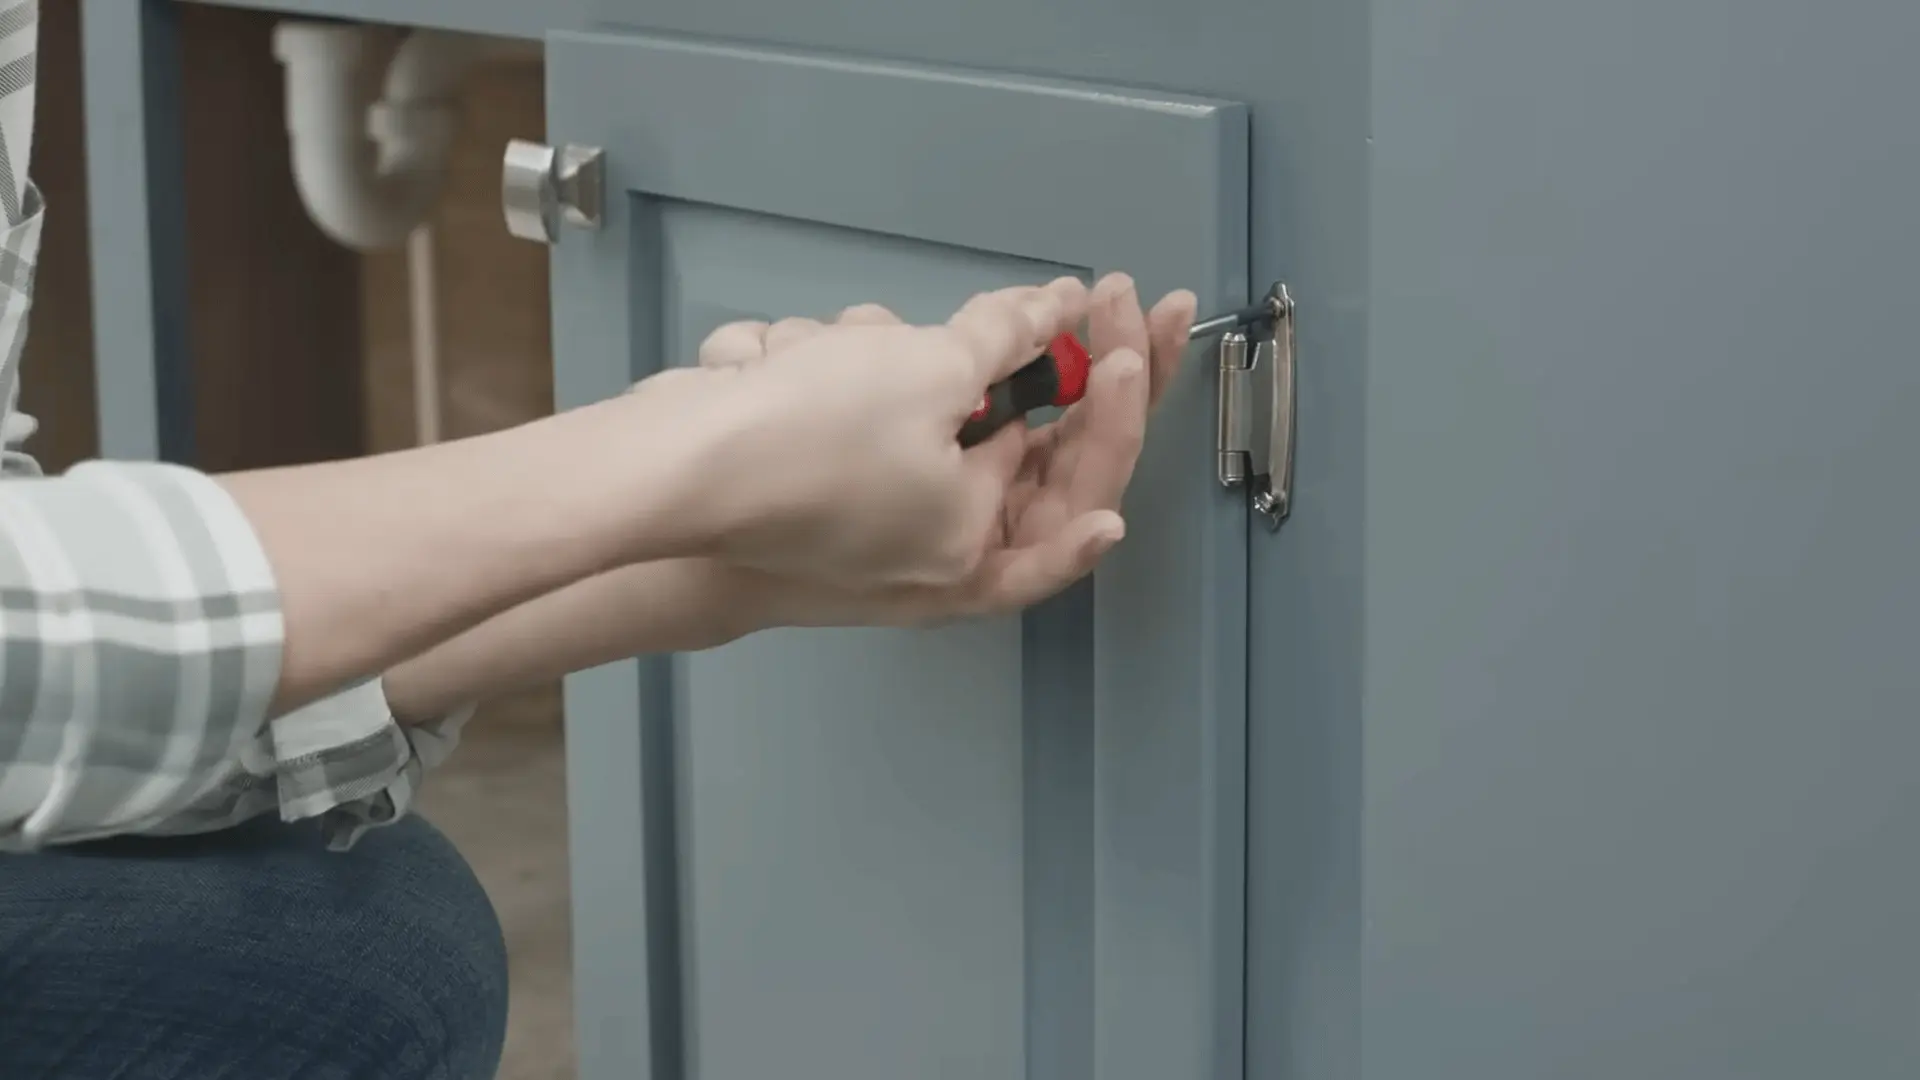
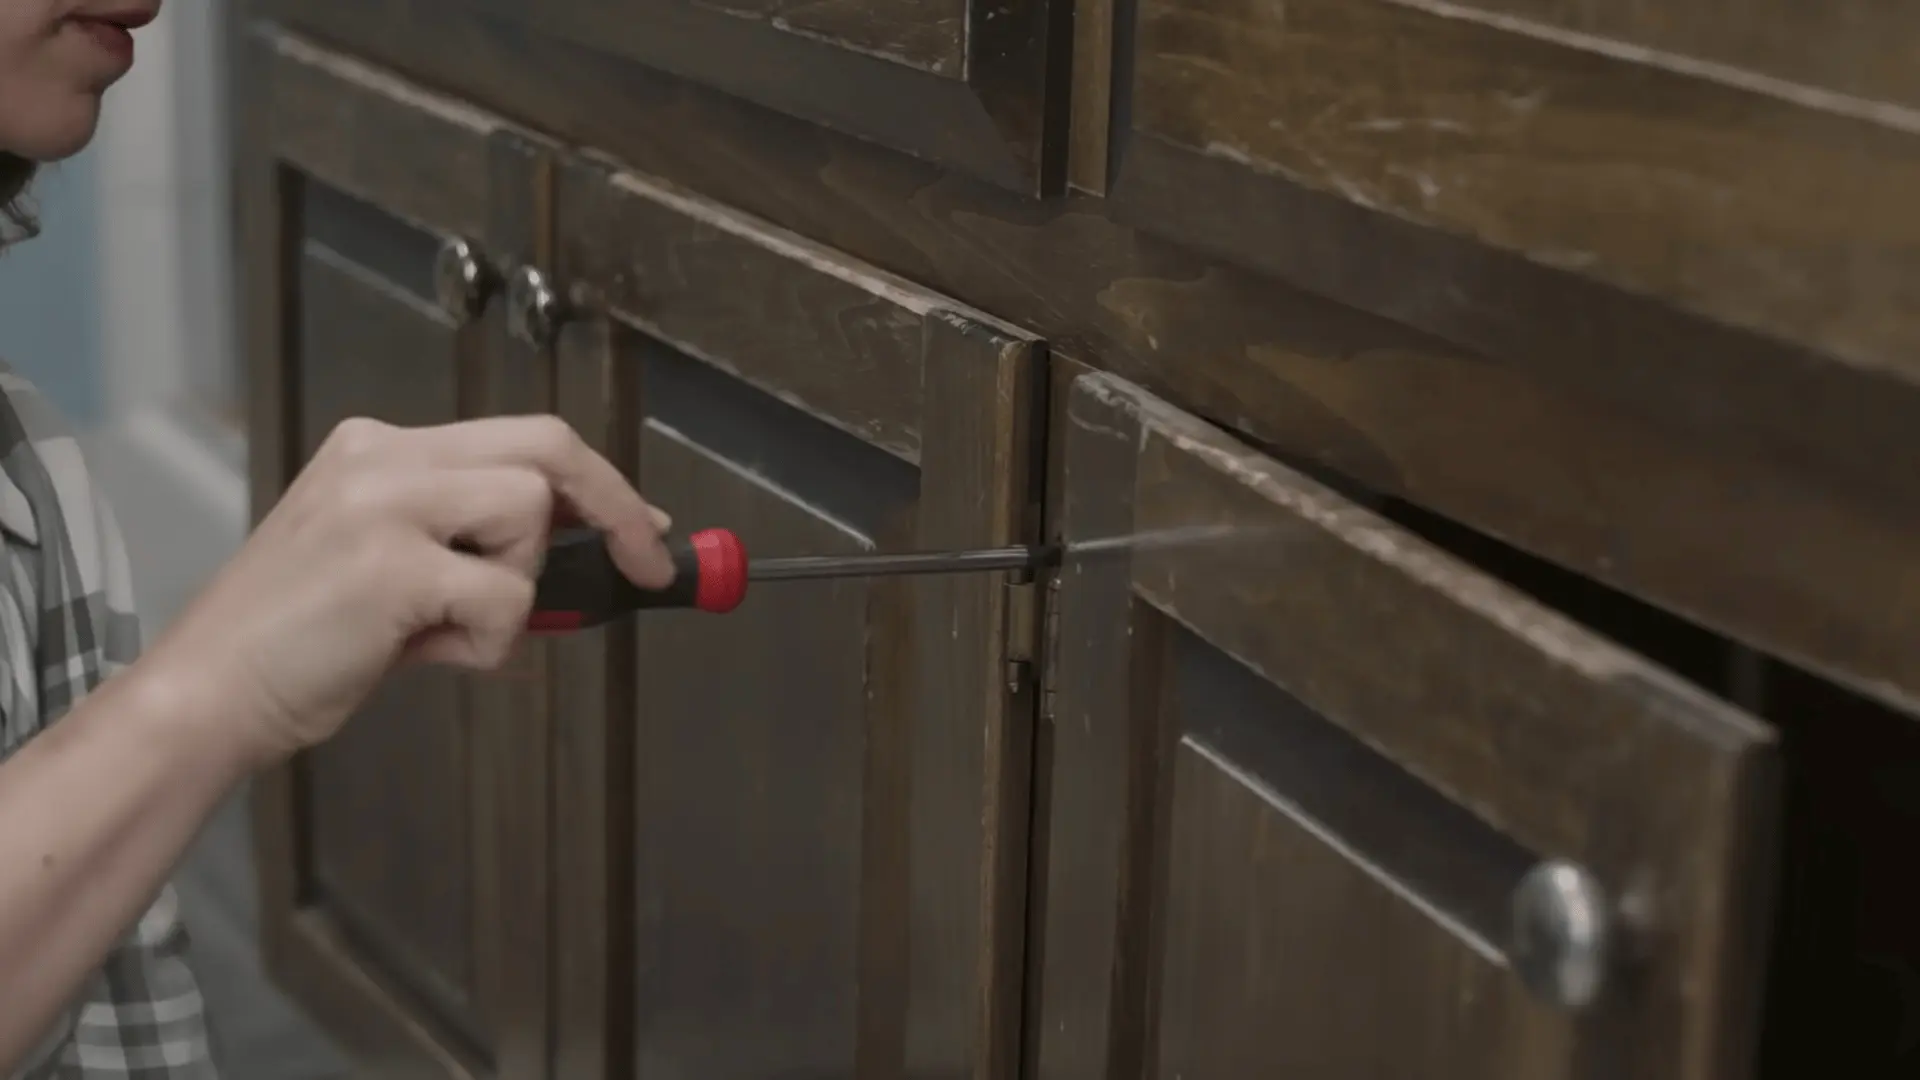
Once the paint has dried, reinstall the drawers, doors, and any new hardware. Drill new holes for handles if necessary.
Make sure all drawers and doors open and close smoothly, adjusting hardware as needed. If replacing the faucet, install it after reassembly.
Step 5: Final Touches and Clean-Up
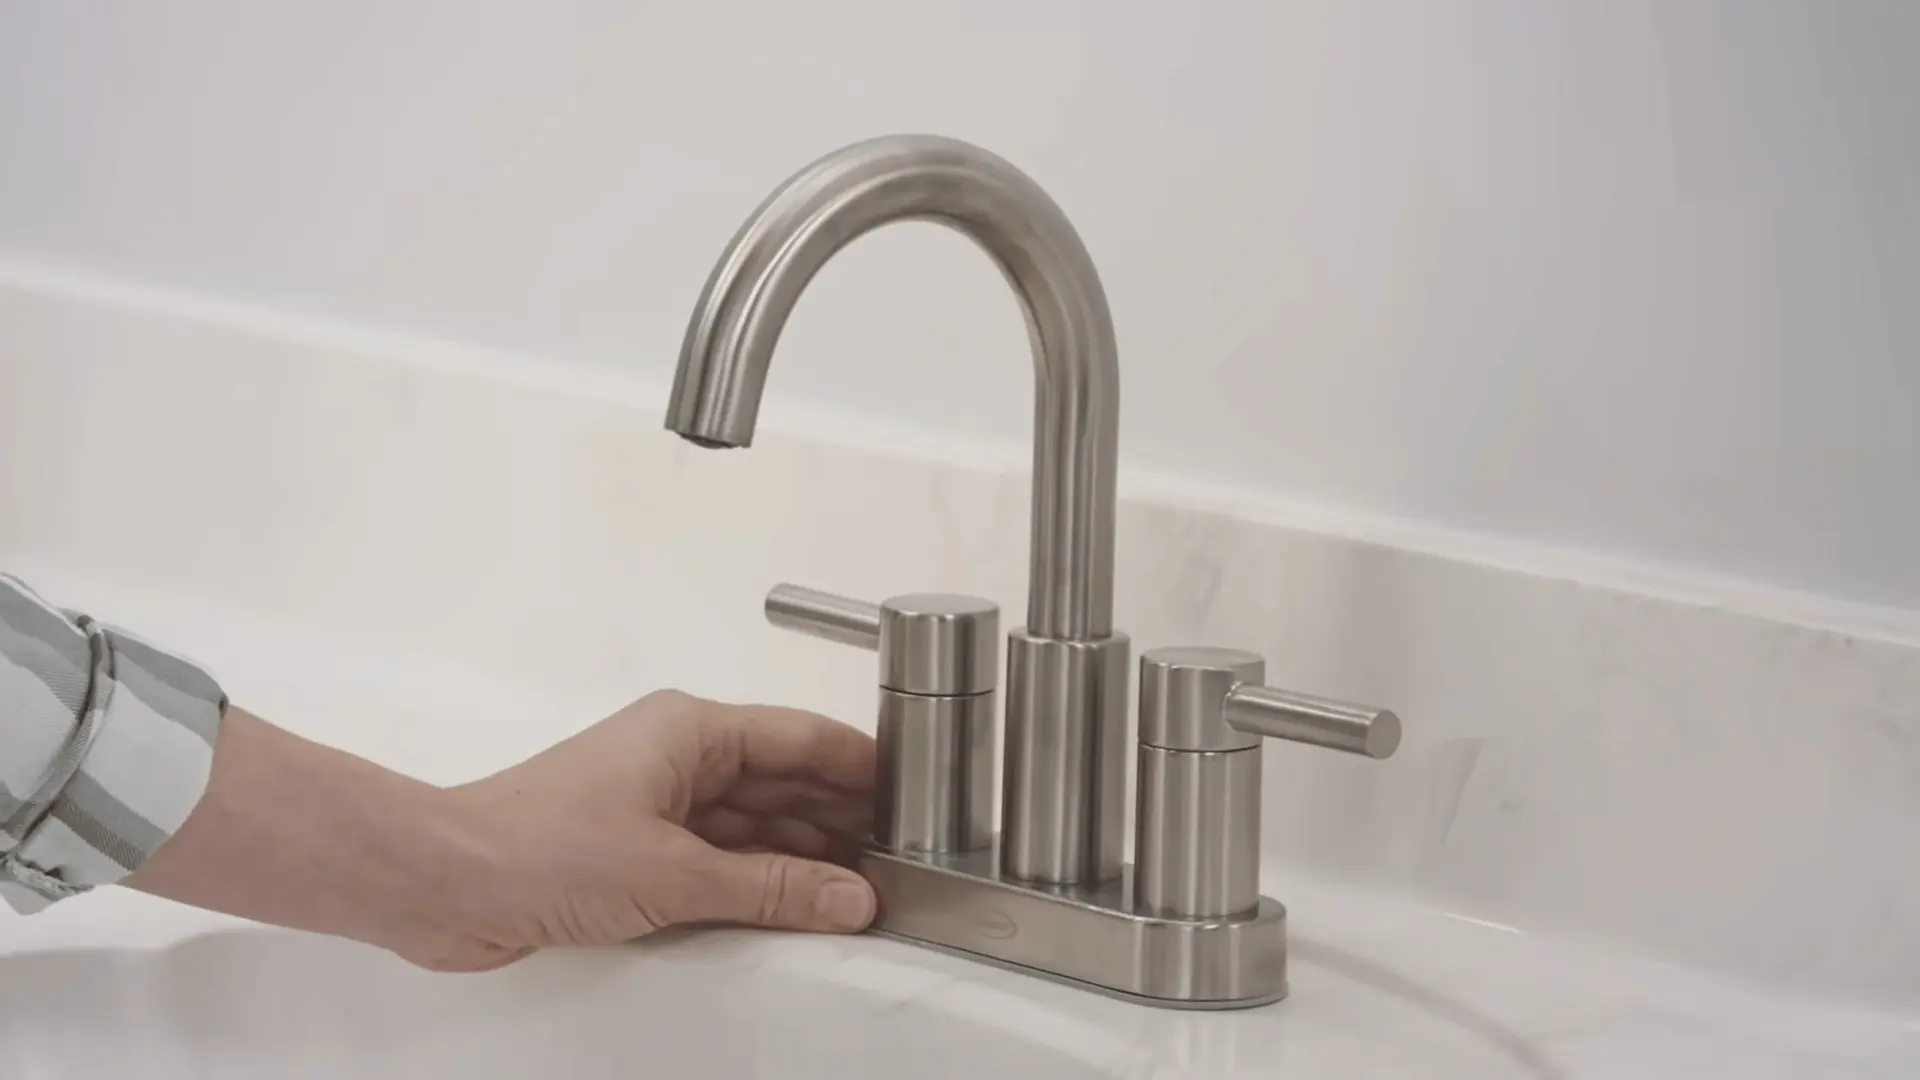
Carefully remove painter’s tape from edges and clean up any paint splatter. Optionally, apply silicone sealant around the faucet for extra protection.
Double-check all assembly and ensure the vanity is fully functional and visually appealing before enjoying the finished result.
For a complete walkthrough of the process, check out the video tutorial below by Lowe’s Home Improvement:
How Much Does It Cost to Paint a Bathroom Vanity?
Painting a bathroom vanity can vary in cost depending on whether you do it yourself or hire a professional.
For a DIY approach, materials such as primer, paint, brushes, rollers, sandpaper, and sealant typically cost $50 to $150, depending on brand and quality.
Hiring a professional can cost significantly more, usually between $200 and $600, which includes labor, materials, and sometimes surface preparation.
The price difference comes down to time, skill, and convenience. Doing it yourself saves money but requires effort and careful application, while a pro ensures a smoother, longer-lasting finish.
Maintaining Your Painted Bathroom Vanity
Read the table below for simple ways to keep your painted bathroom vanity looking fresh. These tips cover cleaning, protection, touch-ups, and preventing damage.
| Task | How to Do It | Tip |
|---|---|---|
| Cleaning | Soft, damp cloth with mild soap. Avoid abrasives. | Wipe weekly. |
| Touch-ups | Use leftover paint for scratches. Lightly sand first. | As needed. |
| Protecting | Use coasters or trays; avoid hot items. | Always protect surfaces. |
| Moisture Control | Wipe spills immediately to prevent water damage. | Prevents peeling or warping. |
Pro Tip: Apply a thin layer of clear, water-based polyurethane once a year to add extra protection and make cleaning easier.
How Long Does It Take to Paint a Bathroom Vanity?
Painting a bathroom vanity takes 1 to 3 days, depending on prep, drying times, and the number of coats applied. Following the timeline below ensures a smooth, professional finish.
- Cleaning, sanding, and prepping the surface take around 30 to 60 minutes.
- Primer dries in 1 to 2 hours, after which sanding and painting can begin.
- Each coat of paint needs 2 to 4 hours to dry before the next is applied.
- Plan for two to three coats for full, even coverage throughout.
- Final curing takes 24 to 48 hours before the vanity is ready for use.
- Rushing drying times is the most common cause of peeling and poor finish.
Patience is key; allowing proper drying and curing time ensures a durable, long-lasting result that looks polished for years.
Conclusion
Painting bathroom cabinets is one of the smartest, most budget-friendly ways to refresh your bathroom without a costly renovation.
With the right paint, proper prep, and a little patience, the results can look completely professional.
A painted bathroom vanity not only upgrades your space visually but also adds durability and moisture resistance that lasts for years. The key is preparation: clean, prime, and take your time between coats.
Start with one small cabinet, build your confidence, and work your way through the full vanity for a stunning transformation.
Ready to refresh your bathroom? Grab your supplies and start painting today; your dream vanity is just a few coats away.
Have questions or finished your vanity makeover? Drop a comment below; we’d love to see how it turned out!
Frequently Asked Questions
Can You Paint Over an Already Painted Bathroom Vanity?
Yes, you can paint over a vanity that’s already been painted. Proper preparation is crucial: clean, sand lightly, and prime the surface before applying new paint to prevent peeling or uneven results.
How Do I Paint a Bathroom Vanity that Has Laminate?
To paint laminate, clean the surface, lightly sand, and apply a bonding primer designed for laminate. Finish with moisture-resistant paint to ensure a durable, long-lasting result.
When Should You Repaint Your Bathroom Vanity?
Repaint your bathroom vanity when you notice peeling, chipping, fading, or water damage on the surface. Visible wear, staining, or an outdated look are also clear signs it’s time for a fresh coat of paint.