
How to Strip Furniture to Natural Wood?
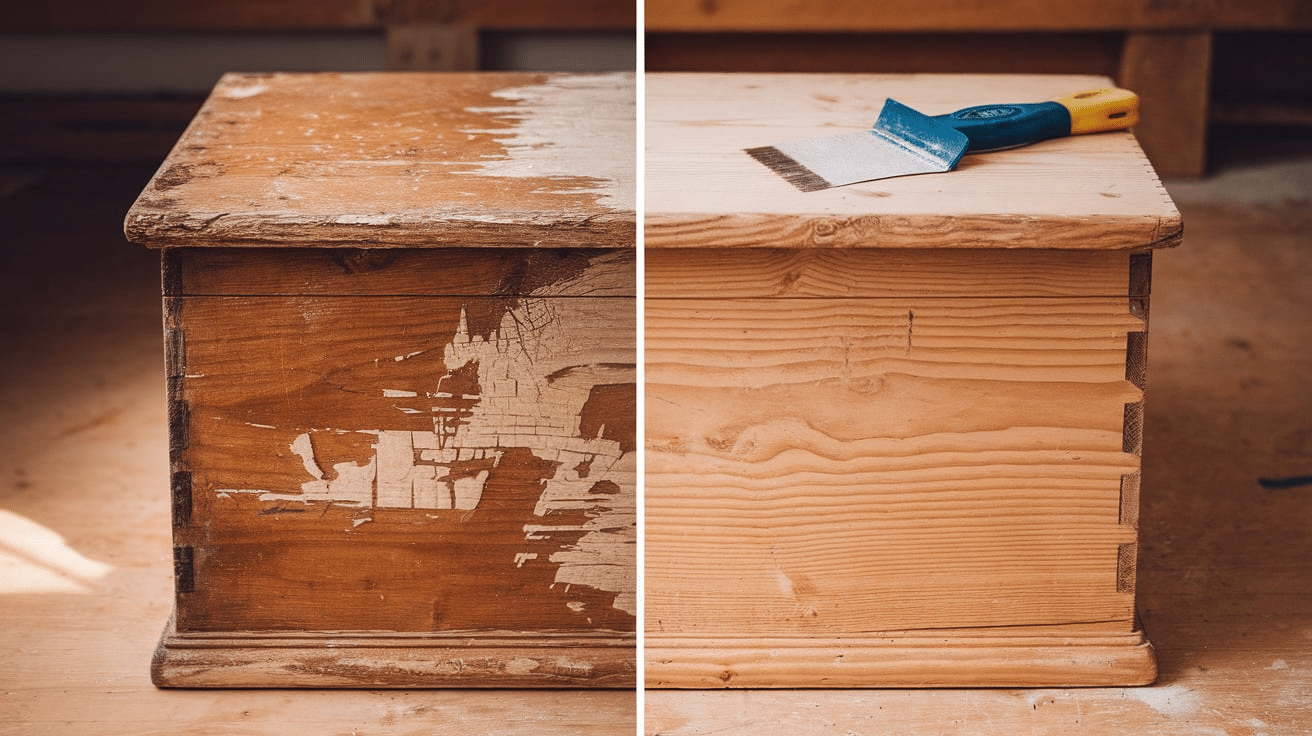
Stripping furniture to reveal natural wood is an easy way to refresh an old piece and give it a new look.
Removing the paint or finish can bring it back to life and show off the wood’s natural texture if you have a family heirloom or a piece that’s seen better days.
The process might sound a little intimidating, but don’t worry—I’ll guide you through it step by step. With the right tools and a little patience, you can do this project yourself at home.
In this blog, I’ll share the simple steps to strip your furniture and uncover the natural wood underneath.
If you want to restore an old dresser, a coffee table, or any other piece, I’ve got you covered. Let’s turn that old furniture into something fresh and new!
Why Strip Furniture?
Before getting into the steps, it’s helpful to understand why you might want to strip your furniture in the first place. Stripping furniture allows you to:
- Restore its original beauty: Over time, paint, varnish, and stains can hide the natural grain and texture of the wood. Stripping allows you to show off the wood’s natural look.
- Give new life to old furniture: If you have an old piece of furniture that looks worn out, stripping the paint or finish and exposing the wood can make it feel new again.
- Remove damaged or chipped finishes: If the paint or finish on your furniture is peeling or damaged, stripping it off can help you start fresh with a clean surface.
- Create a unique look: Sometimes, stripping paint from a piece of furniture can give it a rustic or vintage feel, which works well for many different decorating styles.
What You’ll Need
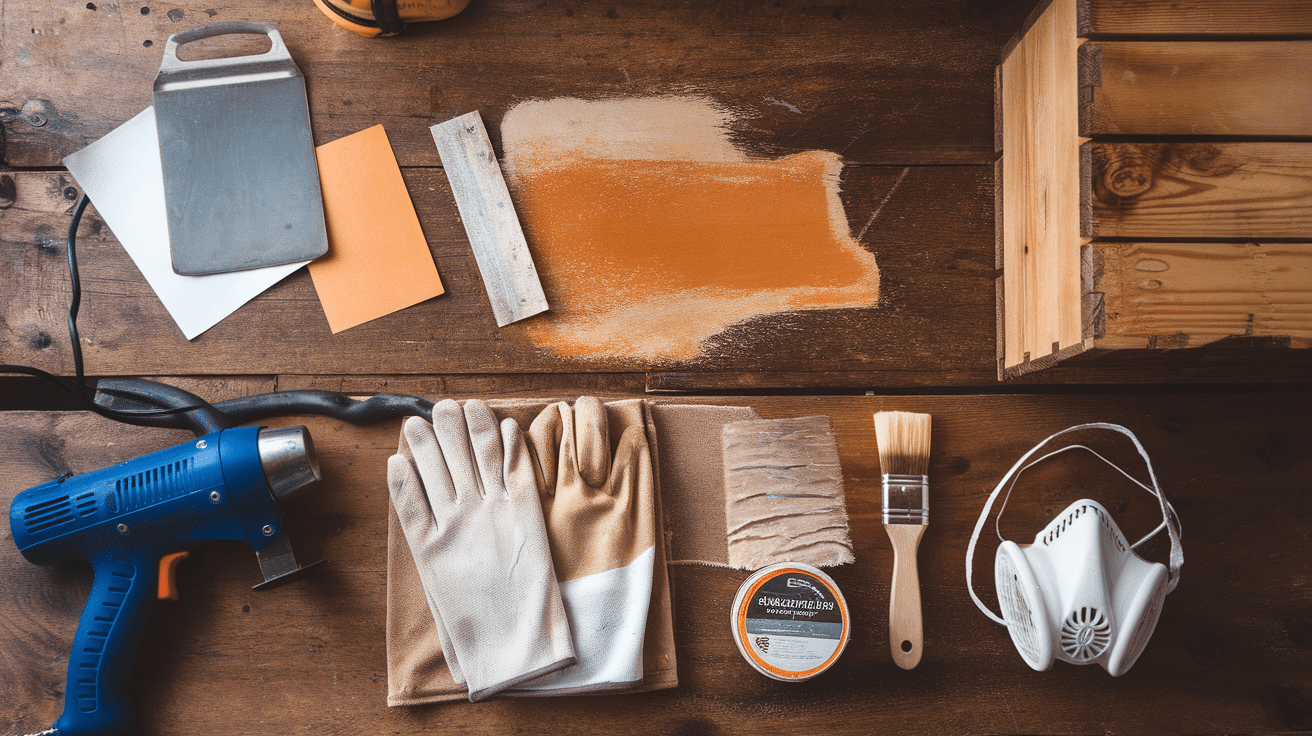
Before you begin the process, gather the right tools and materials. Here’s a list of what you will need:
- Stripping Solution: A chemical paint stripper or remover designed for wood is essential to break down the paint or finish. Look for products that are safe for indoor use and suitable for the finish you want to remove (e.g., stain, varnish, or lacquer).
- Plastic Scraper: A plastic scraper or putty knife gently scrapes off the paint or finishes once the stripper loosens it.
- Steel Wool or Sandpaper: Steel wool or medium-grit sandpaper removes any leftover residue or smoothing the wood’s surface after stripping.
- Paintbrush or Applicator: You’ll need a paintbrush to apply the stripper to the furniture surface.
- Gloves and Safety Glasses: Wear gloves to protect your hands from chemicals and safety glasses to protect your eyes.
- Drop Cloths or Plastic Sheets: Protect your floor and surrounding areas from the mess. Lay down drop cloths or plastic sheets to catch any drips or splatters.
- Rags or Paper Towels: Use these to wipe off the excess stripper and any residue left on the surface.
- Mineral Spirits or Wood Cleaner: After stripping, use mineral spirits or a wood cleaner to clean the wood before sanding.
Step-by-Step Guide to Stripping Furniture
Follow these simple steps to strip your furniture and reveal its natural wood. Be patient, take your time, and work in a well-ventilated area for safety.
1. Prepare the Workspace
The first step is to prepare your workspace. Stripping furniture can get messy, so it’s important to set up a safe and protected area.
- Lay down a drop cloth or plastic sheets to protect the floor and nearby furniture.
- Move the piece you’re working on to a well-ventilated area, preferably outdoors or in a garage. The chemicals in the stripping solution can produce fumes, so it’s best to work in an area with plenty of airflow.
- Make sure the area is free from items that could get damaged by chemicals.
2. Apply the Stripping Solution
Now that your workspace is set up, it’s time to apply the stripping solution.
- Read the instructions: Always read the product’s instructions before use. Different strippers may have other applications and safety guidelines.
- Apply the stripper: Using a paintbrush, apply the stripping solution to the surface of the furniture. Work in small sections, making sure to cover every part of the surface. Be generous with the stripper, as you need to loosen the old paint or finish.
- Let it sit: After applying the stripper, let it sit for the amount of time specified on the product label. This could range from 15 minutes to an hour, depending on the product you use. During this time, the stripper will break down the paint or finish, making it easier to remove.
3. Scrape Off the Paint or Finish
Once the stripper has time to work, it’s time to remove the old paint or finish.
- Scrape gently: Use a plastic scraper or putty knife to scrape off the loosened paint gently. Always work toward the wood grain to avoid damaging the surface. Don’t use metal scrapers, as they can scratch the wood.
- Work in small sections: If the paint doesn’t come off easily, apply more stripper to that area and wait a few more minutes before scraping again.
- Dispose of the waste: Place the removed paint or finish into a safe container for disposal. Avoid flushing it down the drain or throwing it in the trash unless the product instructions say it’s secure.
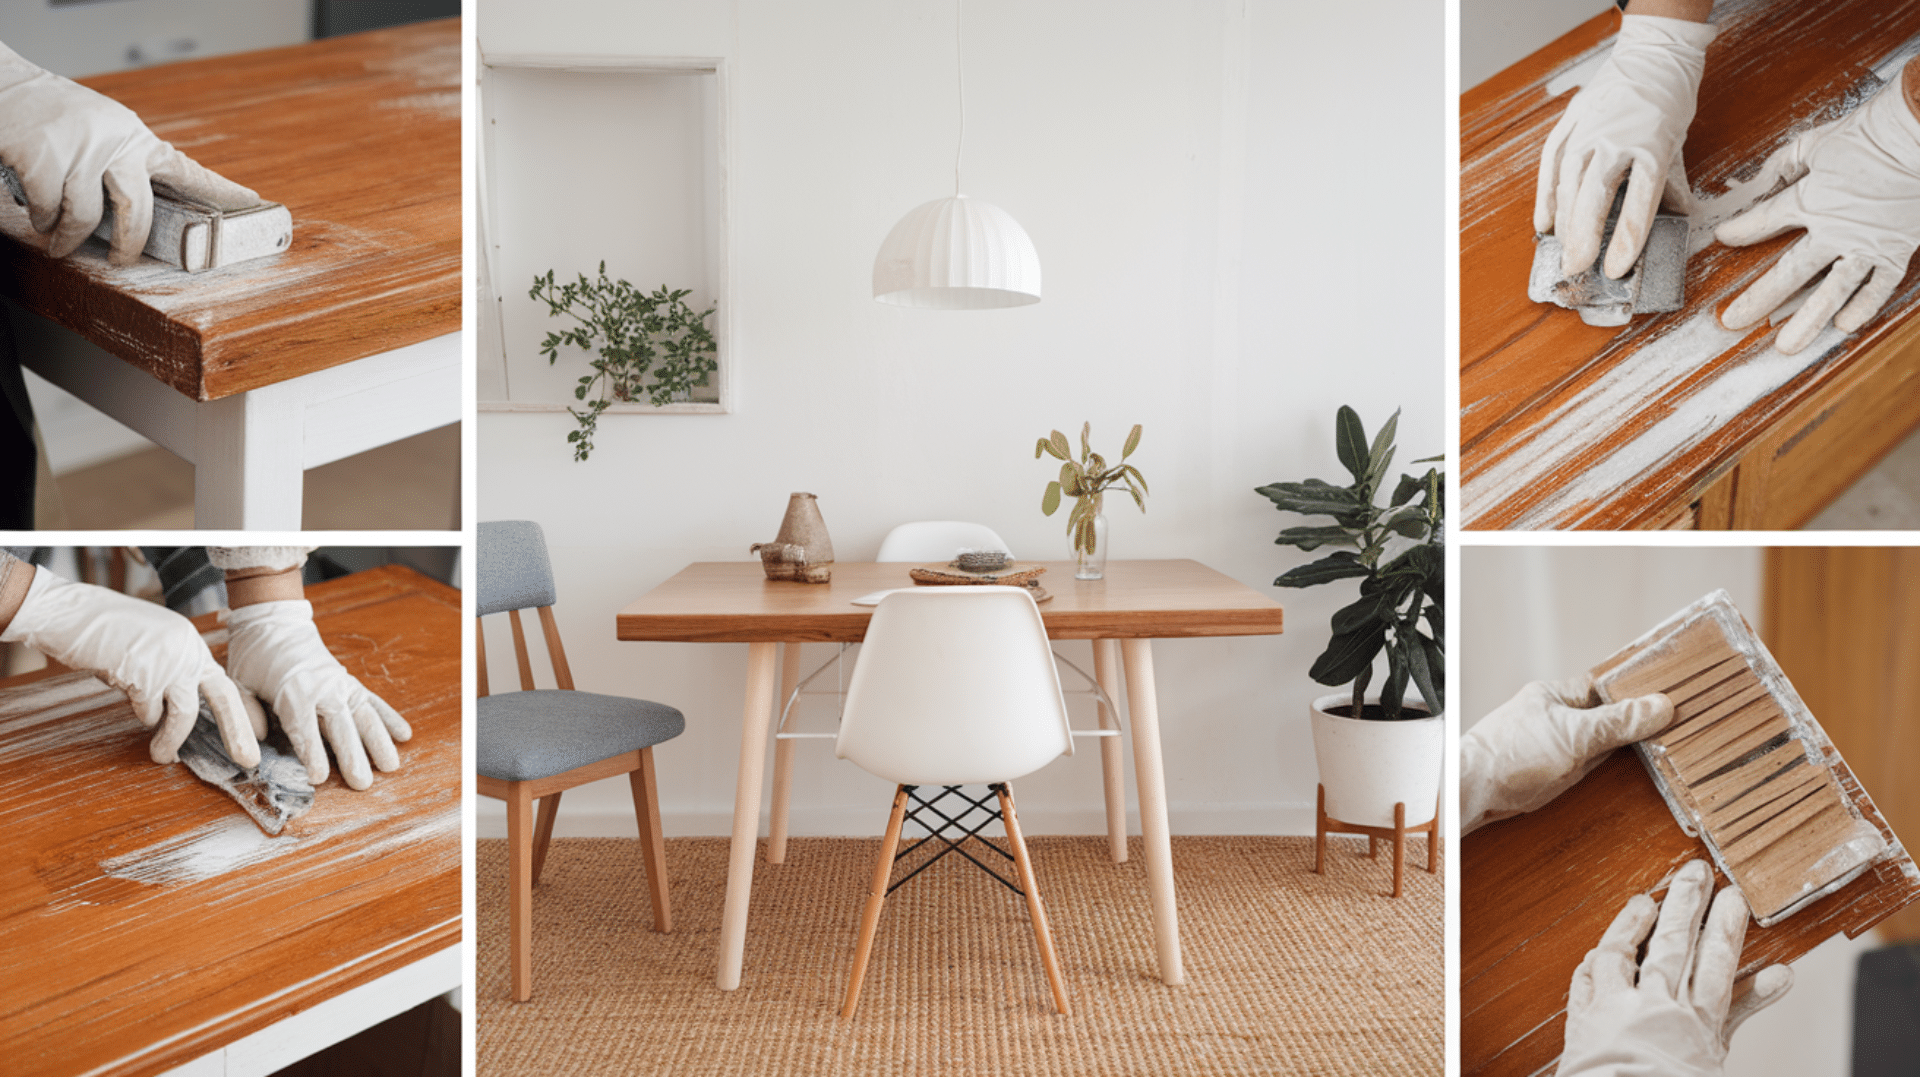
4. Use Steel Wool or Sandpaper for Fine Details
After scraping off most of the paint, you may still notice some stubborn areas or residue left behind. This is where steel wool or sandpaper comes in.
- Use steel wool: For detailed areas or stubborn paint, use fine steel wool (grade 0000) to rub the surface gently. Steel wool works well on intricate carvings or hard-to-reach spots.
- Sand the surface: After removing the paint, lightly sand the wood with medium-grit sandpaper (around 120-150 grit) to smooth out the surface. Be gentle to avoid scratching the wood or removing too much of the natural texture.
5. Clean the Surface
Once all the paint has been removed, cleaning the wood is important to remove any leftover stripper and dust from sanding.
- Use mineral spirits or wood cleaner: Dampen a clean rag with mineral spirits or wood cleaner and wipe down the entire piece. This will help remove any remaining stripper and prep the wood for finishing.
- Let it dry: Allow the furniture to dry completely before moving on to any further finishing steps.
6. Sand the Wood
Sanding is the final step in stripping furniture. This step helps smooth out the wood and makes it ready for any finish you’d like to apply.
- Use finer sandpaper: Once the furniture is clean and dry, use finer sandpaper (around 220 grit) to sand the entire surface. Sand with the grain of the wood, and remove any rough spots or uneven areas.
- Dust the surface: After sanding, wipe the wood down with a damp cloth to remove all dust. Let it dry completely before applying any paint, stain, or finish.
Finishing Touches: What to Do After Stripping Furniture
After you’ve successfully stripped your furniture and revealed the natural wood, it’s time to decide what finish you want. Here are a few options to consider:
1. Stain
If you want to add a bit of color while keeping the natural grain of the wood visible, consider applying a wood stain.
The stain gives the wood a rich color without hiding its texture. Choose a stain that suits your room’s color scheme.
2. Clear Finish
If you love the natural look of the wood, apply a clear wood finish to protect it. This could be a polyurethane or lacquer that will seal and protect the wood.
3. Paint
You can apply a coat of paint if you prefer a painted finish.
Choose a high-quality paint that’s designed for wood, and make sure to apply a primer first for better adhesion.
Tips for Success
- Work in sections: Don’t try to strip the entire piece of furniture at once. Work in smaller sections for better control and to avoid wasting time.
- Wear protective gear: Always wear gloves and safety glasses when working with chemicals.
- Take your time: Stripping furniture can take some time, so be patient and don’t rush the process.
- Test the stripper on a small area first: If you’re unsure how a stripper will affect the finish, test it on a small, hidden area before applying it to the entire surface.
Conclusion
Stripping furniture to reveal natural wood is a simple and effective way to refresh old furniture and give it a new life.
With the right tools and patience, you can remove old paint or finish and uncover the wood’s true beauty.
If you choose to stain, clear finish, or leave it natural, the results will make your furniture look new again. Remember to work in sections, take your time, and use safety precautions.
The process may take some time, but the effort will be worth it when you see the finished product.
Following the simple steps in this guide can transform your furniture into a beautiful, natural-looking piece that fits perfectly into your home.
Frequently Asked Questions
What is the best way to strip furniture?
The best way is to use a chemical stripper, a plastic scraper, and sandpaper to remove paint or finish carefully.
How do I know if my furniture needs stripping?
If the paint is peeling or cracked, or the finish looks worn, it’s time to strip the furniture.
Is it necessary to sand after stripping furniture?
Yes, sanding helps smooth the surface and remove any leftover residue from the stripper.
How long does it take to strip furniture?
It usually takes a few hours, depending on the piece’s size and the finish’s complexity.


