
21 DIY Ghost Painting Ideas for a Haunted Vibe
Want to make your space a bit more haunted?
Ghost paintings bring that special touch of spooky fun without going overboard.
These simple art pieces catch everyone’s eye and spark fun chats when guests visit.
Here’s the good news: You don’t need to be an expert painter to create ghost-themed art.
In this guide, you’ll find 21 easy painting methods that work well for both beginners and experienced artists.
Each idea comes with clear steps and tips to help you succeed.
From misty figures on canvas to subtle shadows in watercolor, these projects fit any skill level and budget.
I’ll show you which supplies work best and how to fix common mistakes.
Plus, you’ll learn tricks to make your paintings stand out in just the right way.
Ready to start painting some friendly spirits?
Let’s begin.
Creative Ghost Painting Ideas for a Haunted Vibe
1. Misty Window Ghost
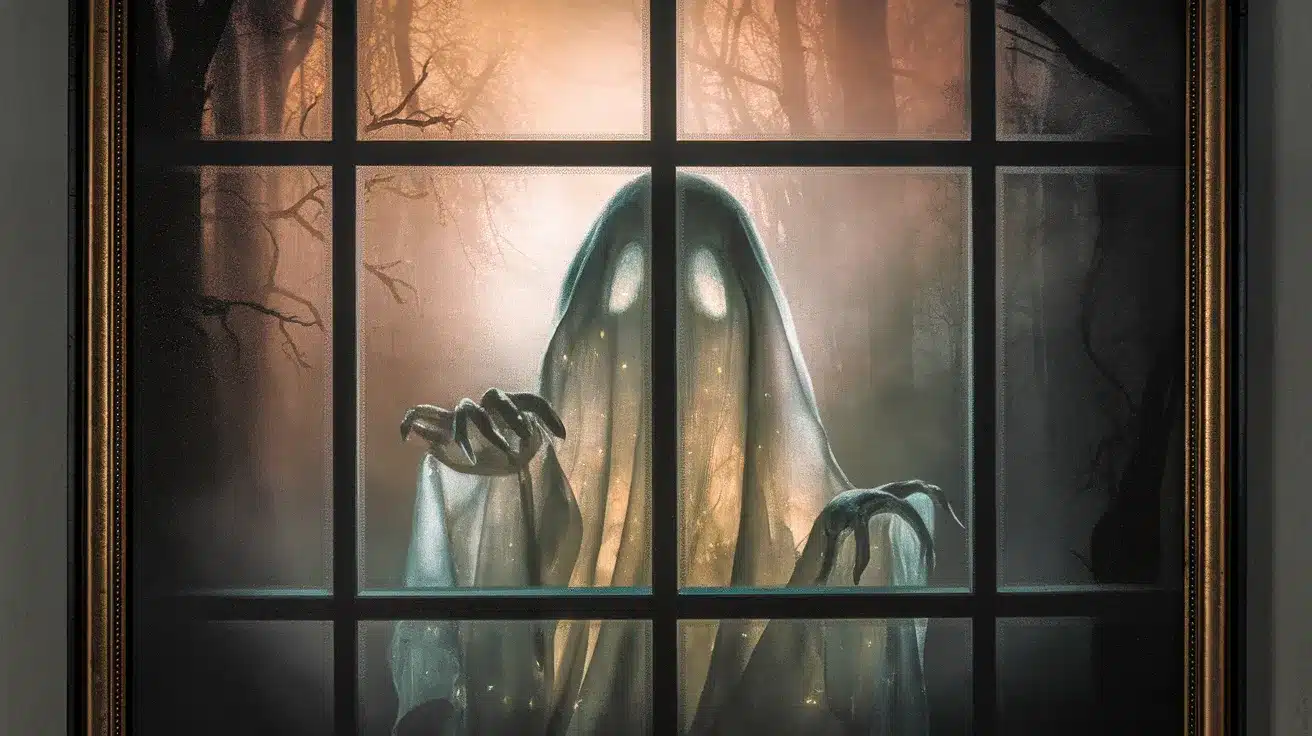
A spooky window art display that catches attention from both inside and outside your home.
This project creates the effect of a white, transparent figure that seems to peer through a foggy window, making passers-by do a double-take.
The gentle glow at night adds an extra layer of eeriness to your Halloween setup.
Materials Required
- White tissue paper
- Clear tape
- Scissors
- Pencil
- Black construction paper
- Battery-operated LED lights (optional)
Steps
- Clean your window thoroughly
- Cut a large piece of white tissue paper to fit your window
- Draw a basic ghost shape on the tissue paper
- Create facial features using small pieces of black construction paper
- Carefully tape the tissue paper to your window
- Add LED lights behind the display for nighttime viewing
- Place additional tissue paper around the ghost to create a misty effect
- Secure all edges with clear tape
2. Shadow Figure Portrait

This wall decoration plays with light and shadow to create an unsettling silhouette that seems to watch from within a frame.
The contrast between light and dark elements makes this piece stand out in any Halloween display, especially when placed in a dimly lit corner.
Materials Required
- Large picture frame
- White paper or canvas
- Black construction paper
- Scissors
- Glue
- Tape
- LED candle
- Reference image for silhouette
Steps
- Remove glass from the picture frame
- Cut white paper to fit the frame size
- Draw your figure silhouette on black paper
- Cut out the silhouette carefully
- Center and glue silhouette to white background
- Place completed artwork in the frame
- Position LED candle to cast shadows
- Hang in a strategic location for maximum effect
3. Forest Spirit Scene
This table or shelf decoration combines natural elements with crafting materials to build a miniature haunted forest setting.
The final piece tells a story through its detailed arrangement of trees, mist, and mysterious shapes that seem to hide between branches.
Materials Required
- Clear glass container or jar
- Small branches or twigs
- Cotton balls
- Black paper
- Battery-operated string lights
- Moss or dried grass
- Small stones
- Clear fishing line
- Scissors
Steps
- Clean container thoroughly
- Create a base layer with stones and moss
- Position branches to form tree shapes
- Cut spirit shapes from black paper
- Hang shapes using fishing line
- Add cotton balls for a fog effect
- Weave lights through the scene
- Seal the container if desired
- Position lighting for best shadow effects
4. Moonlit Ghost Family
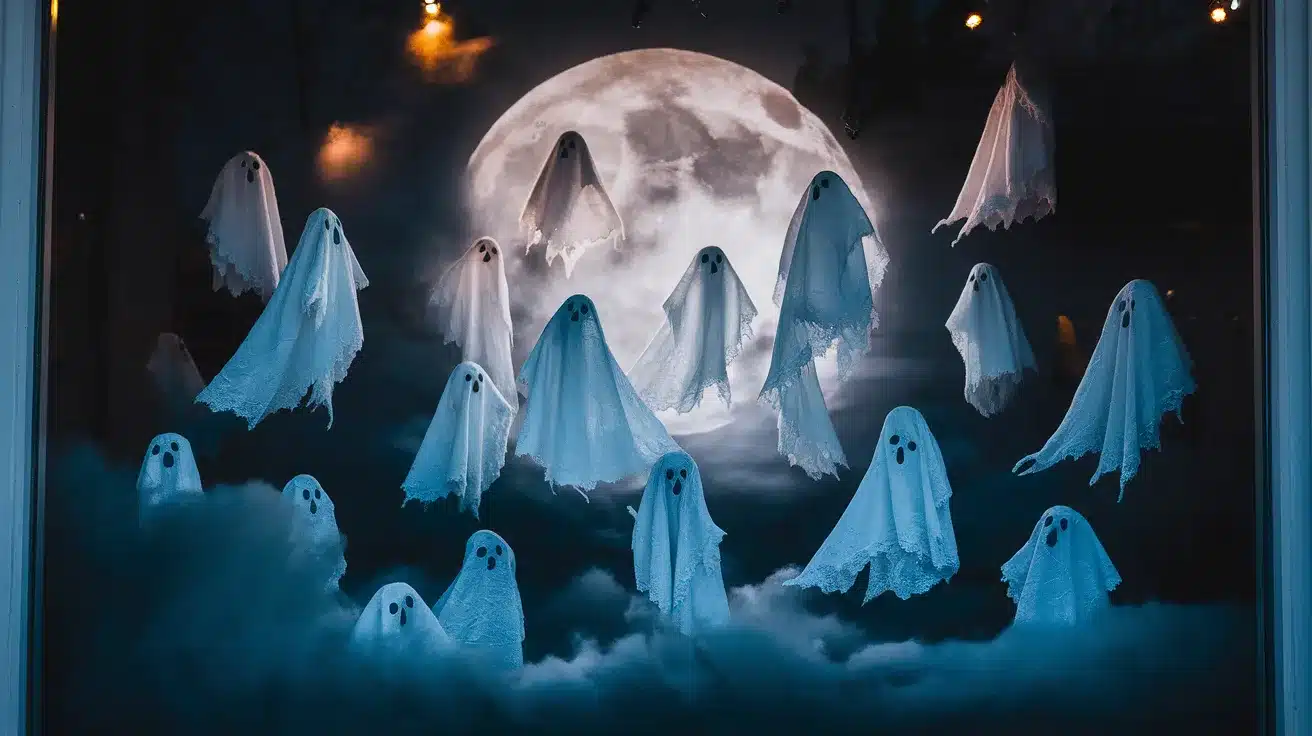
A simple yet striking window display shows a gathering of ghost figures against a dark background.
It gives the impression of spirits floating in the moonlight.
This group display creates an eye-catching scene that looks particularly effective when backlit, making it perfect for front-facing windows.
Materials Required
- White sheets or fabric pieces
- Black poster board
- Silver or white paint
- The round object for tracing
- Scissors
- Clear tape
- LED light strip
Steps
- Paint a large moon on the black poster board using silver paint
- Cut different-sized ghost shapes from white fabric
- Arrange ghosts in a family grouping around the moon
- Secure the poster board to your window
- Add LED lights behind the display for a nighttime effect
- Adjust fabric ghosts to create a movement illusion
5. Bedsheet Ghost Classic
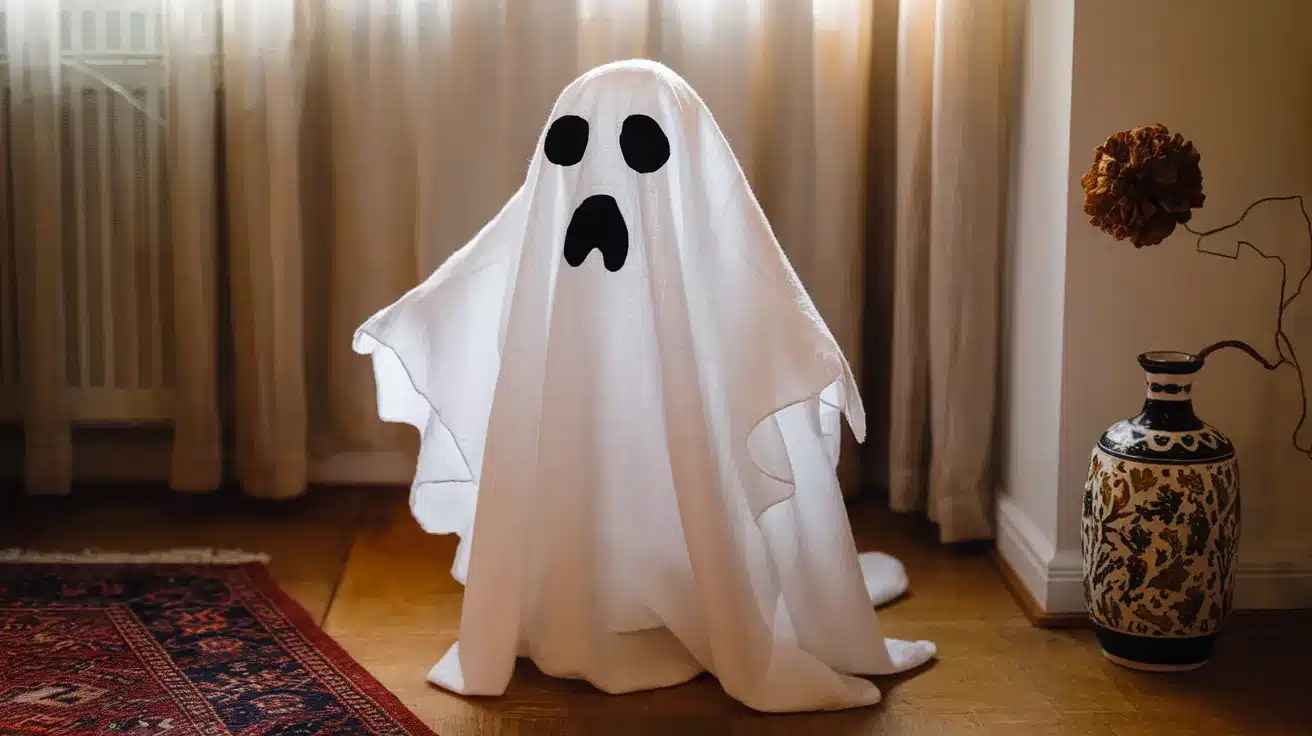
A true Halloween standard brought to life as a standing decoration that adds a touch of old-school to any room corner or porch.
This three-dimensional ghost figure stands guard with its simple yet striking presence, capturing the pure essence of Halloween traditions.
Materials Required
- White twin-size sheet
- Wire coat hanger
- Fishing line
- Black felt
- Scissors
- Small pole or broomstick
- Safety pins
Steps
- Shape coat hanger into a round head form
- Attach the wire form to the pole/broomstick
- Drape sheet over the frame, letting it pool at the bottom
- Cut and attach black felt circles for eyes
- Secure sheet with safety pins where needed
6. Victorian Ghost Lady
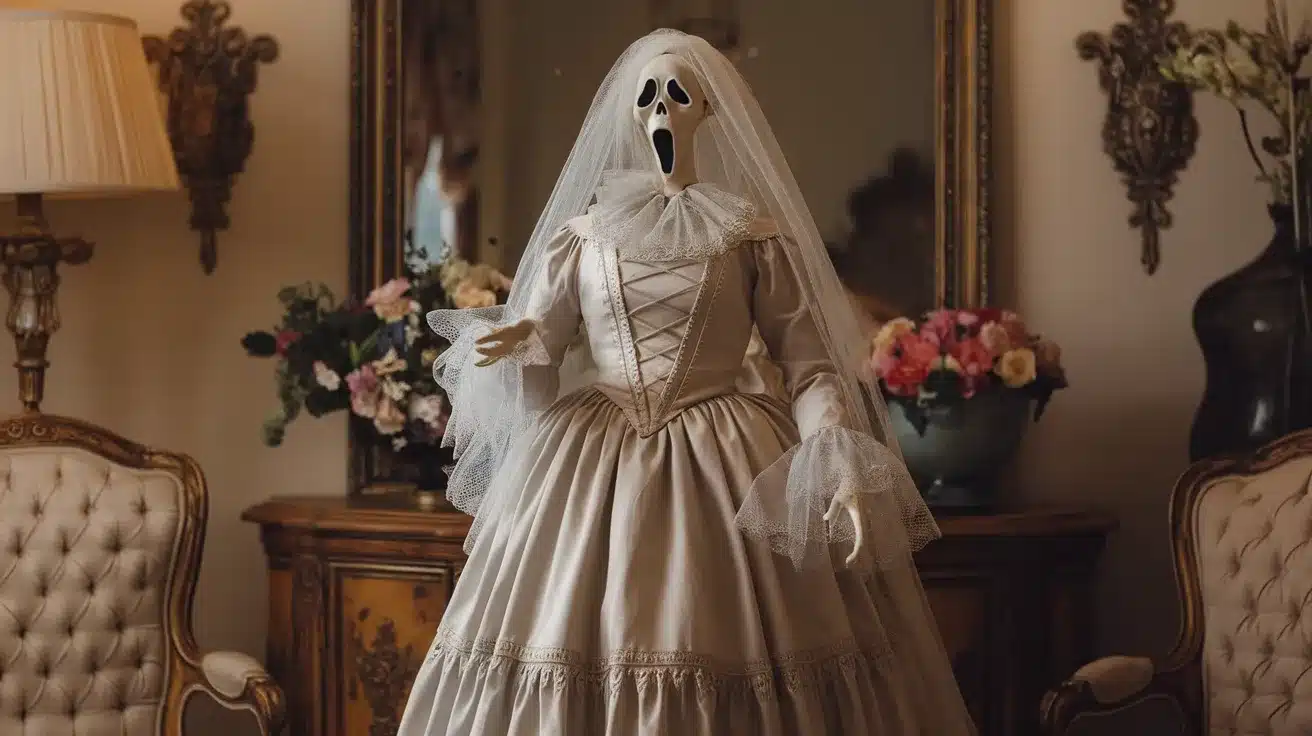
This sophisticated decoration brings a touch of historical haunting to your space.
The figure combines classic period elements with ghostly features to create a haunting presence that works well in any formal room setting or as a centerpiece.
Materials Required
- Long white dress or nightgown
- Wire dress form or coat stand
- Lace scraps
- White tulle
- String of white lights
- White wig or fabric for hair
- Black ribbon
- Safety pins
Steps
- Set up dress form in the desired location
- Layer dress/nightgown over the form
- Add lace details and tulle overlays
- Style the head area with a wig or fabric
- Weave lights through the dress layers
- Add black ribbon accents for period detail
7. Ghost Cat Silhouette
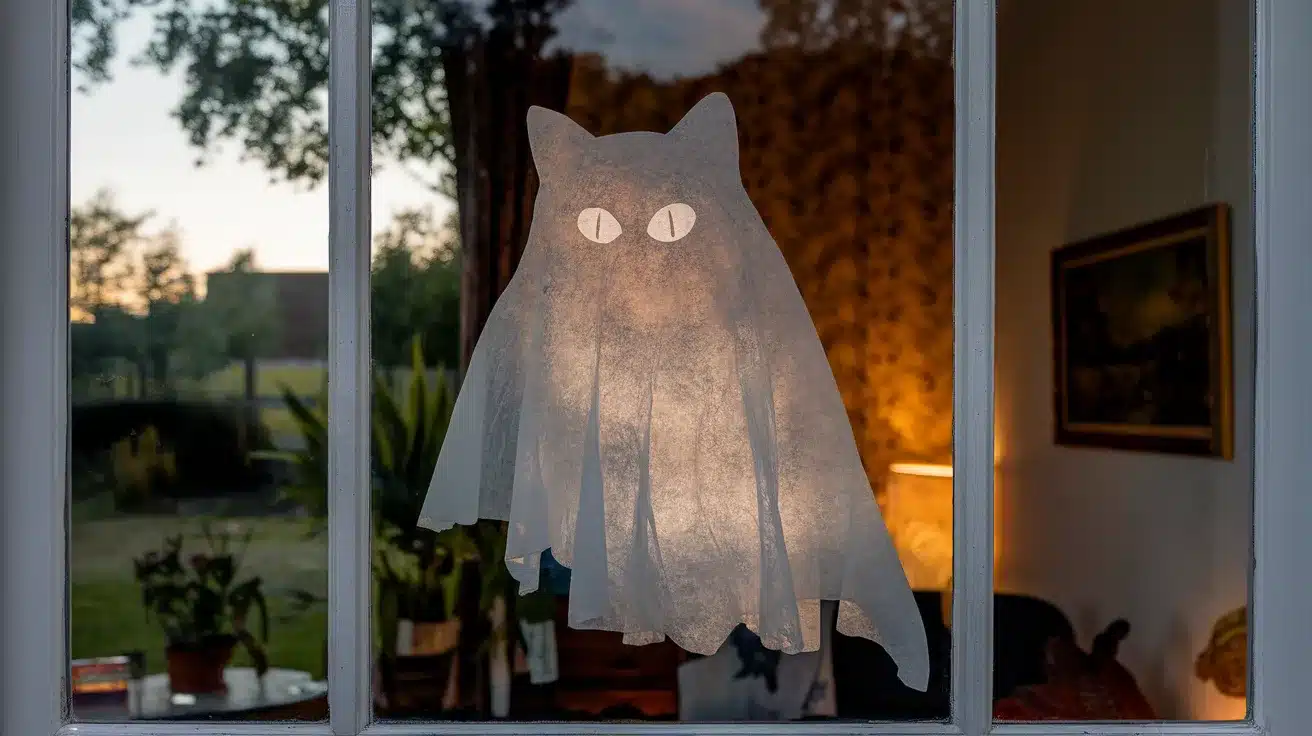
A mysterious feline figure that creates an attention-grabbing window display, combining the natural grace of a cat with spectral elements.
This decoration works exceptionally well when placed near a light source, casting long shadows that move with the changing light throughout the day.
Materials Required
- Black cardboard
- White tissue paper
- Clear tape
- Scissors
- Pencil
- White string lights
- Template of cat silhouette
- Clear fishing line
Steps
- Trace the cat silhouette onto black cardboard
- Cut out the shape carefully
- Create glowing eyes with small tissue paper circles
- Position lights behind the display
- Hang using clear fishing line
- Add tissue paper wisps for a ghostly effect
8. Ghost Child with Balloon
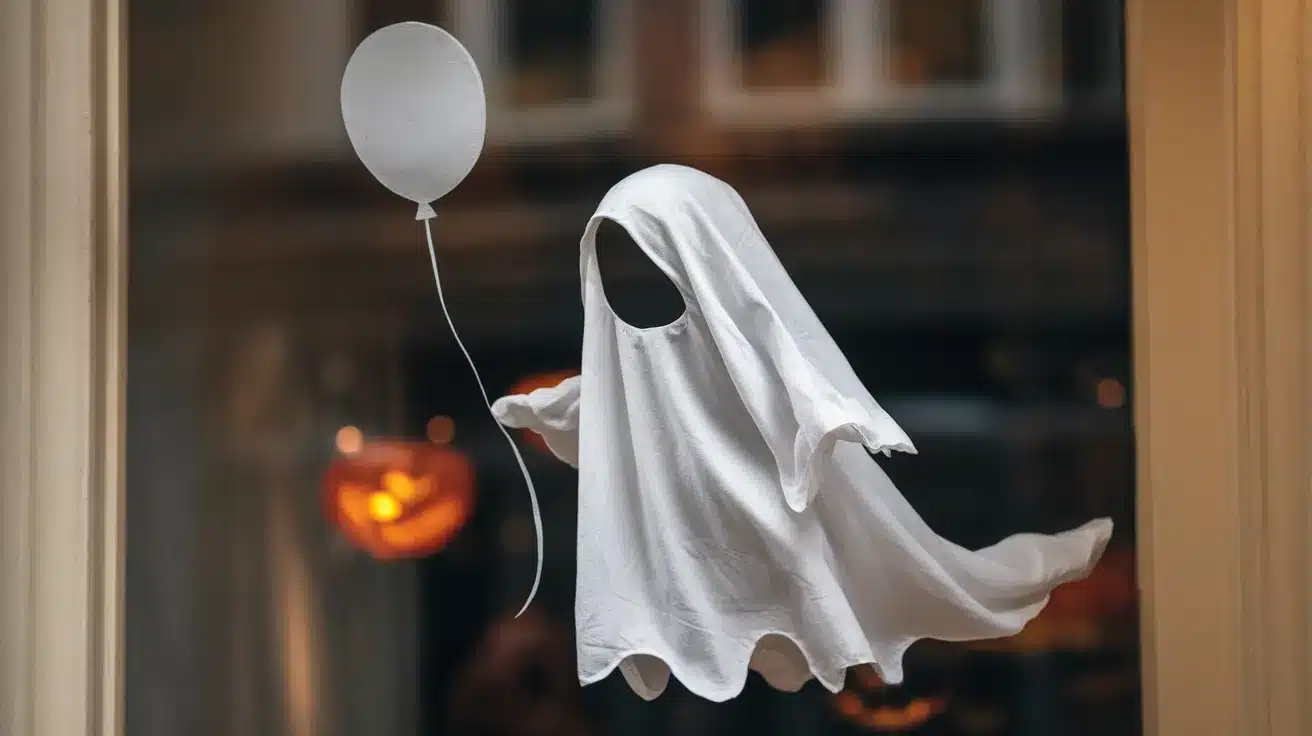
This touching and slightly melancholic window scene depicts a small spirit figure holding a single balloon.
Its simple but meaningful composition draws viewers in and creates a gentle storytelling element in your Halloween display.
Materials Required
- White fabric or sheets
- Red balloon cutout
- Wire for shaping
- Clear fishing line
- White LED lights
- Black felt for details
- Double-sided tape
Steps
- Shape a basic child figure with a wireframe
- Cover frame with white fabric
- Add balloon cutout and string detail
- Create face details with black felt
- Position lights for a gentle glow
9. Dancing Spirits Circle
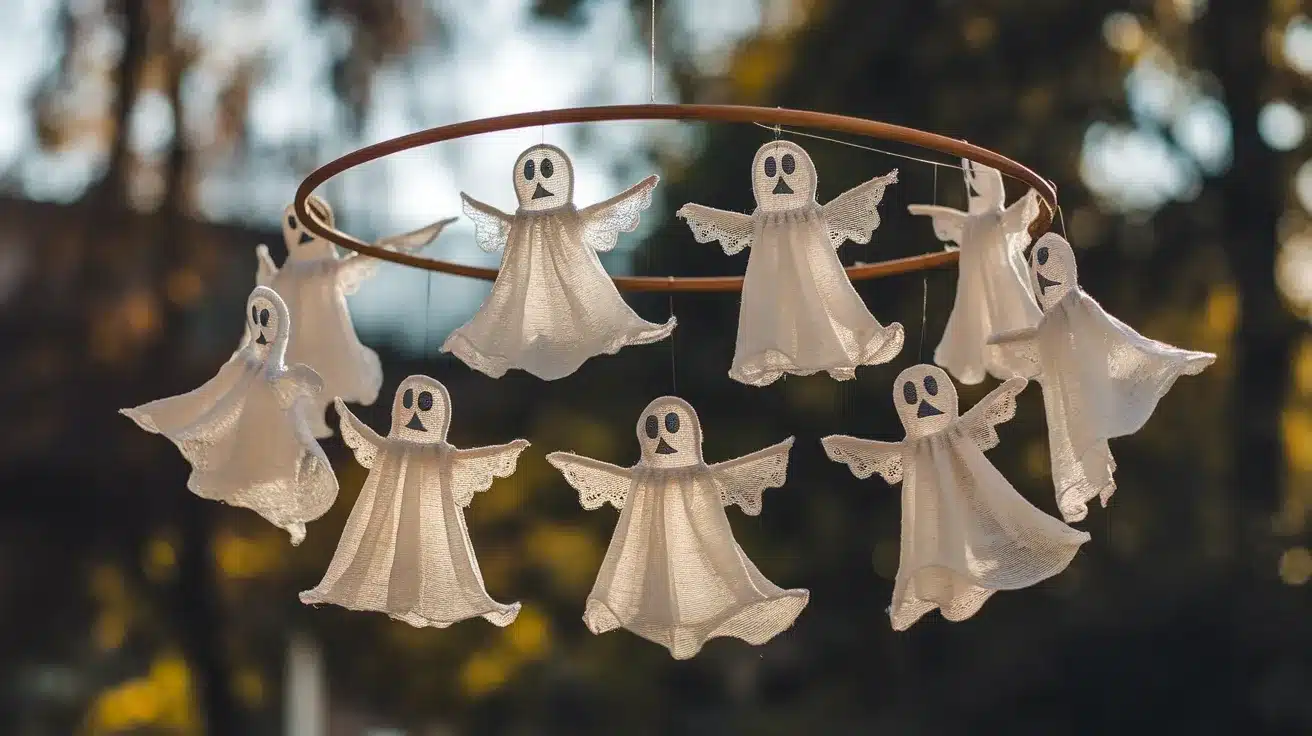
This whimsical arrangement features multiple ghost figures in a circular dance formation.
This hanging decoration spins gently in natural air currents, creating an illusion of movement that makes the spirits appear to be truly dancing together.
Materials Required
- White gauze fabric
- Circle embroidery hoop
- Scissors
- White thread
- LED battery lights
- Clear fishing line
- Safety pins
- White ribbon
Steps
- Attach gauze ghost shapes to embroidery hoop
- Space figures evenly around the circle
- Add lights between the figures
- Create hanging points with fishing line
- Balance the circle for proper spinning
- Secure loose elements with safety pins
10. Ghost in the Mirror
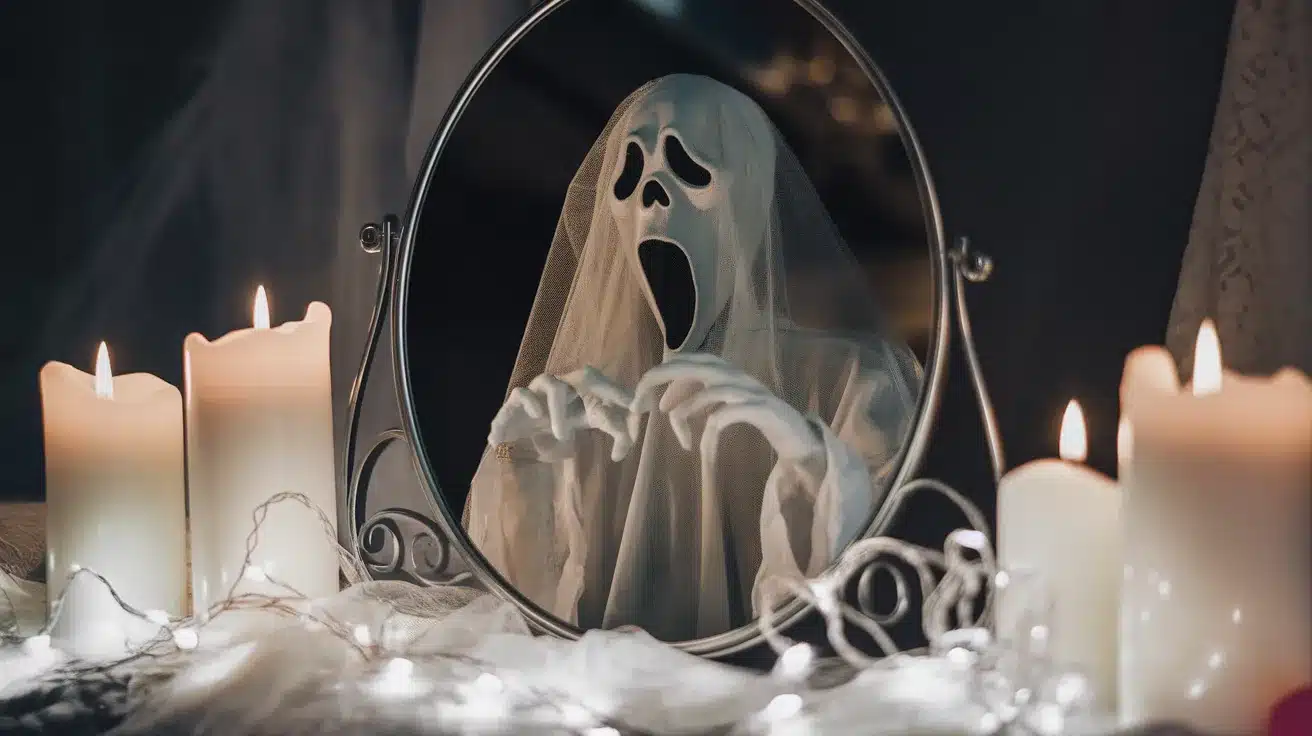
An effectively simple but startling decoration that uses an ordinary mirror to create an unexpected spectral appearance.
This setup works particularly well in hallways or darker corners where the reflection might catch someone by surprise.
Materials Required
- Large mirror
- White gauze or tulle
- Removable adhesive
- Battery-operated candles
- White string lights
- Small hooks
- Clear tape
Steps
- Clean mirror surface thoroughly
- Position lights around the mirror frame
- Create a gauze figure shape
- Attach the figure partially behind the mirror
- Add candles for atmospheric lighting
11. Ghost Musical Notes
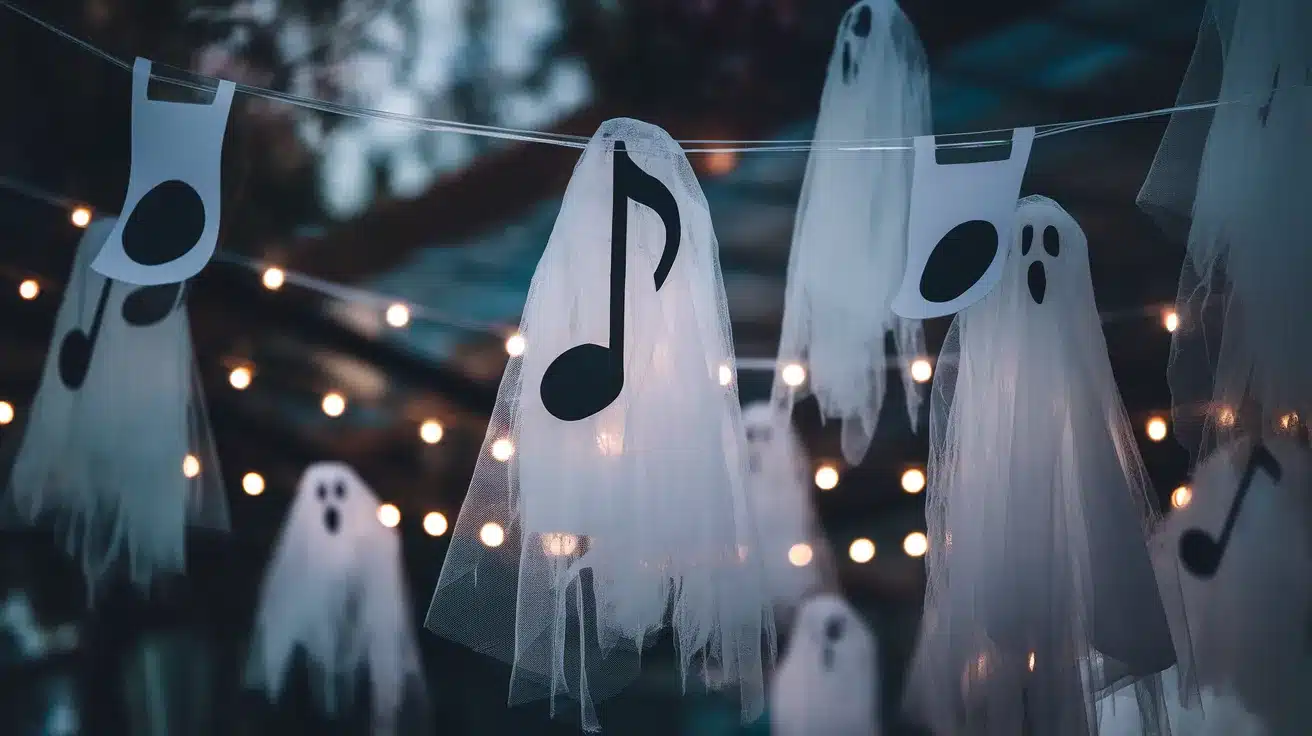
A floating musical display combining ghostly figures with musical notation creates an illusion of spirits emerging from sheet music.
This piece works well in any music room or as part of a larger haunted scene.
It suggests phantom melodies drifting through the air.
Materials Required
- White paper sheets
- Black marker
- Clear fishing line
- White tulle or gauze
- LED string lights
- Music note templates
- Double-sided tape
- Black cardstock
Steps
- Draw or print large musical notes on white paper, making them at least 8 inches tall for visibility. Space them as if creating a flowing melody line.
- Cut strips of white tulle into ghost shapes, about 12 inches long each, giving them flowing, uneven edges to suggest movement.
- Attach the ghost shapes to selected musical notes using a clear fishing line. Vary the heights and angles for a natural appearance, and make sure each connection point is secure.
- Position LED lights behind the display, focusing on the ghost shapes to create a soft glow effect.
- Add small black cardstock details to create faces or suggestions of musical instruments if desired.
12. Library Ghost Reader
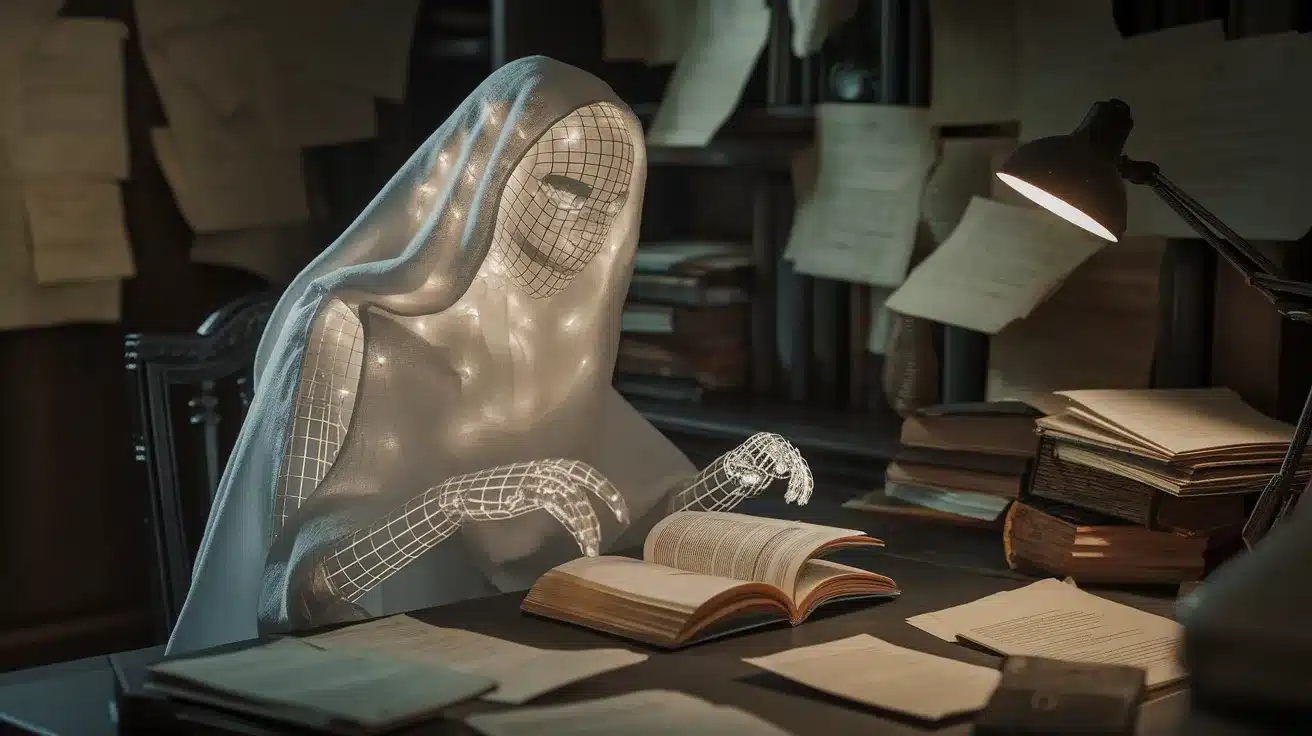
This scene depicts a spectral figure absorbed in reading, perfect for creating a scholarly haunted atmosphere in any book-filled space.
This setup suggests a peaceful presence continuing their love of literature.
Materials Required
- Old hardcover book
- White fabric or cheesecloth
- Small desk lamp
- Wire for structure
- Clear fishing line
- White LED lights
- Safety pins
- Reading glasses (optional)
Steps
- Create a basic wireframe to suggest a seated figure. Make sure the frame is stable enough to hold the book. Bend the wire to show a natural reading position.
- Layer white fabric over the wireframe, securing it with safety pins. Create extra fabric pools at the base for a realistic setting effect.
- Position the open book in the figure’s ‘hands’, securing it with clear fishing line so it appears to float slightly.
- Set up the desk lamp to cast gentle shadows, placing LED lights strategically under the fabric for an inner glow.
- Add reading glasses slightly askew on the book for extra character, if desired.
- Arrange any additional books around the base to complete the scene.
13. Rain and Ghost Scene
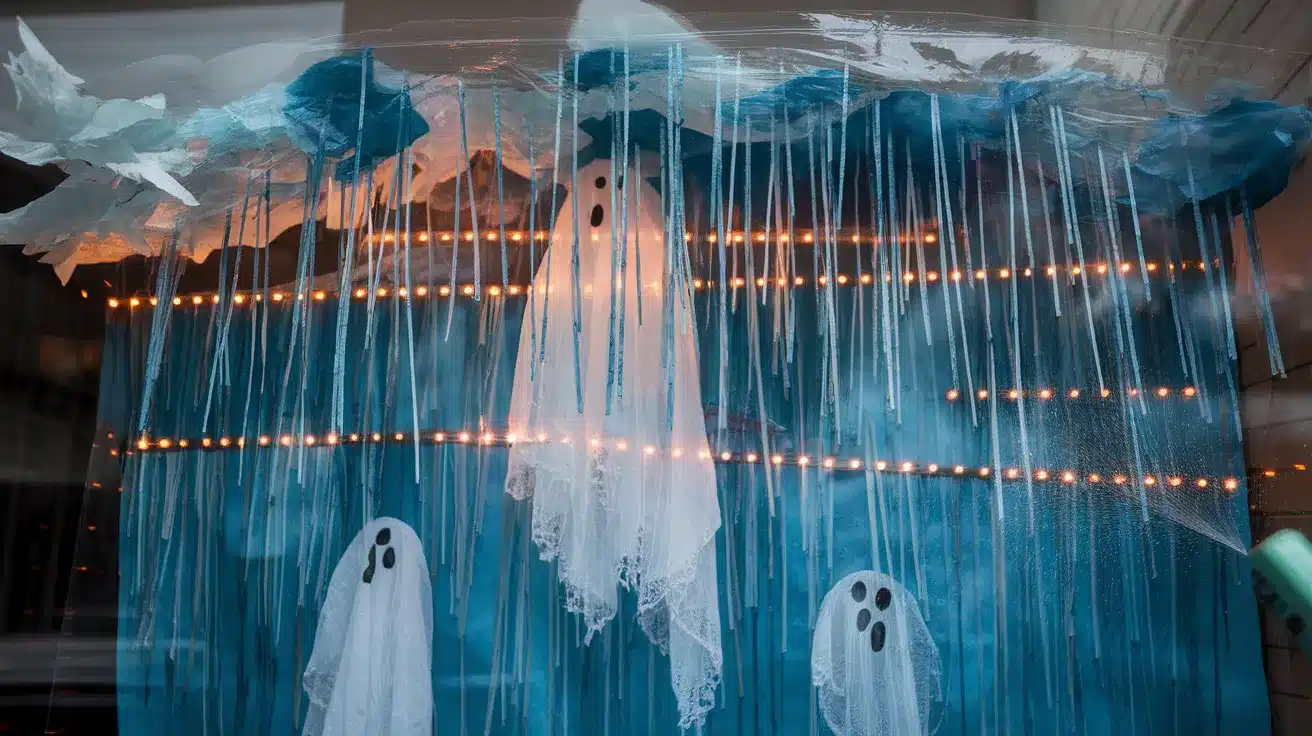
This multi-layered window display combines the appearance of rainfall with ethereal figures, creating a moody and atmospheric scene.
It uses lighting and transparency effects to suggest spirits appearing in stormy weather.
Materials Required
- Clear plastic sheet
- Blue and white paint
- White tissue paper
- LED strip lights
- Spray bottle with water
- Clear fishing line
- White gauze
- Blue cellophane
Steps
- Paint raindrop streaks on the clear plastic sheet using diluted blue and white paint, working from top to bottom. Let them run naturally for realistic effect.
- Create ghost figures from tissue paper and gauze, making them of various sizes. Give them flowing, ragged edges to suggest movement in the rain.
- Layer the blue cellophane behind certain areas to create depth and shadow effects. Secure with clear tape.
- Mount LED strips around the frame, positioning them to highlight both rain streaks and ghost figures.
- Spray water occasionally on the plastic sheet for real droplet effects during display time.
14. Garden Ghost Among Flowers
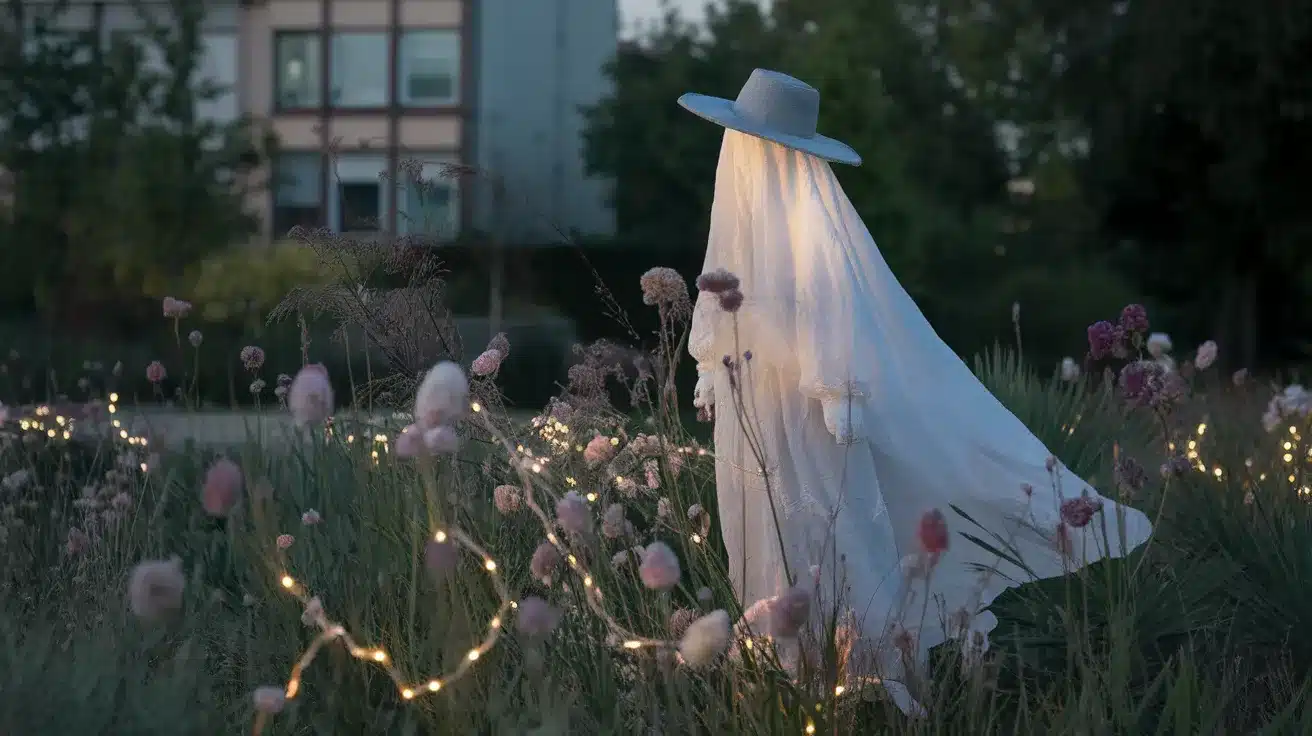
This gentle outdoor scene integrates spectral elements with natural garden features, creating an unexpected and enchanting vision among the plants.
This display works particularly well in the evening hours.
Materials Required
- White weatherproof fabric
- Garden stakes or shepherd’s hooks
- Solar-powered LED lights
- Clear fishing line
- White ribbon
- Plant-safe wire
- Safety pins
- Artificial flowers (optional)
Steps
- Select a location among flowers or plants, preferably where natural air movement will create gentle motion. Securely place garden stakes or hooks in the ground.
- Shape the weatherproof fabric into a flowing figure using safety pins to create dimension. Make sure the fabric is long enough to move with the breeze.
- Secure the figure to stakes using plant-safe wire and fishing line. Create multiple anchor points for stability while maintaining a floating appearance.
- Weave solar-powered LED lights through nearby plants and around the figure’s base. Place them to create subtle uplighting effects.
- If natural flowers aren’t available, add artificial ones to the figure and secure them with a white ribbon for a garden spirit effect.
- Test the display at different times of day to ensure proper lighting and movement effects.
15. Ghost Tea Party

A whimsical setup that creates an ethereal dining scene, perfect for a corner display or centerpiece.
This arrangement suggests an ongoing phantom gathering, frozen in time with delicate details.
It catches the eye and sparks the imagination about the invisible guests.
Materials Required
- White tablecloth or lace cloth
- Vintage teacups and saucers
- White tulle or gauze fabric
- Clear fishing line
- LED tea lights
- Silver or white serving tray
- Small chains or old keys
- White ribbon
- Safety pins
Steps
- Set up your table with the white tablecloth, letting it pool naturally on the floor. To suggest multiple seated figures, create layers of fabric at different heights.
- Shape individual ghost forms using tulle, giving them a seated position. Pin strategic points to maintain the shape while allowing gentle movement.
- Arrange teacups, saucers, and serving pieces as if in use. Tilt some slightly and position them at different heights using hidden supports.
- Install LED lights beneath the fabric layers and inside teacups for a subtle glow effect.
- Add small chains or keys as accessories, letting them peek out from under fabric folds.
- Position extra fabric pieces to suggest movement, like reaching for teacups.
16. Ghost Train Station
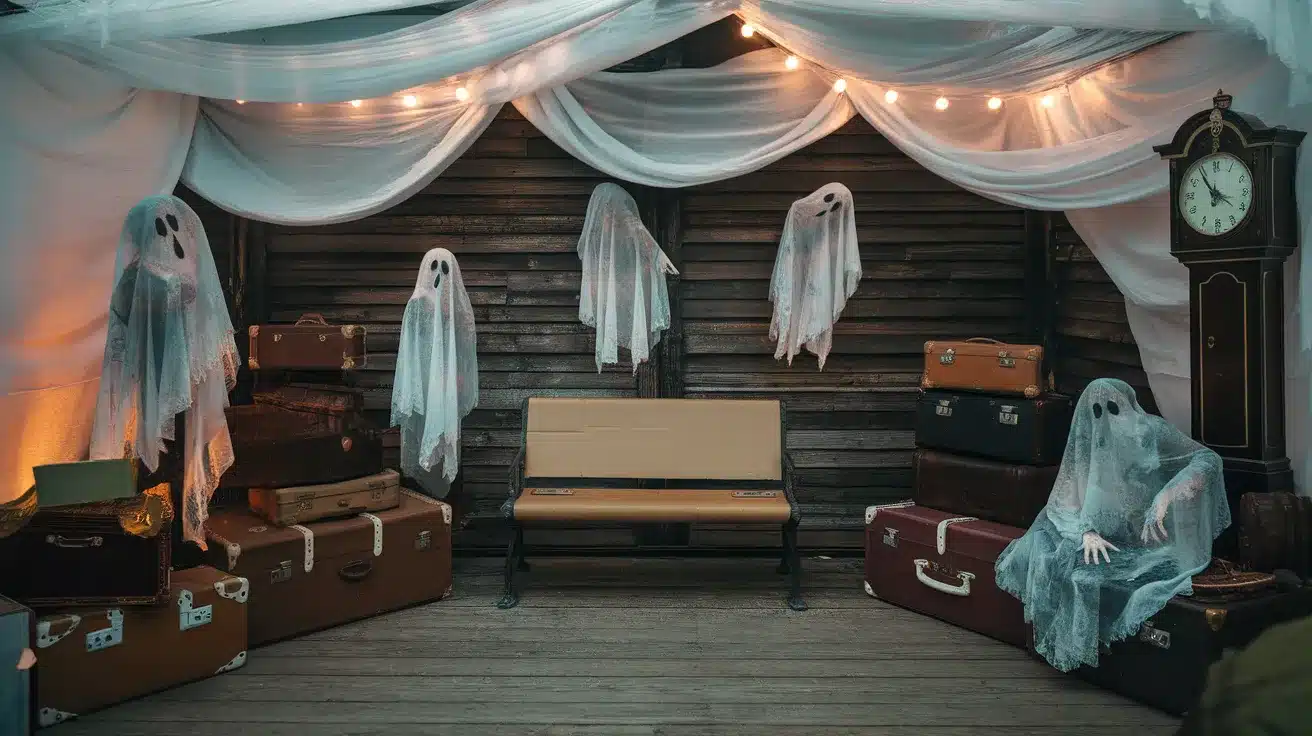
A large-scale scene that transforms a space into a phantom waiting platform, suggesting travelers from another time.
This display works well in long hallways or against large walls, creating depth and story within your Halloween setup.
Materials Required
- White sheets or curtains
- Vintage suitcases
- Old clock or clock face
- White LED strip lights
- Cardboard for bench shape
- Clear fishing line
- White gauze
- Black paper for details
Steps
- Create a backdrop using white sheets or curtains, hanging them in layers to suggest platform depth. Add gentle folds and movements in the fabric.
- Build a simple bench out of cardboard, cover it with white fabric, and arrange old suitcases around it.
- Make several ghost figures in different poses – standing, sitting, walking – using gauze and hidden supports.
- Install the clock slightly higher than eye level, setting it to suggest midnight or late evening.
- Position LED strips behind fabric layers and under the bench for atmospheric lighting.
17. Ghost Baby Cradle

A tender and touching display centered around a vintage cradle, creating a gentle and slightly wistful atmosphere.
This scene combines soft lighting and subtle movement to suggest a caring presence watching over the cradle.
Materials Required
- Small vintage cradle or bassinet
- White lace or sheer curtains
- Baby blanket in white
- Small white dress or gown
- LED string lights
- Clear fishing line
- White tulle
- Music box (optional)
Steps
- Position the cradle in a quiet corner, ensuring it’s stable. Layer the baby blanket inside, creating natural-looking folds and slight indentations.
- Create a parent figure using white lace or curtains, shaping it to appear leaning over the cradle. Secure with hidden pins and supports.
- Arrange the small dress or gown in the cradle, letting part of it hang over the edge as if moving gently.
- Weave LED lights through the scene, focusing on creating a soft glow from within the cradle and behind the parent figure.
- Add tulle wisps around the edges of the scene for extra movement and depth.
- Place a music box nearby if desired, and set to play a gentle lullaby.
18. Ghost Writing Letters
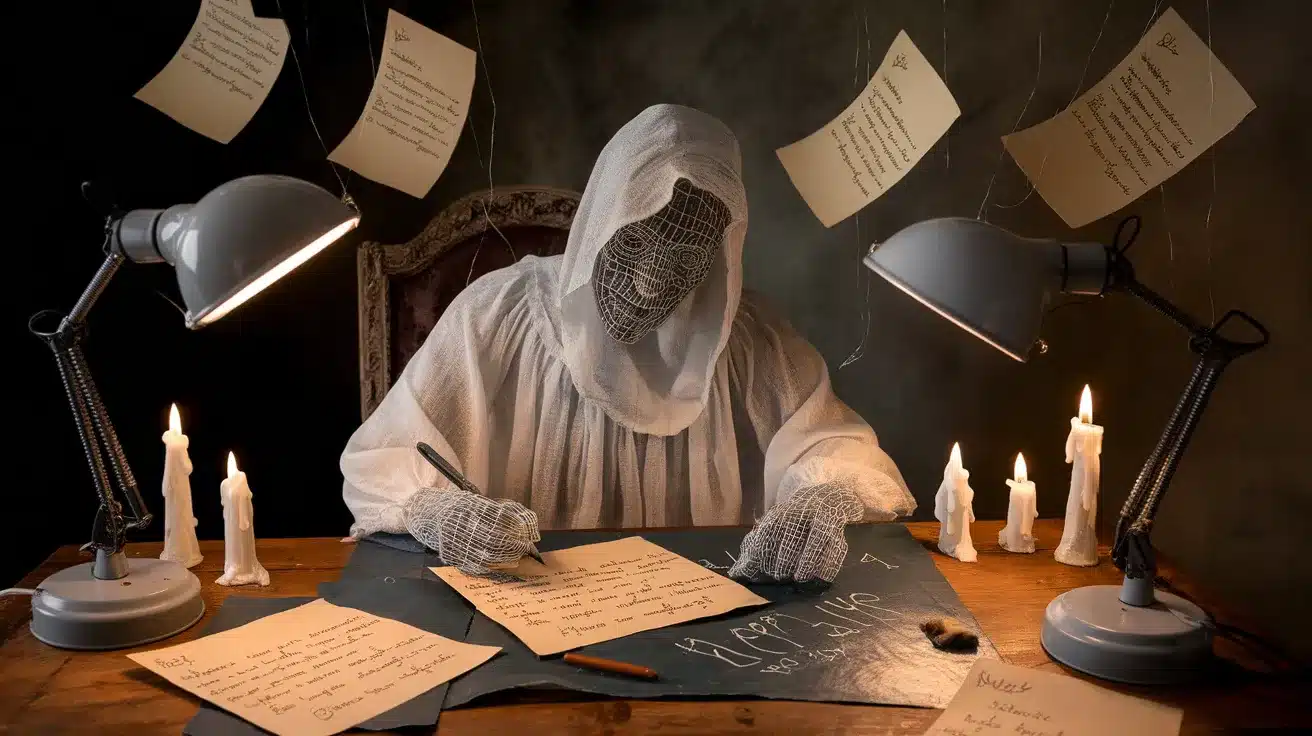
This nostalgic scene features a spectral figure penning letters at an old desk.
The display captures a moment of quiet contemplation, with writing materials arranged to suggest ongoing correspondence from beyond.
Materials Required
- Writing desk or small table
- White fabric or gauze
- Old papers or parchment
- Fountain pen or quill
- LED desk lamp
- Clear fishing line
- White ink
- Envelope collection
- Battery candles
Steps
- Set up the desk against a wall, arranging papers and envelopes in a natural scatter. Some should appear mid-writing, others sealed and ready to send.
- Create the ghost figure using white fabric over a simple wire frame, positioning it as if seated and leaning slightly forward in concentration.
- Position the lamp to cast shadows over the writing area, adding battery candles for extra lighting effects.
- Scatter partially written letters with white ink showing faded text and ghostly messages.
- Add floating elements using clear fishing lines to suggest supernatural activity.
19. Ghost Playing Piano
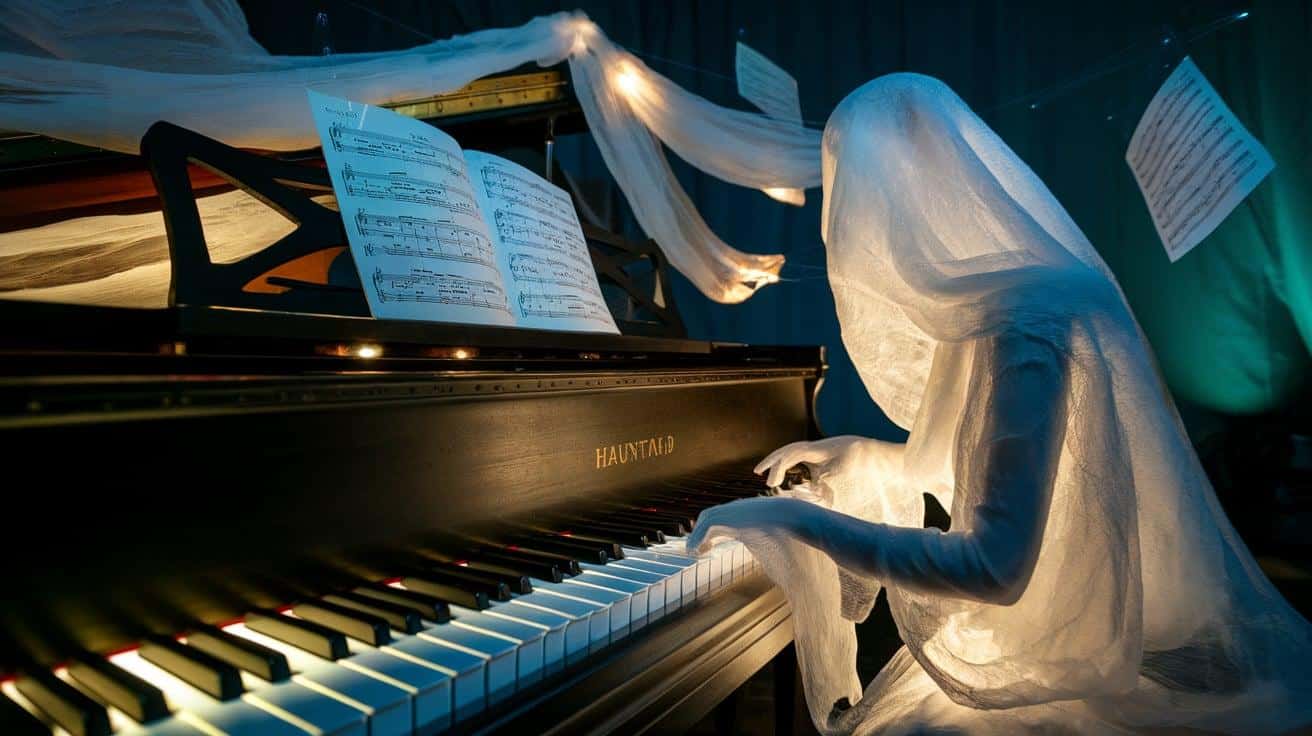
An atmospheric display centered around a piano suggesting music from an unseen performer.
This setup creates a striking visual while hinting at phantom melodies in the air.
Materials Required
- Piano or keyboard
- White tulle or gauze
- LED strip lights
- Sheet music
- Clear fishing line
- White fabric
- Safety pins
- Small electric fan
Steps
- Drape the piano with layers of white fabric, creating natural folds that suggest a figure at the keys. Shape the fabric to show hands positioned over the keyboard.
- Position sheet music is on the stand, slightly worn and yellowed for the age effect.
- Install LED strips under the piano lid and behind the music stand for subtle illumination.
- Create movement using a small fan hidden from view, allowing the fabric to shift gently.
- Add floating music sheets secured with a clear fishing line for extra supernatural effect.
20. Ghost at Sunset
A window display that uses natural light and shadows creates a striking silhouette effect.
This scene takes advantage of evening light to produce a naturally eerie atmosphere.
Materials Required
- Orange and yellow tissue paper
- White gauze
- Clear tape
- Black paper
- LED string lights
- Fishing line
- Safety pins
- White fabric
Steps
- Create a sunset background using layers of orange and yellow tissue paper on the window.
- The ghost figure is formed using white gauze and fabric, and it is positioned to appear floating against the colored background.
- Add black paper silhouettes of trees or buildings at the bottom for depth.
- Install LED lights behind key areas to enhance the glow effect when natural light fades.
- Secure all elements with clear tape and a fishing line for stability while maintaining the illusion of floating.
21. Ghost Through Curtains
It is a simple but effective display that turns ordinary window treatments into a haunting scene.
This setup uses light and shadow to create the impression of a figure moving through the fabric.
Materials Required
- White sheer curtains
- LED spotlight
- Wireframe
- White tulle
- Clear fishing line
- Safety pins
- Small fan
- White string lights
Steps
- Hang layered sheer curtains, creating depth with multiple panels. Allow them to drape naturally with slight gathering.
- Build a basic figure shape using a wire frame and white tulle, positioning it to appear as if passing through the curtains.
- Install the LED spotlight at an angle to cast defined shadows through the layers.
- Place the small fan to create gentle movement in the curtains and figure.
- Add string lights behind the curtains for additional depth and glow effects.
- Secure any floating elements with a clear fishing line for controlled movement.
How to Choose the Right Ghost Design for Your Space
I know picking the perfect ghost design can feel tricky.
Let’s break it down into simple steps that will help you make the best choice for your space.
1. Room Assessment
- Measure your space – height, width, and depth available
- Look for natural display spots (windows, corners, open walls)
- Check power outlets for lighting needs
- Note daily light changes in the space
- Look for air vents or drafts
- Think about safety with kids/pets
2. Set the Spooky Level
- A light, friendly ghost that adds beauty
- A middle-ground spirit with some mystery
- A more intense presence that draws attention
3. Match Your Style
- Clean, simple lines for modern spaces
- Fun, cartoon-style for casual rooms
- Detailed, life-like work for formal areas
4. What You’ll Need
- A good canvas or wooden board
- Regular pencils for your first sketch
- Acrylic paints (dries fast, easy to use),
- Oil-based paints (takes time to dry, rich colors)
Maintenance Tips for Keeping Your Ghost Paintings Spooky
1. Smart Placement
- Choose walls that don’t get direct light
- Use curtains or blinds for extra shade
- Move pieces if you notice the sun hitting them
- Check for fading every few months
2. Regular Cleaning
- Use a soft, dry cloth once a week
- Wipe gently in one direction
- Don’t use water or cleaning sprays
- Pay extra attention to the frame edges
3. Quick Fix-Ups
- Look for spots that seem dull
- Keep spare paint in the same colors
- Fix small areas with a tiny brush
- Let touch-ups dry fully before hanging
4. What You Need
- Clean, lint-free cloths
- Your original paint colors
Conclusion
Ghost paintings add a fun touch to any room.
I hope these ideas spark your interest in creating your own spooky art.
Remember, there’s no wrong way to paint a ghost—each piece tells its story.
Start small if you’re new to painting. Try one simple design and build your skills from there.
Mix up your placement and lighting until you find what works best in your space.
The best part?
Your ghost paintings will be one-of-a-kind pieces that make your home stand out.
Try these ideas, and don’t forget to put your own spin on them. Your perfect ghostly gallery is just a few brush strokes away.
Happy painting!
Frequently Asked Questions
What Types of Paint Work Best for Creating Ghost Effects?
Watercolors and acrylics create the best ghost effects.
Watercolors give a misty look, while acrylics offer stronger white highlights and better coverage.
Can I Paint Ghosts on Materials Other Than Canvas?
Yes, you can paint ghosts on wood, glass, fabric, or even walls.
Just make sure to use paint that’s made for your chosen surface.
What Should I Do If I Make a Mistake While Painting?
Let mistakes dry completely, then paint over them with a light base color.
Once dry, try your ghost design again on the fresh surface.


