
25 Funky Hand Painted Furniture Ideas
Tired of boring furniture that looks like everyone else’s? I used to walk through furniture stores feeling uninspired by the same bland pieces everywhere.
Then I learned about hand-painted furniture, and everything changed. What if I told you that old dresser in your garage could become a stunning focal point? Hand-painted furniture lets you create one-of-a-kind pieces that reflect your personality. You can modify thrift store finds into conversation starters, save money, and express your creativity all at once.
I’m sharing funky hand-painted furniture ideas that will inspire you to pick up a brush. These aren’t complicated projects; they’re fun, doable modifications that anyone can try.
Let’s turn your furniture from forgettable to fabulous.
Benefits of Funky Hand-Painted Furniture
Hand-painted furniture has completely changed how I think about decorating my home. Instead of buying expensive new pieces, I started painting old furniture with bold colors and fun patterns.
The results have been fantastic, each piece tells its own story and adds personality that you just can’t get from store-bought items.
A One-of-a-Kind Look for Your Home
When I painted my first piece – an old coffee table – I never thought it would bring so much personality to my space.
I started with simple stripes, and now that table starts more conversations than any store-bought piece ever did.
What makes it special? No one else has anything quite like it. I’ve mixed colors that perfectly match my curtains and throw pillows, creating a look that feels completely put together.
Sustainable and Eco-Friendly Approach
I saved five large furniture pieces from ending up in landfills last year alone. Instead of buying new, I found solid wood pieces at yard sales and thrift stores.
The best part? These older pieces are often made from better materials than new furniture. I spent $40 on a solid oak dresser that just needed some TLC and paint.
That’s way less than the $500+ I would have spent on a new one, and I kept a perfectly good piece of furniture from going to waste.
Customizable to Your Style
What I love most about painting my own furniture is that I can change it whenever I want. Last month, I wasn’t happy with how my bookshelf looked in my home office.
Instead of shopping for a new one, I simply picked up some paint and gave it a fresh look over the weekend. I’ve learned that bold patterns work great in my living room, while my bedroom pieces look better with subtle designs.
I started with small projects, like side tables, before moving on to bigger pieces. Each project taught me something new.
I messed up plenty of times – like when I forgot to sand my first cabinet properly, and the paint started peeling after a week.
But those mistakes helped me understand what works and what doesn’t.
Now, I can transform any piece to match exactly what I need, whether it’s adding some bright colors to my kitchen or creating a calm vibe in my bedroom.
Funky Hand-Painted Furniture Ideas
These are my 25 favorite hand-painted furniture modifications, which will inspire you to see old pieces in a whole new light. These ideas range from bold geometric patterns to lively nature scenes, and I’ve organized them from beginner-friendly projects to more advanced techniques.
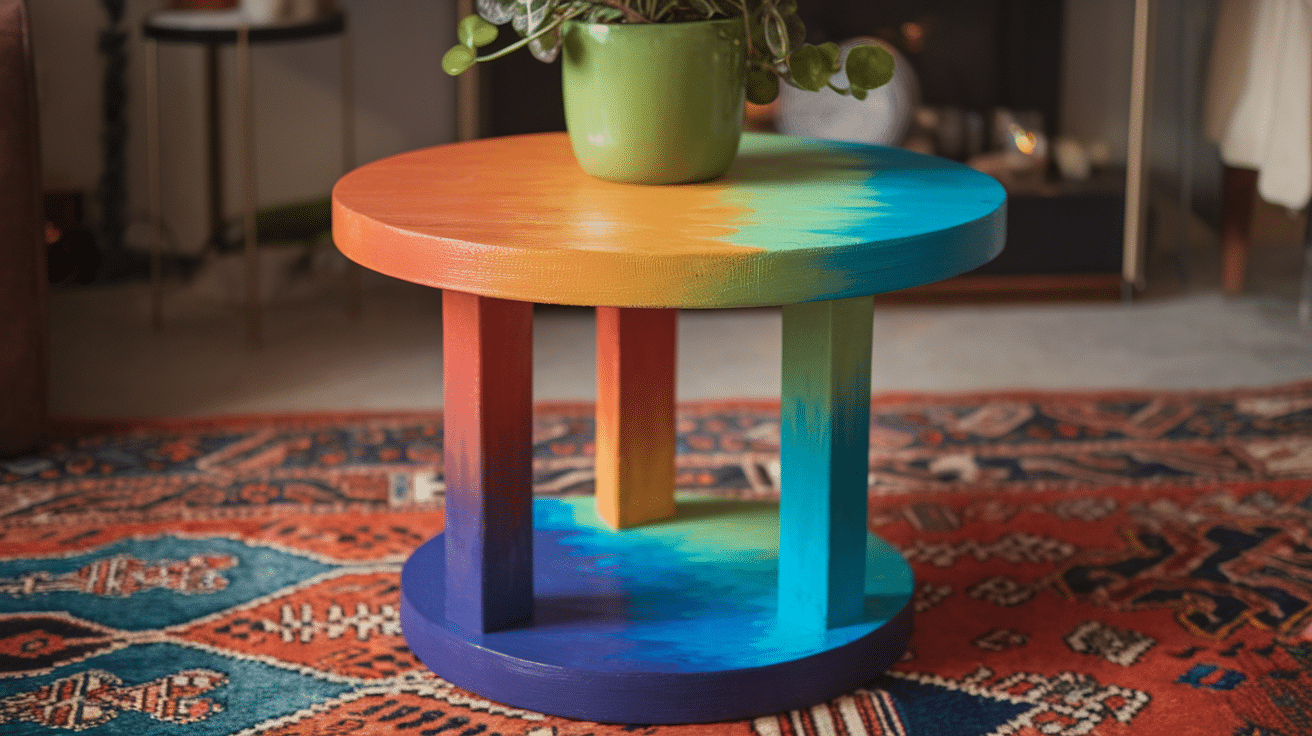
1. Geometric Painted Coffee Table

I transformed an old coffee table by painting bold geometric patterns in vibrant colors. It added a modern flair to my living room, making it an eye-catching focal point.
Steps to Follow:
- Sand the table to ensure smoothness.
- Tape off geometric shapes using painter’s tape.
- Paint each section with different bold colors.
- Once dry, apply a clear varnish to protect the paint.
2. Abstract Painted Bookshelf
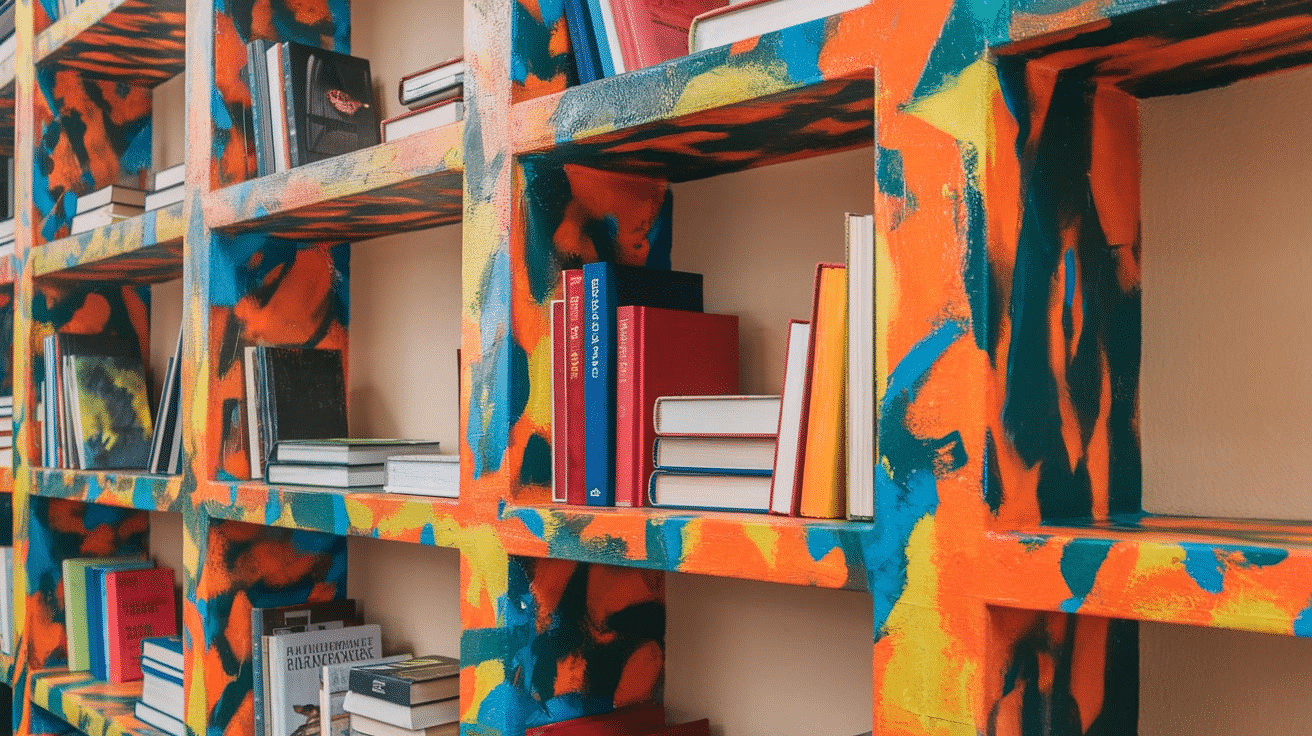
My bookshelf became a conversation starter when I painted it with abstract, flowing colors. The design was playful yet modern, fitting perfectly with my eclectic style.
Steps to Follow:
- Clean and lightly sand the bookshelf.
- Use a pencil to sketch abstract shapes or lines.
- Paint with acrylic paints, blending colors for a flowing effect.
- Seal with a clear protective coat.
3. Floral Painted Nightstand
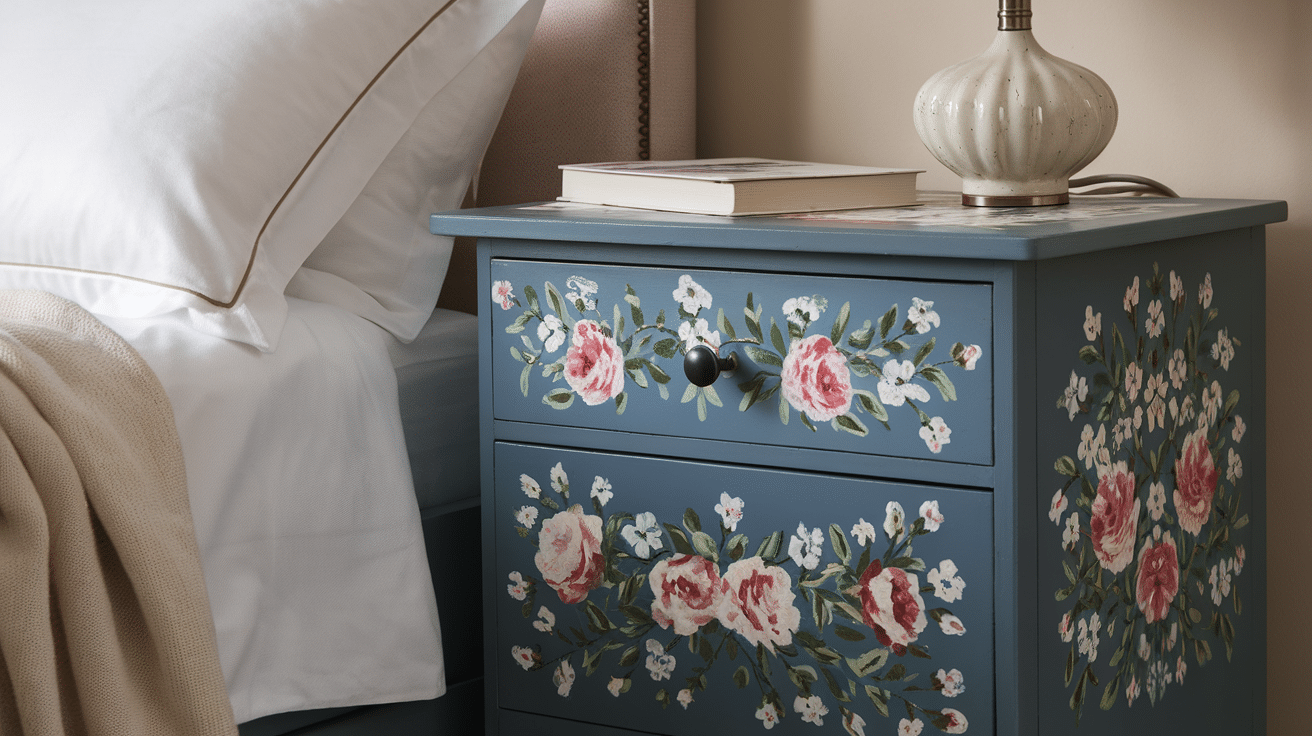
I added a soft floral design to my nightstand, bringing a touch of whimsy to my bedroom. The soft pastels made the space feel warm and inviting.
Steps to Follow:
- Sand and clean the nightstand surface.
- Draw the floral design lightly with a pencil.
- Paint the flowers with small brushes using soft colors.
- Finish with a matte sealer to protect the design.
4. Bohemian Painted Chair
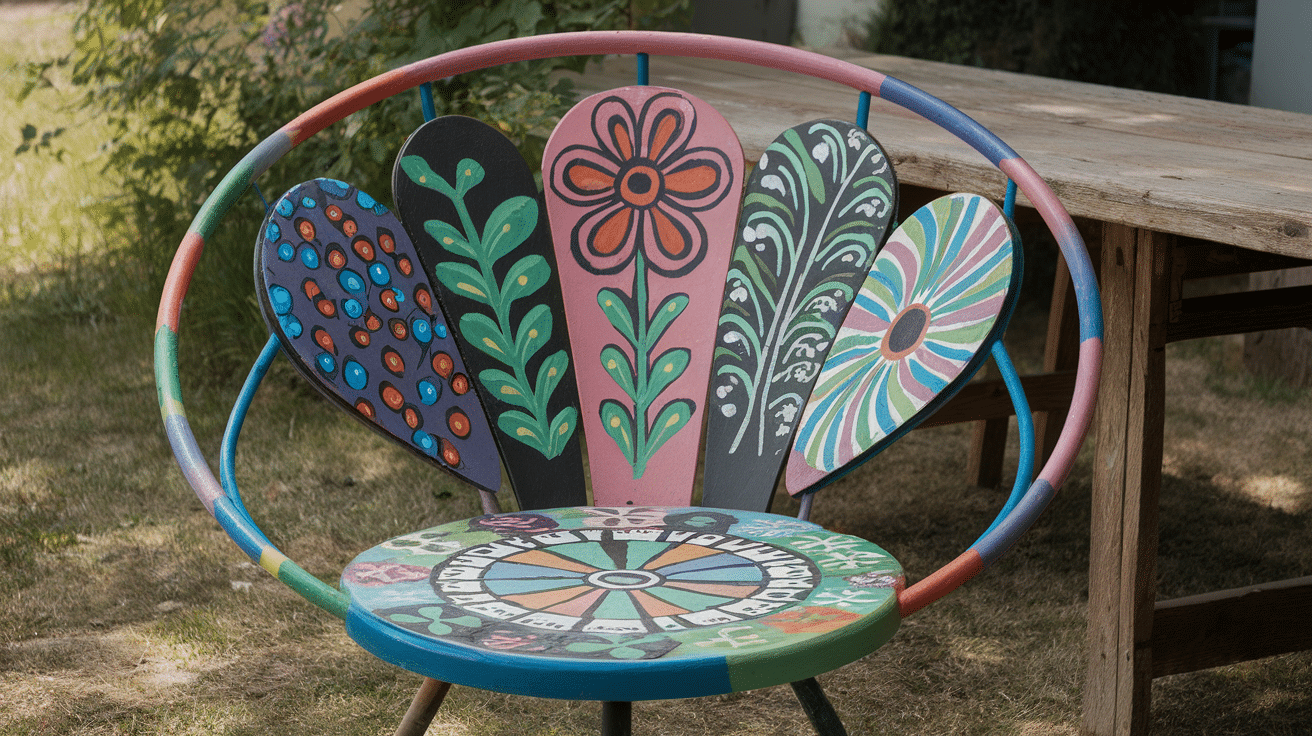
Turn a simple chair into a boho masterpiece by painting intricate mandala designs. It gave the chair a unique vibe, blending perfectly with my cozy living room.
Steps to Follow:
- Lightly sand the chair to remove old paint.
- Draw the mandala design on the seat and backrest.
- Paint the design with bright, contrasting colors.
- Let it dry and apply a protective layer of wax.
5. Retro Painted Dresser
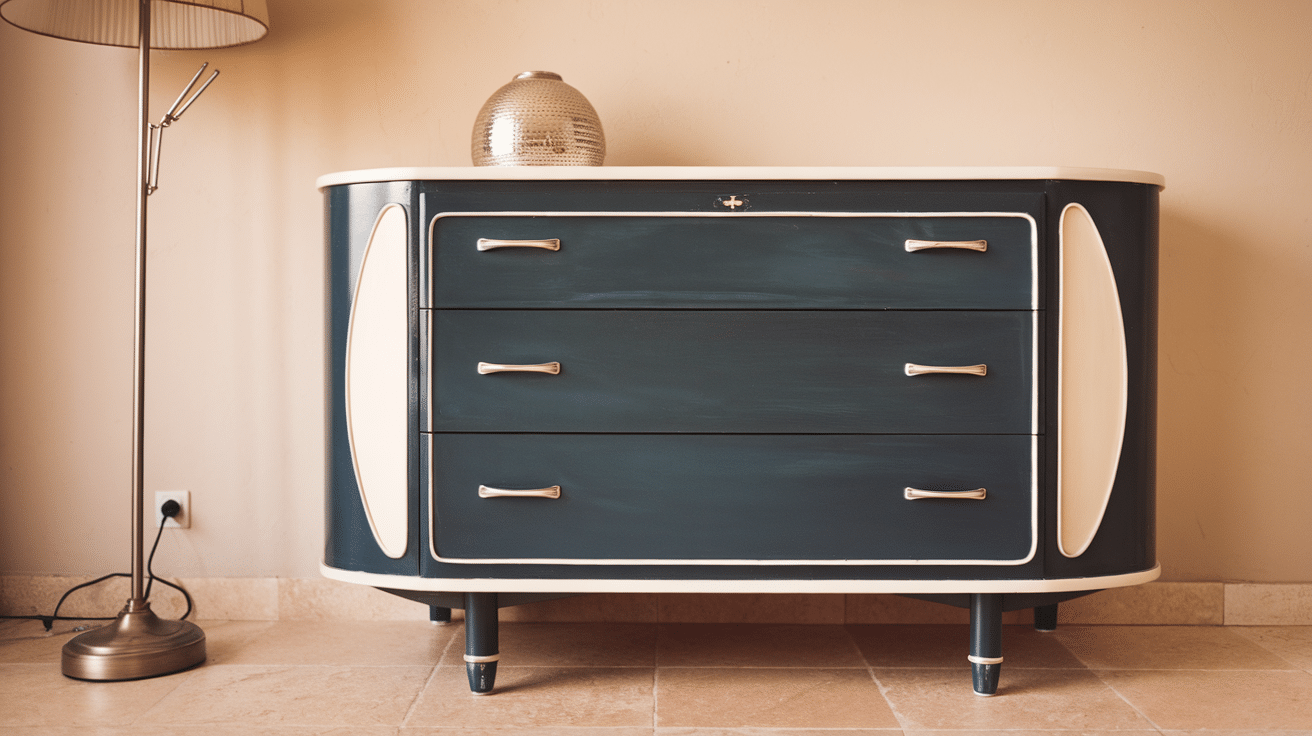
Revamped an old dresser with retro colors and funky patterns, bringing a nostalgic touch to my room. It was the perfect blend of vintage and fun!
Steps to Follow:
- Sand the dresser to create a smooth surface.
- Tape off the sections for the retro pattern.
- Paint in bold colors like mustard yellow, teal, and orange.
- Seal the finish with a clear varnish for durability.
6. Lively Painted Cabinet

painted a kitchen cabinet with a whimsical animal pattern. The design made the cabinet look quirky, adding personality to the room.
Steps to Follow:
- Sand and clean the cabinet doors.
- Sketch animal designs or patterns on the surface.
- Paint each design using fine brushes and bright colors.
- Apply a protective coat once it’s dry.
7. Hand-Painted Console Table with Stripes
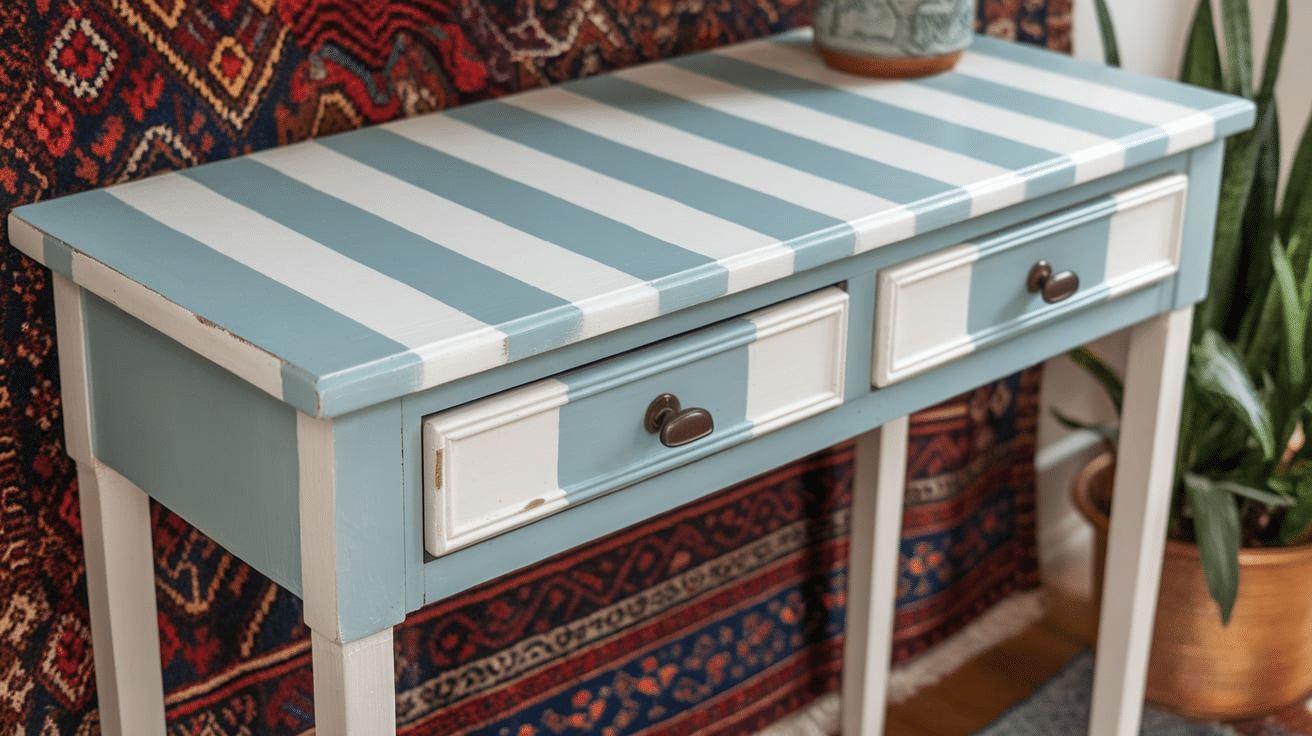
I refreshed my console table by adding wide, horizontal stripes in alternating colors. The bold design added drama without being too overpowering.
Steps to Follow:
- Sand and prime the table.
- Tape off equal sections for the stripes.
- Paint each stripe with contrasting, bold colors.
- Once dry, apply a clear sealant for a long-lasting finish.
8. Ombre Painted Chest of Drawers
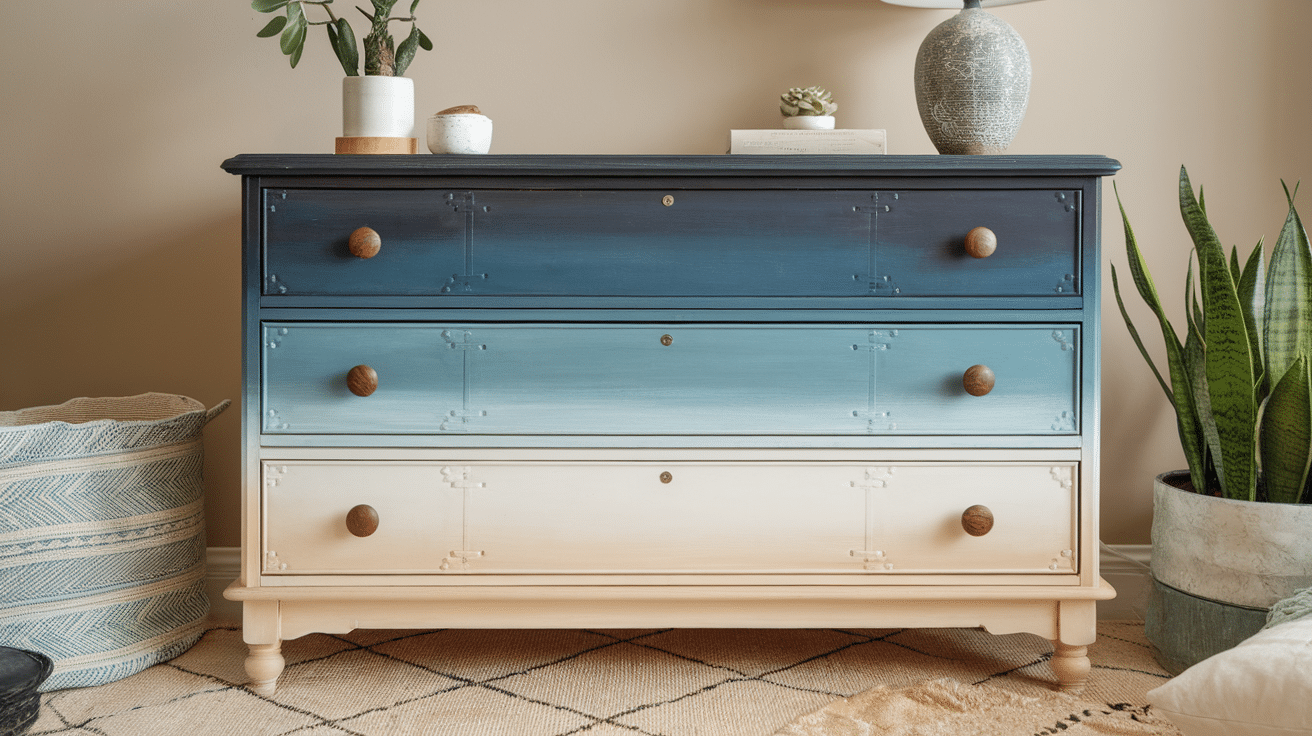
Paint the chest of drawers with an ombre effect, transitioning from deep navy at the bottom to soft blush at the top. It created a serene, calming vibe.
Steps to Follow:
- Sand the surface of the chest for a smooth finish.
- Choose two or three colors for the ombre effect.
- Blend the colors from dark to light, ensuring smooth transitions.
- Finish with a coat of clear varnish.
9. Funky Painted Wardrobe Doors
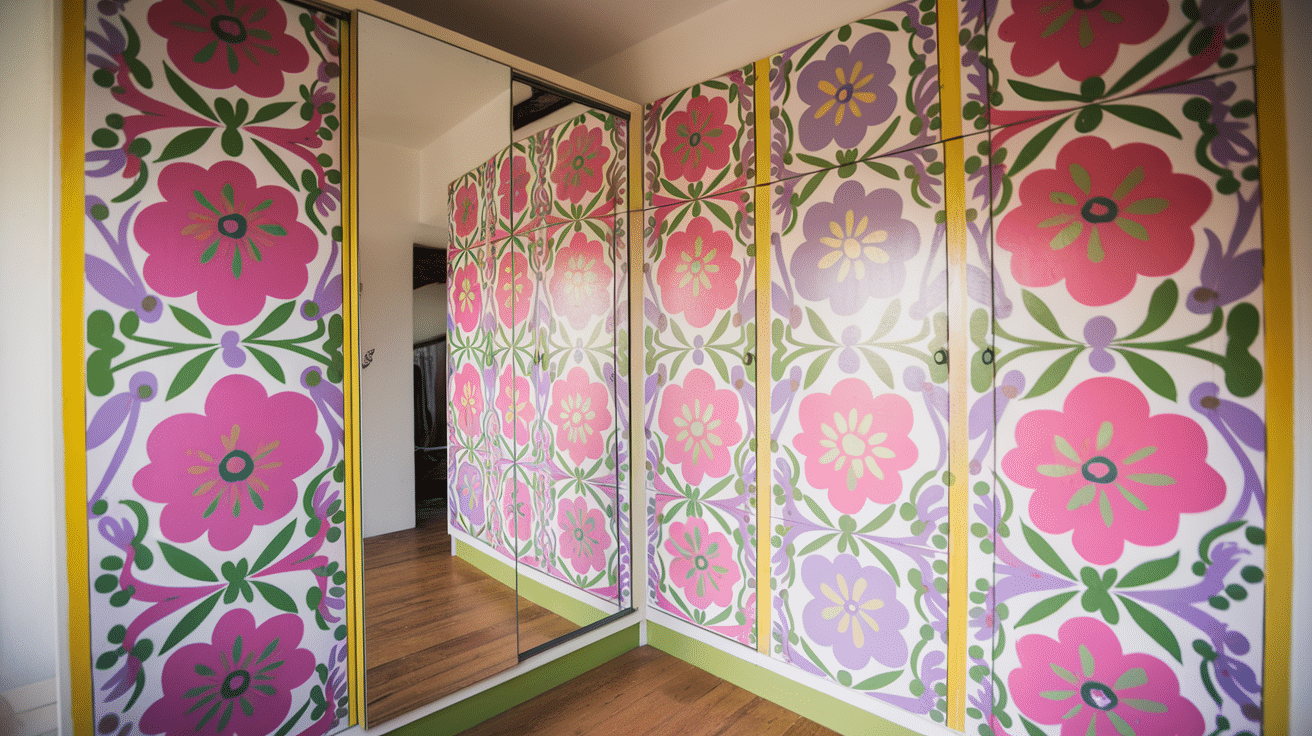
I added a funky zigzag pattern to the wardrobe doors. The bold and bright design gave the room a playful, modern look.
Steps to Follow:
- Clean and sand the wardrobe doors.
- Use painter’s tape to create zigzag patterns.
- Paint the sections in alternating colors.
- Once dry, seal with a clear coat to protect the paint.
10. Painted Storage Bench with Tribal Design
I painted a storage bench in a bold tribal design with deep reds and blacks. It made the entryway feel dynamic and full of life.
Steps to Follow:
- Sand the bench and prepare the surface.
- Draw a tribal pattern lightly with a pencil.
- Paint the design using dark reds and blacks.
- Apply a protective sealer once the paint is dry.
11. Colorful Hand-Painted Side Table
Turn a drab side table into a colorful masterpiece with overlapping circular designs. The bright hues made the room feel alive.
Steps to Follow:
- Sand the side table to prepare it.
- Draw overlapping circles on the surface.
- Paint each circle with a different vibrant color.
- Let the paint dry and apply a sealing coat.
12. Painted Storage Cabinet with a Chevron Pattern
![]()
I gave my plain storage cabinet a stylish makeover with a bold chevron pattern. The black-and-white contrast made it stand out beautifully in my room.
Steps to Follow:
- Sand and clean the cabinet surface.
- Use painter’s tape to mark the chevron pattern.
- Paint each section with contrasting colors like black and white.
- Seal the paint with a clear protective coat.
13. Hand-Painted Mirror Frame

Paint the mirror frame with a quirky color palette and funky patterns. It became a standout piece in my hallway, adding a fun touch.
Steps to Follow:
- Clean the mirror frame and sand it if necessary.
- Use tape to create geometric or funky patterns.
- Paint in contrasting colors to create the desired effect.
- Once dry, seal the paint with a clear varnish.
14. Artistic Painted Nightstand

Use abstract art to paint a plain nightstand, turning it into a mini art piece. The splashes of color added an artistic touch to my bedroom.
Steps to Follow:
- Sand the nightstand to smooth the surface.
- Draw abstract designs lightly with a pencil.
- Use bold colors and brush strokes to fill in the design.
- Let it dry and finish with a protective topcoat.
15. Painted Bookshelf with Horizontal Stripes
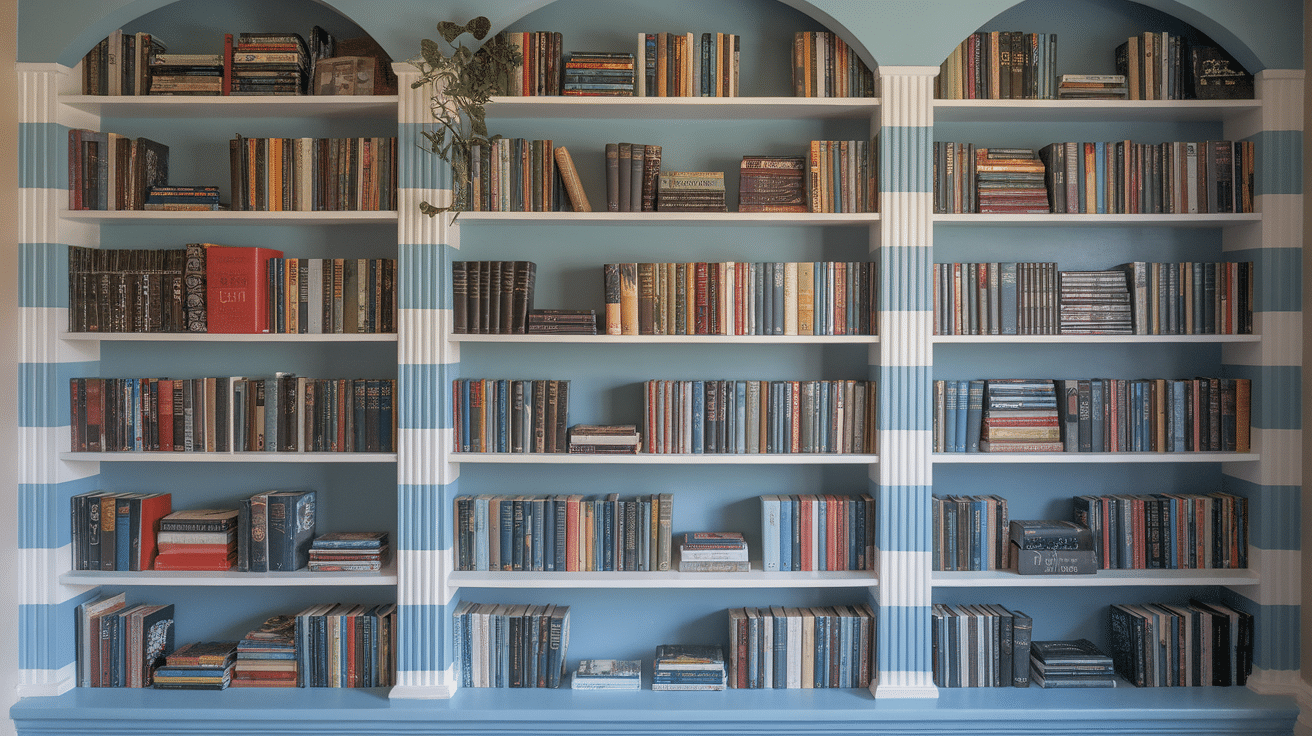
I painted my bookshelf with horizontal stripes in varying shades of blue. It added depth and a modern touch to the room.
Steps to Follow:
- Sand the bookshelf surface.
- Tape off horizontal sections for stripes.
- Paint the stripes in alternating colors.
- Finish by sealing with a clear varnish to protect the stripes.
16. Painted Chair with Polka Dots
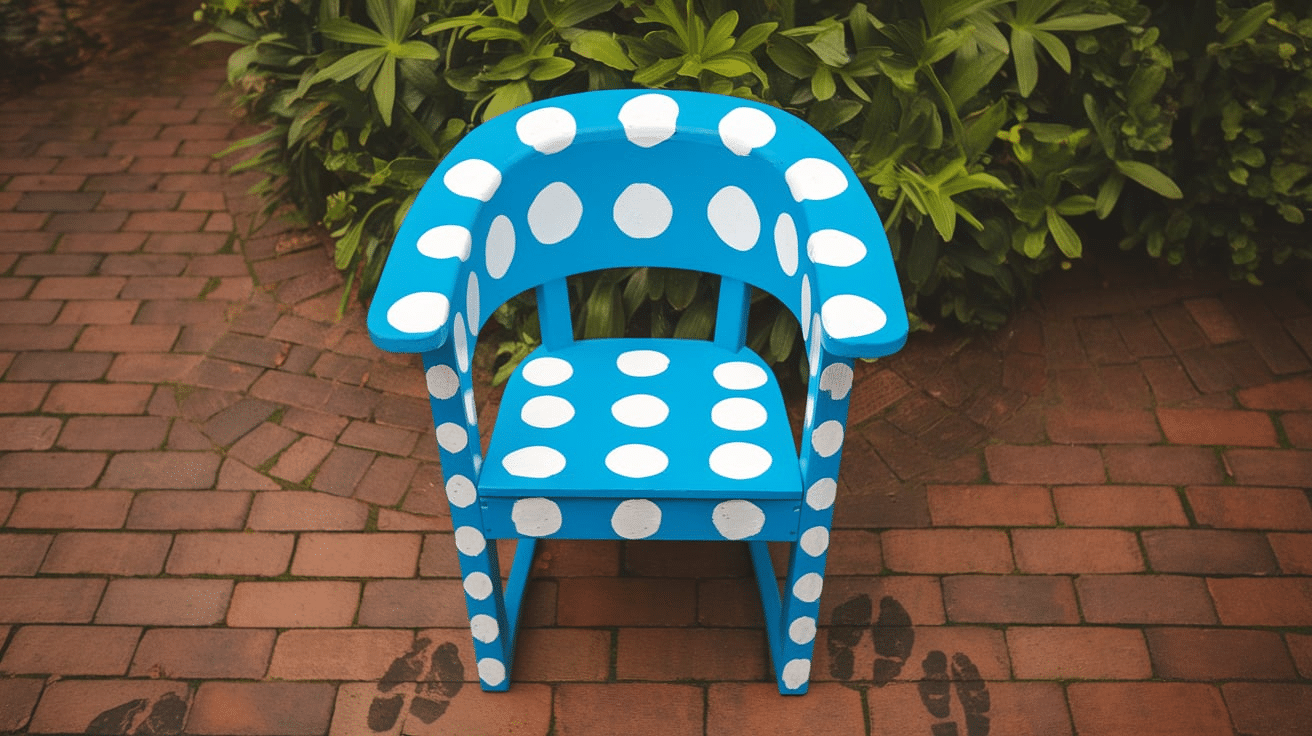
I added whimsical polka dots to a simple chair using bright, contrasting colors. It turned the chair into a fun, playful statement piece.
Steps to Follow:
- Sand and clean the chair.
- Lightly sketch where the polka dots will go.
- Use a stencil to paint even dots with bold colors.
- Apply a topcoat once the paint is dry.
17. Hand-Painted End Table with Chevron and Floral Pattern
![]()
Combine a chevron pattern and floral details on my end table for a quirky, yet stylish look. It brightened up my living space in no time.
Steps to Follow:
- Sand the surface of the table.
- Draw the chevron pattern and floral accents with a pencil.
- Paint with contrasting colors and fine brushes.
- Seal with a clear protective coat for durability.
18. Painted Headboard with Bold Stripes
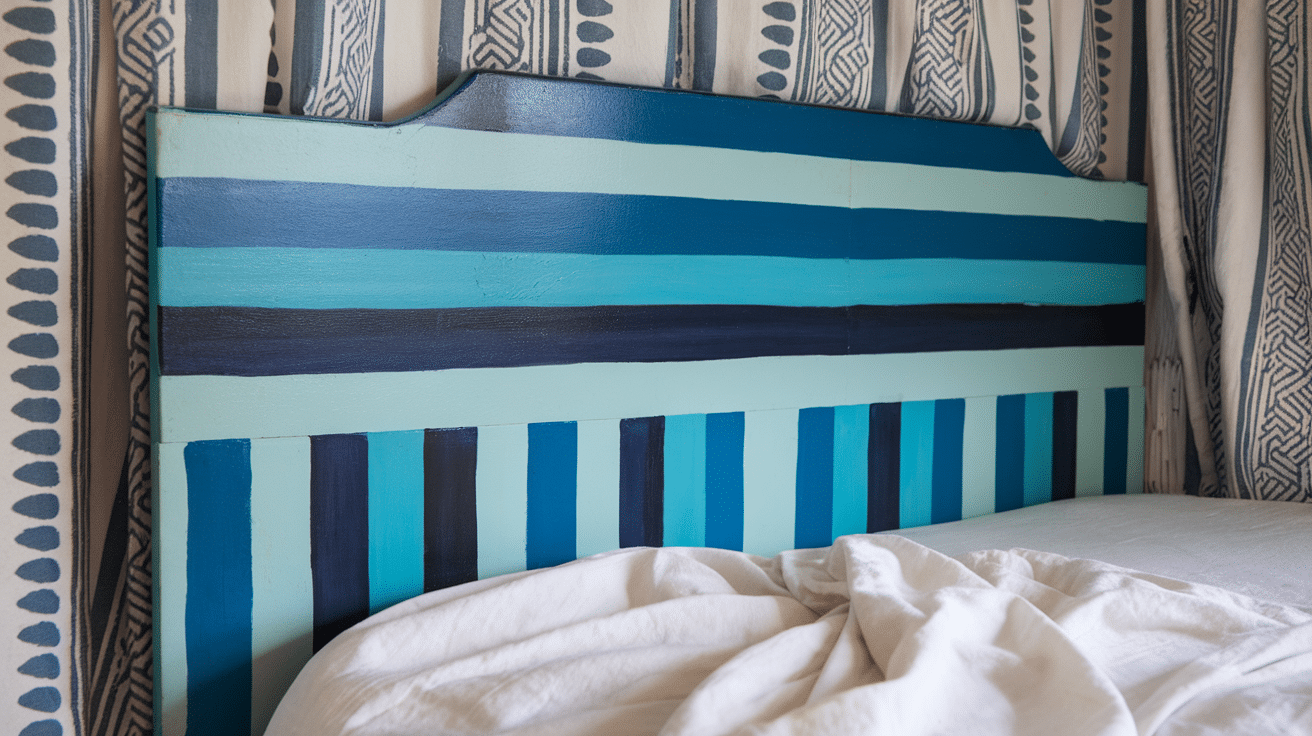
I painted my wooden headboard with bold vertical stripes in shades of green and gold. It became a dramatic focal point in the room.
Steps to Follow:
- Sand the headboard to smooth the surface.
- Use painter’s tape to create even vertical stripes.
- Paint each stripe with contrasting colors.
- Seal with a protective topcoat to preserve the stripes.
19. Hand-Painted Vintage Trunk
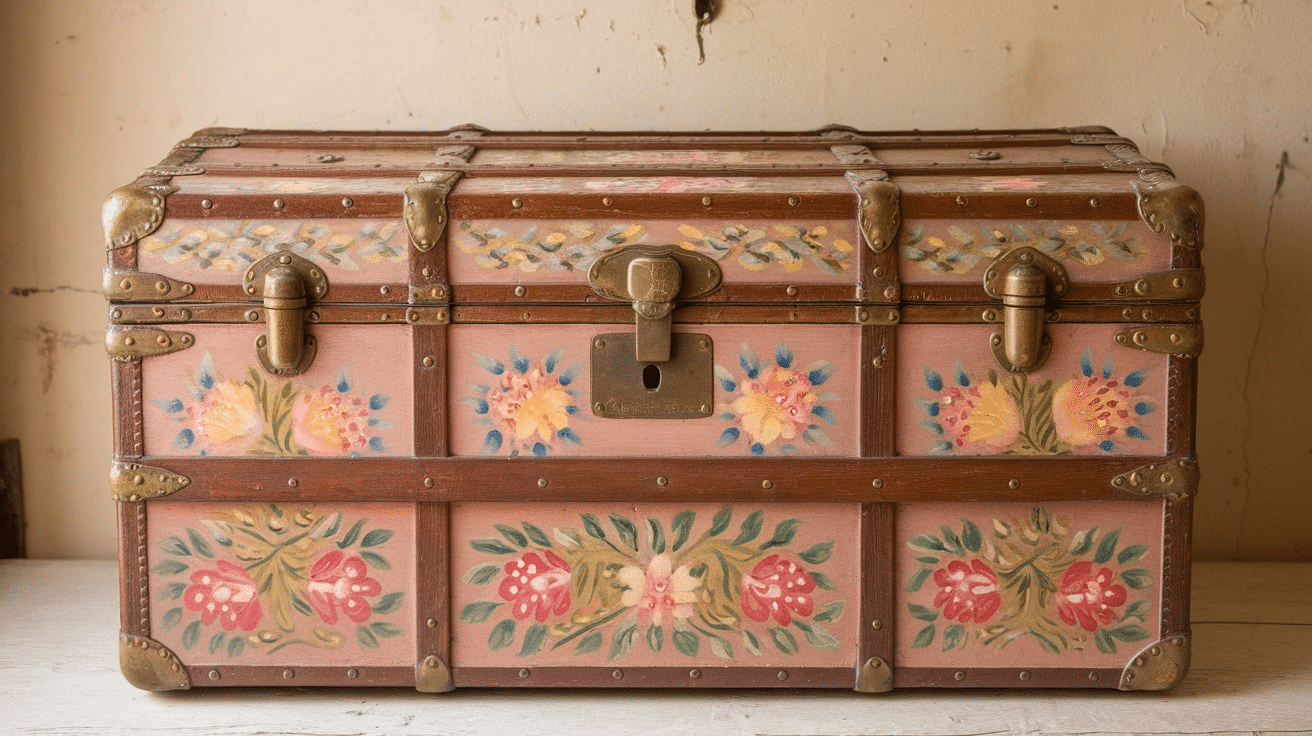
I gave my vintage trunk a makeover by painting it with a colorful patchwork design. It made the trunk look unique and fun in my living room.
Steps to Follow:
- Sand and clean the trunk.
- Sketch a patchwork design with a pencil.
- Paint each patch with different colors and patterns.
- Finish by sealing the paint with a clear varnish.
20. Painted Accent Chair with Floral Design
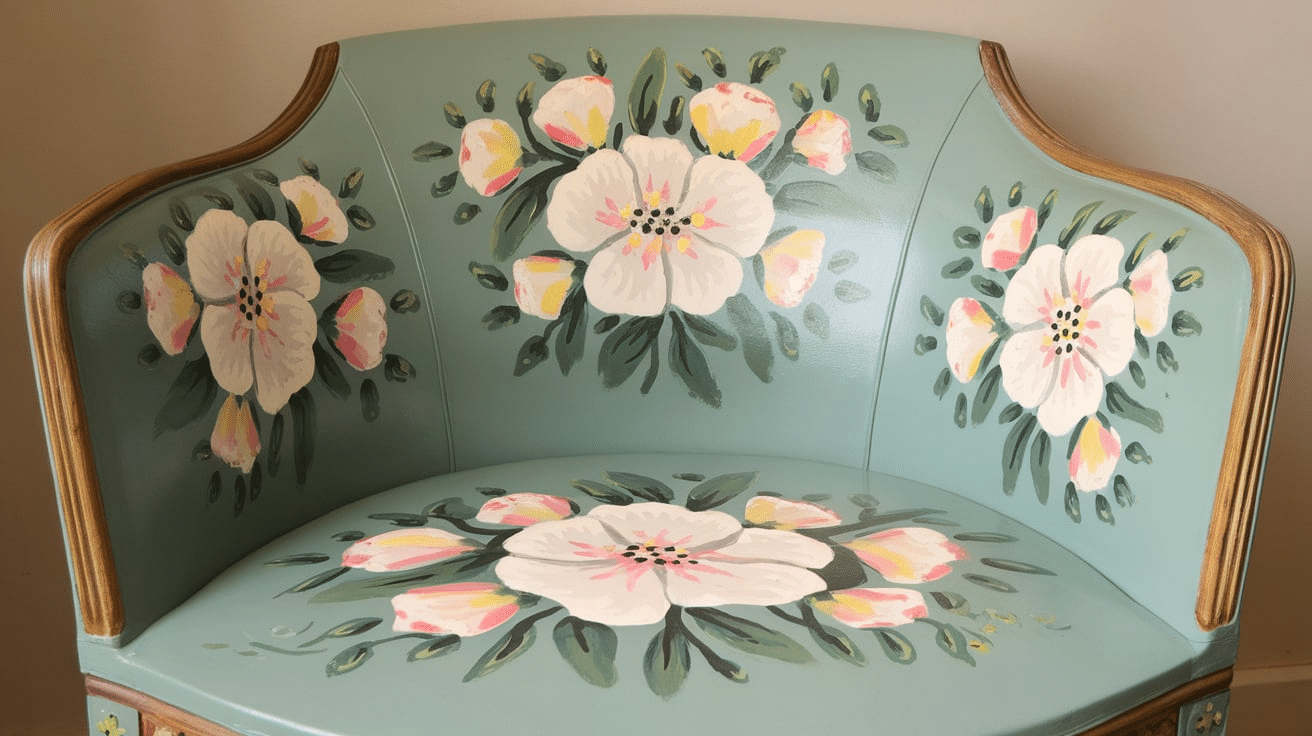
I decided to paint an old accent chair with a delicate floral design, which instantly gave it a fresh, feminine look.
Steps to Follow:
- Sand the chair and clean the surface.
- Draw floral patterns with a pencil.
- Paint the design with soft, pastel colors.
- Apply a topcoat for protection.
21. Hand-Painted Filing Cabinet
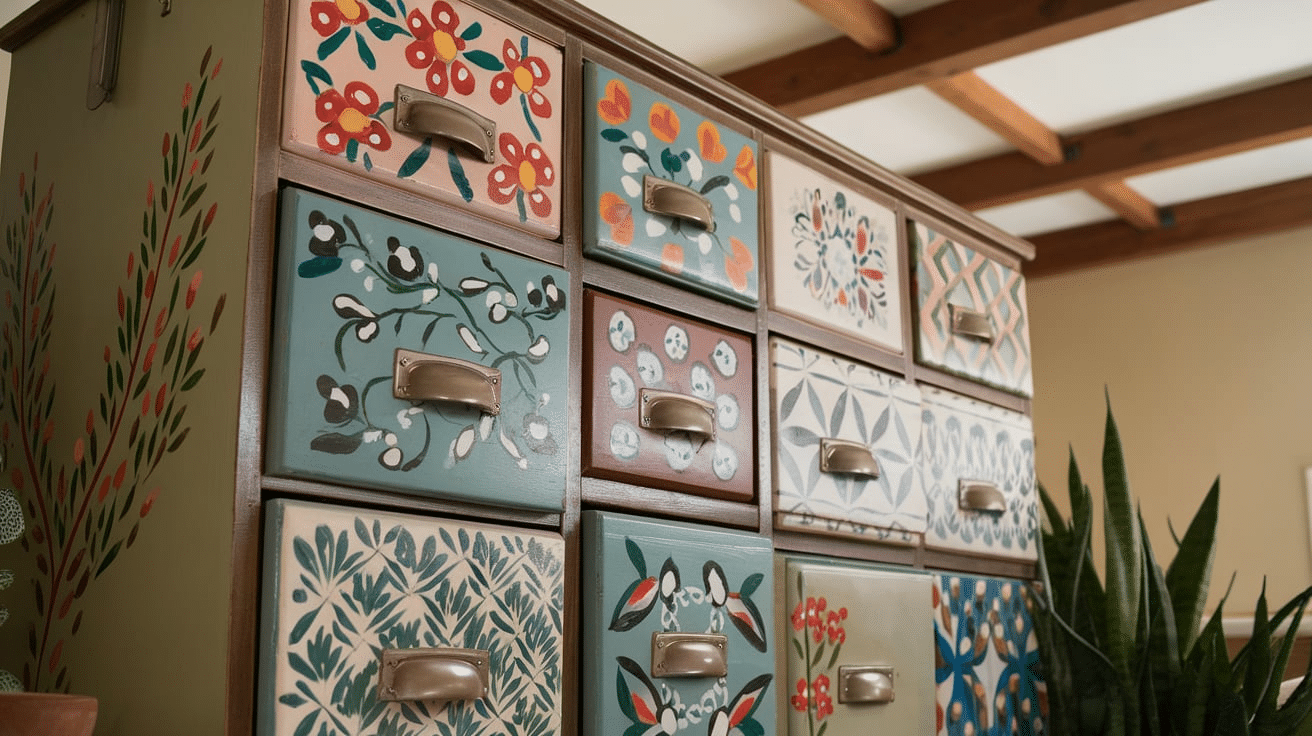
I gave my dull filing cabinet a quirky twist by painting it in a mix of pastel shades with funky patterns. It made my office space feel vibrant.
Steps to Follow:
- Clean the filing cabinet thoroughly.
- Tape off sections to create patterns.
- Paint with pastel colors in geometric shapes.
- Seal the finish to protect the paint.
22. Painted Accent Table with Ombre Effect
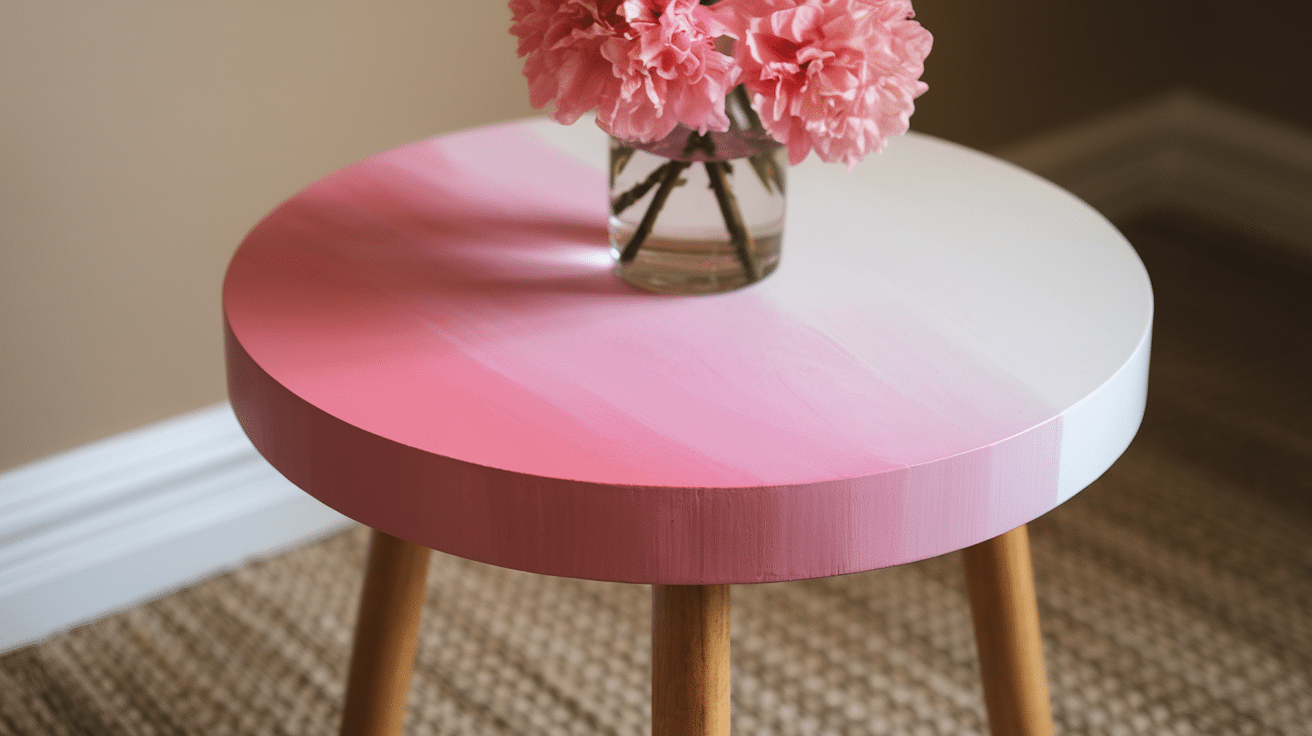
Paint a small accent table with a smooth ombre effect, transitioning from coral to pink. It became a soft, trendy addition to my living room.
Steps to Follow:
- Sand the table for a smooth finish.
- Choose two colors for the ombre effect.
- Blend the colors from dark to light using a paintbrush.
- Let it dry, then apply a clear protective coat.
23. Painted Armchair with Retro Patterns
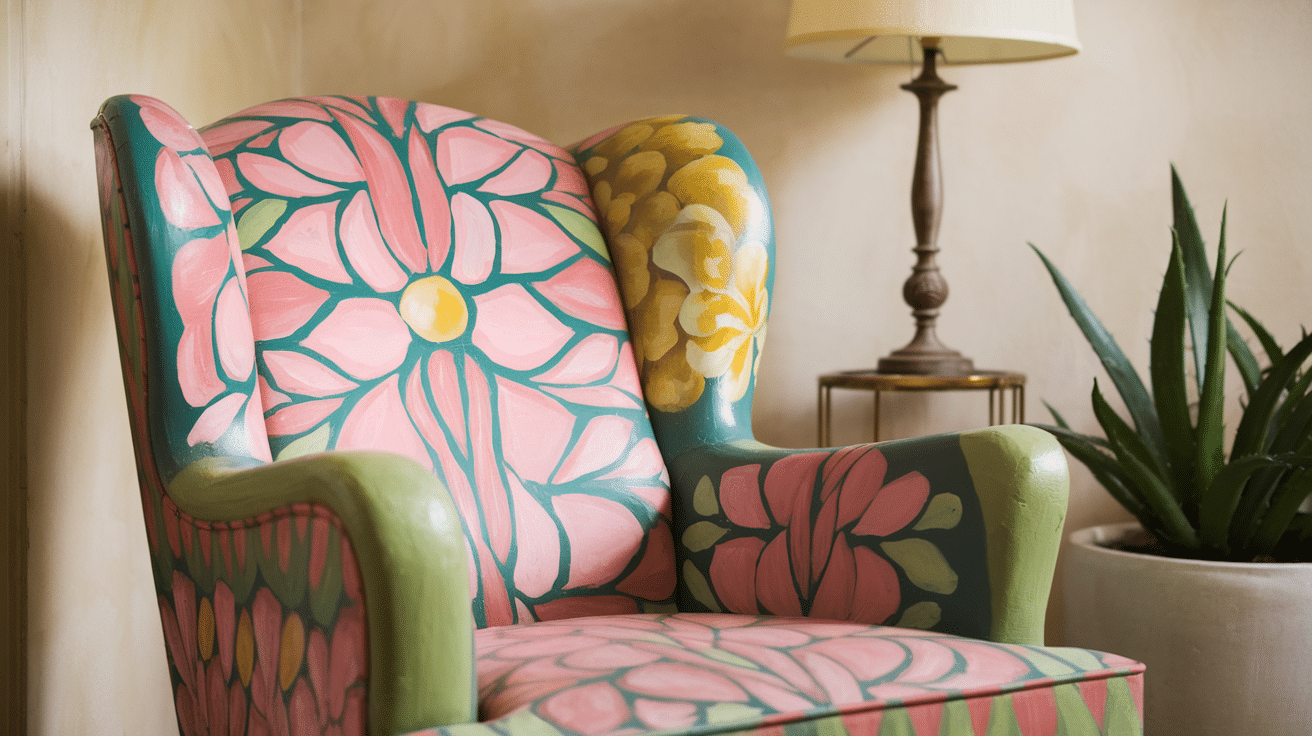
I transformed an old armchair with vibrant retro patterns. The bold colors gave the chair a mid-century modern look, which fit perfectly with my décor.
Steps to Follow:
- Sand and clean the armchair frame.
- Draw the retro patterns using a pencil.
- Paint each section with contrasting colors and fine brushes.
- Once dry, apply a topcoat to preserve the design.
24. Painted Dining Table with Fruit Motifs
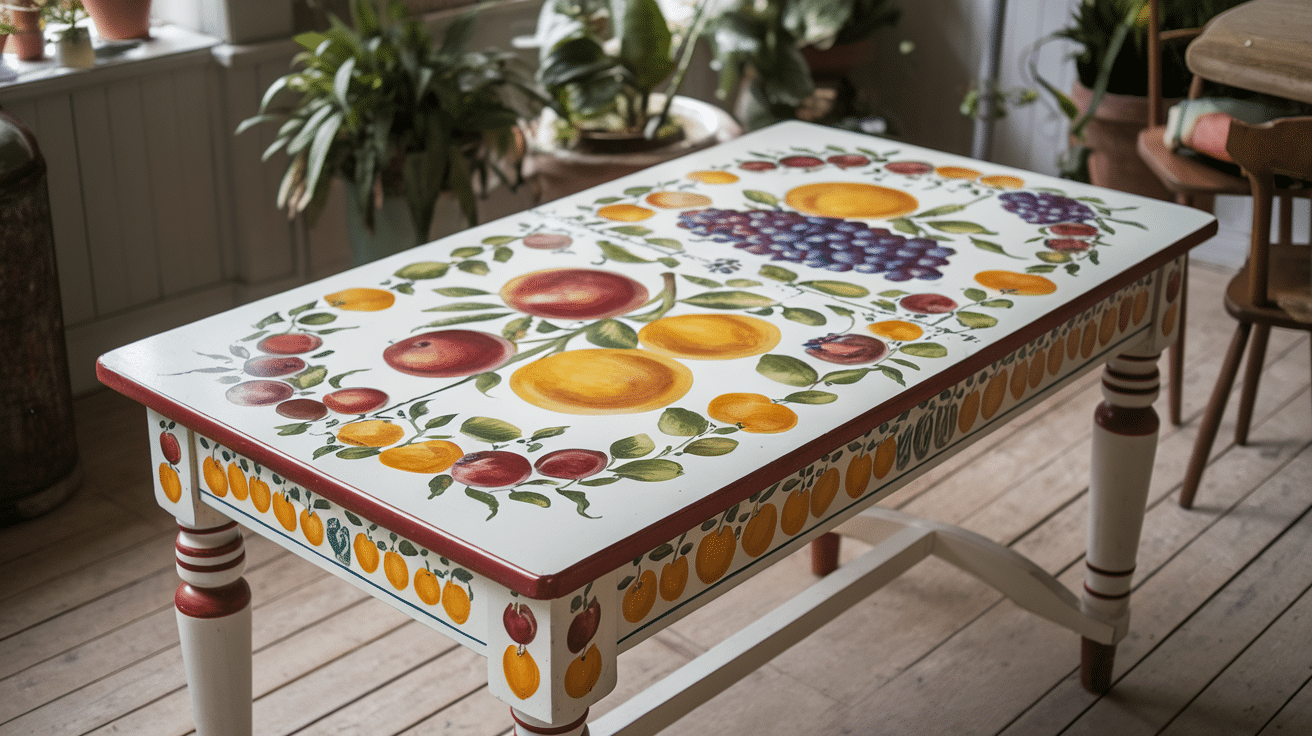
Paint a fun fruit motif on my dining table. It added a whimsical touch that complemented the rest of my kitchen décor.
Steps to Follow:
- Sand the table for a smooth base.
- Sketch fruit motifs around the tabletop.
- Paint each fruit with bright, contrasting colors.
- Apply a topcoat for protection once dry.
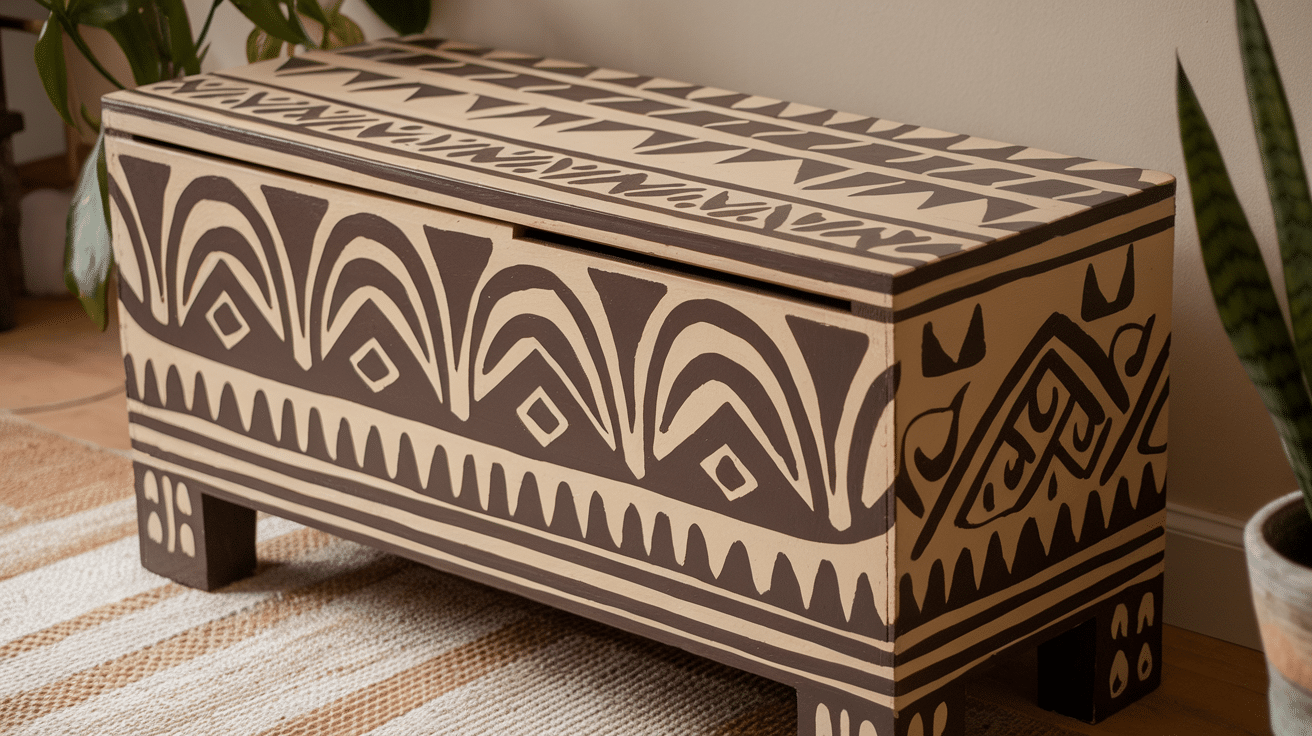
25. Hand-painted bench with Aztec Patterns

I painted my wooden bench with bold Aztec patterns. It brought a unique and ethnic vibe to my hallway, and it was surprisingly easy to do.
Steps to Follow:
- Sand the bench and clean the surface.
- Draw the Aztec pattern with a pencil.
- Paint the sections with earthy tones and bright accents.
- Finish by sealing the paint for a durable, long-lasting finish.
How to Care for Funky Hand-Painted Furniture?
Simple Care Tips for Funky Hand-Painted Furniture
- Use a soft, slightly damp cloth for regular dusting; it works perfectly and doesn’t harm the paint
- Wipe down each piece weekly with a microfiber cloth, paying extra attention to handles and edges
- Mix a small amount of mild dish soap with water for tougher spots like coffee spills.
- Never use strong chemical cleaners because they can strip away the protective finish.
- Keep painted pieces away from direct sunlight to prevent uneven fading
- Rotate decorative items on top of furniture to prevent sun damage in unavoidable spots
- Place felt pads under any items that sit on painted surfaces
- Use coasters and protective mats to prevent marks from heavy items like vases
- Put out coasters during parties and explain to guests that pieces need extra care
- Apply fresh protective topcoat every 2-3 years to maintain durability and color vibrancy
Common Mistakes to Avoid During Painting
These mistakes happen to everyone, but learning from them saves time and frustration. The first big error is rushing into painting without proper preparation, skipping sanding on old furniture causes paint to bubble after just two weeks.
Always clean surfaces thoroughly, especially greasy spots where paint never dries properly.
Choosing the wrong paint creates costly lessons. Using wall paint on furniture means it scratches off within days. Furniture-specific paint with proper primer and sealer works much better.
Always test paint on the bottom or back of pieces first – what looks good on paint chips can look completely different on actual furniture.
Temperature matters more than most people realize. Painting in cold spaces during winter prevents paint from drying properly. Waiting for days between 65-75°F gives the best results. Patience really is key with these projects, and proper preparation prevents hours of repainting work later.
Conclusion
Hand-painted furniture opens up a world of creative possibilities that modifies both your space and your relationship with home decor. These ideas prove that you don’t need expensive new pieces to create a home that reflects your personality.
The beauty of hand-painted furniture lies in its imperfections and uniqueness. Each brush stroke tells a story, and every color choice becomes part of your home’s character.
With proper preparation, the right materials, and basic care techniques, your painted pieces will bring joy for years to come.
Ready to start your first project? Pick a straightforward piece, gather your supplies, and let your creativity flow. Remember, there’s no wrong way to express yourself through paint. Your furniture is waiting to become something extraordinary; all it needs is your personal touch.
Frequently Asked Questions
How Long Does Hand-Painted Furniture Last?
Well-prepared and properly sealed hand-painted furniture can last 5-10 years with good care. The key is using a high-quality sealer and maintaining basic care.
What Kind of Paint Should I Use on Furniture?
Chalk paint and acrylic furniture paint work best. Use chalk paint for most pieces because it sticks well and gives a smooth finish. For high-traffic items like coffee tables, prefer acrylic furniture paint with a strong sealer for better durability.
How Do I Fix Mistakes in Hand-Painted Furniture?
Small drips can be sanded smooth once fully dry. For bigger issues, like wrong colors or patterns, wait for the paint to dry completely, lightly sand the area, and repaint. Once, completely redid a cabinet front, and you can’t tell it was painted twice.


