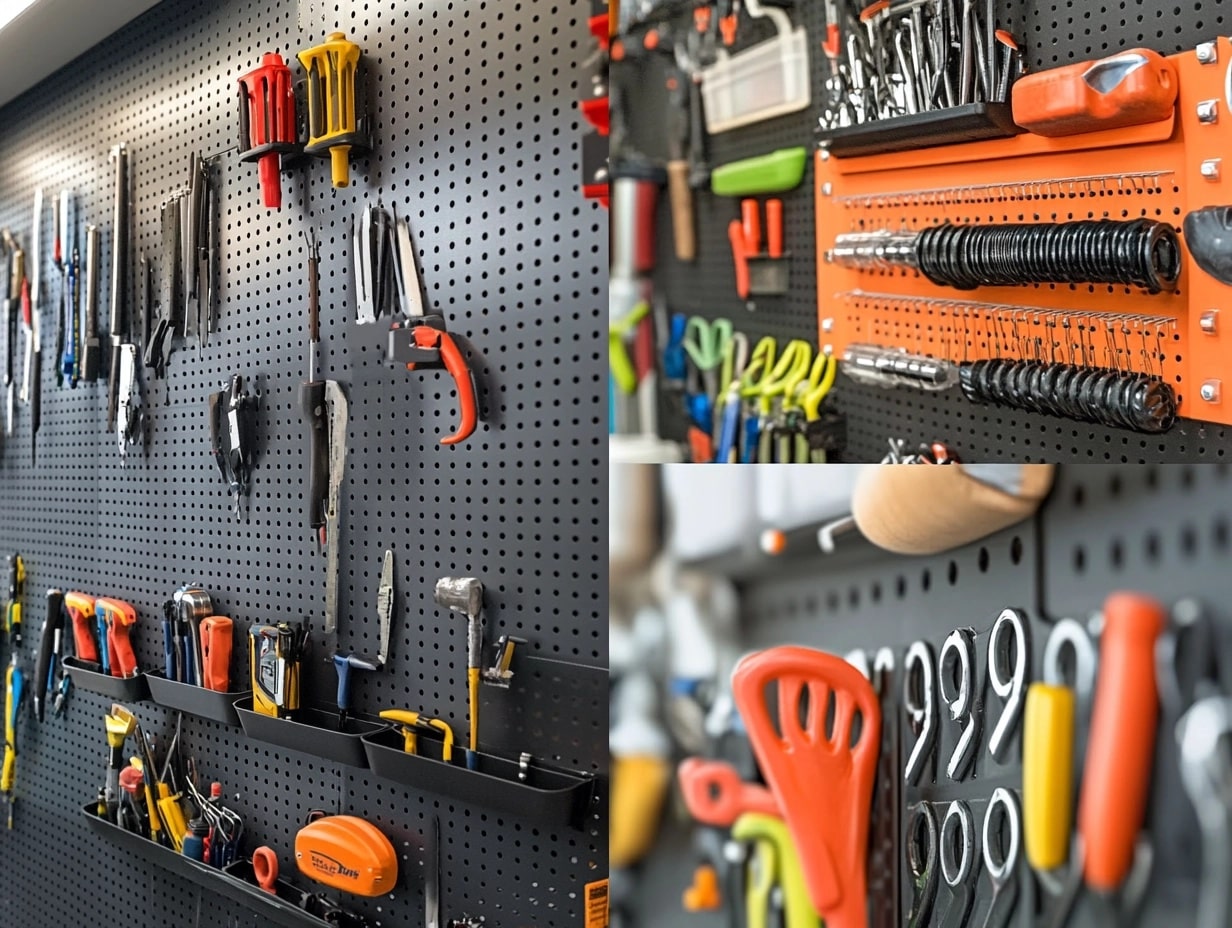
40 Creative DIY Garage Storage Ideas to Try
After years of helping homeowners tackle garage storage challenges, I’ve discovered that the right organization system can transform any space.
What I’ve learned from converting countless cluttered garages into functional workshops and storage spaces.
When organizing garages, I was overwhelmed by the sheer volume of items most families accumulate.
But through trial and error, I’ve developed solutions that work for any space and budget.
Let me guide you through these tested storage ideas.
Why Organize Your Garage?
- Reclaim valuable space
- Find items quickly
- Protect tools and equipment
- Create functional work areas
- Maintain safe storage practices
Creative DIY Garage Storage Ideas
1. Wall-Mounted-Pegboard System
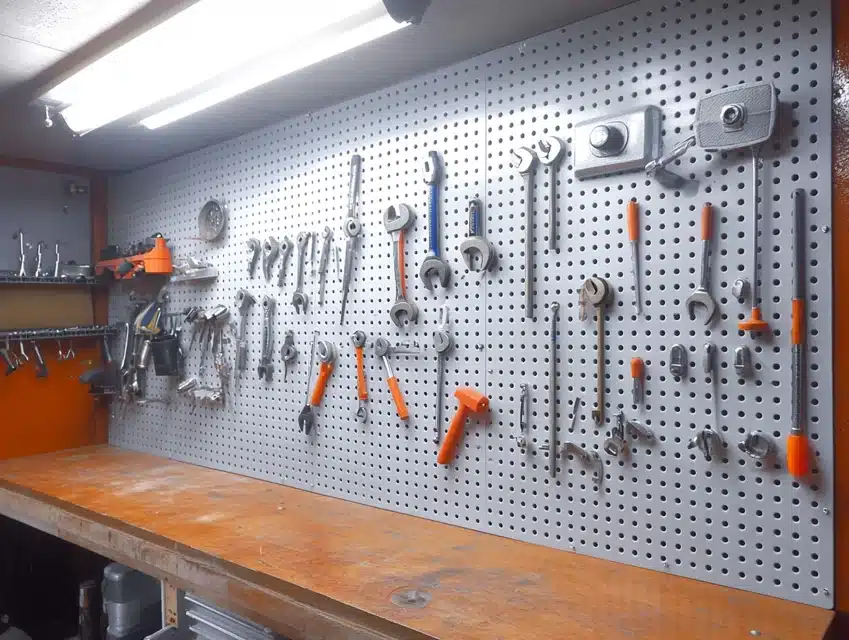
My first pegboard installation completely changed how I viewed garage organization.
The endless configuration possibilities make this solution incredibly versatile.
I’ve found that proper installation ensures years of reliable tool storage.
The visual organization helps track tools instantly, saving countless hours of searching.
Each tool’s outline drawn on the board ensures items return to their proper place.
Installation Steps:
- Install proper wall backing for support.
- Create airspace behind the board for hook clearance.
- Add a frame around the edges for stability.
- Use correct length mounting screws.
- Install adequate lighting above the board.
- Create tool shadow outlines.
- Test weight capacity thoroughly.
2. Overhead Storage Innovation
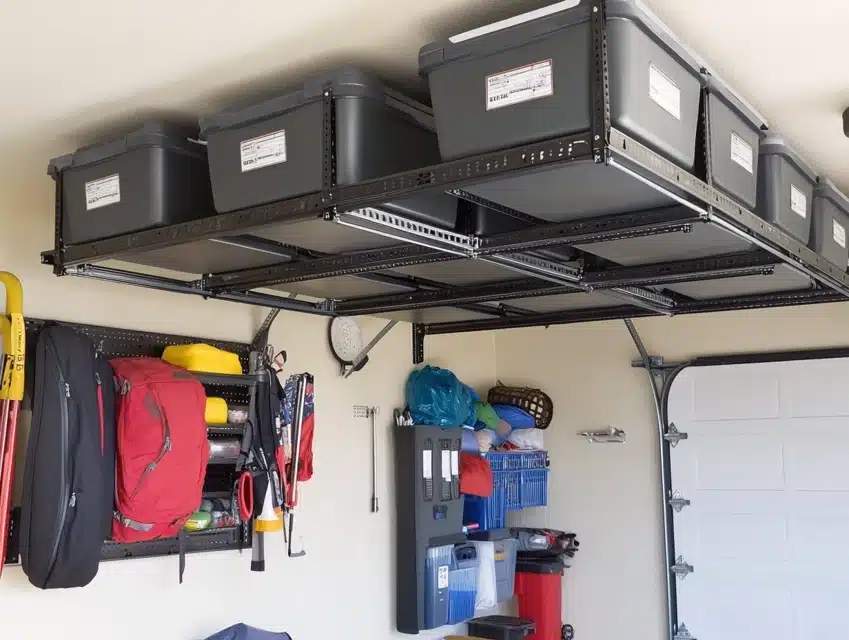
My best space-saving discovery came from looking up at unused ceiling space.
These sturdy racks transform dead air into valuable storage real estate.
Each installation requires careful planning to avoid interference with garage doors.
The system holds seasonal items perfectly while keeping them safe from moisture.
Proper installation ensures years of reliable overhead storage.
Installation Steps:
- Locate ceiling joists precisely.
- Install heavy-duty mounting brackets.
- Create proper clearance measurements.
- Add safety rails for security.
- Test weight capacity thoroughly.
3. Magnetic Tool Organization
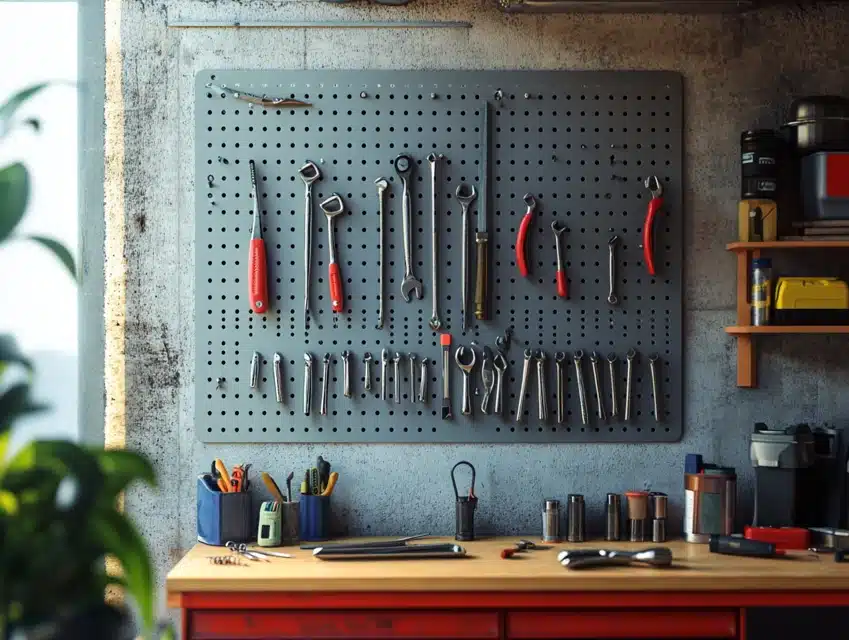
I discovered this solution while searching for quick-access tool storage.
The magnetic strips hold metal tools securely while keeping them visible.
Strategic placement near workbenches provides instant tool access.
Multiple strips create organized zones for different tool types.
This system has become essential in all my garage setups.
Installation Steps:
- Select proper strength magnets.
- Mount at an accessible height.
- Create tool grouping zones.
- Install adequate wall anchors.
- Test holding strength carefully.
4. PVC Storage Solution
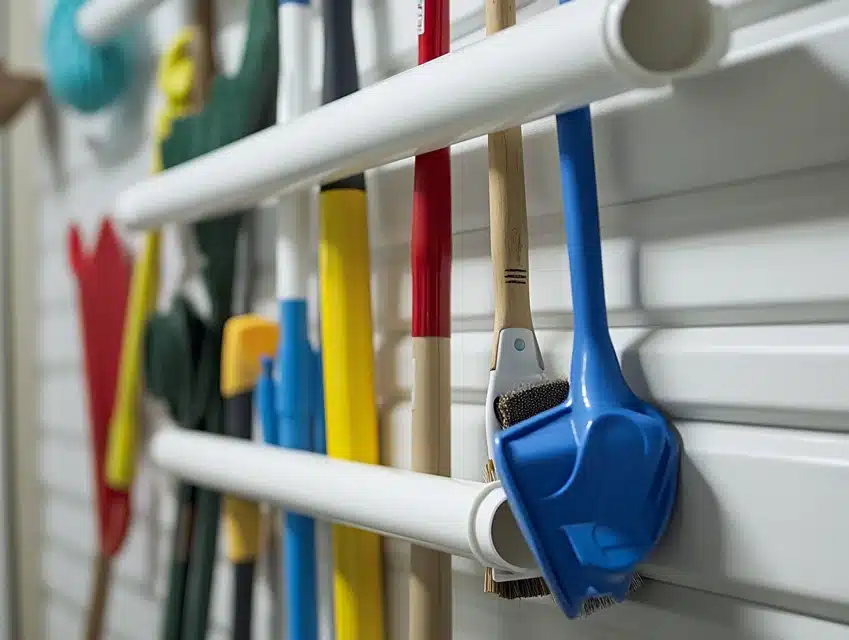
This affordable system revolutionized long-tool storage in my garage.
Cut PVC pipes at perfect angles to maintain tool stability.
The modular design allows easy expansion as needed.
Each tube gets labeled for quick identification.
This organization method keeps tools upright and easily accessible.
Installation Steps:
- Cut pipes at proper angles.
- Create a secure mounting system.
- Install adequate support backing.
- Add a clear labeling system.
- Test stability thoroughly.
5. Sliding Bin Innovation
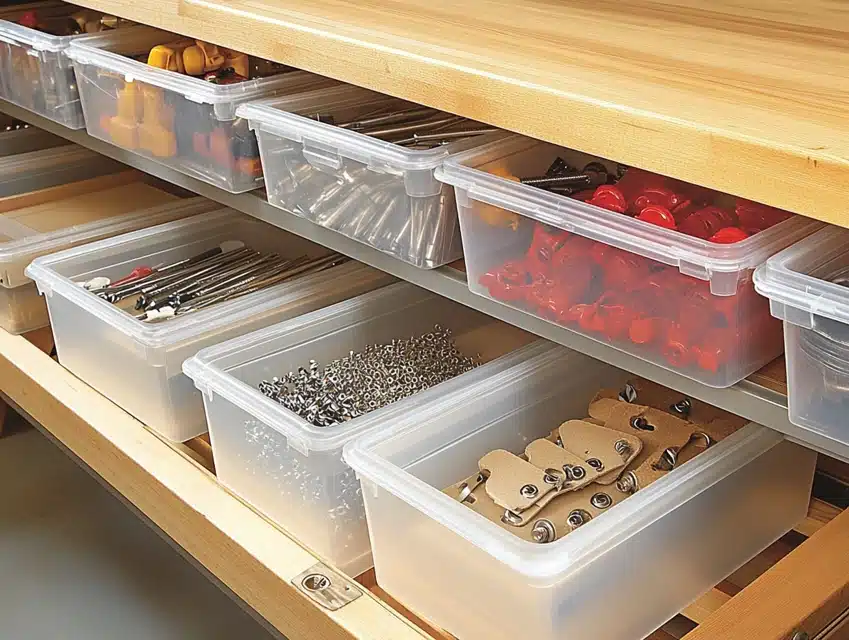
This project transformed wasted under-shelf space into accessible storage.
The smooth-gliding tracks allow easy access to stored items.
Each bin holds specific categories for better organization.
Clear bins make contents visible instantly.
The system maximizes vertical space while maintaining easy reach.
Installation Steps:
- Install heavy-duty sliding tracks securely.
- Mount proper support brackets.
- Create a bin labeling system.
- Add safety stops on tracks.
- Test weight capacity thoroughly.
6. Folding Workbench Creation
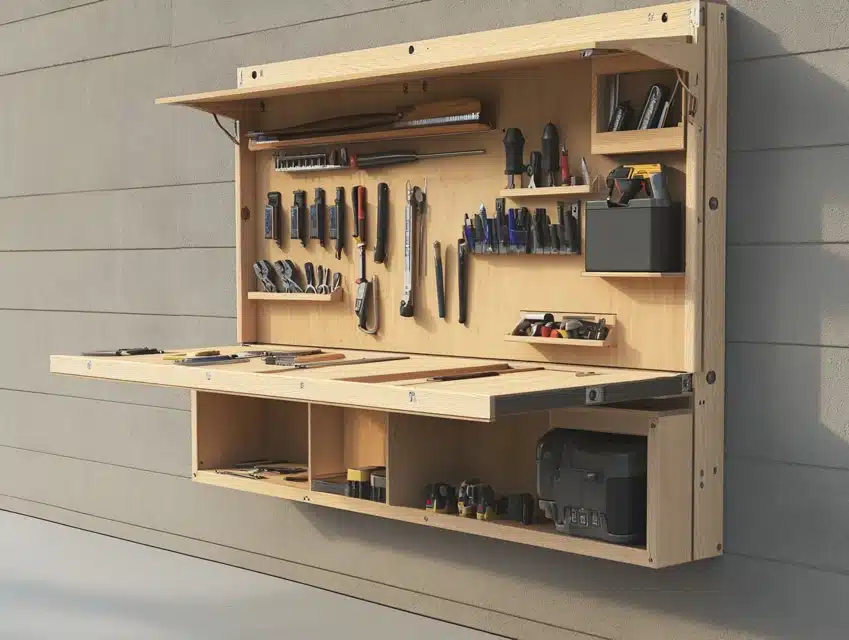
My space-saving workbench design changed how I view garage workshops.
The bench folds flat against the wall when not needed.
Sturdy hinges support heavy project work safely.
Built-in storage keeps frequently used tools handy.
This solution works perfectly in smaller garages.
Installation Steps:
- Install proper wall support system.
- Create a sturdy folding mechanism.
- Add a reliable locking system.
- Mount storage solutions underneath.
- Test weight capacity extensively.
7. Overhead Bike Storage
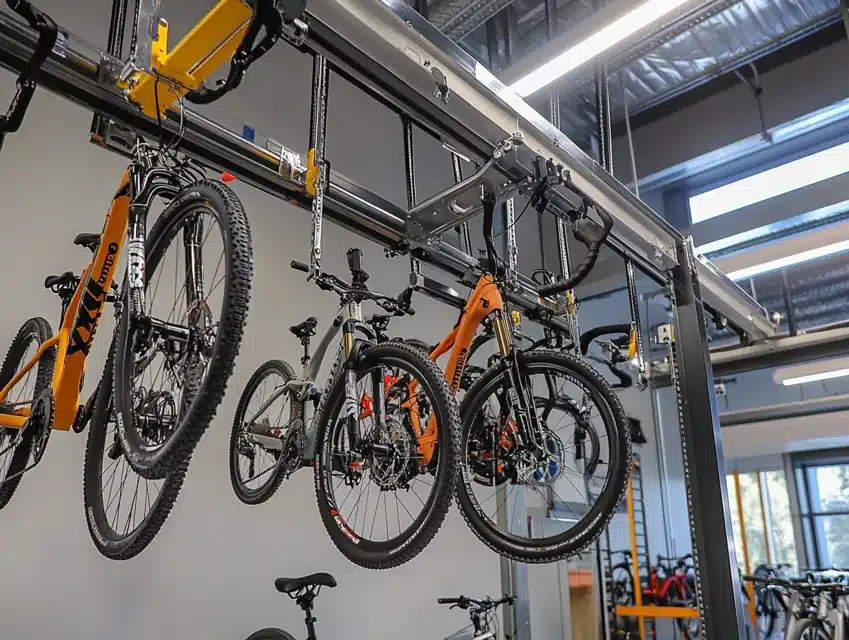
This pulley system elegantly solved the common problem of bike storage.
Each bike lifts smoothly to ceiling height when not in use.
Special hooks prevent damage to bike frames.
The system includes safety locks for secure storage.
Installation requires careful planning for proper clearance.
Installation Steps:
- Install ceiling mounting brackets securely.
- Create proper pulley system alignment.
- Add safety locking mechanisms.
- Test the lifting mechanism thoroughly.
- Install bike protection padding.
8. Rolling Cabinet System
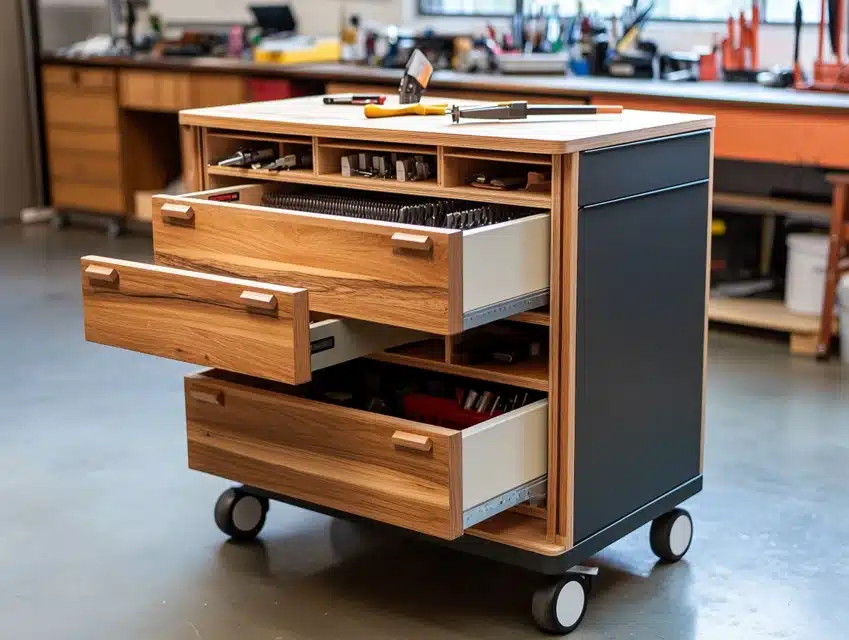
My mobile storage solution revolutionized how we use garage space.
Each cabinet moves easily to where it’s needed most.
Heavy-duty casters support substantial weight while maintaining mobility.
Custom dividers inside keep tools and supplies organized.
These cabinets transform any garage into a flexible workspace.
Installation Steps:
- Select proper weight-rated casters.
- Install sturdy cabinet base support.
- Create an interior organization system.
- Add locking wheel mechanisms.
- Test mobility under full load.
9. Pallet Storage Innovation
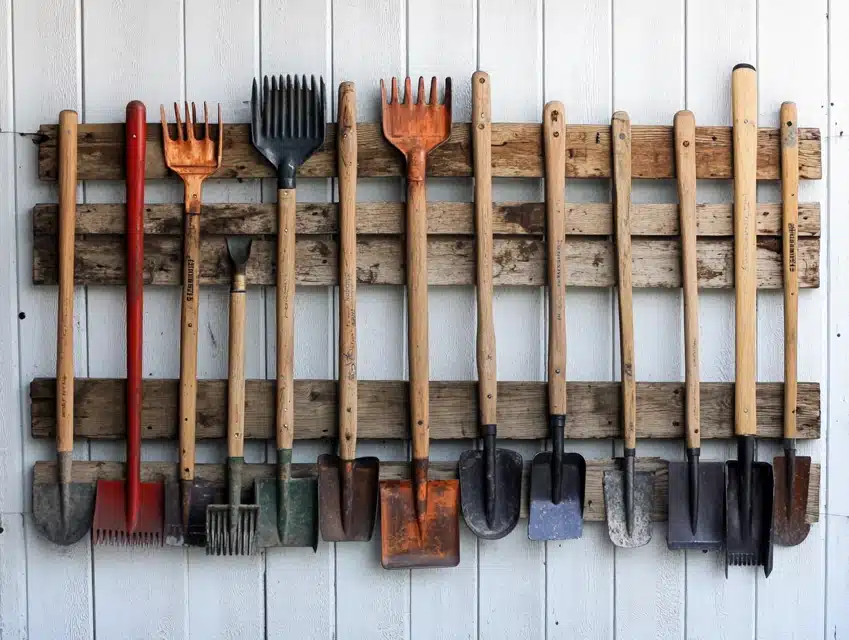
This recycled solution provides incredible storage at minimal cost.
The natural spacing between pallet boards holds tools perfectly.
Strategic mounting creates multiple storage levels.
Each pallet section serves specific storage needs.
Weather-treated wood ensures long-term durability.
Installation Steps:
- Clean and treat pallets properly.
- Create a secure wall mounting system.
- Install proper support brackets.
- Add tool-holding sections.
- Test weight distribution carefully.
10. Mason Jar Organization

This clever under-shelf system keeps small items perfectly organized.
Each jar holds specific items like screws, nails, or bolts.
Clear glass makes contents instantly visible.
The screw-top lids ensure secure storage.
Labels help maintain proper organization long-term.
Installation Steps:
- Install jar lids under shelving securely.
- Create proper spacing between jars.
- Add a clear labeling system.
- Test jar attachment strength.
- Install adequate lighting above.
11. Customizable Shelving Design
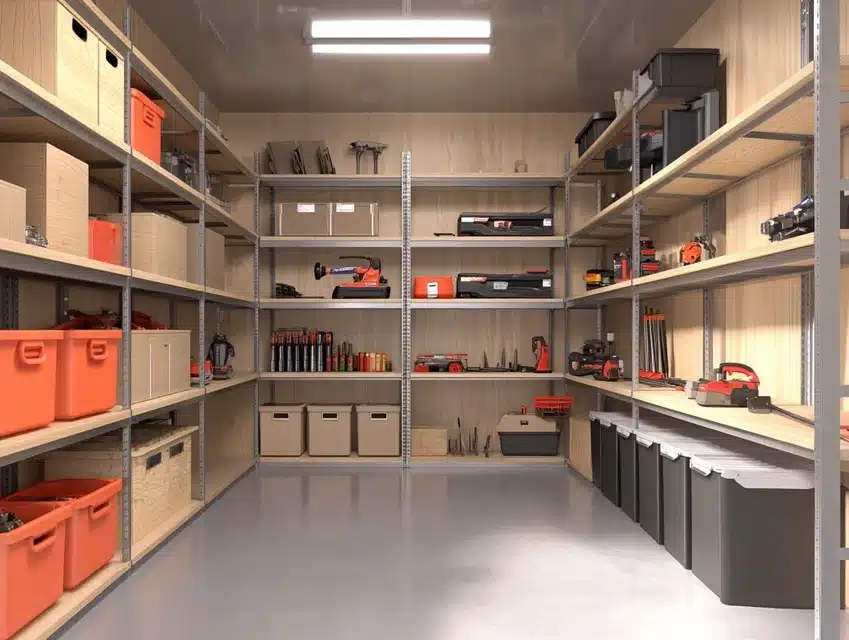
This adaptable shelving system emerged from my need to accommodate items of varying sizes in different seasons.
The adjustable shelf heights allow for perfect customization as storage needs change throughout the year.
Each shelf bracket includes multiple mounting points for easy height adjustments without tools.
The modular design means sections can be added or removed as storage requirements evolve.
Special reinforcement techniques ensure stability even when fully loaded with heavy items.
Proper spacing between uprights provides optimal support while maximizing storage capacity.
Installation Steps:
- Install vertical support tracks with proper wall anchoring.
- Create multiple height adjustment points carefully.
- Add proper bracket support systems thoroughly.
- Install shelf surfaces with reinforcement.
- Test weight capacity at various heights.
12. Lumber Storage System
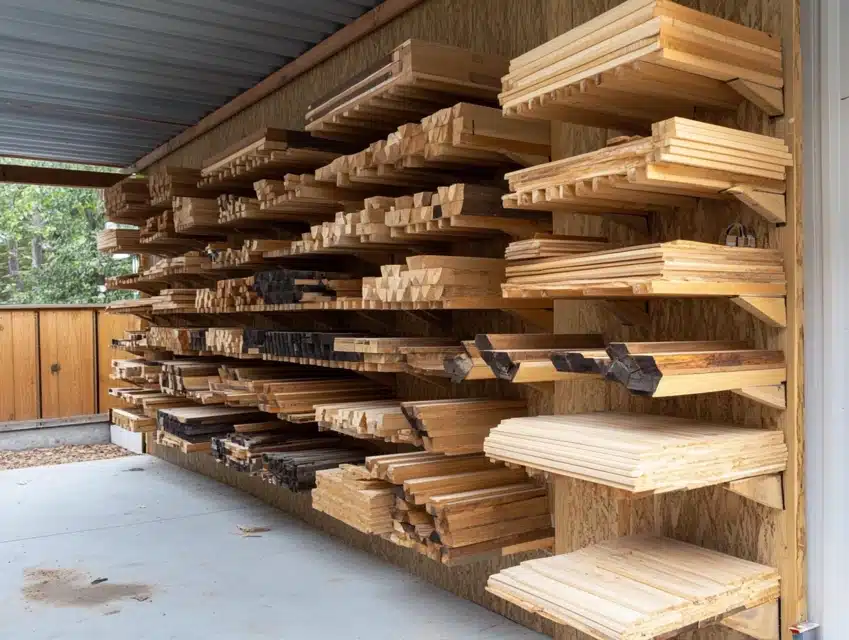
My most challenging project involved creating organized storage for varying lengths of wood.
The wall-mounted system keeps different sizes of lumber easily accessible and properly supported.
Multiple levels efficiently accommodate everything from small scraps to full-length boards.
Special angled supports prevent warping while keeping materials organized.
The design includes space for both sheet goods and dimensional lumber storage.
Each level features adjustable dividers to keep different wood types separated.
Installation Steps:
- Install main support brackets into wall studs securely.
- Create proper angle supports for material stability.
- Add divider system for organization purposes.
- Install safety rails to prevent sliding.
- Test full weight capacity thoroughly.
13. Stackable Storage Tower
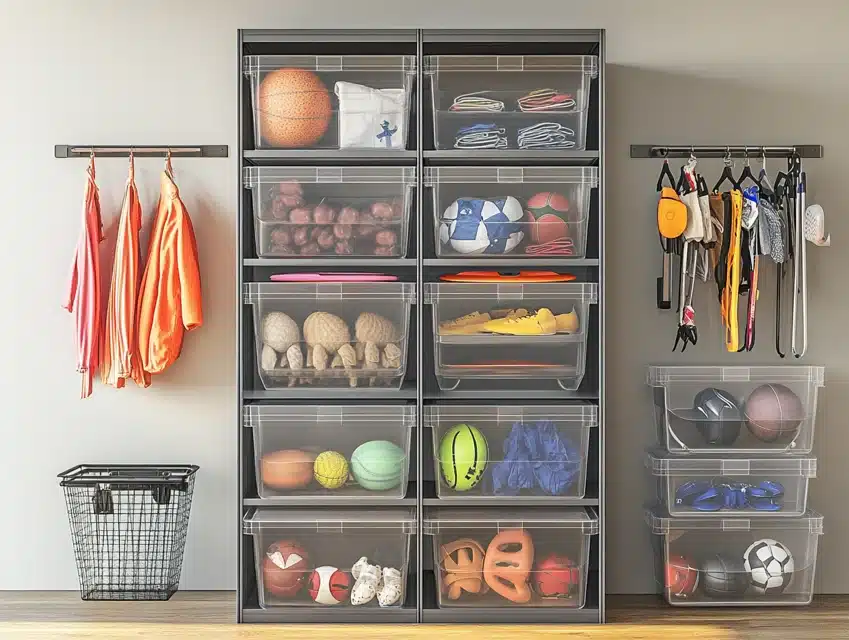
This vertical storage solution maximizes floor space while maintaining easy access.
Each bin level features clear labeling and smooth sliding action for content retrieval.
The modular design allows for adding or removing sections as needed seasonally.
Special interlocking features ensure stability when bins are fully stacked.
The system includes proper ventilation to prevent moisture buildup in stored items.
Built-in handles make moving filled bins safe and convenient.
Installation Steps:
- Create a stable base platform for stacking.
- Install proper bin sliding mechanisms.
- Add a ventilation system throughout the structure.
- Create a clear labeling system carefully.
- Test stability under various load conditions.
14. Cord and Hose Management
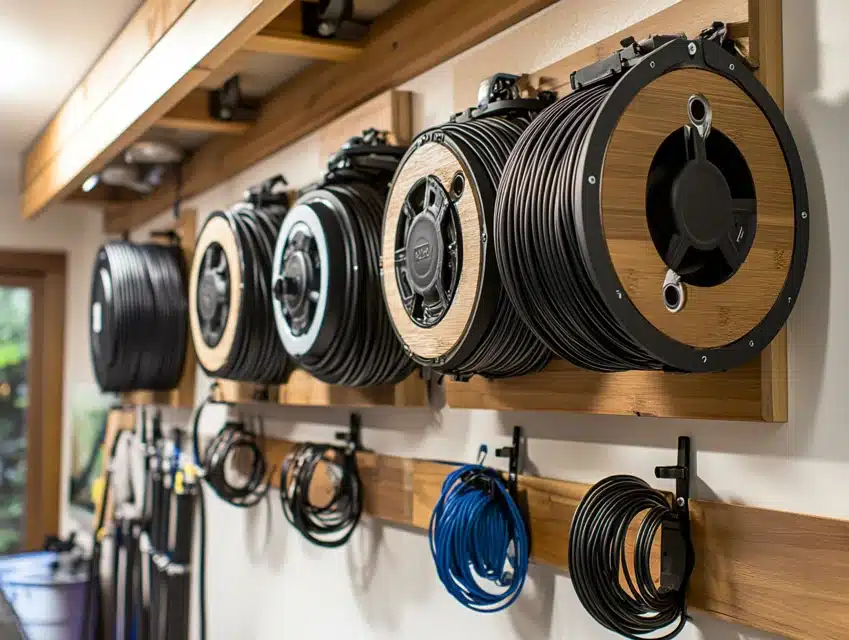
This organizational system has solved the problem of tangled cords and hoses in my garage.
The wall-mounted reels provide perfect storage while preventing kinks and damage to expensive cords.
Each mounting bracket includes a locking mechanism to prevent unwanted unwinding of stored items.
Special guides ensure proper winding and prevent twisted cords during storage and retrieval.
The system includes separate sections for electrical cords, garden, and air hoses.
Built-in tension control prevents excessive stress on stored materials.
Installation Steps:
- Mount reel brackets into solid wall supports.
- Install proper guide mechanisms for winding.
- Create a tension control system carefully.
- Add safety locks for secure storage.
- Test the winding mechanism thoroughly.
15. Mobile Pegboard Cart
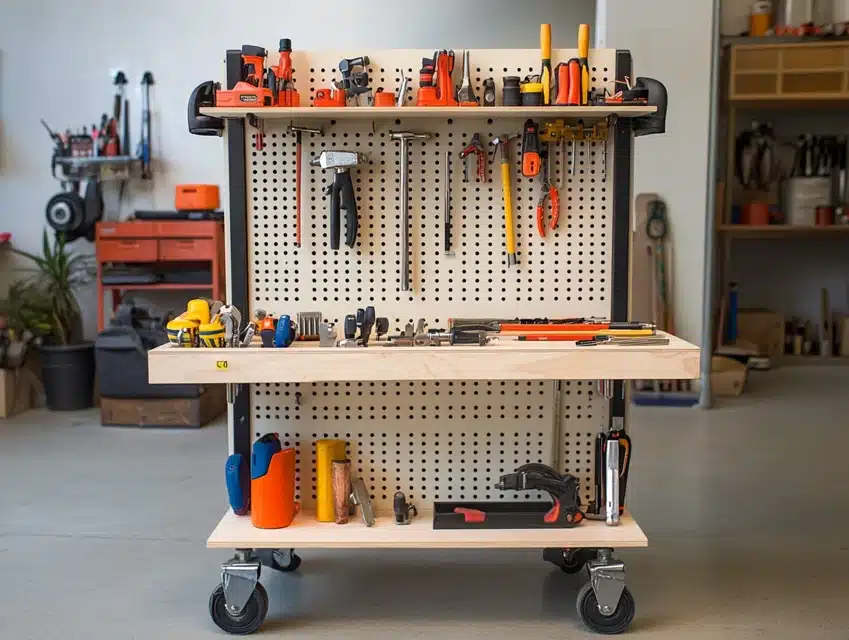
My workshop’s flexibility increased dramatically with this portable storage solution.
The rolling pegboard cart brings tools exactly where needed in the workspace.
Each side of the cart features customizable tool arrangements for different projects.
Built-in shelves below provide storage for larger items and power tools.
The sturdy wheel system includes locking casters for stability during use.
Installation Steps:
- Build a sturdy frame with proper support.
- Install high-quality caster wheels securely.
- Mount pegboard panels with reinforcement.
- Create a tool organization system carefully.
- Test mobility under full load capacity.
16. Under-Shelf Hook System
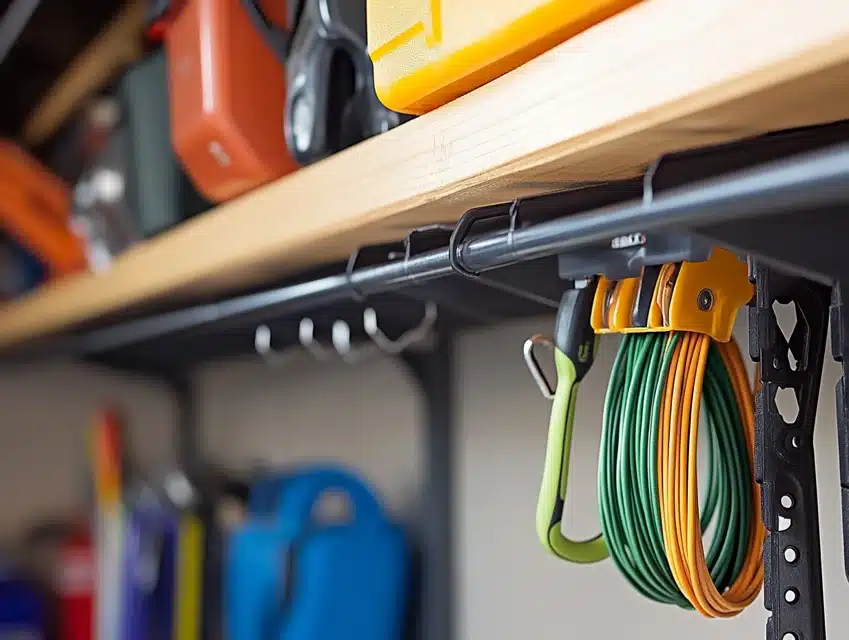
This simple solution doubled the storage capacity of existing garage shelves.
Every inch of under-shelf space becomes useful for hanging lightweight items.
The hooks install quickly while providing secure storage for various tools and equipment.
Special coating on hooks prevents damage to stored items.
The strategic placement allows easy access while maximizing available space.
Installation Steps:
- Install hooks with proper spacing measurements.
- Create a weight distribution plan carefully.
- Add protective coating to hook surfaces.
- Test weight capacity for each hook.
- Install safety catches where needed.
17. Repurposed Bookshelf Innovation
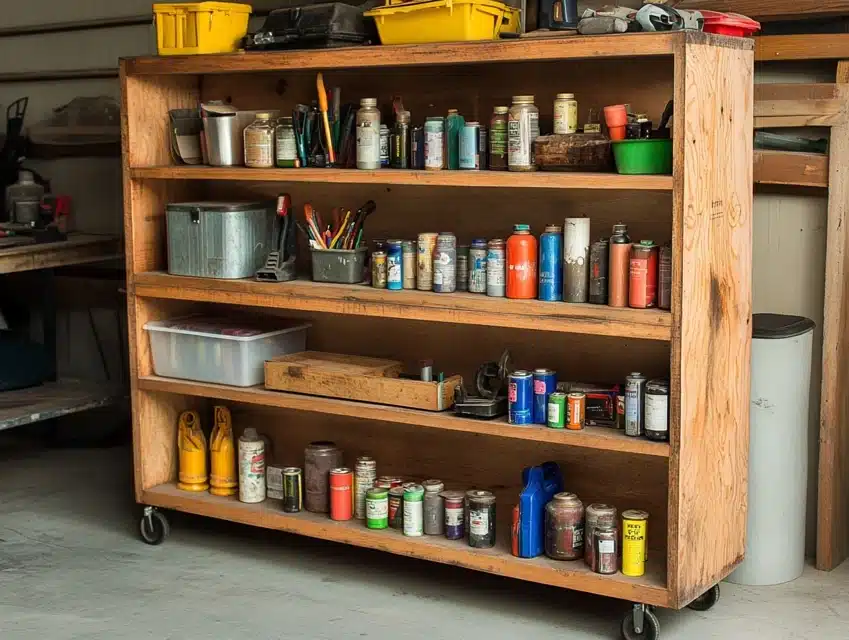
My favorite storage solution came from transforming old bookcases into organized garage storage.
The sturdy shelves proved perfect for holding everything from paint cans to power tools.
Each shelf received custom dividers to create specific zones for different items.
Strategic placement of small bins maximizes storage in previously wasted spaces.
The addition of wheels makes these units completely mobile when needed.
Special shelf liner prevents damage from oil or chemical spills.
Installation Steps:
- Reinforce shelf structure for heavy items.
- Install the proper wheel system carefully.
- Create custom divider placement.
- Add protective surface coating.
- Test stability under full load.
18. Tool Drawer Organization
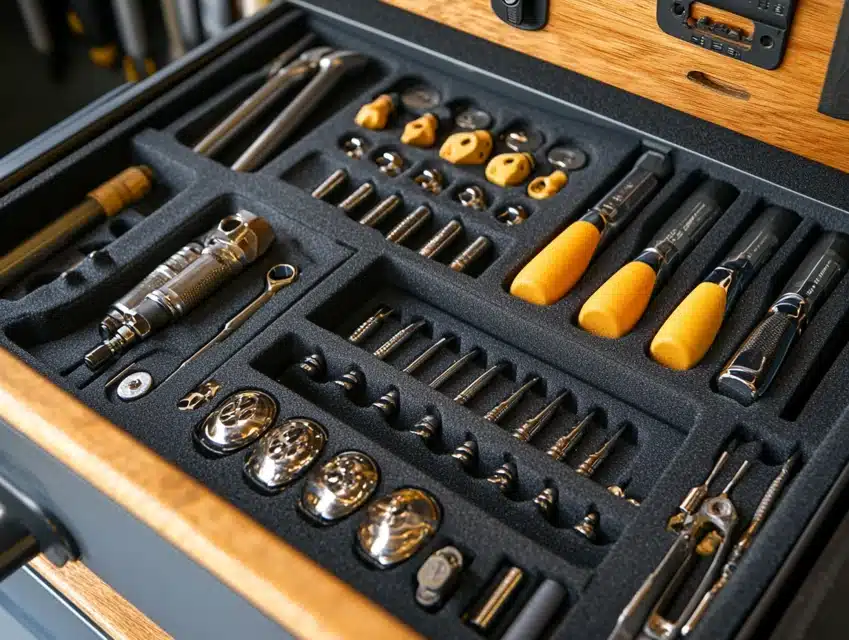
This system transformed chaotic tool drawers into perfectly organized storage spaces.
Custom-cut foam inserts create specific spots for each tool in the collection.
The organization system makes missing tools immediately noticeable.
Each drawer features a photographed layout guide for proper tool replacement.
Special coating on the foam prevents moisture buildup and tool corrosion.
Installation Steps:
- Measure drawer dimensions precisely.
- Create custom foam inserts carefully.
- Add tool identification system.
- Install a moisture protection layer.
- Test drawer operation when full.
19. Filing Cabinet Transformation
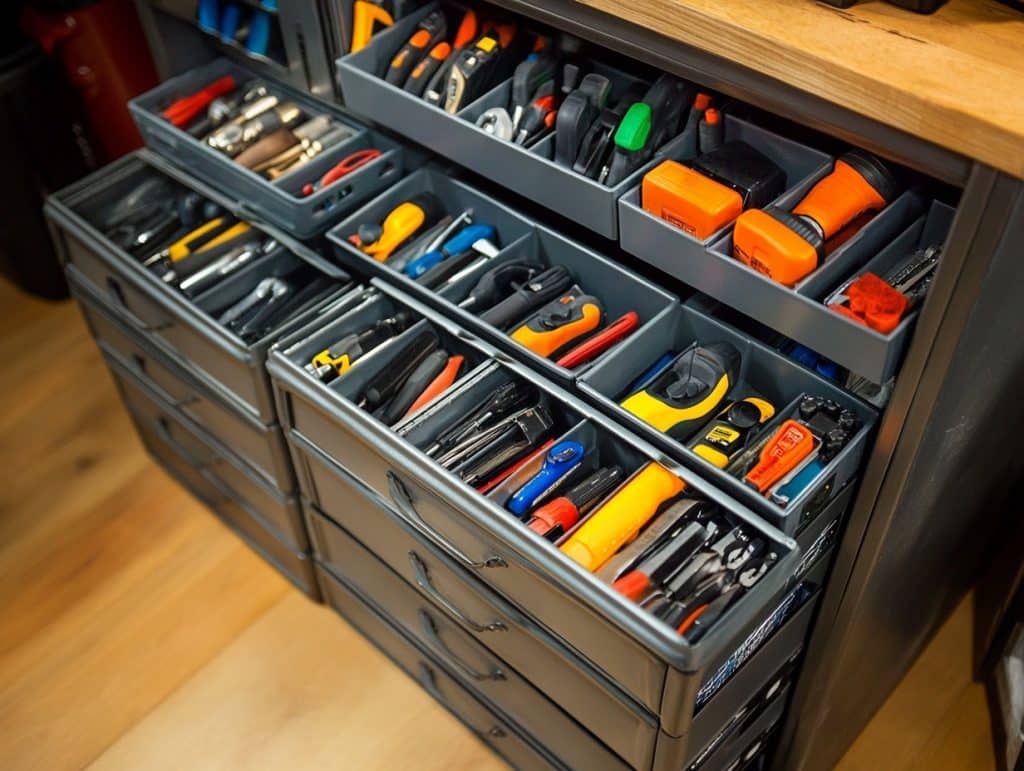
This innovative repurposing turned old filing cabinets into vertical tool storage.
The deep drawers perfectly accommodate larger power tools and equipment.
Each drawer received custom dividers for organized storage sections.
The sturdy metal construction provides excellent protection for expensive tools.
Special drawer liners prevent tools from sliding during operation.
Installation Steps:
- Clean and prep the cabinet thoroughly.
- Install proper drawer dividers.
- Create non-slip surface lining.
- Add a clear labeling system.
- Test drawer operation carefully.
20. Bucket Wall Storage
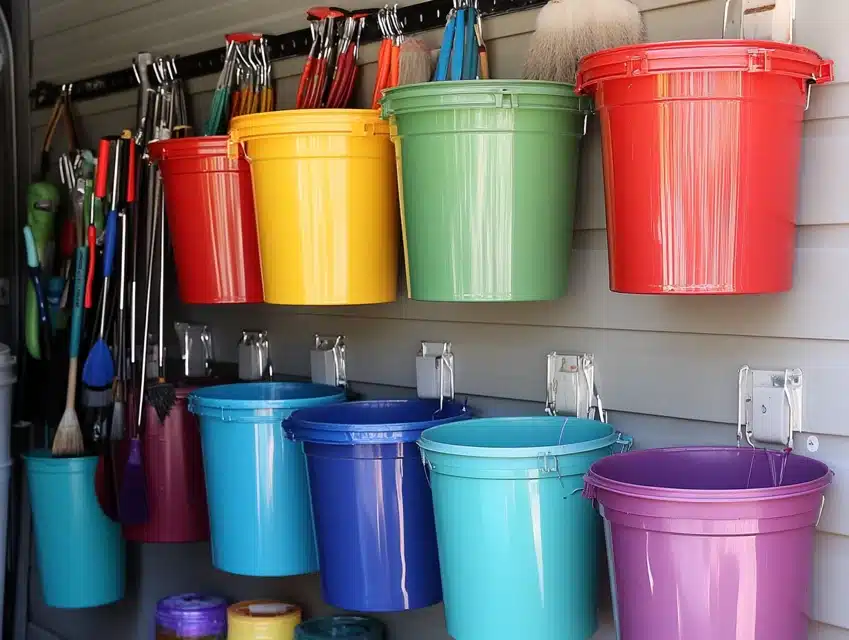
This innovative system transformed ordinary paint buckets into versatile wall storage.
Each bucket mounts securely while remaining easily removable for transport.
The graduated heights create perfect access to stored items at various levels.
Special drainage holes prevent water collection in outdoor installations.
Color-coded buckets help organize different categories of tools and supplies.
The system proves particularly useful for storing frequently used items.
Installation Steps:
- Install mounting brackets into wall studs.
- Create a proper bucket spacing layout.
- Add drainage system carefully.
- Install bucket removal mechanism.
- Test weight capacity thoroughly.
21. Driver and Wrench Organization
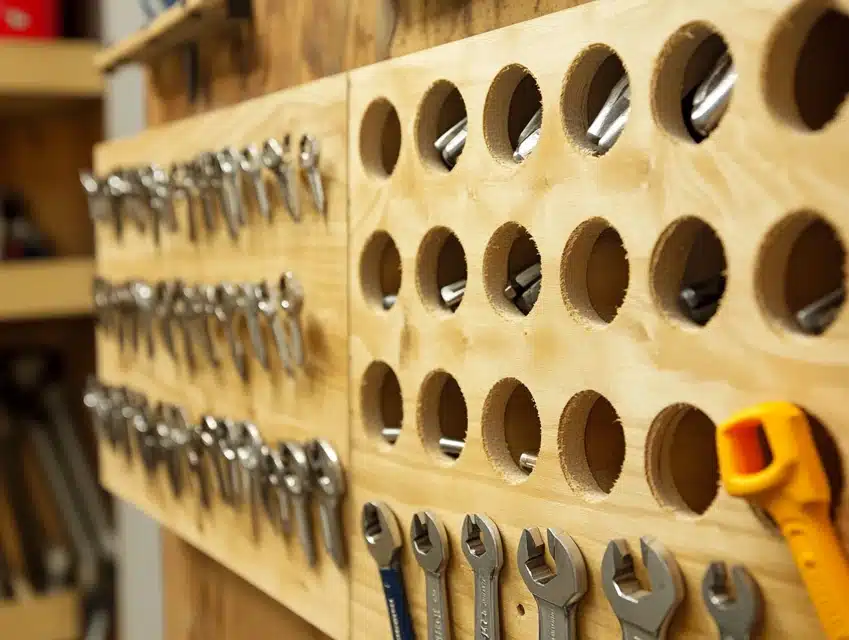
My solution for storing screwdrivers and wrenches revolutionized quick tool access.
Custom-drilled holes in wooden blocks create perfect angles for tool storage.
Each tool slot receives size labeling for easy identification.
The angled design makes tool selection and replacement effortless.
Multiple blocks at different heights accommodate various tool sizes.
Installation Steps:
- Create precise hole measurements.
- Drill proper angle for tool placement.
- Install size identification system.
- Mount blocks securely to the wall.
- Test stability under full load.
22. Ladder Storage Innovation
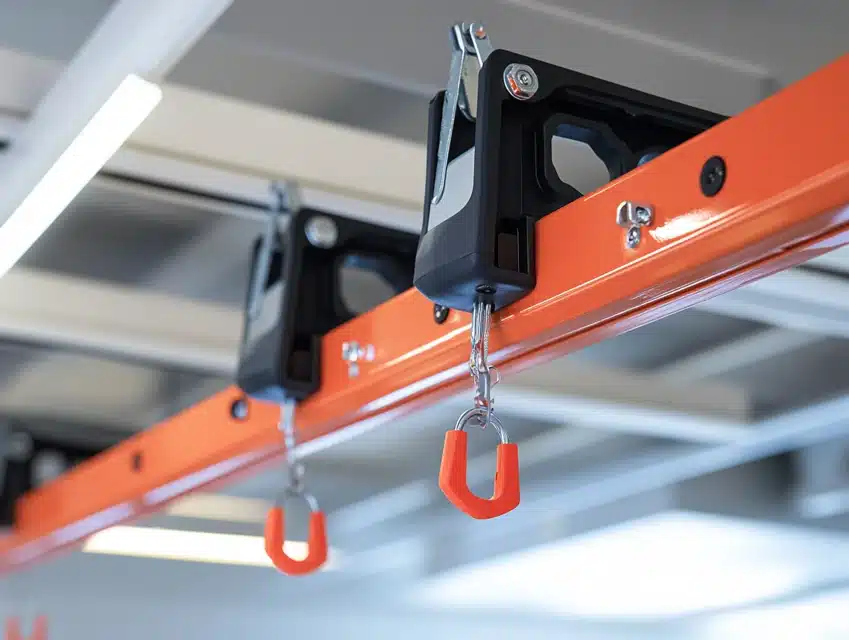
This ceiling-mounted system keeps ladders secure yet easily accessible.
The pulley mechanism makes raising and lowering ladders effortless.
Special padding protects ladder surfaces during storage.
Safety locks ensure secure overhead storage.
The system works perfectly for various ladder sizes and styles.
Installation Steps:
- Install ceiling mounting brackets securely.
- Create proper pulley alignment.
- Add a safety locking mechanism.
- Install protective padding.
- Test operation with different ladders.
23. Spray Paint Storage Design

This specialized rack transformed how I organize and access spray paint cans.
The tiered design allows clear visibility of every can color and type.
Each row tilts slightly backward to prevent cans from falling forward.
The spacing accommodates various can sizes while maximizing storage capacity.
Custom labels help track paint types and remaining quantities easily.
The entire unit mounts securely to prevent any accidental spills.
Installation Steps:
- Build a tiered frame with proper angles.
- Install secure mounting brackets.
- Create a label identification system.
- Add safety rails for security.
- Test stability with a full load.
24. Hanging Jar System

My most versatile small-item storage solution uses the ceiling space creatively.
Every jar screws securely into mounted lids while remaining easily accessible.
Clear jars make finding small items quick and simple.
The system keeps the floor and shelf space free for larger items.
Regular-mouth mason jars work perfectly for most storage needs.
Installation Steps:
- Mount jar lids securely to the surface.
- Create proper spacing between jars.
- Install a clear labeling system.
- Add content identification method.
- Test weight capacity carefully.
25. Overhead Track System
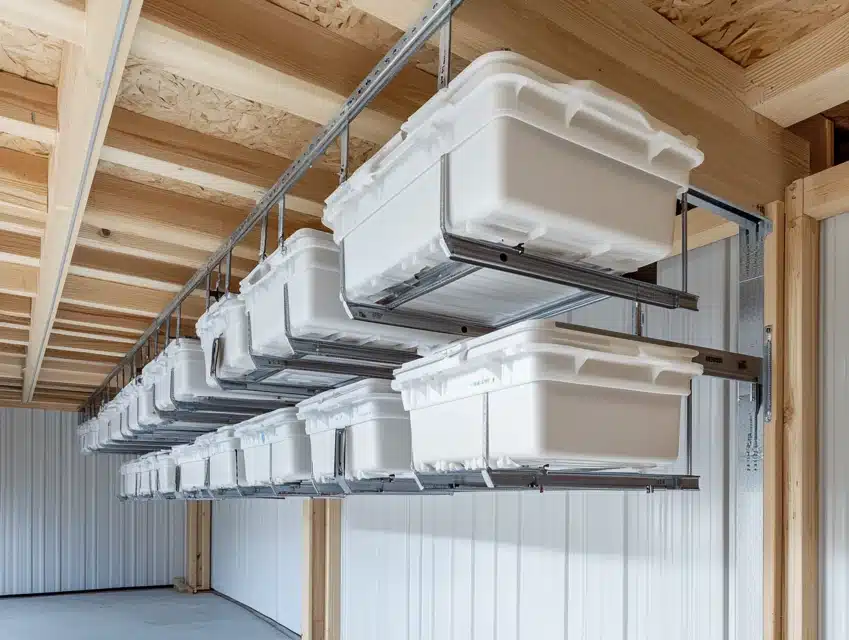
This sliding bin system efficiently maximizes often-wasted ceiling space.
The tracks allow bins to slide smoothly for easy access when needed.
Each bin includes proper labeling for quick content identification.
Safety catches prevent bins from accidentally sliding off tracks.
The system works particularly well for seasonal storage items.
Installation Steps:
- Install ceiling tracks into sturdy supports.
- Mount the sliding mechanism properly.
- Create a bin organization system.
- Add safety stop mechanisms.
- Test sliding operation thoroughly.
26. PVC Screwdriver Organization
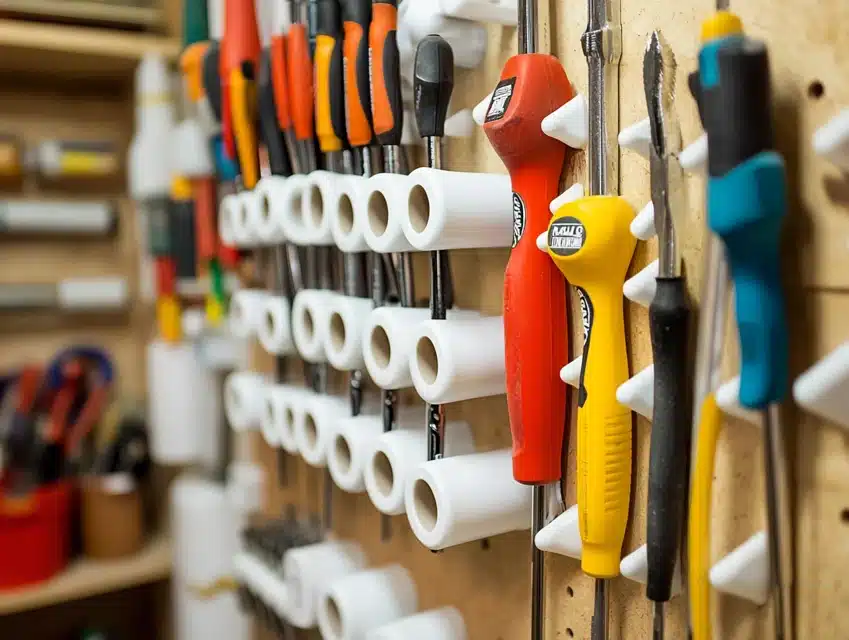
This vertical storage solution completely changed how I store and access screwdrivers.
The angled cuts in PVC pipes create perfect holders for various screwdriver sizes.
Each tube receives clear labeling for quick tool identification.
The white pipes keep tools visible while providing excellent protection.
Special mounting brackets ensure the entire unit remains stable under full load.
Installation Steps:
- Cut PVC pipes at precise angles.
- Create a secure mounting system.
- Install proper backing support.
- Add clear identification labels.
- Test stability with full tool load.
27. Shoe Organizer Tool Storage
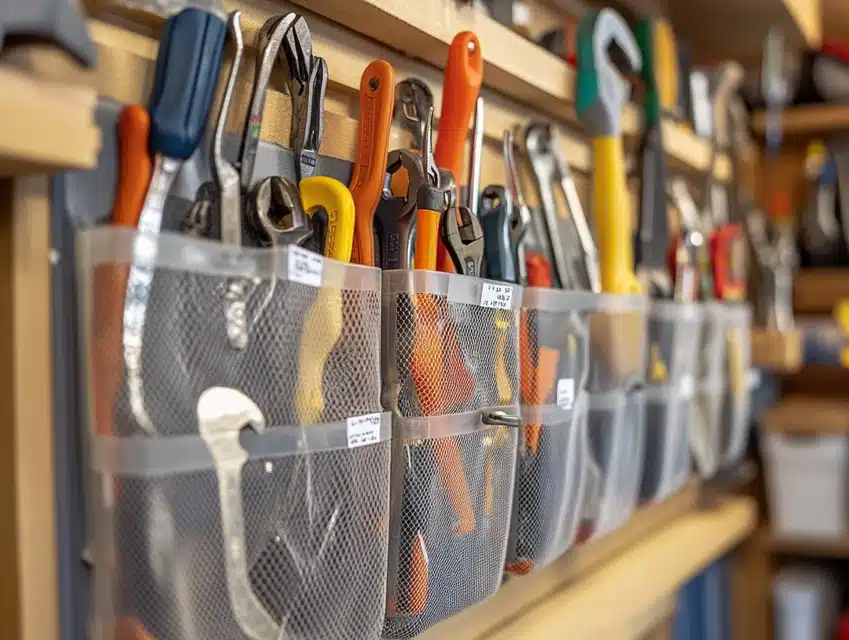
This repurposed solution transformed ordinary shoe organizers into perfect tool storage.
Each pocket holds specific tools or supplies within easy reach.
Clear pockets make finding items quick and simple.
The flexible material prevents tool damage while maintaining organization.
Multiple organizers can create extensive storage systems.
Installation Steps:
- Install sturdy mounting hardware.
- Create a tool placement strategy.
- Add proper identification labels.
- Reinforce pocket seams carefully.
- Test weight capacity thoroughly.
28. Garden Tool Organization
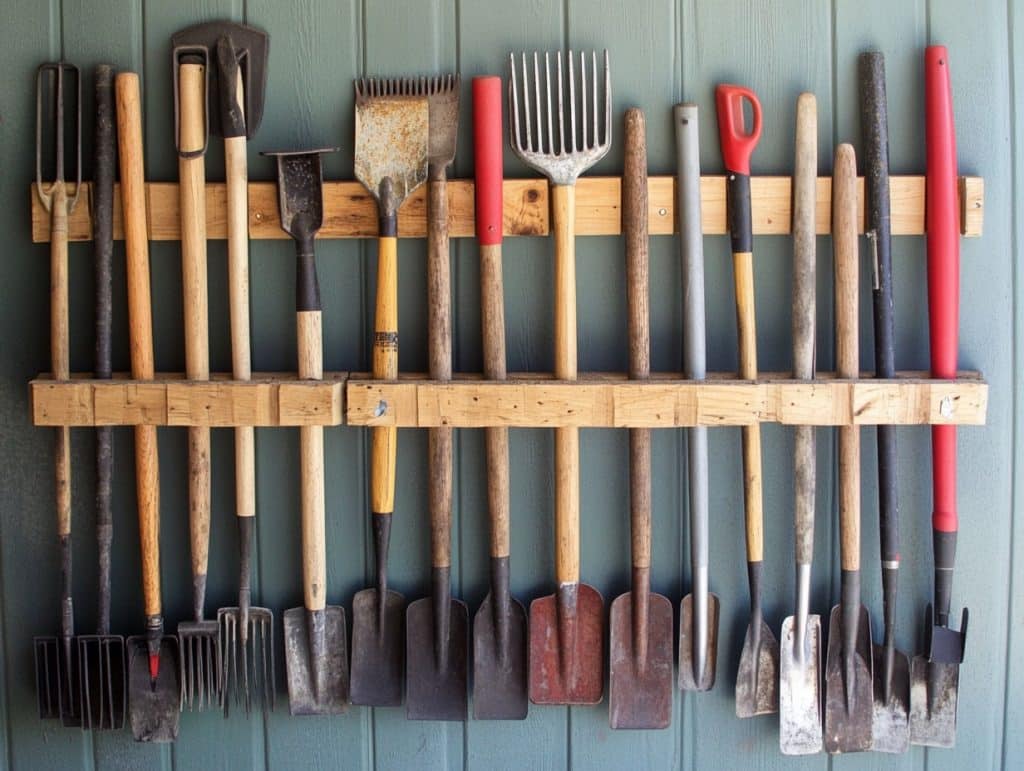
My pallet-based solution keeps long-handled garden tools perfectly organized.
The vertical storage saves valuable floor space while keeping tools accessible.
Each slot holds tools securely while allowing easy removal.
The weather-resistant finish protects the wood from moisture damage.
Regular maintenance keeps the system working smoothly year-round.
Installation Steps:
- Prepare pallets with weather protection.
- Create a proper tool spacing layout.
- Install secure mounting brackets.
- Add tool identification system.
- Test stability under full load.
29. Floating Shelf Installation
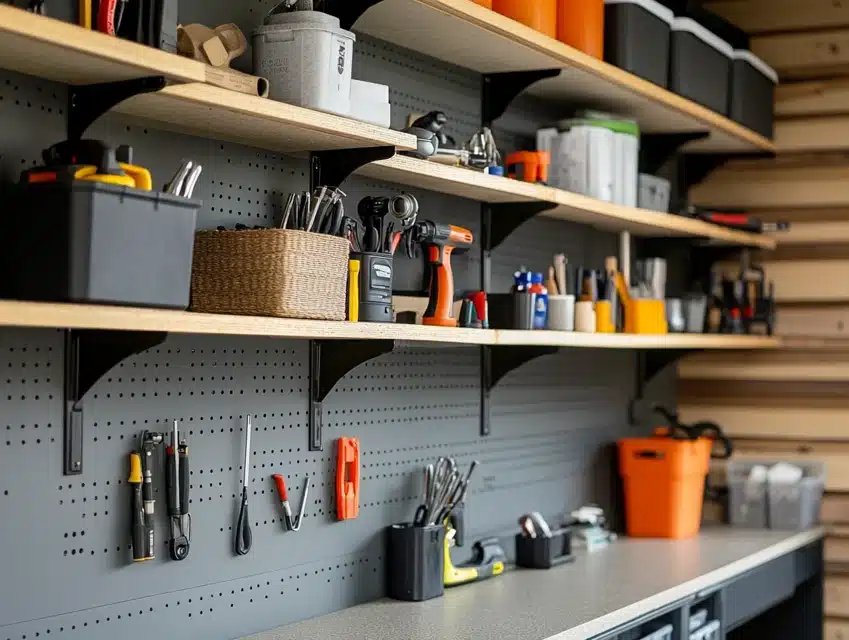
This minimalist storage solution maximizes wall space without bulky visible supports.
The hidden bracket system creates a clean, modern look while providing sturdy storage.
Each shelf includes built-in ledges to prevent items from sliding off.
The strategic placement allows perfect access to frequently used items.
The design accommodates various weight requirements through proper bracing.
Installation Steps:
- Install hidden wall brackets securely.
- Create a proper shelf support system.
- Add safety ledge installation.
- Mount shelves with precise leveling.
- Test weight distribution carefully.
30. Under-Bench Storage Design

My workbench transformation doubled storage capacity through hidden drawers.
The smooth-sliding drawers utilize previously wasted space under the bench.
Each drawer features custom dividers for organized storage.
Full-extension slides allow complete access to stored items.
The system maintains bench stability while adding functionality.
Installation Steps:
- Install drawer slides properly.
- Create custom drawer dimensions.
- Add interior organization system.
- Mount drawer fronts securely.
- Test the sliding mechanism thoroughly.
31. Cable Organization System
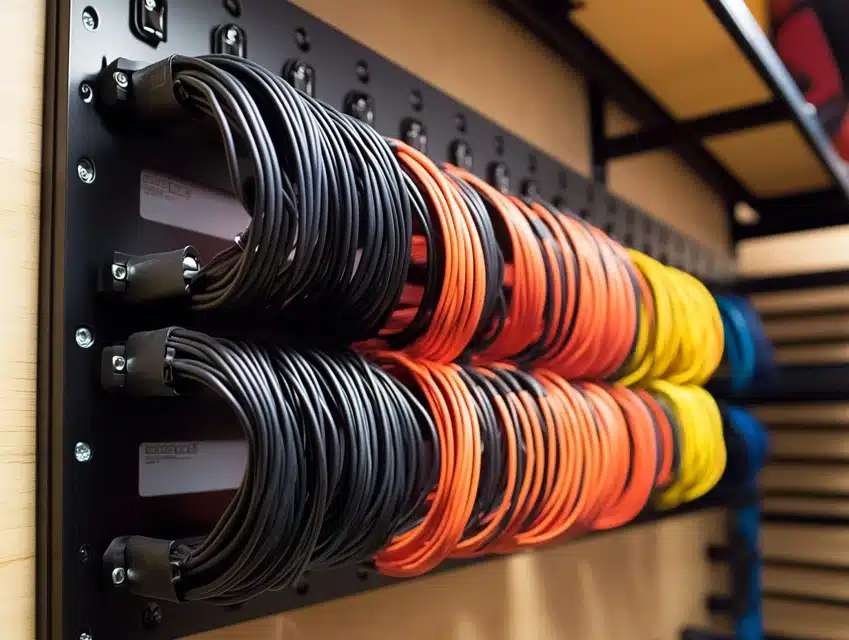
This solution solved the eternal problem of tangled cables and cords.
The wall-mounted system keeps cables neatly coiled and easily accessible.
Each section includes proper labeling for quick identification.
Special hooks prevent cable damage during storage.
The design allows for the easy addition of new cables.
Installation Steps:
- Mount storage hooks securely.
- Create proper spacing between sections.
- Install cable identification system.
- Add protective coating on hooks.
- Test weight capacity thoroughly.
32. Mobile Tool Chest Creation
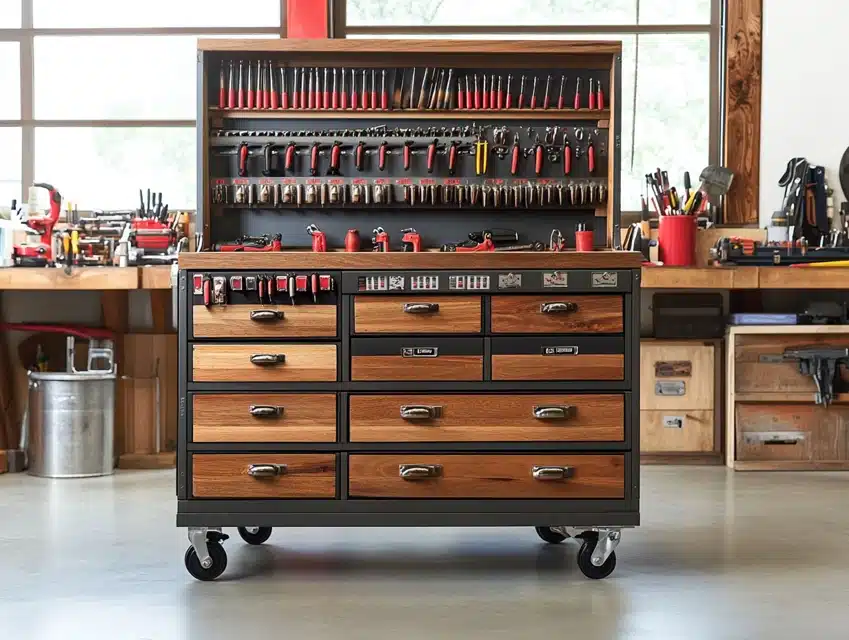
This rolling storage solution combines accessibility with substantial storage capacity.
The multi-drawer design keeps tools organized at different working heights.
Heavy-duty wheels allow easy movement throughout the garage space.
Each drawer features custom foam inserts for specific tool storage.
Locking mechanisms ensure tools remain secure when not in use.
Installation Steps:
- Install heavy-duty caster wheels securely.
- Create a drawer organization system.
- Add proper locking mechanisms.
- Install drawer slides carefully.
- Test mobility under full load.
33. Vertical Bike Storage

This space-saving solution keeps bikes secure while maximizing floor space.
The wall-mounted hooks hold bikes firmly without damaging frames.
Each mounting point includes protective padding for bike contact points.
The system accommodates various bike sizes and styles easily.
Special angle adjustments allow for different frame designs.
Installation Steps:
- Install wall mounting brackets securely.
- Add protective padding to contact points.
- Create proper spacing between bikes.
- Install safety catch mechanisms.
- Test weight capacity thoroughly.
34. Garage Door Storage
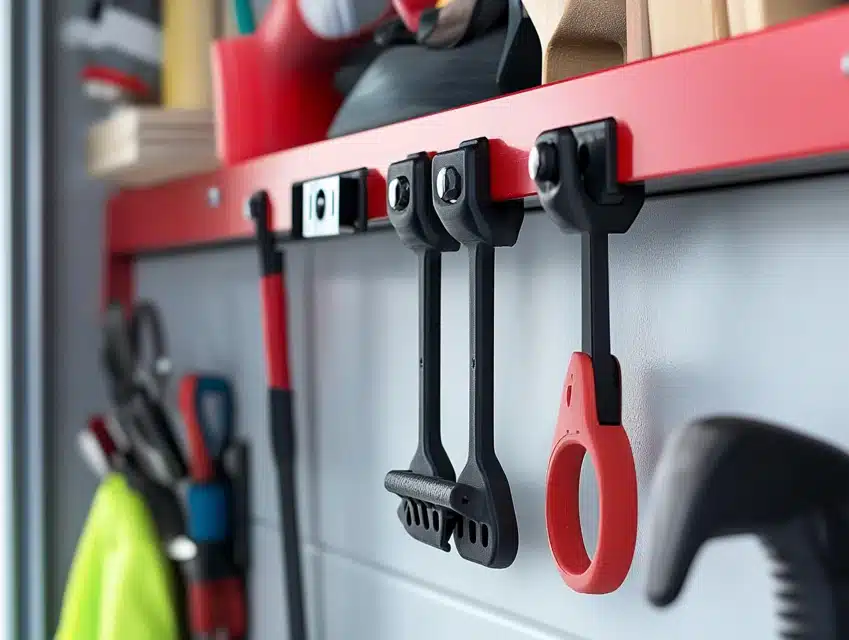
This innovative system utilizes often-overlooked garage door space.
The lightweight storage hooks attach securely without affecting door operation.
Each hook section holds specific items within easy reach.
Special mounting ensures items stay secure during door movement.
The system works perfectly for frequently accessed items.
Installation Steps:
- Install door-safe mounting brackets.
- Create a proper item spacing layout.
- Add secure attachment points.
- Test door operation carefully.
- Install safety catches properly.
35. Fold-Out Panel System
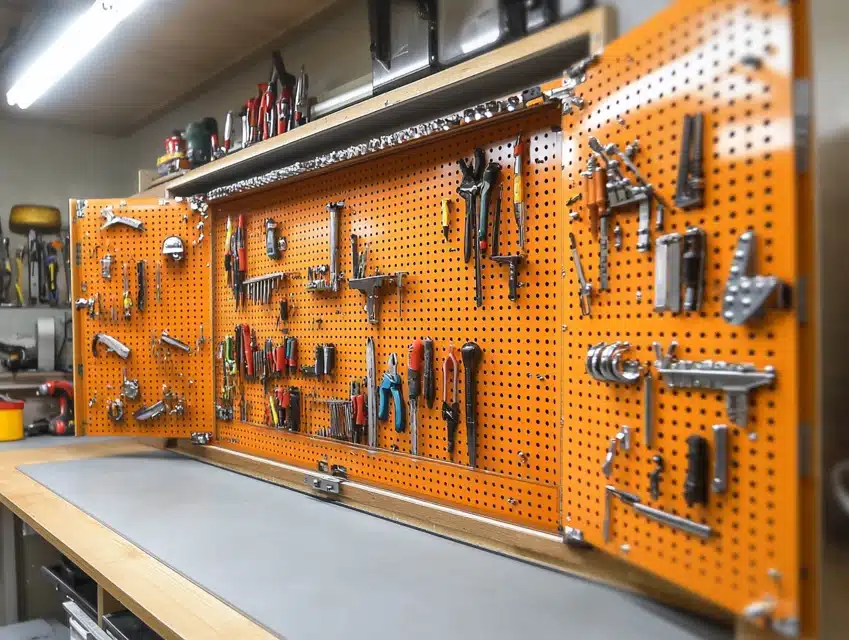
This innovative design maximizes limited wall space through clever engineering.
The hinged panels swing out to reveal multiple layers of storage surfaces.
Each panel includes custom tool holders and organization systems.
The folding mechanism allows easy access while maintaining security.
When closed, the system presents a clean, organized appearance.
Installation Steps:
- Install heavy-duty hinges securely.
- Create proper panel spacing design.
- Add tool-holding mechanisms.
- Install panel locking system.
- Test operation under full load.
36. Overhead Lumber Organization
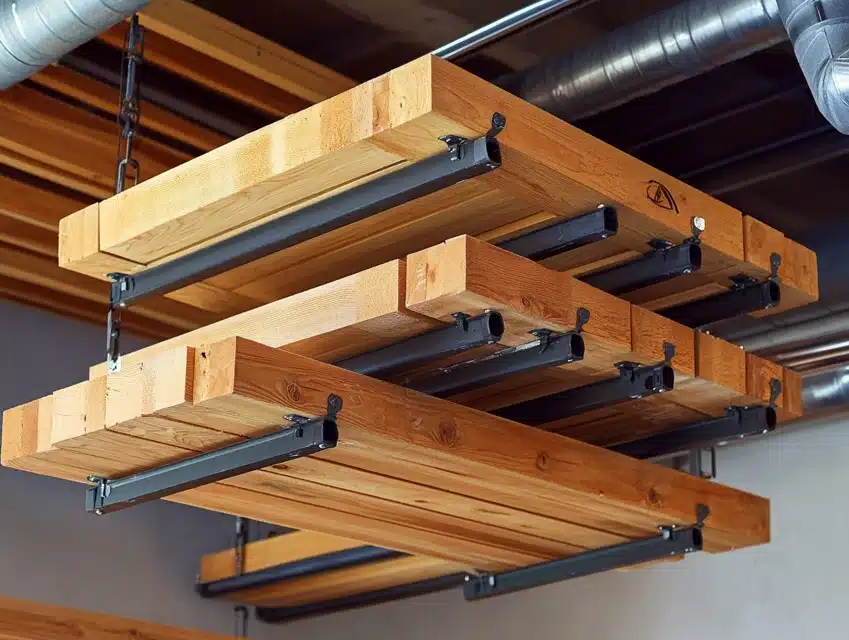
My solution for long material storage utilizes unused ceiling space effectively.
The bracket system keeps lumber and pipes organized and easily accessible.
Each support point includes rubber padding to prevent material damage.
Special spacing allows air circulation to prevent moisture issues.
The design accommodates materials of various lengths and sizes.
Installation Steps:
- Mount ceiling brackets into solid supports.
- Install protective padding carefully.
- Create proper spacing between levels.
- Add safety rails for security.
- Test weight distribution thoroughly.
37. Tire Storage System
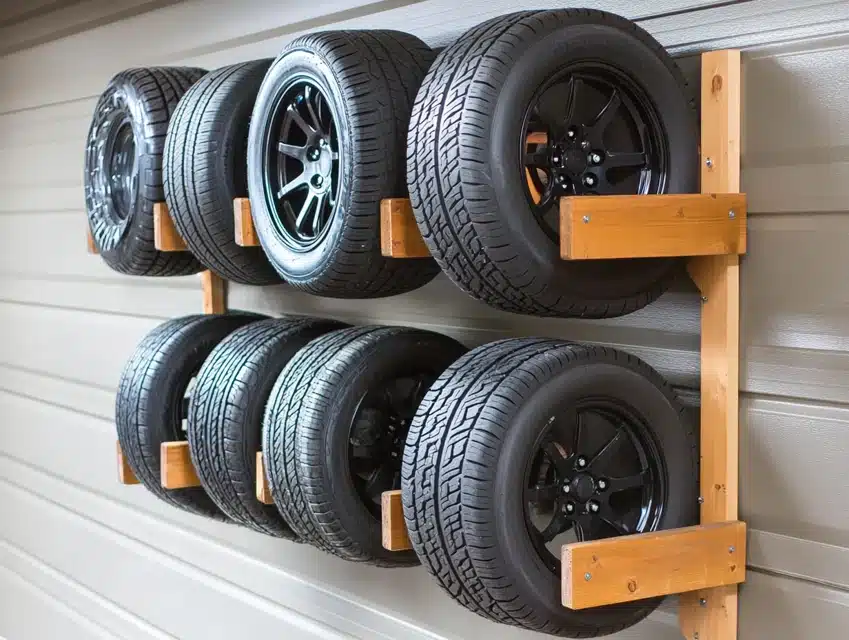
This wall-mounted solution keeps seasonal tires organized and protected.
The angled supports prevent tire deformation during long-term storage.
Each mounting point includes proper weight distribution consideration.
Special coating on supports prevents tire damage.
The system allows easy access to seasonal tire rotation.
Installation Steps:
- Install wall mounting brackets securely.
- Create a proper tire spacing layout.
- Add protective coating to supports.
- Install safety straps carefully.
- Test weight capacity thoroughly.
38. Sliding Pegboard Innovation
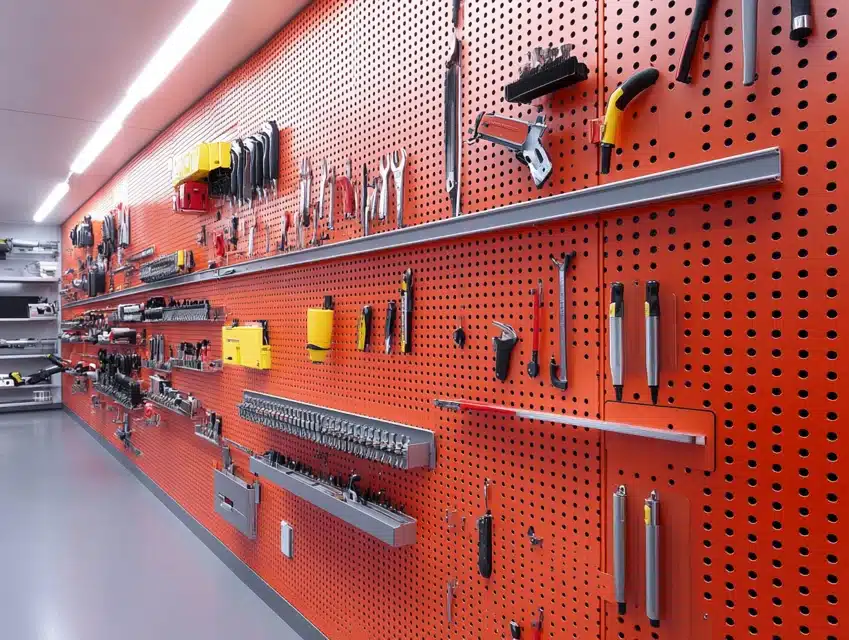
This movable wall system revolutionized how I access and store tools.
The sliding panels create multiple storage surfaces while saving space.
Each panel moves smoothly on overhead tracks for easy access.
The system includes built-in locks to secure panels when needed.
Custom tool arrangements on each side maximize storage capacity.
Installation Steps:
- Mount overhead tracking system securely.
- Install smooth rolling mechanisms.
- Create a panel guide system carefully.
- Add proper locking features.
- Test sliding operation thoroughly.
39. Recycling Station Design

My organized approach to recycling transformed a cluttered corner.
The wall-mounted rack keeps bins elevated and easily accessible.
Each section includes clear labeling for proper sorting.
The design allows easy bin removal for emptying.
Special drainage features handle liquid container residue.
Installation Steps:
- Install wall mounting brackets properly.
- Create a bin support system carefully.
- Add identification labels.
- Install drainage system properly.
- Test weight capacity thoroughly.
40. Wall Rail Organization
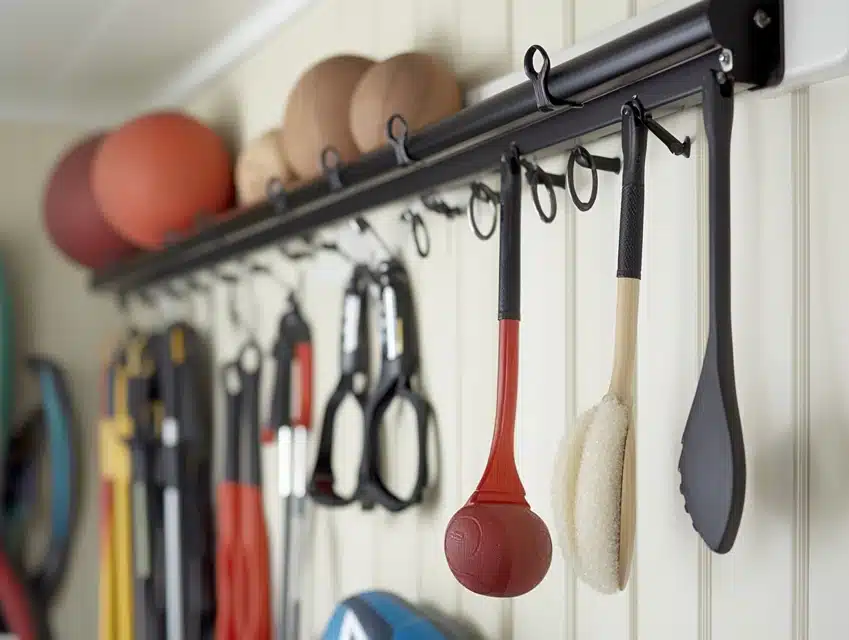
This flexible system allows infinite adjustment possibilities.
The rail-mounted hooks and brackets move easily to accommodate changing needs.
Each attachment point locks securely while remaining adjustable.
The system works perfectly for tools, sports equipment, and general storage.
Multiple rail heights create organized storage zones.
Installation Steps:
- Mount wall rails into solid supports.
- Install proper spacing between rails.
- Add various attachment options.
- Create organization zones carefully.
- Test the security of all components.
Conclusion
After implementing hundreds of garage storage solutions, I’ve learned that a successful organization combines practicality with personal needs.
Every garage presents unique challenges, but proper planning and execution can transform any space into an efficient storage area.
Key Principles for Success:
- Start with a thorough cleanup
- Plan zones for different activities
- Consider vertical space utilization
- Implement proper lighting
- Create maintenance schedules
- Document storage systems
- Build in flexibility for future needs
Remember, the perfect garage organization system evolves as your needs change.
Start with basic solutions and expand as you identify specific requirements.
Frequently Asked Questions
How Can I Organize My Garage Efficiently on a Budget?
From my experience, start with basic pegboard systems and DIY shelving—Repurpose materials like pallets and PVC pipes for cost-effective storage.
Focus on vertical storage first, then expand gradually. I’ve helped many homeowners create effective systems for under $200 using salvaged materials and basic tools.
What Are Some Easy DIY Storage Solutions for Small Garage Spaces?
To maximize floor space, begin with wall-mounted storage. I recommend starting with pegboards, vertical bike storage, and overhead shelving.
Tool organization using PVC pipes and magnetic strips offers quick wins. Focus on multi-purpose solutions that combine storage with functionality.
What Materials and Tools Do I Need for Building Garage Storage Units?
Essential tools include a drill, level, stud finder, and basic hand tools. For materials, start with plywood, 2x4s, and mounting hardware.
For safety, I always recommend investing in quality fasteners and wall anchors. Keep basic supplies like pegboard hooks and storage bins on hand.
Are There Step-By-Step Plans or Tutorials Available for DIY Garage Shelves?
I’ve developed several basic shelf plans using standard lumber sizes.
Start with simple floating shelves or bracket-supported units. Always focus on proper mounting and weight distribution.
Consider modular designs that can be expanded later.
How Can I Maximize Storage Space in My Garage?
Look up – ceiling space often offers untapped storage potential. Use wall space efficiently with adjustable systems.
I recommend creating zones for different activities and implementing proper traffic flow patterns.
Consider seasonal rotation systems for less-used items.

