DIY Cafe Curtains: Stylish and Affordable for Beginners
I understand you want a budget-friendly home project. Making your own cafe curtains can feel tricky when you’re watching your spending.
I get it – store-bought curtains often cost too much, and many DIY guides suggest pricey materials.
But here’s the good news: you can make beautiful cafe curtains without spending lots of money. I’ve tried several methods myself, and I found smart ways to create these charming window treatments on a tight budget.
In this guide, I’ll show you step-by-step how to make cafe curtains using basic materials.
You’ll learn where to find low-cost fabrics, which simple tools you need, and how to measure and sew your curtains perfectly.
How to Choose & Calculate the Perfect Fabric
First, let’s talk about the amount of fabric needed.
Here’s my simple math trick: measure your window width and multiply it by 2.
Why? Your curtains need some nice folds when they hang. For example, if your window is 30 inches wide, you’ll want 60 inches of fabric.
For the length, measure from where you’ll hang the rod to where you want the curtains to end. Add 8 inches extra – trust me on this!
You’ll need 4 inches for the top pocket (where the rod goes) and 4 inches for the bottom hem.
About fabric types – cotton works great for beginners. It’s easy to work with and doesn’t cost much. Plus, it washes well! I suggest starting with plain white or cream cotton.
These colors let in plenty of light while still giving you privacy.
DIY Cafe Curtains Guide
Tools & Materials Required
- Fabric (2 inches wider than your window/space)
- Measuring tape
- Scissors
- Straight pins
- Sewing machine
- Thread
- Tension rod
- Iron (for crisp folds)
- Pencil or fabric marker
Step-by-Step Process for Making
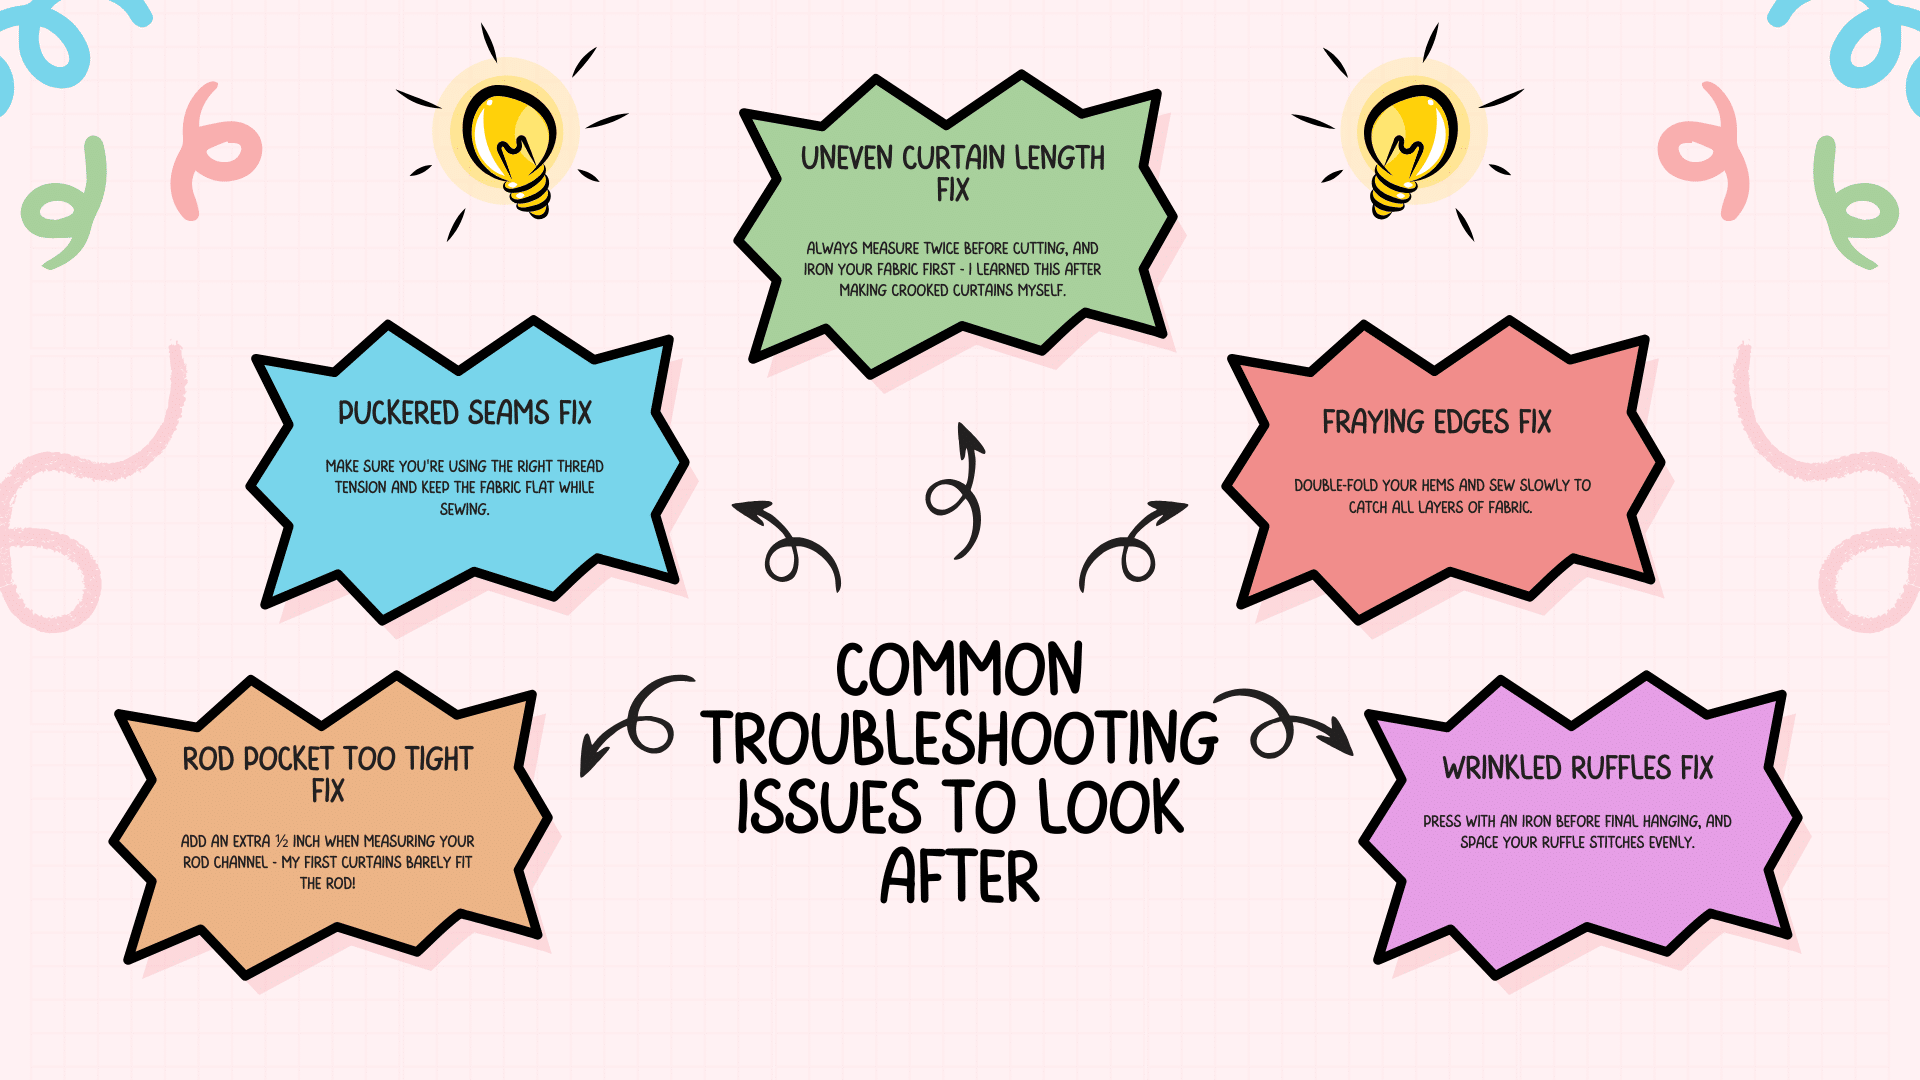
1. Measure and Cut
- Cut fabric 2 inches wider than your window width
- Add 6 inches to your desired length
- For window curtains, make two equal panels
2. Initial Fitting
- Hang the tension rod where you want it
- Drape fabric over the rod to mark where it falls
- Remove the fabric and lay it flat
3. Create the Hems
- Fold all edges ¼ inch inward
- Pin the folds in place
- Sew around all four sides
- This stops fabric from fraying
4. Make the Rod Pocket
- Fold the top down to your marked line
- Pin in place
- Sew about 2 inches down from the fold for the ruffle
- Place rod on fabric to measure space needed
- Sew the second line below the rod placement
- Leave enough room to slide the rod through
5. Final Assembly
- Insert the rod through the pocket
- Adjust fabric to create even ruffles
- Hang your curtain
- For Windows, repeat the process for the second panel
DOWNLOAD THE ENTIRE DIY CAFE CURTAINS GUIDE FROM THIS PDF
An Overall Budget Analysis
| Category | Item | Cost | Notes |
|---|---|---|---|
| Basic Materials Cost | Cotton Fabric | $8-12 per yard | Most windows need 1-2 yards |
| Thread | $3-4 per spool | ||
| Tension Rod | $5-8 | ||
| Straight Pins | $2-3 per pack | ||
| Total Basic Cost | $18-27 | ||
| Money-Saving Tips | Store Sales | -40% savings | I saved 40% during a sale |
| Use Basic Cotton | – | Instead of fancy materials | |
| Neutral Thread | – | Multi-purpose thread | |
| Dollar Stores | – | For tension rods | |
| Leftover Materials | – | Keep it for future projects. | |
| Optional Extras | Iron | – | Borrow if you don’t own one. |
| Fabric Scissors | $8-10 | Worth buying for more projects | |
| Measuring Tape | $1-2 | ||
| Bottom Line | Store-Bought Curtains | $30-50 per panel | |
| DIY Curtains | $18-27 total | Save $20-30 per window |
Best Customization & Styling Options to Consider
I’ve tried these myself, and they don’t cost much.
1. Trim Details ($3-5)
- Ribbon edges
- Lace borders
- Decorative tape
- I found simple tassels at craft stores for under $5 a yard.
2. Color Blocking ($5-8)
- Add a bottom band in a different color
- Make stripes using two fabrics
- Create patterns with leftover fabric pieces. Tip: Mix solid colors for an easy but eye-catching look.
3. Tie-Backs ($2-4)
- Fabric strips from your leftover material
- Simple ribbon bows
- Basic rope ties: Save money by making tie-backs from your main fabric!
4. Hemline Variations (No extra cost)
- Scalloped edges
- Pointed hem
- Wavy bottom: These need careful cutting and folding – no extra materials are needed.
This way, you can have unique curtains without spending too much. Most of these changes use materials you might already have or cost a little extra.
Some Budget-Friendly Tips & Tricks
- Join fabric store mailing lists – I get 50% off coupons regularly in my inbox.
- Shop end-of-season clearance sales for the best fabric deals.
- Use old bedsheets as practice material before cutting your good fabric.
- Save money on patterns by using graph paper to make your own templates.
- Make friends with your local fabric store staff – they’ll tell you about upcoming sales.
- Buy plain fabric and add simple decorations instead of picking expensive patterned material.
- Keep all fabric scraps – they’re perfect for making matching tie-backs.
- Check thrift stores for curtain rods and rings.
- Use hem tape for straight edges if you don’t own a sewing machine.
- Split fabric costs with a friend who’s also making curtains.
- Look for slightly imperfect fabric rolls – they often sell at half price.
- Buy basic sewing supplies in bulk if you plan to make more curtains.
- Test your design using cheap muslin fabric first.
- Get measuring tools from dollar stores – they work just as well.
- Trade skills with crafty friends – maybe swap curtain-making for their expertise!
Certain Care & Maintenance Tips to Keep in Mind
- Gentle Washing Schedule: Keep it simple and wash your cafe curtains every 2-3 months unless they get dirty – I wash mine in cool water with mild soap.
- Smart Storage Method: Roll your curtains instead of folding them when storing them – this helps avoid those stubborn creases.
- Quick Spot Cleaning: Tackle small marks right away with a damp cloth – I’ve saved my curtains from stains this way.
- Rod Care: Wipe down your tension rods monthly – dust build-up can make curtains stick.
- Proper Drying Technique: Skip the dryer when possible – I hang mine to dry flat to keep their shape.
- Regular Dust Control: Use your vacuum’s brush attachment weekly – it’s better than waiting for visible dust.
- Sun Protection: If your windows receive direct sunlight, Switch your curtains between them every few months—this prevents uneven fading.
Conclusion
Making cafe curtains at home is easier than you might think! I’ve shared my hands-on tips to help you create beautiful window treatments without breaking the bank. The key is staying organized and following each step carefully.
Remember, your first curtain might not be perfect – mine wasn’t! But that’s okay. With these simple steps and budget-friendly options, you’ll get better each time you try.
Want to learn more about home decor on a budget? Check out my other guides: “DIY Roman Shades Made Simple,” “Budget-Friendly Window Valances,” and “Quick Home Decor Updates Under $50.”
Leave a comment below if you try this project – I’d love to see how your curtains turn out!
Got questions? Just ask, and I’ll help you figure it out.
Frequently Asked Questions
Can I Create Cafe Curtains without Sewing?
Yes! Use iron-on hem tape for all edges. You’ll need to fold the fabric edges, place the tape inside, and press with a hot iron until sealed.
How Do I Install Cafe Curtains Once They’re Made?
First, mark where you want the rod. Install the brackets if using a standard rod, or simply twist a tension rod to fit. Slide curtains on and adjust for evenness.
How Do I Measure My Windows and Calculate Fabric Requirements?
Measure window width and multiply by 2 for fullness. Add 8 inches to desired length for hems. For example: 30-inch window = 60 inches of fabric width.

