Create Your Own DIY Wooden Ladder: Materials, Tools & Tips
Building a DIY wooden ladder opens up new spaces in your home. A well-made ladder makes reaching high spots simple and safe.
This guide will show you how to build a strong wooden ladder using basic tools and materials. You’ll learn the key steps to making a ladder that looks good and works well. We’ll cover picking the right wood, cutting precise angles, and adding important safety features.
This guide clearly explains each step. You’ll learn how to join parts, add finishing touches, and ensure your ladder stays steady. Whether you need it for your garage, library, or loft space, you’ll end up with a ladder that fits your needs.
Let’s start building a ladder that’s both practical and eye-catching.
Planning Your DIY Wooden Ladder
Making a wooden ladder starts with good planning. A well-planned DIY wooden ladder project makes the building process smoother and safer. Let’s look at what you need to consider.
Choosing the Right Ladder Type
When making a DIY wooden ladder, you’ll want to pick a style that fits your needs. Here are the main types to consider:
A straight ladder works well for basic tasks. It leans against walls and offers a simple, useful design. This type needs less wood and fewer cuts.
Step ladders stand on their own. They work great in garages and workshops. The steps are wider than standard rungs, making them more comfortable.
Loft ladders attach to upper spaces. They need extra planning for brackets and mounting points, and the angle matters more with these ladders.
Decorative ladders add style to rooms. They can hold blankets, magazines, or plants. These put less focus on weight support and more on looks.
Understanding Ladder Anatomy
| Ladder Component | Function | Importance for Safety & Durability |
|---|---|---|
| Rails | Run up both sides, holding the ladder structure together. | Provide the backbone for the ladder. Strong rails prevent bending and ensure stability. |
| Rungs | The steps you climb on. Space them evenly between the rails. | Rungs should be evenly spaced (10-12 inches). Solid rungs support weight and prevent accidents. |
| Braces | Support the ladder by connecting the rails. | Prevent twisting or wobbling while climbing. Good braces ensure the ladder holds its shape. |
| Feet | Sit at the bottom of the ladder, providing stability on the ground. | Flat, angled feet prevent slipping and keep the ladder stable during use. |
Step-by-Step Construction Guide
Materials You’ll Need for Your DIY Ladder
| Material | Description | Notes/Usage |
|---|---|---|
| Wood (White Oak or Similar) | Strong, durable hardwood for side rails and rungs | White oak is mentioned, but other hardwoods like maple or pine can be used based on preference. |
| Steel Pipe (½” diameter) | For the sliding track (if making a rolling ladder) | Used to create the track for the ladder to slide along. |
| Steel Pipe Elbows and Tees | Connectors for creating the track system | Various elbows and tees to assemble the track system. |
| Wood Screws | To secure rungs and rails | Used to attach rungs to the side rails; ensure they’re strong and sturdy for safety. |
| Nails | To secure components temporarily during assembly | For holding parts in place before final screws are added. |
| Casters (Wheels) | For adding mobility (if making a rolling ladder) | Basic casters for $2 each are used to make the ladder movable. Add a wedge to ensure proper fit. |
| Glue (Wood Glue) | To bond the rungs into the side rails | Wood glue is applied to each dado joint before securing the rungs with screws. |
| Sanding Tools | Sandpaper, orbital sander, or a hand sander | To smooth out rough edges and prepare the ladder for finishing. |
| Wood Stain/Finish | To protect the wood and enhance the appearance | The transcript uses Rubio Monocoat’s “Corn Silk” finish, but any wood stain or finish works. |
| Forstner Bit (3/8″ diameter) | For drilling holes for screw recesses | They are used for drilling holes to recess screws into the side rails for a clean finish. |
| Plug Cutter | For creating wooden plugs to cover screw holes | Wood plugs are inserted into screw holes and flushed cut to hide screws. |
| Rubber Feet (Optional) | Non-slip feet for stability | Used to prevent the ladder from slipping, especially for rolling ladders. |
| Wood Dowels (Optional) | Alternative to screws for joining rungs | It can be used instead of screws to create a cleaner look, depending on the design choice. |
Step 1: Building the Track System
Start your DIY wooden ladder project at the hardware store. Get half-inch steel pipes with matching fittings for your track. These pieces will join together to make a sturdy guide for your ladder. Place the assembled track at your loft’s edge, making sure it’s firmly attached to support the ladder’s weight.
Step 2: Creating the Side Pieces
Select solid white oak boards for your DIY wooden ladder sides. White oak offers the strength needed for this project. Use a standard ladder as your guide for the right angle. Transfer this angle to your oak pieces and make clean cuts with your miter saw.
Step 3: Making the Track Connection
The ladder needs a secure way to hold onto the track. Form this connection by drilling a one-inch hole at the top of each side piece. Cut a channel from this hole with your jigsaw. This creates a path for the pipe while keeping the ladder safely attached.
Step 4: Setting the Bottom Angle
Your DIY wooden ladder needs to sit flat on the floor. Mark a level line on each side piece. Cut these marks with your miter saw. Test the angles by standing the pieces up – they should rest evenly on the ground without rocking.
Step 5: Preparing the Rungs
Cut eight white oak pieces for your rungs. Set your saw to match the angles of your side pieces. Make each rung 21 inches long for comfortable climbing. Sand these pieces now – it saves time when the ladder comes together later.
Step 6: Joining the Parts
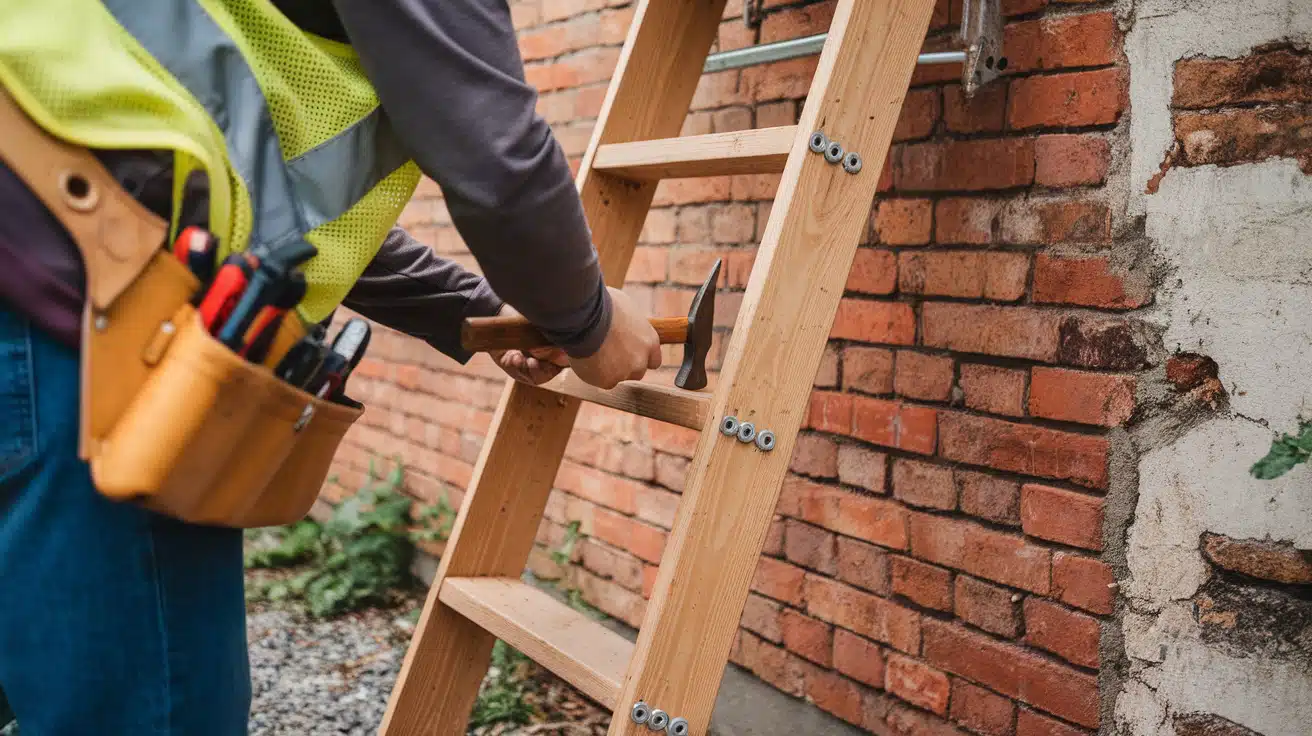
Cut slots in the side pieces where your rungs will sit. A chop saw makes clean, even cuts for these joints. Test each rung in its slot before adding glue. The fit should be snug but not too tight. Add screws through the sides into each rung for extra strength.
Step 7: Adding Final Details
Make wooden plugs to cover your screw holes. These small touches make your DIY wooden ladder look more professional. Sand everything smooth once the plugs are in place. Add small wedges at the bottom of each side, then attach basic caster wheels for smooth sliding.
Step 8: Finishing Touches
Sand your completed DIY wooden ladder to remove any rough spots. Apply an oil finish to protect the wood and bring out its natural beauty. Let everything dry fully before mounting your ladder on the track. Test it carefully to ensure it slides well and feels solid.
Video Tutorial
Personalizing Your DIY Wooden Ladder
1. Adding Your Style
Your DIY wooden ladder can shine with the right finish. Oakwood takes well to too many colors. Light stains show off the natural wood grain, while darker stains create a more formal look.
Oil-based finishes sink into the wood and protect it. Test your chosen finish on a scrap piece first to see the true color.
2. Choosing the Right Look
Paint works well for a modern DIY wooden ladder design. White paint fits farmhouse styles. Black creates an industrial feel. Sand between coats for a smooth finish.
Use paint made for wood surfaces. Let each coat dry fully before adding the next one. The final look should match your room’s style.
3. Making Special Details
Small touches make your DIY wooden ladder stand out. Round the edges of your rungs for a softer look. Shape the top rails into gentle curves. Add simple line patterns to the side rails. Keep any designs clean and simple. Too many details can make the ladder look busy.
4. Creating Practical Beauty
Turn your DIY wooden ladder into more than just steps. Hang it flat against a wall to hold blankets. Place it near your bed for a unique nightstand. Set it in your bathroom to hold towels.
The natural wood adds warmth to any room. Make sure it stays firmly mounted wherever you place it.
5. Matching Your Space
Look at your room’s current style. Your DIY wooden ladder should feel like it belongs there. Match existing wood tones in your furniture. Consider the hardware finish on other pieces.
Simple changes in color or finish help the ladder fit right in. The goal is to make it look intentional, not added as an afterthought.
Maintenance and Care for Your Wooden Ladder

Monthly Safety Review
Keep your DIY wooden ladder safe with regular checks. Look over each rung at the start of every month. Press down on each step to test its strength.
Listen for squeaks or creaks that might signal loose parts. Feel along the rails for rough spots or splinters. These small checks prevent bigger problems later.
Quick Fixes and Repairs
Fix minor issues on your DIY wooden ladder right away. Tighten loose screws before they cause problems. Fill small cracks with wood filler that matches your finish.
Sand rough spots smooth before they catch on clothes or skin. Clean off any dirt or marks with a soft cloth. Simple fixes keep your ladder working well.
Knowing When to Replace Parts
Some damage needs more than a simple fix. Replace any rung that feels weak or shows deep cracks. Change rails that have warped or split. New parts should match your original wood type.
Install them using the same methods you used to build the ladder. Good repairs make your DIY wooden ladder safe again.
Indoor Storage Solutions
Store your DIY wooden ladder in a dry place away from heating vents and sunny windows. Lay it flat or lean it securely against a wall. Never leave it outside where rain can reach it. Good storage stops wood from warping and keeps your finish looking fresher longer.
Long-term Protection
Clean your DIY wooden ladder every few months. Use a soft brush to remove dust. Wipe with a barely damp cloth if needed. Check the finish for wear. Add a new coat of protection when the old one looks thin. This care helps your ladder stay strong and beautiful for years.
Conclusion
A homemade wooden ladder brings more than function to your space. Following this guide, you’ve created something that will serve you daily while adding character to your home.
Remember to check your ladder’s stability monthly. Maintenance steps help your wooden ladder stay strong and safe through years of use. Keep it stored in a dry place, away from sunlight and moisture.
Your wooden ladder proves the careful planning and skilled work you put into it. Each carefully placed and secured rung shows the time you put into making something lasting.
As you use your ladder to reach those high spots, you’ll appreciate the solid feel of the wood under your feet and the clean lines you crafted by hand.


