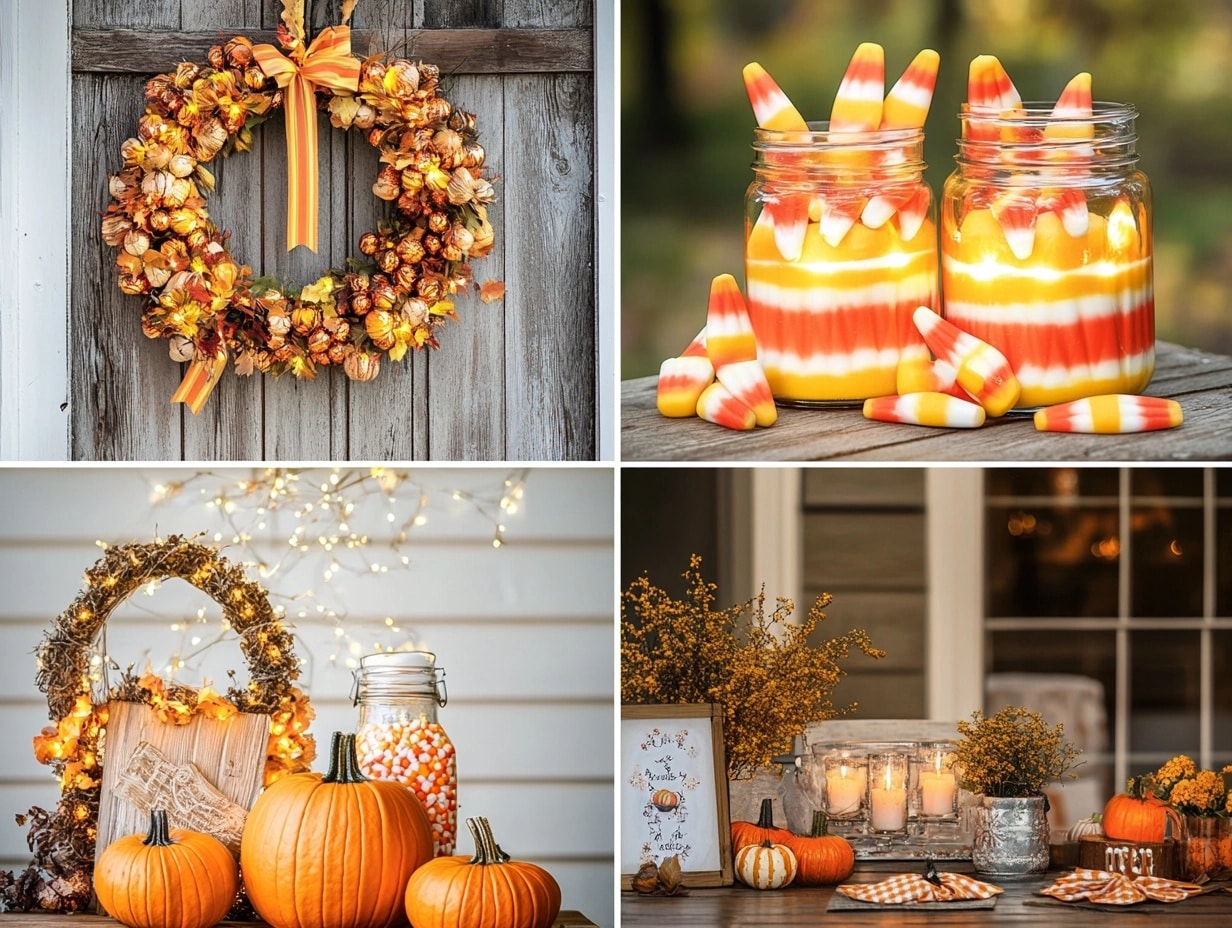
18 Candy Corn-Themed Party Decorations for Halloween
My love for Halloween decorating led me to explore candy corn’s iconic colors and shapes.
These simple pieces of candy inspire countless creative decorating ideas.
After years of Halloween styling, I’ve discovered unique ways to incorporate these classic colors.
Let me share how these cheerful orange, yellow, and white combinations brighten any space.
The History of Candy Corn
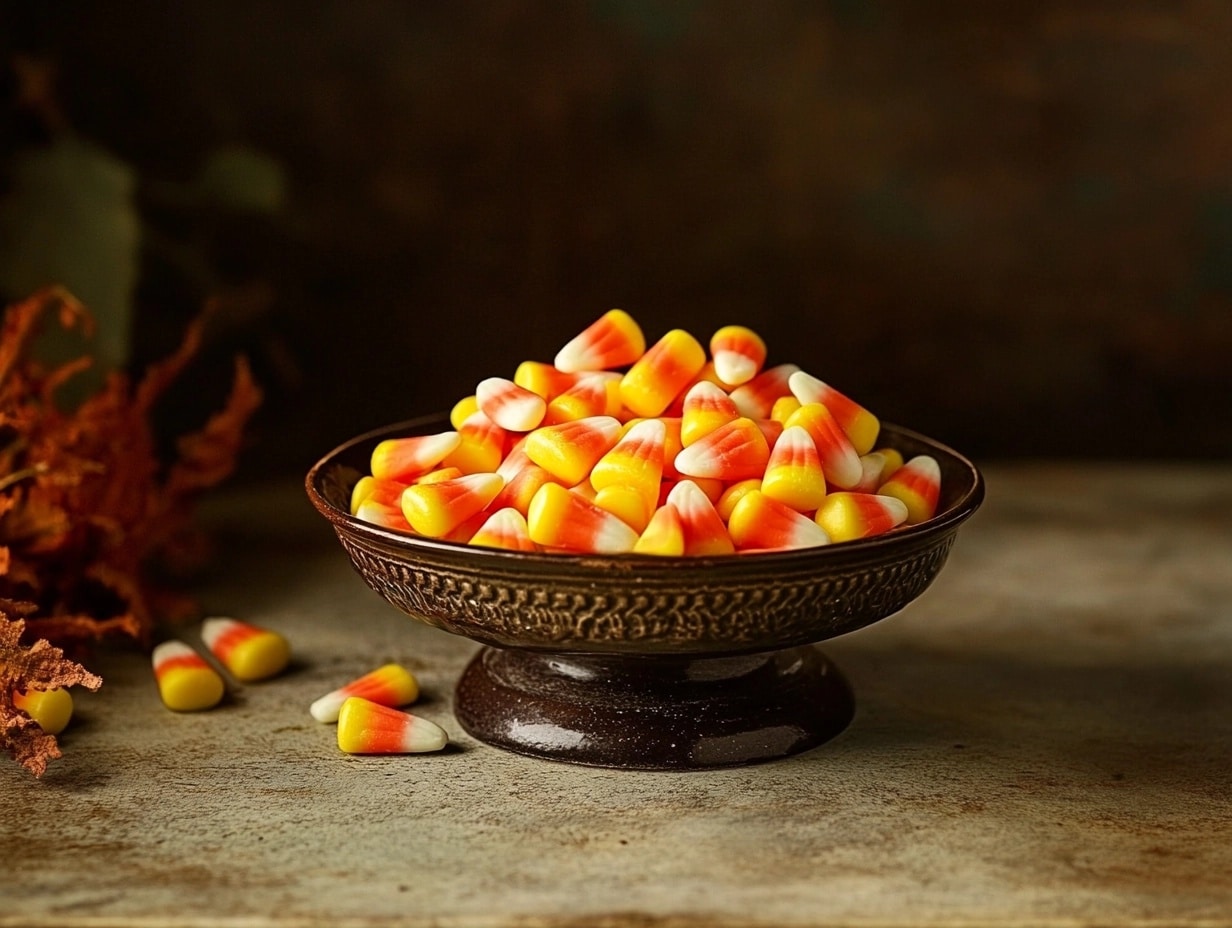
After researching candy corn’s fascinating history, I discovered that this simple treat is deeply connected to America’s harvest celebrations.
Let me share what makes this iconic candy special to our autumn traditions.
The story of candy corn began in the 1880s at the Wunderle Candy Company.
George Renninger first created these tricolored kernels by hand, layering each color carefully. The Goelitz Confectionery Company (now Jelly Belly) started producing them in 1898.
Each piece was made by hand by pouring a warm candy mixture into kernel-shaped molds. The process took several days as each color needed to set before adding the next layer.
These small candies quickly became associated with harvest celebrations and Halloween.
Their colors mirror the changing colors of autumn corn, connecting them to harvest traditions.
By the 1950s, candy corn had become the official candy of Halloween festivities.
Many families pass down traditions of decorating with and sharing candy corn each fall.
The simple design has inspired countless seasonal decorations and treats.
Creative Ways to Use Candy Corn in Decor
1. Candy Corn-Themed Wreath
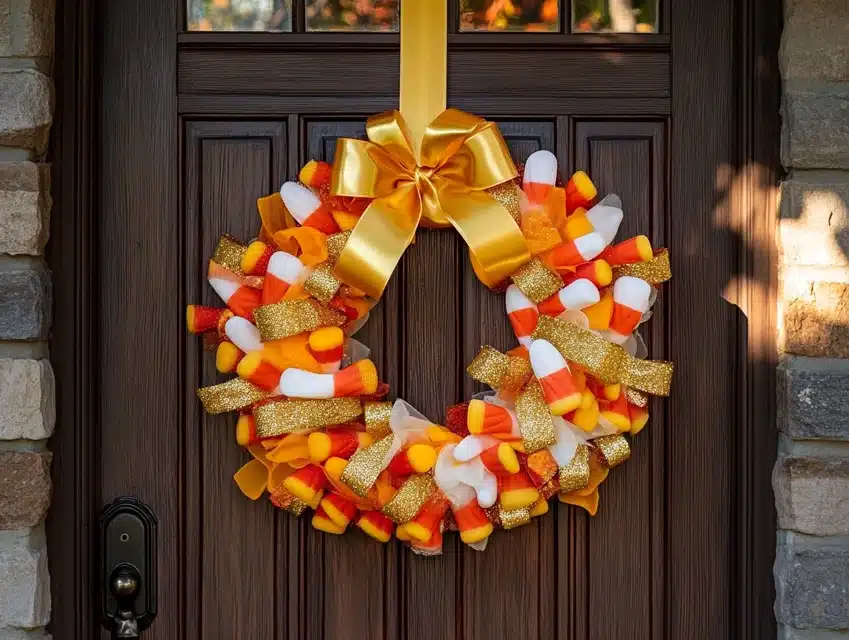
I created this eye-catching wreath that brings autumn cheer to my front door.
The layers of ribbon spiral outward in a perfect candy corn color progression.
Small touches of glitter catch light as guests approach the entrance.
The size makes a bold statement while maintaining elegant proportions.
Each section carefully transitions from white to orange to yellow.
DIY Steps:
- Start with an 18-inch wire wreath form.
- Layer white ribbon for the base section.
- Add an orange ribbon in the middle section.
- Complete with yellow ribbon outer layer.
- Attach artificial candy corn pieces.
- Create a hanging loop with a strong ribbon.
- Add weather protection spray.
2. Mason Jar Centerpieces
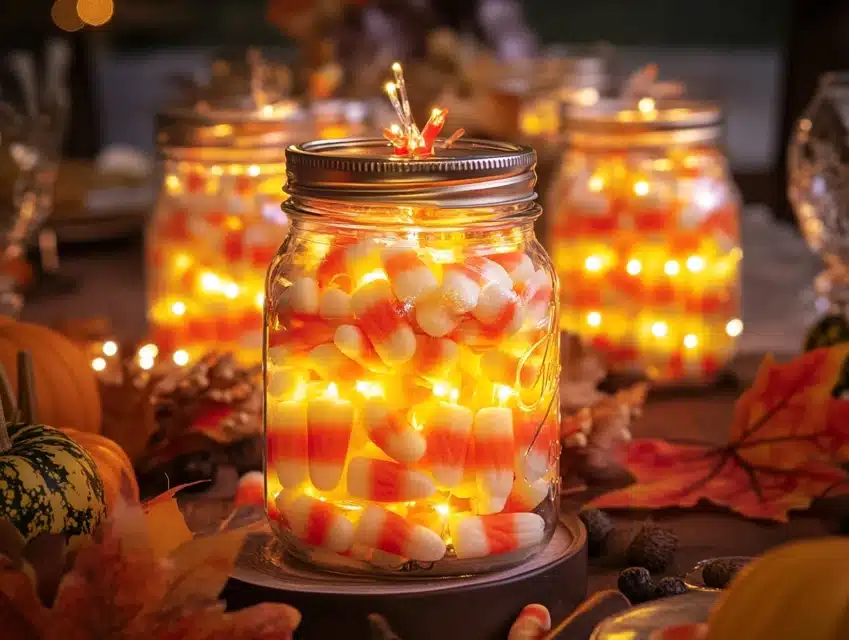
I transformed simple glass jars into glowing candy corn displays that light up our dining room.
Each jar creates its magical light show as the fairy lights twinkle through layers of candy.
The warm glow reflects off the glass, creating a cozy autumn ambiance during evening gatherings.
Guests always ask how I achieved the perfect layered effect in each jar.
The battery-operated lights mean I can place these anywhere without worrying about cord placement.
DIY Steps:
- Clean jars thoroughly with glass cleaner.
- Layer white candy corn at the bottom third.
- Add orange pieces for the middle section.
- Complete with yellow candy corn on top.
- Insert battery-operated fairy lights.
- Create a wire handle for the hanging option.
- Seal tops with clear covers.
3. Glowing Candle Holders
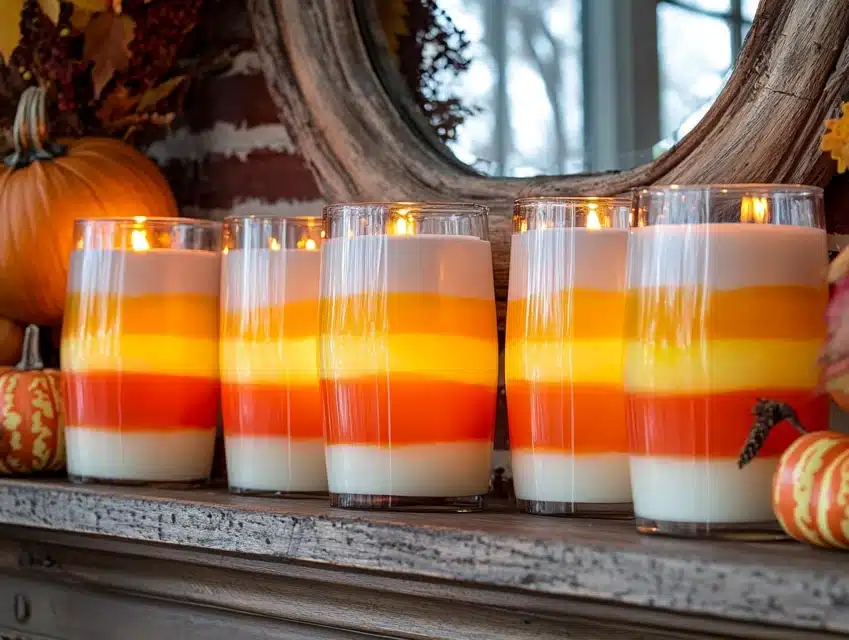
My window display features candy corn-inspired candle holders that cast beautiful shadows.
The painted stripes wrap around clear glass holders in a perfect candy corn progression.
When lit, the candles create a warm glow, highlighting each color transition.
I positioned them at different heights to create visual interest on my mantel.
The paint technique allows light to shine through while maintaining the striped pattern.
DIY Steps:
- Clean glass holders with rubbing alcohol.
- Apply glass paint primer for durability.
- Create tape guides for straight lines.
- Paint the white section first, letting dry.
- Add the orange middle stripe carefully.
- Complete with yellow top section.
- Seal with a clear protective coating.
4. Designer Throw Pillows
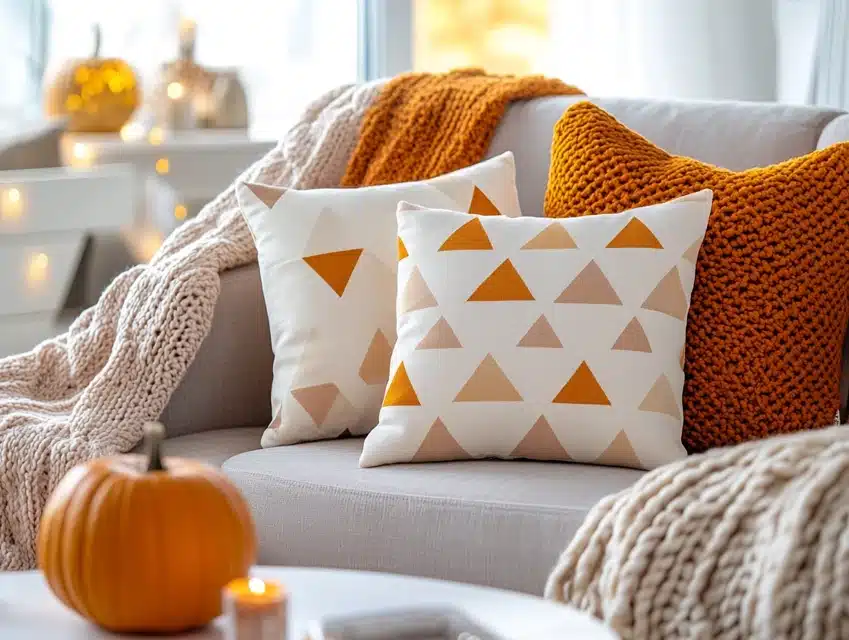
I designed these pillows to bring candy corn charm to our living room seating.
The geometric pattern uses candy corn colors in modern triangle arrangements.
Each pillow features different designs while maintaining the color theme.
Durable fabric choices mean these pillows last beyond the Halloween season.
The various sizes create interesting groupings on chairs and sofas.
DIY Steps:
- Choose washable fabric in three colors.
- Create paper templates for designs.
- Cut fabric pieces with extra seam allowance.
- Sew triangles in a candy corn pattern.
- Add piping in contrasting colors.
- Insert quality pillow forms.
- Add hidden zippers for cleaning.
5. Festive Holiday Garland
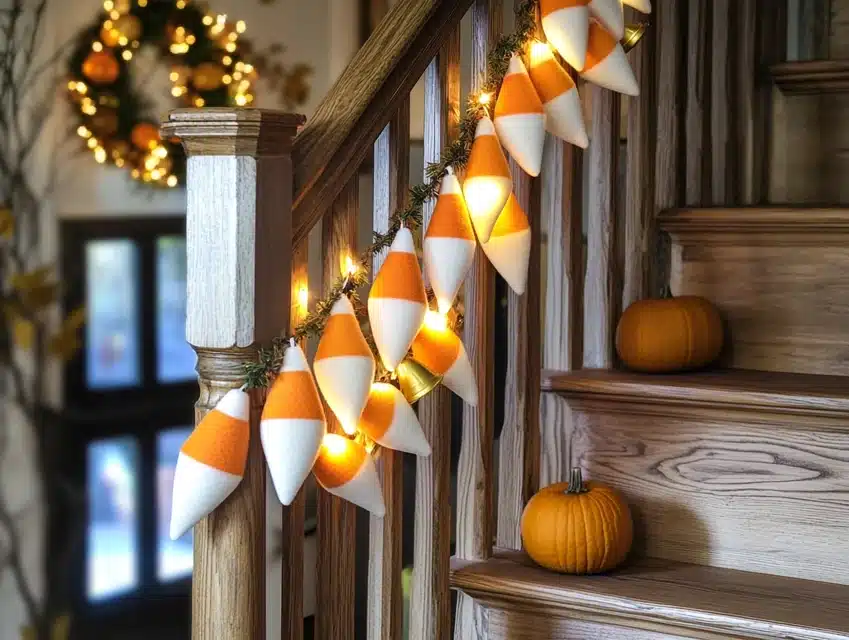
I created this eye-catching garland that transforms our staircase into a candy corn cascade.
The handcrafted pieces alternate between fabric and felt triangles, each carefully sized to mimic real candy corn shapes.
Small bells attached between segments add gentle tinkling sounds when people pass by the display.
The garland weaves through the banister posts, creating a playful pattern that draws the eye upward.
Tiny LED lights woven through the garland pieces create magical evening sparkle effects.
Each connection point is reinforced to prevent sagging or stretching over time.
The entire length can be adjusted by adding or removing sections as needed.
DIY Steps:
- Cut triangle shapes from stiff felt and fabric.
- Sew reinforced points for hanging strength.
- Create spacing guides for even distribution.
- Add bell attachments between pieces.
- Weave thin wire for light strands.
- Install hook points along the banister.
- Create a storage roll for next year.
6. Welcoming Door Display
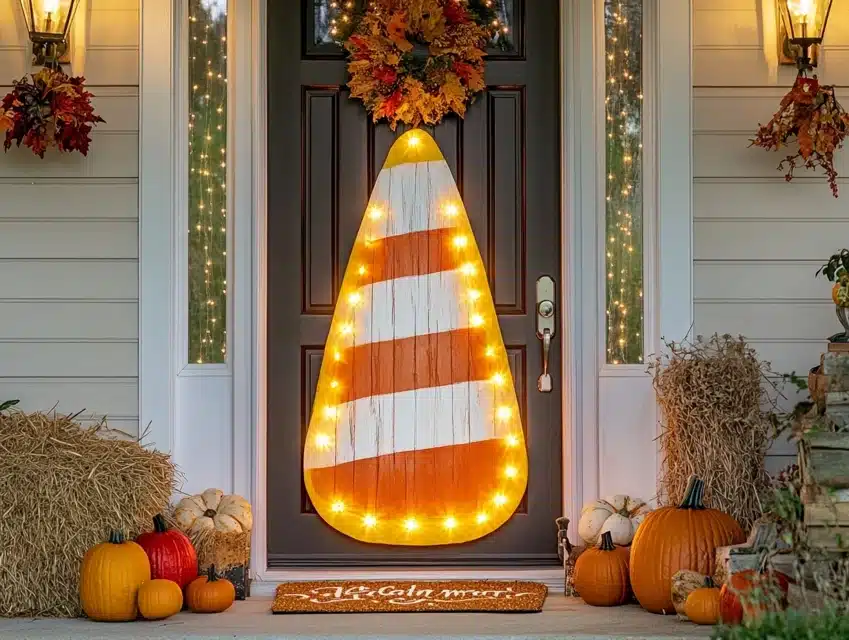
My front door showcase features an oversized candy corn creation that stops visitors in their tracks.
The wooden base, cut in perfect candy corn proportions, displays hand-painted sections in vivid seasonal colors.
Weather-resistant paint and sealer ensure the piece maintains its brightness through autumn storms.
Small battery-operated lights outline the edges, creating a welcoming glow as evening approaches.
Custom lettering adds personalized messages that change throughout the season.
The hanging system allows for easy removal and storage between seasons.
Each color section features subtle glitter that catches sunlight throughout the day.
DIY Steps:
- Cut plywood in candy corn shape.
- Sand edges for a smooth finish.
- Apply outdoor primer coating.
- Paint sections in proper order.
- Add lettering with stencils.
- Install outdoor lighting system.
- Create sturdy hanging hardware.
7. Dining Table Runner
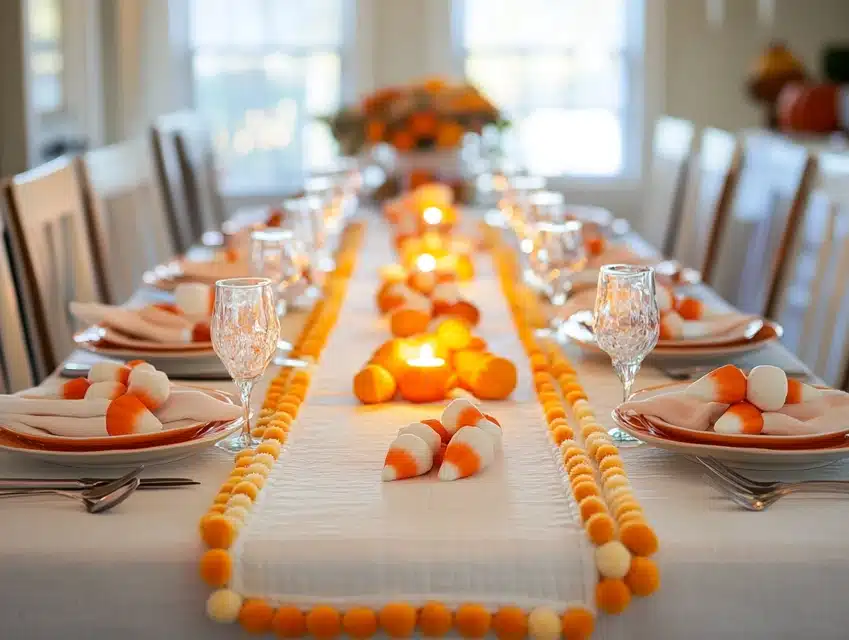
I designed this table runner to become the centerpiece of our Halloween dining experience.
The fabric choices include subtle metallic threads that catch candlelight during evening meals.
Each stripe transitions smoothly into the next, creating a perfect candy corn color progression.
The edges feature small pompom trim in alternating seasonal colors for extra charm.
Both ends display quilted candy corn shapes that hang elegantly over the table edges.
The runner length allows for place settings while keeping decorative elements visible.
The special backing fabric prevents slipping on the table surface.
DIY Steps:
- Measure the table for proper length.
- Cut fabric strips in graduating widths.
- Sew stripes with reinforced seams.
- Add quilted end pieces.
- Attach decorative trim carefully.
- Create a non-slip backing layer.
- Add care instruction label.
8. Seasonal Flower Arrangements
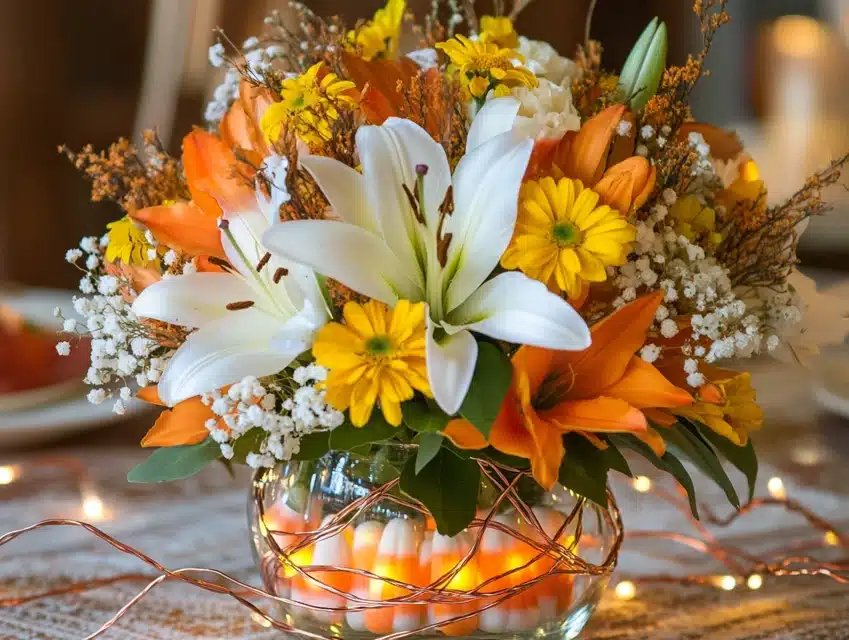
I designed these stunning floral displays that capture candy corn colors through natural blooms.
The arrangement starts with pure white lilies at the base and transitions to vibrant orange marigolds in the middle section.
Bright yellow daisies crown the top, creating the perfect candy corn color progression naturally.
Small sprays of baby’s breath add texture between each color section, creating soft transitions.
The clear glass vase features layers of candy corn between the flower stems, adding whimsy to the design.
Copper wire lights weave through the arrangement, creating magical evening illumination.
Each arrangement lasts about two weeks and requires proper care and flower food maintenance.
DIY Steps:
- Select fresh flowers in the proper colors.
- Create graduated height guides.
- Layer candy corn in a clean vase.
- Build arrangements from the bottom up.
- Add wire lights between stems.
- Mist flowers daily for freshness.
- Change the water every three days.
9. Decorated Seasonal Pumpkins
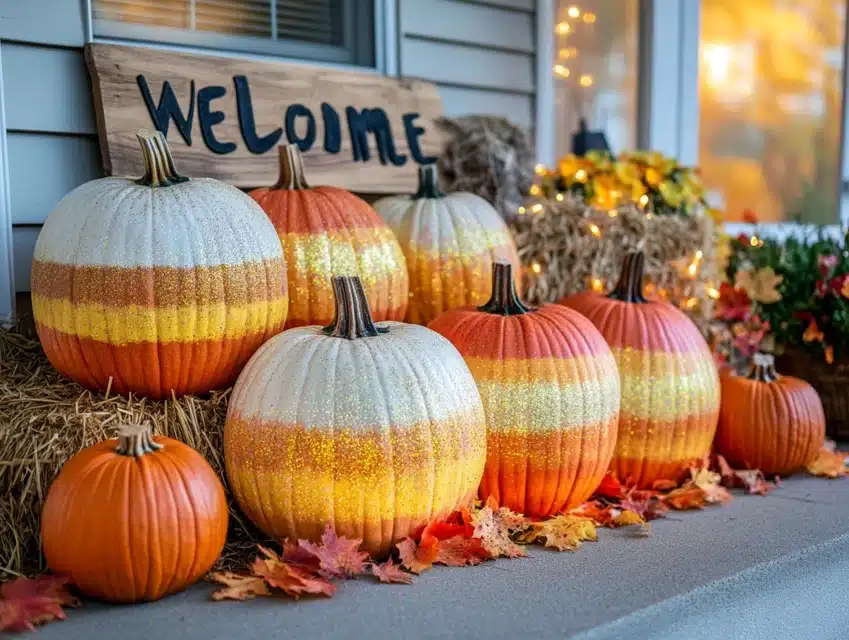
I transformed ordinary pumpkins into candy corn masterpieces that brighten our front porch display.
Each pumpkin features hand-painted stripes that perfectly mimic candy corn coloring, starting with a white base near the stem.
The middle sections showcase rich orange hues that fade into bright yellow bases, creating a natural ombre effect.
Small rhinestones and glitter accent certain sections, beautifully catching morning dew and evening lights.
The arrangement includes various pumpkin sizes, from tiny decorative gourds to large statement pieces.
Weather-resistant sealer keeps the paint fresh throughout the autumn season.
Special non-toxic paint allows these pumpkins to return to the garden after the season.
DIY Steps:
- Clean pumpkins thoroughly.
- Apply white primer base coat.
- Paint color sections carefully.
- Add sparkle embellishments.
- Seal with weather protection.
- Create display platforms.
- Monitor for touch-up needs.
10. Creative Wall Display
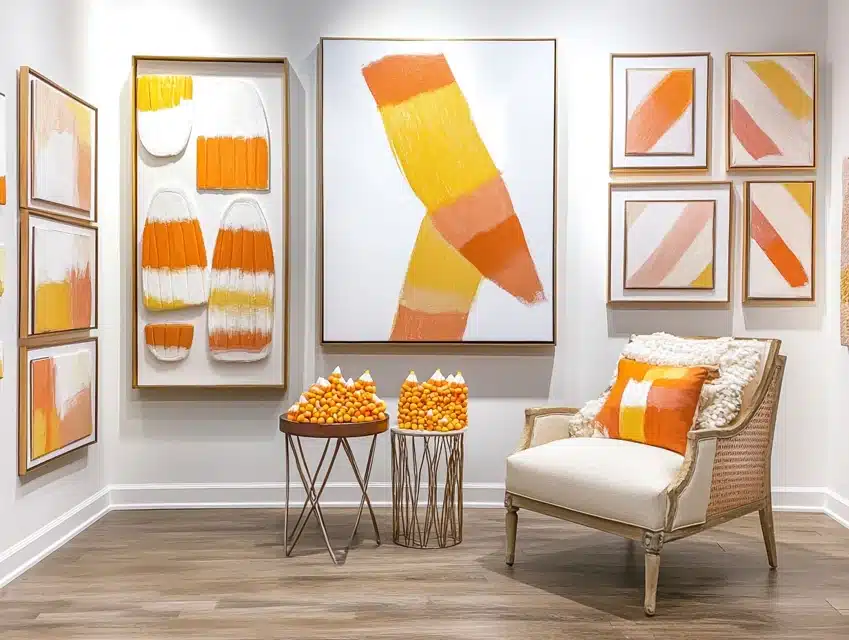
I created a gallery wall that celebrates candy corn through various artistic interpretations.
Large canvas pieces feature abstract candy corn shapes in bold brush strokes and rich textures.
Smaller framed pieces showcase actual candy corn arranged in photographic patterns.
Mixed media elements include fabric art with embroidered candy corn motifs.
Metallic frames in copper and gold add warmth to the overall display.
LED picture lights highlight key pieces in the evening hours.
The entire gallery arrangement can be easily updated with seasonal variations.
DIY Steps:
- Plan layout on the floor first.
- Create paper templates for spacing.
- Install proper wall anchors.
- Hang the largest pieces first.
- Add smaller artwork around.
- Install picture lighting.
- Label back for easy storage.
11. Outdoor Light Display
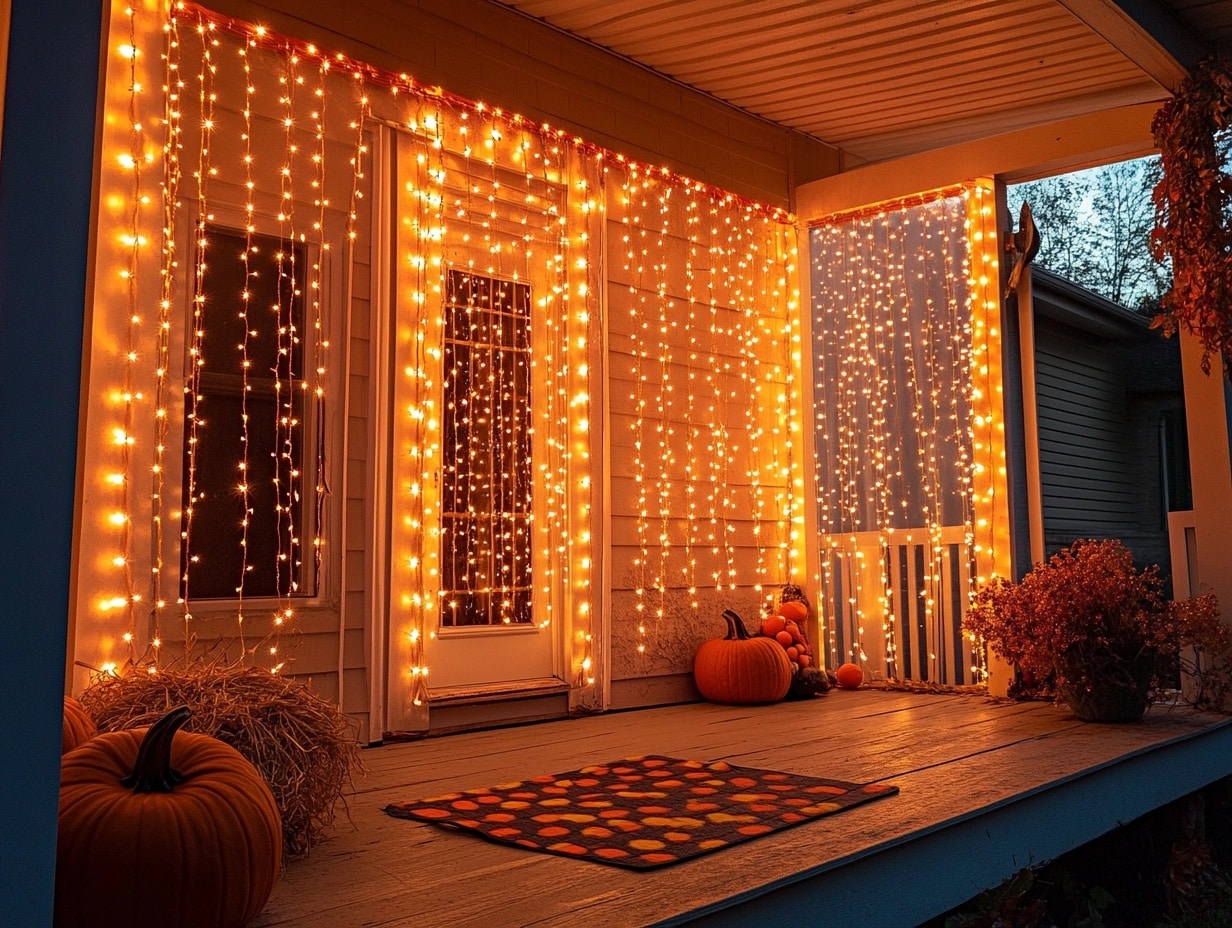
Using custom-painted string lights, I transformed our front porch into a magical candy corn wonderland.
Each bulb cover features hand-painted candy corn stripes that create a striking effect when illuminated.
The lights cascade from the porch ceiling in varying lengths, creating a curtain effect of glowing candy corn.
Special weatherproof paint ensures the colors stay vibrant through autumn rain and wind.
The arrangement includes timer-controlled settings for perfect evening displays.
Motion sensors activate special lighting patterns when guests approach.
The entire display casts beautiful colored shadows on the porch floor below.
DIY Steps:
- Clean each light cover thoroughly.
- Apply weatherproof primer first.
- Paint stripes in proper sequence.
- Seal with outdoor protectant.
- Create graduated hanging points.
- Install timer and motion sensors.
- Test weather resistance.
12. Layered Candle Creation
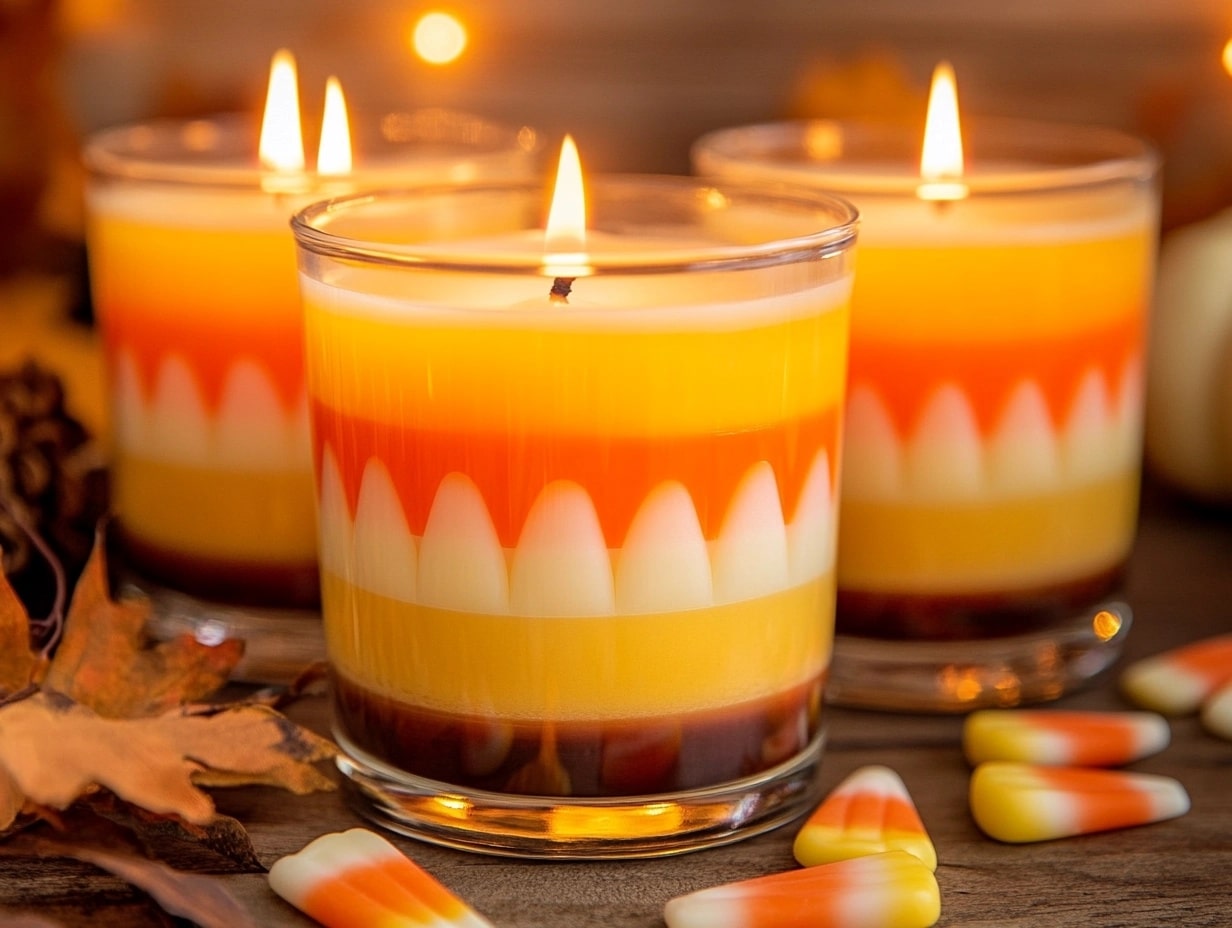
I crafted these unique candles that reveal candy corn colors as they slowly burn down.
Each layer contains specially scented wax – vanilla for white, orange cream for middle, and honey for yellow.
The colors blend slightly at their meeting points, creating beautiful gradient effects.
Glass containers feature etched candy corn patterns that glow when the candles are lit.
The triple-wick design ensures even burning through each colorful layer.
Special wax additives create a shimmer effect in the melted portions.
Each candle burns for approximately 40 hours, providing a long-lasting seasonal ambiance.
DIY Steps:
- Prepare wicks with proper support.
- Melt each color separately.
- Add specific scents to layers.
- Pour layers at cthe orrect temperatures.
- The center wicks perfectly.
- Create protective packaging.
- Add burning instructions.
13. Holiday Accent Tree
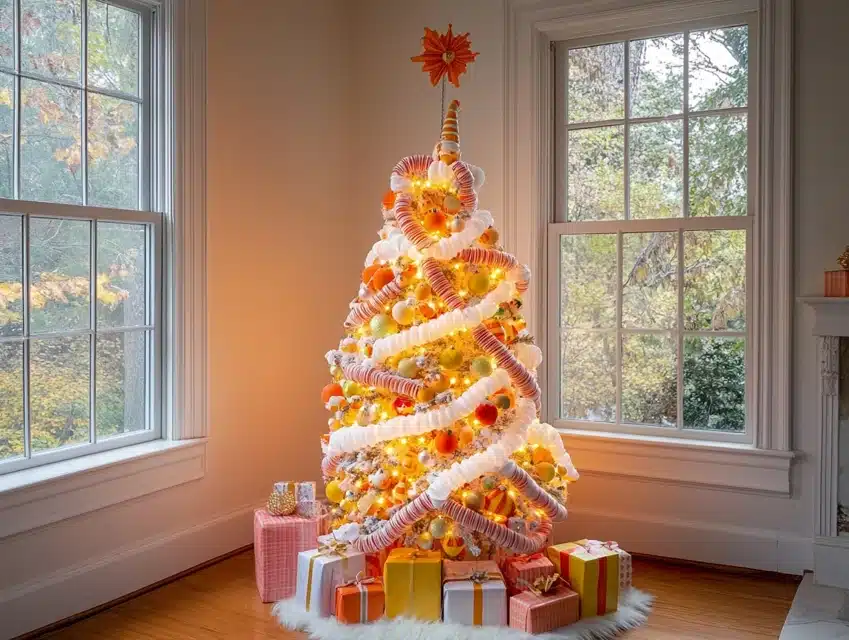
I designed this four-foot tree that brings candy corn charm to our living room corner.
The branches feature carefully curated ornaments in signature candy corn colors and shapes.
Tiny LED lights wrapped around each branch create a warm, inviting glow.
Custom-made candy corn garland spirals from top to bottom in perfect symmetry.
Small mirror balls in orange and yellow reflect light throughout the room.
The tree topper features an oversized illuminated candy corn creation.
Presents are wrapped in coordinating papers and piled beneath the tree’s branches.
DIY Steps:
- Assemble the tree base securely.
- Add lights from the bottom up.
- Create a custom ornament layout.
- Install garland symmetrically.
- Position mirror elements carefully.
- Add wrapped display boxes.
- Create a storage system for pieces.
14. Decorative Serving Collection
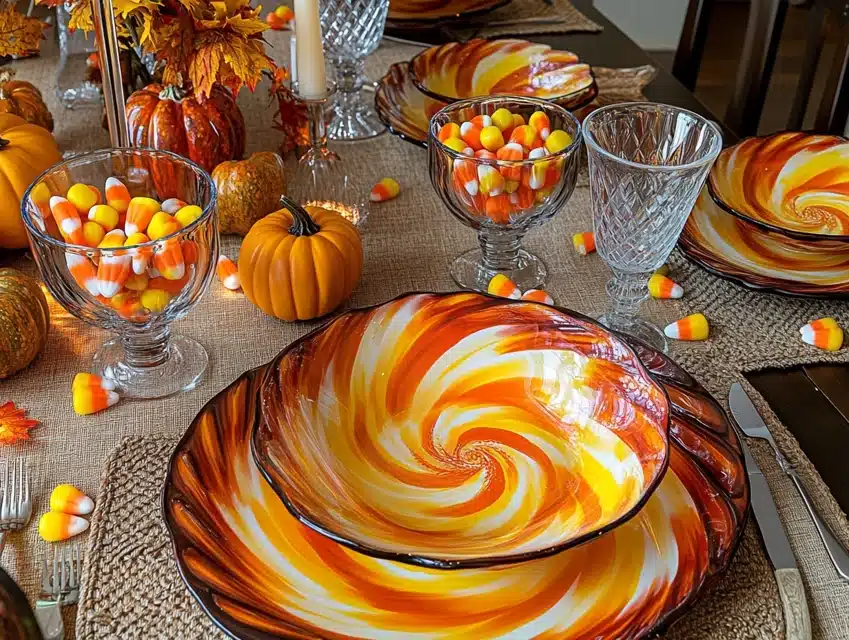
I curated a collection of serving pieces that celebrate candy corn colors in sophisticated ways.
Each bowl features hand-painted stripes swirling outward from the center in perfect color progression.
The serving platters showcase candy corn patterns along their edges while maintaining clean centers for food display.
Special ceramic glazes create depth and movement in the color transitions.
Hidden candy corn shapes appear as guests empty each serving piece.
The collection includes everything from tiny dip bowls to large serving platters.
Every piece remains food-safe while displaying festive designs.
DIY Steps:
- Clean ceramic pieces thoroughly.
- Apply ceramic primer base.
- Paint designs with food-safe colors.
- Create a protective clear glaze.
- Test for dishwasher safety.
- Design matching place cards.
- Create proper storage spaces.
15. Glowing Paper Lanterns
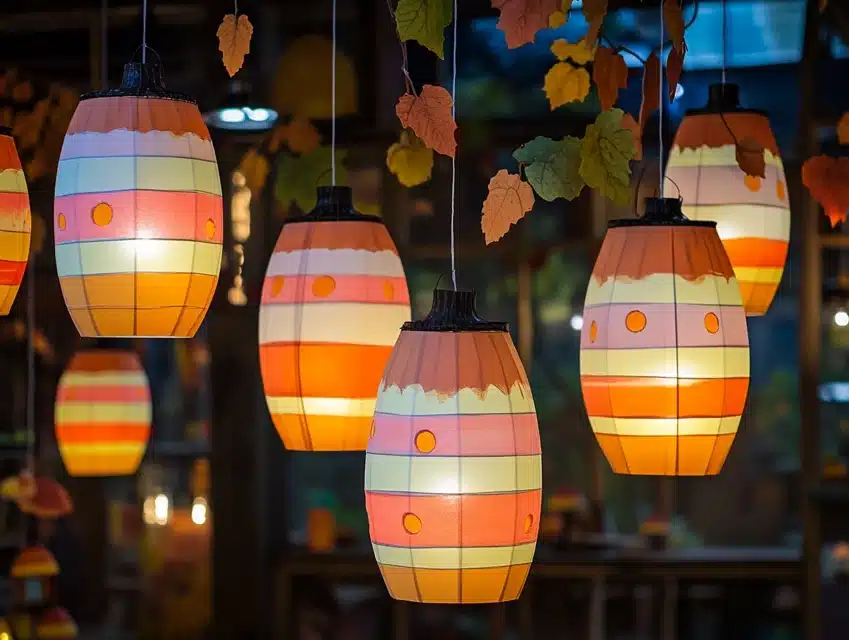
I created a series of lanterns that cast candy corn-colored shadows throughout our space.
Each lantern starts with white paper, carefully painted in graduated candy corn stripes.
Battery-operated flameless candles inside create safe, long-lasting illumination.
The lanterns hang at varying heights, creating a floating candy corn display.
Special paint techniques allow light to filter through while maintaining color intensity.
Small cutouts in candy corn shapes add extra pattern to the light display.
Wire reinforcements ensure the lanterns maintain their shape over time.
DIY Steps:
- Select proper paper weight.
- Create cutting templates first.
- Paint colors in proper order.
- Install wire support frames.
- Add hanging hardware securely.
- Position lighting elements.
- Test flame resistance.
16. Layered Mantel Design
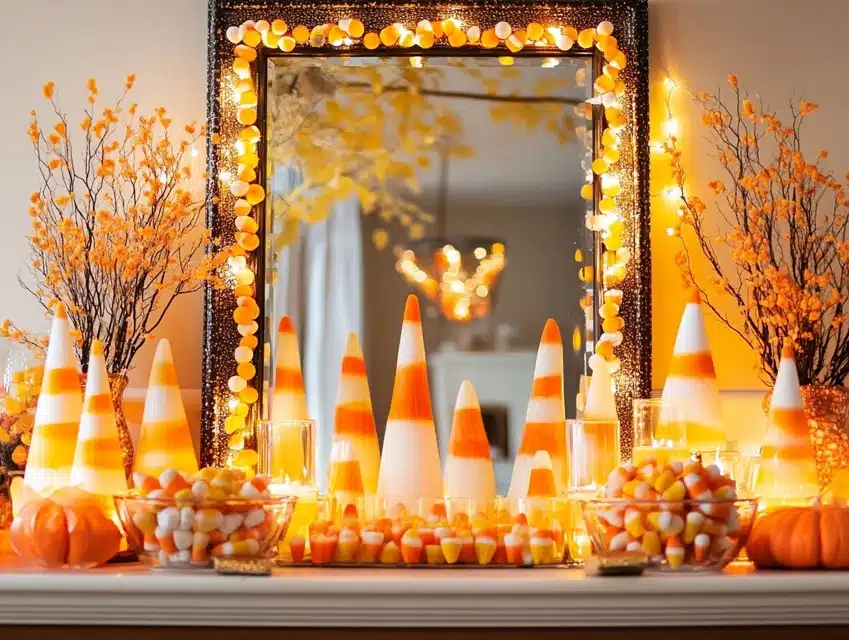
I transformed our fireplace mantel into a candy corn-inspired display that draws everyone’s attention.
The background features a large mirror framed with painted candy corn patterns.
Graduated pillar candles in seasonal colors create height variation across the display.
Small candy corn trees of varying sizes fill spaces between larger elements.
Crystal bowls filled with actual candy corn catch and reflect light beautifully.
Tiny string lights weave through the entire arrangement, creating evening magic.
The entire display changes slightly each week as I rotate seasonal elements.
DIY Steps:
- Clear the mantel completely first.
- Create a scaled arrangement plan.
- Position the largest items first.
- Add lighting elements carefully.
- Layer smaller decorations.
- Create secure anchor points.
- Document arrangement for next year.
17. Table Setting Accents
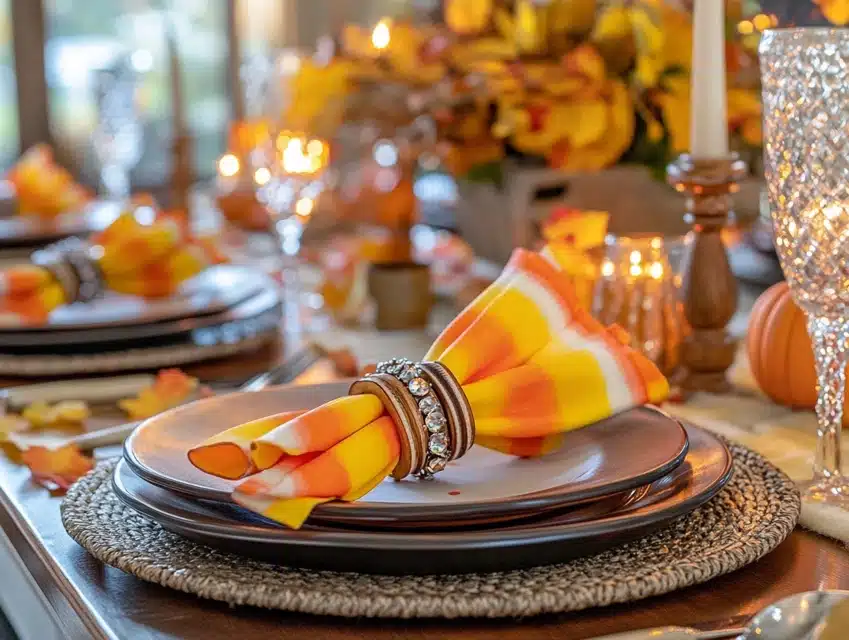
I designed these napkin rings that elevate our autumn dining experience with special attention to detail.
Each ring features three candy corn-colored bands, hand-painted on wooden bases.
Small crystal accents mark the color transitions, catching candlelight during evening meals.
The rings hold napkins in sculptural shapes that showcase all three colors simultaneously.
Matching place cards feature miniature candy corn designs that coordinate perfectly.
The finish remains durable through multiple dinner parties and careful storage.
Every ring includes a felt lining to protect delicate napkin fabrics.
DIY Steps:
- Cut wooden ring bases carefully.
- Sand surfaces are completely smooth.
- Paint color bands precisely.
- Add crystal embellishments.
- Create a protective coating.
- Design storage solutions.
- Make matching place cards.
18. Display Stand Collection
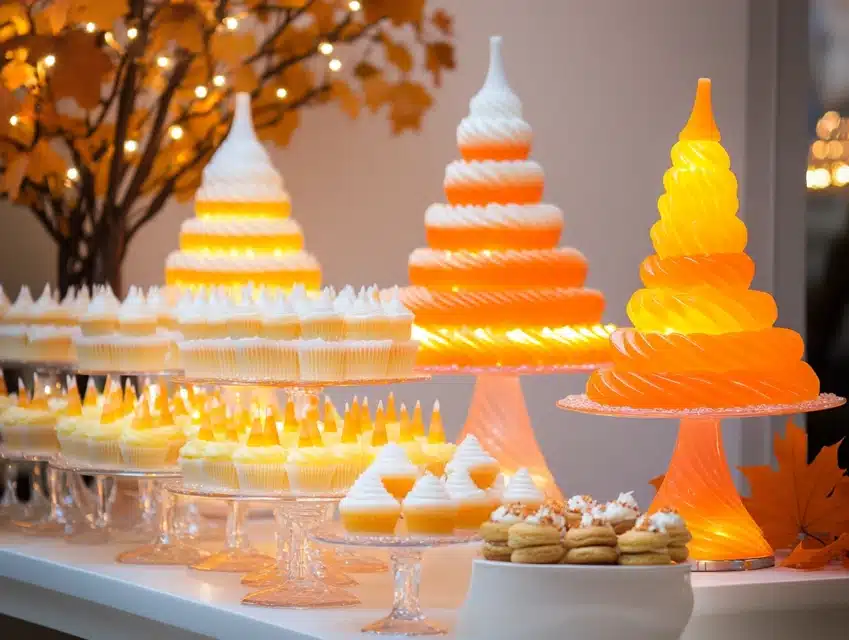
I curated a set of cake stands that create a stunning candy corn-colored dessert display.
The stands feature graduated heights, each painted in flowing candy corn-inspired patterns.
Special food-safe paints ensure treats can be placed directly on surfaces.
LED lights built into the bases illuminate each level with a subtle glow.
The collection works together or as individual accent pieces throughout the home.
Crystal elements added to each stand create sparkle and movement.
The entire set packs efficiently for storage between seasons.
DIY Steps:
- Select various stand heights.
- Create paint protection barriers.
- Apply food-safe color coats.
- Install lighting elements.
- Add crystal decorations.
- Test weight capacity.
- Design storage containers.
Conclusion
After years of developing these candy corn-inspired decorations, I’ve learned that this simple candy offers endless creative possibilities.
Each project brings challenges and rewards, creating unique seasonal displays that delight visitors of all ages.
The key to success lies in careful color selection and attention to detail in every piece.
These decorations work together to create a cohesive autumn theme throughout any space.
Remember that candy corn colors can be sophisticated when properly balanced and thoughtfully displayed.
Most importantly, have fun with your creations – these playful decorations should bring joy to both creators and viewers.
Whether you start small with a single project or transform your entire space, candy corn decorations add warmth and whimsy to the autumn season.
Frequently Asked Questions
Where Can I Buy Candy Corn Decorations?
I find the best selection at craft stores like Michaels and Hobby Lobby starting in late August.
Online marketplaces like Etsy offer unique handmade pieces.
Target and HomeGoods usually stock affordable candy corn-themed items in their seasonal sections.
Local fall festivals often feature artisan-made decorations.
What Are Some Unique Candy Corn Decor Items?
Beyond traditional items, I’ve discovered candy corn-shaped pillows, ceramic serving pieces, and hand-painted furniture.
Look for unexpected items like candy corn stained glass suncatchers, garden stakes, and bathroom sets.
Many artists create one-of-a-kind pieces that incorporate candy corn themes in surprising ways.
How Can I Make DIY Candy Corn Decorations at Home?
Start with simple projects like painted mason jars or wooden signs.
Basic craft supplies in white, orange, and yellow can transform everyday items into candy corn-themed decor.
Before tackling larger pieces, I recommend beginning small projects like painted pumpkins or paper crafts. Most projects need basic supplies from craft stores.
What Are Creative Ways to Decorate with a Candy Corn Theme?
For balance, mix candy corn elements with traditional fall decor. Layer different textures using fabric, paint, and actual candy corn.
Create vignettes combining various candy corn items at different heights. I love incorporating lighting elements to make displays glow.
Remember to spread pieces throughout your space rather than clustering everything together.
Are There Affordable Options for Candy Corn Decor?
Many dollar stores carry candy corn-themed items from September onward.
Create budget-friendly decorations using paint and basic craft supplies. Transform existing fall decor with candy corn colors.
Watch for end-of-season sales to stock up for next year. Consider making simple pieces to save money while getting exactly what you want.

