
Proper lighting gives life to the subject in a photograph. This element emphasizes the right details and sets the mood of a photograph.
Lighting affects a photograph’s overall visual impact and adds more depth.
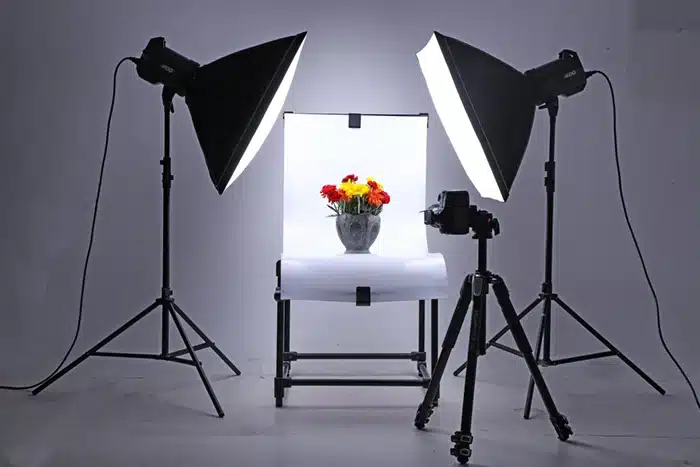
The placement of the light makes all the difference.
From the powerful hard lighting to the more organic and raw natural lighting, your photograph and the emotions it conveys change completely.
Lighting vis-a-vis photography has two elements for a photographer.
The first is to understand how light interacts with the curves of the subject, and the second is to see which sections of the subject are bright and dark.
The most interesting part is that these effects can be achieved by strategically placing various floor lamps.
Read on to learn about the various nuances of each type of lighting and the effect it will achieve.
The 14 Main Key Lighting Types
1. Natural Lighting
Natural light is the type of light that provides illumination without any intervention from humans.
For example, sunlight and moonlight are the two main examples of natural lighting.
It is an organic type of lighting as the light could be diffused by clouds or fog.
2. Flat Lighting
Flat Light is the light that falls directly and completely on the face of the photograph’s subject.
It is an artificial lighting form often used to capture product photographs and portraits.
This lighting technique is widely used in symmetrical photography.
3. Backlight
Backlighting is a well-known technique in placing the light source behind the photograph’s subject.
The technique creates illumination and separates the photograph from the background.
The object is placed precisely between the camera and the source of light.
4. Short Lighting
Short lighting is used to illuminate only one side of the subject in the photograph.
Adopting this technique, the photographer will light the side farther from the lens.
To do this, the photographer places the distant side of the camera in the light and the closest side of the camera in the shadow.
This is one of the classic techniques
5. Broad Lighting
This illumination technique is used to brighten one side of the object more than the other as it will be closer to the lens.
This technique also casts a shadow on the other side of the farther side of the face.
6. Split Lighting
Split lighting is when one part of the subject is illuminated while the other is left in the shadows.
The light falls upon the object at a 90-degree angle. Dramatic portraits are often made using this technique.
7. Rim Lighting
This lighting technique is used when the subject’s outline has to be highlighted.
The light is positioned behind the subject to capture the object’s silhouette or the person in the frame.
The form or the shape is essentially captured rather than capturing the photograph’s subject.
8. Loop Lighting
The key light creates a shadow on the subject’s cheek in the Loop Lighting technique.
Often used to define a face and highlight the cheekbones, this effect is achieved by balancing light and shadow simultaneously.
This can be achieved by strategically placing any floor lamp so that only half the face is illuminated.
9. Fill Light
A fill light is used when the key light creates a shadow on the other side of the object.
For instance, when the light falls on the left of a person’s face, a shadow of the nose will fall on the right side.
Therefore, a fill light is used to illuminate that dark portion of the face. It is used to calculate the depth and the brightness levels.
10. Butterfly Lighting
When the light falls on the object from the top, this technique is called Butterfly Lighting.
This is primarily used for portrait shots to create a shadow beneath the nose and the chin of the subject’s face.
11. Rembrandt Lighting
This technique uses one light and reflector to create a triangle underneath the subject’s eye.
This will allow the photographer to imbue a two-dimensional image with a three-dimensional semblance.
Here, the shadow from the nose merges with the shadow from the cheek.
12. Soft Lighting
Using a diffused light instead of a direct light source will create a soft effect.
There will not be any shadows on any side of the object.
There are barely any contracts between dark and light areas in the photograph.
It is widely used to make authentic portraits and offer a more genuine look.
13. Hard Lighting
A complete opposite of soft light, hard lighting creates clear shadows with a shape contrast.
The photograph is dramatic, as the outline of the subject is well-defined.
This light creates harsh and well-defined shadows.
These kinds of photographs invoke strong emotions and are daunting.
14. Side Lighting
The process of illuminating a single side of the object is called Side Lighting.
This kind of lighting enhances the shape of an object as half of it is left in the shadow.
Also called Chiaroscuro, this type of lighting is preferred by many ace photographers who wish to create high contrast for a brooding effect.
Do you want to know more about floor lamps? Our previous blog on types of floor lamps provides essential context to this topic.
Conclusion
In photography, understanding the importance of correct lighting is paramount.
Lighting sets a context for the photographer and for the viewer as well.
These techniques can be achieved by placing various types of floor lamps strategically.
An expert photographer plays with light and shadow to make visually striking images.
From a mysterious vibe to a clear-cut, in-your-face image, a photograph can say tons about the subject and the viewer.
Therefore, trying the lighting mentioned above is a must to understand every nuance.
Which tip was the most helpful? Let us know in the comments.