35 Unique Fall Wreaths to Craft This Season
As autumn leaves start to fall, the urge to decorate our homes with cozy, seasonal touches grows stronger.
But why settle for store-bought when you can create something truly special?
Imagine opening your front door to find a unique, handcrafted wreath that perfectly captures the essence of fall.
From rustic grapevine designs to modern minimalist hoops, there’s a DIY wreath idea for every style and skill level.
These fall wreath projects will inspire you to bring the warmth and beauty of the season right to your doorstep.
Whether you are a crafting novice or a seasoned pro, you’ll find something here to spark your creativity.
Ready to roll up your sleeves and make a wreath that’ll be the envy of the neighborhood?
Let’s jump into these fun and festive fall wreath ideas!
1. Magnolia Leaf Wreath: A Touch of Southern Charm
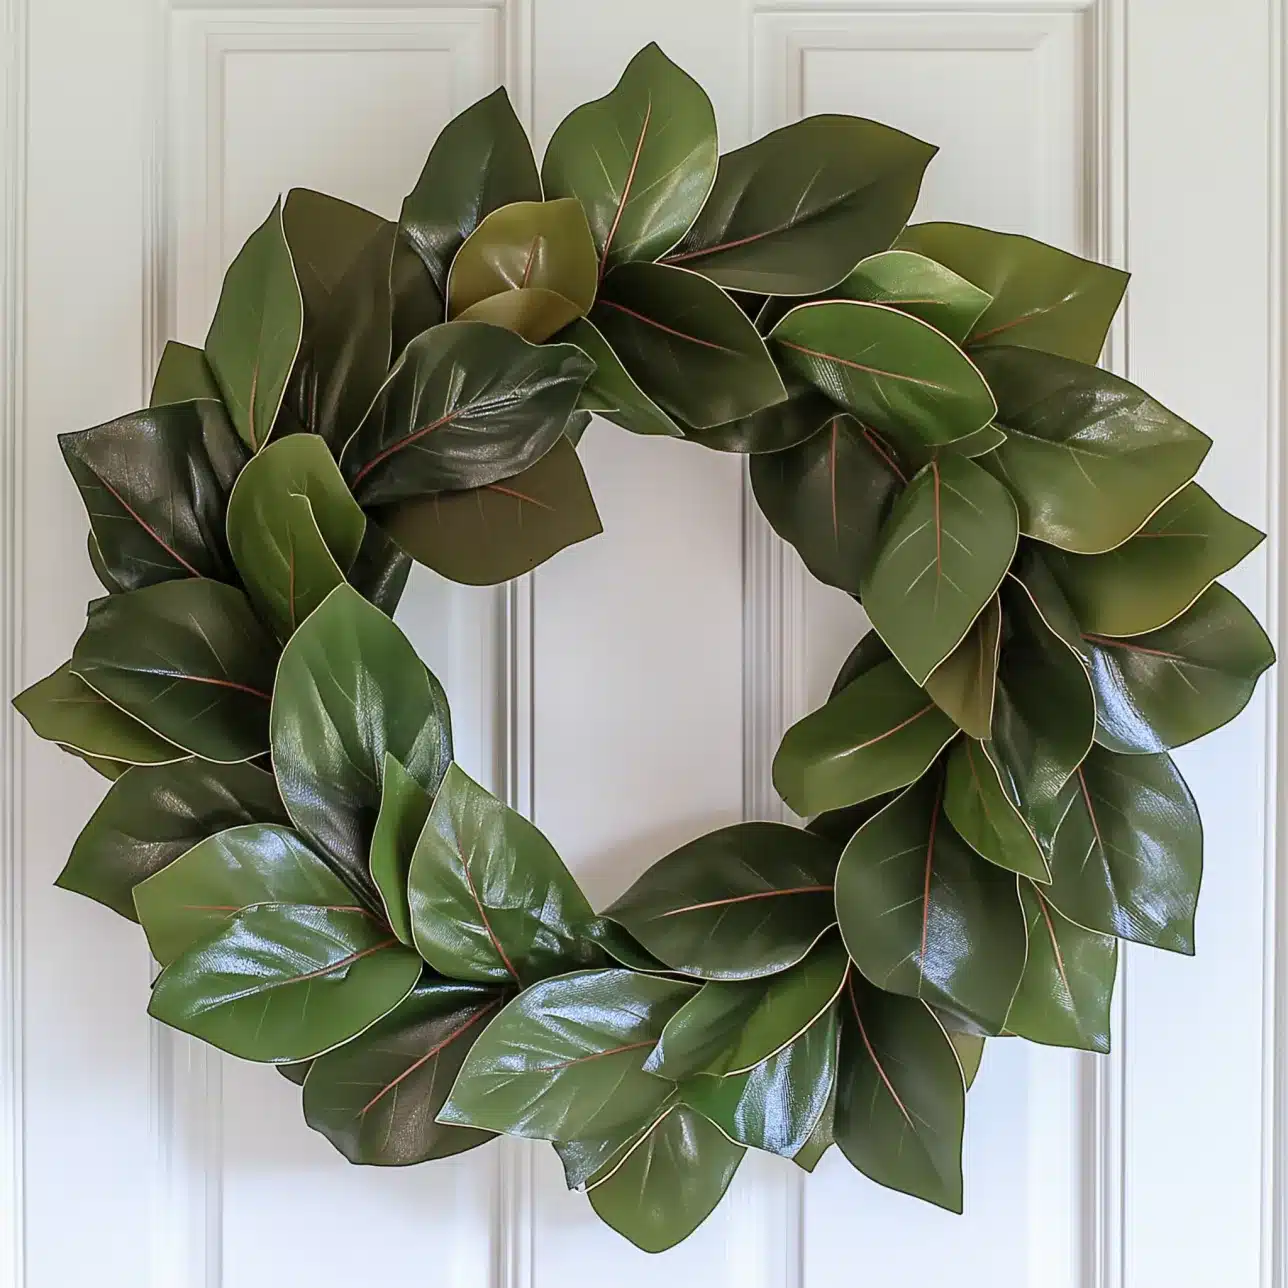
Nothing says classic fall decor quite like a magnolia leaf wreath.
With its large, glossy leaves in deep green hues, this wreath brings a touch of Southern grace to any entryway.
Whether you use fresh leaves for a natural look or opt for faux ones for longevity, the result is equally stunning.
This timeless decoration adds sophistication to your door while capturing the essence of autumn.
Basic Materials Needed
- Fresh or faux magnolia leaves
- Wreath form (grapevine or wire)
- Floral wire
- Hot glue gun and glue sticks
- Pruning shears or scissors
Crafting Process
- Attach leaves to your base
- Overlap them slightly for a full appearance
- Add pinecones or berries for a personal touch
Full Tutorial:Home Made Lovely
Additional Tips
- Preservation: Spray fresh leaves with a clear sealant
- Customization: Add accents like pinecones or berries
- Maintenance: Keep out of direct sunlight; mist occasionally
2. Faux Terracotta Pot Wreath: A Rustic Autumn Delight
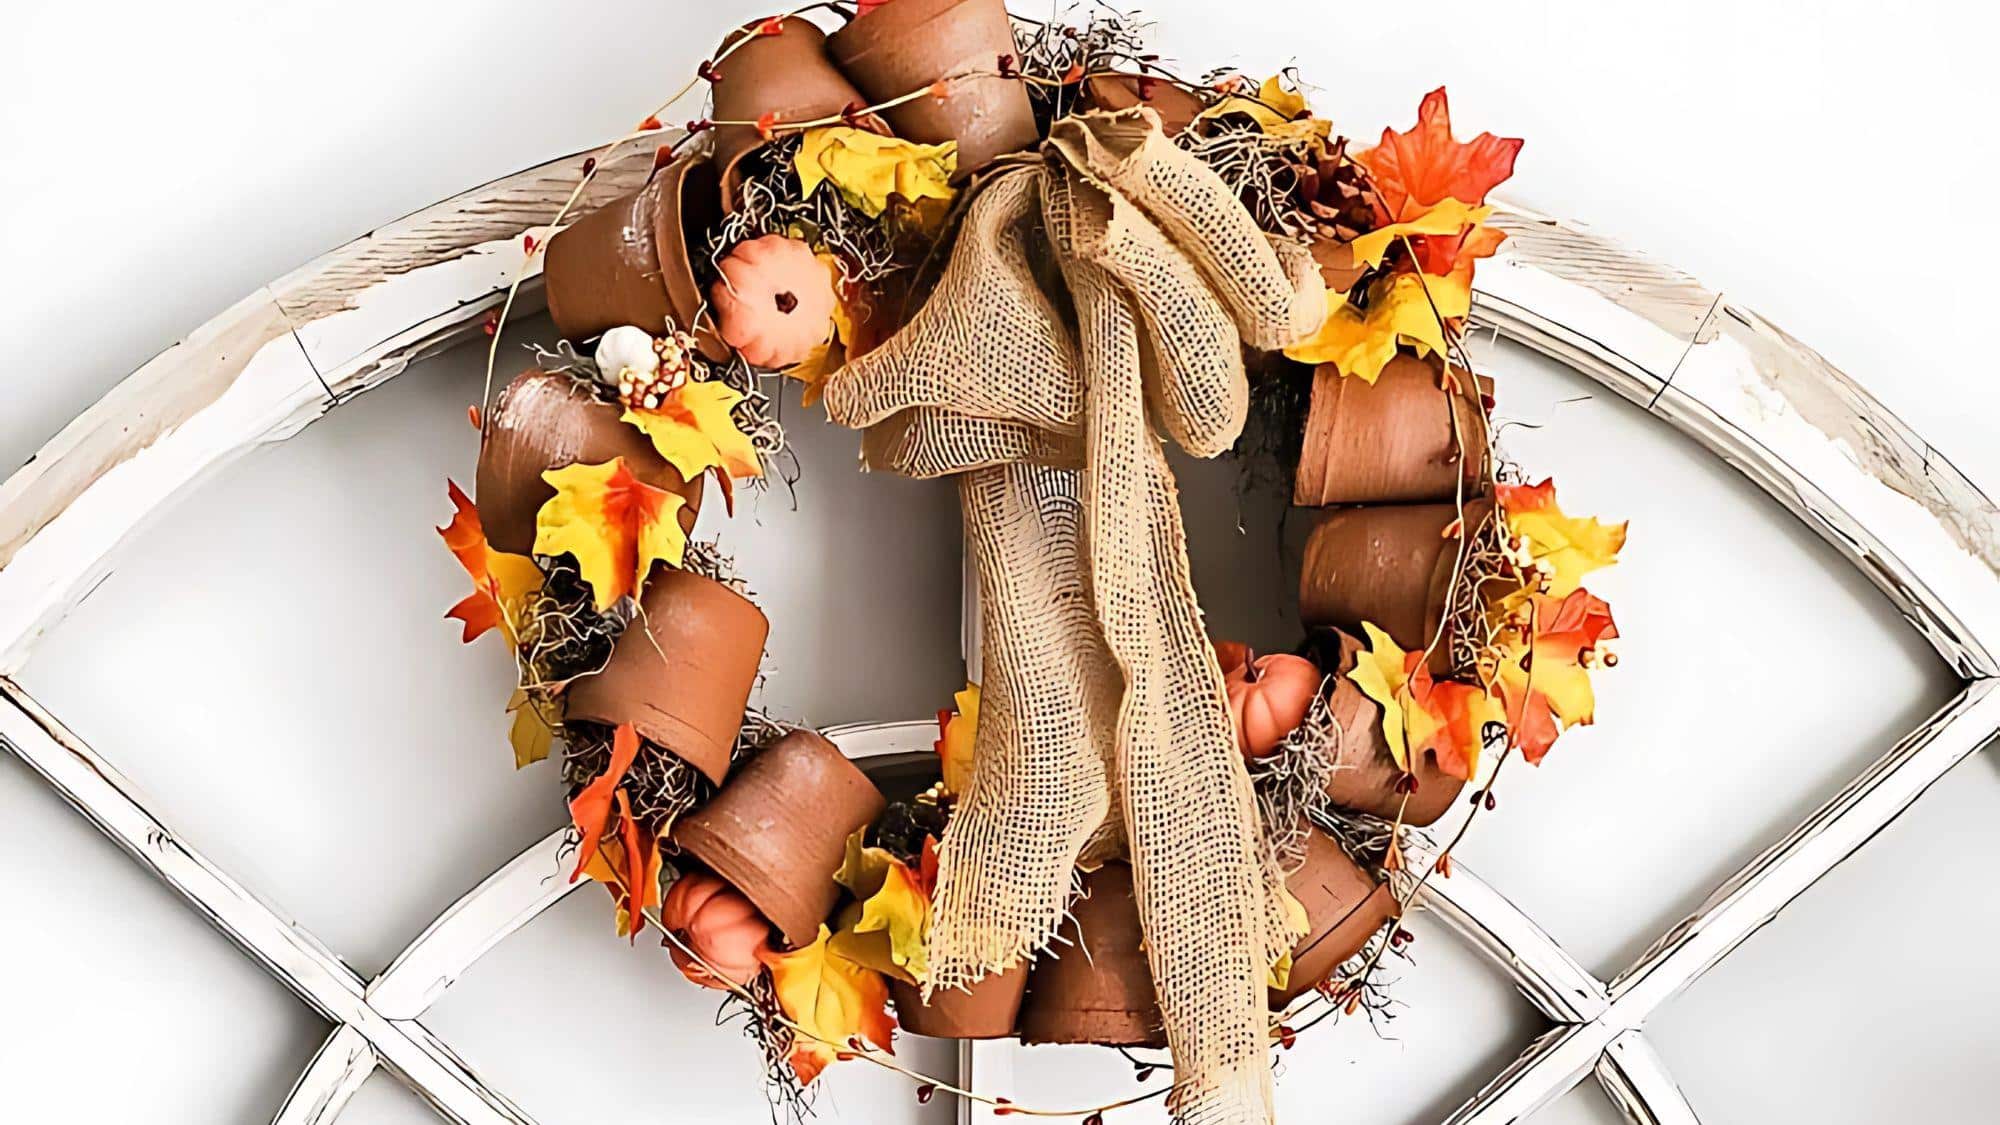
Bring a garden-inspired charm to your fall decor with a faux terracotta pot wreath.
This unique design combines the earthy warmth of miniature clay pots with the cozy autumn feel, creating a standout piece for your home.
The pots’ rich, reddish-brown hues perfectly capture the mood of the season, while their texture adds depth and interest to your door or wall.
Basic Materials Needed
- Miniature terracotta pots
- Wreath form (grapevine or wire)
- Floral wire
- Hot glue gun and glue sticks
- Faux foliage and small pumpkins
- Burlap bow (optional)
Crafting Process
- Position terracotta pots evenly around the wreath form
- Secure pots using floral wire and hot glue
- Add faux foliage and small pumpkins between pots
- Attach a burlap bow for extra flair
Full Tutorial:DIY Beautify
Additional Tips
- Arrangement: Ensure pots are evenly spaced for visual balance
- Securing: Double-check that all elements are firmly attached
- Customization: Mix different sizes of pots or paint them for variety
- Durability: Use weather-resistant materials if hanging outdoors
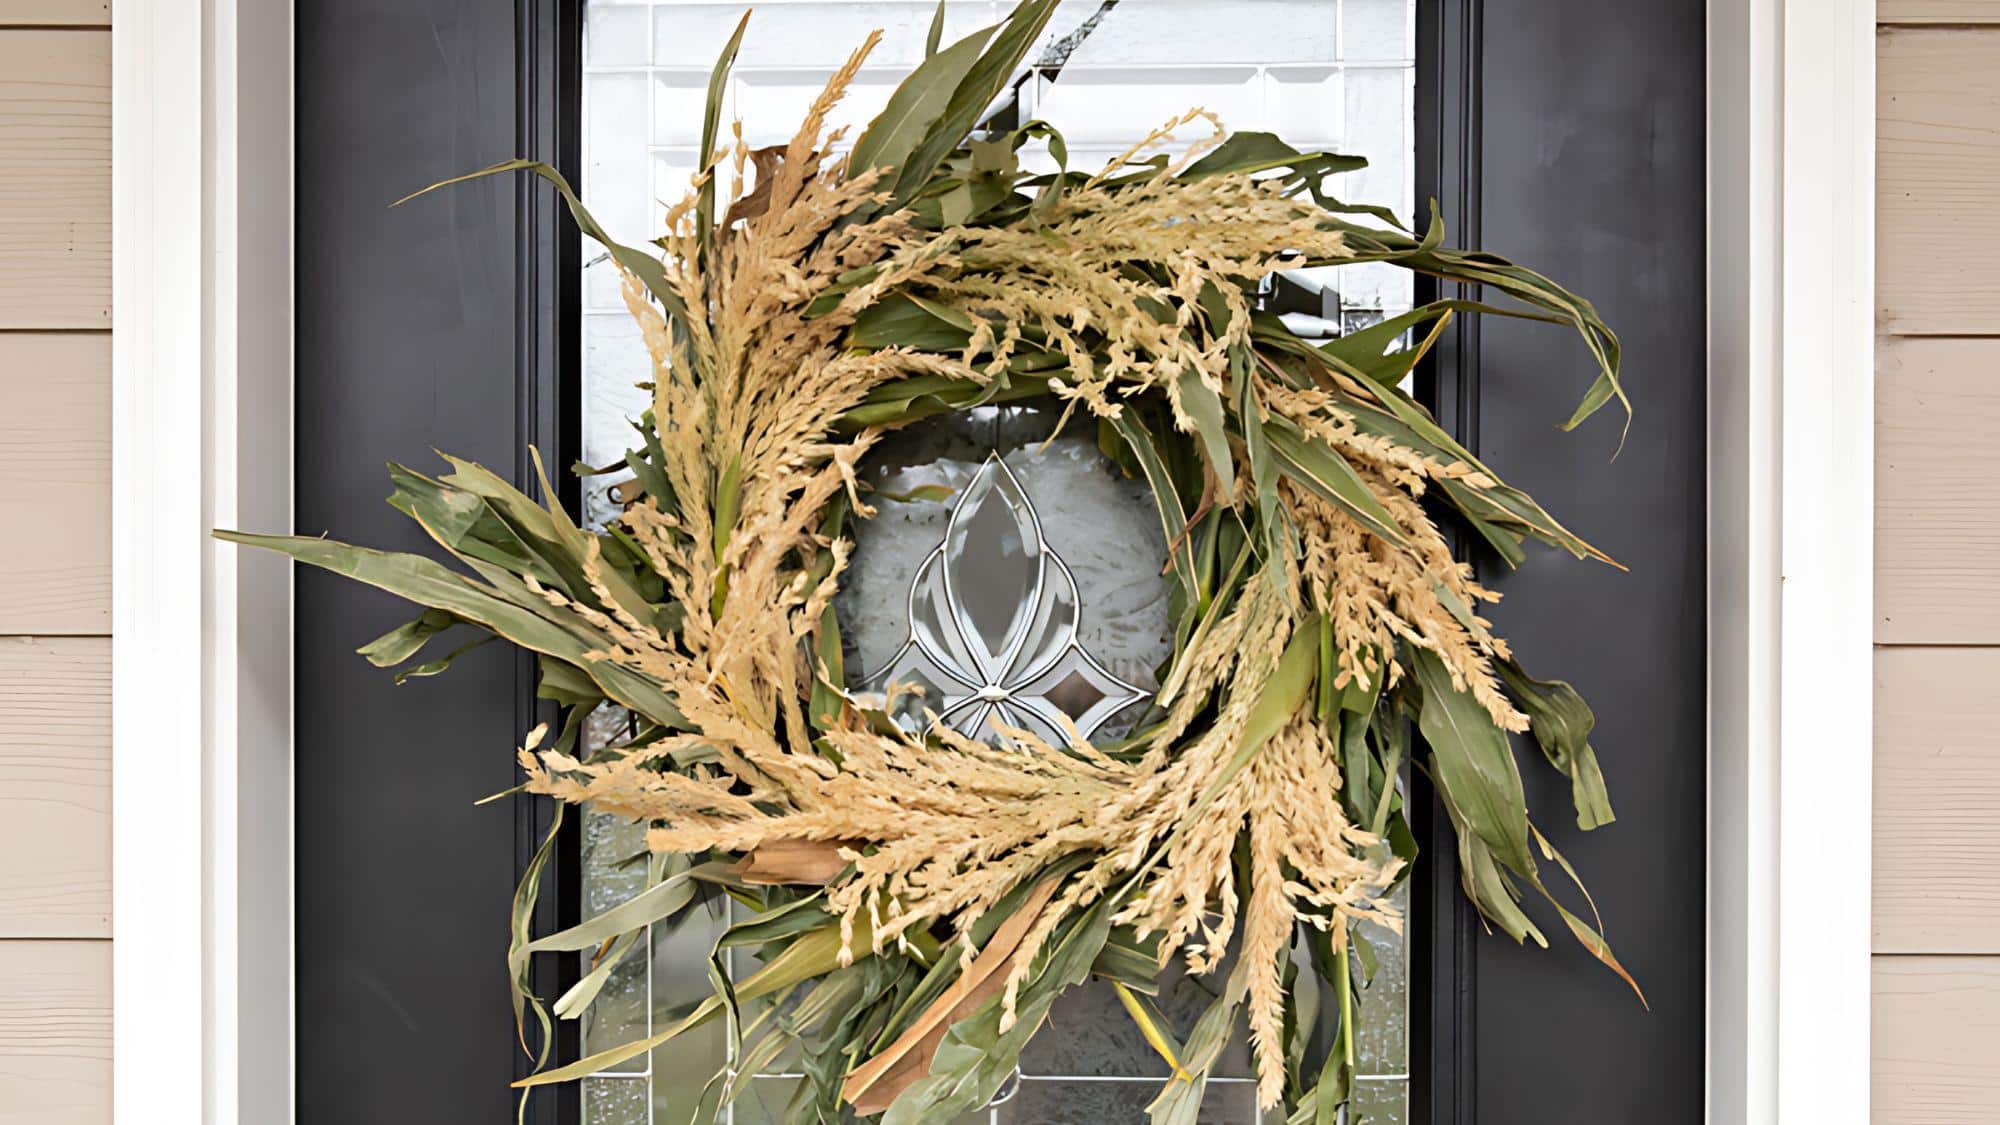
3. Wheat Wreath: Capturing the Golden Essence of Fall
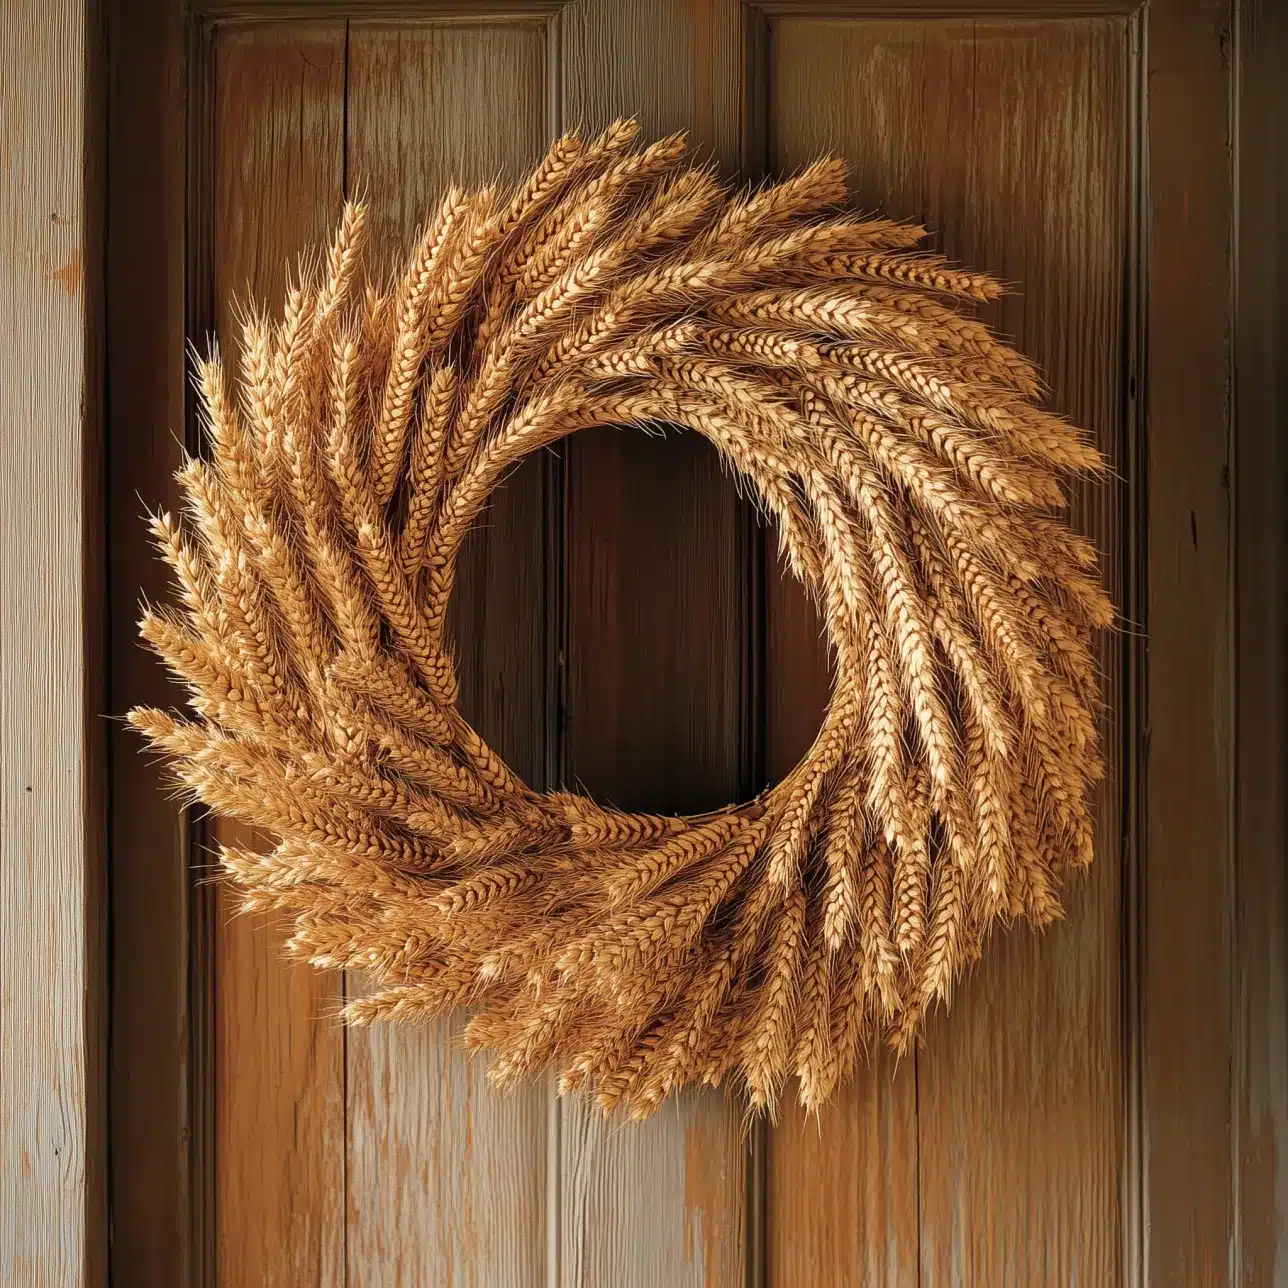
A wheat wreath brings the warmth and beauty of the harvest season right to your door.
This natural, rustic decoration showcases the golden hues of autumn, creating a stunning visual display that celebrates the bounty of fall.
The textured wheat bundles, arranged in a circular form, offer a simple nod to the changing season.
Basic Materials Needed
- Wheat bundles
- Wreath form (foam or grapevine)
- Floral wire
- Hot glue gun and glue sticks
- Ribbon for hanging (optional)
Crafting Process
- Clean and dry wheat bundles thoroughly
- Secure wheat to the wreath form using floral wire
- Overlap bundles for a full, lush appearance
- Trim excess stems and arrange them neatly
- Add a ribbon for hanging if desired
Full Tutorial:Blooming Homestead.
Additional Tips
- Preparation: Use only dry, clean wheat for best results
- Attachment: Wrap wire tightly to keep bundles secure
- Layering: Overlap bundles for a fuller look
- Finishing: Trim and arrange for a neat appearance
- Preservation: Spray with clear sealant to prevent shedding
4. Dyed Coffee Filter Wreath: A Colorful Fall Surprise
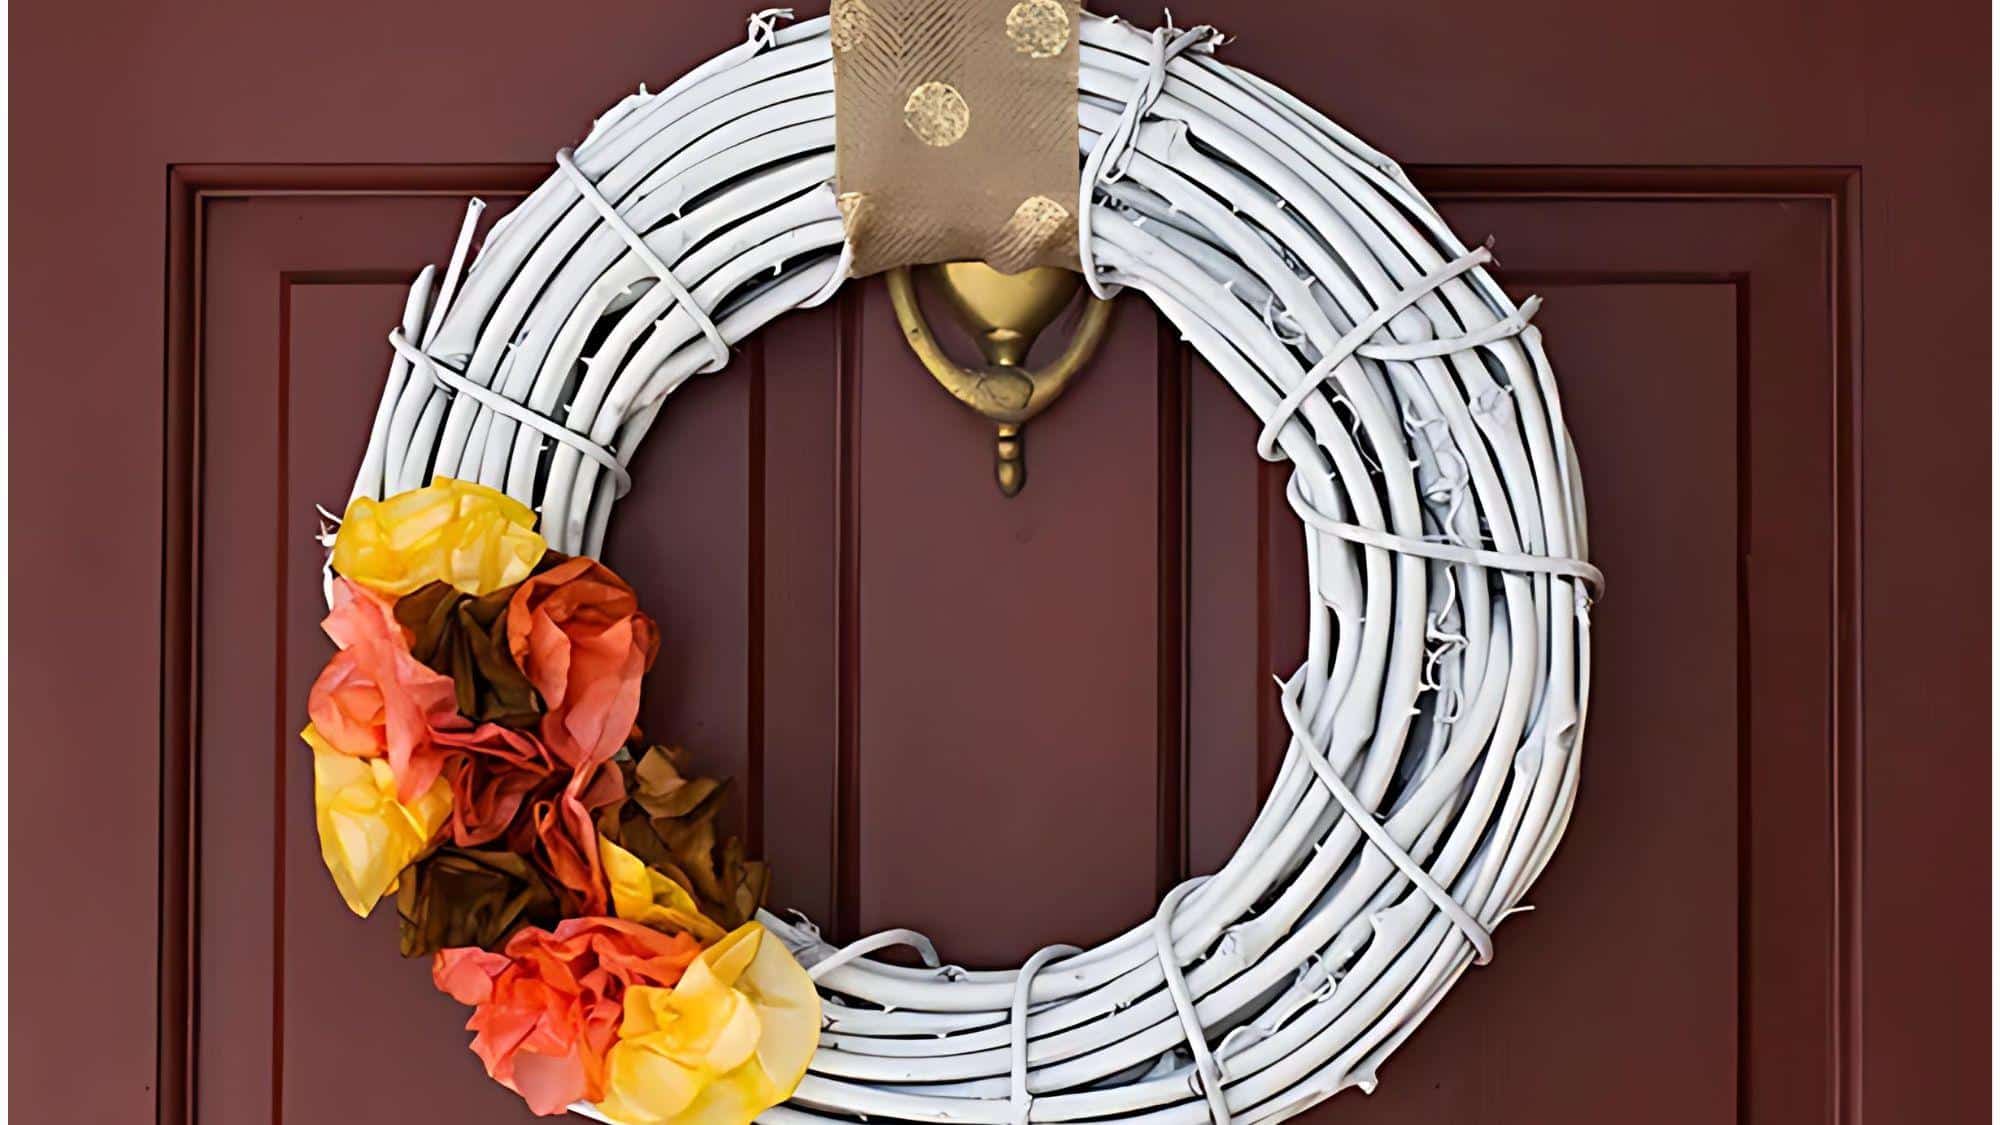
Transform ordinary coffee filters into a vibrant fall decoration with this unique and budget-friendly wreath.
This project offers a playful twist on traditional autumn decor, bringing a burst of color and whimsical texture to your home.
The result is a cheerful, eye-catching wreath that celebrates the season in a fresh, creative way.
Materials Required
- White coffee filters
- Food coloring or fabric dye
- Large bowls for dyeing
- Water
- Wreath form (foam or wire)
- Hot glue gun and glue sticks
- Floral wire (optional)
Crafting Process
- Prepare dye baths with chosen colors
- Dip coffee filters into dye and let dry
- Fold and attach dyed filters to the wreath form
- Layer filters for a full, fluffy appearance
- Add any additional accents as desired
Full Tutorial:Sarah Hearts
Additional Tips
- Color Variations: Mix dyes for a multi-colored or ombre effect
- Customization: Incorporate faux flowers or leaves for extra flair
- Preservation: Display indoors to protect from moisture
- Texture: Crinkle filters for added dimension
5. Fall Gnome Wreath: A Whimsical Welcome

Bring a touch of enchantment to your autumn decor with a delightful fall gnome wreath.
This charming creation combines the cozy feel of autumn with the playful spirit of folklore, resulting in a unique and eye-catching door decoration.
The gnome’s leaf-adorned beard and colorful hat capture the essence of the season while adding a whimsical twist to traditional fall wreaths.
Materials Required
- Faux fall leaves
- Wreath form (foam or grapevine)
- Fabric or felt for gnome hat
- Stuffing (crumpled newspaper or cotton)
- Hot glue gun and glue sticks
- Floral wire
- Scissors
Crafting Process
- Create the wreath base with faux leaves
- Craft the gnome’s hat using fabric or felt
- Form the gnome’s beard with autumn-colored leaves
- Attach hat and beard to the wreath
- Add finishing touches like a small nose or hands
Full Tutorial: One Little Project
Additional Tips
- Customization: Vary hat colors to suit your style
- Securing: Use floral wire for sturdy attachment
- Durability: Ensure all elements are firmly fixed
- Accessories: Add mini pumpkins or acorns for extra charm
6. Feather Wreath: Nature’s Hug
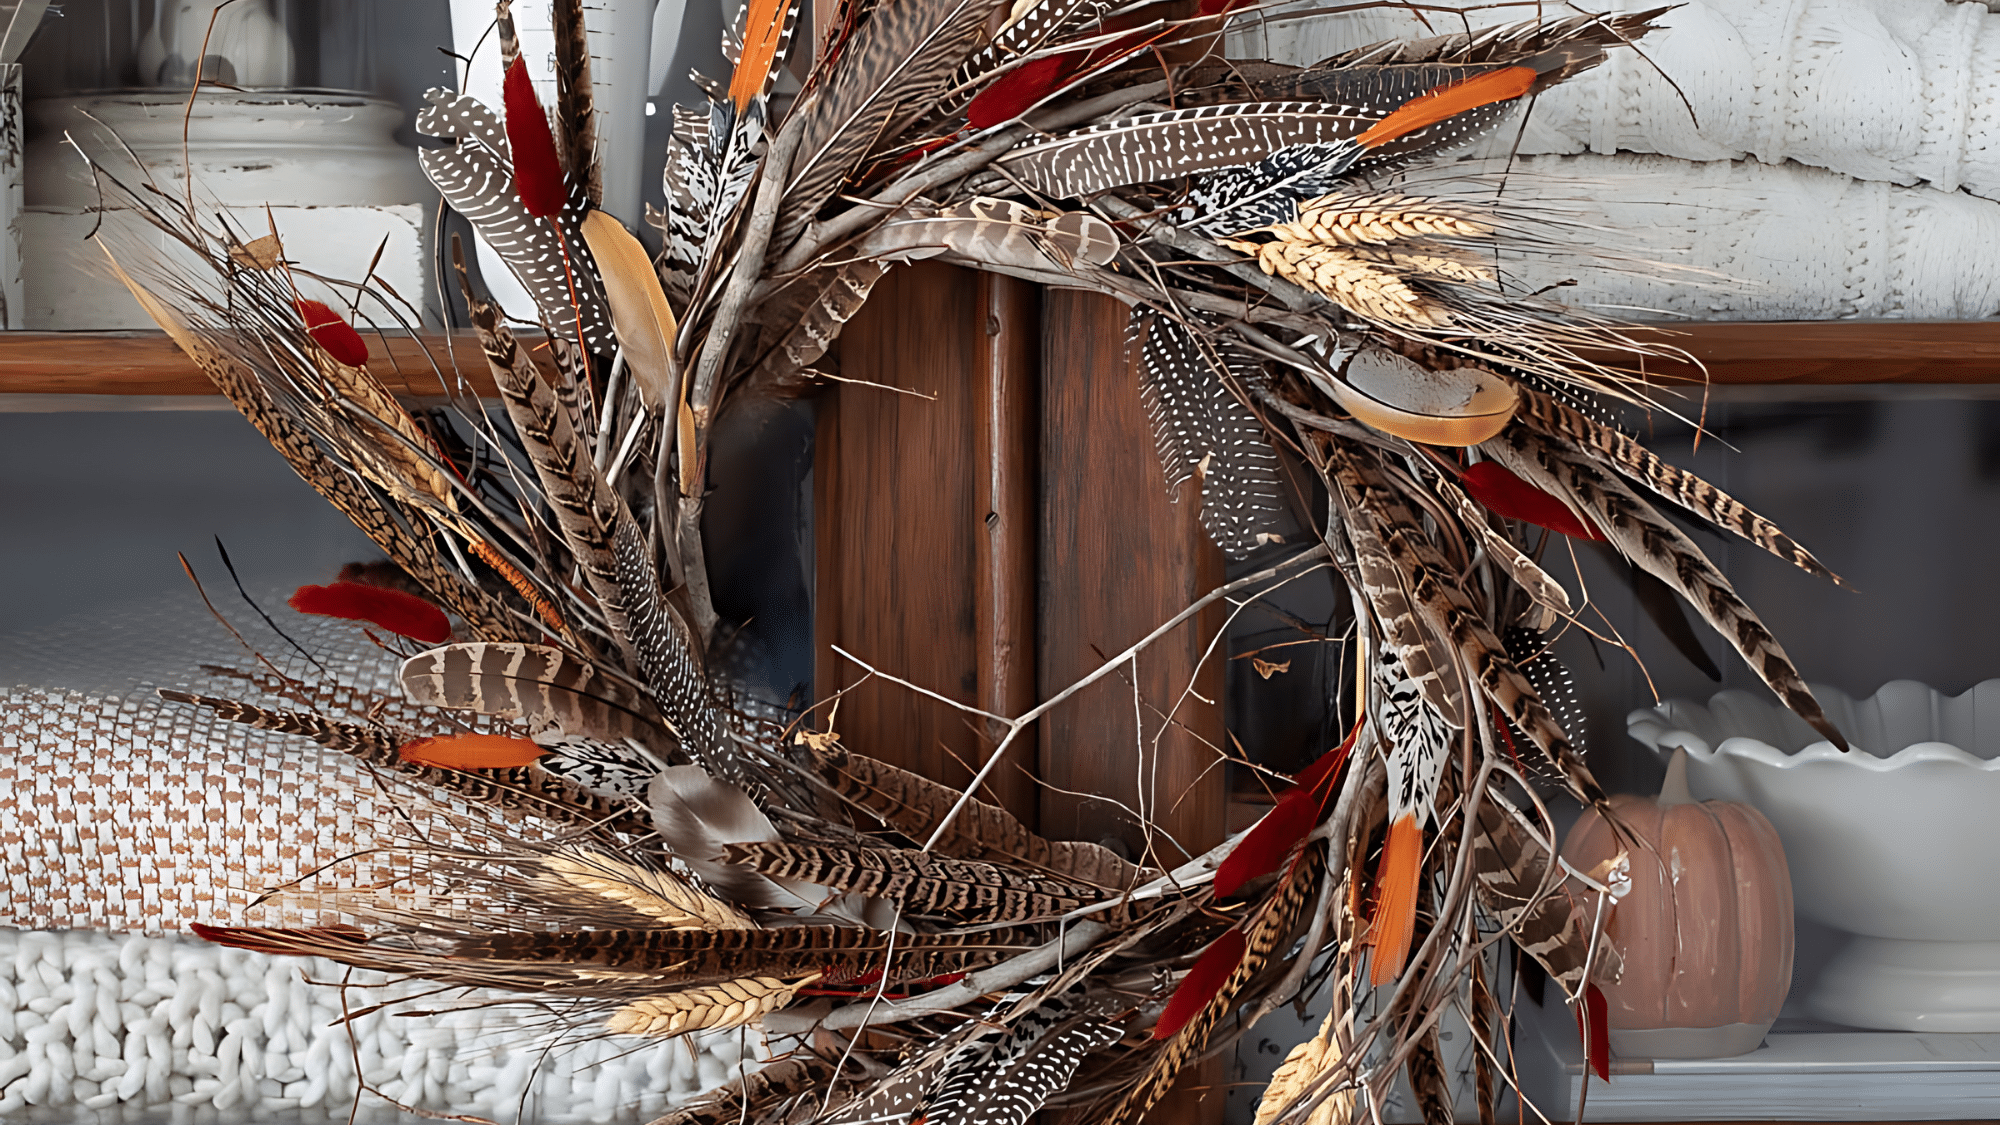
Bring a touch of natural sophistication to your autumn decor with a stunning feather wreath.
This unique creation combines the delicate beauty of feathers with the rustic charm of wheat and twigs, resulting in a wreath that’s earthy.
It’s a perfect way to welcome fall with a nod to the changing seasons and migrating birds.
Materials Required
- Feathers (faux or real)
- Wheat bundles
- Twigs
- Wreath form (foam or grapevine)
- Floral wire
- Hot glue gun and glue sticks
- Ribbon for hanging (optional)
Crafting Process
- Attach twigs to the wreath form as a base
- Layer wheat bundles over the twigs
- Carefully arrange and secure feathers
- Fill in gaps with smaller feathers or wheat
- Add a ribbon for hanging if desired
Full Tutorial:Inspired by Charm
Additional Tips
- Arrangement: Balance feathers and wheat for a cohesive look
- Securing: Use floral wire for sturdy attachment
- Customization: Incorporate pinecones or dried flowers for extra texture
- Color Scheme: Choose feathers that complement your fall color palette
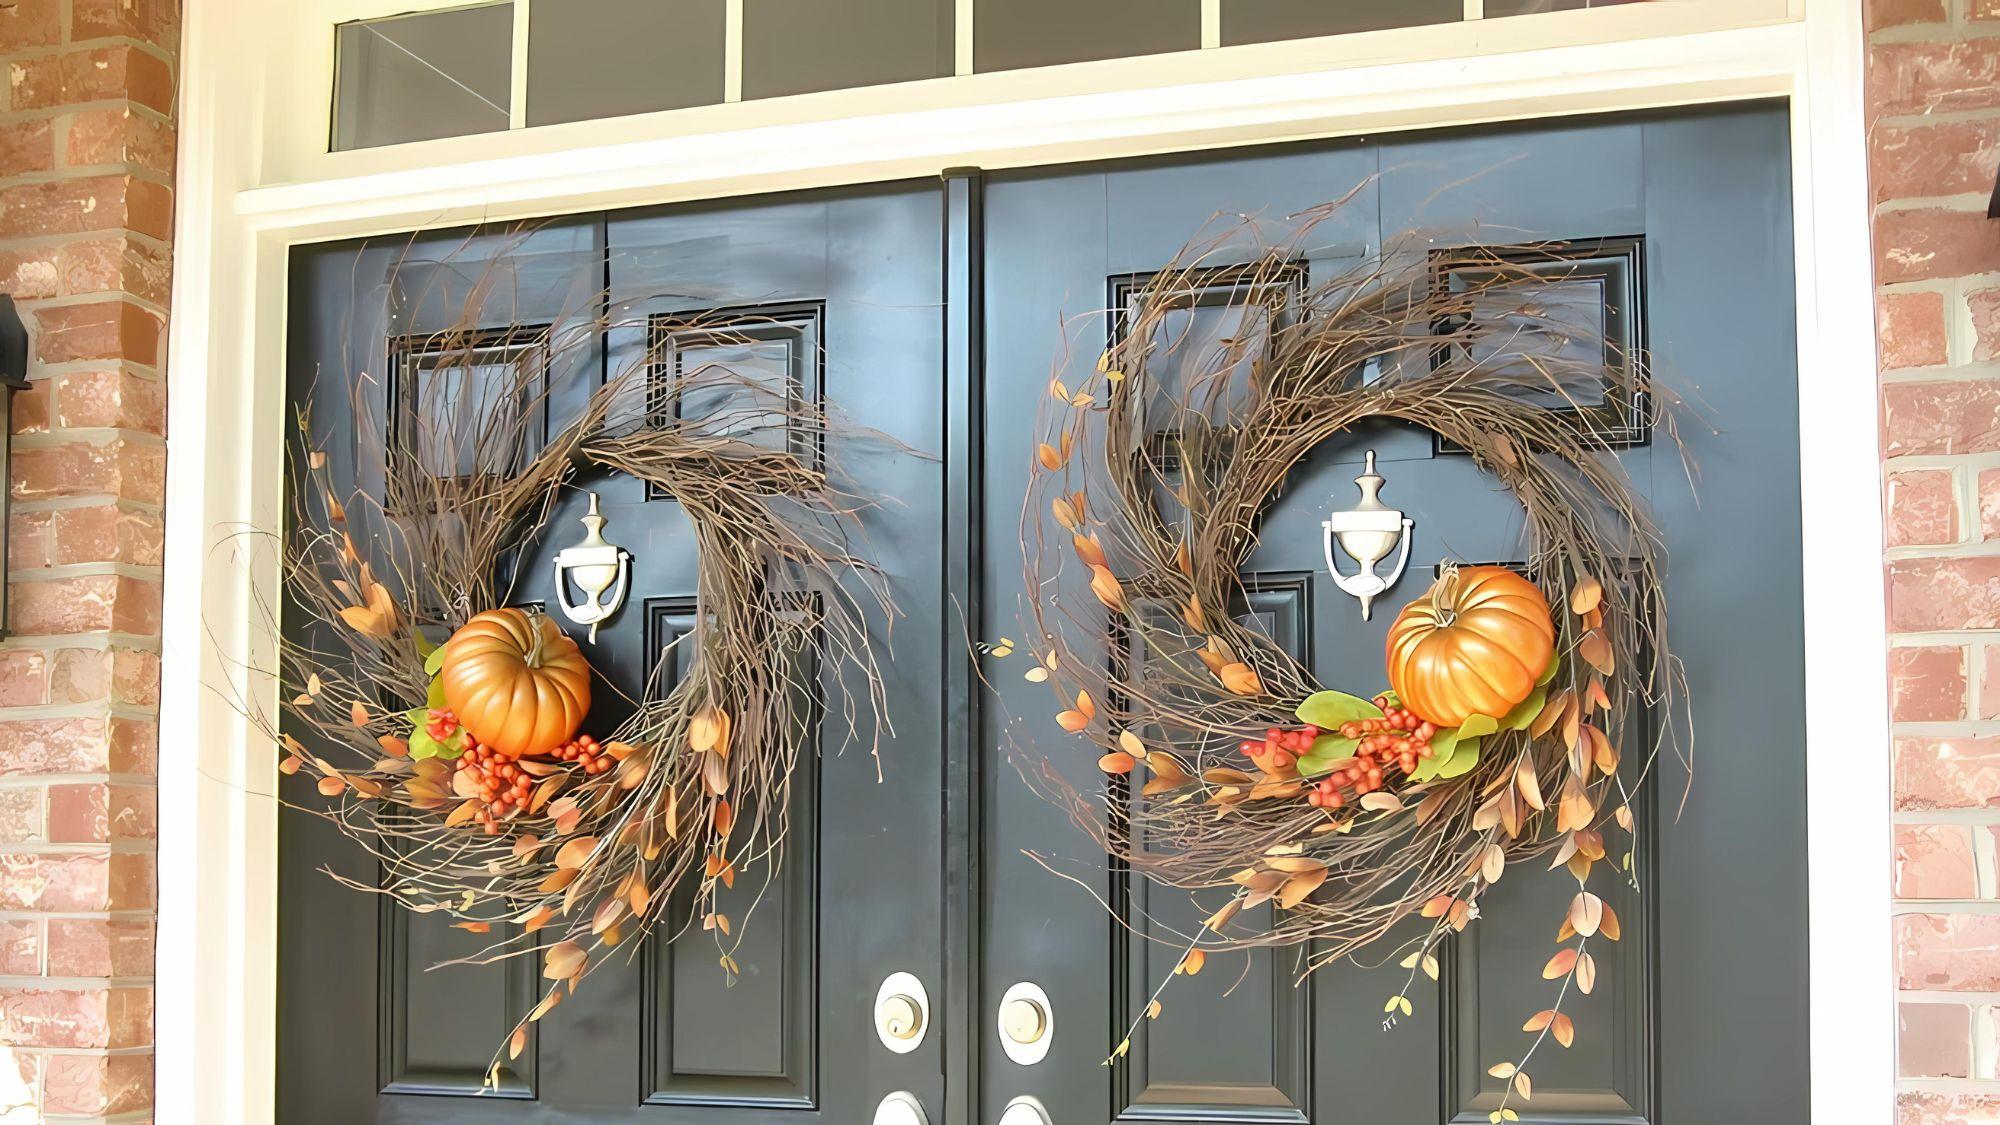
7. Fall Grapevine Wreath: A Classic Autumn Welcome
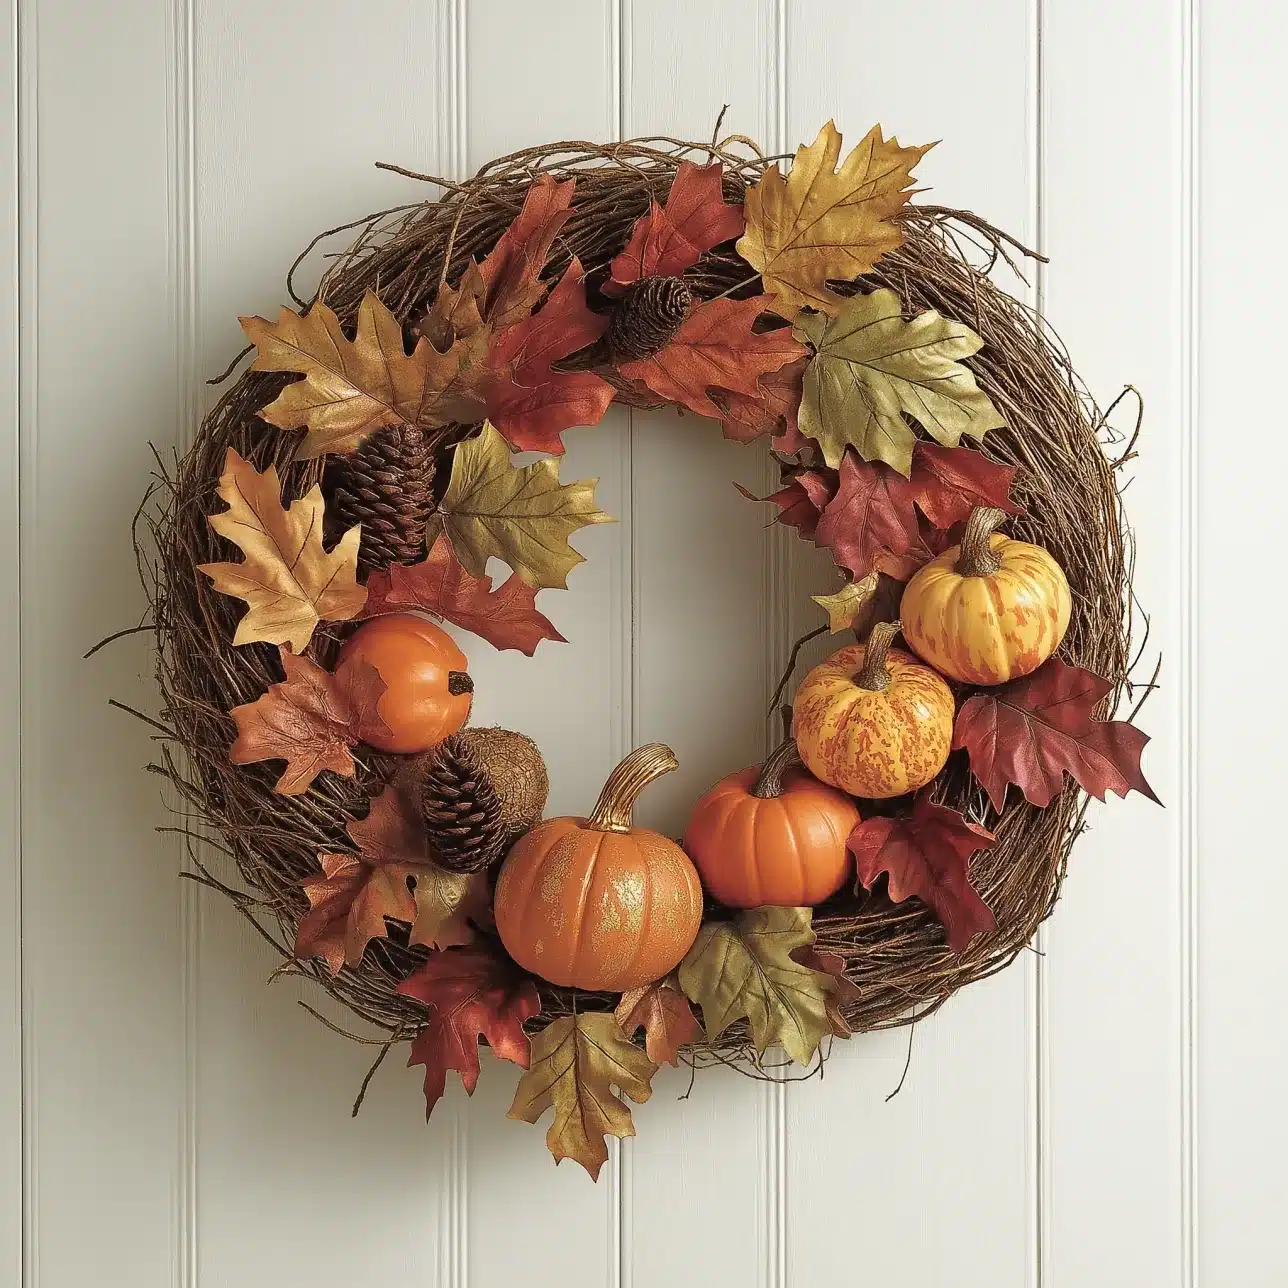
Welcome the heart of autumn with a traditional fall grapevine wreath.
This timeless decoration brings together the best elements of the season – rustic textures, warm colors, and nature’s bounty.
The grapevine base provides a perfect foundation for showcasing a variety of fall favorites, from colorful leaves to plump pumpkins, creating a wreath that truly captures the spirit of the harvest season.
Materials Required
- Grapevine wreath form
- Faux foliage (leaves, berries)
- Pinecones
- Small pumpkins or gourds
- Floral wire
- Hot glue gun and glue sticks
- Ribbon for hanging (optional)
Crafting Process
- Start with the grapevine wreath as your base
- Attach larger faux foliage pieces evenly around the wreath
- Add pinecones and small pumpkins for texture
- Fill in gaps with smaller leaves and berries
- Secure a ribbon for hanging if desired
Full Tutorial:Crazy Little Projects
Additional Tips
- Layering: Evenly distribute elements for a balanced look
- Securing: Use floral wire for heavier items like pumpkins
- Customization: Add a monogram or seasonal sign in the center
- Color Scheme: Mix warm autumn hues for a cohesive design
8. Sunflower Wreath: A Burst of Autumn Sunshine
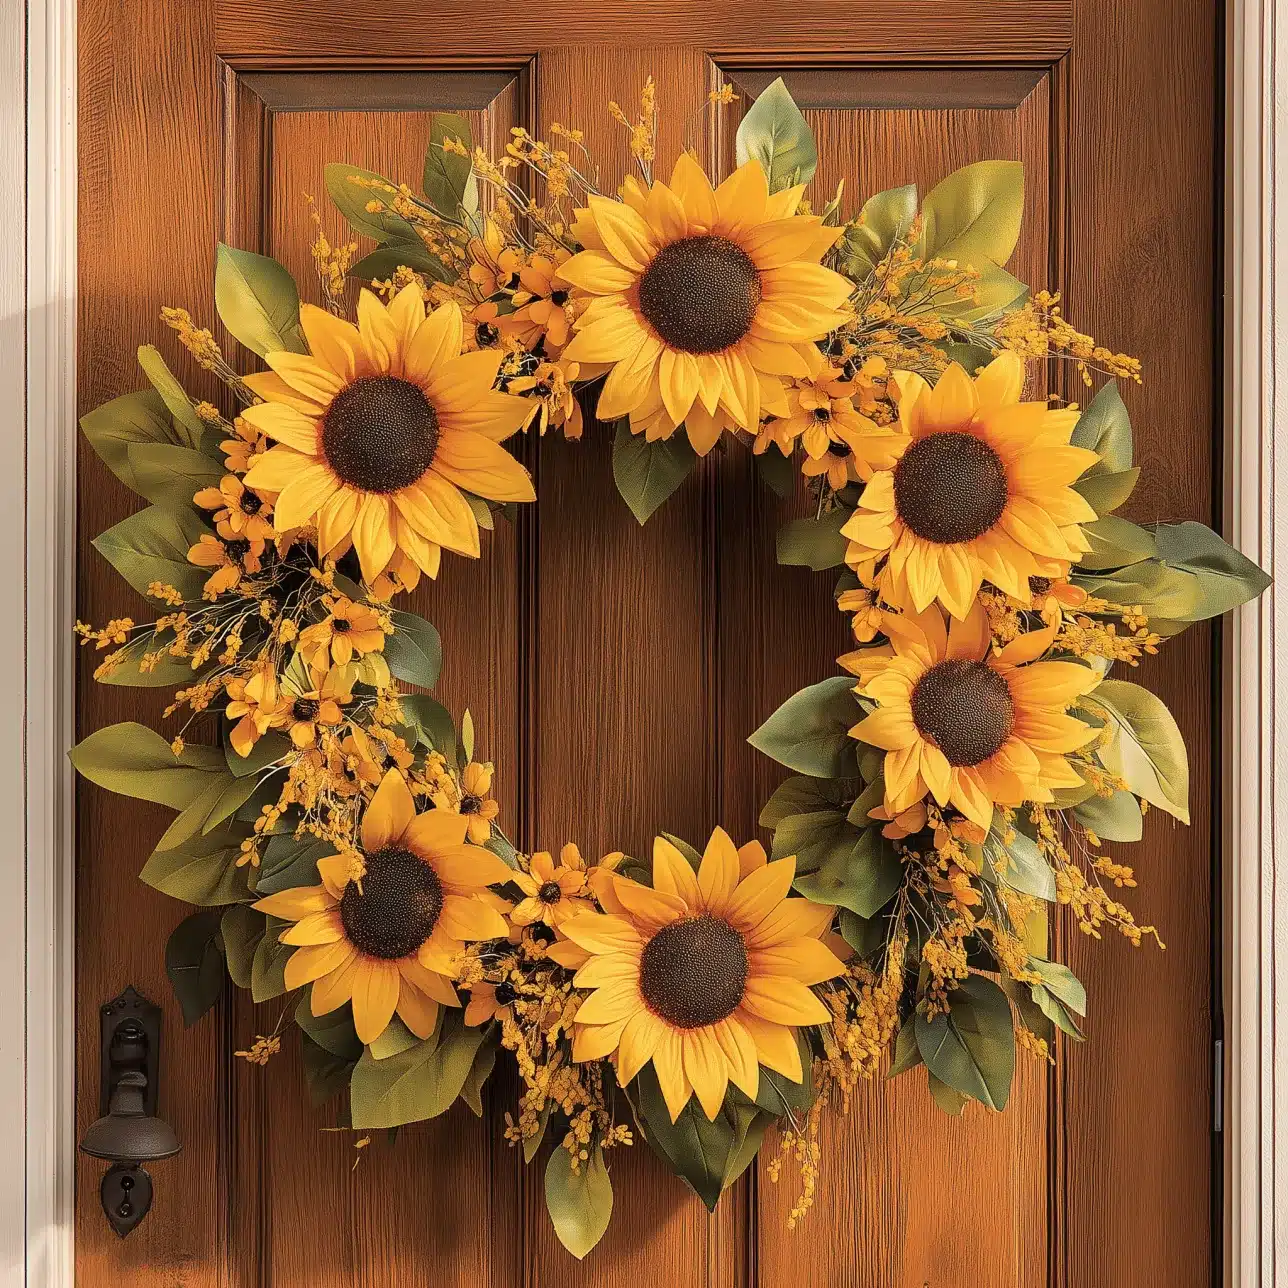
Bring the warmth and cheer of late summer into your fall decor with a stunning sunflower wreath.
This bright and inviting creation captures the essence of the harvest season, offering a sunny welcome to all who visit your home.
With its rich, golden hues and simple beauty, a sunflower wreath is the perfect way to transition your decor from summer to autumn.
Materials Required
- Faux sunflowers (yellow or orange)
- Wreath form (foam or grapevine)
- Floral wire
- Hot glue gun and glue sticks
- Greenery (optional)
- Ribbon for hanging (optional)
Crafting Process
- Prepare your wreath form
- Arrange sunflowers evenly around the form
- Secure flowers with floral wire and hot glue
- Add greenery between sunflowers if desired
- Attach a ribbon for hanging
Full Tutorial:Houseful of Handmade
Additional Tips
- Arrangement: Ensure even placement for a balanced look
- Securing: Use both wire and glue for sturdy attachment
- Customization: Mix in small accent flowers or autumn leaves
- Color Variation: Consider using both yellow and orange sunflowers for depth
9. Woodsy Fall Log Wreath: Bringing the Forest to Your Door
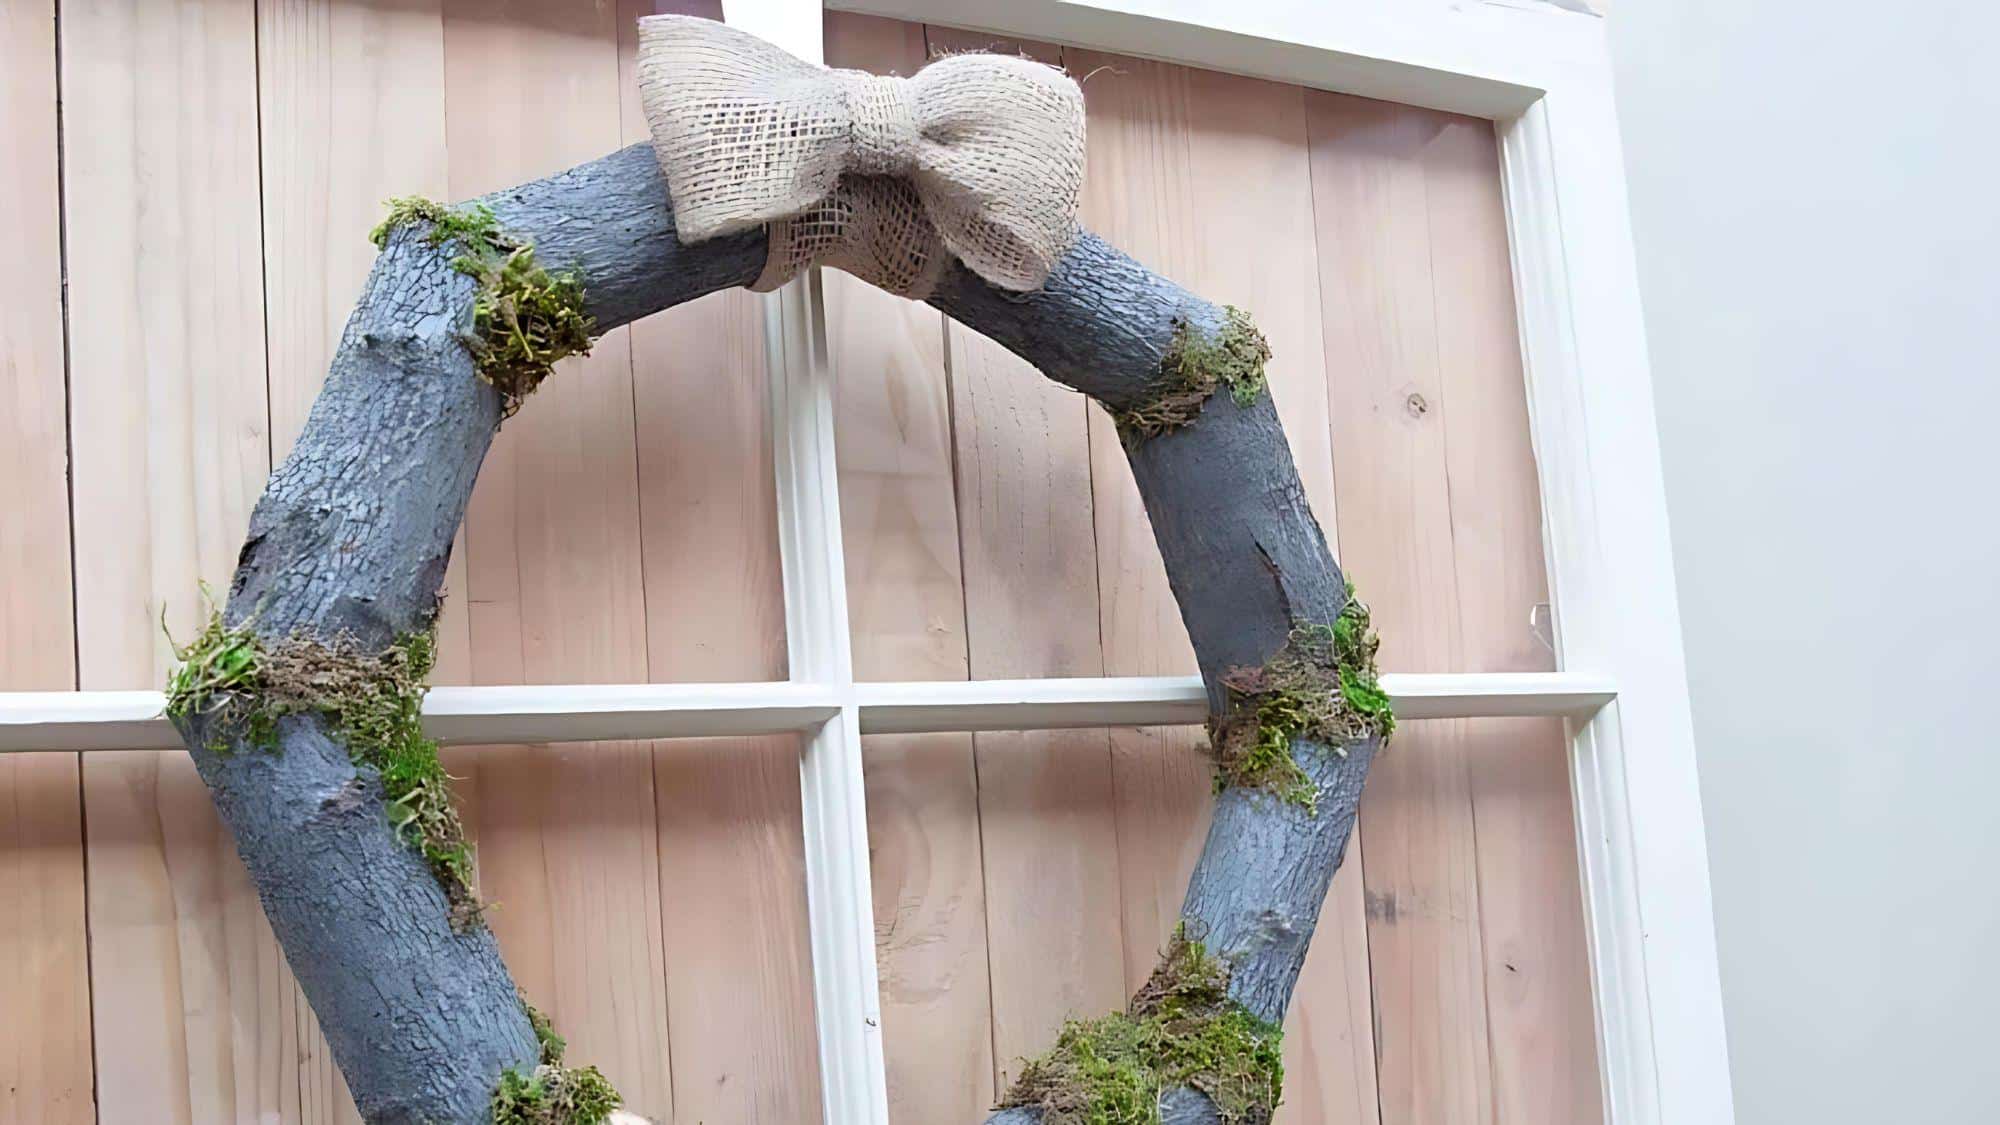
Welcome the rustic charm of autumn with a woodsy fall log wreath.
This unique creation brings the natural beauty of the forest right to your doorstep, offering a rugged and earthy welcome to the season.
Using simple materials found in nature, you can craft a wreath that looks stunning and connects your home to the great outdoors.
Materials Required
- Tree branches (similar size)
- Moss
- Wreath form (wire or foam)
- Floral wire
- Hot glue gun and glue sticks
- Ribbon for hanging (optional)
Crafting Process
- Gather similarly sized tree branches
- Attach branches to the wreath form using floral wire
- Fill gaps between branches with moss
- Secure moss with hot glue
- Add a ribbon for hanging if desired
Full Tutorial: Get the step-by-step instructions [here](link to tutorial).
Additional Tips
- Securing Branches: Use floral wire for sturdy attachment
- Adding Moss: Fill gaps for a cohesive, textured look
- Customization: Incorporate pinecones or acorns for extra woodland flair
- Safety: Ensure branches are clean and pest-free before use
10. Pumpkin Grapevine Wreath: Simplicity for Fall
Embrace the essence of autumn with a pumpkin grapevine wreath that perfectly balances rustic charm and modern grace.
This wreath design offers a minimalist approach to fall decor.
It focuses on the iconic pumpkin shape nestled within the natural twists of grapevines.
It’s a sophisticated yet warm welcome for your home that captures the spirit of the harvest season.
Materials Required
- Small faux pumpkins
- Grapevine wreath form
- Floral wire
- Hot glue gun and glue sticks
- Greenery or leaves (optional)
- Ribbon for hanging (optional)
Crafting Process
- Select a grapevine wreath as your base
- Arrange faux pumpkins evenly around the wreath
- Secure pumpkins with floral wire and hot glue
- Add optional greenery or leaves for contrast
- Attach a ribbon for hanging if desired
Full Tutorial:Crafts by Amanda
Additional Tips
- Positioning: Ensure pumpkins are evenly spaced for balance
- Securing: Use both wire and glue for sturdy attachment
- Customization: Add a burlap bow or seasonal sign for personal flair
- Color Scheme: Choose pumpkin colors that complement your home’s exterior
11. Fall Charger Wreath: Country Chic Charm for Your Door

Bring a touch of farmhouse flair to your autumn decor with a delightful fall charger wreath.
This unique design transforms a simple charger plate into a charming focal point, combining rustic elements with cozy country style.
It’s a fresh take on traditional wreaths that adds warmth and personality to your home’s entrance.
Materials Required
- Charger plate
- Faux florals (leaves, berries)
- Wooden words or signs
- Gingham ribbon
- Hot glue gun and glue sticks
- Floral wire
Crafting Process
- Begin with the charger plate as your base
- Arrange faux florals around the plate’s edge
- Secure wooden words or signs in the center
- Add gingham ribbon for a country touch
- Attach a loop for hanging
Full Tutorial:The Craft Patch
Additional Tips
- Attachment: Use both glue and wire for secure fastening
- Customization: Select florals that match your home’s color scheme
- Finishing Touches: Create a gingham bow for extra charm
- Balance: Ensure even distribution of elements around the charger
12. Brown Paper Bag Wreath: A Rustic Fall Charmer
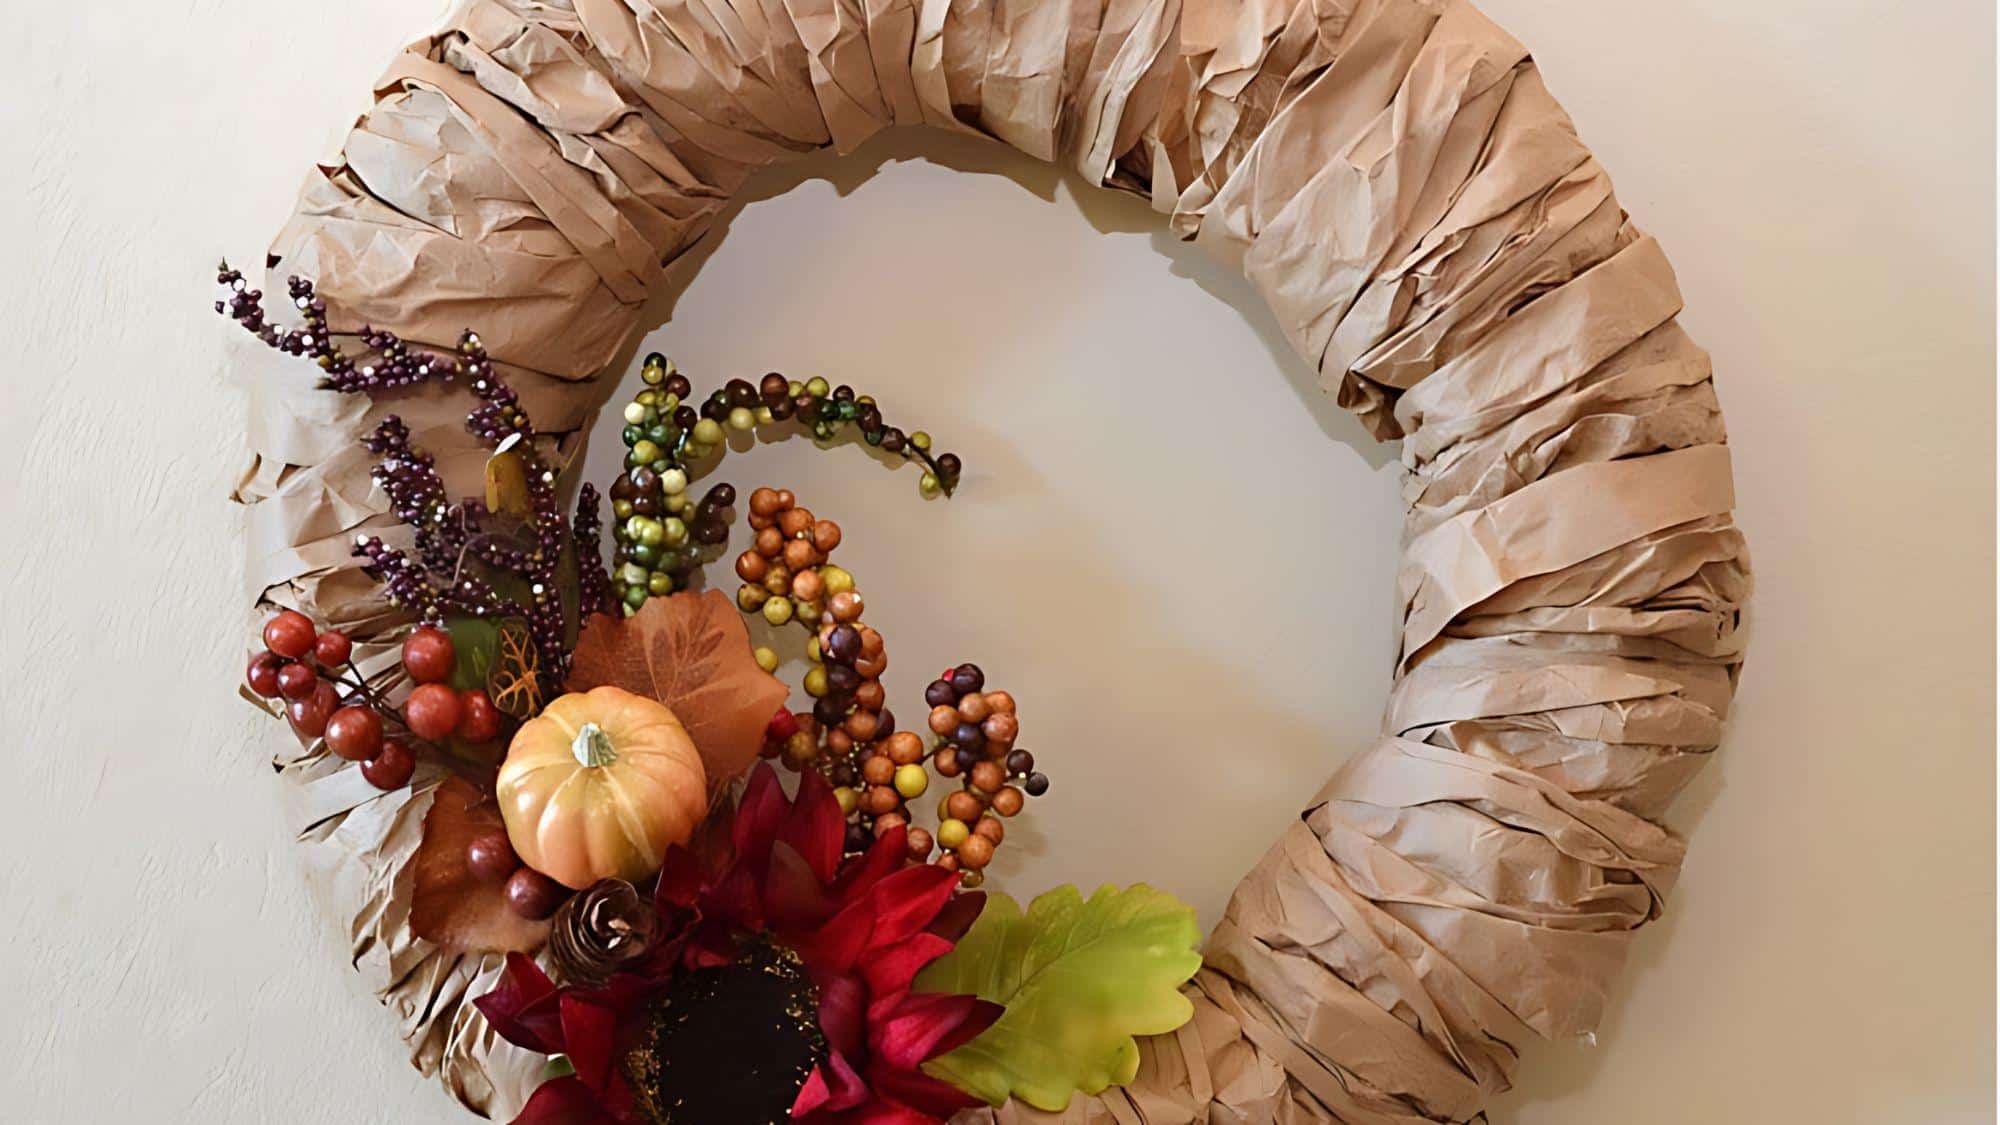
Transform ordinary brown paper bags into a stunning autumn wreath that’s both eco-friendly and budget-conscious.
This charming DIY project combines simplicity with rustic appeal, creating a unique door decoration that captures the essence of fall.
By pairing crumpled kraft paper with faux foliage, you can craft a wreath that will impress guests and spark conversation.
Materials Required
- Brown paper bags or packing paper
- Faux fall foliage
- Wreath form (foam or wire)
- Hot glue gun and glue sticks
- Scissors
- Ribbon for hanging (optional)
Crafting Process
- Cut and crumple paper bags to create texture
- Attach paper to wreath form using hot glue
- Add faux fall foliage for color and depth
- Secure all elements with hot glue
Full tutorial:Dream A Little Bigger
Additional Tips
- Texture variety: Vary paper textures for visual interest.
- Durability: Ensure all elements are securely attached for outdoor use.
- Personalization: Customize with extras like pinecones or small pumpkins.
13. Autumn Paper Leaf Wreath: A Festive Fall Favorite

Bring the vibrant colors of autumn indoors with this charming paper leaf wreath.
Crafted from scrapbook paper and glitter cardstock, this DIY project offers a playful and colorful twist on traditional fall decor.
The result is an eye-catching wreath that captures the essence of the season, perfect for brightening up your home or welcoming guests at your door.
Materials Required
- Scrapbook paper in fall colors
- Glitter cardstock
- Wreath form (foam or wire)
- Hot glue gun and glue sticks
- Scissors
- Ribbon for hanging (optional)
Crafting Process
- Cut various leaf shapes from scrapbook paper and cardstock
- Arrange leaves on wreath form, overlapping for depth
- Secure leaves with hot glue
- Add glitter cardstock leaves for sparkle and contrast
Full tutorial:Polkadot Chair
Additional Tips
- Leaf variety: Cut out different leaf shapes and sizes for a more natural look.
- Depth creation: Layer leaves to add dimension and visual interest to your wreath.
- Color coordination: Choose paper colors and patterns that complement your existing fall decor.
14. Silver Tray Wreath: A Customizable Autumn Welcome
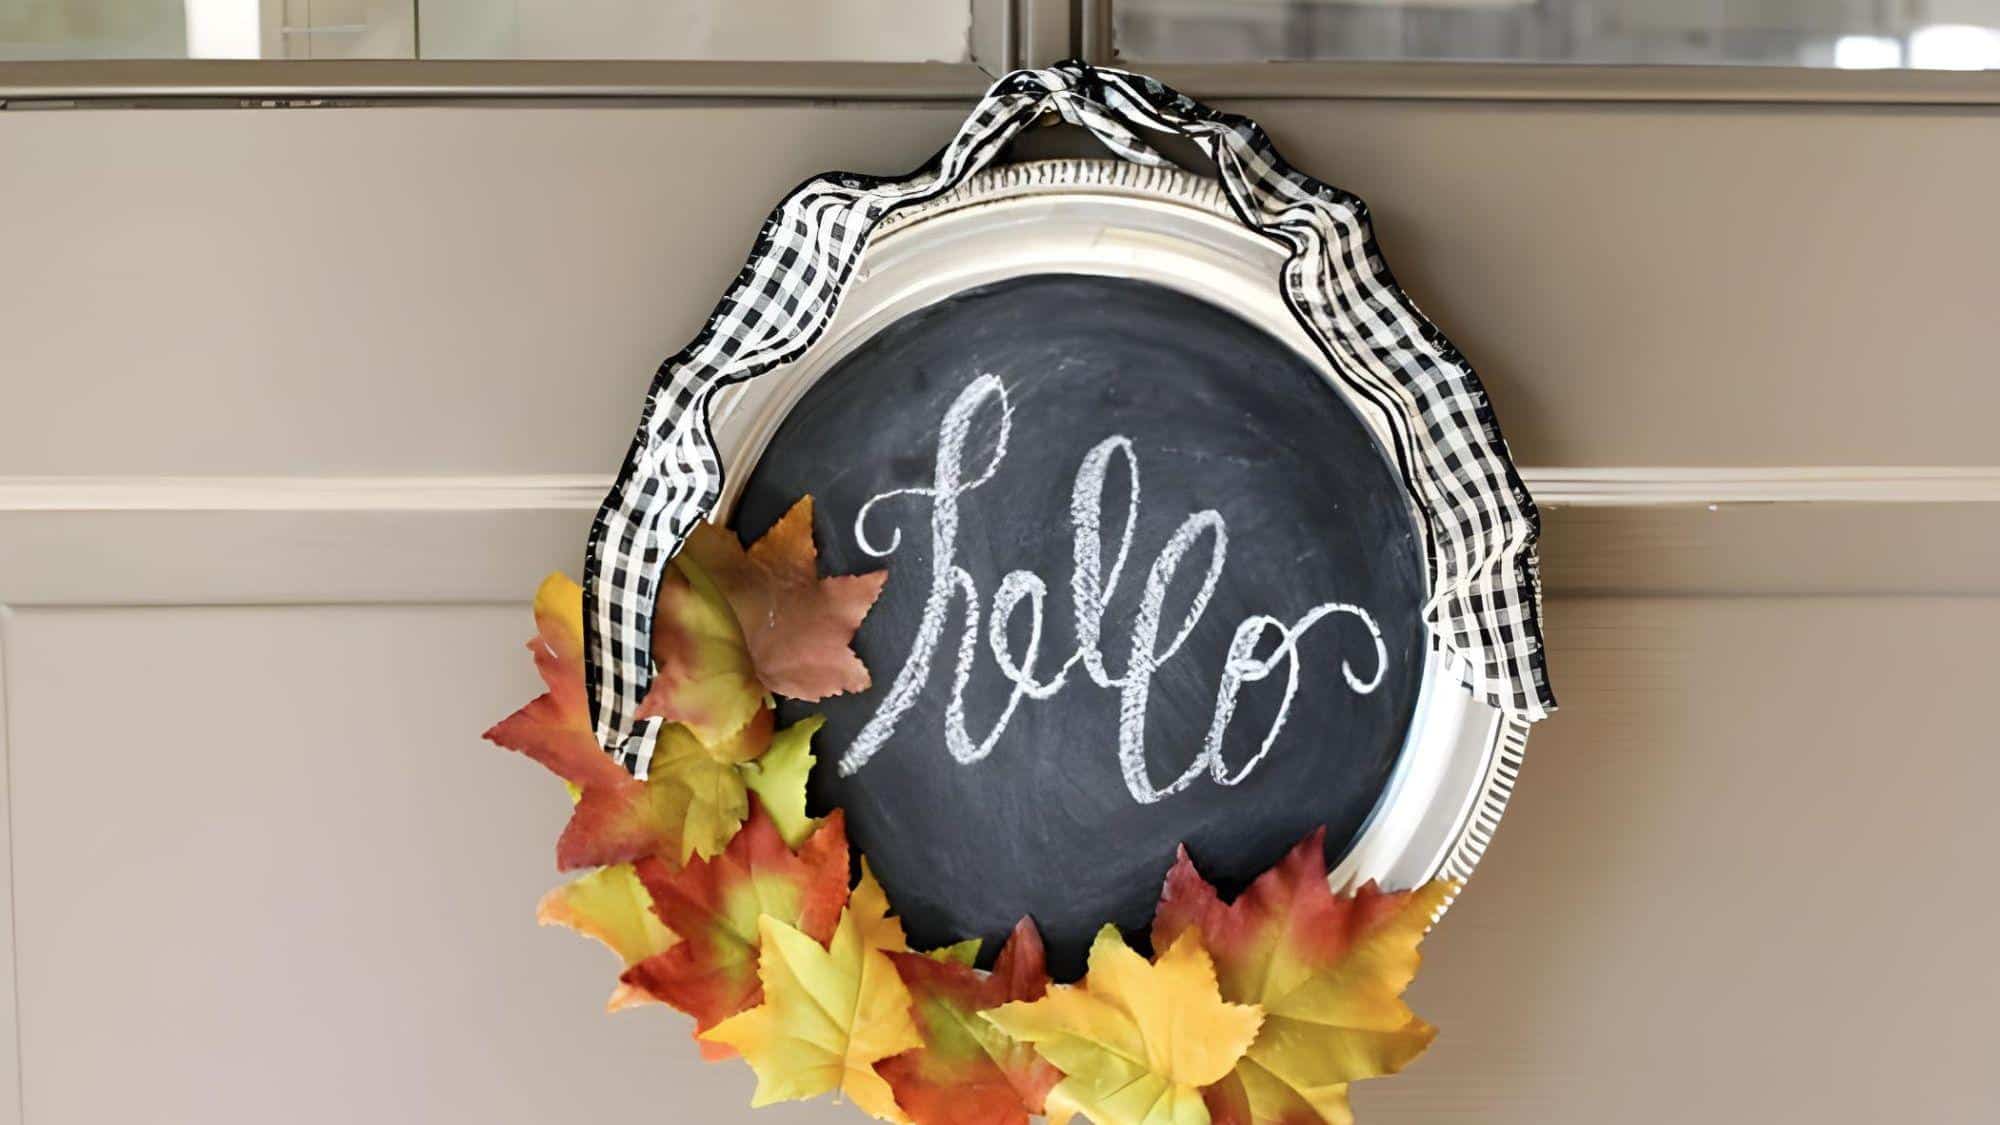
Transform a simple silver tray into a unique and versatile wreath that adds a touch of grace to your fall decor.
This innovative DIY project combines the charm of a traditional wreath with the functionality of a chalkboard, allowing you to personalize your greeting for every occasion.
The silver tray serves as a striking backdrop for autumn leaves, creating a wreath that’s both eye-catching and practical.
Materials Required
- Silver tray
- Chalkboard paint
- Faux fall leaves
- Chalk or chalk marker
- Hot glue gun and glue sticks
- Ribbon for hanging (optional)
Crafting Process
- Paint the center of the silver tray with chalkboard paint
- Arrange and glue faux fall leaves around the tray’s edge
- Allow paint to dry completely
- Write your personalized message on the chalkboard surface
- Attach ribbon for hanging if desired
Full tutorial: Average But Inspired
Additional Tips
- Versatile canvas: Paint the entire tray surface for more writing space.
- Seasonal updates: Switch out leaves and messages to match different holidays or seasons.
- Creative placement: Use as a unique table centerpiece or wall decoration.
15. Fresh Cornstalk Wreath: A Harvest-Inspired Masterpiece
Assume the bounty of autumn with a stunning wreath crafted from fresh cornstalks.
This natural creation captures the essence of the harvest season, bringing a touch of rustic charm to your home.
The textured cornstalks, arranged on a grapevine base, create a wreath that’s not only visually striking but also a celebration of fall’s agricultural heritage.
Materials Required
- Fresh cornstalks
- Grapevine wreath form
- Floral wire
- Hot glue gun and glue sticks
- Ribbon for hanging (optional)
Crafting Process
- Clean and dry cornstalks thoroughly
- Create small bundles of cornstalks
- Secure bundles to the grapevine form using floral wire
- Arrange bundles to cover the entire wreath
- Add decorative elements like ribbon or mini pumpkins
Full tutorial: Delia Creates
Additional Tips
- Cornstalk prep: Remove any leaves or debris from cornstalks before use for a cleaner look.
- Secure attachment: Use both floral wire and hot glue for extra durability.
- Natural accents: Incorporate other fall elements like wheat stalks or dried flowers for added interest.
16. Cotton Grass and Pumpkin Wreath: A Modern Autumn
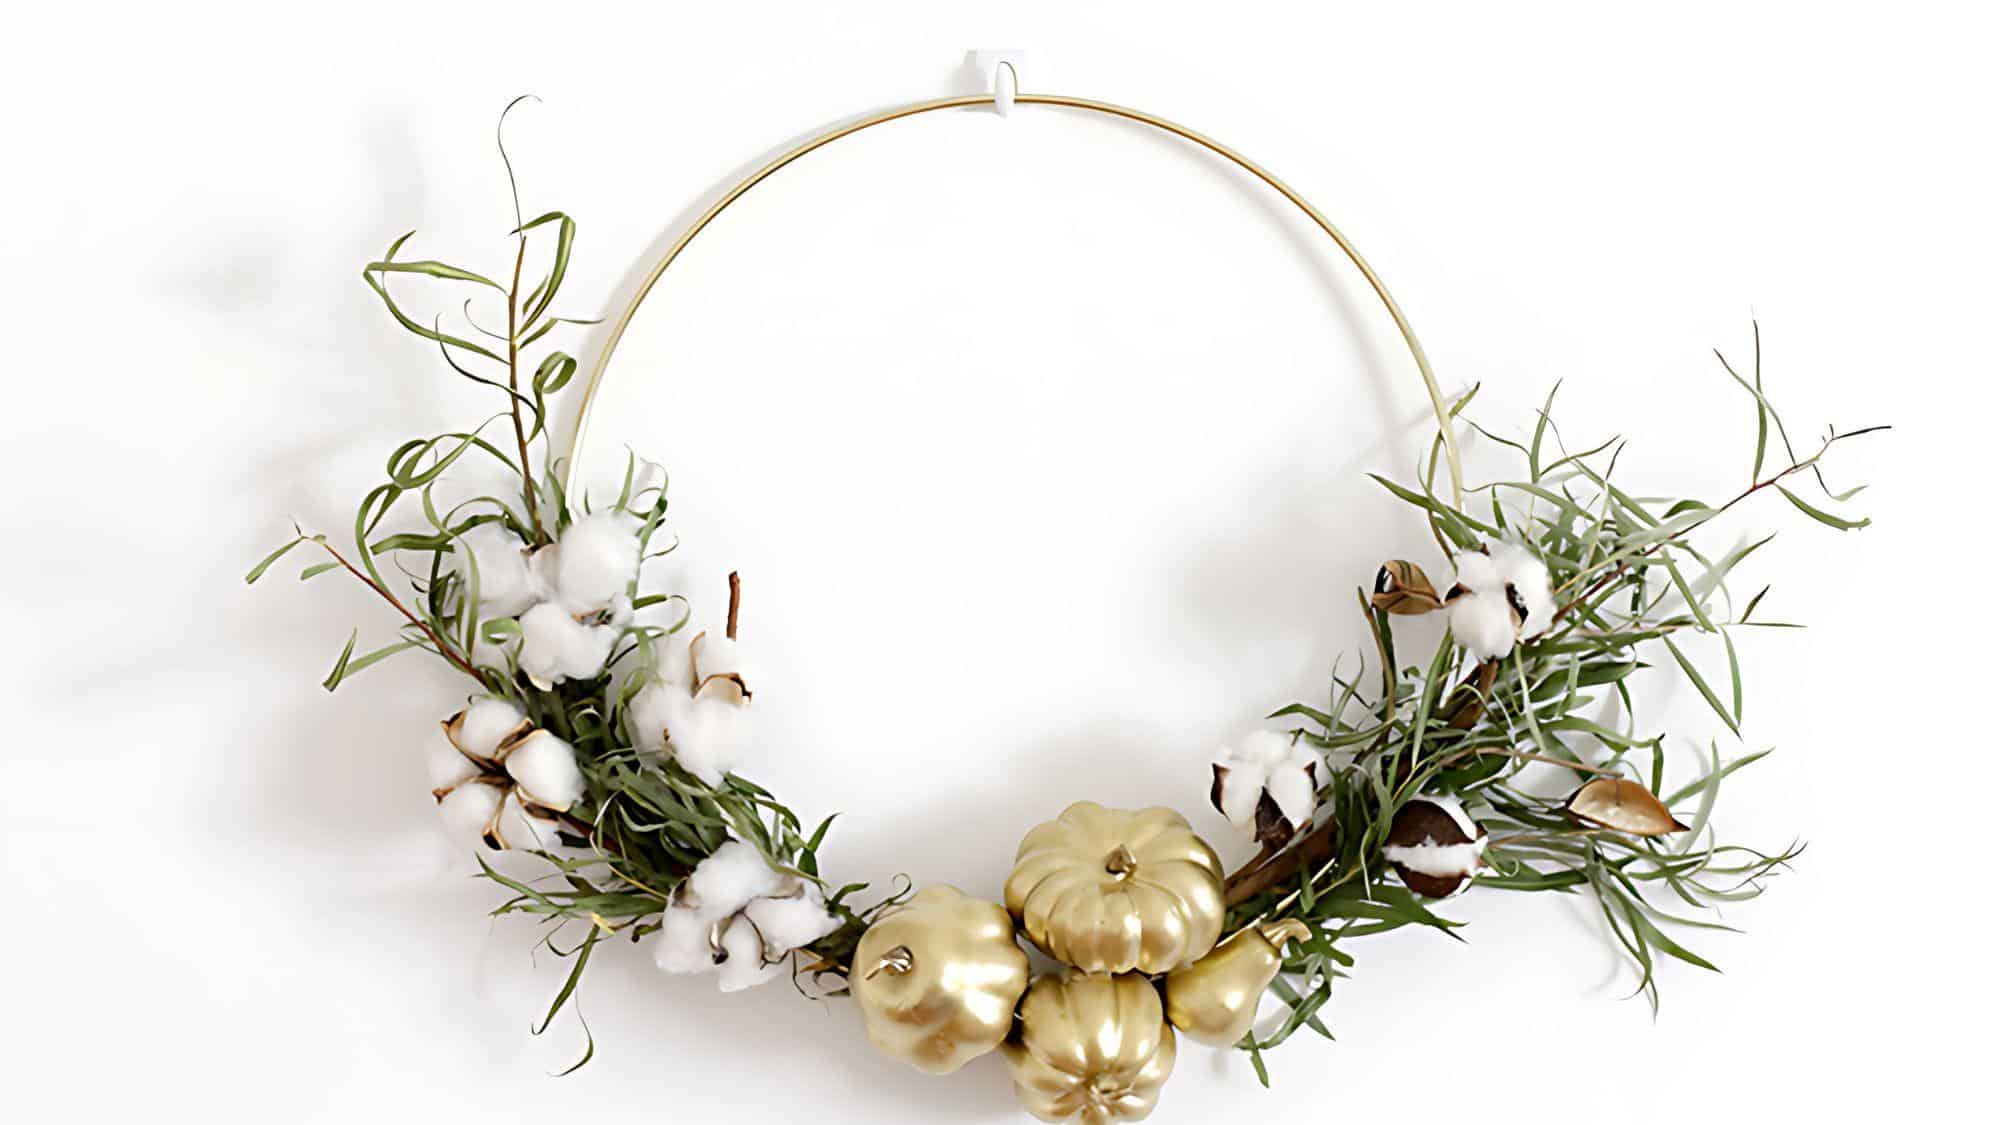
Heighten your fall decor with this chic and contemporary wreath that combines the softness of cotton stems with the glamour of gold-painted pumpkins.
This sophisticated DIY project brings a fresh, modern twist to traditional autumn wreaths, creating a stunning focal point for your home that effortlessly blends rustic and refined elements.
Materials Required
- Faux cotton stems
- Small faux pumpkins
- Gold spray paint
- Wreath form (foam or grapevine)
- Floral wire
- Hot glue gun and glue sticks
- Ribbon for hanging (optional)
Crafting Process
- Spray paint faux pumpkins gold and allow to dry
- Arrange cotton stems around the wreath form
- Secure cotton stems with floral wire and hot glue
- Add gold pumpkins, distributing evenly
- Attach ribbon for hanging if desired
Full tutorial:The Merrythought
Additional Tips
- Paint perfection: Use light, even coats of spray paint for a smooth finish on pumpkins.
- Balanced design: Alternate cotton stems and pumpkins for a visually pleasing arrangement.
- Textural interest: Incorporate other fall elements like dried grasses or berries for added depth.
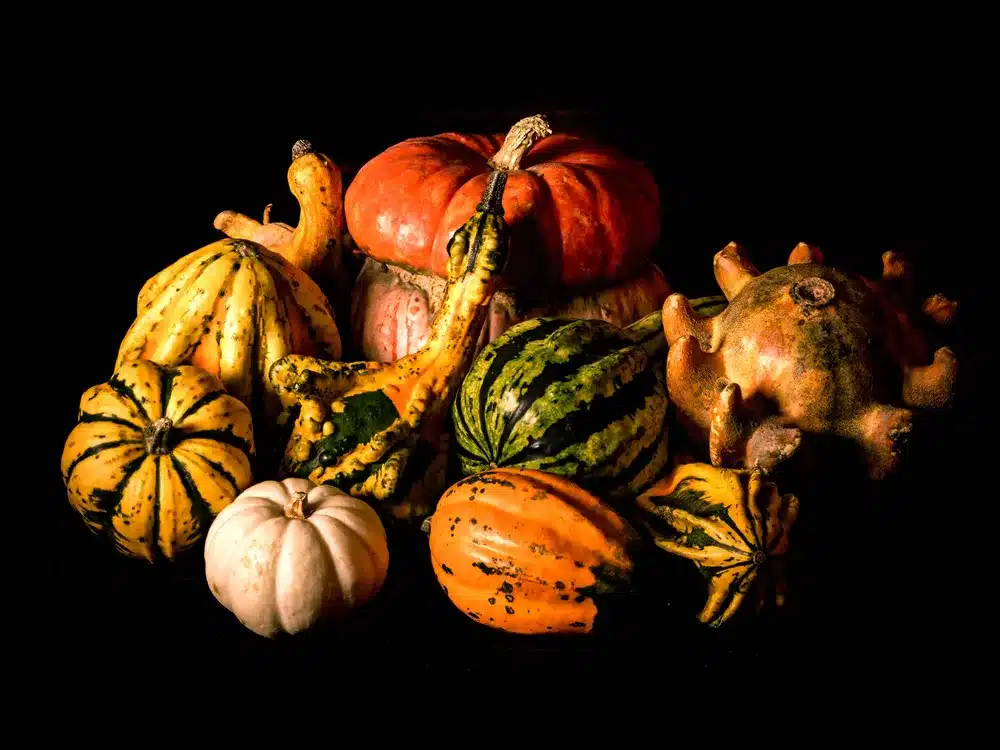
17. Fall Gourd Wreath: A Quirky Celebration of Autumn
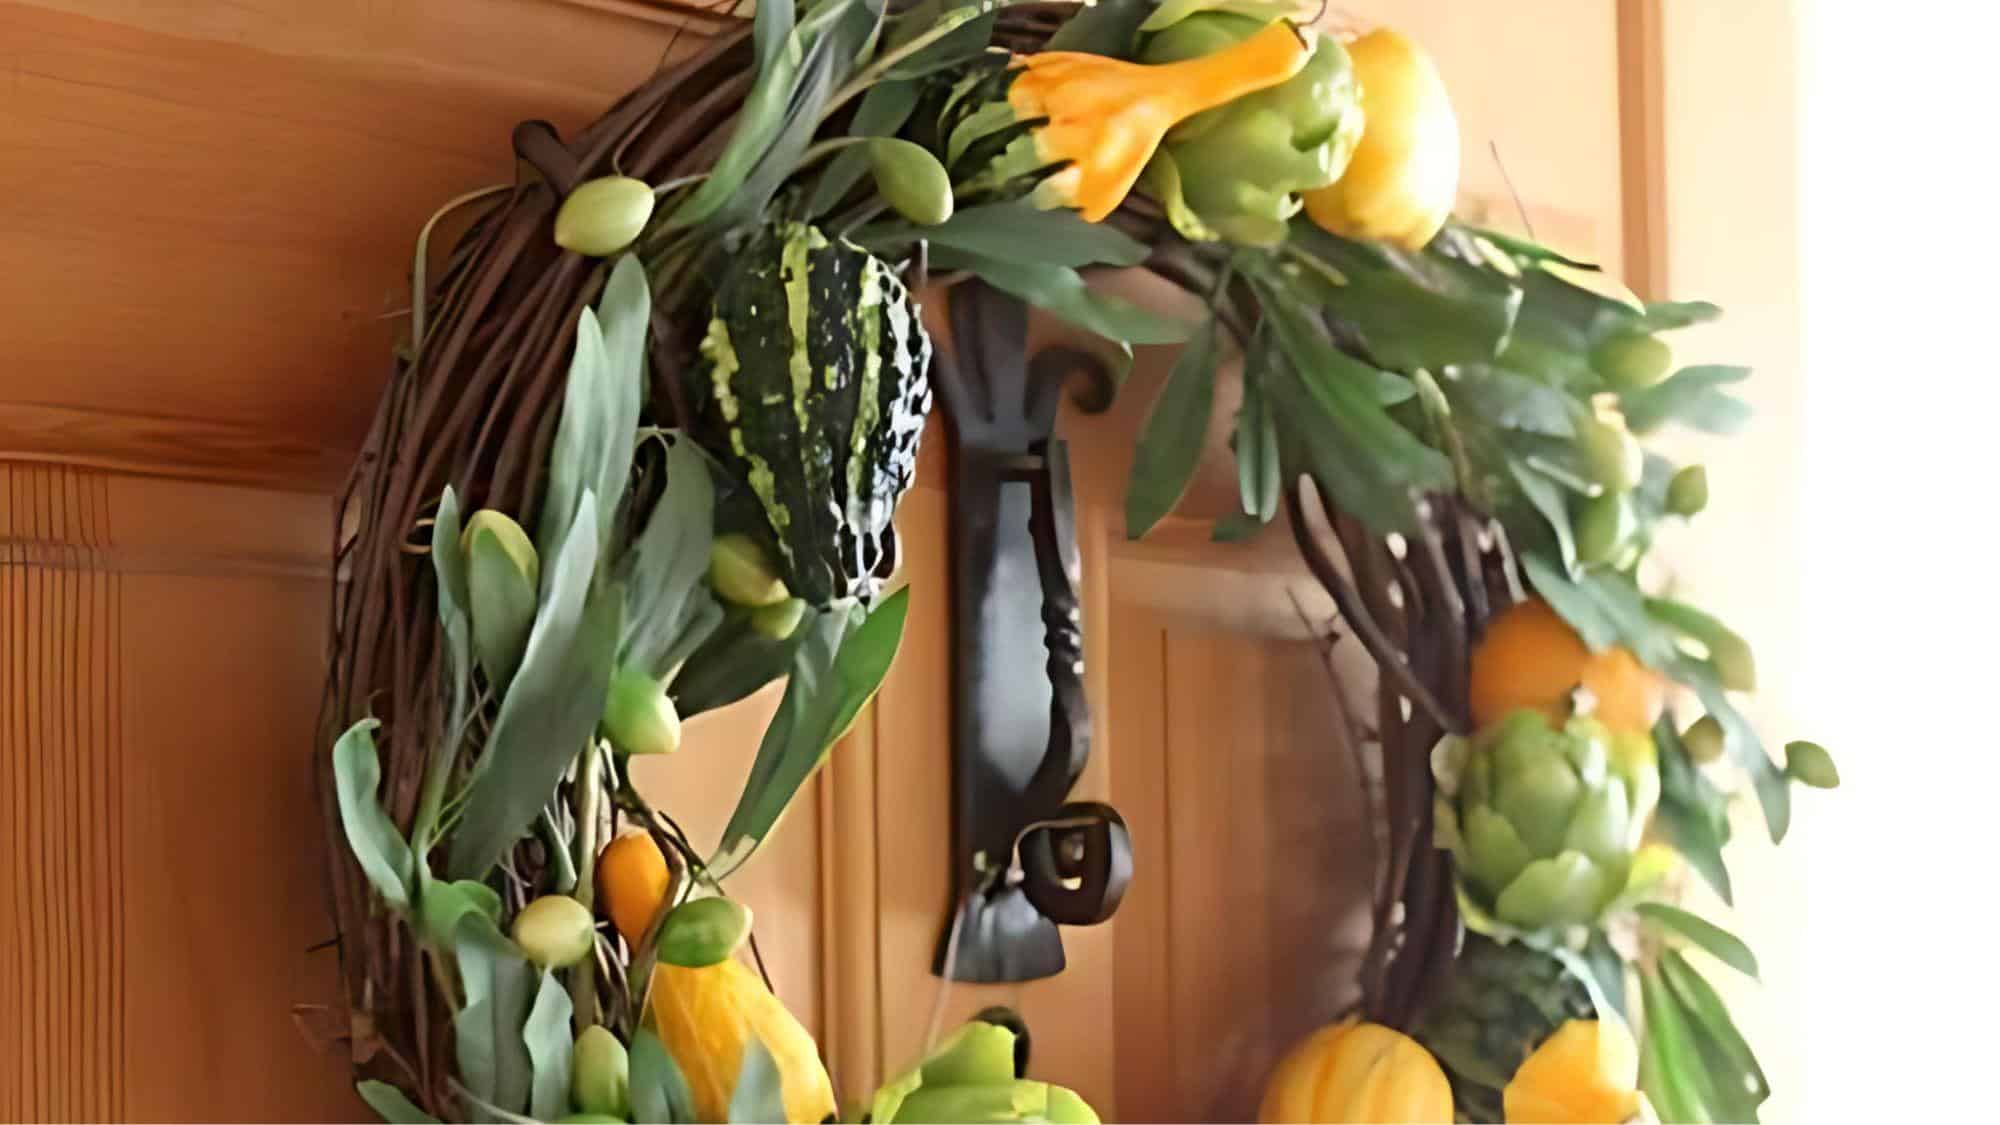
Welcome the whimsical side of fall with a unique wreath that showcases the natural beauty and diversity of gourds.
This eye-catching creation turns the humble gourd into a work of art, featuring an array of shapes, sizes, and colors that capture the essence of the harvest season.
The result is a charming and distinctive wreath that’s sure to become a conversation piece in your autumn decor.
Materials Required
- Small gourds in various shapes and colors
- Wreath form (foam or grapevine)
- Floral wire
- Hot glue gun and glue sticks
- Greenery (optional)
- Ribbon for hanging (optional)
Crafting Process
- Select a variety of small gourds
- Arrange gourds on the wreath form for a balanced composition
- Secure gourds with floral wire and hot glue
- Add optional greenery for contrast
- Attach ribbon for hanging if desired
Full tutorial:Garden Therapy
Additional Tips
- Gourd prep: Clean and dry gourds thoroughly before use to prevent mold.
- Visual balance: Mix different gourd shapes and colors for an interesting, varied look.
- Seasonal longevity: Consider using artificial gourds for a wreath that lasts multiple seasons.
18. Minimalist Dried Grass Wreath: Nature’s Understated Grace
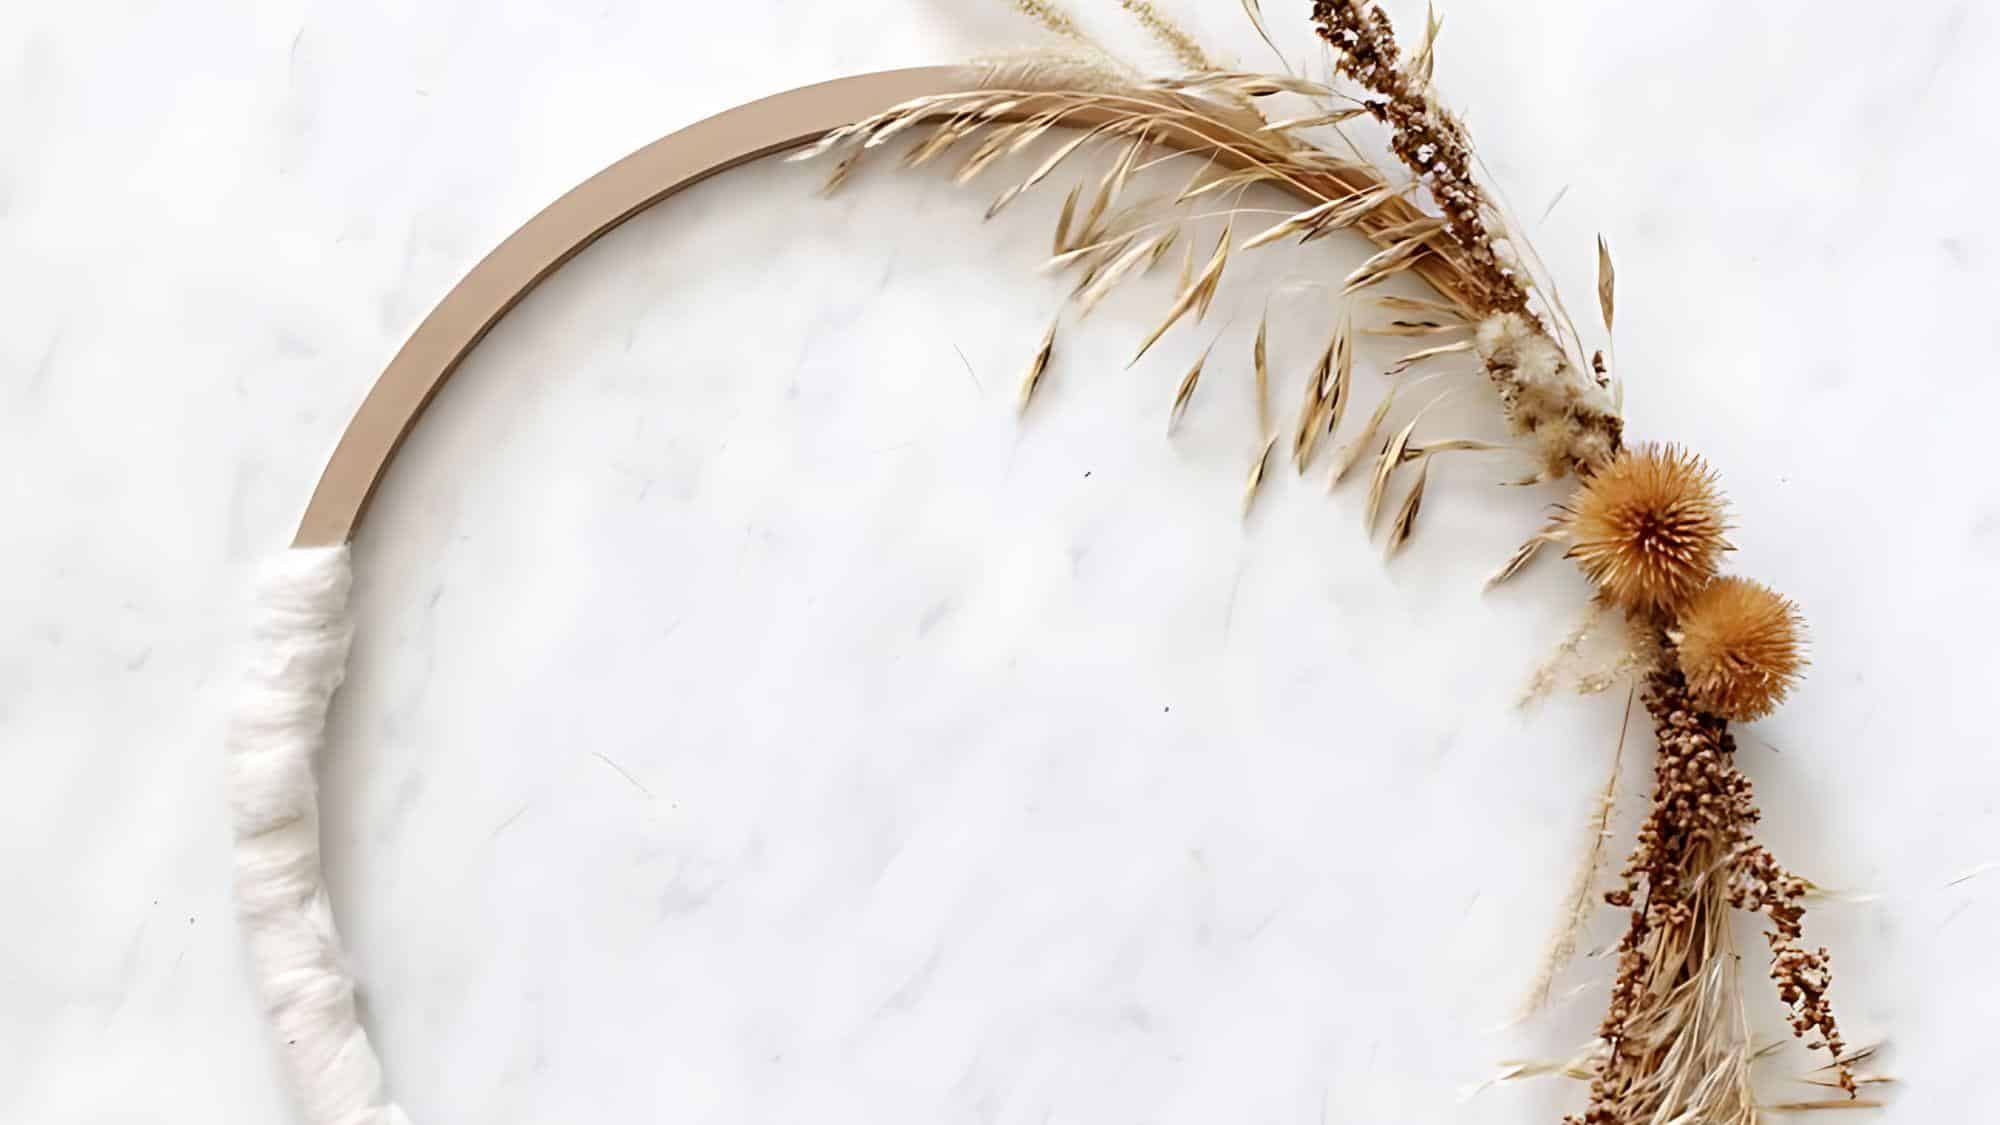
Embrace the beauty of simplicity with this sophisticated dried grass wreath.
Perfect for those who appreciate a minimalist aesthetic, this wreath showcases the subtle textures and muted tones of dried grasses.
The result is a refined and versatile piece that adds a touch of natural grace to any fall decor scheme.
Materials Required
- Dried grasses
- Wood wreath ring
- Floral wire
- Hot glue gun and glue sticks
- Ribbon for hanging (optional)
Crafting Process
- Gather and sort dried grasses by length
- Wrap grasses around the wood wreath ring in overlapping layers
- Secure grasses with floral wire and hot glue
- Trim excess grass for a neat appearance
- Attach ribbon for hanging if desired
Full tutorial: The Merrythought
Additional Tips
- Texture variety: Mix different types of dried grasses for added visual interest.
- Natural flow: Allow some grasses to stick out for a more organic, effortless look.
- Color enhancement: Consider lightly spray painting some grasses for subtle color accents.
19. Baby’s Breath Wreath: A Whimsical Autumn Wonder
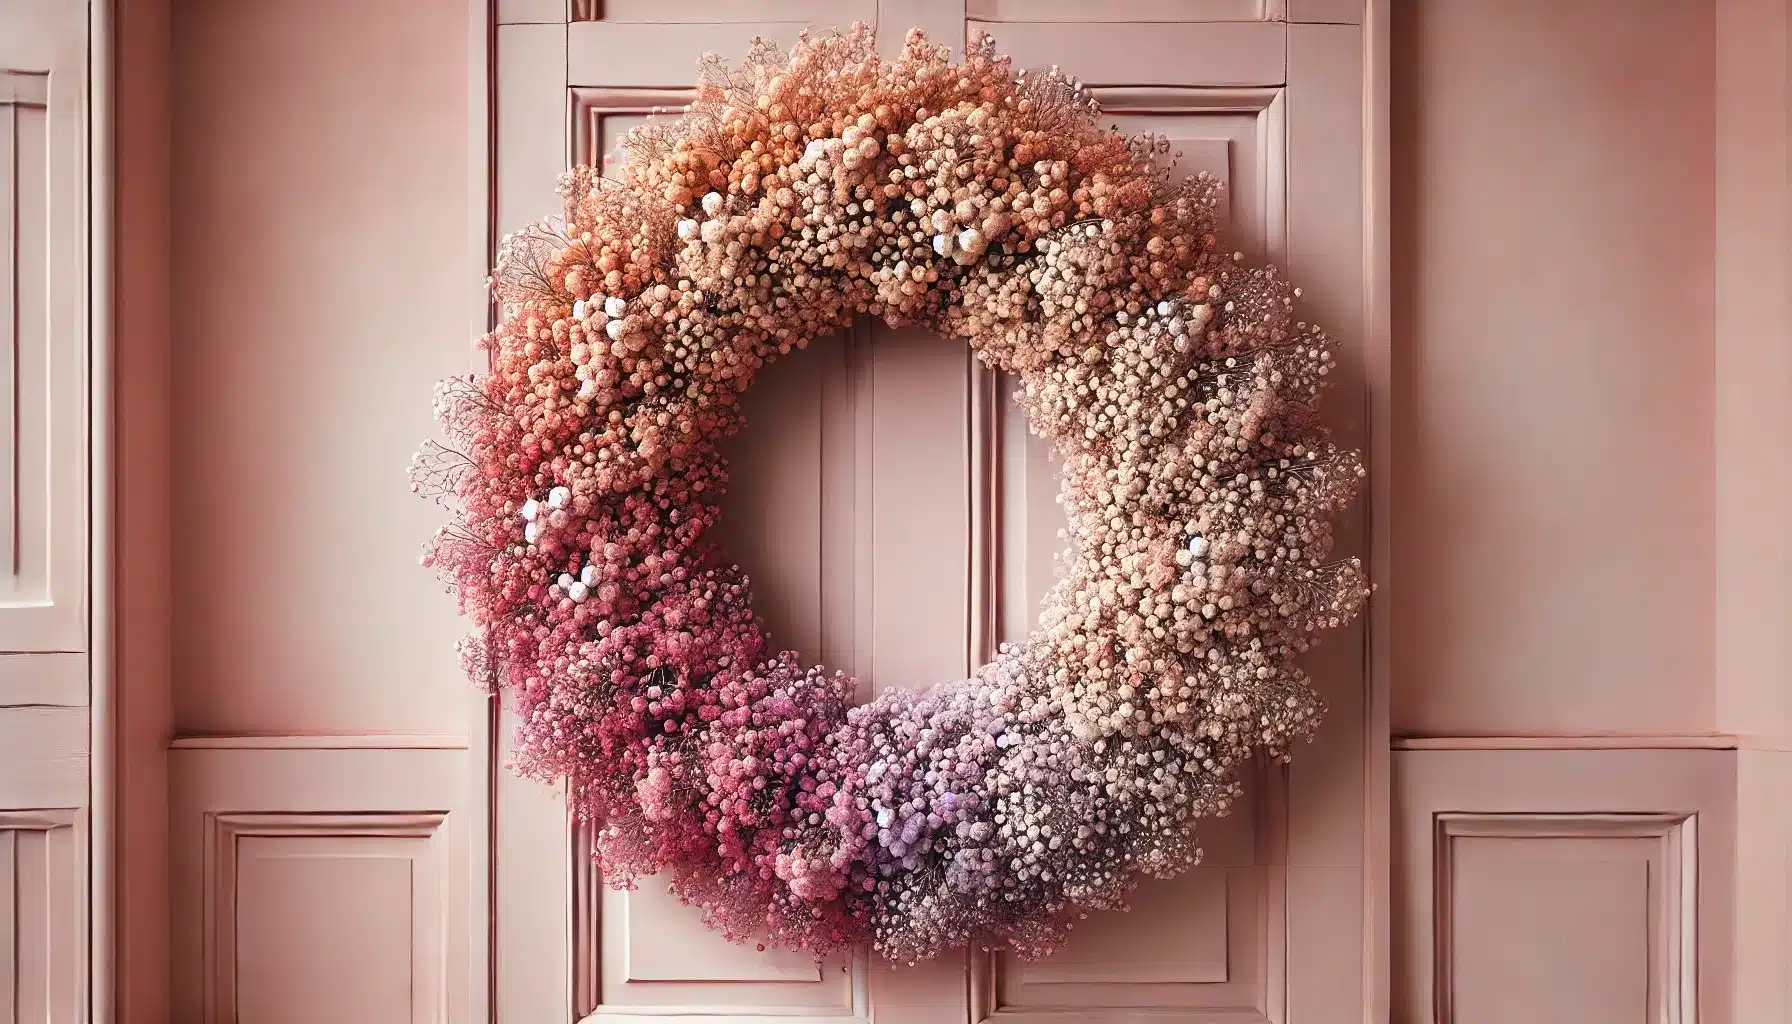
Transform delicate baby’s breath into a stunning fall wreath with this creative DIY project.
By spray-painting the baby’s breath in seasonal hues, you’ll create a soft, romantic wreath that captures the essence of autumn while maintaining an airy, ethereal quality.
Materials Required
- Baby’s breath
- Spray paint in seasonal colors
- Foam wreath form
- Floral wire
- Hot glue gun and glue sticks
- Ribbon for hanging (optional)
Crafting Process
- Spray paint baby’s breath in desired fall colors
- Allow painted baby’s breath to dry completely
- Attach baby’s breath to foam wreath form using floral wire
- Fill in gaps with additional baby’s breath as needed
- Secure loose pieces with hot glue
Full tutorial:The House that Lars Built
Additional Tips
- Color blending: Use multiple spray paint colors for a more dynamic, ombre effect.
- Gentle handling: Work carefully with the painted baby’s breath to avoid breakage.
- Complementary accents: Add small faux berries or leaves for extra fall flair.
20. Neutral Pastel Pumpkin Wreath: A Soft Touch of Autumn
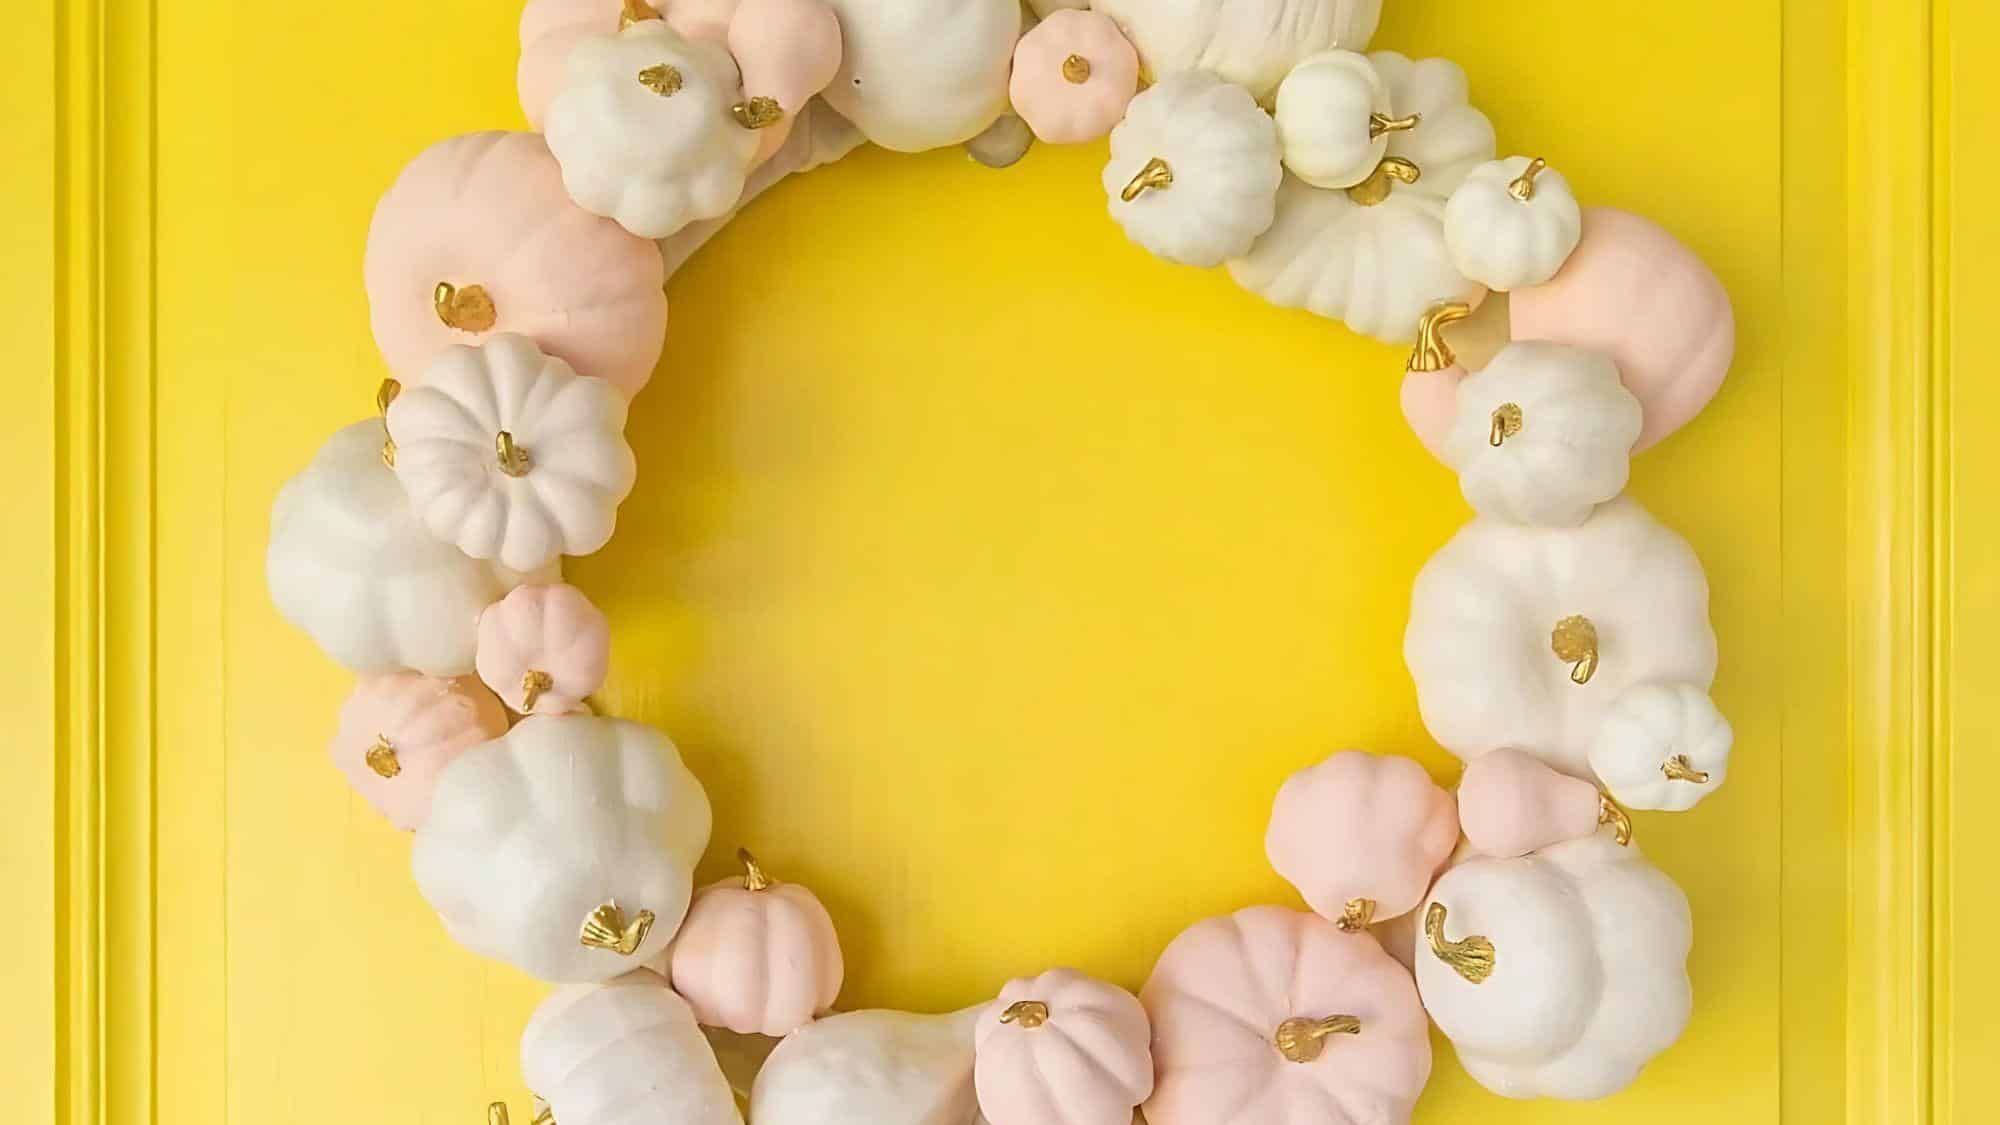
Bring a fresh, contemporary twist to your fall decor with this charming pastel pumpkin wreath.
By using soft, muted colors, this wreath offers a subtle nod to the season while maintaining a light and airy feel. It’s the perfect choice for those who prefer a more understated autumn aesthetic.
Materials Required
- Small faux pumpkins (painted in pastel colors)
- Wreath form (foam or grapevine)
- Floral wire
- Hot glue gun and glue sticks
- Greenery or faux florals (optional)
- Ribbon for hanging (optional)
Crafting Process
- Paint faux pumpkins in pastel shades and allow to dry
- Arrange pumpkins on wreath form for balanced composition
- Secure pumpkins with floral wire and hot glue
- Add optional greenery or florals for texture
- Attach ribbon for hanging if desired
Full tutorial:Lovely Indeed
Additional Tips
- Color harmony: Choose a cohesive pastel palette for a polished look.
- Textural contrast: Mix smooth pumpkins with rougher elements like burlap for added interest.
- Size variation: Use pumpkins of different sizes to create depth and dimension.
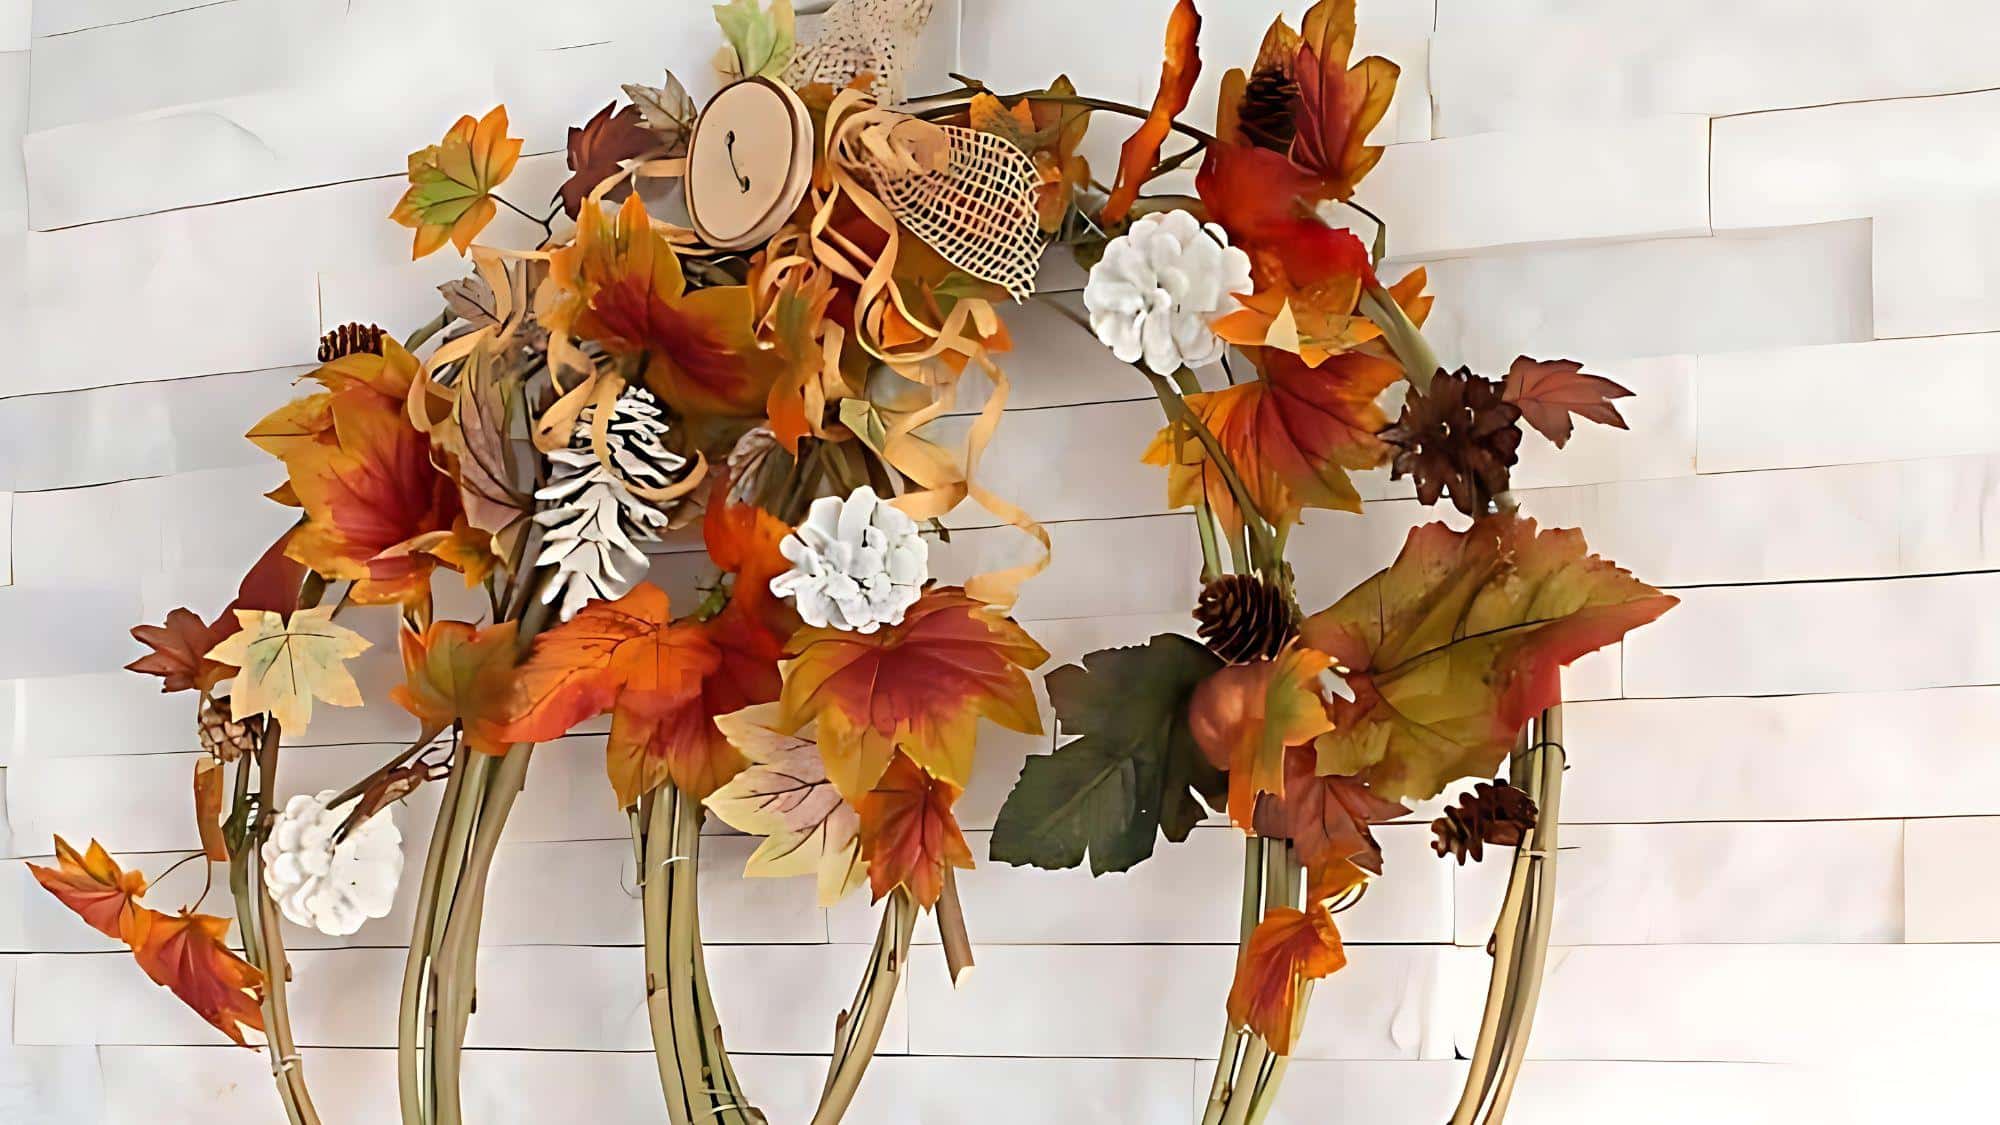
21. Harvest Pumpkin Wreath: A Grand Autumn Statement
Make a bold seasonal statement with this oversized harvest pumpkin wreath.
Featuring long, wispy branches and an array of pumpkins, this wreath is designed to create a dramatic and eye-catching display, perfect for larger front doors or spacious entryways.
Materials Required
- Long faux branches
- Small faux pumpkins
- Grapevine wreath form
- Floral wire
- Hot glue gun and glue sticks
- Ribbon for hanging (optional)
Crafting Process
- Attach long branches to grapevine form with floral wire
- Arrange pumpkins evenly around the wreath
- Secure pumpkins with hot glue
- Add additional autumnal elements as desired
- Attach ribbon for hanging if needed
Full tutorial:Made In A Day
Additional Tips
- Branch arrangement: Vary branch directions for a natural, windswept look.
- Color layering: Use pumpkins in different shades to add depth to the design.
- Seasonal updates: Consider adding small lights for a festive evening glow.
22. Apple Wreath: A Crisp Orchard Inspired Creation
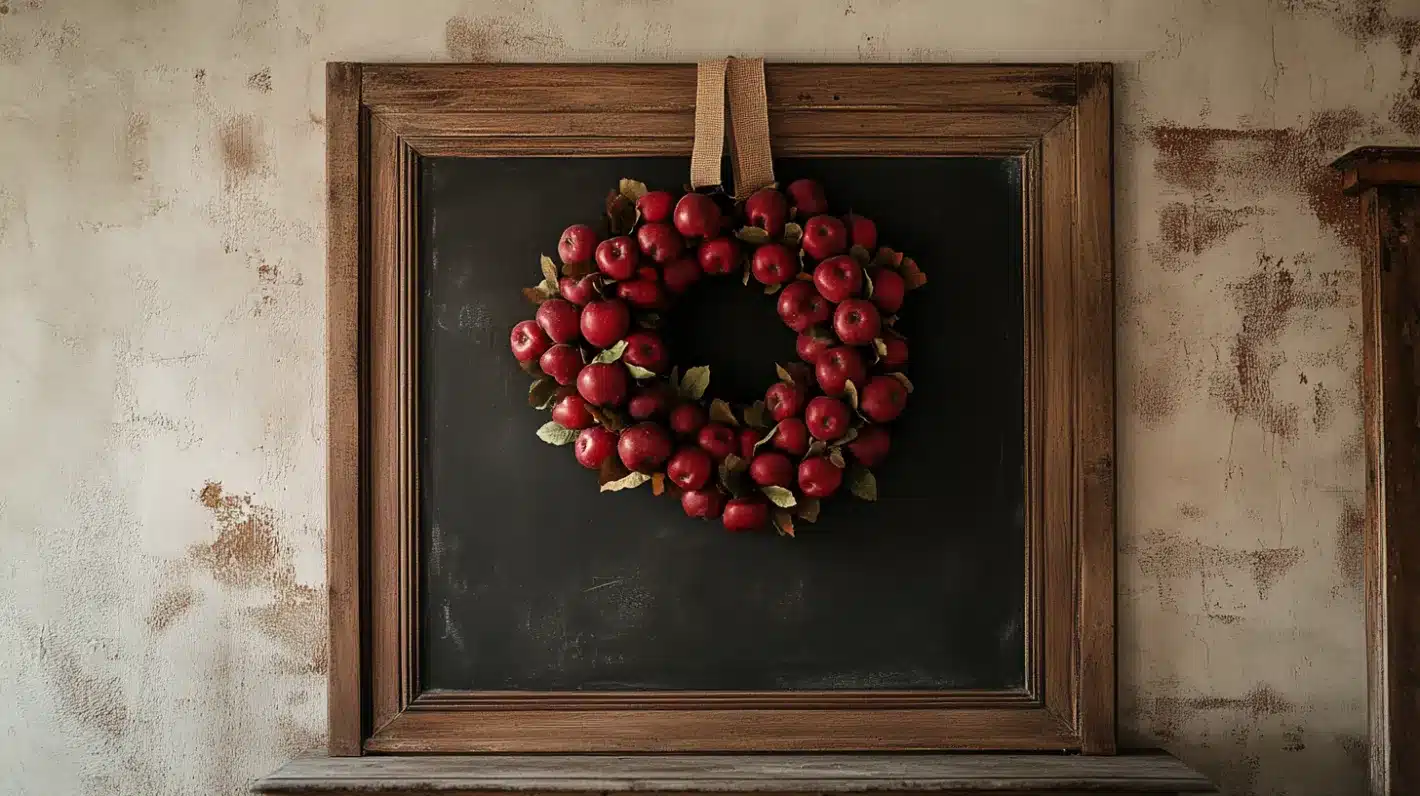
Bring the freshness of the apple orchard to your front door with this delightful apple wreath.
Featuring an abundance of faux apples, this wreath adds a bright, cheery touch to your fall decor, perfect for those who love a more fruit-forward autumn theme.
Materials Required
- Faux apples
- Foam wreath form
- Burlap fabric
- Hot glue gun and glue sticks
- Floral wire
- Ribbon for hanging (optional)
Crafting Process
- Wrap foam wreath form with burlap fabric
- Arrange faux apples on the wreath form
- Secure apples with hot glue and floral wire
- Add complementary elements like leaves or flowers
- Attach ribbon for hanging if desired
Full tutorial:The Wood Grain Cottage
Additional Tips
- Apple variety: Mix different types and colors of apples for a realistic orchard look.
- Secure attachment: Double-check that all apples are firmly attached to withstand outdoor conditions.
- Seasonal scent: Consider adding cinnamon sticks for a fragrant autumn touch.
23. Branch Wreath: A Bold Burst of Autumn Sunshine
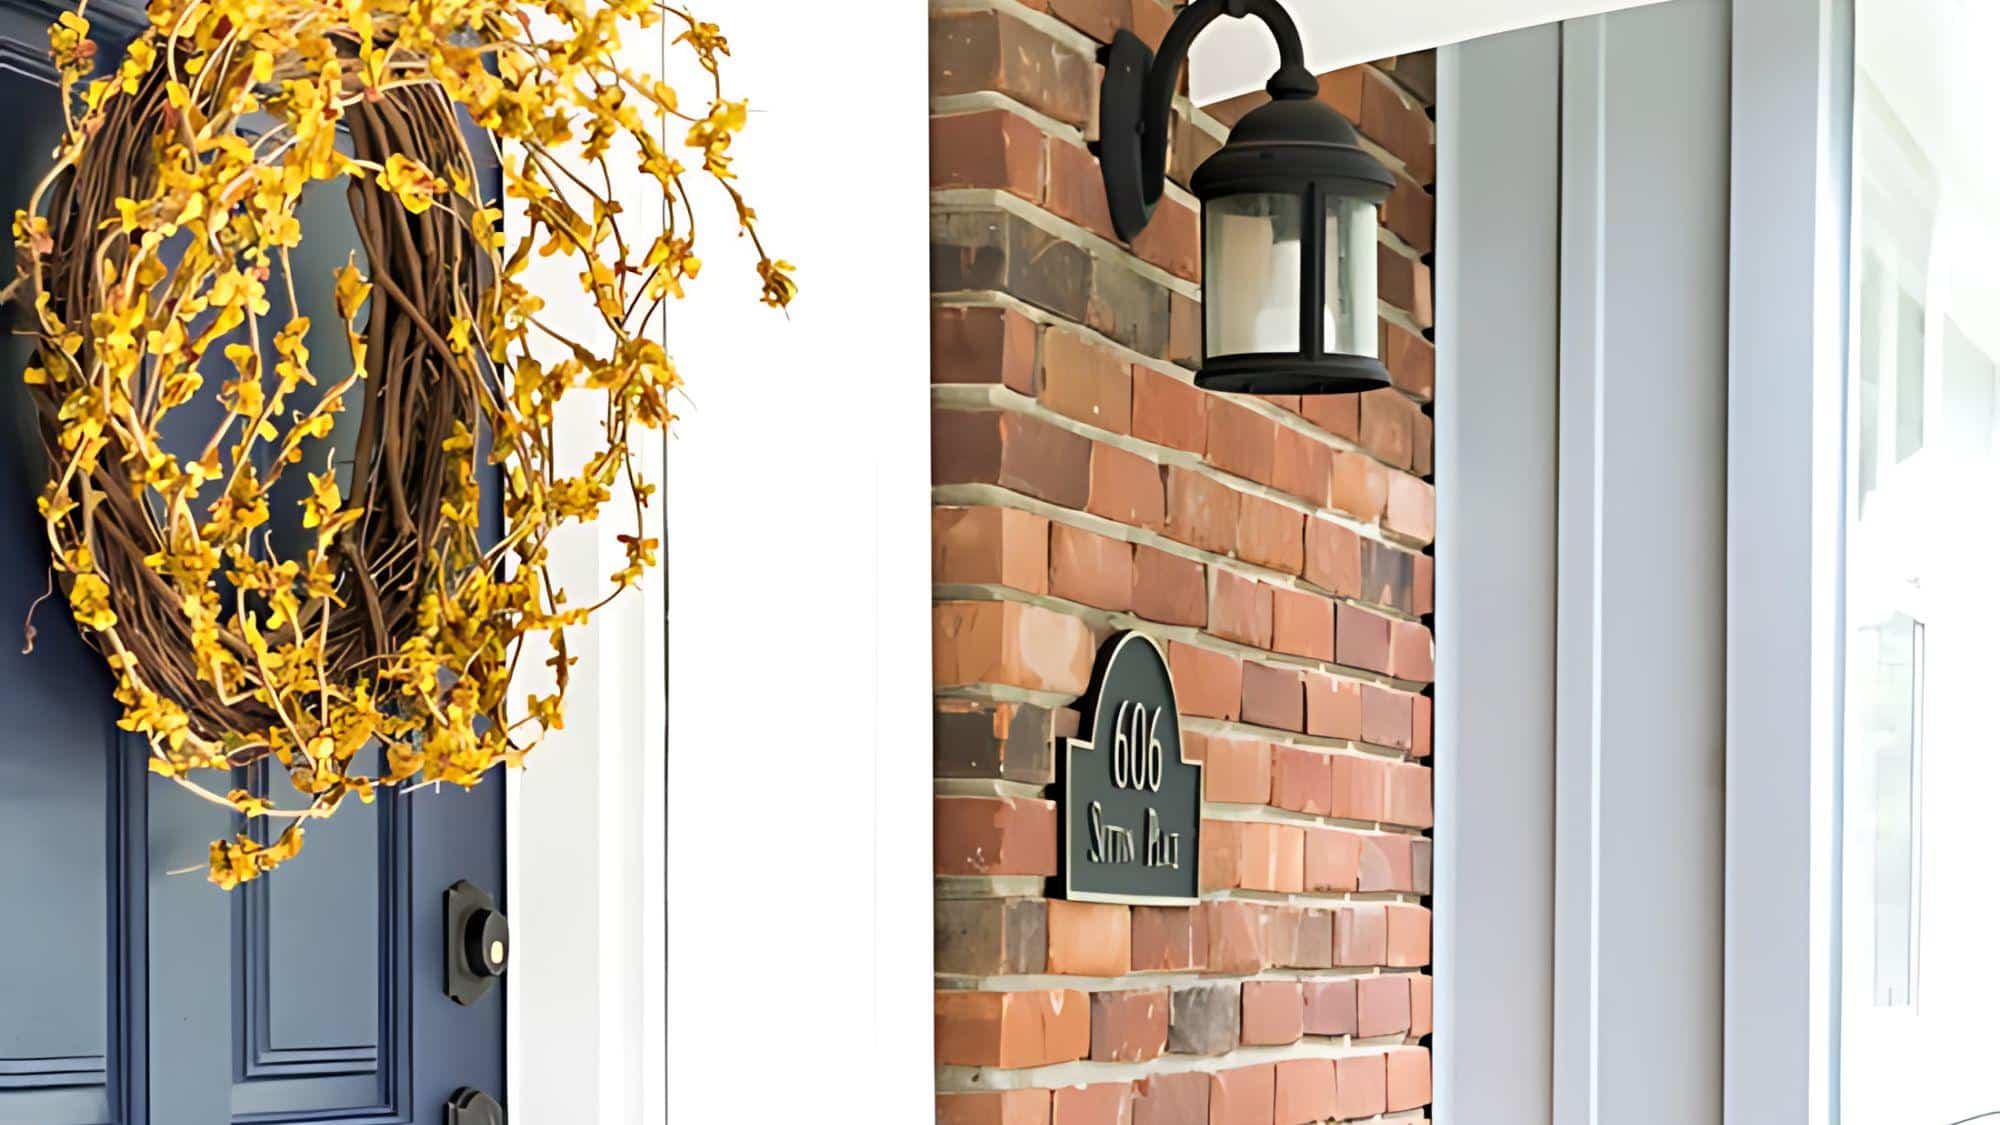
Brighten up your fall decor with this eye-catching branch wreath.
Featuring vibrant yellow curved branches, this wreath adds a daring and cheerful touch to your home.
It’s the perfect way to make a bold statement and infuse your space with the energy of the season.
Materials Required
- Curved yellow branches
- Wreath form (foam or wire)
- Floral wire
- Hot glue gun and glue sticks
- Ribbon for hanging (optional)
Crafting Process
- Arrange curved branches evenly around the wreath form
- Secure branches with floral wire
- Reinforce attachment points with hot glue
- Add complementary elements if desired
- Attach ribbon for hanging if needed
Full tutorial:On Sutton Place
Additional Tips
- Branch spacing: Ensure even distribution of branches for a balanced look.
- Color pop: Consider adding small dark-colored elements for contrast.
- Shape maintenance: Gently reshape branches as needed to maintain the wreath’s form.
24. Painted Pinecone Wreath: Nature’s Canvas

Transform ordinary pinecones into a work of art with this charming painted pinecone wreath.
By using muted tones and pinks, you’ll create a unique and vibrant decoration that combines the rustic texture of pinecones with a soft, artistic color palette.
Materials Required
- Pinecones
- Paint in muted tones and pinks
- Foam wreath form
- Hot glue gun and glue sticks
- Floral wire
- Ribbon for hanging (optional)
Crafting Process
- Paint pinecones in chosen colors and allow to dry
- Arrange painted pinecones on the wreath form
- Secure pinecones with hot glue and floral wire
- Add complementary elements like faux flowers or leaves
- Attach ribbon for hanging if desired
Full tutorial: The House that Lars Built
Additional Tips
- Paint application: Use light coats of paint to preserve the pinecones’ texture.
- Color gradient: Arrange pinecones in a color gradient for a sophisticated look.
- Natural accents: Mix in some unpainted pinecones for textural contrast.
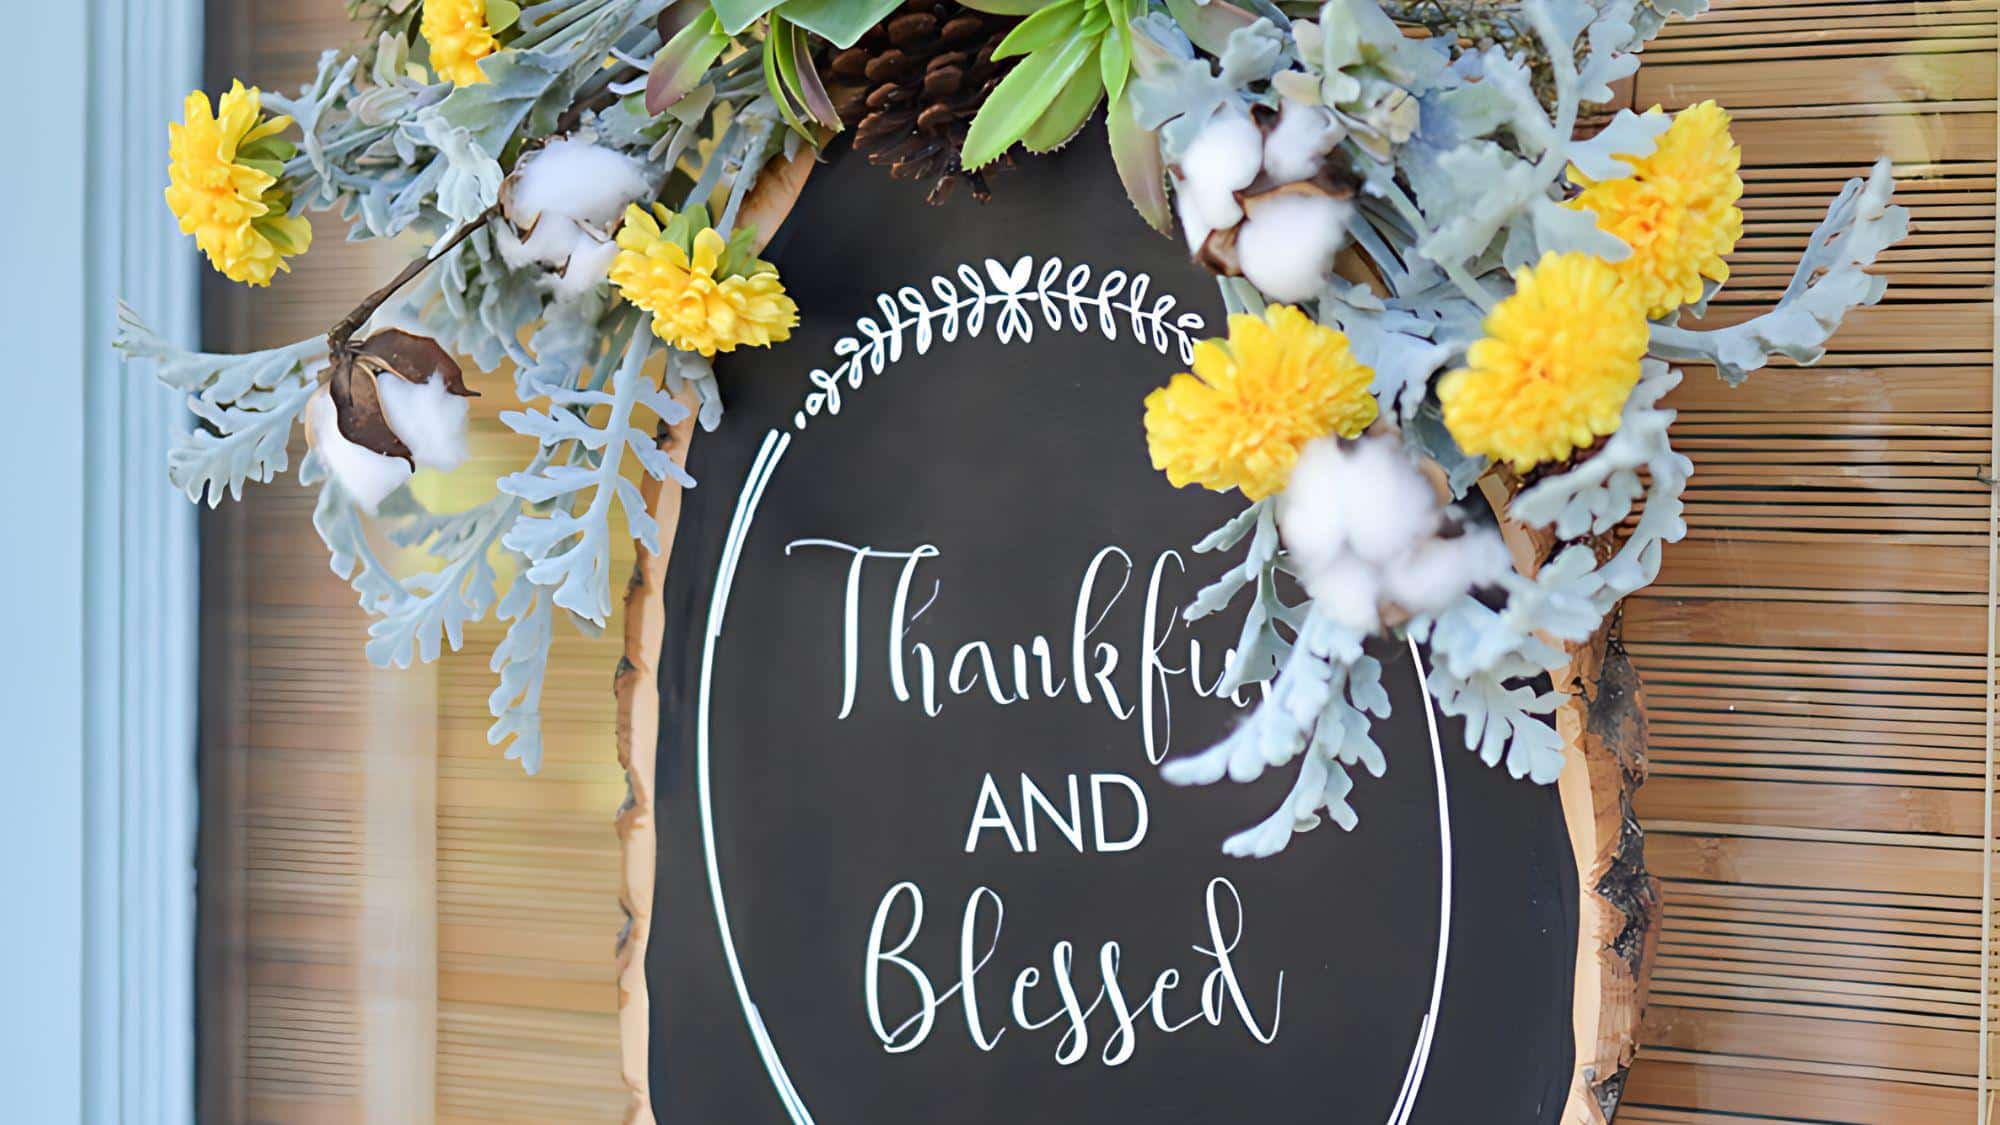
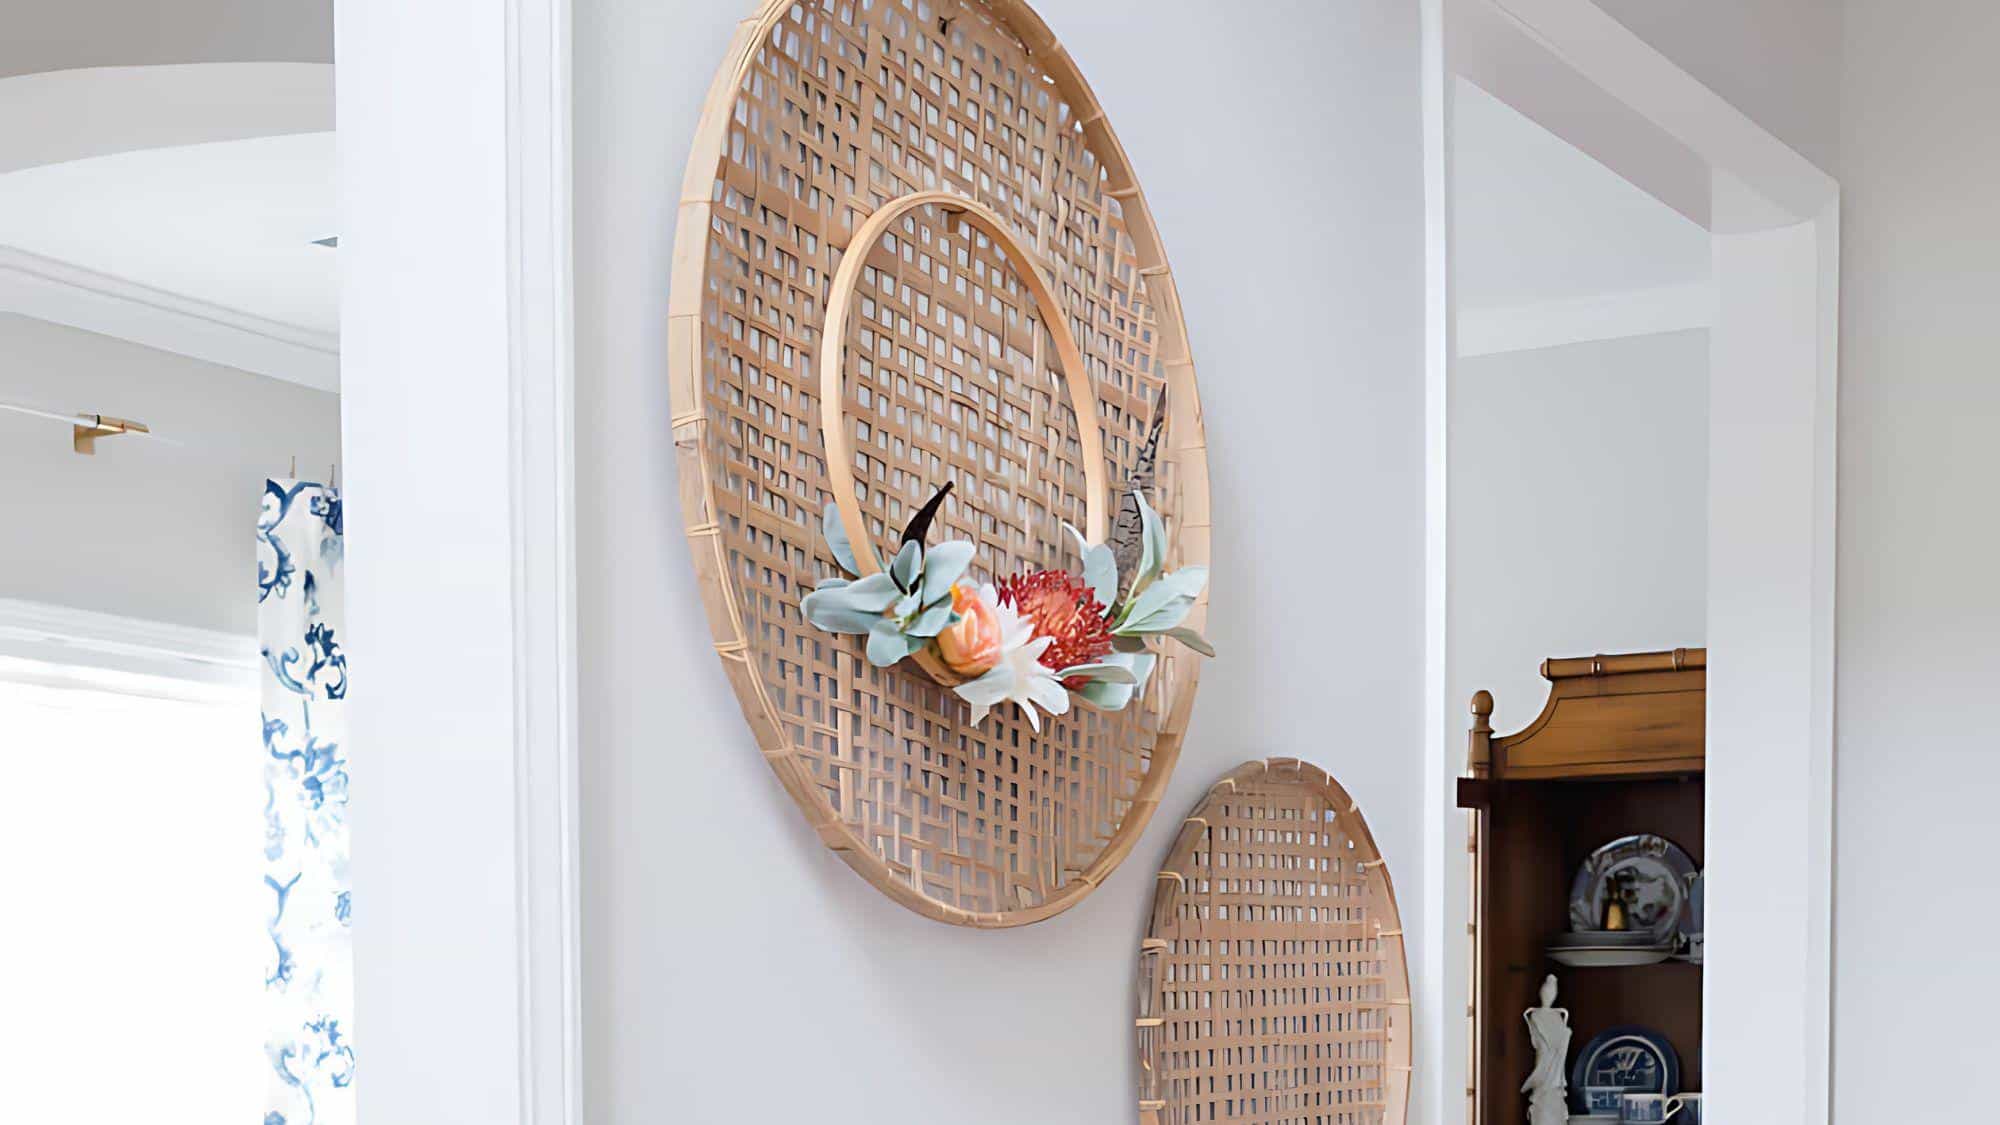
25. Basket Wreath: Rustic Charm Meets Floral Grace

Create a charming and unique wreath using a shallow basket filled with lush faux hydrangeas.
This easy-to-make decoration combines rustic and graceful elements, resulting in a versatile piece that can complement various decor styles.
Materials Required
- Shallow basket
- Faux hydrangea blossoms
- Stencil for a saying (optional)
- Black paint (optional)
- Ribbon for hanging
- Hot glue gun and glue sticks
Crafting Process
- Fill basket evenly with faux hydrangea blossoms
- Secure flowers with hot glue
- Stencil a saying onto the basket if desired
- Attach ribbon for hanging
- Add any final decorative touches
Full tutorial: Twelve on Main
Additional Tips
- Flower arrangement: Vary the heights of hydrangeas for a fuller look.
- Basket selection: Choose a basket with an interesting texture or weave pattern.
- Seasonal updates: Easily switch out flowers to match different seasons or holidays.
26. Chalkboard Wreath: A Customizable Autumn Welcome
Combine creativity with functionality using this unique chalkboard wreath.
Made from a large wood slice painted with chalkboard paint, this wreath allows you to personalize your seasonal greetings and change them as often as you like.
Materials Required
- Large wood slice
- Chalkboard paint
- Faux fall leaves
- Chalk or chalk marker
- Hot glue gun and glue sticks
- Ribbon for hanging (optional)
Crafting Process
- Paint the wood slice with chalkboard paint and let it dry
- Attach faux leaves around the edge with hot glue
- Write or draw your chosen design on the chalkboard surface
- Add ribbon for hanging if desired
- Customize with additional seasonal elements as needed
Full tutorial: Home Stories A to Z
Additional Tips
- Surface preparation: Prime the wood slice before applying chalkboard paint for better coverage.
- Leaf arrangement: Overlap leaves slightly for a fuller, more natural look.
- Chalk art: Experiment with different chalk colors for varied seasonal designs.
27. Felt Leaf Wreath: A Cozy Autumn Clutch
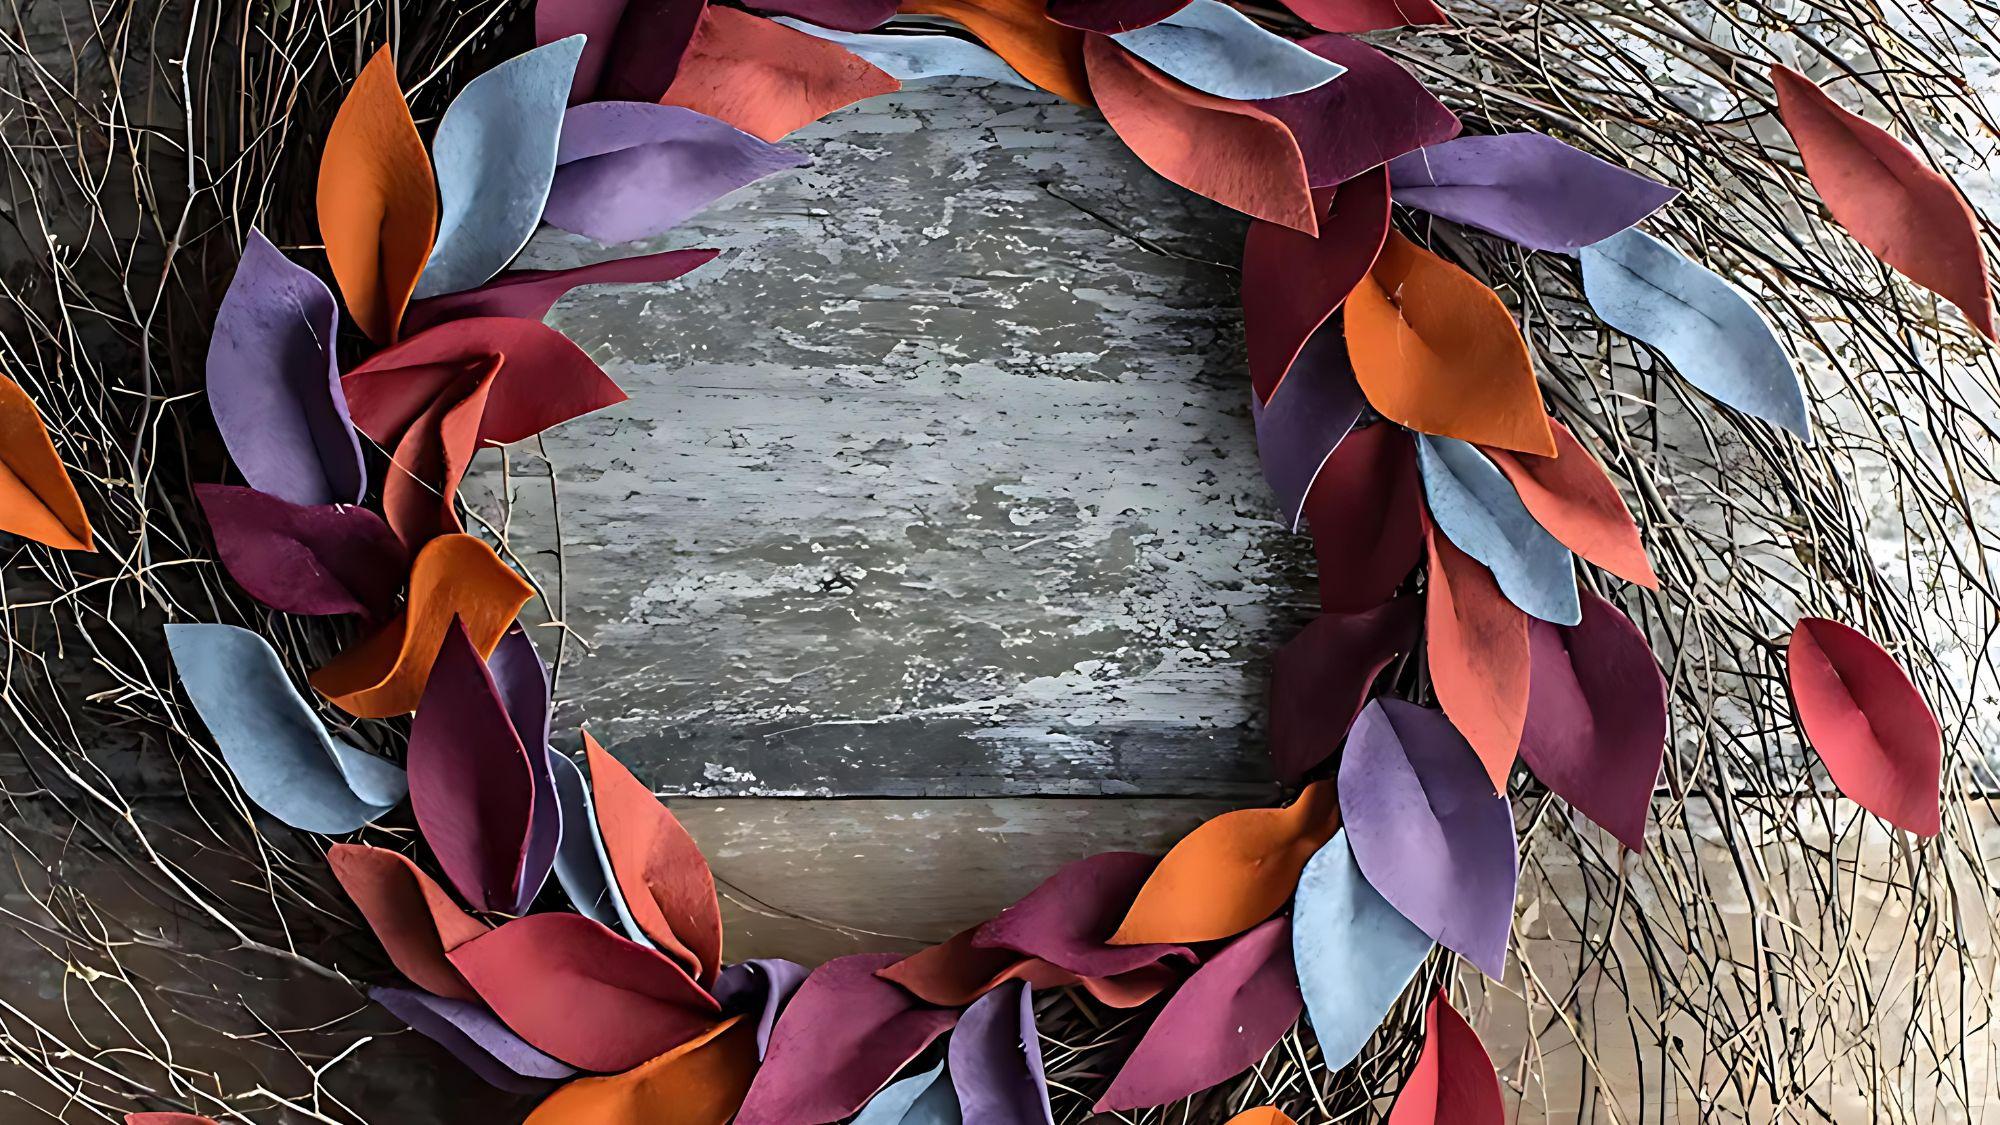
Create a warm and inviting fall decoration with this budget-friendly felt leaf wreath.
Featuring deep jewel-toned felt leaves, this wreath offers a sophisticated look that’s both visually appealing and cost-effective.
Materials Required
- Felt in deep jewel tones
- Wreath form (foam or wire)
- Scissors
- Hot glue gun and glue sticks
- Floral wire (optional)
- Ribbon for hanging (optional)
Crafting Process
- Cut various leaf shapes from felt
- Arrange leaves on wreath form, overlapping for depth
- Secure leaves with hot glue
- Add optional ribbon for hanging
Full tutorial:Lia Griffith.
Additional Tips
- Leaf variety: Create different sizes and shapes for a natural look.
- Color blending: Mix complementary colors for a rich, layered effect.
- Texture enhancement: Slightly curl leaf edges for added dimension.
28. Pampas Grass Wreath: Soft Textures of the Season
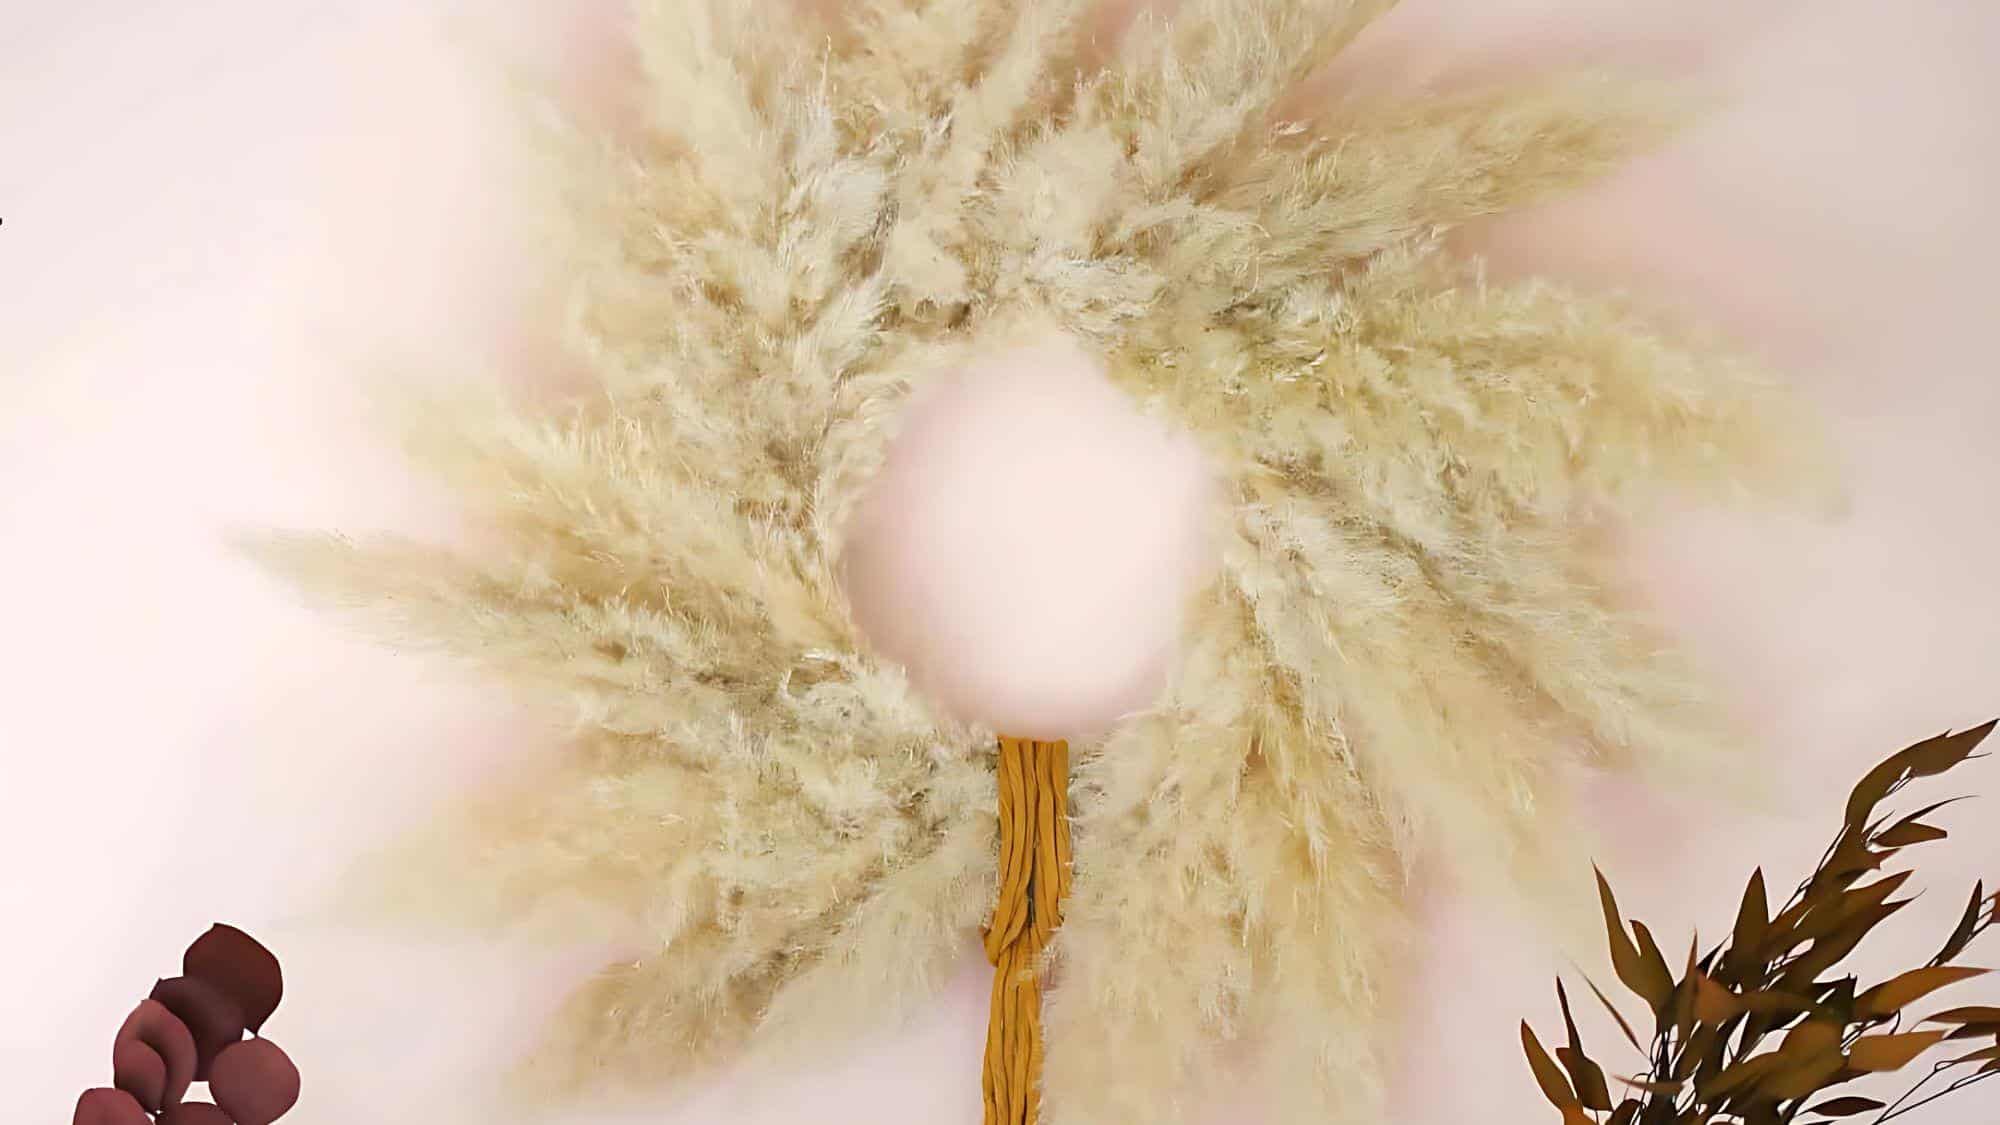
Adopt a modern fall look with this stunning pampas grass wreath.
The feathery texture of pampas grass creates a soft, inviting decoration that captures the essence of autumn.
Materials Required
- Pampas grass
- Wreath form (foam or wire)
- Floral wire
- Hot glue gun and glue sticks
- Ribbon for hanging (optional)
Crafting Process
- Attach pampas grass to wreath form using floral wire
- Layer grass for a full, textured appearance
- Secure loose pieces with hot glue
- Add ribbon for hanging if desired
Full tutorial: A Beautiful Mess
Additional Tips
- Grass arrangement: Vary the direction of grass for a natural, windswept look.
- Color accent: Consider adding a few colored pampas stems for subtle contrast.
- Maintenance: Gently fluff the grass periodically to maintain its full appearance.
29. Oranges & Eucalyptus Wreath: A Fresh Autumn Aroma
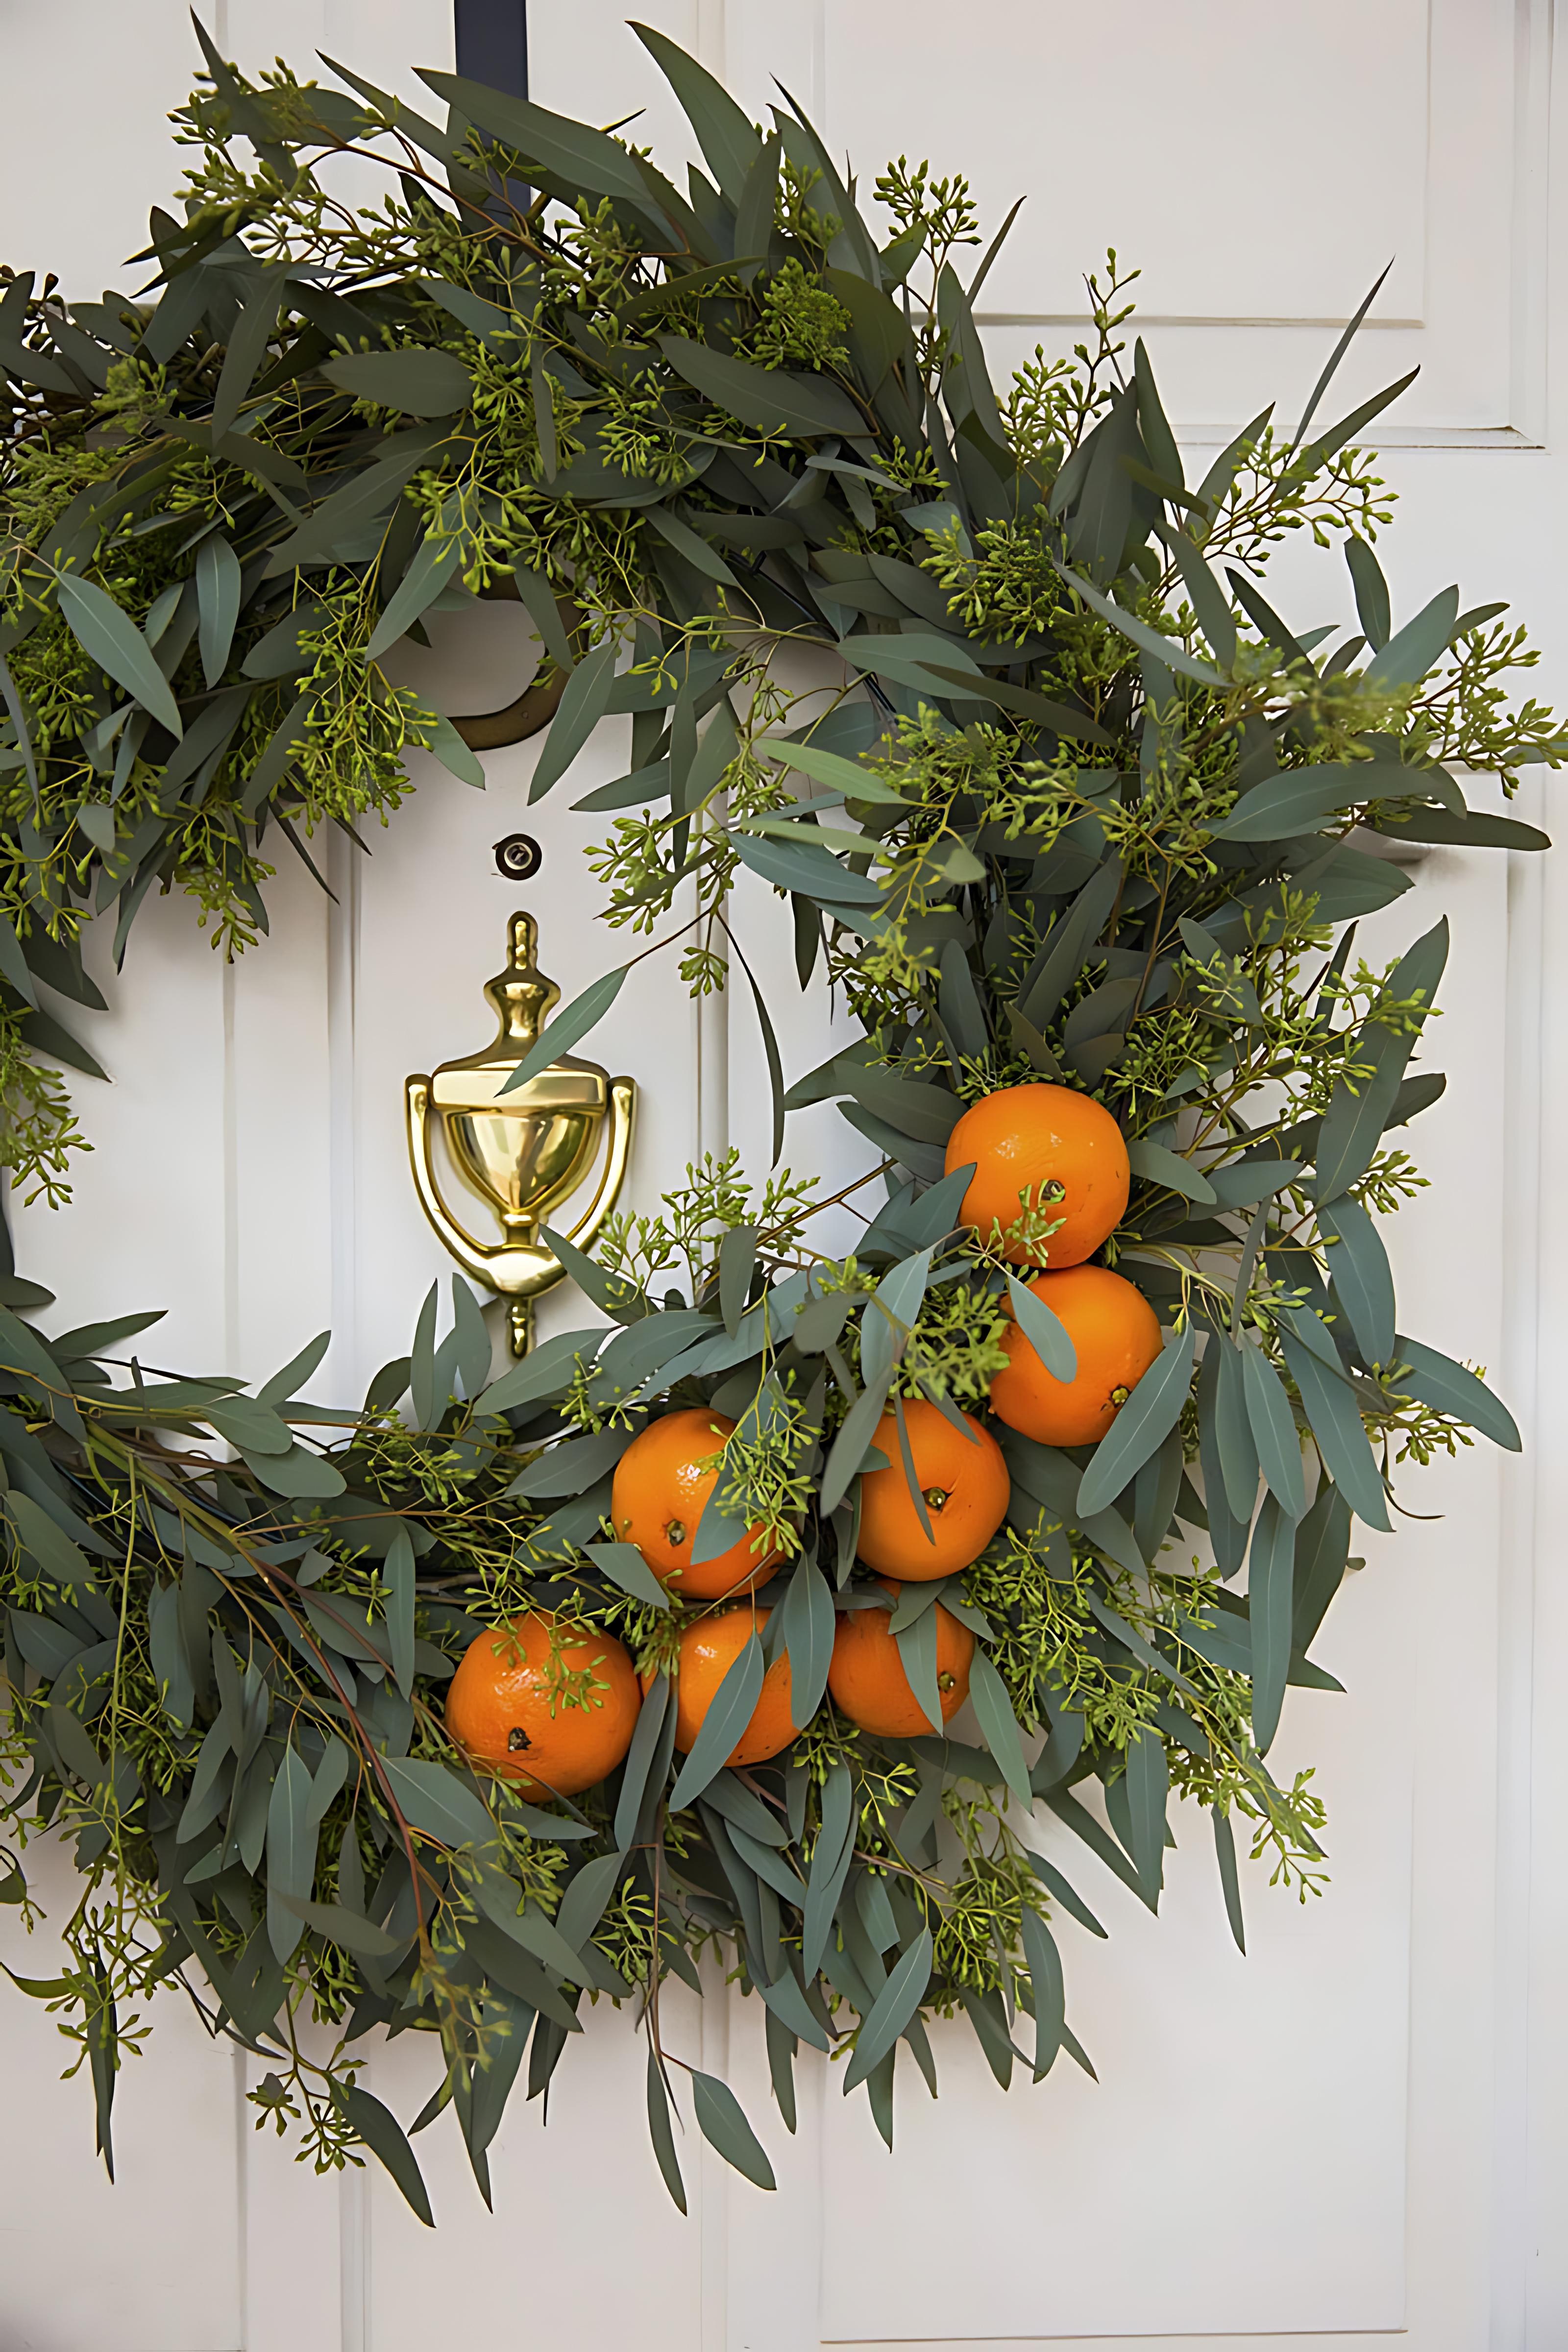
Bring the scents of the season to your door with this fragrant orange and eucalyptus wreath.
This natural creation combines vibrant colors with aromatic appeal for a truly sensory fall experience.
Materials Required
- Fresh or dried oranges
- Eucalyptus stems
- Wreath form (foam or wire)
- Floral wire
- Hot glue gun and glue sticks
- Ribbon for hanging (optional)
Crafting Process
- Slice and dry oranges if using fresh
- Attach eucalyptus stems to wreath form with floral wire
- Secure orange slices with wire and hot glue
- Add ribbon for hanging if desired
Full tutorial:Louise Roe
Additional Tips
- Orange preparation: Dry orange slices in a low-temperature oven for longevity.
- Eucalyptus placement: Alternate direction of stems for a fuller look.
- Scent boost: Add cinnamon sticks or star anise for extra fragrance.
30. Ombre Paper Leaf Wreath: A Colorful Fall Fantasy
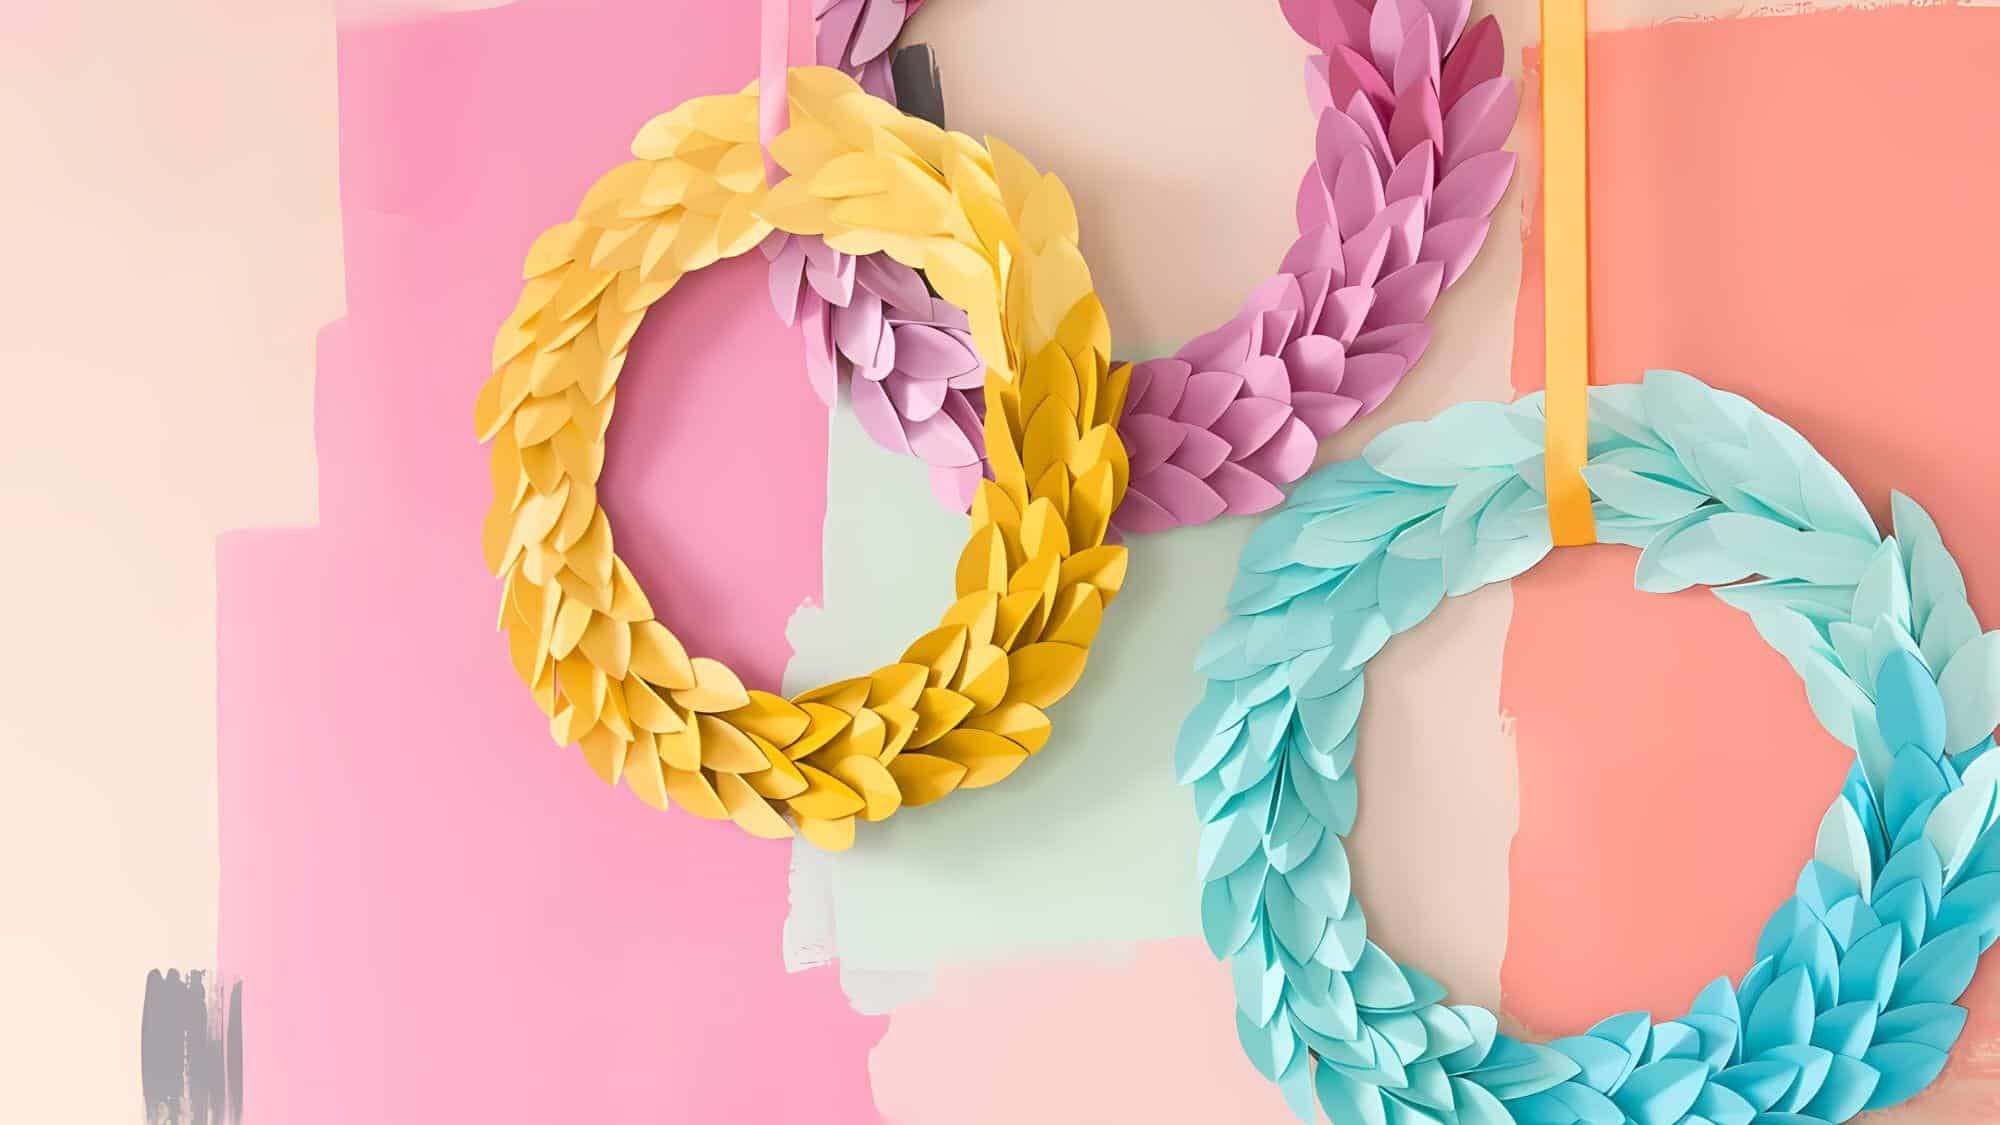
Add a playful touch to your autumn decor with this whimsical ombre paper leaf wreath.
The gradient of colors creates a visually striking decoration that’s sure to brighten any space.
Materials Required
- Scrapbook paper in gradient colors
- Wreath form (foam or wire)
- Scissors
- Hot glue gun and glue sticks
- Ribbon for hanging (optional)
Crafting Process
- Cut leaf shapes from scrapbook paper in various sizes
- Arrange leaves on wreath form in gradient pattern
- Secure leaves with hot glue
- Add ribbon for hanging if desired
Full tutorial:Damask Love
Additional Tips
- Color flow: Blend colors gradually for a smooth ombre effect.
- Leaf layering: Overlap leaves for added depth and texture.
- Shape variety: Mix different leaf shapes for visual interest.
31. Dip-Dyed Corn Husk Wreath: A Bold Autumn Statement

This wreath transforms ordinary corn husks into a captivating fall decoration.
By dip-dying the husks in black, you create a stark contrast that catches the eye and adds a touch of sophistication to your autumn decor.
The interplay of light and shadow on the dyed husks creates depth and interest, making this wreath a standout piece for modern homes or those looking to break away from traditional fall color schemes.
Materials Required
- Corn husks
- Black dye
- Wreath form (foam or wire)
- Floral wire
- Hot glue gun and glue sticks
- Ribbon for hanging (optional)
Crafting Process
- Dip corn husks in black dye and dry completely
- Attach dyed husks to wreath form using floral wire
- Layer husks for a full, textured appearance
- Secure with hot glue as needed
Full tutorial: Jojotastic
Additional Tips
- Dye variation: Leave some husks partially dyed for an ombre effect.
- Texture enhancement: Curl or twist some husks for added dimension.
- Accent addition: Consider incorporating a few metallic-painted husks for contrast.
32. Simple Cattail Wreath: Rustic Minimalism
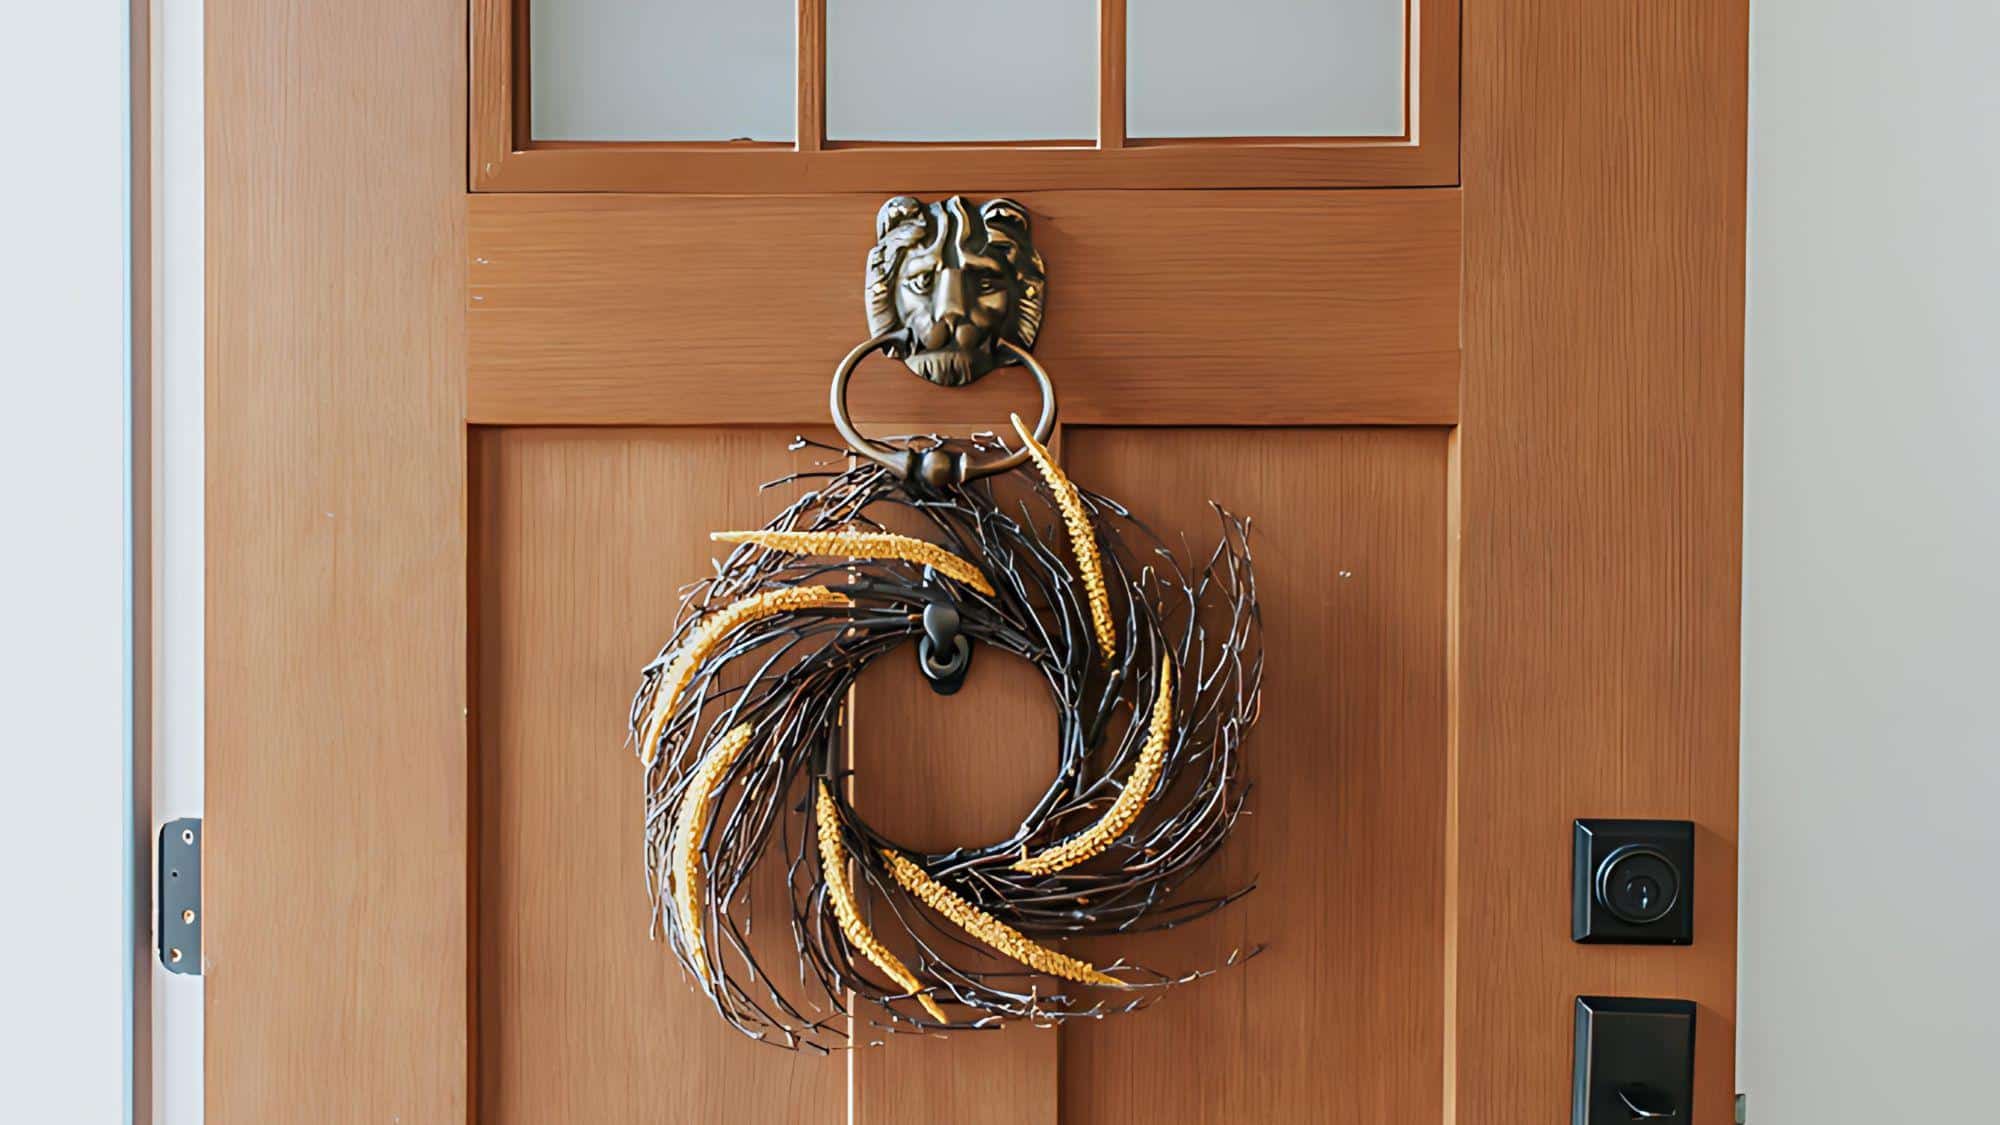
Celebrate the subtle beauty of autumn with this understated cattail wreath.
The slender, cylindrical shapes of the cattails bring to mind peaceful lakesides and marsh landscapes, evoking a sense of tranquility in your home.
This wreath’s simplicity allows it to complement a wide range of decor styles, from country chic to modern farmhouse, making it a versatile choice for any fall setting.
Materials Required
- Cattails
- Twig wreath form
- Floral wire
- Hot glue gun and glue sticks
- Ribbon for hanging (optional)
Crafting Process
- Attach cattails to twig wreath form using floral wire
- Position cattails evenly for a balanced look
- Secure with hot glue as needed
- Add ribbon for hanging if desired
Full tutorial:Pretty Handy Girl
Additional Tips
- Cattail preparation: Spray cattails with hairspray to prevent shedding.
- Natural accents: Add small pinecones or acorns for extra texture.
- Color boost: Include a few faux fall leaves for a pop of color.
33. Boho Macramé Wreath: Artisanal Autumn Charm
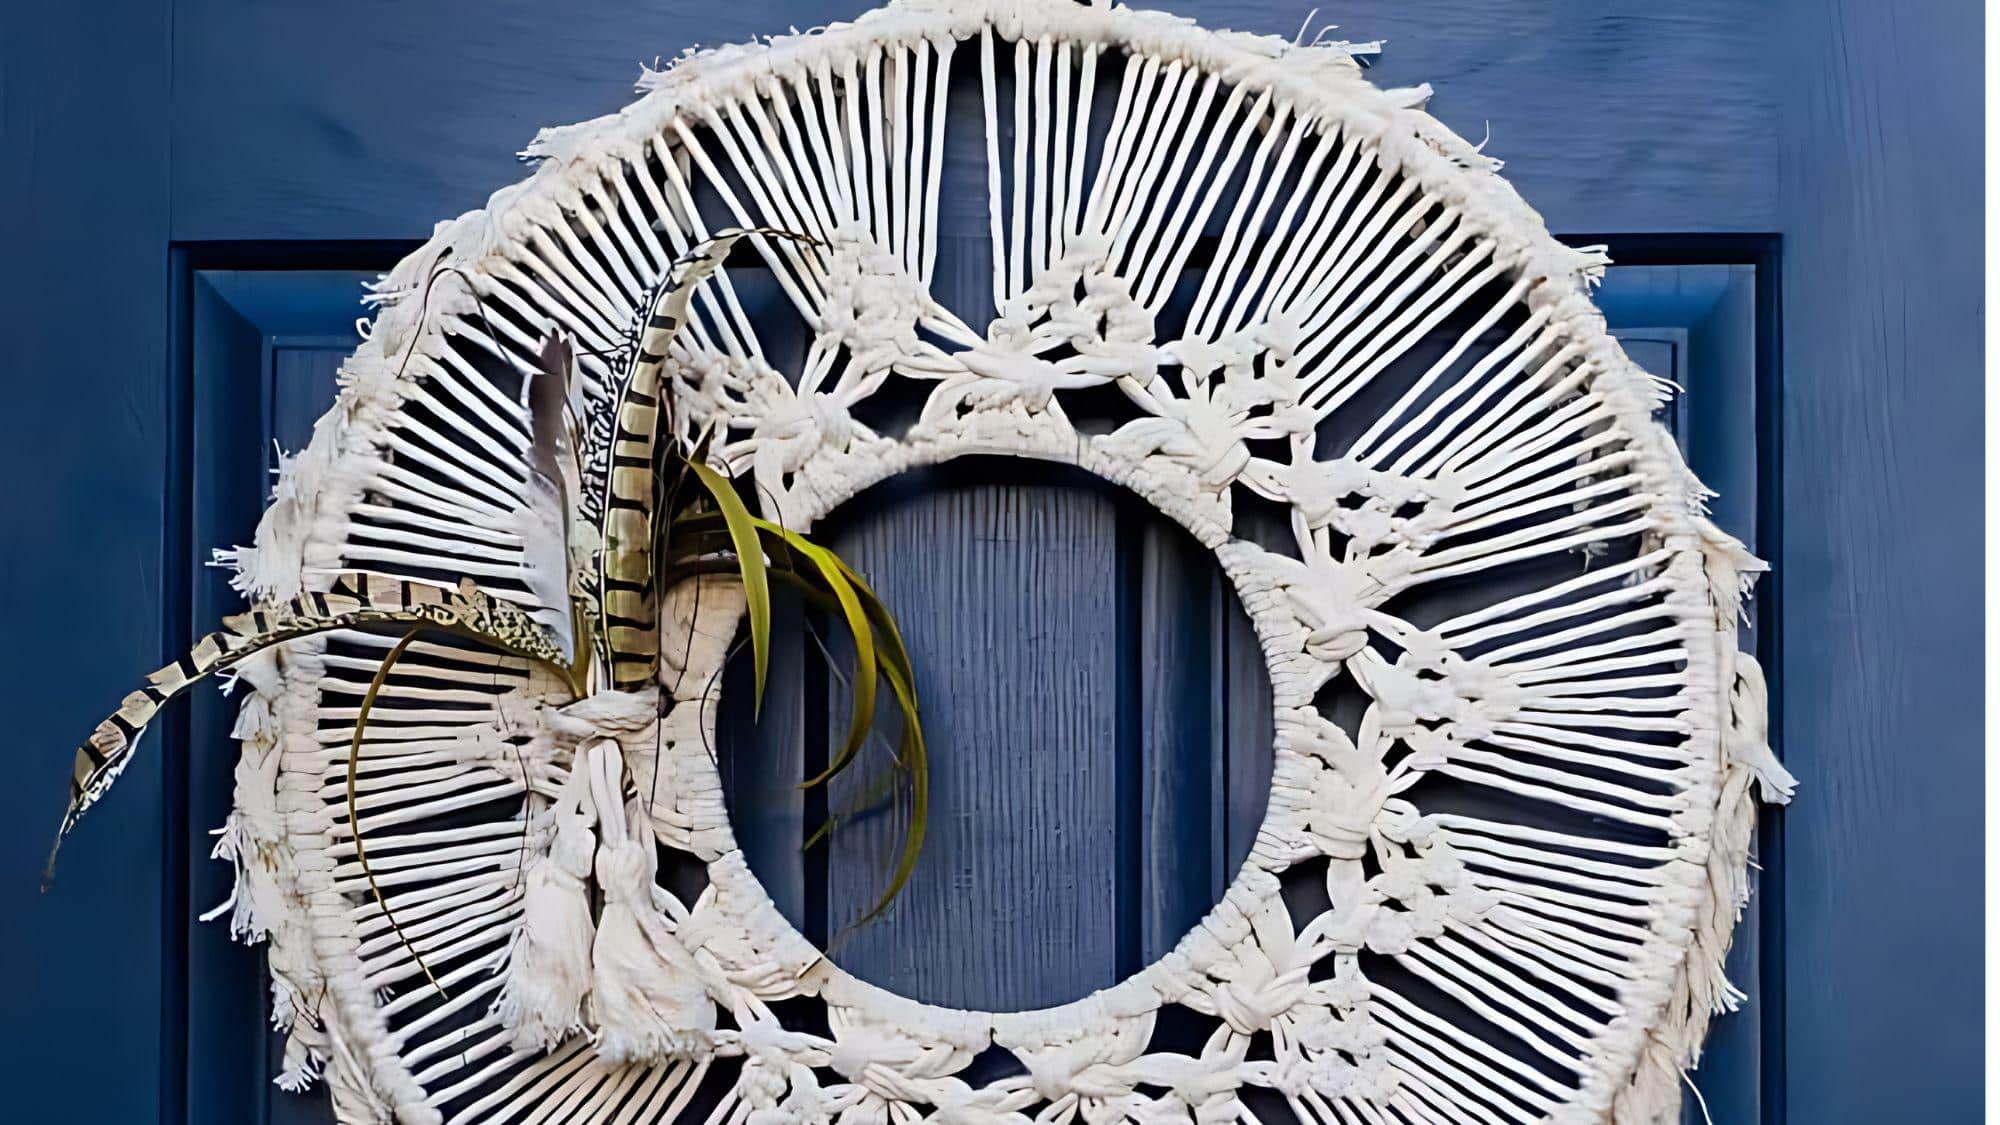
This wreath combines the timeless craft of macramé with seasonal flair.
The intricate knots and patterns create a visually engaging piece that adds texture and warmth to your space.
The soft, natural fibers of the macramé cord bring a cozy feel to your autumn decor, while the design flexibility allows you to incorporate personal touches that reflect your individual style.
Materials Required
- Macramé cord
- Wreath form (foam or wire)
- Wooden beads (optional)
- Hot glue gun and glue sticks
- Scissors
- Ribbon for hanging (optional)
Crafting Process
- Create or attach a pre-made macramé piece to the wreath form
- Secure macramé with hot glue
- Add wooden beads or other boho elements
- Attach ribbon for hanging if desired
Full tutorial: Place of My Taste
Additional Tips
- Pattern selection: Start with simple knots if you’re new to macramé.
- Fringe addition: Include longer strands at the bottom for a trendy fringe effect.
- Color play: Use naturally dyed cords for a subtle color variation.
34. Wheel Wreath: Rustic Charm Meets Floral Beauty
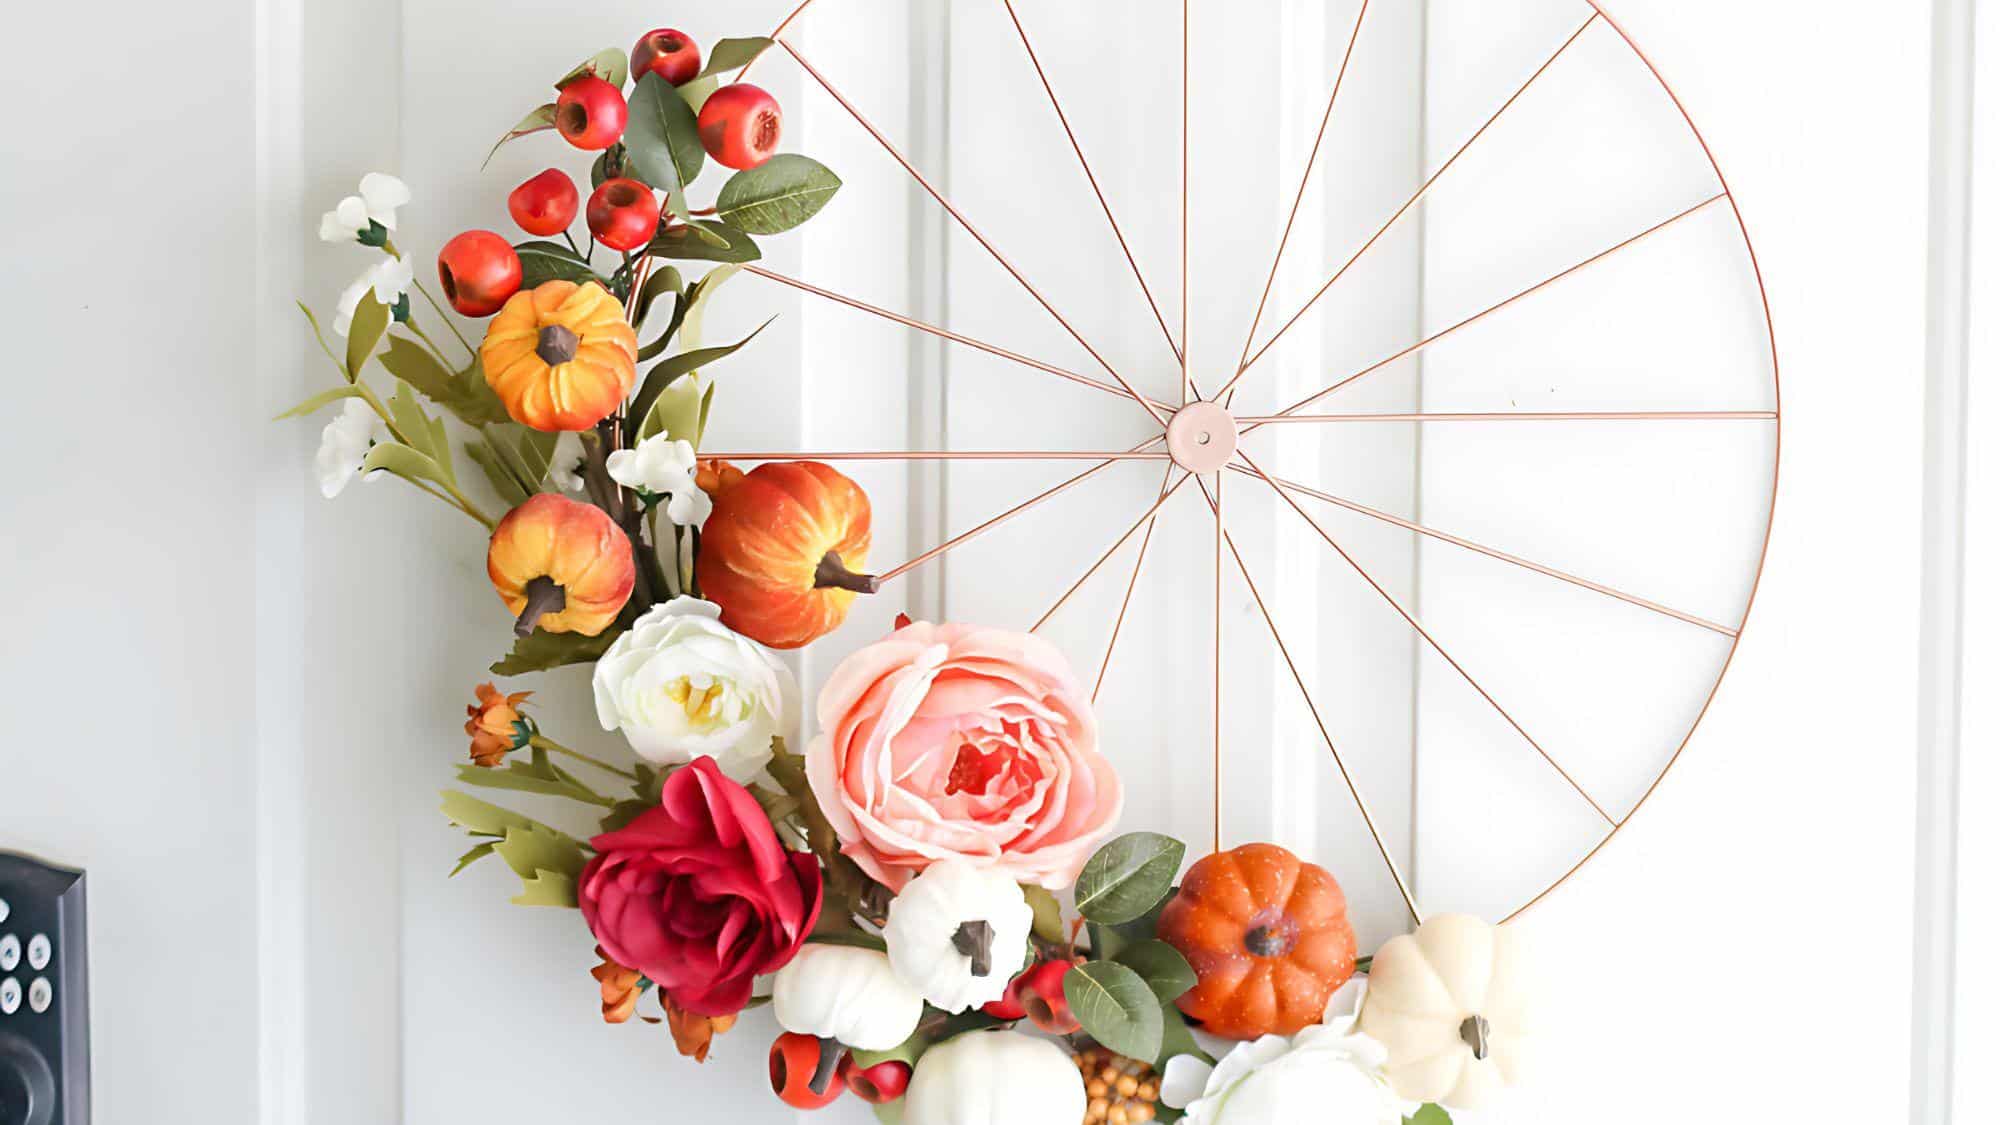
Repurpose an old wheel into a show-stopping fall decoration.
This wreath takes the concept of upcycling to new heights, turning a functional object into a piece of art.
The circular shape of the wheel provides a perfect frame for lush fall blooms, creating a harmonious blend of industrial and natural elements.
This wreath serves as a conversation starter and adds a touch of whimsy to your autumn decor.
Materials Required
- Wheel (bicycle or decorative)
- Faux fall flowers
- Floral wire
- Hot glue gun and glue sticks
- Ribbon for hanging (optional)
Crafting Process
- Clean and prepare the wheel
- Attach flowers to the wheel using floral wire
- Secure flowers with hot glue as needed
- Add ribbon for hanging if desired
Full tutorial:Lolly Jane
Additional Tips
- Flower selection: Mix different sizes and types of flowers for visual interest.
- Greenery addition: Incorporate faux leaves or vines for a fuller look.
- Wheel preparation: Consider painting the wheel to complement your decor.
35. Embroidery Hoop Wreath: Flimsy Fall Charm
This wreath brings a touch of crafting nostalgia to your fall decor.
The simplicity of the embroidery hoop serves as a clean, modern base for showcasing beautiful autumn elements.
The combination of florals and feathers allows for a play of textures, creating a wreath that’s visually interesting from every angle.
Its compact size makes it perfect for smaller spaces or as part of a larger wall arrangement.
Materials Required
- Embroidery hoop
- Faux florals
- Feathers
- Floral wire
- Hot glue gun and glue sticks
- Ribbon for hanging (optional)
Crafting Process
- Arrange florals and feathers on the embroidery hoop
- Secure elements with floral wire and hot glue
- Adjust placement for a balanced look
- Add ribbon for hanging if desired
Full tutorial:The Home I Create
Additional Tips
- Hoop selection: Use a wooden hoop for a more rustic look.
- Asymmetry: Try an off-center design for a modern twist.
- Seasonal updates: Easily switch out florals for different seasons or holidays.
Final Thoughts
Wrapping up your fall decor with a DIY wreath is a wonderful way to welcome the season and express your creativity.
From the bold Dip-Dyed Corn Husk Wreath to the delicate Embroidery Hoop Wreath, each design offers a unique way to celebrate autumn’s beauty.
These projects not only save you money but also allow you to craft a decoration that perfectly matches your style.
Remember, the key to a great wreath is in the details – mix textures, play with colors, and don’t be afraid to add personal touches.
Why not gather your crafting supplies and try making one of these wreaths this weekend?
Your front door (and your guests) will thank you. Share your creations in the comments below – we’d love to see how you’ve brought these ideas to life!