Transform Your Entryway: The HEMNES Shoe Cabinet Guide
Are you looking for a way to organize your shoes and make your entrance more welcoming? The HEMNES shoe cabinet offers a simple answer.
Many homes face a common issue – shoes scattered near the front door. This not only looks messy but can make your space feel smaller. A well-organized entrance sets the tone for your entire home.
The HEMNES cabinet stands out with its slim design. It fits perfectly in narrow spaces while holding several pairs of shoes. Plus, its clean lines work well with many home styles.
In this guide, we’ll show you how to use the HEMNES cabinet in your home. You’ll learn about its features, setup tips, and ways to keep your entrance tidy. Our step-by-step tips will help you create an organized entrance that works for your daily needs.
Exploring the IKEA HEMNES Shoe Cabinet
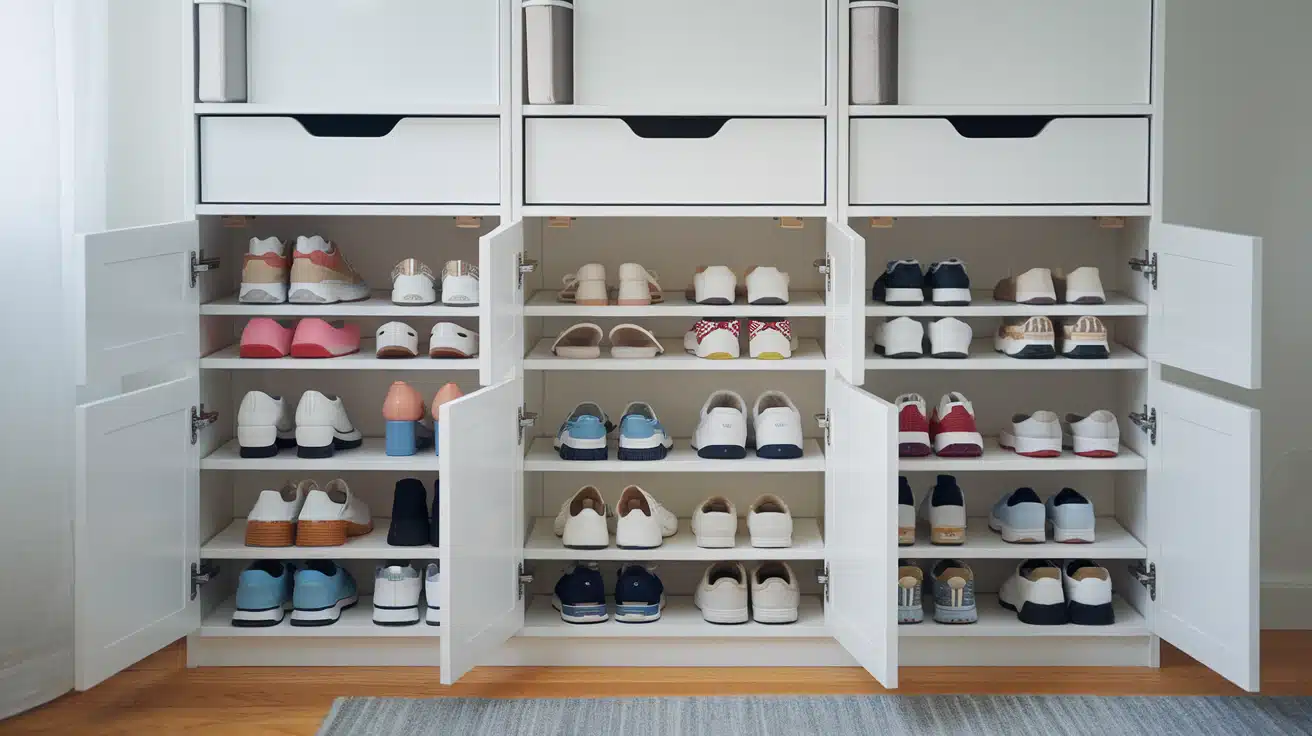
The HEMNES shoe cabinet combines function and style in a compact form. Its thin profile makes it perfect for small spaces, while the simple design fits well in any home setting. You can choose from white, black-brown, or gray-stained finishes to match your home’s style.
Each cabinet measures 42 inches high, 35 inches wide, and 8 inches deep. Its slim size helps you save floor space while keeping your shoes in order. The cabinet doors tilt outward instead of swinging open, saving even more room in tight spots.
The solid pine construction means this cabinet can handle daily use. Each compartment holds 4-6 pairs of shoes, depending on their size. The total storage space fits 12-18 pairs, making it work well for single users and families.
Some helpful features include:
- Built-in air vents to keep shoes fresh
- Three separate compartments for easy sorting
- Adjustable feet for uneven floors
- Hidden storage behind each door
Parents find the cabinet useful for teaching kids to put away their shoes. The easy-to-use doors mean even small children can help keep the entrance tidy. The solid build quality maintains stability even with regular opening and closing.
Ikea Hemnes Shoe Cabinet Hack: Step-By-Step Guide
Tools and Material
| Tools Needed | Materials Needed |
|---|---|
| Power drill | 2 HEMNES shoe cabinets |
| Drill bits (1/16 inch) | Wood glue (Gorilla brand) |
| Pencil | Frog tape |
| Hobby drill gauge | Extra-strong double-sided tape |
| Clamps (2-3) | Screws (included with cabinets) |
| Measuring tape | Optional: Paint or wood stain |
| Level | Optional: Custom wood top |
| Screwdriver |
Step 1: Preparation
Clear your entrance area completely. Remove all shoes, decor, and furniture to create a clean workspace. This will make assembly easier and help you see how the finished cabinet will fit.
Sort all parts from both IKEA boxes, making separate piles for screws, brackets, and hardware. This simple step saves time during assembly.
Step 2: Assembly of the First Cabinet
Follow IKEA’s instructions to build your first cabinet. Skip attaching the top piece for now – you’ll add this later. Make sure all joints are tight and secure. Take your time with this first build, as it sets the foundation for your project.
Step 3: Positioning the First Cabinet
Place the assembled cabinet against your chosen wall. Use a level to check its position. Make sure it sits straight and stable. This placement check helps you spot any floor unevenness that might need adjusting.
Step 4: Assembly of the Second Cabinet
Build the second cabinet like the first but with one key difference. Leave off one leg – the side that will join the first cabinet. Keep the back panel in place for stability. This creates a seamless look when both units come together.
Step 5: Combining the Cabinets
Line up your second cabinet next to the first. The sides should touch perfectly. Apply wood glue to the joining edges. Use clamps at the top and bottom to hold cabinets together. Let this setup dry overnight for best results.
Step 6: Securing the Cabinets
After drying, mark screw positions using frog tape as a template. Drill 1/16-inch pilot holes through both cabinets. Add screws to create a strong bond. Fill any small gaps with wood glue and press together until set.
Step 7: Finishing Touches
Once everything is secure, attach both top pieces. The video creator used strong double-sided tape to make future changes easily. Load your shoes—each compartment fits 2-3 pairs of women’s or two pairs of men’s shoes.
Final Adjustments
Check all doors open smoothly. Test the stability by gently pushing from different angles. Clean any glue residue with a damp cloth. Make sure all surfaces are clean and ready for use.
DOWNLOAD THE FULL GUIDE FROM THIS PDF
CLICK HERE
Video Tutorial
Check out this detailed DIY video tutorial by Niky Foster.
DIY vs. Hiring a Professional
| Aspect | DIY Suitable When… | Call a Professional When… |
|---|---|---|
| Skill Level | You can use basic tools like drills and levels | You need complex cuts or custom fitting |
| Time | You have 2-3 hours free for setup | You need quick, same-day setup |
| Space Type | Your floor is level and the walls are straight | Your walls are uneven or floors slope |
| Tools | You own or can borrow basic tools | You need special equipment |
| Budget | You want to save on labor costs | Cost isn’t your main concern |
| Changes | You plan to follow basic assembly steps | You want major design changes |
| Safety | Your space needs standard wall mounting | You need special wall reinforcement |
| Number of Units | Installing 1-2 cabinets | Installing multiple units or built-ins |
| Experience | You’ve built furniture before | You’ve never used power tools |
| Help Available | You have someone to assist with lifting | You’ll work alone with heavy items |
Why Customize Your HEMNES Shoe Cabinet?
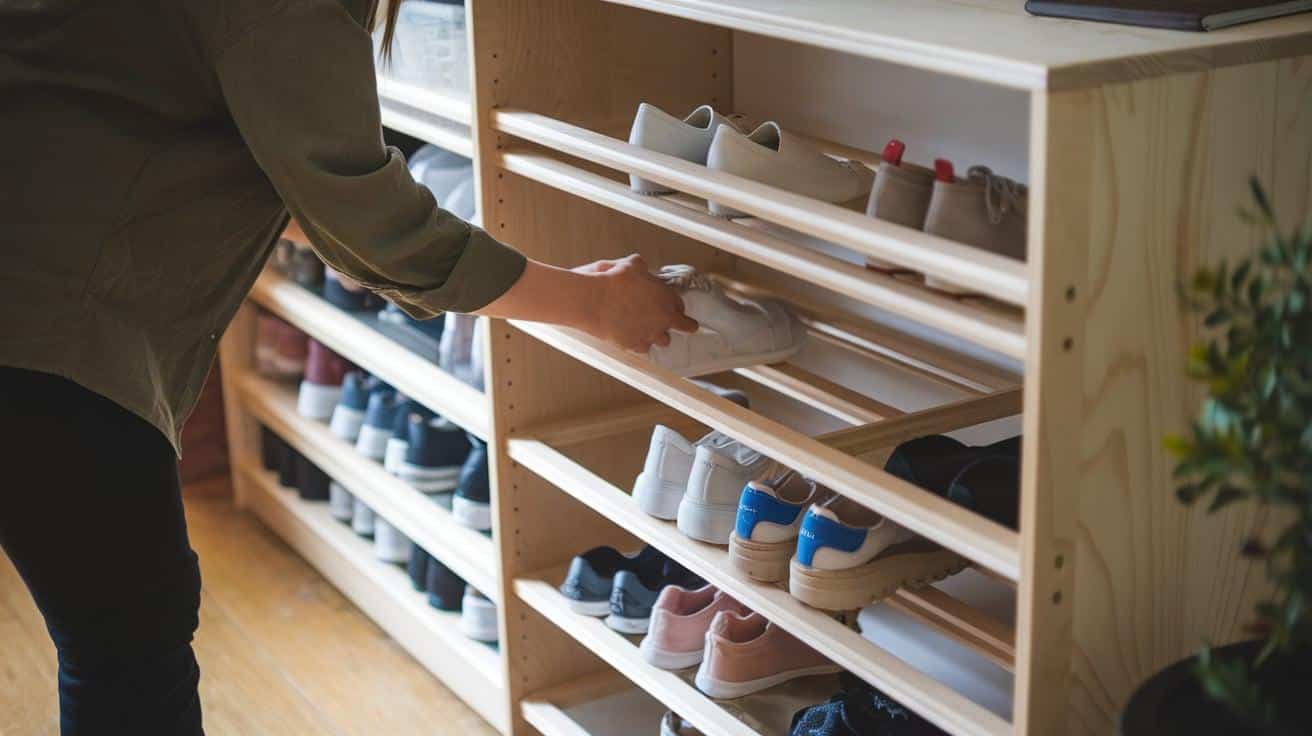
Making changes to your HEMNES cabinet can help it better suit your needs. Small updates can transform a basic cabinet into something that fits your space perfectly. The right changes can simplify shoe storage while adding a personal touch to your home.
Personalization and Practicality
Every home has different storage needs. You might want extra space for winter boots or a spot for shoe care items. Small tweaks to your cabinet can solve these specific storage problems. Adding hooks on the sides gives you spots for umbrellas or bags. Installing a small shelf on top creates room for keys and mail.
Creative Customizations
Here are some ways to make your HEMNES cabinet work better for you:
- Paint the cabinet to match your wall color
- Add new knobs or handles for a fresh look
- Place a cushioned top to create a sitting area
- Install motion-sensor lights inside each compartment
- Put labels on doors to organize family shoes
- Add stick-on wallpaper to the doors for pattern
- Create a tray on top for small items
Simple changes like these help your cabinet serve multiple purposes. The flat top surface works well as a display area for plants or photos. During cold months, you can also add baskets on top for gloves and scarves.
Additional Tips
1. Keep Your Cabinets Stable
Regular checks make a big difference in how long your cabinet lasts. Put your bulkier shoes on the lowest shelves. This helps stop the cabinet from tipping forward when doors open.
Each month, look at the hinges and tighten any loose screws. The cabinet works best when fixed to your wall with proper anchors.
2. Make The Most of Your Storage
Smart sorting helps you find shoes faster. Give each family member their own section, or split spaces by season. Small shoes need less room, so kids’ sections often hold more pairs.
Thin sandals stored on their sides let you fit extra pairs. A simple shoe-care kit on top keeps cleaning supplies close.
3. Style Your Cabinet Space
Your cabinet’s top offers more than shoe storage. A small dish holds coins and keys right where you need them. Mail finds its spot in a slim box that matches your style. During holidays, the flat top works well for simple decorations. A tiny lamp adds both style and function.
4. Space-Saving Ideas
Think about which shoes you use most often. Keep these pairs in easy-to-reach spots. Save closet space for tall boots that won’t fit in the cabinet. Light items work best in top sections.
The middle spots make grabbing daily shoes simple. When seasons change, swap out shoes you won’t need for months.
Conclusion
A well-organized shoe storage system changes how you feel when you enter your home. The HEMNES cabinet keeps your shoes tidy and uses small spaces well.
This guide shows you how to double your storage by joining two cabinets. The result is a clean, unified look that works in most homes. Each shelf holds multiple pairs of shoes, from kids’ sneakers to adult footwear.
Building this cabinet takes time and care, but the outcome is worth the effort. Your entrance stays neat, your shoes remain organized, and you gain a useful surface for daily items.
The simple design fits many styles, while the storage space meets real family needs. A tidy entrance creates a calm start to every day.

