Stepwise Guide for Getting Distressed Black Finish
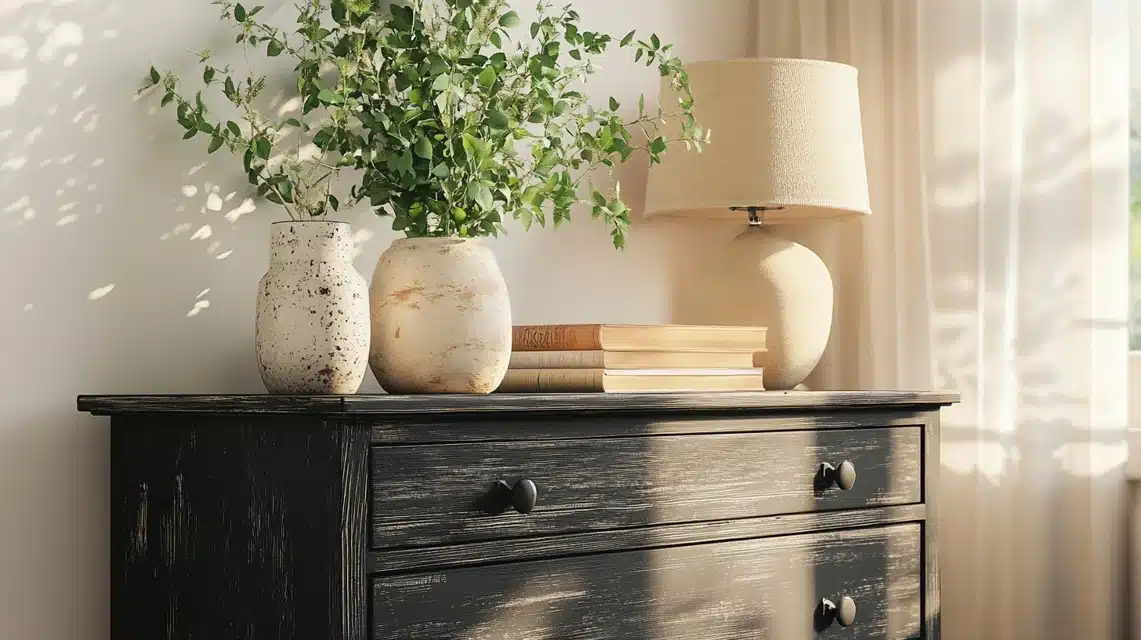
I love how a distressed black finish can completely transform furniture, giving it an amazing look.
Whether revamping an old piece or adding character to something new, this process is simple and rewarding.
In this guide, I’ll walk you through each step, from gathering the materials to mastering techniques like wet distressing and dry brushing.
You’ll learn how to balance rustic charm and polished elegance perfectly. Trust me, with a little effort and creativity, you’ll create stunning furniture that stands out in any space.
How to Make the Distressed Black Finish on Furniture
Step 1: Gather Materials Required
Painting Materials
- General Finishes Lamp Black Milk Paint – For the solid black base coat.
- Paintbrush – A high-quality brush (e.g., Purdy paintbrush) for painting and applying the topcoat.
Distressing Material
- 120-Grit Sandpaper – Preferably slightly used for a softer effect.
- Damp Paper Towel or T-Shirt Rag – This cleans dust and fingerprints.
Topcoat Materials
- General Finishes Flat Topcoat (Water-Based) – This is used for sealing and enhancing the finish.
- Popsicle Stick – This stirs the topcoat to avoid air bubbles.
Optional Tools
- Drop Cloth – To protect your workspace.
- Painter’s Tape – Cover areas you don’t want to paint or distress.
- Gloves – To keep your hands clean while working.
- Clean Surface or Stand – To hold the furniture while working for easier access.
Step 2: Preparation
- Choose the Paint: Use General Finishes Lamp Black milk paint to achieve a solid black finish. Apply multiple coats if needed to ensure complete coverage.
- Allow Paint to Dry: Ensure the paint is completely dry before starting the distressing process.
Step 3: Distressing the Furniture
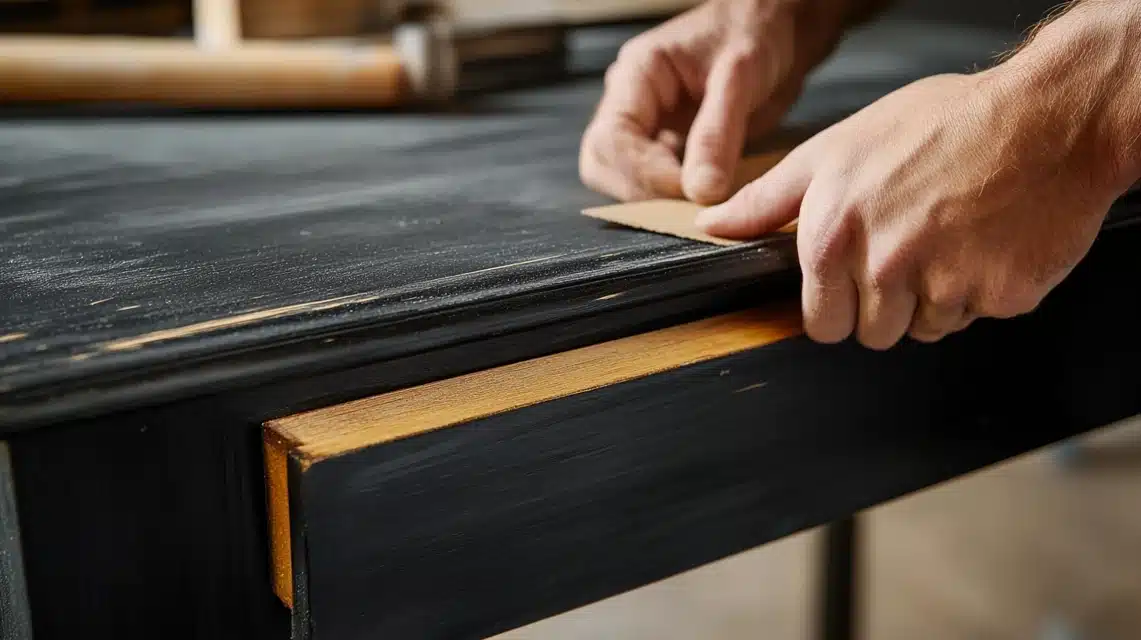
- Select Sandpaper: Use 120-grit sandpaper that has been used previously to soften its edges, preventing overly sharp distressing marks.
- Focus on Natural Wear Areas:
- Sand areas where natural wear would occur, such as edges, corners, or areas near handles.
- Lightly distress the surface to reveal the honey-colored wood underneath.
- Avoid over-distressing to maintain a natural look.
- Smooth Out Imperfections: If you notice any drips, uneven finishes, or imperfections, use the distressing process to blend them seamlessly into the design.
- Dust the Surface: Clean off dust and fingerprints using a damp paper towel or soft rag before applying the topcoat.
- Touch-Up: If you’ve distressed an area too much, repaint it with black paint and allow it to dry before continuing.
Step 4: Applying the Topcoat
- Select the Topcoat: Use General Finishes Flat water-based topcoat for a clear, smooth finish.
- Prepare the Topcoat: Stir the topcoat with a popsicle stick to avoid introducing air bubbles.
- Apply Topcoat with a Brush:
- Use a high-quality brush (e.g., Purdy paintbrush) to spread the topcoat evenly.
- Apply enough topcoat to ensure a thick, even coat across the surface. Avoid using too little.
- Prevent Drips:
- Watch for drips, especially in corners and crevices. Remove them promptly with the brush.
- For edges, lightly brush along the direction of the edge for a seamless finish.
- Allow to Dry:
- Let the topcoat dry completely to achieve a clear and smooth finish.
- Avoid touching the surface during the drying process to allow it to self-level.
- Apply a Second Coat: If additional durability or shine is desired, apply a second layer of topcoat once the first coat is dry. No sanding is required between coats.
- Inspect the Finish: Ensure all areas are evenly coated, and no streaks or brushstrokes remain.
- Enjoy the Result: Let the piece fully dry and admire the smooth, polished black distressed finish.
Techniques for Distressed Black Furniture
Achieving a distressed black furniture finish requires carefully applying techniques that bring out the paint’s beauty and the piece’s natural elements. Here are four commonly used methods:
1. Wet Distressing
Wet distressing involves removing paint while it is still slightly damp. This method creates a softer, more natural transition between the painted surface and the underlying material.
Process:
- Apply a coat of black paint and let it dry just enough to become tacky.
- Use a damp cloth or sponge to gently rub areas where you want the base material or earlier paint layers to show.
Benefits:
- It produces a smoother, less harsh effect than sanding.
- It is ideal for furniture with intricate details where precision is key.
2. Hand Sanding
Hand sanding is a popular method for creating controlled distressing. This technique gives you greater flexibility over how much distressing you want and where it should be applied.
Process:
- Use medium-grit sandpaper (e.g., 120–150 grit) to target edges, corners, and areas that naturally experience wear over time.
- Gently sand until the desired amount of base material is exposed.
Benefits:
- Allows for a customized look with precise control over distressing.
- Works well on flat surfaces and areas prone to natural wear.
3. Dry Brushing
Dry brushing adds subtle texture and depth using minimal paint and light strokes. This method is perfect for enhancing the character of black furniture.
Process:
- Dip the brush into a small amount of black paint, then blot off excess paint until the brush is nearly dry.
- Lightly sweep the brush across the surface, focusing on raised areas and details.
Benefits:
- It creates a layered look that highlights the texture and natural patterns of the furniture.
- It is easy to achieve a variety of effects based on brush pressure.
4. Color Washing
Color washing combines the richness of black paint with a hint of transparency, allowing the natural wood tones or base layers to peek through.
Process:
- Mix black paint with water to thin it out.
- Apply the mixture with a brush and remove the excess with a cloth to control the transparency.
Benefits:
- Adds depth and dimension without completely covering the original surface.
- It is ideal for achieving a rustic or vintage appearance.
Summing Up
With the right materials, preparation, and techniques, such as hand sanding or color washing, you can turn any piece of furniture into a one-of-a-kind piece.
The imperfections and unique details make each project special, adding warmth and character to your home.
I hope this guide has given you the confidence to try this project and explore your creativity.
Take your time, enjoy the process, and watch your furniture become a beautiful statement in any room.
Frequently Asked Questions
Can You Distress Black Furniture without Sanding?
Yes, you can distress black furniture without sanding by using wet distressing techniques, such as wiping the paint with a damp cloth before it dries.
Is Distressed Black Furniture Still in Style?
Yes, distressed black furniture remains popular for its timeless appeal and versatility. It effortlessly fits into farmhouse, vintage, and modern home decor styles.
What Does “Distressed” Mean in Fashion and Furniture Contexts?
In fashion and furniture, “distressed” refers to intentionally aged or worn aesthetics, giving items a vintage, rustic, or lived-in appearance for added character.

