
Step-By-Step Guide for DIY Workbench
Want to take your projects to the next level? A sturdy workbench is a must-have for any workshop.
It doesn’t matter if you’re into woodworking, fixing up your home, or crafting – a good workbench will make your life easier.
Its always rewarding to build one yourself!
It’s cheap and simple, and you can make it just the way you like.
In this guide, I’ll take you through everything you need to know.
We’ll cover:
- The materials and tools you’ll need
- Step-by-step instructions to build your own awesome workbench.
- Some cool ideas to make your bench even better.
So, let’s get started and build a workbench that’ll make all your DIY dreams come true!
Choosing the Right Workbench for Your Needs
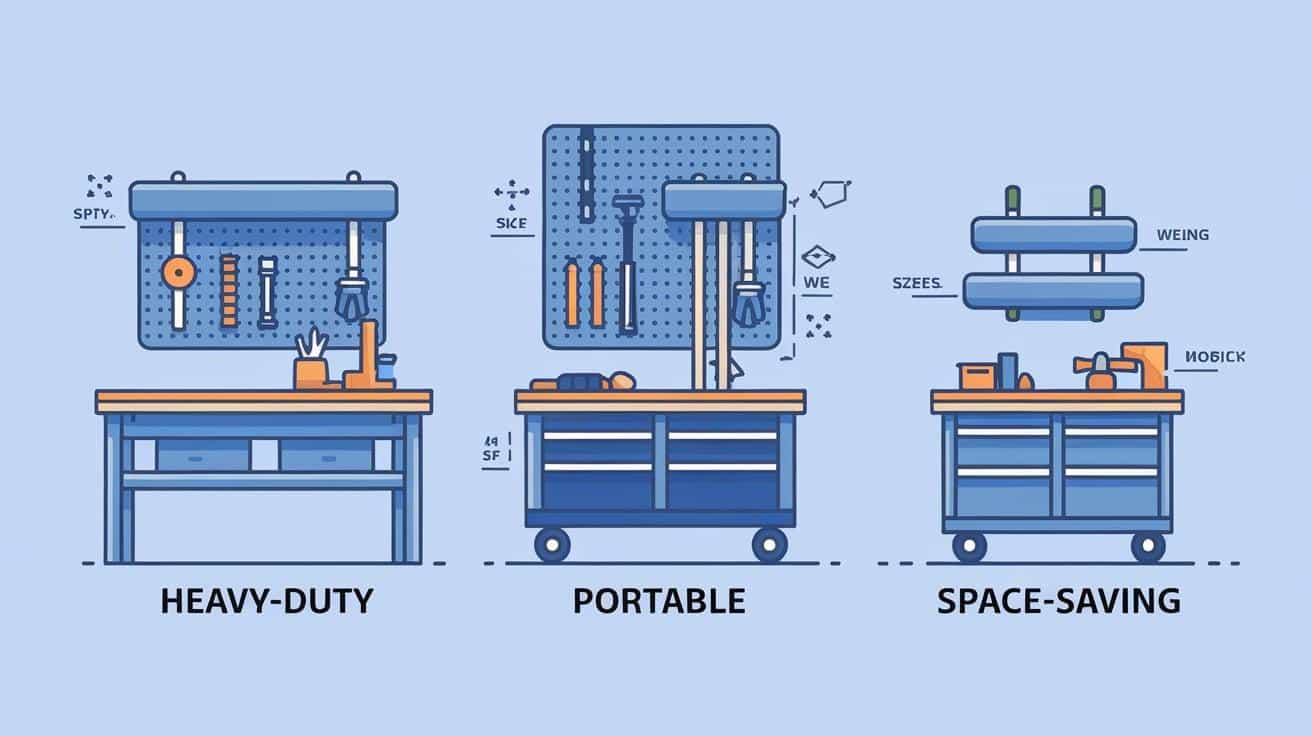
Before you start building, think about what kind of workbench you need.
Do you have a big space or a small one? Will you be moving your bench around or keeping it in one spot? And what kind of projects will you be working on?
Let’s break it down:
Stationary vs. Mobile Workbenches
If you’ve got a dedicated workspace, a stationary bench is the way to go.
It’s sturdy and can handle heavier projects.
But if you’re tight on space or need to move your bench around, consider a mobile one with wheels.
Small vs. Large Workbenches
The size of your bench depends on your space and projects.
A compact bench will do the trick if you’re working on smaller crafts or have limited room.
But if you’ve got big projects or plenty of space, go for a larger bench.
Light-Duty vs. Heavy-Duty Workbenches
Think about the types of projects you’ll be doing.
A light-duty bench is fine if you’re into light crafting or small repairs.
But if you’re planning on tackling bigger projects or using heavy tools, invest in a heavy-duty bench that can handle the weight.
Materials & Tools You Need to DIY Work Bench
Materials
- Lumber Choices: 2x4s, 3x4s, or 4x4s for legs; MDF, plywood, or repurposed tabletops for the surface.
- Fasteners: 2 ½” and 1 ¼” self-tapping screws, 3” drywall screws.
- Optional Add-ons: Casters for mobility, brackets for additional stability, and power strips for convenience.
Tools
- Cutting Tools: Miter saw or circular saw.
- Drilling Tools: Cordless drill or impact driver.
- Measuring & Marking: Tape measure, speed square, straightedge, pencil.
- Safety Gear: Safety glasses, ear protection, work gloves.
Step-by-Step Guide to Building a DIY Workbench
Step 1: Cutting the Materials
- Get your lumber cut to size. For a small bench, try 60″x24″. For a bigger one, go for 72″x30″.
- A speed square helps you make straight, precise cuts.
Step 2: Assembling the Frames
- Use 2x4s to make the top and bottom frames. Attach the short sides to the long front and back with screws.
- Use a square tool to check that everything lines up straight.
Step 3: Attaching the Legs
- Screw the legs into the top frame first. Please make sure they’re flush and even.
- Flip it over and attach the bottom frame 6″ up from the ground. This makes it extra sturdy.
- Clamps keep everything in place while you work, so your bench comes out nice and straight.
Step 4: Reinforcing for Durability
- Add braces and bolts to make your bench strong and long-lasting.
Step 5: Adding the Work Surface and Bottom Shelf
- Use 1 ¼” screws to secure your tabletop (MDF, plywood, or whatever you like) to the top frame.
- Screw the lower shelf to the bottom frame. Make sure it’s level and fits snugly between the legs.
Customizations & Upgrades for Workbench
You’ve got your basic workbench all setup, but why stop there? Add some extras to make it work even better for you!
Storage and Accessories
Want to keep your tools organized and easy to find?
Add a pegboard to the back of your bench. You can also put a vise on one end to steady your projects while you work.
And don’t forget about side brackets—they’re great for hanging clamps or tools you use frequently.
Adding Mobility with Casters
Casters are the way to go if you need to move your bench around.
Look for double-locking ones that keep your bench still when you want it to stay put.
No casters? No problem! Just adjust the height of the legs to make your bench the perfect height for you.
Power and Lighting Enhancements
Add a power strip to one of the legs to make your life easier. Then, you can plug in all your tools right where you need them.
And don’t forget about lighting! An overhead light or a shop light attached to your bench will help you see what you’re doing, even in a dim garage or workshop.
Common Mistakes to Avoid While Making a Workbench
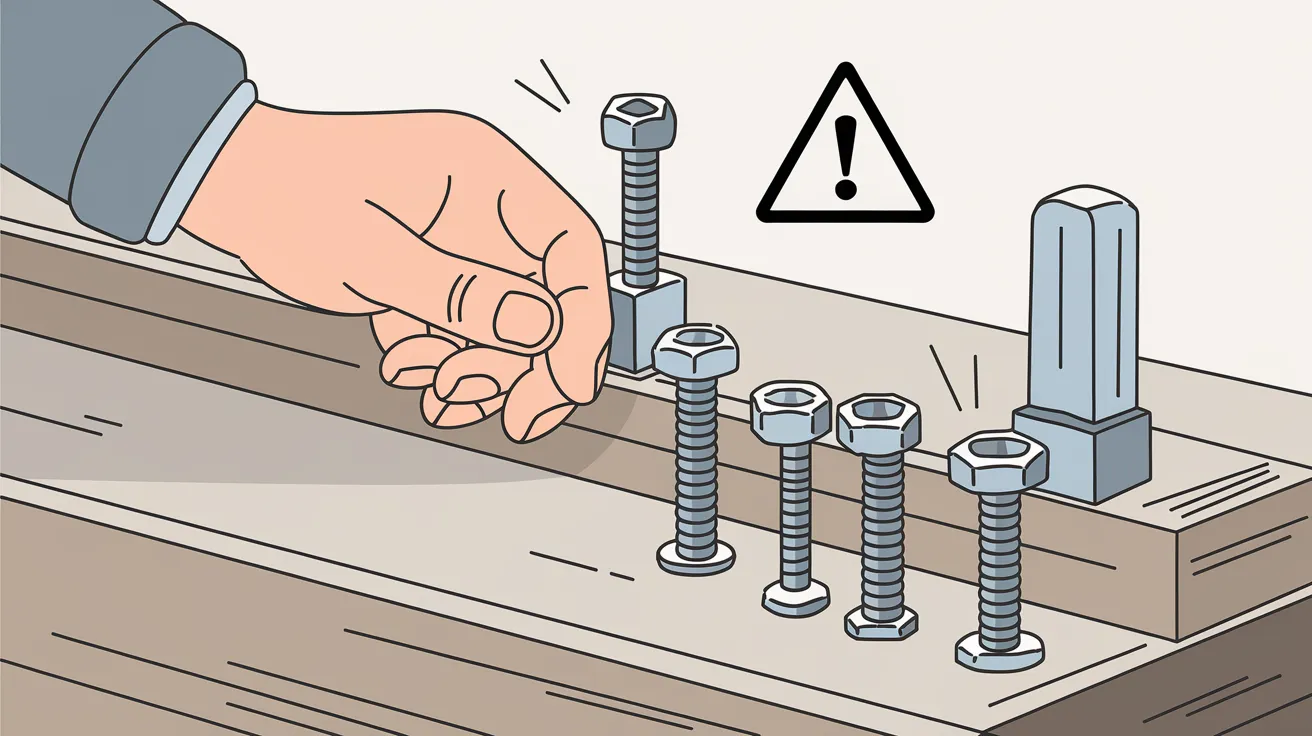
1. Using Low-Quality or Warped Wood
- Avoid pressure-treated wood for indoor projects as it may release harmful chemicals.
- Always check for straight boards to prevent an uneven or wobbly workbench.
2. Not Measuring Properly
- Double-check all measurements before making cuts to ensure accuracy.
- Use a speed square and straightedge for clean, precise cuts.
3. Overlooking Stability
- Ensure all legs are secured tightly to avoid a shaky workbench.
- If using casters, opt for double-locking wheels to keep the bench steady during use.
4. Skipping Reinforcements
- Adding cross-bracing or an extra support beam can increase the workbench’s durability.
- If attaching a vise, reinforce the mounting area with an extra layer of wood.
5. Not Planning for Future Upgrades
- Consider adding power outlets or tool storage during the build rather than modifying later.
- If space allows, build a larger workbench to accommodate future needs.
Free Printable Blueprints
To make your project even easier, here are three free printable workbench blueprints for different needs:
Basic DIY Workbench
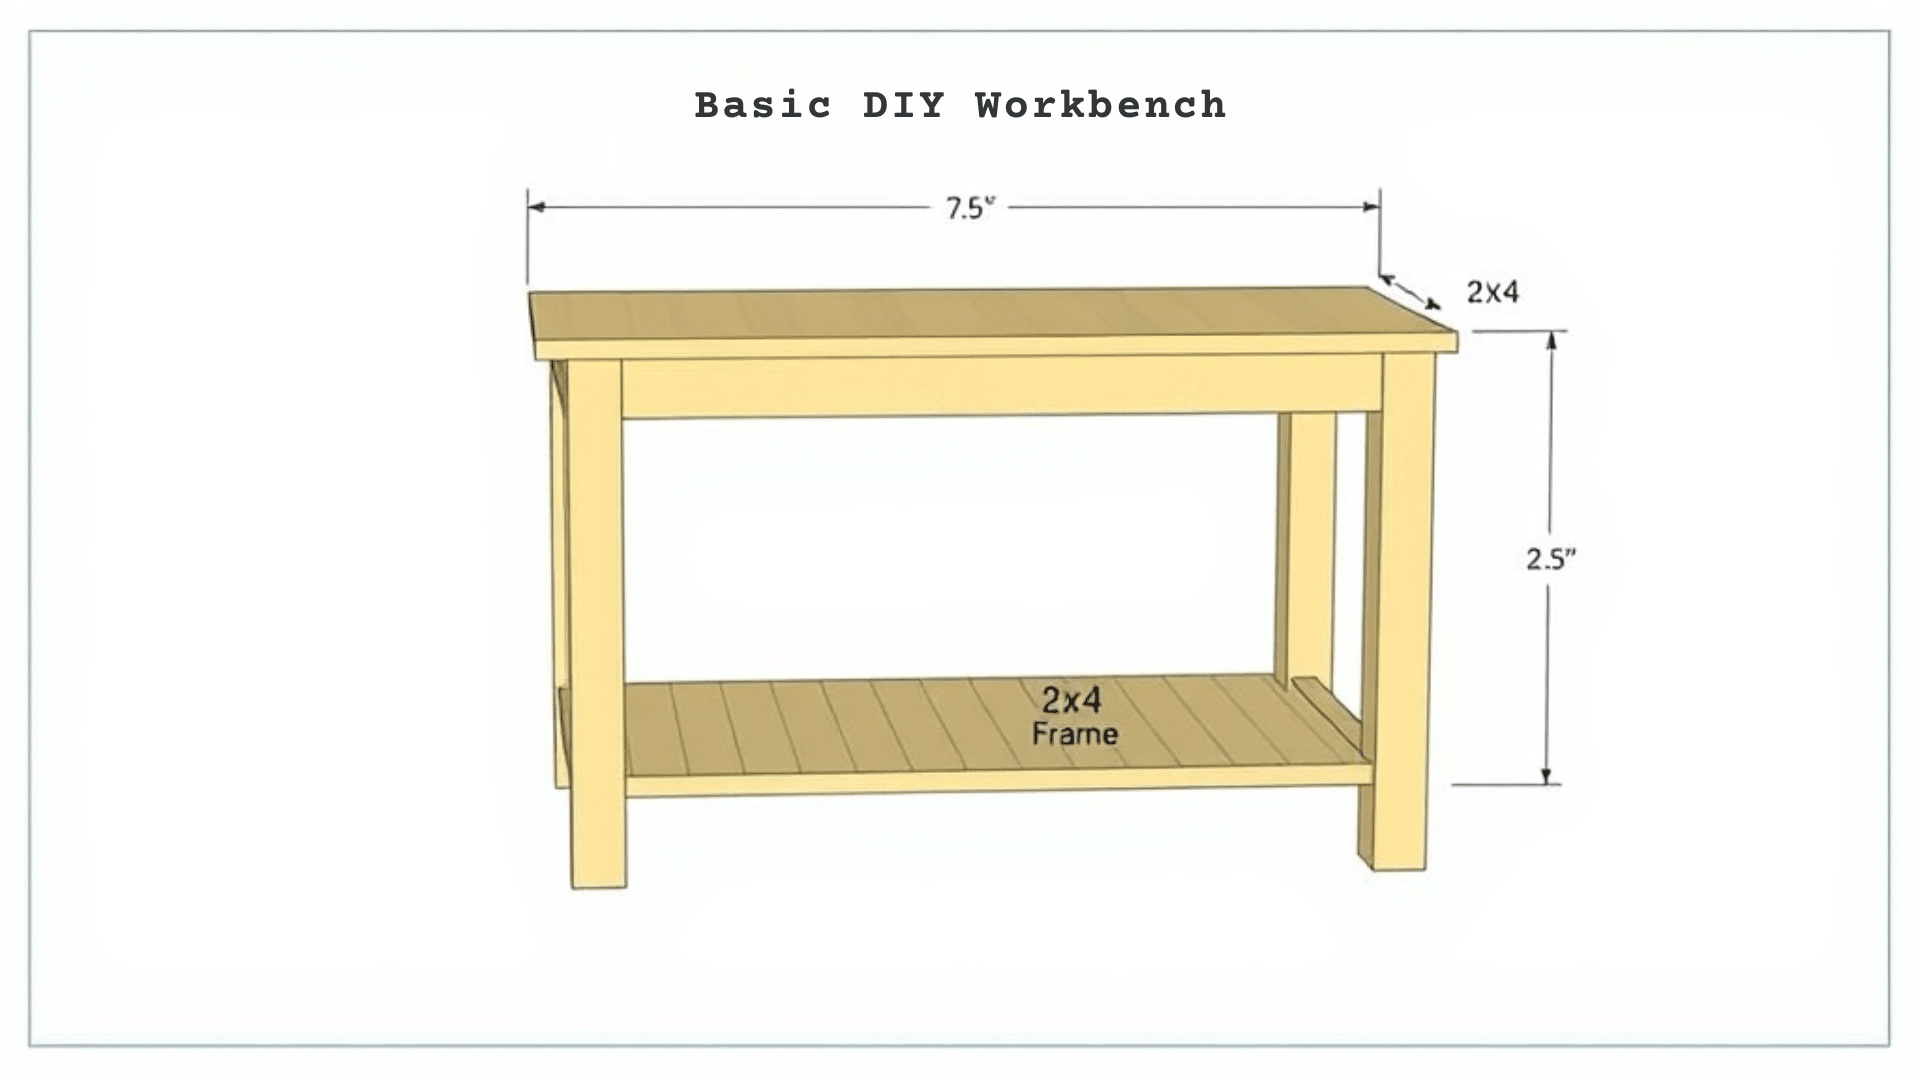
- Perfect for Beginners
- Simple 2×4 frame with a plywood top and bottom shelf.
- Minimal tools are required, sturdy enough for general use.
Heavy-Duty Workbench with Pegboard Backing
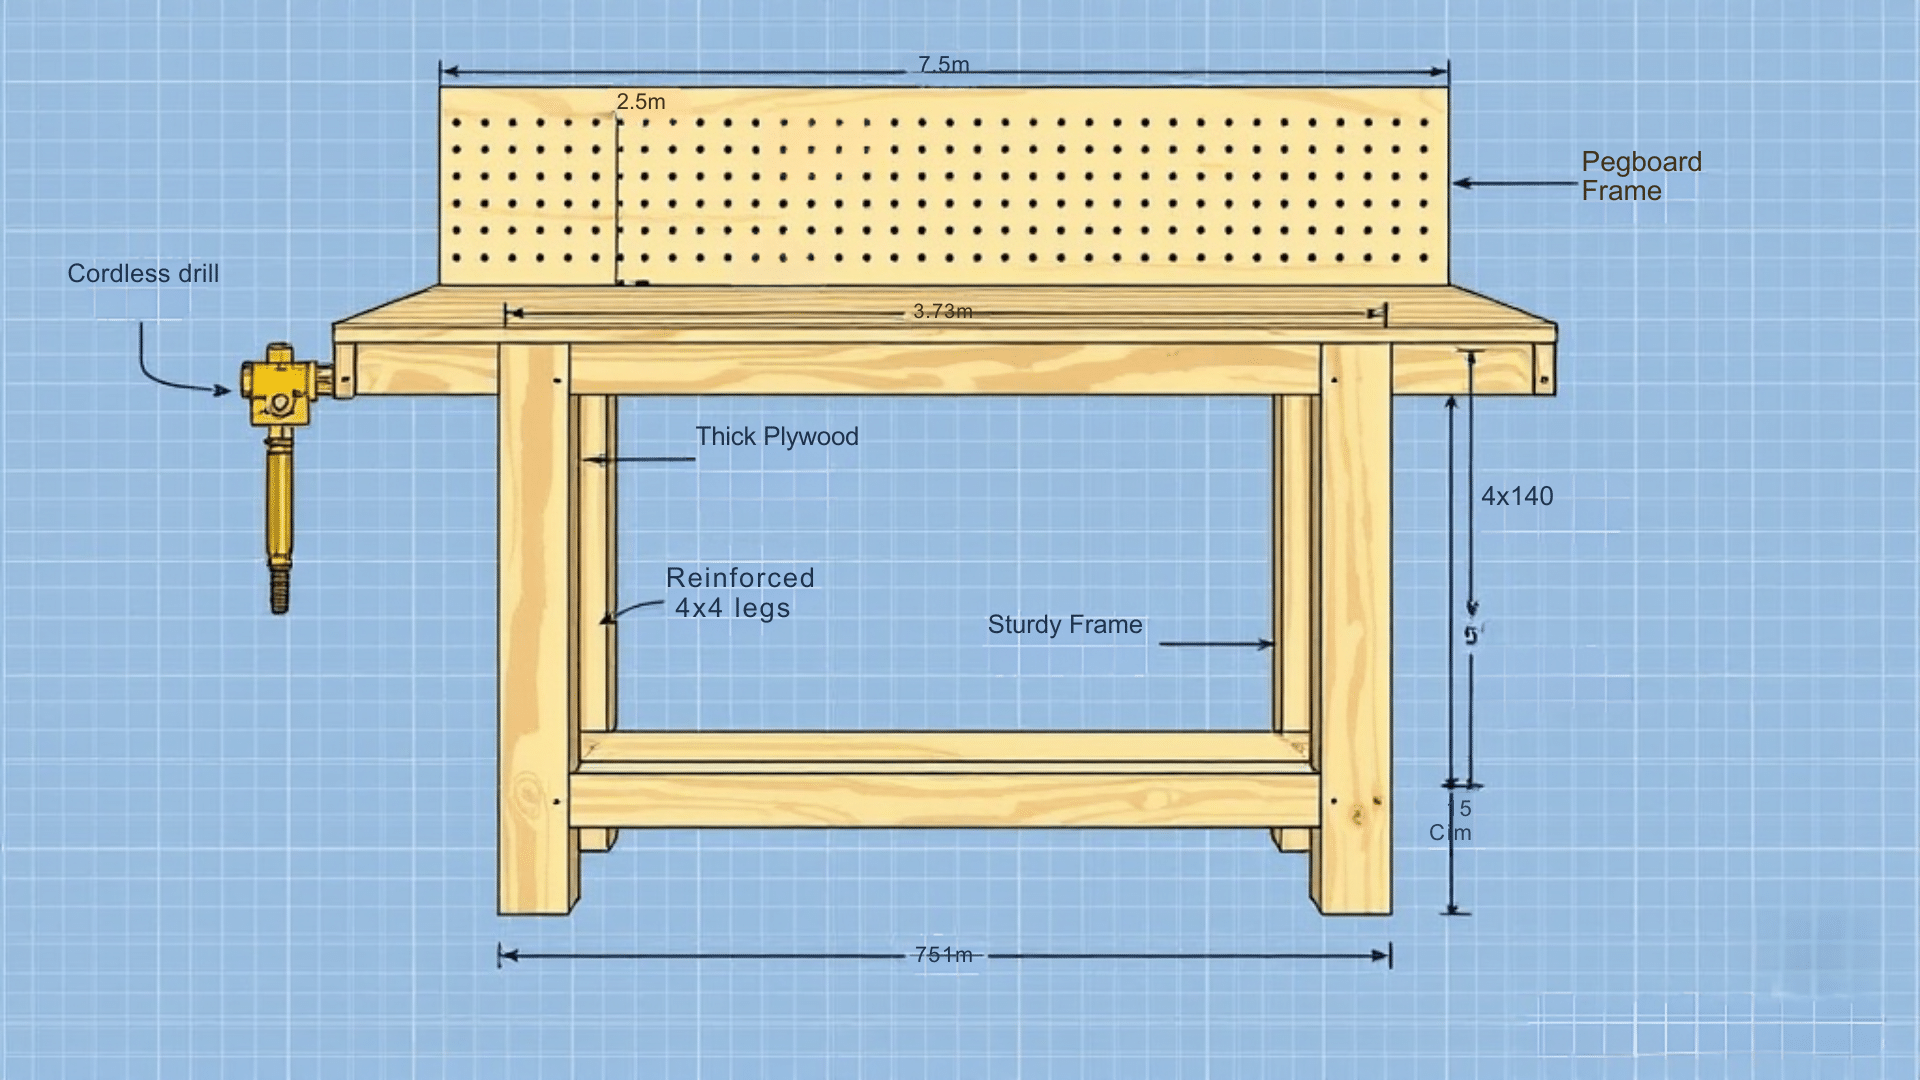
- Ideal for woodworking and garage use.
- Reinforced 4×4 legs, pegboard storage, and vise mount.
Mobile Workbench with Storage Drawers
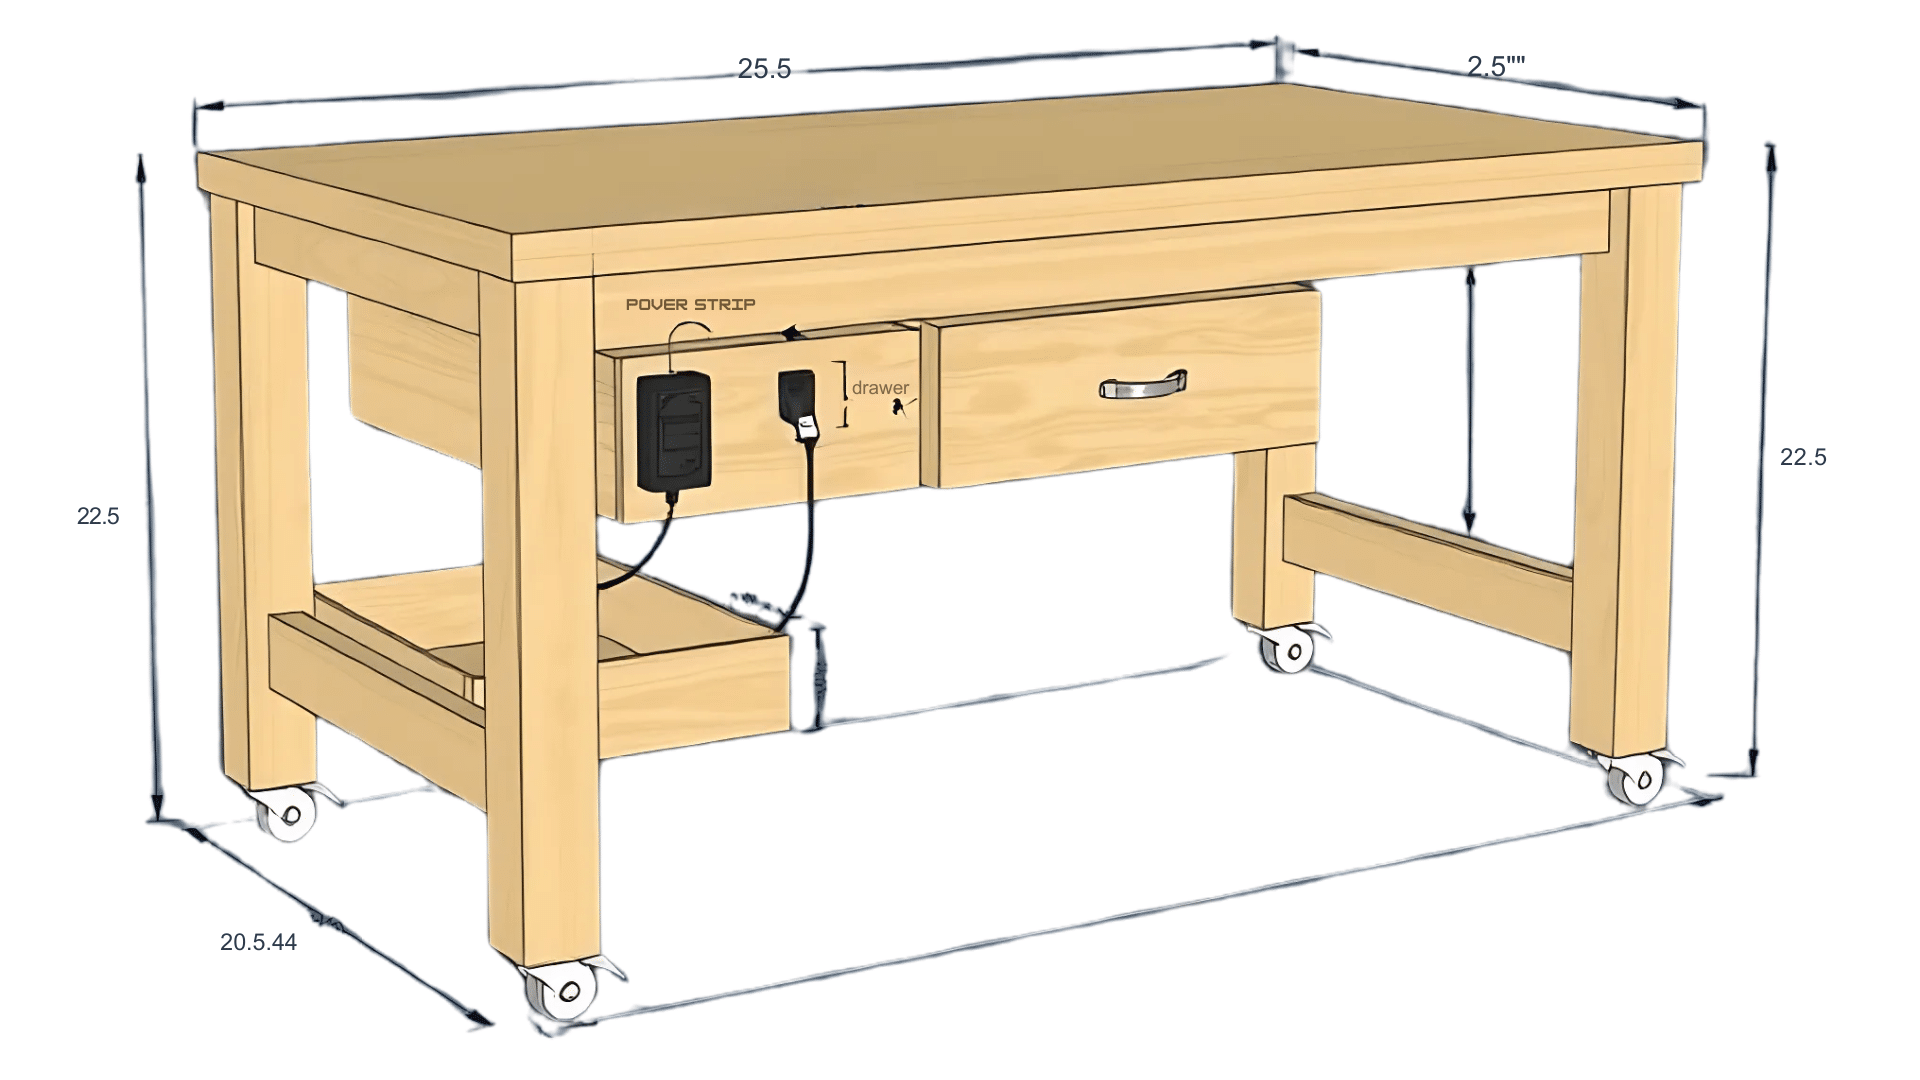
- Best for small spaces or those who need a movable workspace.
- Includes casters, built-in drawers, and a power strip mount.
Maintenance & Long-Term Care of Your Workbench
You’ve put in the hard work to build your awesome workbench, so let’s keep it in tip-top shape for years to come!
Here are a couple of tips to help you out:
Prevent Wobbling & Weakness
Over time, your bench might start to get a little shaky.
To keep it sturdy, check the screws and bolts now and then and tighten them up if needed.
If you notice any cracks or damage, fix them immediately before they worsen.
Choose Durable Finishes
Give your bench a good finish to protect it from dings, dents, and spills. You can use paint, stain, or even a clear coat.
Just make sure to pick something that’s tough enough to handle whatever projects you throw at it!
Conclusion
You did it! You now have all the knowledge you need to create your perfect DIY workbench.
From choosing the right style and size to customizing it with storage and lighting, you’re ready to build a bench that’s uniquely yours.
Remember, the joy of DIY isn’t just about the end result – it’s about the process and the satisfaction of creating something with your own hands.
So, take pride in your work, enjoy the process, and don’t be afraid to add your personal flair.
Now that you have the perfect workbench, it’s time to start working on your next DIY project!


