25 Inspiring Horizontal Deck Railing Ideas to Transform Your Outdoor Space
I know you’re thinking about updating your deck’s appearance.
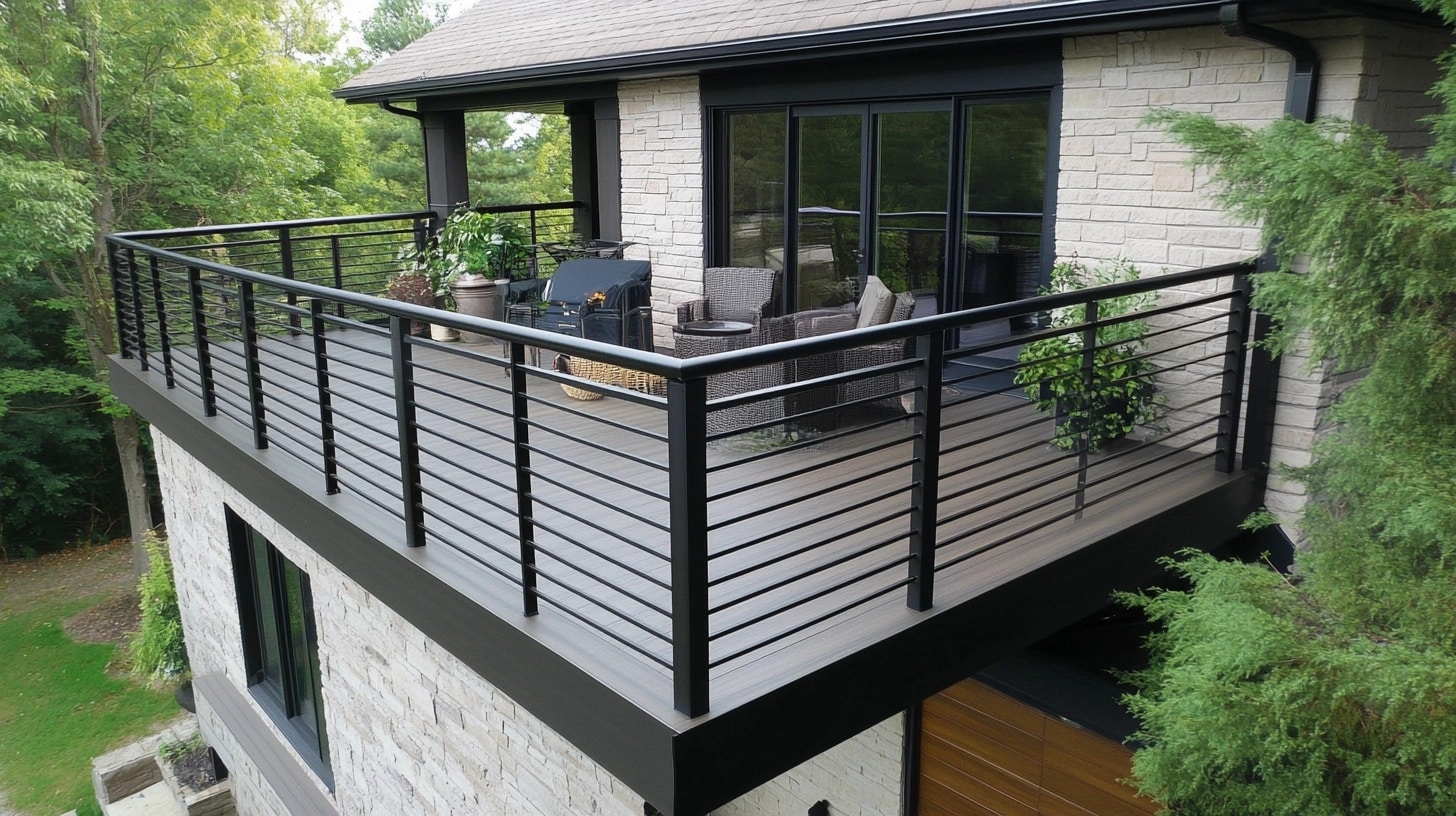
I’ve researched horizontal deck railings because they’re becoming more popular with homeowners who want a modern, clean look for their outdoor areas.
These designs do more than keep people safe – they add visual appeal that helps your deck stand out.
While I still see many traditional vertical railings, I find that horizontal options bring a fresh style that can make your space feel larger and more open.
I’m excited to share 25 creative horizontal railing designs that mix style with functionality.
I’ve included everything from sleek metal cables to warm wooden slats, so you’ll find options that suit your home’s style and budget.
I’m confident these ideas will help you create a safe and stylish outdoor space.
Best Horizontal Deck Railing Ideas to Try
1. Cable Railings
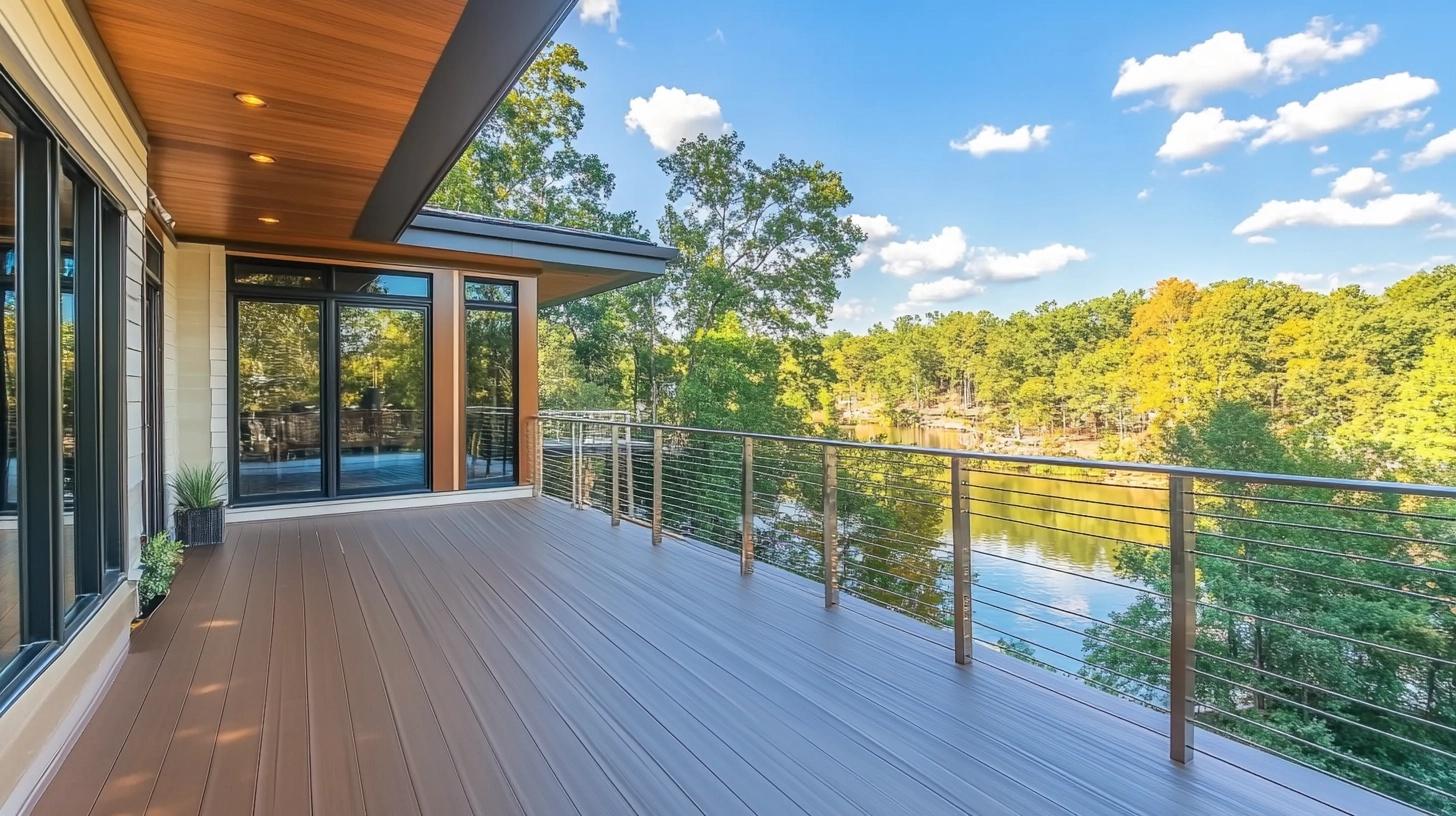
Stainless steel cables run horizontally between metal posts, creating a clean, minimalist look that fits well with modern homes.
The thin cables, typically 1/8 to 1/4 inch in diameter, are secured with end fittings and tensioned to maintain straight lines.
Cost: $150-200 per linear foot
Benefits:
- Maintains clear sightlines from your deck
- Requires minimal cleaning and upkeep
- Strong enough to meet safety codes
2. Wooden Slats
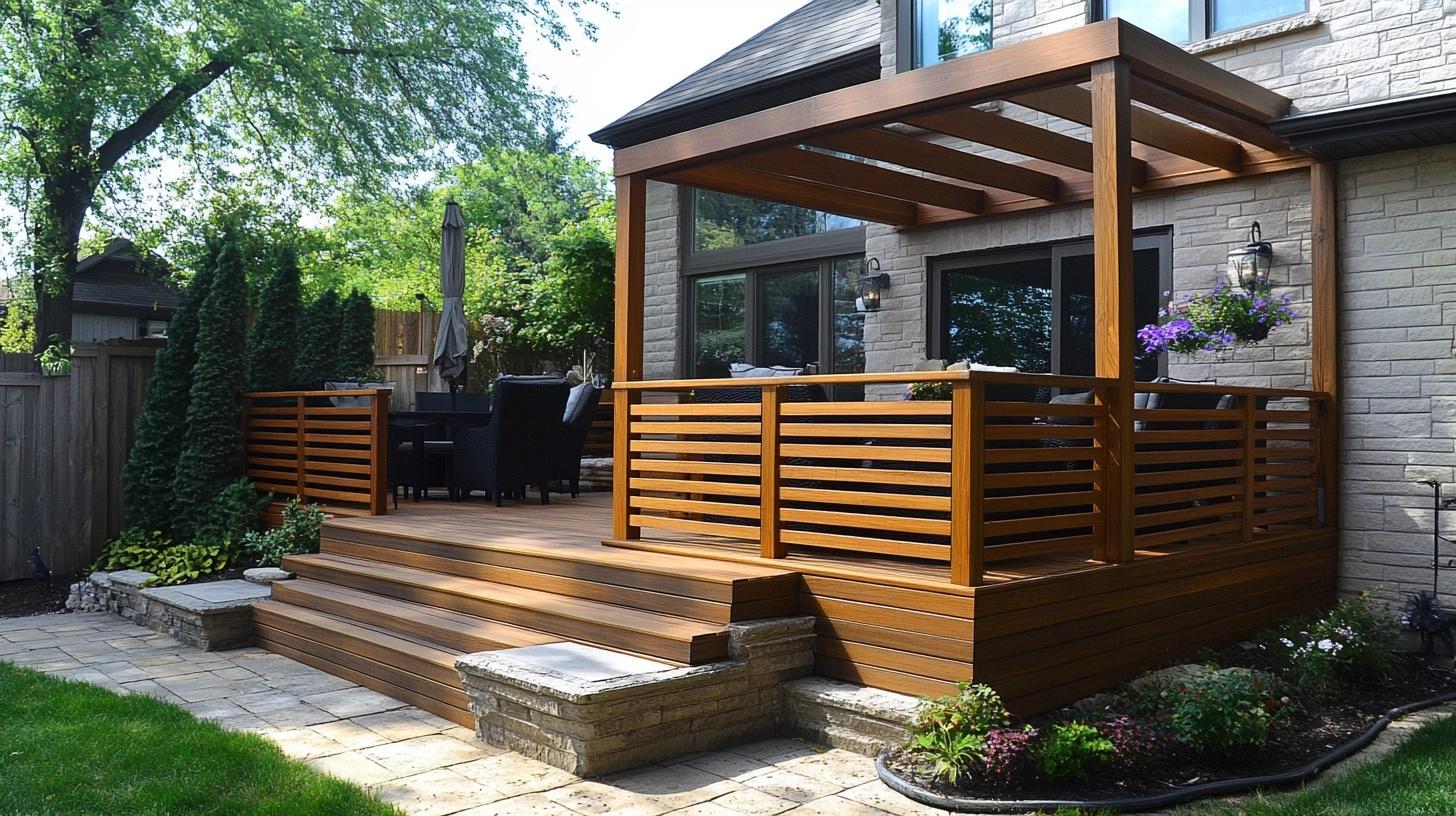
Thin wooden boards mounted horizontally between posts offer a natural touch to your deck’s border.
The slats, usually 2-4 inches wide, can be spaced closer or further apart to control privacy levels. This style combines well with both traditional and modern home designs.
Cost: $50-75 per linear foot
Benefits:
- Offers flexibility in spacing for desired privacy
- Brings natural warmth to the space
- Can be stained or painted to match your deck
3. Metal Pipe Railings
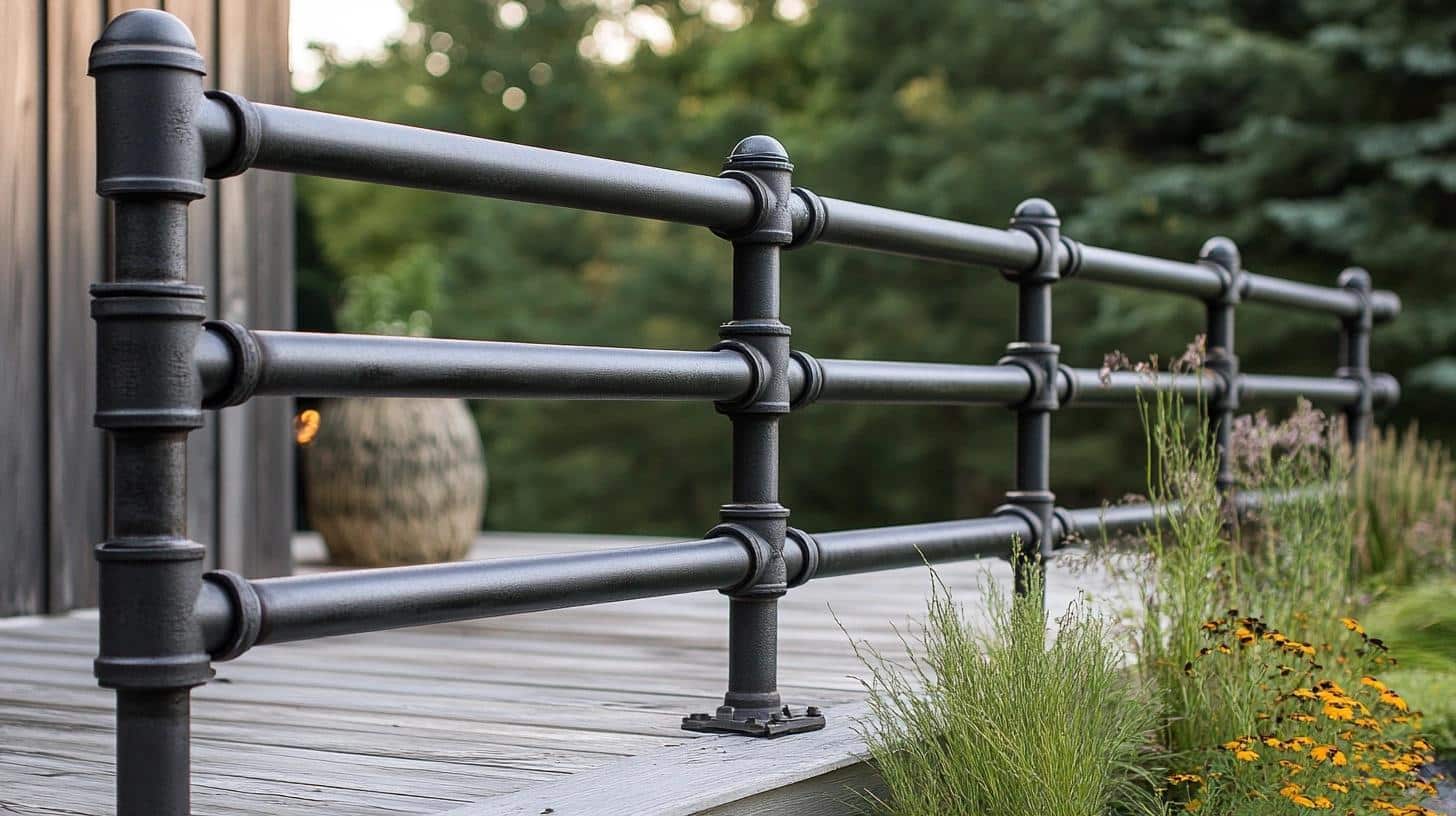
Black or galvanized steel pipes create a sturdy barrier with an industrial feel.
The pipes, typically 1-2 inches in diameter, are secured to metal posts using special fittings. This option fits perfectly with urban-style homes and converted industrial spaces.
Cost: $90-120 per linear foot
Benefits:
- Withstands heavy use and impact
- Needs minimal maintenance
- Provides solid support for hanging plants or lights
4. Glass Panels
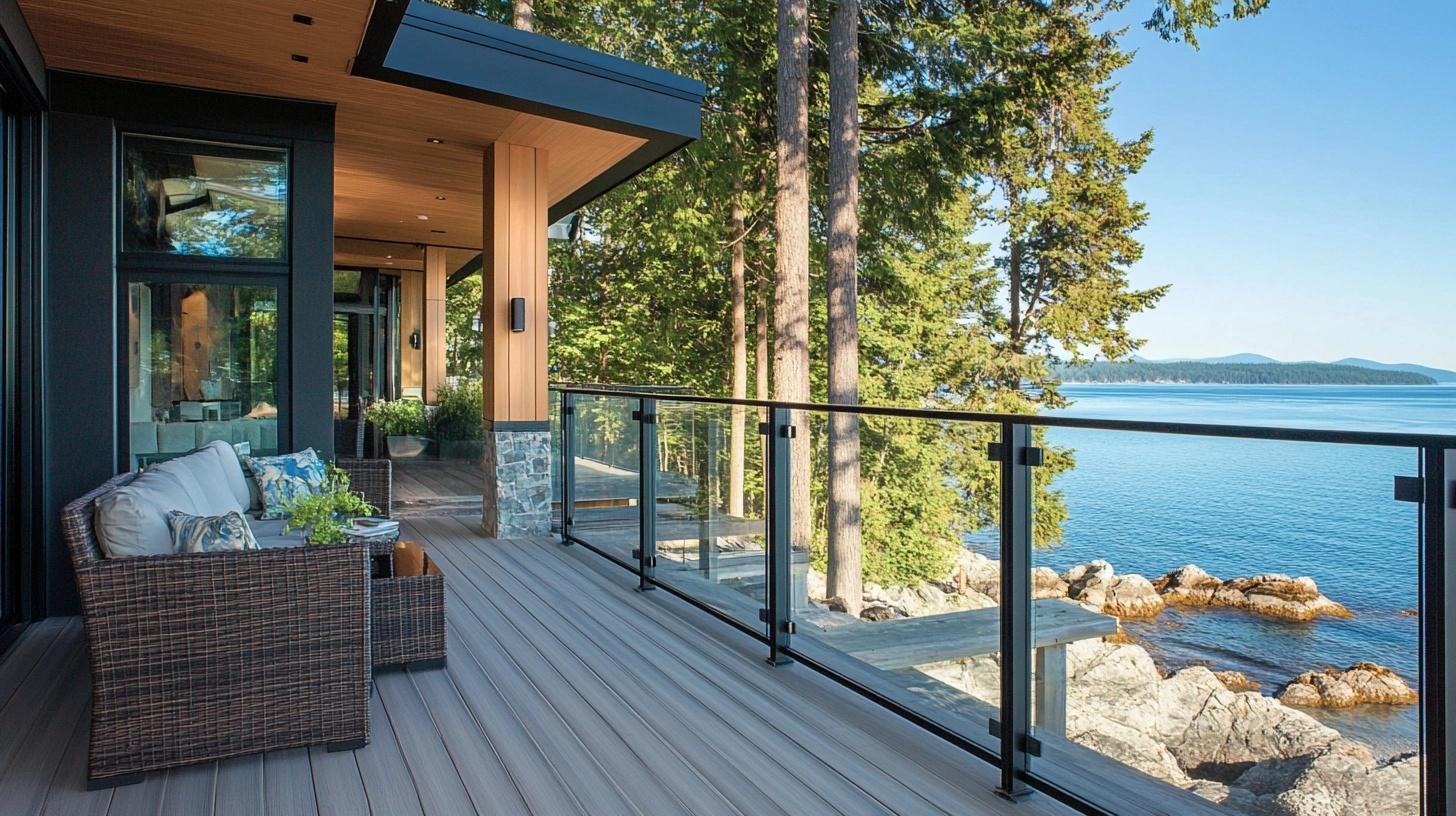
Tempered glass panels, set in aluminum or steel frames, create a see-through barrier that keeps your view completely open.
The panels, which range from 1/4 to 1/2 inch thick, are available in clear or frosted options. This style pairs wonderfully with seaside decks and modern architectural designs.
Cost: $150-200 per linear foot
Benefits:
- Blocks wind while keeping views clear
- Protects small children and pets safely
- Creates an upscale, polished look
5. Metal Bars
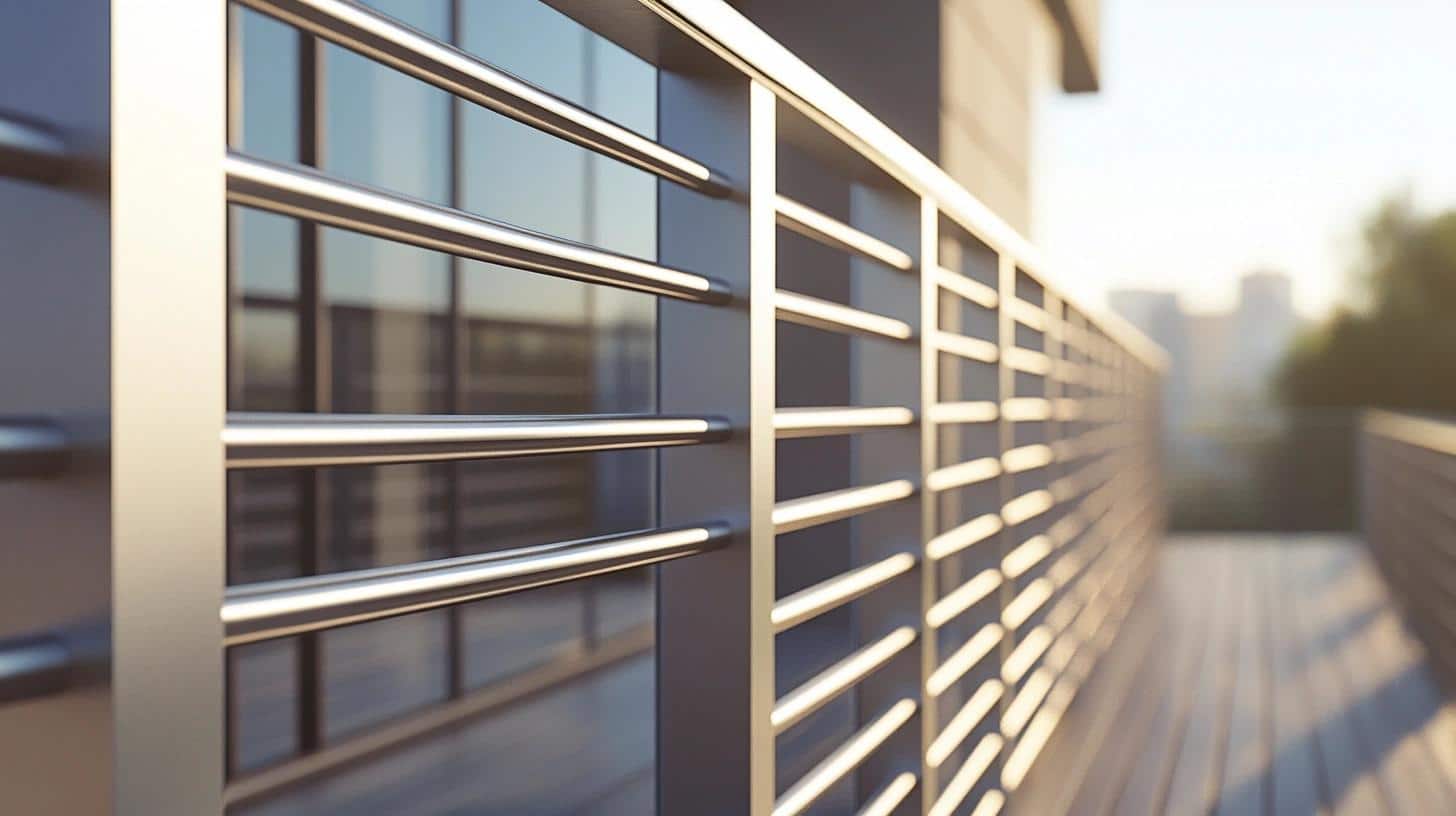
Smooth aluminum or steel bars, positioned horizontally, form a straightforward and structured border.
The bars, typically 1-1.5 inches thick, are welded or bolted to posts for maximum stability. This design complements contemporary and minimalist home styles.
Cost: $80-120 per linear foot
Benefits:
- Stands up to all weather conditions
- Requires only occasional wipe-downs
- Allows partial views through spacing
6. PVC Pipe Railings
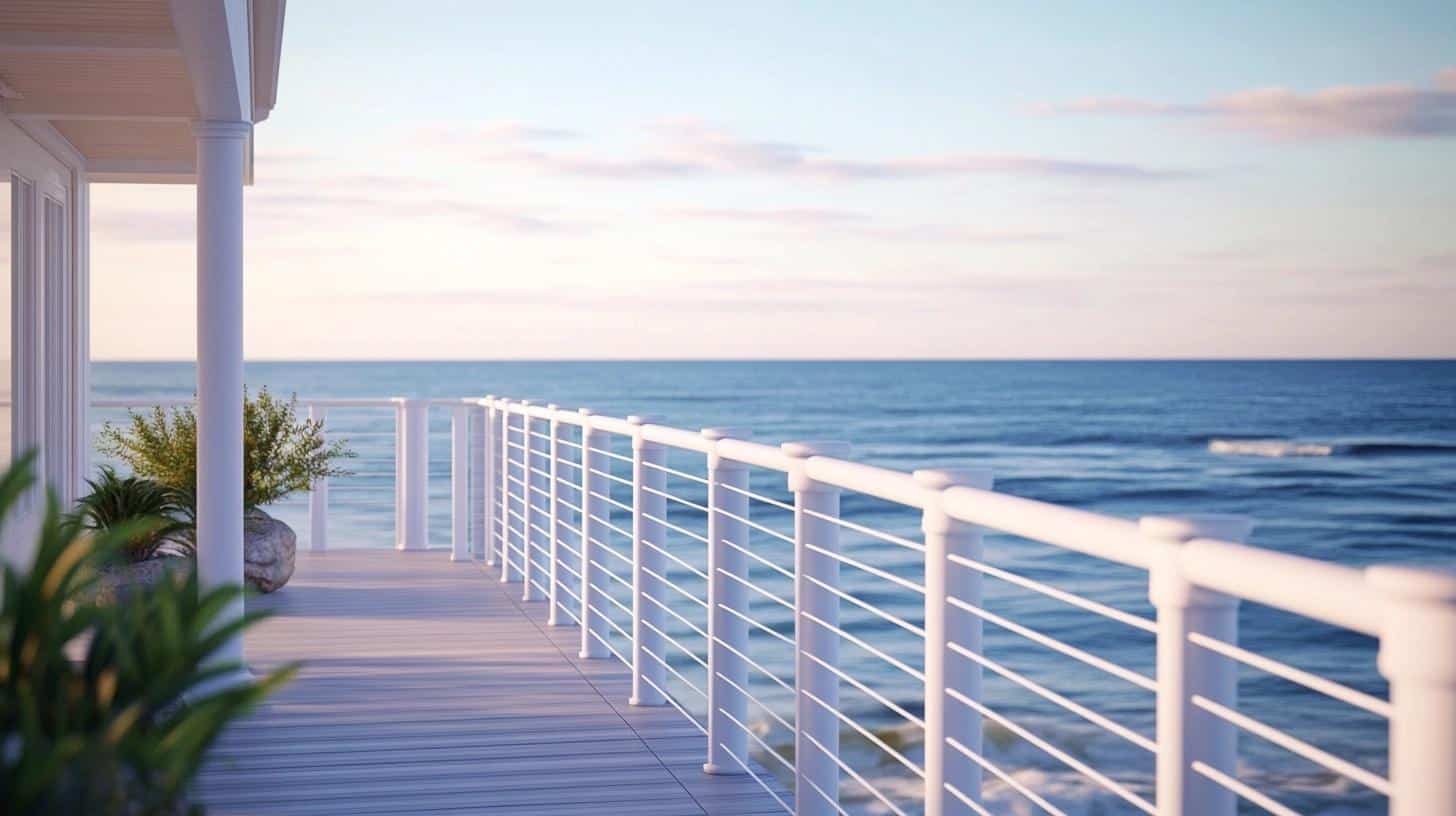
Weather-resistant PVC pipes lined horizontally create a budget-friendly barrier. The pipes, typically 2 inches in diameter, come pre-colored or can be painted.
This option works well for pool areas and beach properties.
Cost: $40-80 per linear foot (including installation)
Benefits:
- Never needs repainting
- Resists water damage
- Stays cool to touch
7. Rope Railings
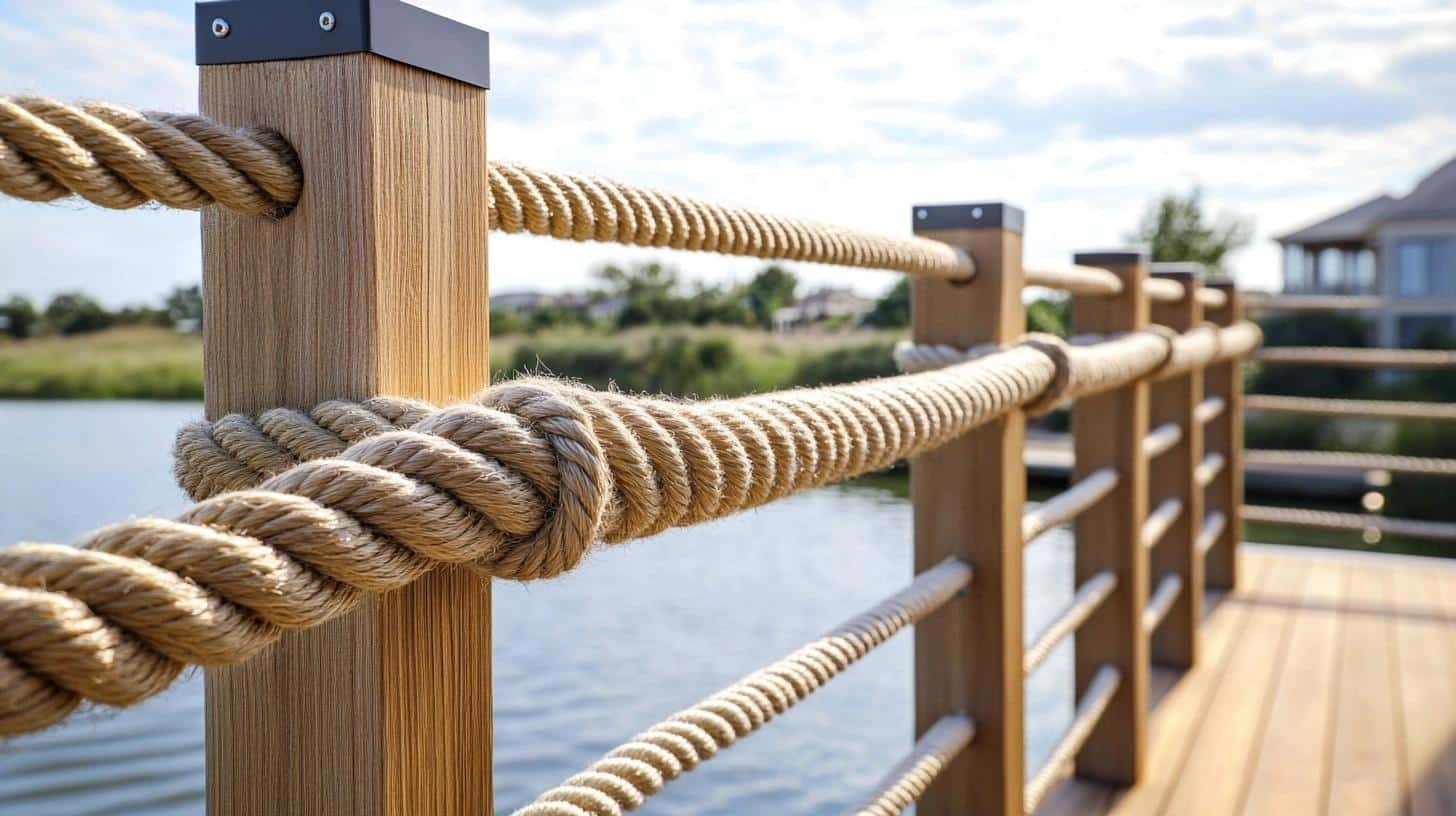
Marine-grade rope, running horizontally through metal supports, brings a coastal vibe to your deck.
Typically 3/4 to 1 inch thick, the ropes are pulled taut and secured with marine-quality knots or metal clamps. This look suits beach houses and waterfront properties perfectly.
Cost: $15-30 per linear foot
Benefits:
- Adds a unique seaside character
- Feels soft and comfortable to touch
- Works well in coastal environments
8. Horizontal Wire Mesh
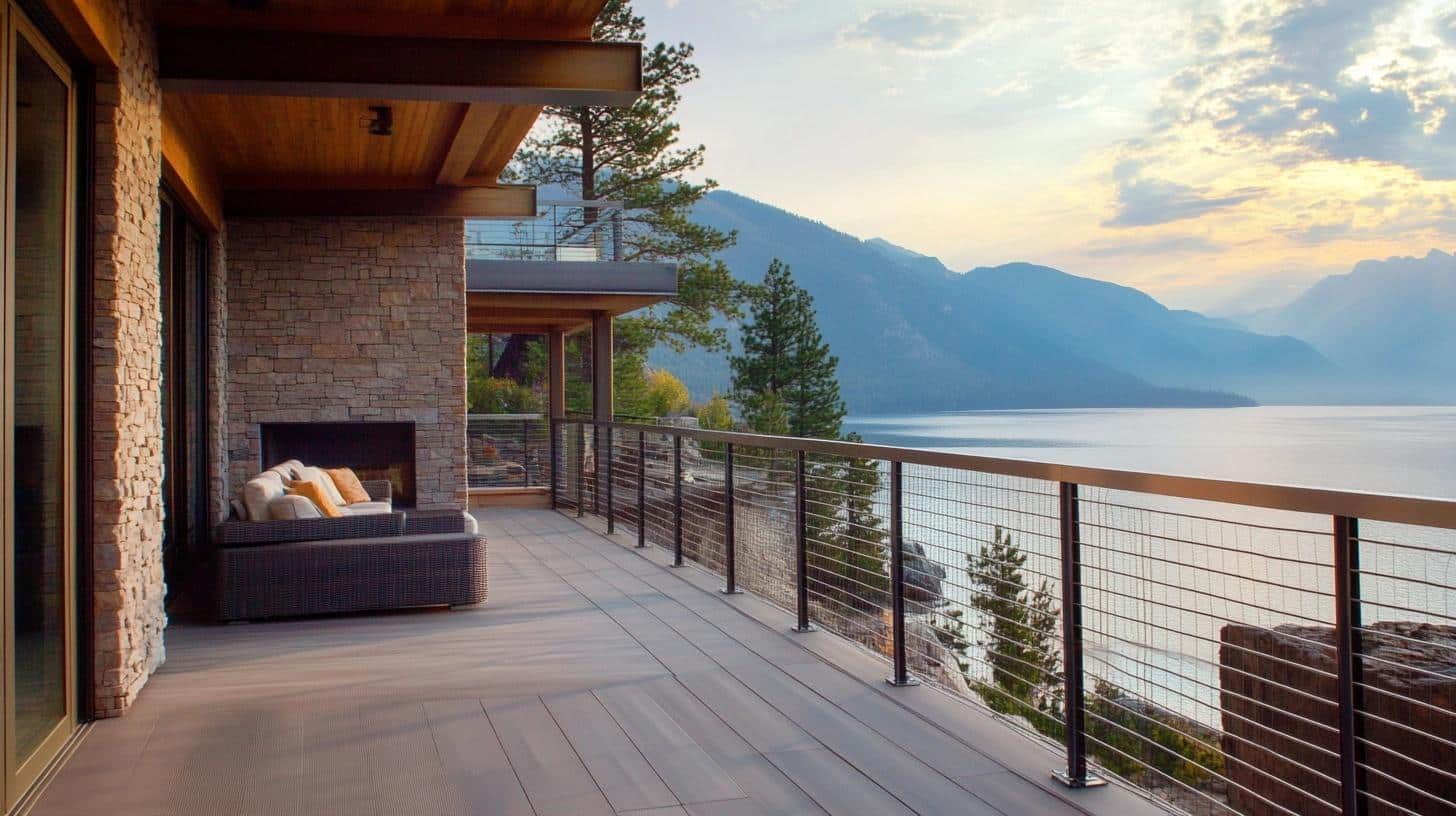
Stainless steel mesh panels, stretched between posts, form a sturdy yet see-through barrier.
The mesh, with 2-3 inch openings, comes in pre-made panels or can be custom-fitted. This option suits both city homes and mountain retreats.
Cost: $40-60 per linear foot
Benefits:
- Prevents climbing by small children
- Allows excellent airflow
- Stops items from falling through
9. Staggered Wood and Metal
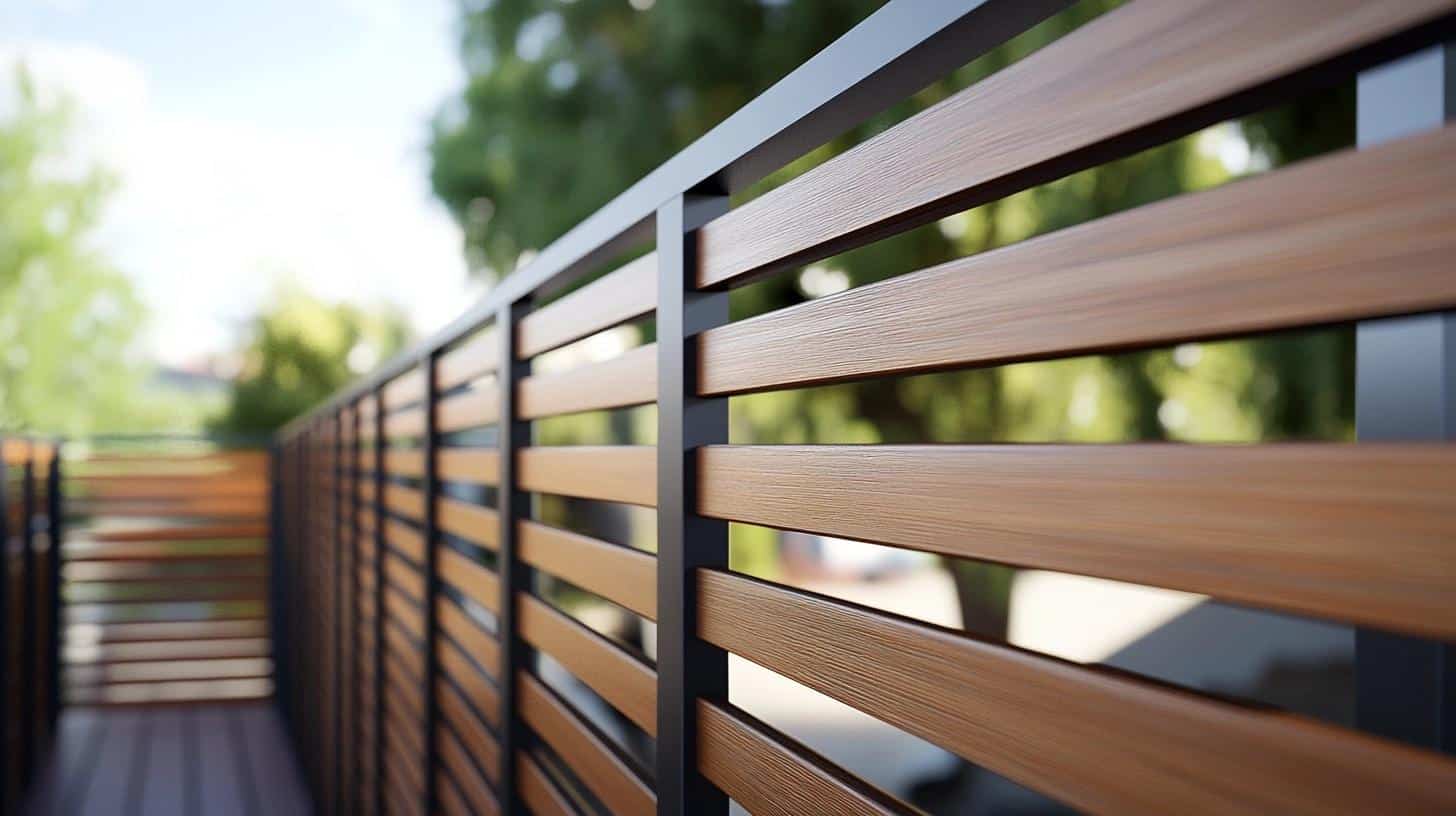
Alternating sections of wooden boards and metal rails create an eye-catching pattern.
The materials, spaced evenly apart, combine dark metal with light wood tones for visual interest. This design fits homes that mix traditional and modern elements.
Cost: $45-75 per linear foot
Benefits:
- Makes a bold visual statement
- Handles weather changes well
- Mixes textures for added interest
10. Perforated Metal Panels
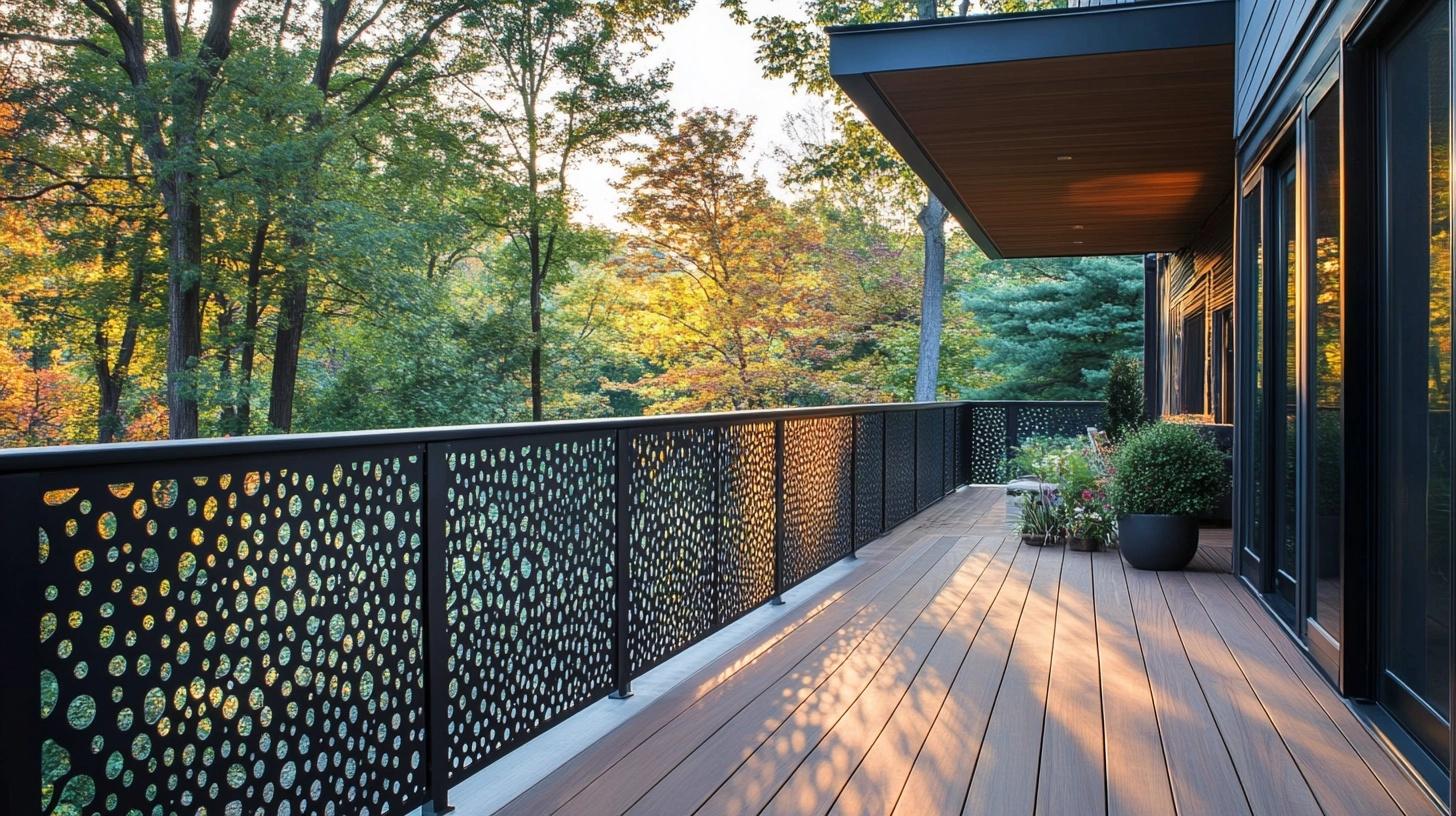
Aluminum or steel sheets with custom-cut patterns create striking visual effects.
The panels, typically 1/8 inch thick, feature various hole sizes and arrangements that filter light and views. This style works well with both urban homes and modern suburban designs.
Cost: $150-300 per linear foot
Benefits:
- Allows customized pattern choices
- Filters sunlight into interesting shadows
- Combines safety with artistic flair
11. Corrugated Metal
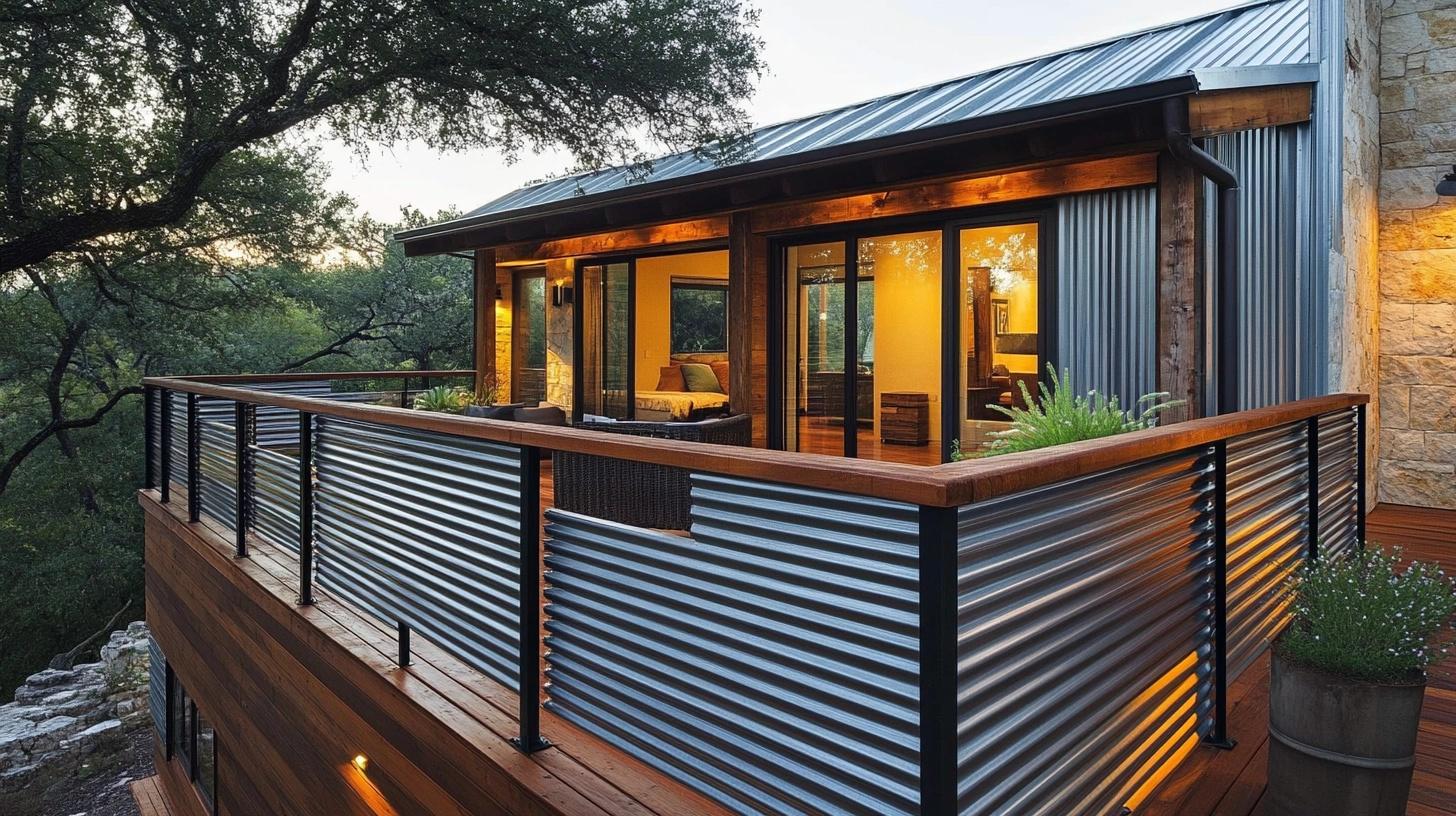
Wavy metal sheets installed horizontally add texture and visual interest.
The panels, made from galvanized steel or aluminum, catch the light at different angles throughout the day. This choice suits modern homes and updated ranch styles.
Cost: $90-180 per linear foot (including installation)
Benefits:
- Creates interesting light patterns
- Handles harsh weather well
- Needs little upkeep over time
12. Metal Mesh Panels
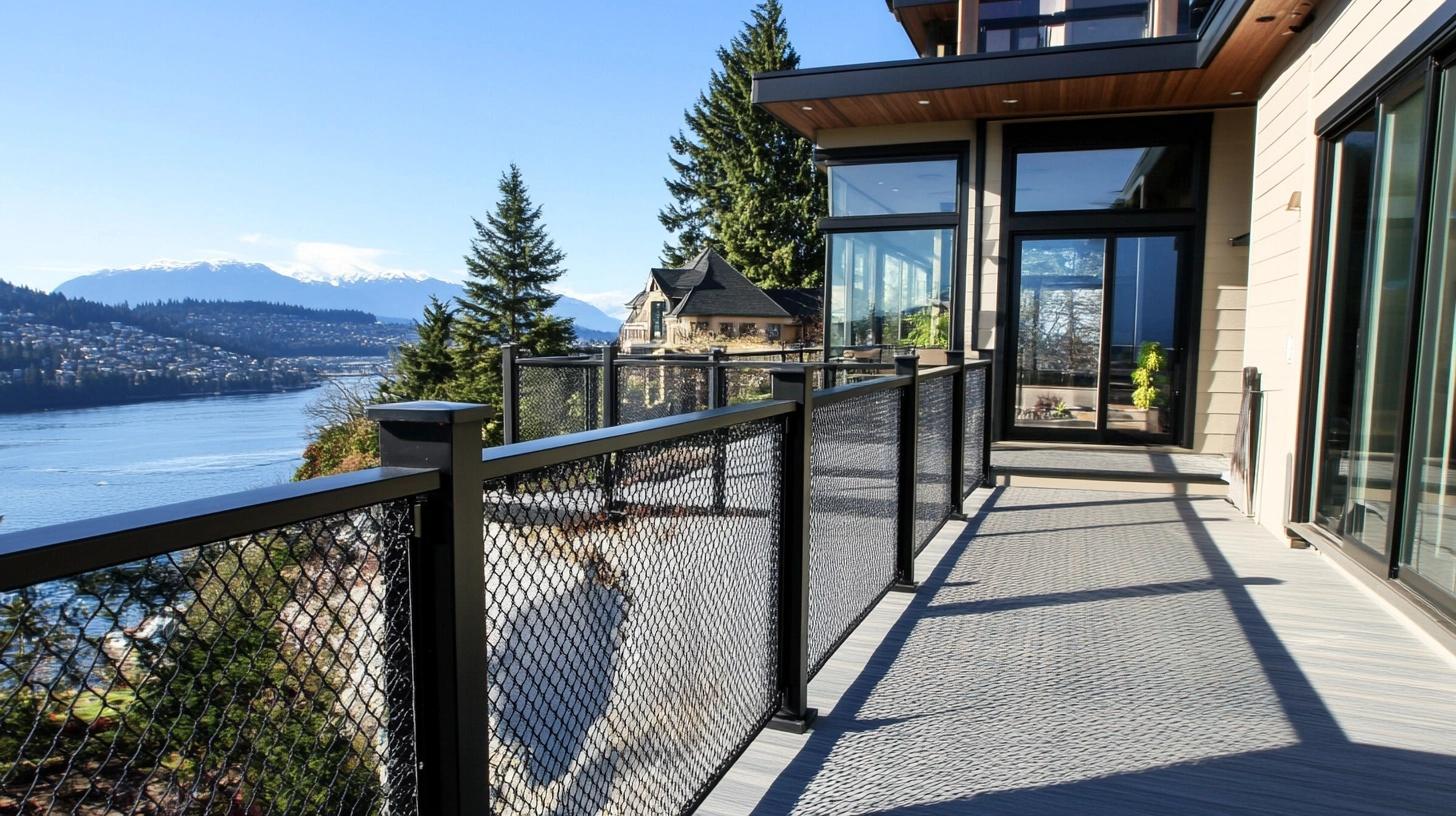
Woven steel mesh stretched between frame posts offers security without blocking views.
The mesh, available in various patterns and sizes, comes in pre-made sections for easy installation. This style works perfectly for urban settings and modern builds.
Cost: $100-200 per linear foot
Benefits:
- Stops small objects from falling
- Easy to clean with water spray
- Maintains full visibility
13. Painted Steel Bars
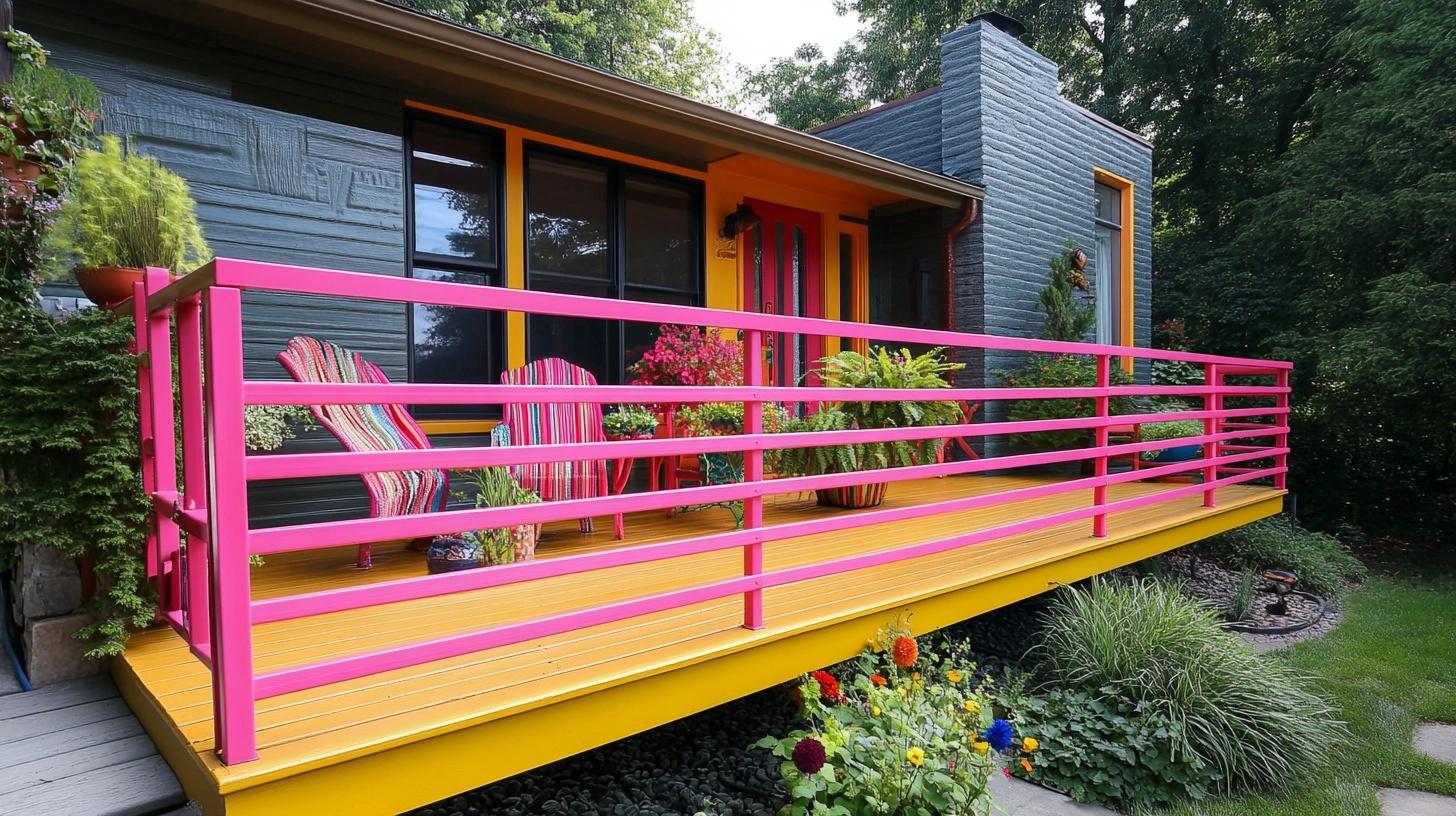
Powder-coated steel bars add color while ensuring lasting protection.
The bars, coated in weather-resistant paint, come in any color to match or accent your home. This option suits homeowners wanting to make a bold statement.
Cost: $120-250 per linear foot
Benefits:
- Resists fading and chipping
- Offers endless color options
- Requires minimal touch-ups
14. Tensioned Wire Railing
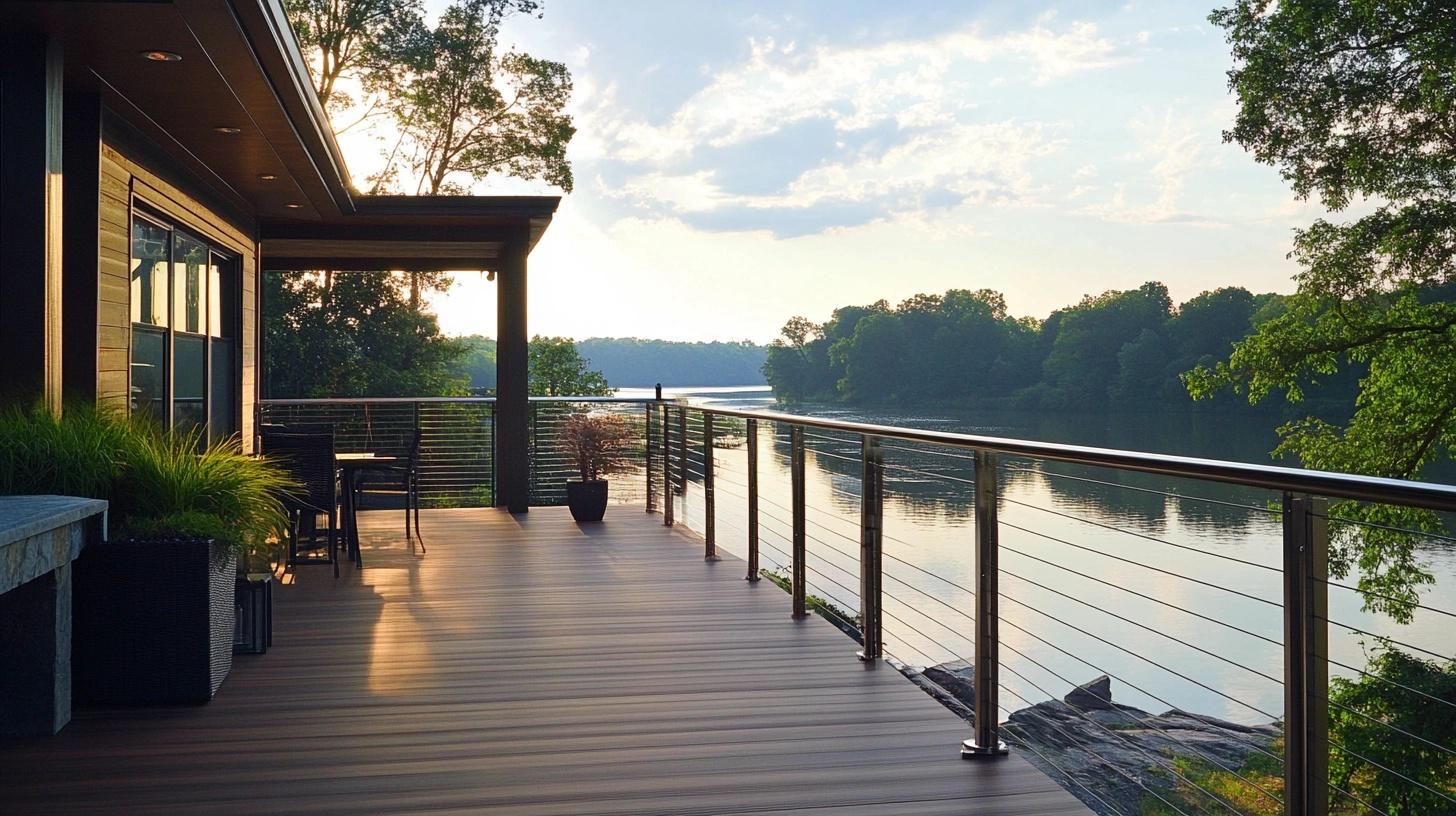
Ultra-thin steel wires run horizontally between end posts, creating near-invisible barriers.
The wires are pulled tight with special tensioners, measuring just 1/8 inch thick. This design excels in areas with scenic views.
Cost: $130-280 per linear foot
Benefits:
- Almost invisible from a distance
- Never blocks your view
- Takes up minimal space
15. Frameless Glass Panels
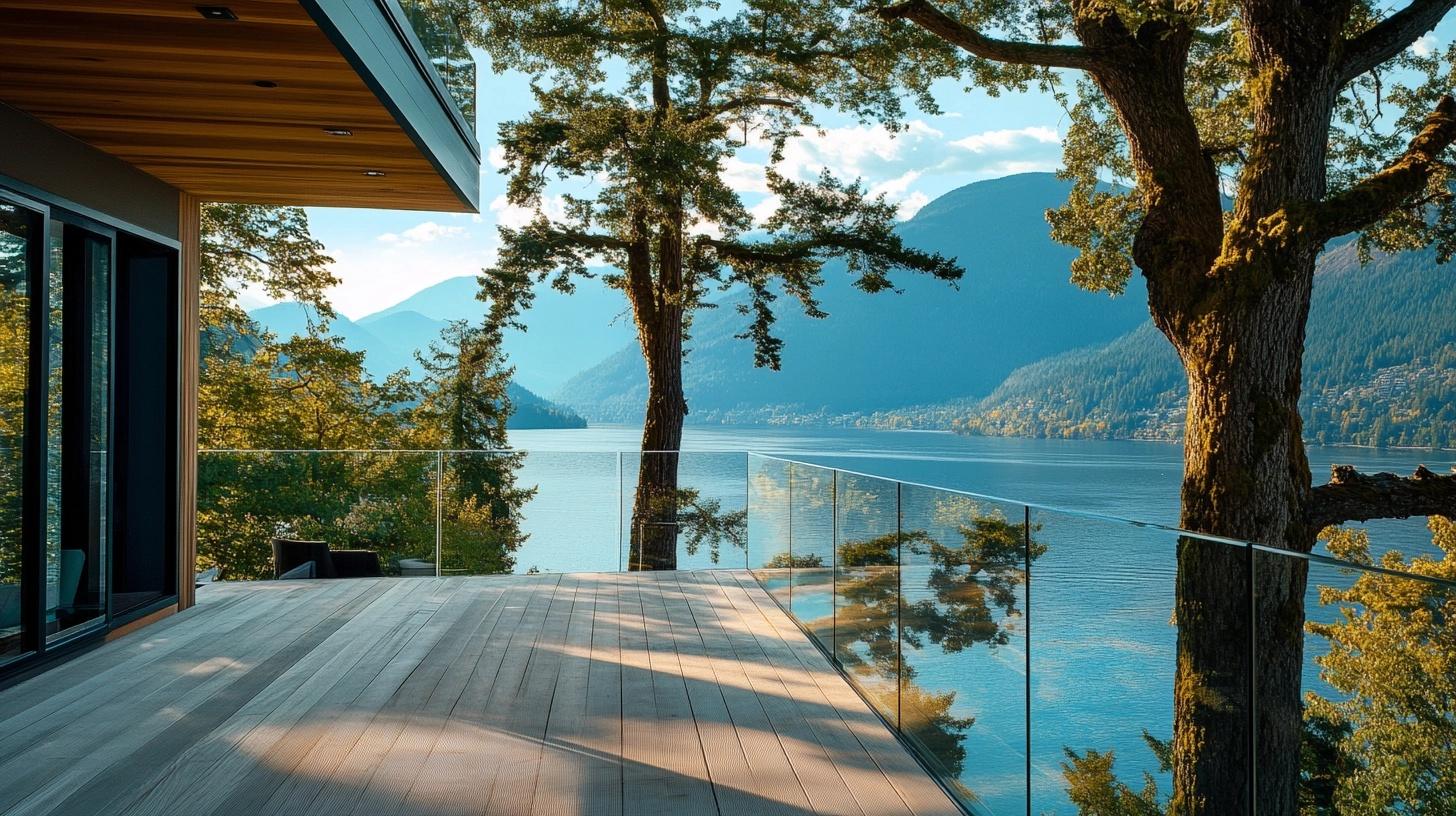
Edge-to-edge glass panels secured with hidden brackets form a clear protective wall.
The tempered glass, measuring 1/2 inch thick, sits flush between posts without visible frames. This style perfectly suits modern homes and penthouses.
Cost: $250-400 per linear foot
Benefits:
- Looks completely unobstructed
- Stops wind while keeping views
- Makes spaces feel larger
16. Decorative Wooden Lattice
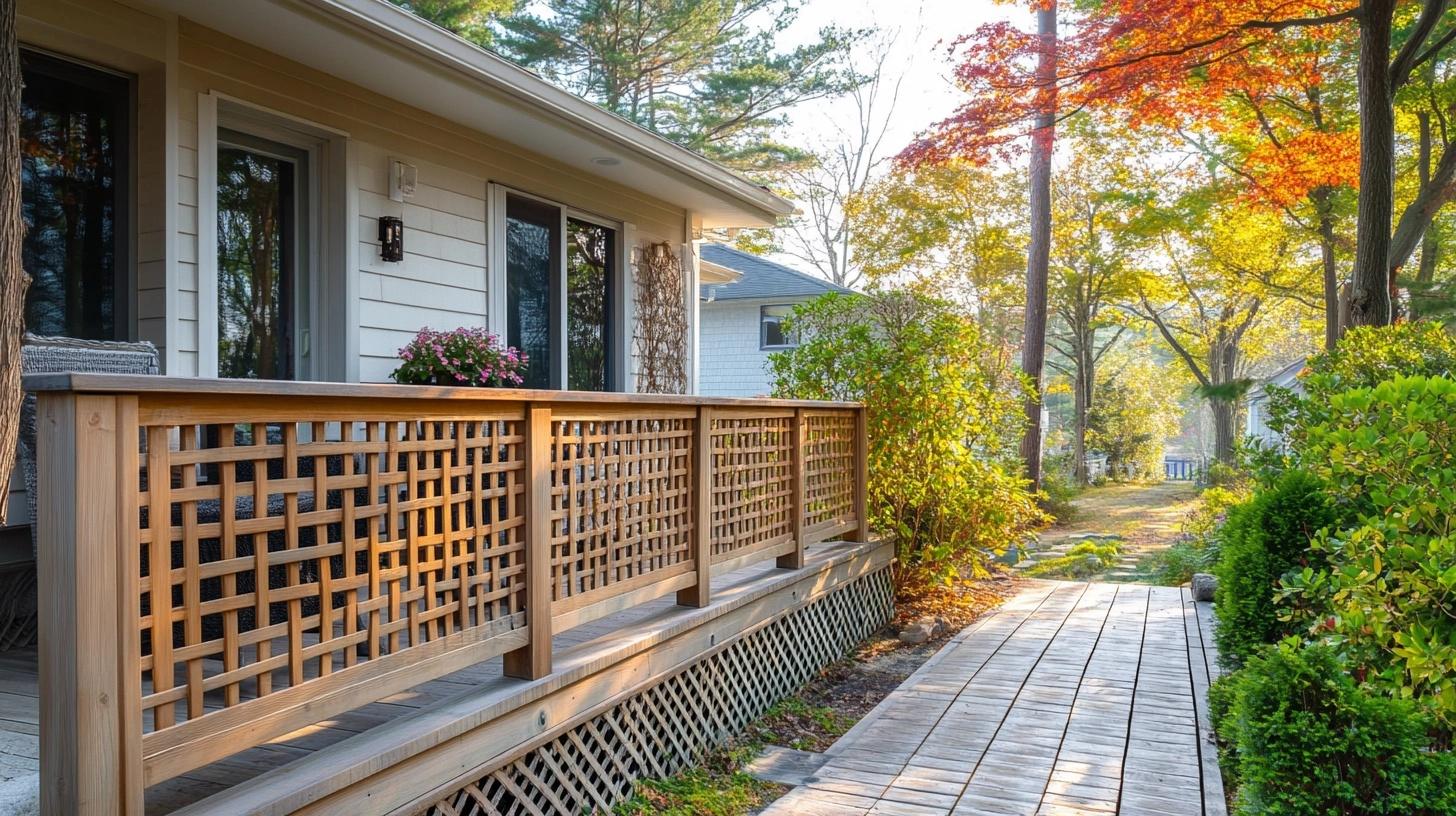
Thin wooden strips cross each other horizontally to form traditional patterns.
The lattice, built from 1/4-inch strips with 2-inch openings, adds texture while maintaining airflow. This option fits well with cottage and traditional home styles.
Cost: $80-150 per linear foot (including installation)
Benefits:
- Forms pretty light patterns
- Supports climbing plants
- Offers partial privacy
17. Barnwood Planks
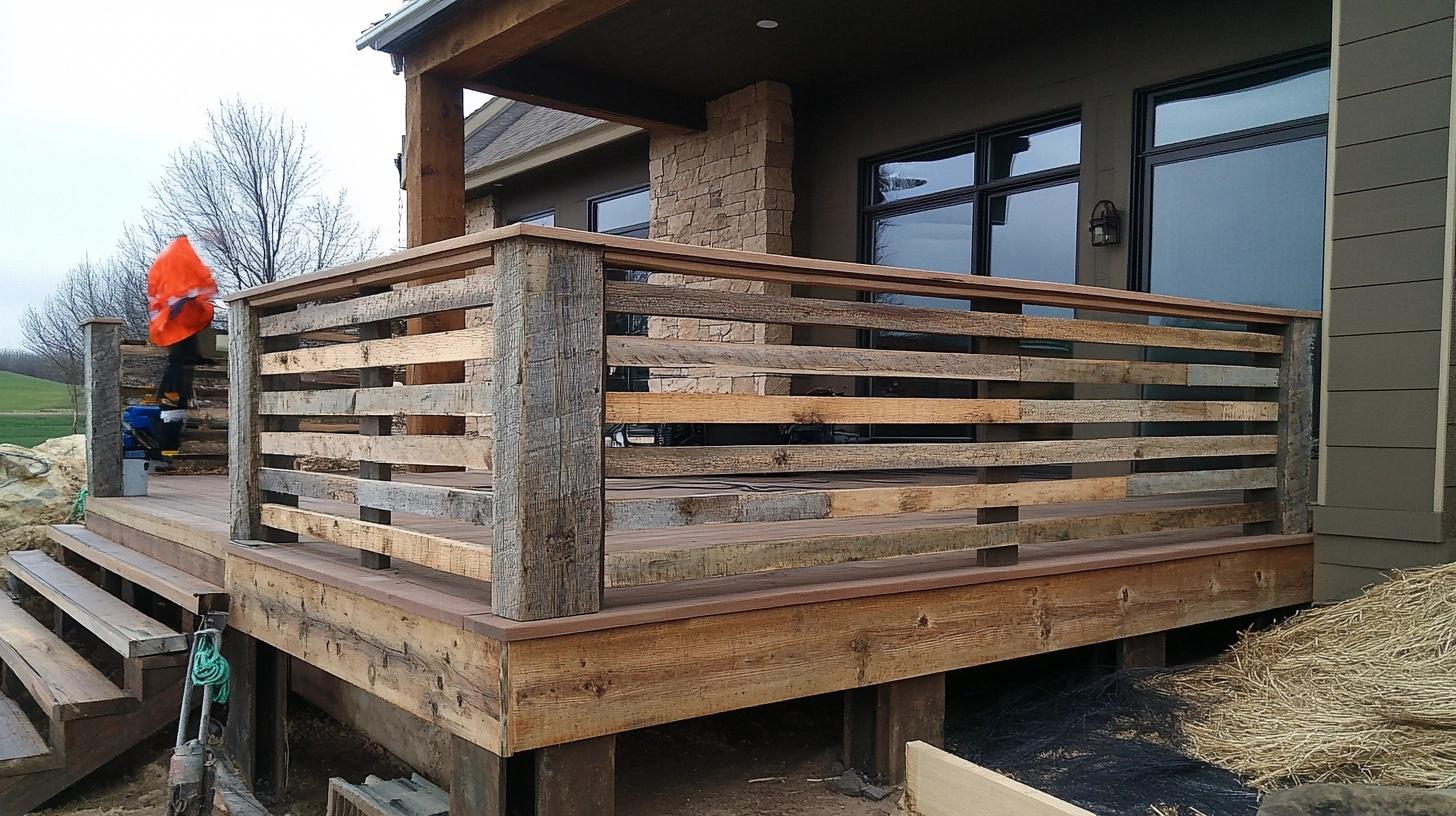
Reclaimed wood from old barns and buildings brings history to your deck’s border.
The planks, weathered by time, show unique grain patterns and color variations from their past lives. This style fits country homes and rustic mountain retreats perfectly.
Cost: $90-175 per linear foot
Benefits:
- Each piece tells a story
- Ages naturally over time
- Uses sustainable materials
18. Mosaic Glass Panels
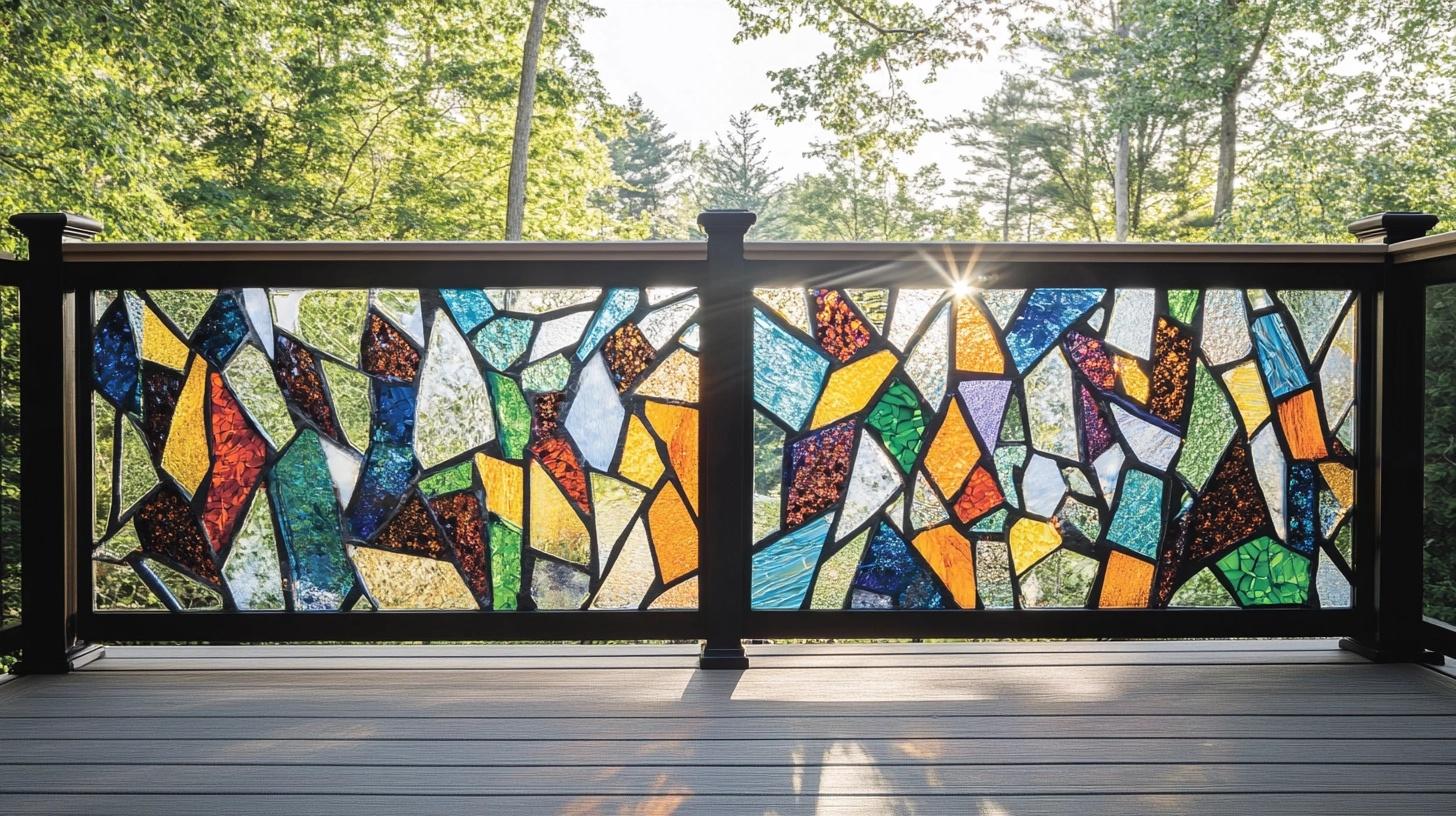
Small colored glass pieces set in weather-proof frames create stunning light effects. The panels, made from tempered glass bits, form patterns that shine in sunlight. This design suits artistic homes and meditation spaces.
Cost: $220-400 per linear foot
Benefits:
- Sparkles in sunlight
- Makes each deck unique
- Changes with lighting
19. Frosted Glass Panels
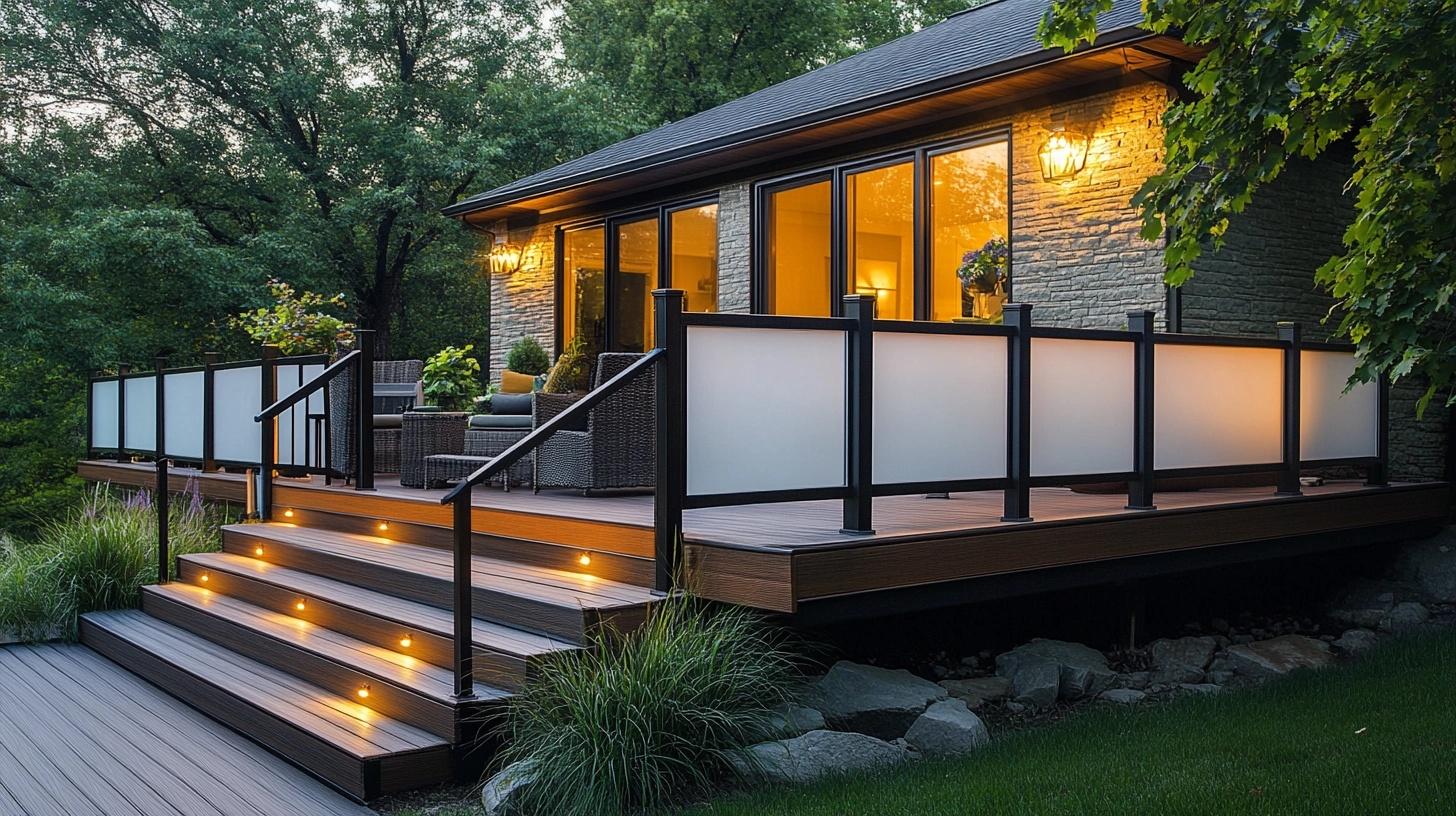
Sandblasted glass panels create a soft, diffused barrier. The panels, 1/2 inch thick, let light through while keeping shapes private. This option works well for urban decks and spaces needing subtle screening.
Cost: $200-350 per linear foot
Benefits:
- Glows softly at night
- Hides marks and smudges
- Maintains bright spaces
20. Decorative Iron Panels
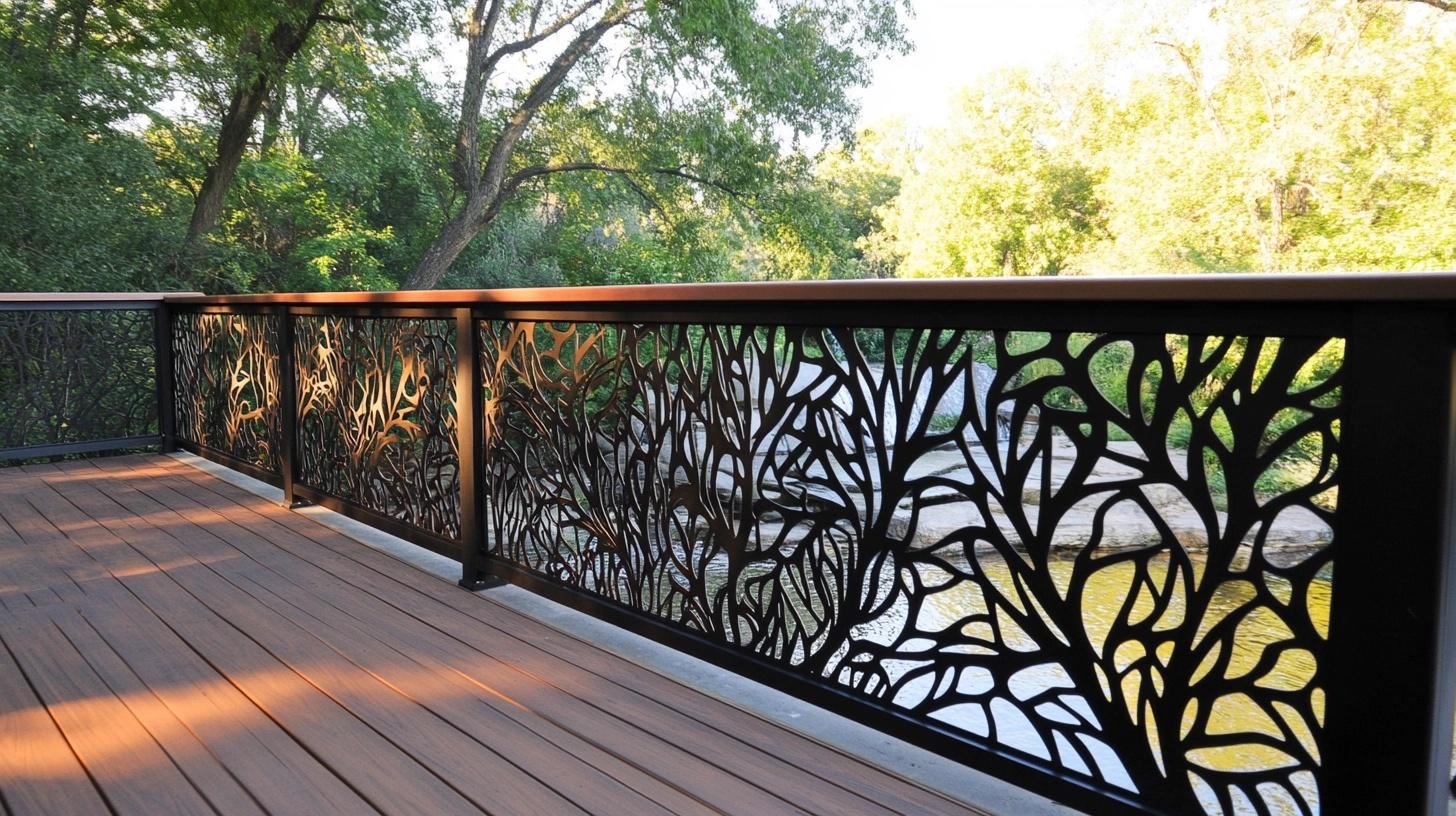
Hand-crafted iron panels showcase custom patterns between posts.
The panels, made from 1/2-inch iron bars, feature unique designs that catch the eyes and cast shadows. This style suits historic homes and custom-built properties.
Cost: $200-400 per linear foot
Benefits:
- Offers one-of-a-kind patterns
- Lasts for generations
- Increases property value
21. Black Steel Flat Bar
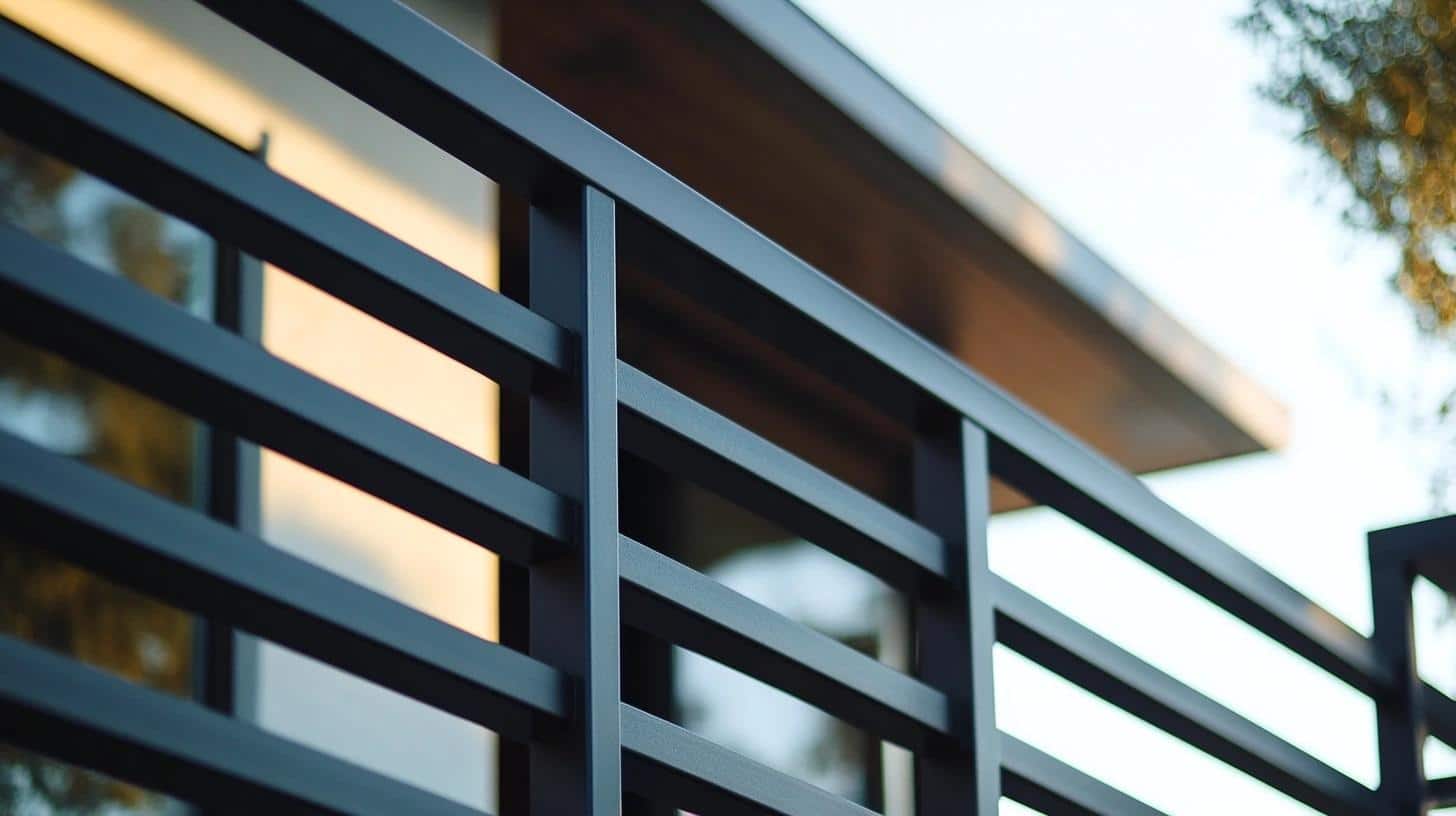
Wide, flat steel bars create bold horizontal lines in a matte black finish.
The bars, measuring 2 inches wide and 1/4 inch thick, are welded to posts for a seamless look. This style works perfectly with industrial and modern farmhouses.
Cost: $150-270 per linear foot
Benefits:
- Makes a strong statement
- Shows no weld marks
- Contrasts with light walls
22. Horizontal Rebar
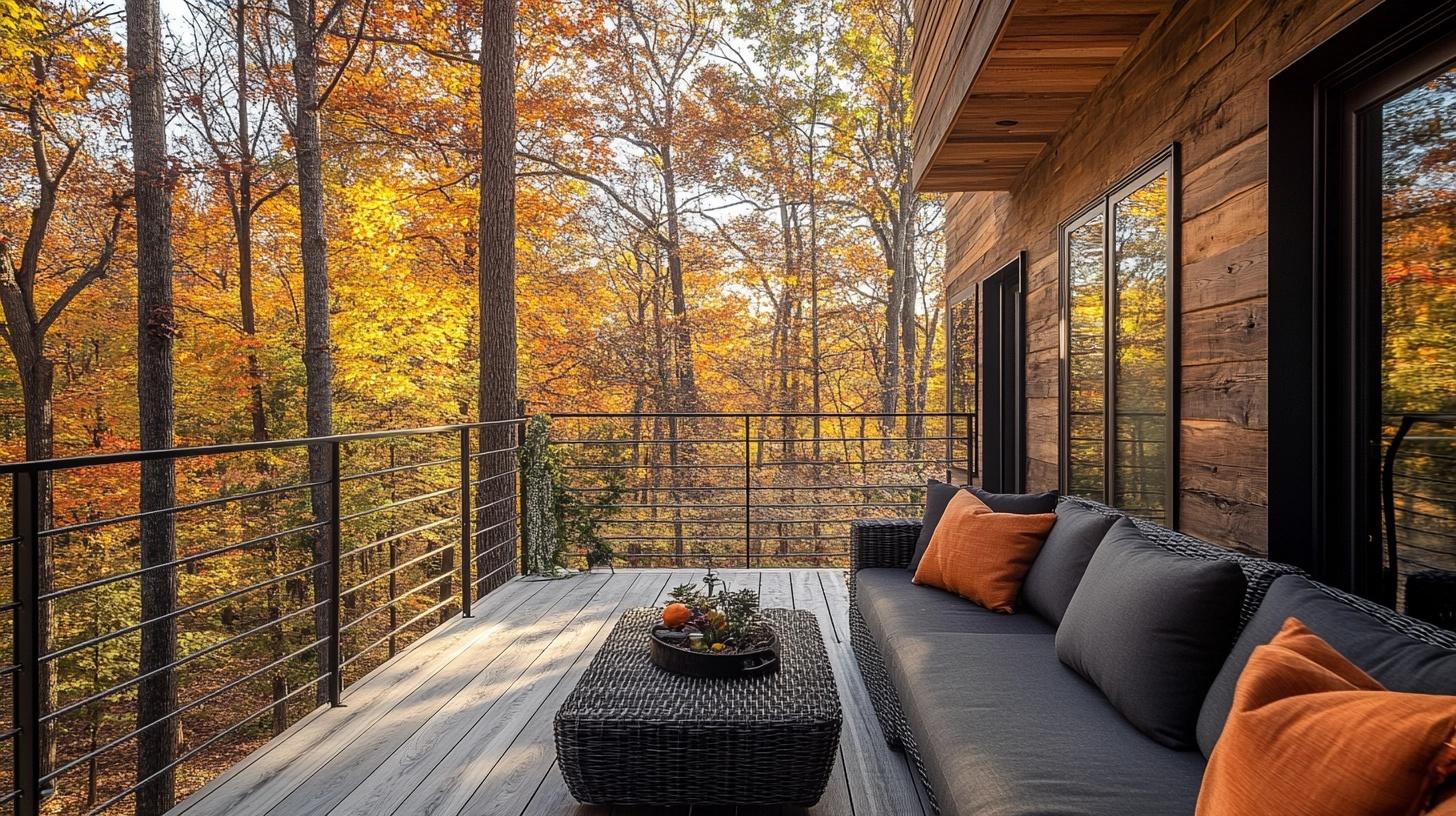
A construction-grade rebar, placed in rows, forms a strong and distinctive barrier.
The bars, typically 1/2 inch thick, are welded to metal posts for maximum strength. This design matches well with concrete and steel architecture.
Cost: $50-100 per linear foot
Benefits:
- Provides maximum durability
- Costs less than standard metal rails
- Supports heavy-weight loads
23. Mixed Material Layers
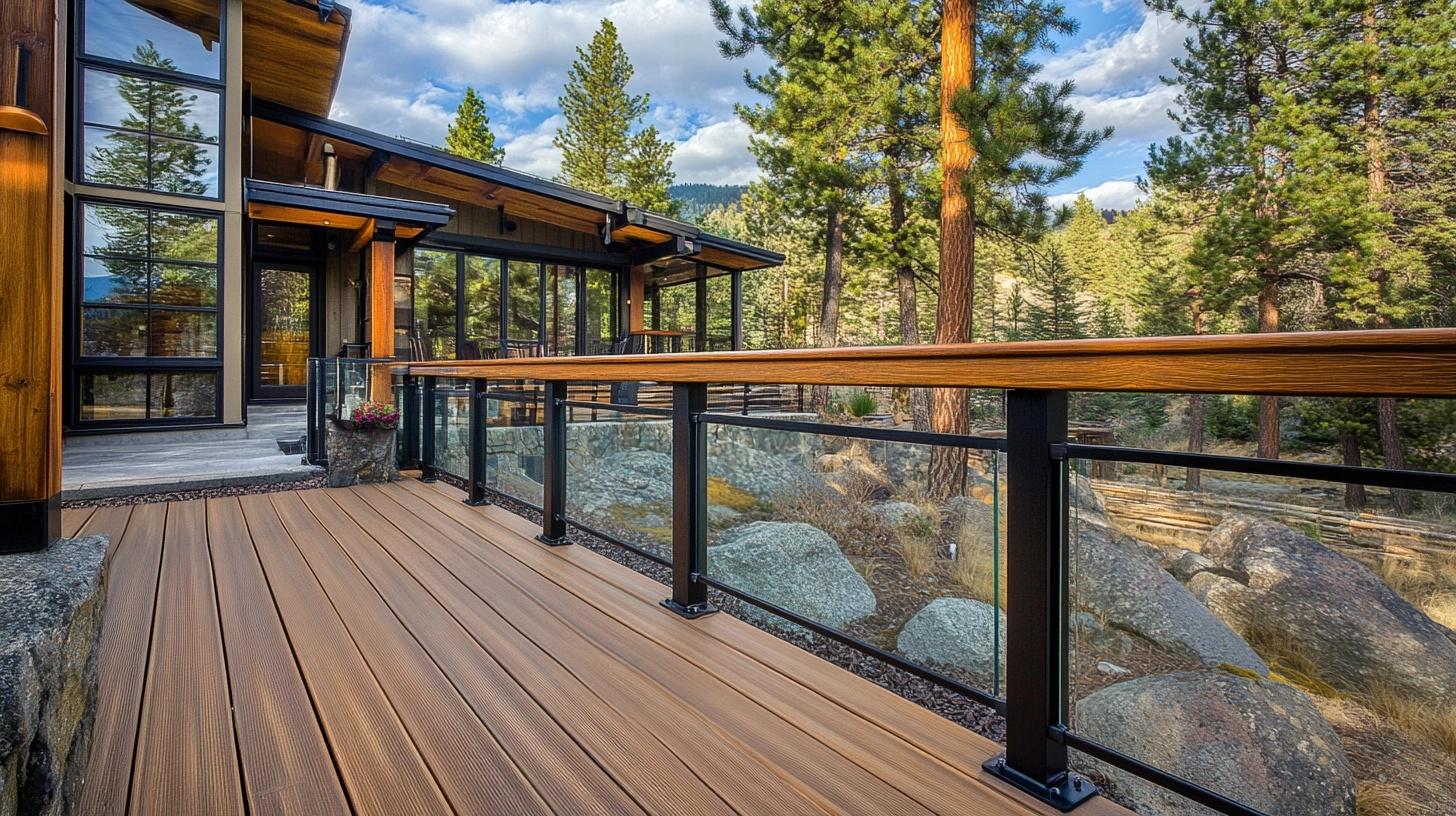
A combination of wood boards, metal sections, and glass pieces creates depth through layering.
Each material sits at a different depth from the posts, with wood closest, metal in the middle, and glass panels facing out. This design works best for large decks where the pattern can fully show.
Cost: $200-350 per linear foot
Benefits:
- Creates unique shadow effects
- Lets you feature multiple textures
- Makes your deck stand out
24. Painted Wood Slats
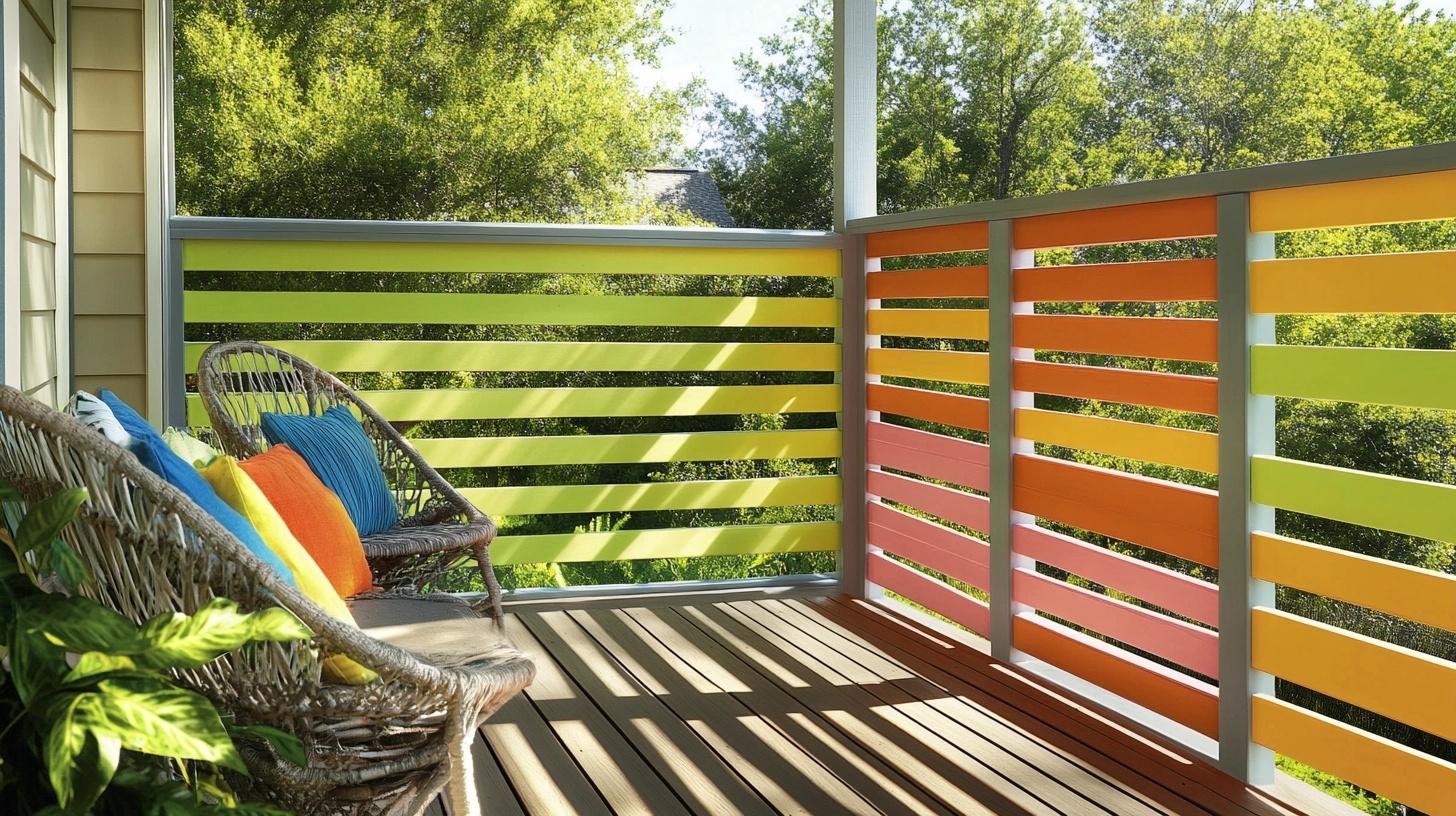
Standard wooden boards finished with exterior paint add bright personality to your space.
The slats, typically 4 inches wide, can be single-colored or patterned. This design is suitable for beach houses and family-friendly spaces.
Cost: $70-130 per linear foot
Benefits:
- Changes look with new paint
- Brightens outdoor spaces
- Matches any color scheme
25. Rustic Log Railings
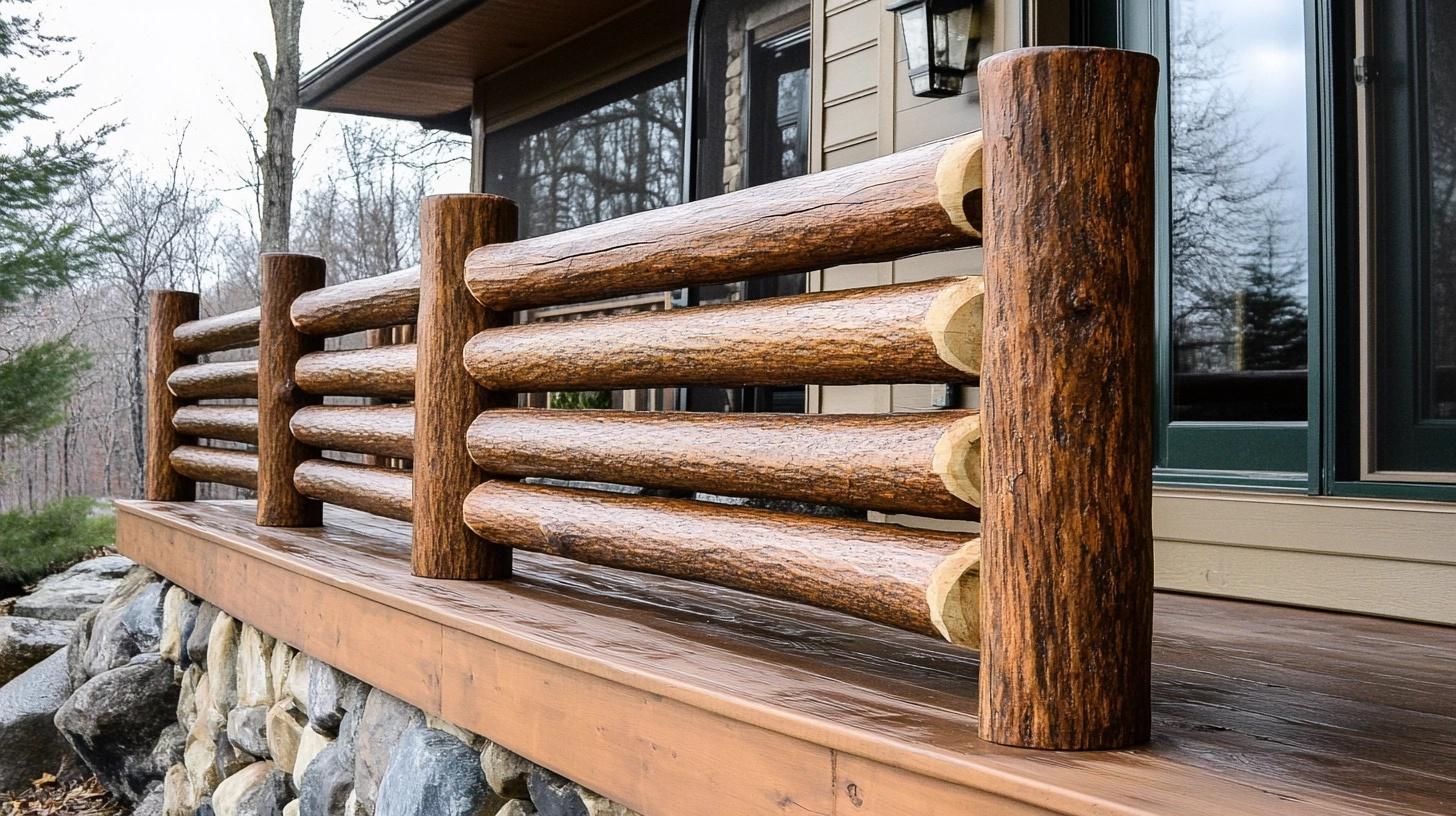
Split logs mounted side by side bring nature right to your deck. The logs, cut to 4-6 inches in diameter, keep their natural bark and character marks.
This option fits perfectly with mountain homes and woodland settings.
Cost: $85-160 per linear foot
Benefits:
- Shows natural wood patterns
- Gets better with age
- Feels solid and stable
Step-by-Step DIY Guide to Building Deck Railings
Tools & Materials Table
| Tool/Material | Description | Cost (Approximate) |
|---|---|---|
| 1×6 Boards | Wooden boards used for creating railing patterns | $6-$10 per board |
| Microfiber Pads | Pads for easy application of stain | $5 per pad |
| Driftwood Gray Stain | Semi-transparent stain for a rustic finish | $20 per can |
| 23-Gauge Pin Nailer | Small nail gun for securing boards | $100-$200 |
| 18-Gauge Brad Nailer (optional) | Larger nail gun for added support | $50-$100 |
| Glue | For additional hold when securing boards | $5 per bottle |
| Sandpaper | Used to sand down the boards | $10 for a pack |
| Chop Saw | Saw for cutting boards to size | $150-$300 |
| Spacers | Scrap wood cut to size for even spacing | DIY (Cost-free) |
| Level | Tool to ensure boards are level | $10-$20 |
Step 1 Cut and Prepare the Boards
- Rip down the 1×6 boards according to your desired pattern. Sand each board to smooth out any rough edges, ensuring a clean surface for staining.
Step 2 Stain the Boards
- Apply Driftwood Gray stain to each board, using microfiber pads for a smooth application. Let the stain dry completely before moving forward.
Step 3 Select and Cut to Size
- Choose the best face of each board (the side that will be visible) and cut each board to the appropriate length based on your post dimensions.
Step 4 Remove Old Spindles and Set the First Board
- Remove any old spindles, keeping some if needed for structural support. Begin installing the new boards, starting with the top board. Ensure it is perfectly level, as this will guide the rest of the installation.
Step 5 Create and Use Spacers
- Make spacers from scrap wood, cutting them to about ¼ inch thick. Use these to keep consistent spacing as you attach each board.
Step 6 Attach Boards with Nailer and Glue
- Using a 23-gauge pin nailer, secure each board in place, adding glue for extra hold if desired. Keep each board level as you go, and check for alignment as needed.
Step 7 Final Fit and Finish
- For the last board in each section, trim if necessary to fit. Step back to check alignment, and repeat the process for all railing sections, using any off-cuts for smaller spaces or gaps.
Smart Care Guide for Deck Railings
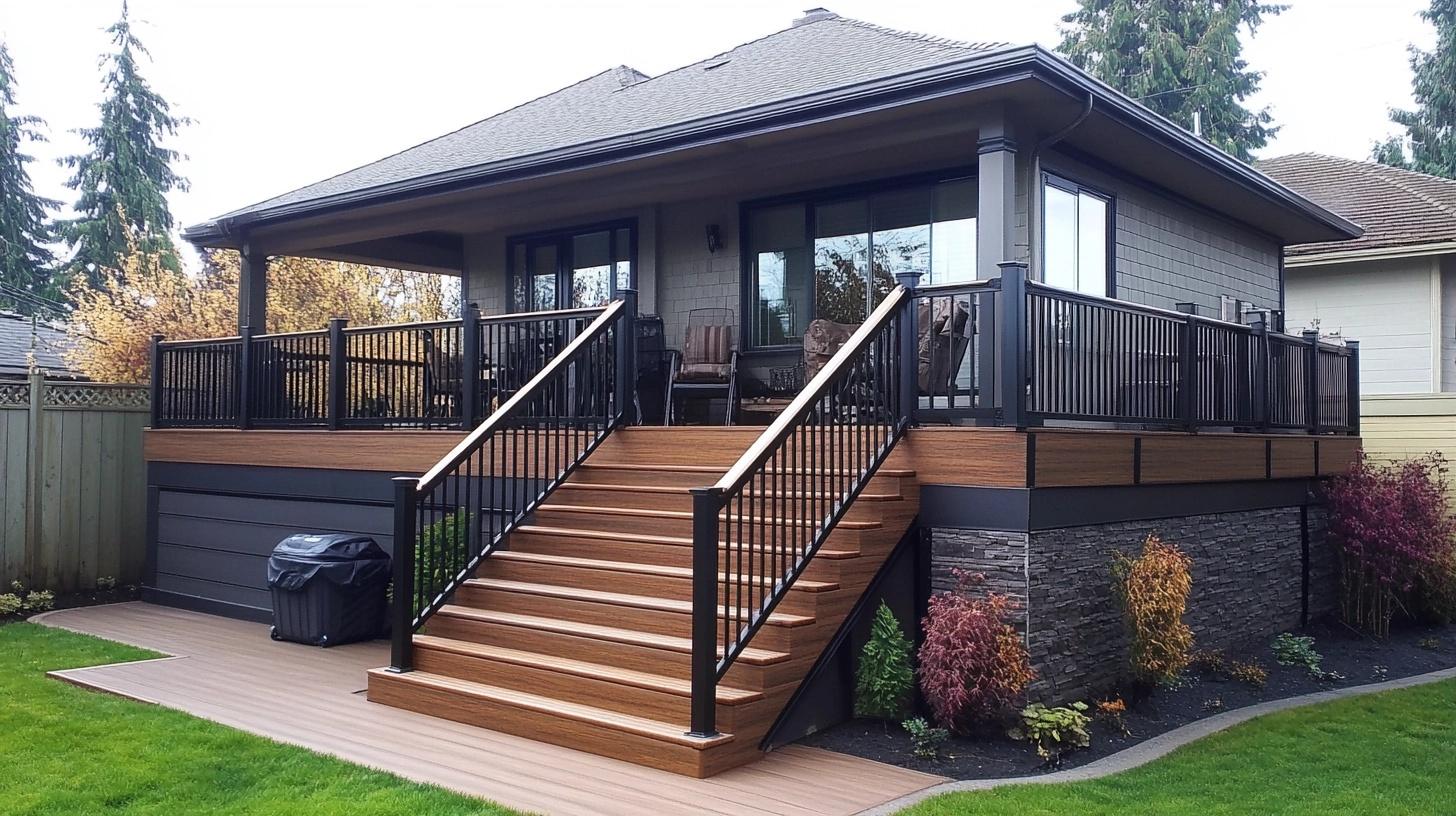
Different materials need specific care to stay strong and good-looking. Here’s how to maintain each type:
Metal Railings (Steel, Aluminum, Wire)
- Check the tension of wires, bolts, and fasteners every 6 months, and wipe with mild soap solution twice yearly.
- Watch for rust spots and treat them immediately, applying metal protectants annually in coastal areas.
Wooden Railings
- Clean with wood cleaner each spring and apply a fresh sealer or stain every 2-3 years.
- Fix loose boards and fill small cracks promptly to prevent bigger issues later.
Glass Panels
- Clean monthly with glass cleaner and inspect rubber gaskets yearly for signs of wear.
- Keep drain holes clear of dirt and tighten any loose fittings as soon as you notice them.
PVC and Composite
- Wash with soap and water twice yearly and remove any mold spots immediately.
- Check for loose sections before winter and keep materials away from direct heat sources.
General Tips for All Types
- Clear snow, leaves, and dirt regularly, and prevent plants from growing on railings.
- Monitor posts for stability and address small problems before they become major repairs.
Conclusion
In this guide, I’ve shown you how horizontal deck railings do more than keep people safe – they can transform your outdoor space entirely.
From budget-friendly PVC options starting at $40 per foot to stunning custom ironwork at $400 per foot, I’ve covered choices for every budget and style.
I’ve explained how each option brings unique benefits, from the clear views of glass panels to the natural warmth of wooden slats.
Ready to start your project? I suggest checking your local building codes and deck structure first.
Take photos of your space and save designs you like. Then, find local contractors who can help bring your vision to life.
Have you tried any of these railing styles? Share your experiences or questions below – I’d love to hear about your deck projects.
Frequently Asked Questions
Are Horizontal Deck Railings Safe for Homes with Children and Pets?
Yes, when properly installed with correct spacing (less than 4 inches between rails) and sturdy materials. Regular safety checks and tight connections ensure protection for all family members.
Can I Retrofit My Existing Vertical Railings to Horizontal Ones?
Yes, but your posts must be strong enough to handle horizontal force, properly spaced (4-6 feet apart), and securely anchored to your deck’s frame. If your current ones don’t meet these standards, you may need new ones.
Do Horizontal Railings Meet Building Code Requirements?
Yes, horizontal railings meet codes when installed at 36-42 inches high with proper spacing. Check local regulations, as some areas have specific rules.
What Materials Offer the Best Durability for Horizontal Railings?
Stainless steel, aluminum, and cedar offer top durability. Steel and aluminum resist rust, while cedar naturally fights decay and insects.
How Do I Prevent Horizontal Wood Railings from Warping Over Time?
Use kiln-dried lumber, seal all sides, maintain proper drainage, and apply fresh sealer yearly. Regular maintenance prevents moisture damage.
What Are Some Eco-Friendly Material Options for Horizontal Railings?
Reclaimed wood, bamboo, and composite materials made from recycled content offer green options that last long and look good.

