How to Mount a Staghorn Fern: Steps and Aftercare Tips
Staghorn ferns are plants that bring a touch of nature’s wonder into our homes. Do you want to know how to mount a Staghorn fern?
This guide will walk you through the basics of Staghorn ferns and their special needs.
Whether a plant enthusiast or a curious beginner, you’ll discover how to give these eye-catching plants the perfect home.
Get ready to explore the steps of selecting, mounting, and nurturing your Staghorn fern, turning it into a thriving, green masterpiece in your living space.
What is a Staghorn Fern?
Staghorn ferns are plants that catch the eye with their unusual shape. They get their name from their forked leaves that look like deer antlers.
These plants are not your typical houseplant. In nature, Staghorn ferns are tree-dwellers. They don’t grow in the ground like most plants we’re used to.
Instead, they attach themselves to tree trunks and branches high in the forest canopy. This way of growing is called epiphytic, which means they live on other plants without harming them.
We will talk about two types of Staghorn ferns:
- Platycerium bifurcatum: This is the more common type. It’s smaller and easier to grow at home.
- Platycerium superbum: This is a larger type. It can grow up to 2-3 feet across at its base.
Both types start small but can become quite big over time. They have two kinds of leaves:
- Fertile fronds (the antler-like ones)
- Sterile fronds (shield-like leaves that cover the plant’s base)
Material Required to Mount a Staghorn Fern
- Staghorn fern
- Fishing Line
- Wooden Board
- Sphagnum Moss
- Mounting Hardware
Step-by-Step Guide to Mounting a Staghorn Fern
Step 1: Preparing the Plaque
Choose a plaque that fits your fern with room to grow. A small board works for young plants, but larger ferns need bigger plaques.
Cedar is a good choice, but pressure-treated wood also works well. Make sure your plaque has a way to hang it up – you can nail or glue it on a hanger at the top.
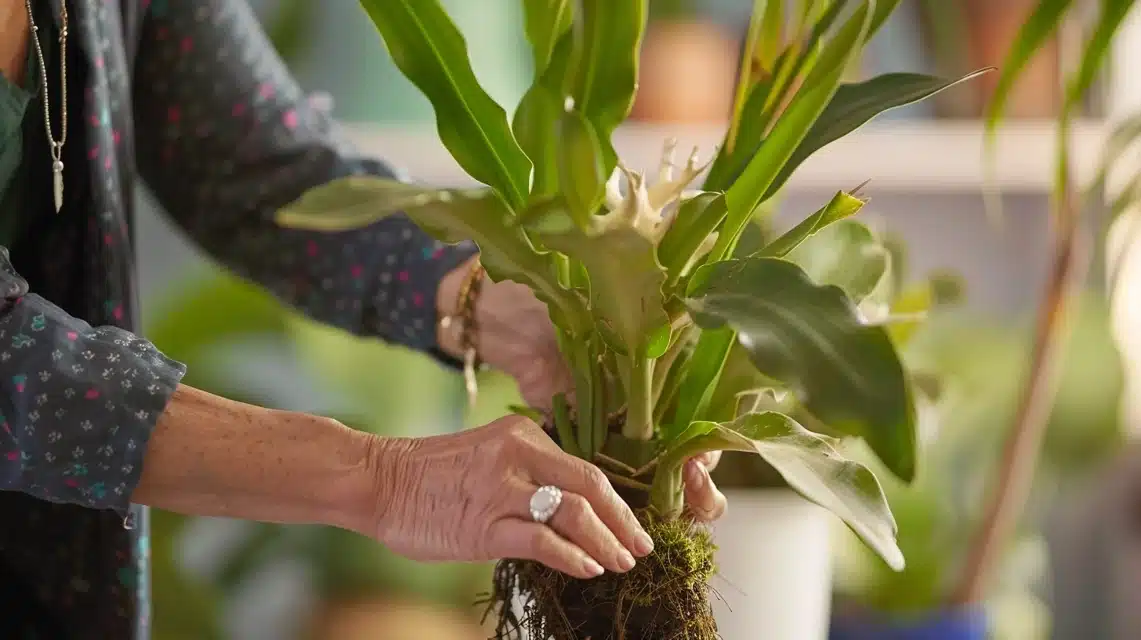
Step 2: Preparing the fern for Mounting
Take your fern out of its pot carefully. Gently flatten out the roots so they can sit nicely on the board. Look for the rhizome—that’s the plant’s main stem.
Put this part at the top of your plaque. This helps the fern grow in the right direction.
Step 3: Adding Sphagnum Moss
Wet your Sphagnum Moss to make it easier to work with. Pack this damp moss around the base of your fern.
Make a little dip or shelf at the top of the moss. This will help when you water the plant later.
Step 4: Securing the fern to the Plaque
Now, use your fishing line to connect everything. Start by tying the line to a hole or nail at the top of the plaque.
Then, wrap the line around the fern and moss. Try to catch the base of the plant as you wrap – this keeps it steady.
Keep wrapping until the fern and moss feel secure on the plaque. Tie off the line at the end.
Remember, it’s okay to use plenty of fishing lines. They’re cheap, and they help keep your fern in place.
With time, the fern will grow and attach itself to the plaque, but for now, the line does the hard work of holding everything together.
Caring for Your Mounted Staghorn Fern
Watering Techniques
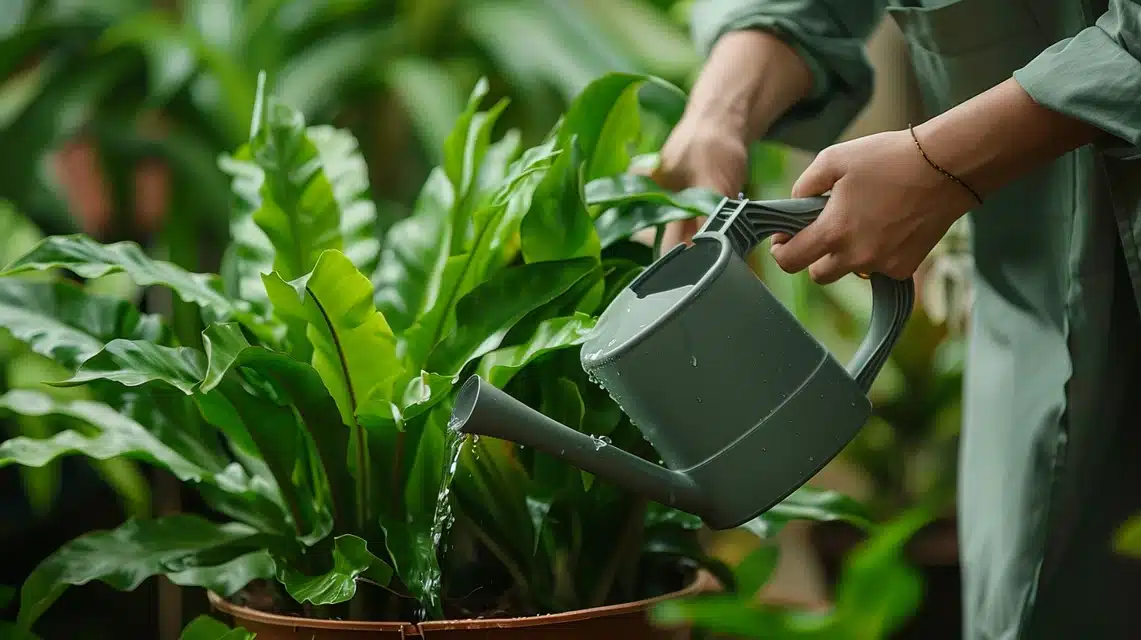
Staghorn ferns like to go from wet to dry and back again, which is how they live in nature. Here’s how to water them right.
- When the moss feels dry, it’s time to water.
- You can soak the whole mount in water or use a hose to wet the moss well.
- If the moss gets very dry, you might need to water it more than once to get it fully wet again.
- Water more often in summer when it’s warm, and the plant grows fast.
- Cut back on water in winter when the plant isn’t growing as much.
Light Requirements
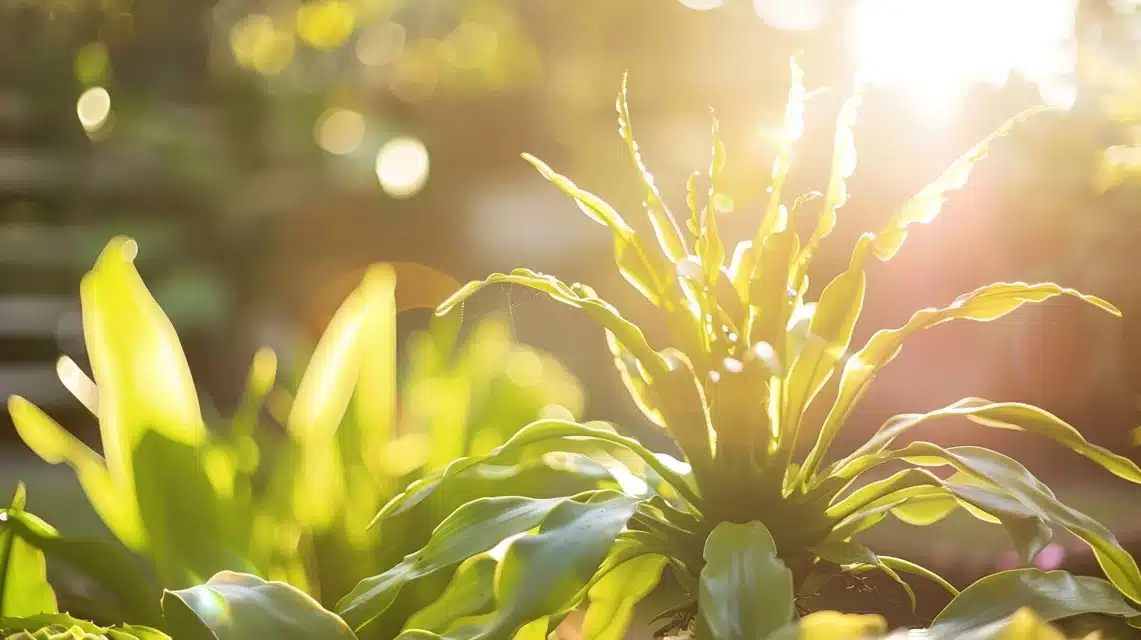
Many people think ferns need low light, but Staghorn ferns are different. They like bright light.
- In nature, they grow high up in trees where they get lots of light.
- At home, put your fern near a window with plenty of light.
- If you hang it on a wall, ensure the fern faces the window, not the room.
- The plant will grow towards the light, so give it the light it needs to grow well.
Maintaining and Repotting the Fern as It Grows
As your Staghorn fern grows, you’ll see some changes. Here’s what to expect and how to keep your fern happy as it grows.
Growth Changes
Over time, the shield fronds (the flat, round leaves at the base) will grow and cover the moss.
The antler-like fronds will get longer and may hang down. Your fern might outgrow its current plaque.
When to Move to a Larger Plaque
If the fern’s shield fronds are reaching the edges of the plaque, it’s time to think about a bigger home.
You might also need to move it if the plant feels too heavy for its current mount.
Steps to Move Your Fern
- Get a new, larger plaque ready.
- Carefully cut away the fishing line holding the fern to its old plaque.
- Gently lift the fern off the old plaque.
- Put fresh, damp moss on the new plaque.
- Place your fern on the new plaque.
- Use a new fishing line to secure the fern, just like when you first mounted it.
- Add more moss around the base if needed.
Dealing with Fishing Line
As your fern grows, the old fishing line might feel tight. Once the shield fronds cover the moss and hold the plant in place, you can remove it.
If the plant still feels loose, loosely apply a new fishing line to support it while allowing room for growth.
Selecting the Right Mount for Your Staghorn Fern
Picking the right mount for your Staghorn fern is key to its health and how it looks in your space.
Let’s look at your options and what to think about when choosing.
Types of Mounts
- Wood Boards: The most common choice. They’re easy to find and work with.
- Driftwood: Gives a natural, beachy look. Make sure it’s clean and sturdy.
- Baskets: Good for a softer, more hanging plant look. Choose ones with open weaves for airflow.
- Rock Walls: For outdoor growing or if you have a large indoor rock feature.
Considerations Before Selecting the Mount
- Durability: Your mount must last, even when wet. Cedar and pressure-treated wood are good choices.
- Looks: Consider how the mount will complement your home’s style. A rustic driftwood piece might look great in a beach house, while a sleek wood board might suit a modern home better.
- Size: Choose a mount that gives your fern room to grow. Remember, some Staghorn ferns can get quite large over time.
- Where You’ll Put It: If you’re hanging it on a wall, make sure the mount isn’t too heavy. Weight matters less for shelves or tables.
- Drainage: Whatever you choose, ensure water can drain away from the fern’s roots.
Summing Up
Bringing a Staghorn Fern into your home is more than adding another plant to your collection.
By following the steps outlined in this guide, you’ll be well-equipped to give your Staghorn Fern the care it needs to flourish.
Remember, each fern is unique and may require adjustments as you learn its preferences.
Cedar is best for mounting Staghorn ferns. It’s durable, resists rot, and looks nice. Pressure-treated wood is a good alternative.
With patience and attention, you’ll soon have a beautiful, healthy Staghorn Fern that becomes a talking point in your home and connects you to nature in a truly special way.


