How to Build a Horizontal Fence on a Slope?
Building a fence on uneven ground can be tricky. This guide shows homeowners how to build a horizontal fence on a slope without making common mistakes.
The post covers everything from checking yard terrain to picking the right style for sloped areas.
Readers will learn about local building rules, needed tools, and step-by-step methods.
The guide also includes tips on making fences look good by changing their heights properly and adding yard items like rocks and plants.
With this guide, anyone can build a strong fence that fits their yard perfectly.
Why Choose a Horizontal Fence?
Horizontal fences add a fresh look to homes that many neighbors will notice. The sideways boards create clean lines that look modern and neat.
These fences provide privacy while also improving the appearance of your yard. The design works well with newer homes and mid-century styles.
Many homeowners pick this style because it stands out from the usual up-and-down fence boards.
A horizontal fence can make even a plain yard look updated and well-planned.
Planning Your Fence Project
Good planning helps your fence project go smoothly.
Understand Your Yard’s Terrain
Start by checking if your yard is flat or sloped. Use a level tool or laser to see how much it slopes.
Walk around your yard with stakes and string to mark the high and low spots.
Knowing your yard’s shape will help you pick the right fence style. Even small slopes need careful planning.
Fence Design Styles for Sloped Yards
You have three main choices for sloped yards:
Option 1: Sloped bottom where fence boards follow the ground. This looks natural but is harder to build.
Option 2: Level the top, with gaps at the bottom filled with trim. This looks clean from the top.
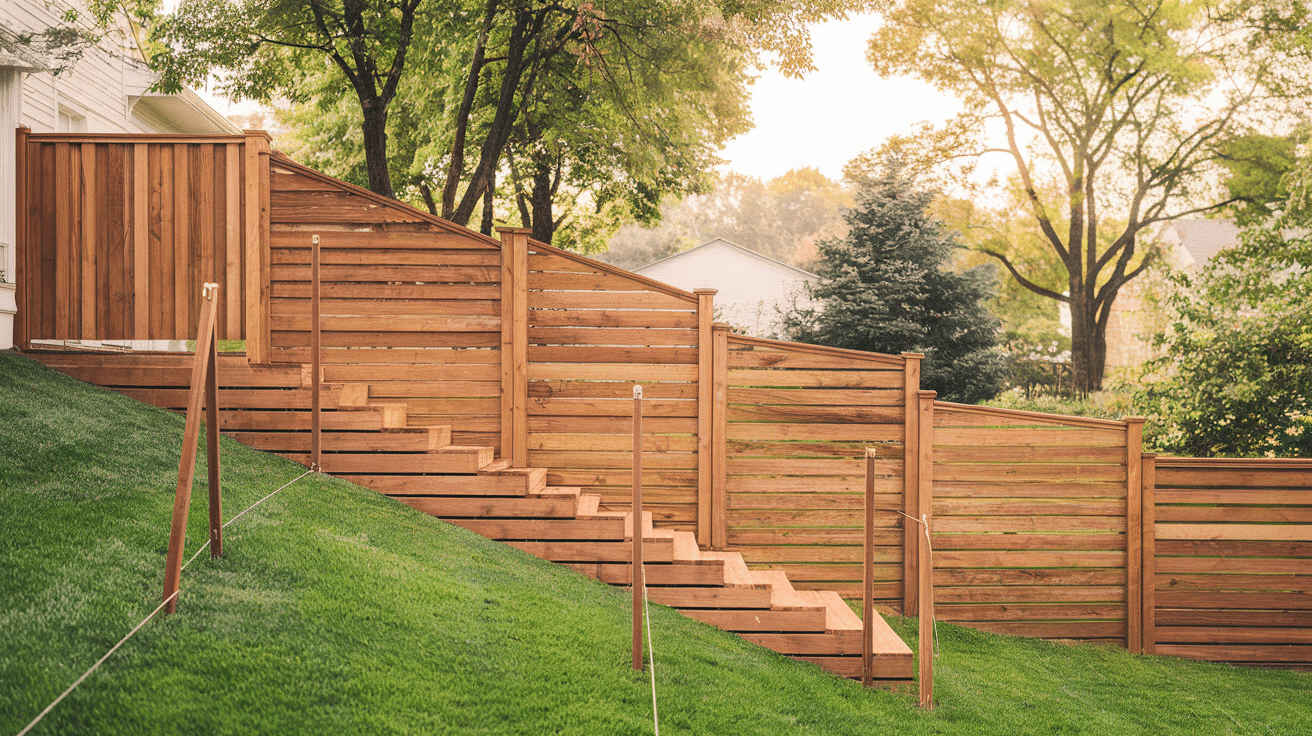
Option 3: Stair-step panels that move down in sections. This works well for steeper slopes.
Each option has good and bad points depending on your yard and needs.
Check Local Building Codes and HOA Rules
Many towns limit the height of fences, often to 6 feet in back yards and 4 feet in front. Check how far from the property lines your fence must be.
Some areas require permits before you start building, and HOA rules might limit fence styles and colors. Always check these rules first to avoid costly mistakes.
Materials and Tools You’ll Need
Materials needed for building a horizontal fence:
- Cedar, redwood, or pressure-treated wood
- Fence posts (4×4 or 6×6)
- Exterior-grade screws
- Level
- Post hole digger
- Measuring tape
- Saw
- Drill
- String line
- Concrete mix
Optional items that you may need for building the fence:
- Landscape fabric – Helps prevent weeds from growing along your fence line
- Gravel – Creates better drainage at the base of posts to prevent rotting
- Sealant or stain – Protects your wood from weather damage and extends fence life
- Trim boards – Covers gaps and gives your fence a finished look
- Post caps – Keeps water off post tops and adds a nice touch to your fence
Step-by-Step Guide to Building Your Horizontal Fence
Follow these steps for a strong, good-looking fence that lasts.
1. Use a Stair-Step Design
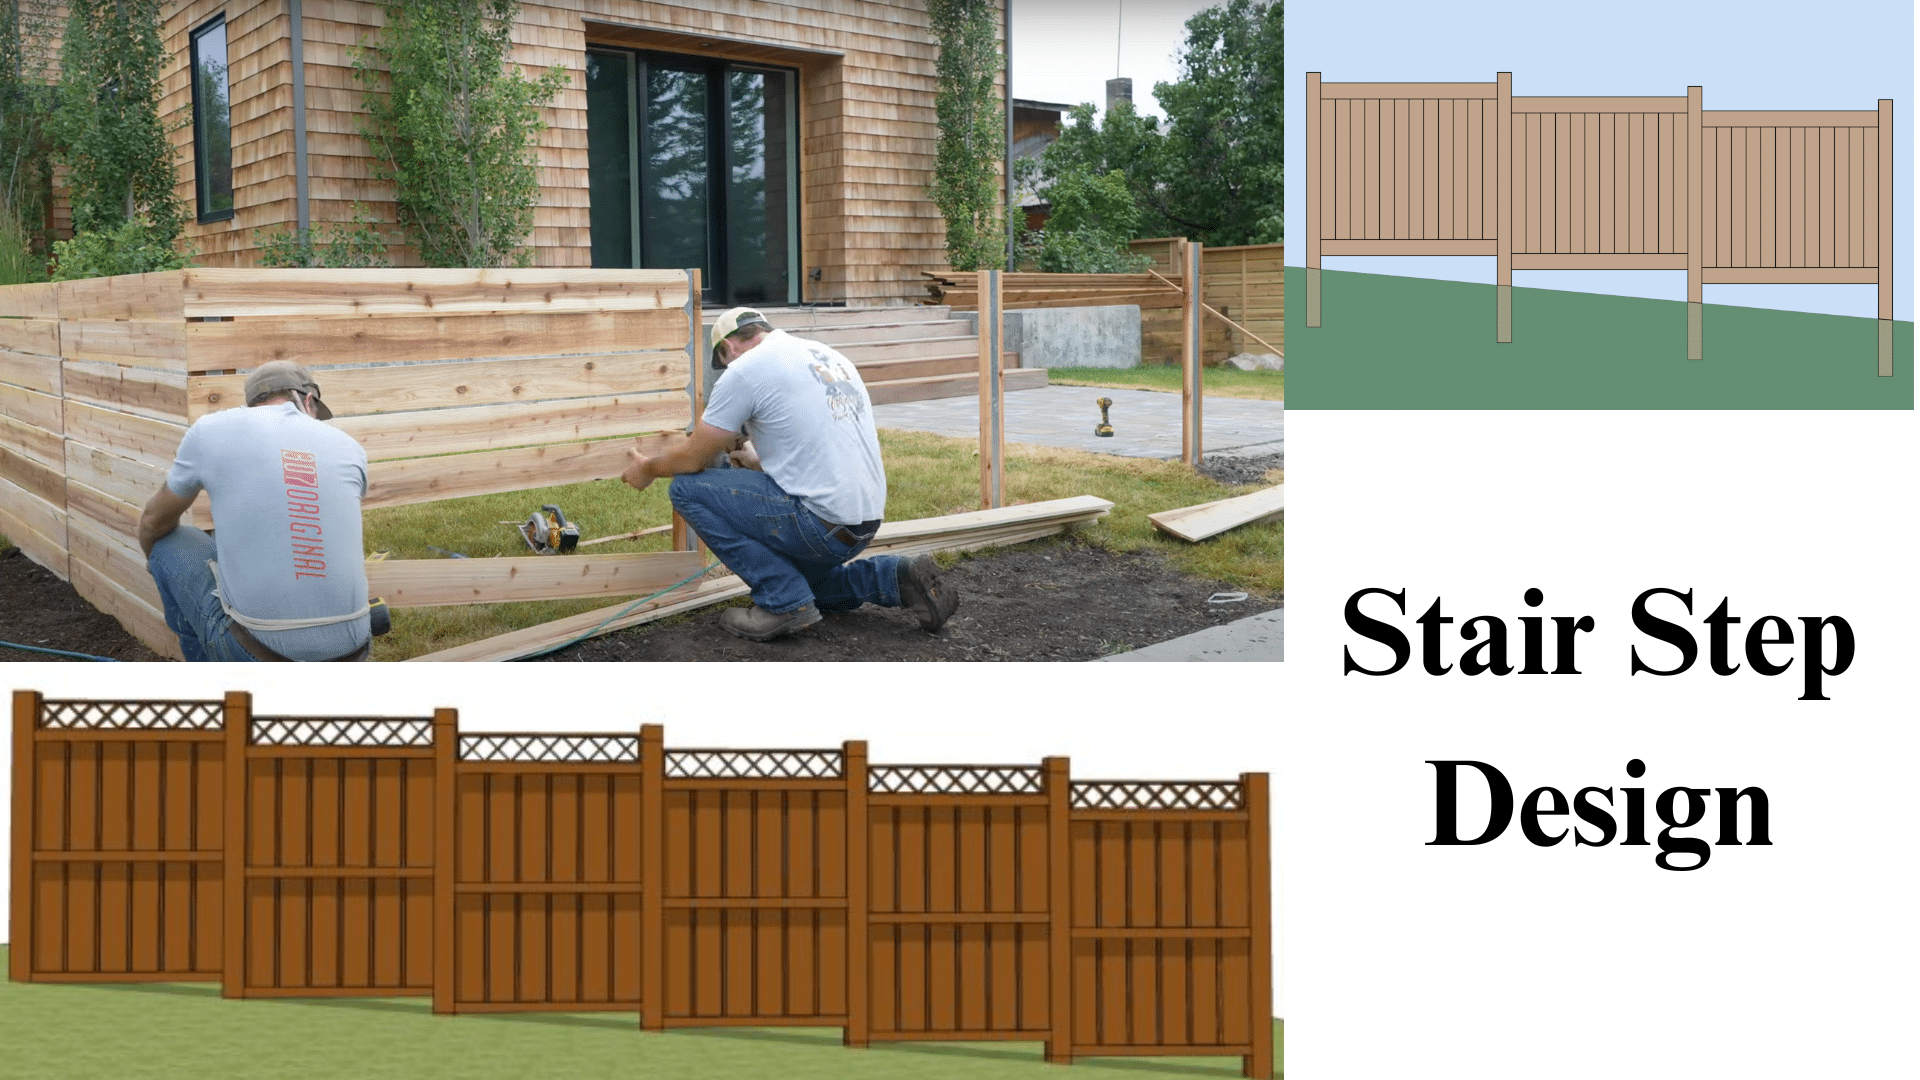
For yards with slopes, your fence should follow a stair-step pattern. Change the height of each picket to match the ground’s ups and downs.
This method works better than forcing the whole fence to slant.
Each section stays level while the fence as a whole follows your yard’s natural shape.
2. Proper Measurement for Pickets
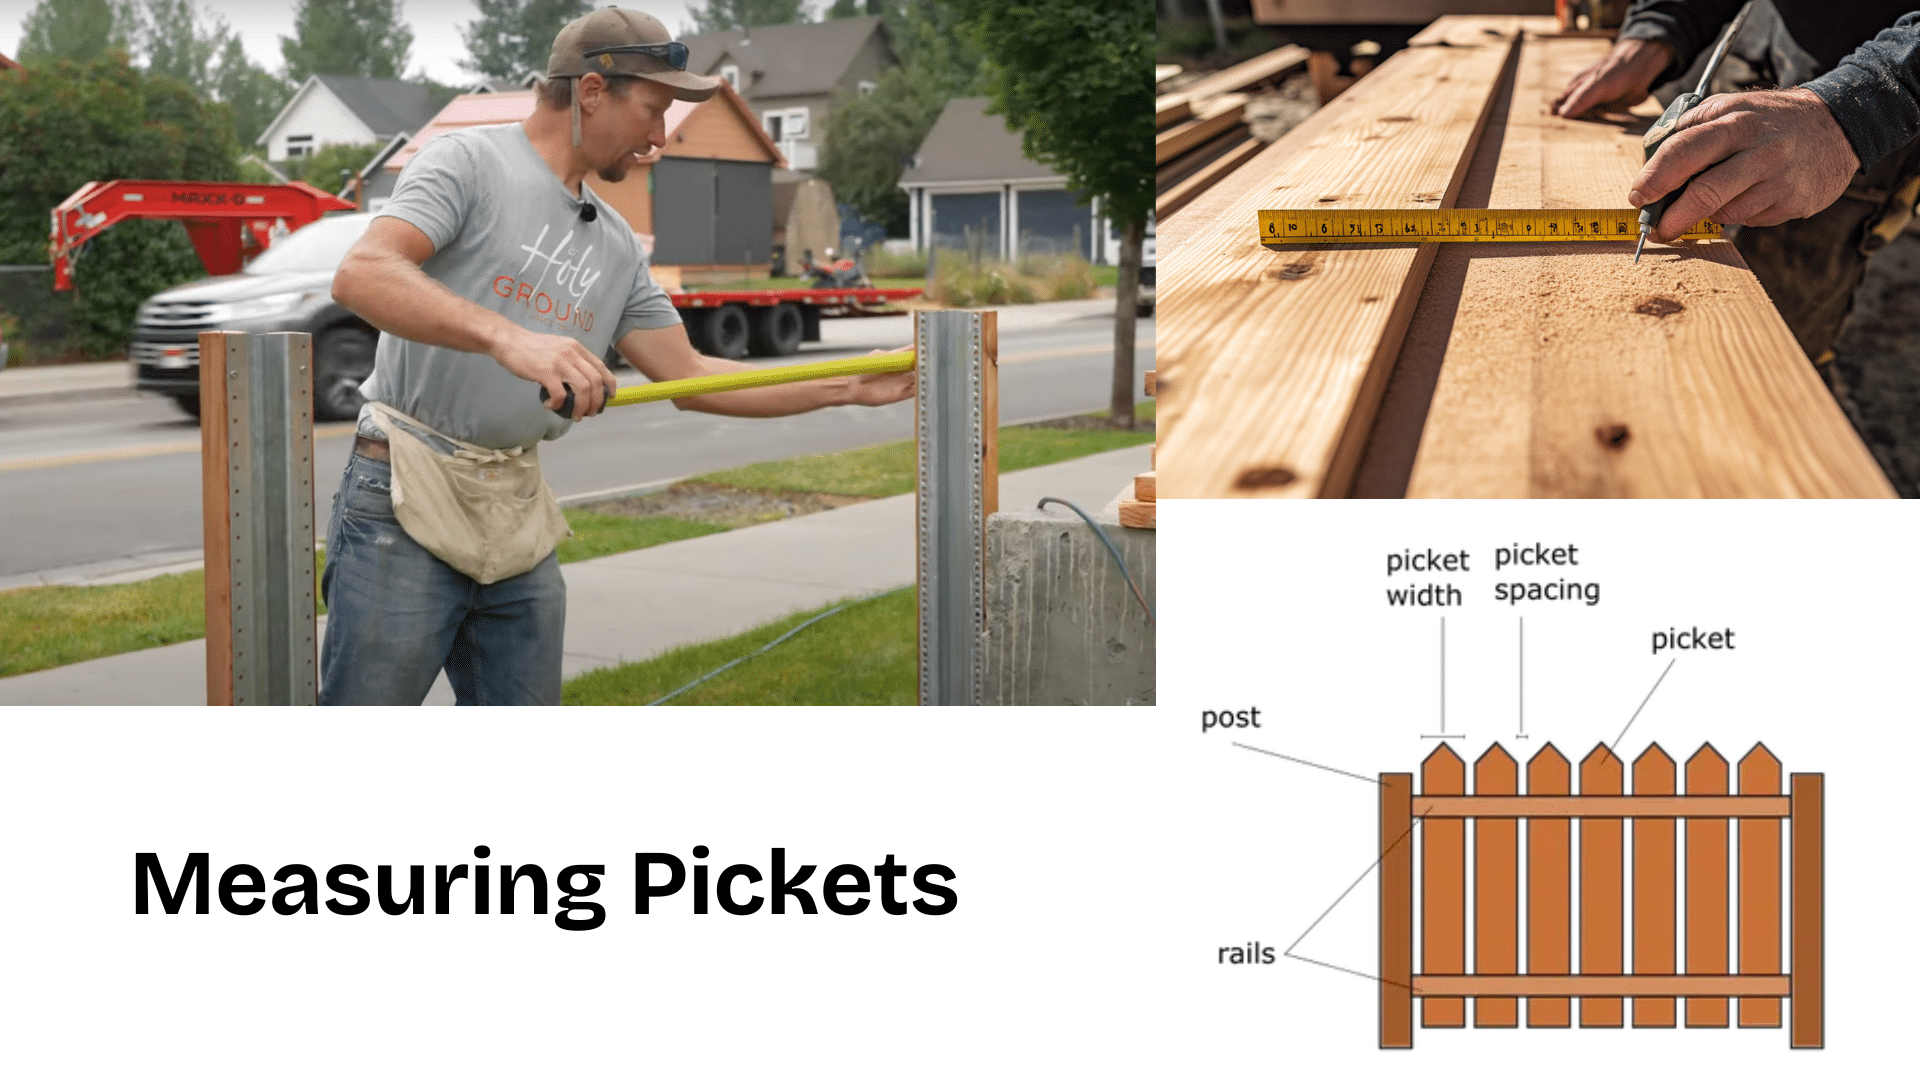
Measure each picket twice before cutting.
Keep a half-inch space between boards to allow for water drainage and wood movement as seasons change.
Use spacers cut from scrap wood to ensure these gaps stay the same size all along your fence line.
3. Custom Angled Cuts for the Bottom Picket
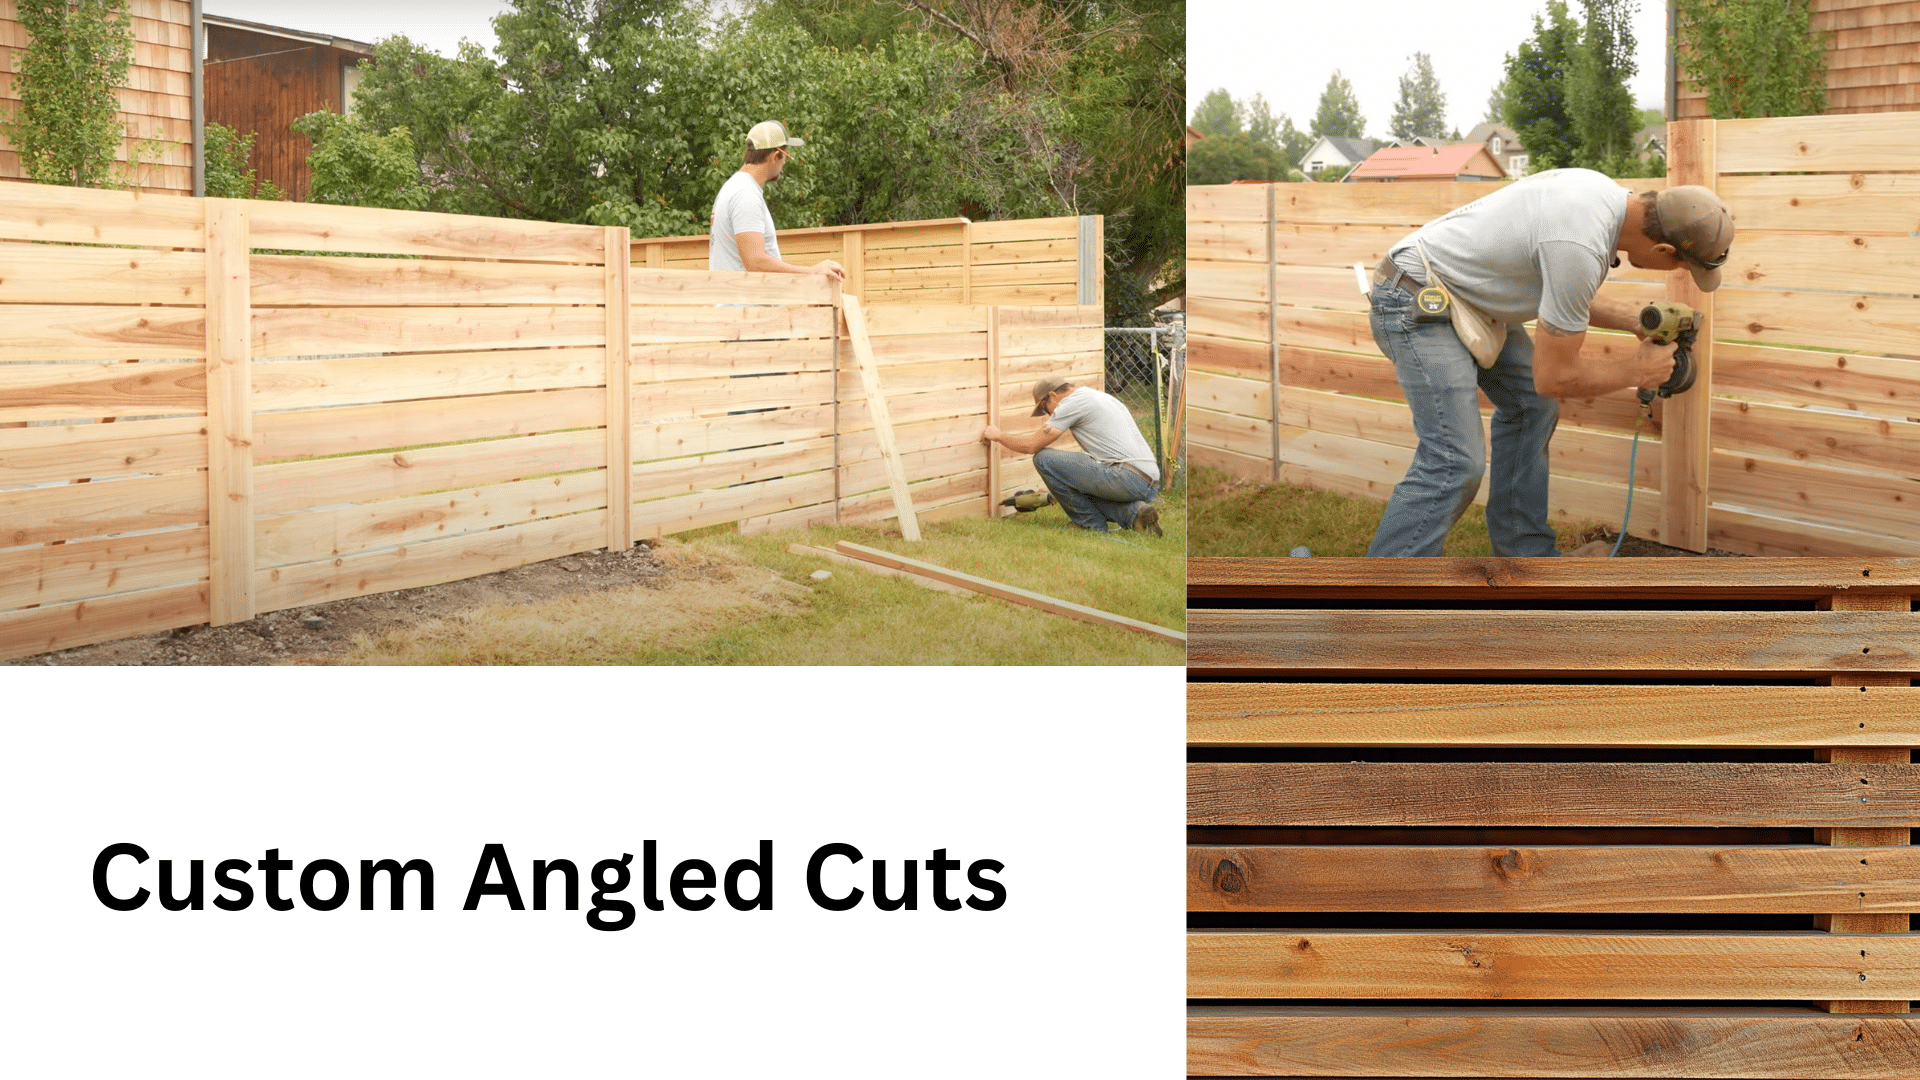
When the ground isn’t flat, the bottom of each picket needs a special cut. Mark where the ground hits each picket, then cut along that line.
This stops gaps at the bottom of your fence and keeps animals from getting under it. A pencil tied to a small block helps mark cutting lines.
4. Add a Top Cap for a Finished Look
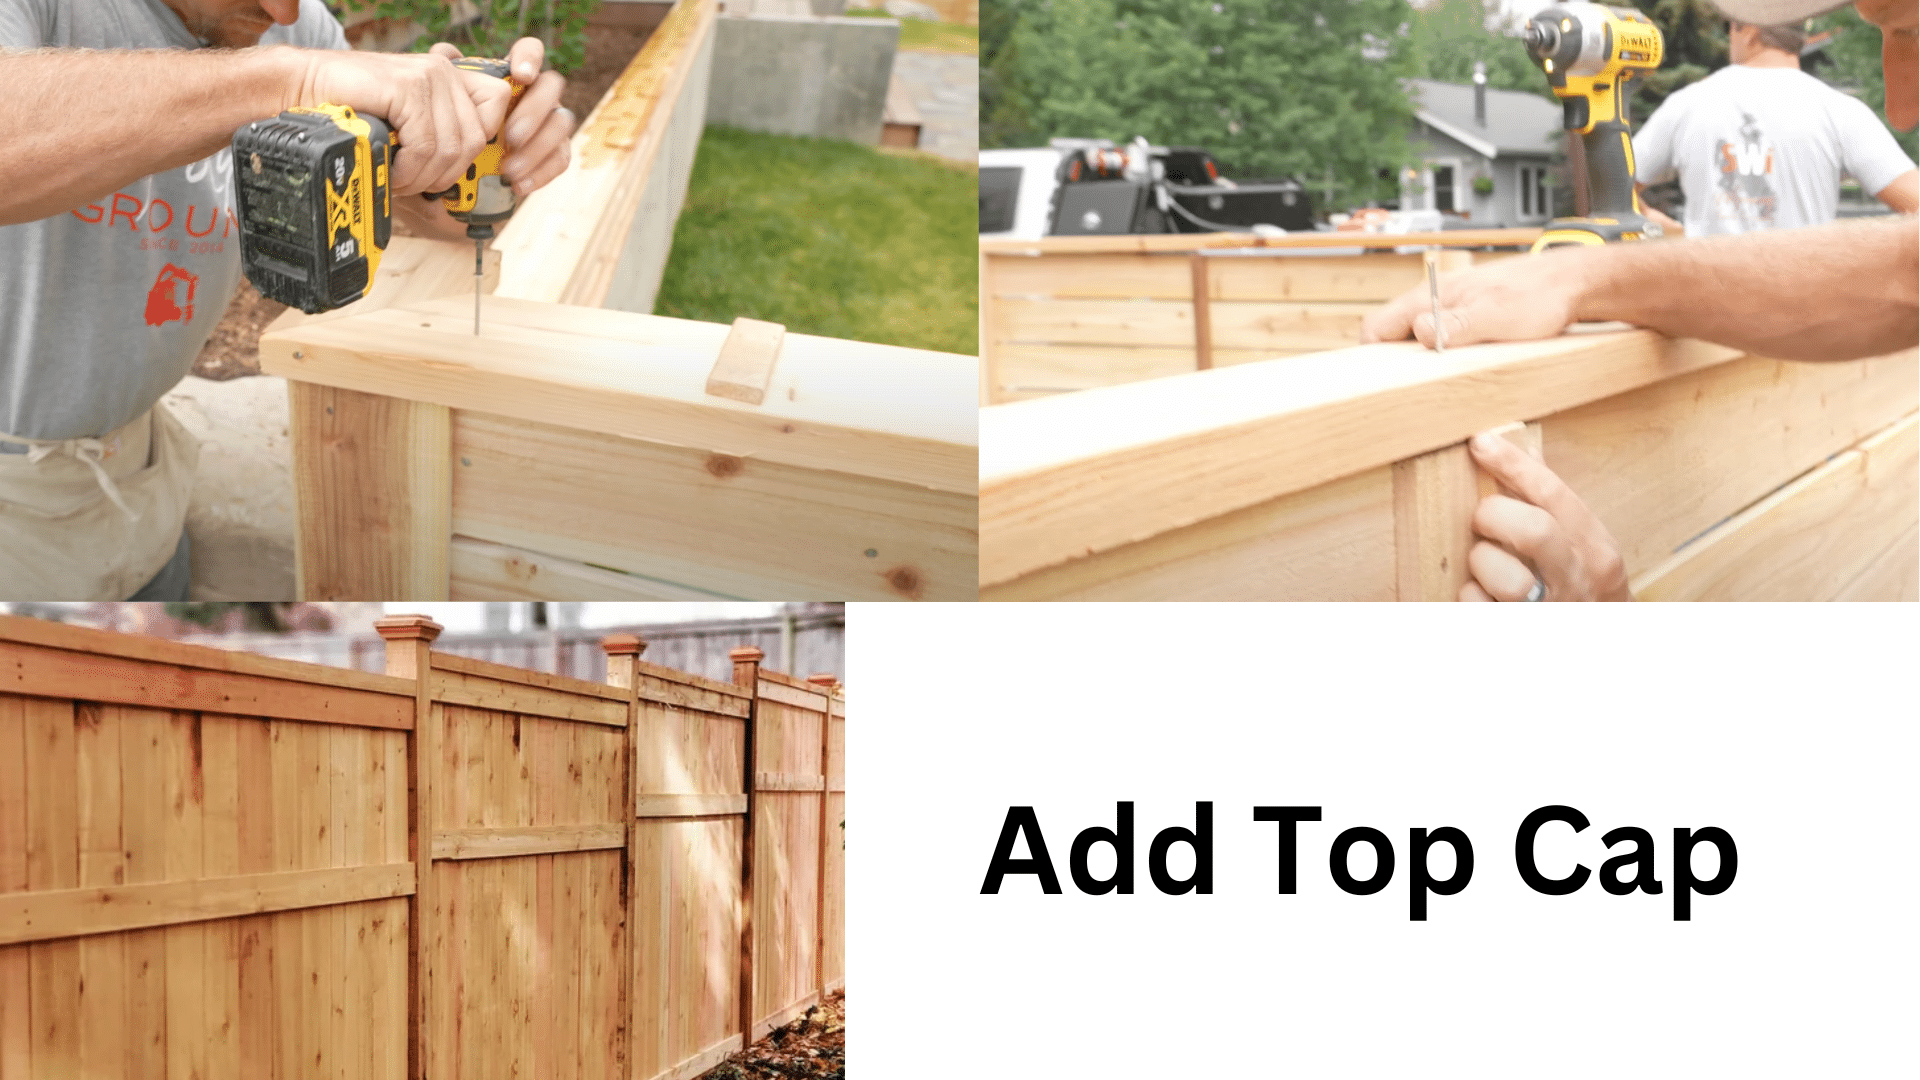
Put a flat cedar board across the top of your fence posts and pickets. Cut the ends at 45-degree angles where they meet at corners.
This top piece protects the end grain of your pickets from water damage and makes your fence look much nicer from both sides.
Visual Appeal Considerations
The look of your fence matters a lot. Make smooth height changes at gates or corners.
This helps your fence look better. Try to match your fence with your house siding or other features.
This creates a unified look. Add modern yard features like small rocks, plants, and lights around your fence.
These small touches can make your fence look much better. Good lighting can also make your fence look nice at night.
Common Mistakes to Avoid
- Failing to check the slope of your yard which can result in an uneven or crooked fence
- Skipping permit requirements, which may lead to fines or forced removal
- Spacing posts too far apart, causing boards to sag over time
- Choosing wood that isn’t suitable for your local climate leads to faster deterioration
- Using regular nails instead of rust-resistant screws designed for outdoor use
Wrapping Up
Learning how to build a horizontal fence on a slope takes work but gives great results.
Good planning saves time and money by avoiding problems before they happen.
The right design choice – whether sloped bottom, level top, or stair-step style – makes a big difference in how the fence works and looks.
Homeowners should check local rules, use the right materials, and follow each step carefully.
A well-built fence not only adds safety and privacy but also makes the whole property look better.
Readers can share photos of their finished projects in the comments section or ask any questions about their fence plans.