From Drills to Saws: The Complete Guide to DIY Tools for Home Improvement
Are you ready to dive into the world of DIY tools for your home improvement projects? Whether you’re a seasoned DIY enthusiast or just getting started, having the right tools at your disposal can make all the difference.
Fastening Tools
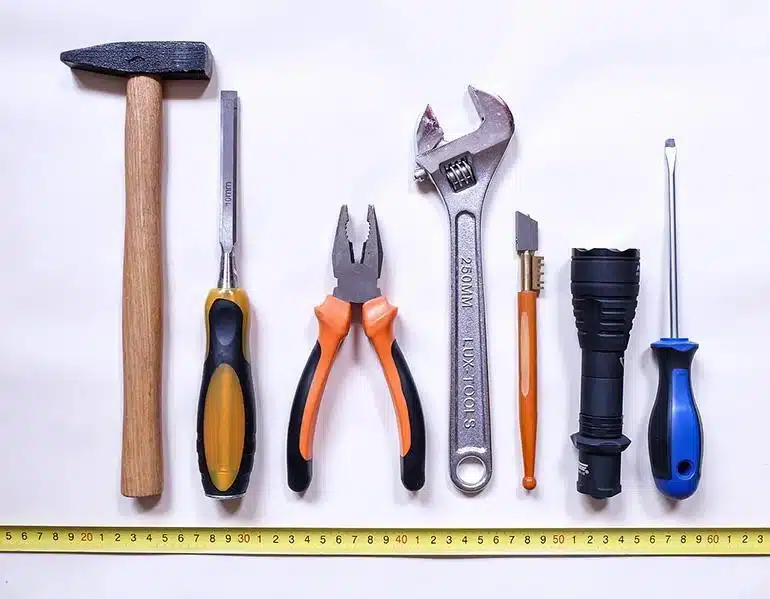 Fastening tools are essential for securing materials together effectively. Hammers are versatile for driving nails, while screwdrivers come in different types (flathead, Phillips, etc.) for driving screws.
Wrenches are used for tightening or loosening nuts and bolts. Tips for proper fastening techniques include using the correct size and type of fastener, applying consistent pressure during fastening, and avoiding over-tightening to prevent damage.
Understanding the compatibility between sockets and nuts is crucial for efficient fastening. Referencing a reliable socket to nut size chart can help DIYers choose the right socket size for different nut sizes, ensuring a secure and snug fit during fastening tasks.
Hammer
One of the most fundamental tools in any DIY arsenal is the trusty hammer. From driving nails to tapping things into place, hammers come in various types, including claw hammers, ball-peen hammers, and framing hammers.
Each type has its specific uses, such as pulling out nails with a claw hammer or shaping metal with a ball-peen hammer. When using a hammer, hold it near the end of the handle for better control and aim for the center of the nail head to avoid bending or breaking the nail.
Screwdriver Set
A good screwdriver set is essential for tackling various tasks, from assembling furniture to fixing appliances. Common types of screwdrivers include flathead, Phillips, and Torx screwdrivers, each designed for different screw types.
When choosing a screwdriver, match the size and type of the screw head to the corresponding screwdriver tip for a snug fit and effective turning. Remember to apply steady pressure and avoid stripping the screw head by using the correct size screwdriver.
Pliers
Pliers are versatile tools that come in handy for gripping, bending, and cutting wires or small objects. Common pliers include needle-nose pliers, which are great for reaching into tight spaces, and adjustable pliers, which can be adjusted to fit various objects.
When using pliers, choose the right type for the task at hand and use them with a firm grip to avoid slipping or damaging the material.
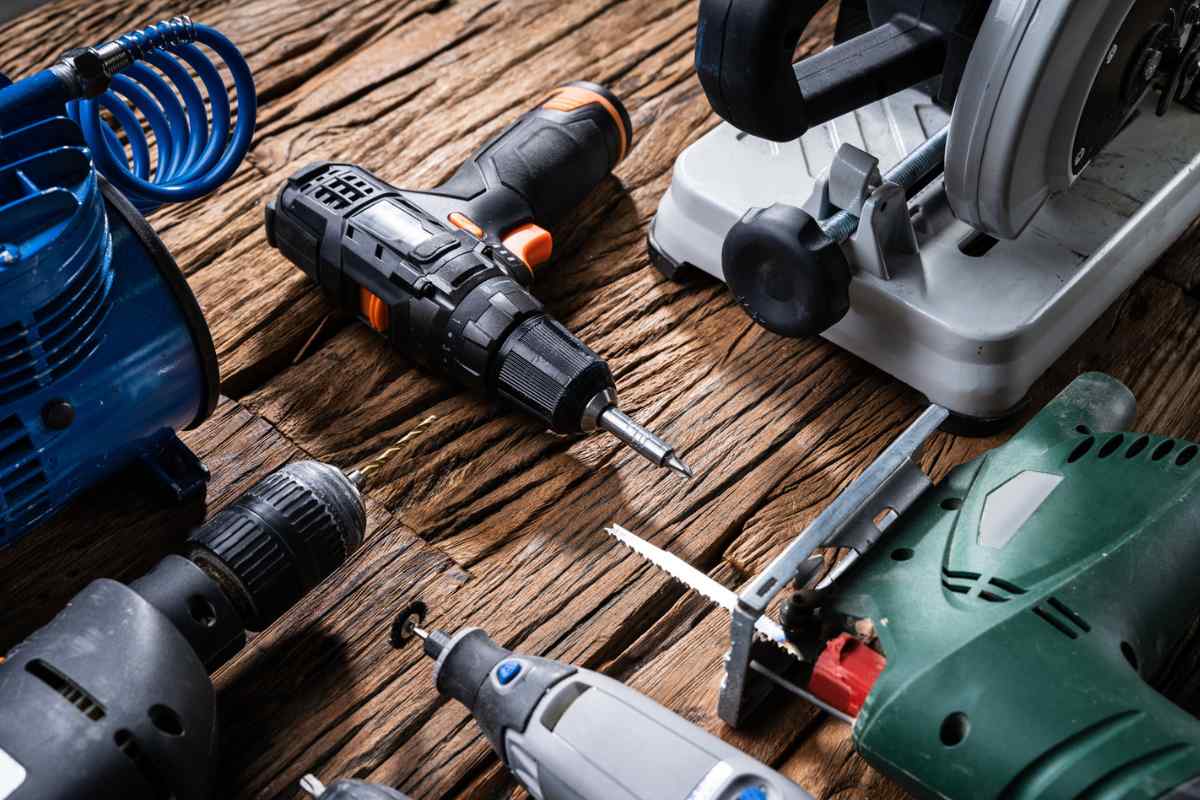
Power Tools

When using a cordless drill, select the appropriate drill bit for your working material, such as wood, metal, or masonry. Start drilling slowly and gradually increase as needed, and always wear safety goggles to protect your eyes from debris.
Circular Saw
A circular saw is indispensable for cutting wood, plastic, or metal with precision and speed. Safety is paramount when using a circular saw, so always wear hearing protection, safety goggles, and gloves.
Follow the manufacturer’s instructions for blade installation and adjustment, and use a straight edge or guide to ensure straight cuts. Be mindful of the saw’s power and keep your fingers and hands clear of the blade’s path while cutting.
Jigsaw
When it comes to making curved cuts or intricate designs, a jigsaw is the tool of choice. It’s ideal for cutting plywood, plastic, and thin metal sheets.
To use a jigsaw effectively, secure the workpiece firmly and use a sharp blade suitable for the material. Start cutting from the edge of the material and move steadily along the desired path, adjusting the speed as needed for smoother curves.
Measuring and Marking Tools
Accurate measurements are crucial in DIY projects, and a tape measure is an essential tool for the job. Use a lockable tape measure for precise measurements, and always measure twice to ensure accuracy before cutting or installing.
When reading measurements, avoid parallax errors by aligning your eye directly with the measurement mark.
Level
Achieving level installations is key to professional-looking results in home improvement projects. A spirit level or bubble level helps ensure that surfaces are straight and even, whether you’re hanging shelves, installing cabinets, or laying flooring. Check the level in multiple directions to confirm accuracy, and use shims if needed to make adjustments.
Marking Tools
Marking tools such as pencils, chalk lines, and marking knives are essential for marking cut lines, layout points, and reference marks on materials.
Choose a marking tool appropriate for the material and visibility required, and make clear and precise marks to guide your cuts and installations accurately.
Conclusion
With the knowledge of essential DIY tools, safety practices, and maintenance tips, you’re ready to tackle home improvement projects confidently and precisely.
Remember to always prioritize safety, choose the right tools for the job, and maintain your tools regularly for optimal performance. Whether you’re hanging pictures, building furniture, or renovating rooms, having the right tools at your fingertips makes all the difference in achieving professional results. Happy DIY-ing!


