Frameless Shower Next to Tub: Design Ideas & Tips
Looking to update your bathroom with a sleek, modern touch? Installing a frameless glass shower next to your bathtub could be the perfect solution.
Many bathrooms feel cramped or outdated with bulky shower curtains or traditional enclosures. But with frameless glass, you can create a space that feels open, airy, and stylish without breaking the bank.
In this blog, we’ll walk you through practical design ideas, tips on choosing the right shower door, and installation advice. You’ll also get easy maintenance tips to keep your bathroom looking fresh.
If you’re remodeling or simply making a small upgrade, this guide will help you create a bathroom you’ll love.
Curious how it all works? Let’s get started!
Benefits of a Frameless Shower Next to a Tub
Placing a frameless shower next to your bathtub creates a bathroom that feels more luxurious without the high cost. This design offers benefits that go beyond just appearance.
The clear glass panels make your bathroom feel larger and more open. With no frames, the glass removes visual barriers, allowing light to flow freely throughout the space.
This simple change can make even smaller bathrooms feel less cramped and more comfortable, giving the illusion of extra room without altering the actual size of the space.
Frameless glass suits a variety of bathroom styles. No matter if your space is modern or more traditional, the clean, simple lines of the glass blend in, allowing your tiles, fixtures, and other design elements to take center stage.
In addition, frameless showers are easier to clean. With fewer edges, corners, and metal parts, there are fewer spots for soap scum and water marks to build up.
The smooth glass surface wipes clean more easily, saving you time and effort so you can spend more time enjoying your bathroom.
Key Design Ideas for Frameless Showers Next to a Tub
These design ideas show how frameless glass showers can complement bathtubs in small and large bathrooms. Each option offers a different way to make your space both good-looking and useful.
1. Minimalist Frameless Glass for Small Spaces
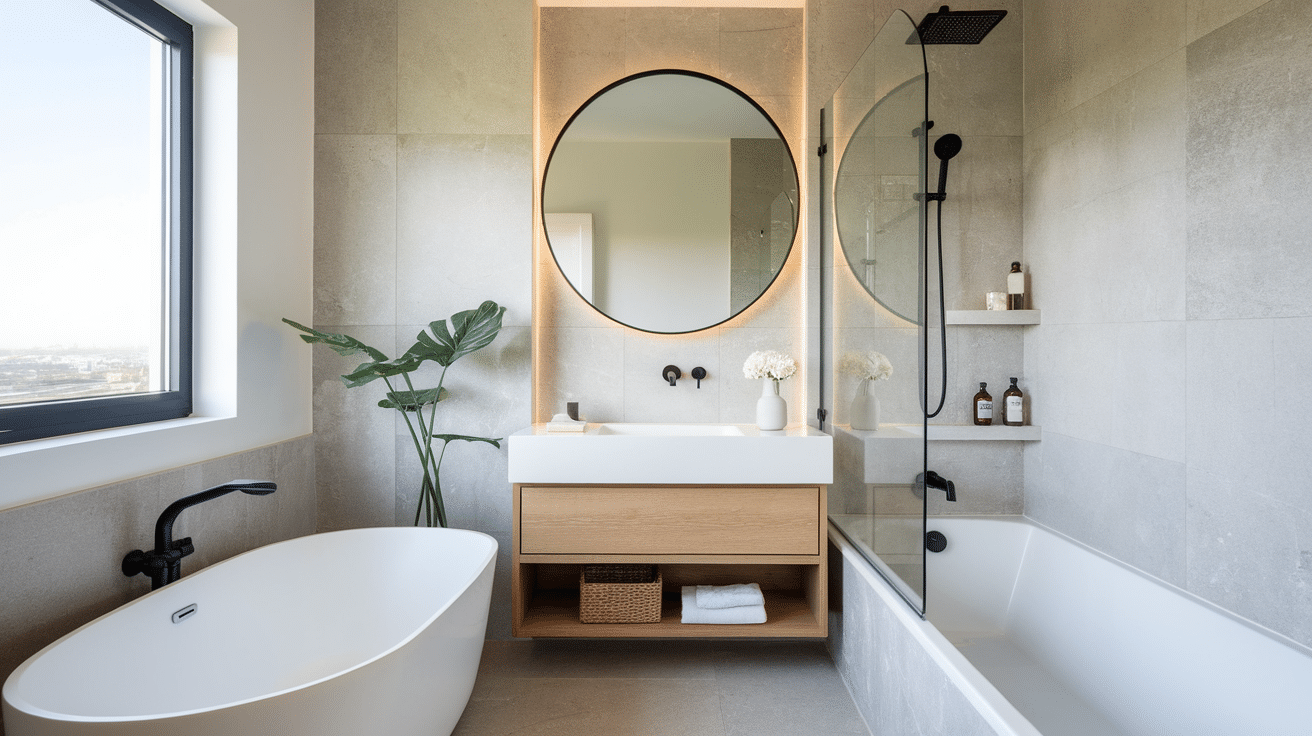
In tight bathrooms, plain glass panels without frames help make the room feel less crowded. The clear glass creates a smooth flow between the tub and shower areas without blocking light or views.
This setup works well when you need both a shower and a tub but don’t have much floor space to spare.
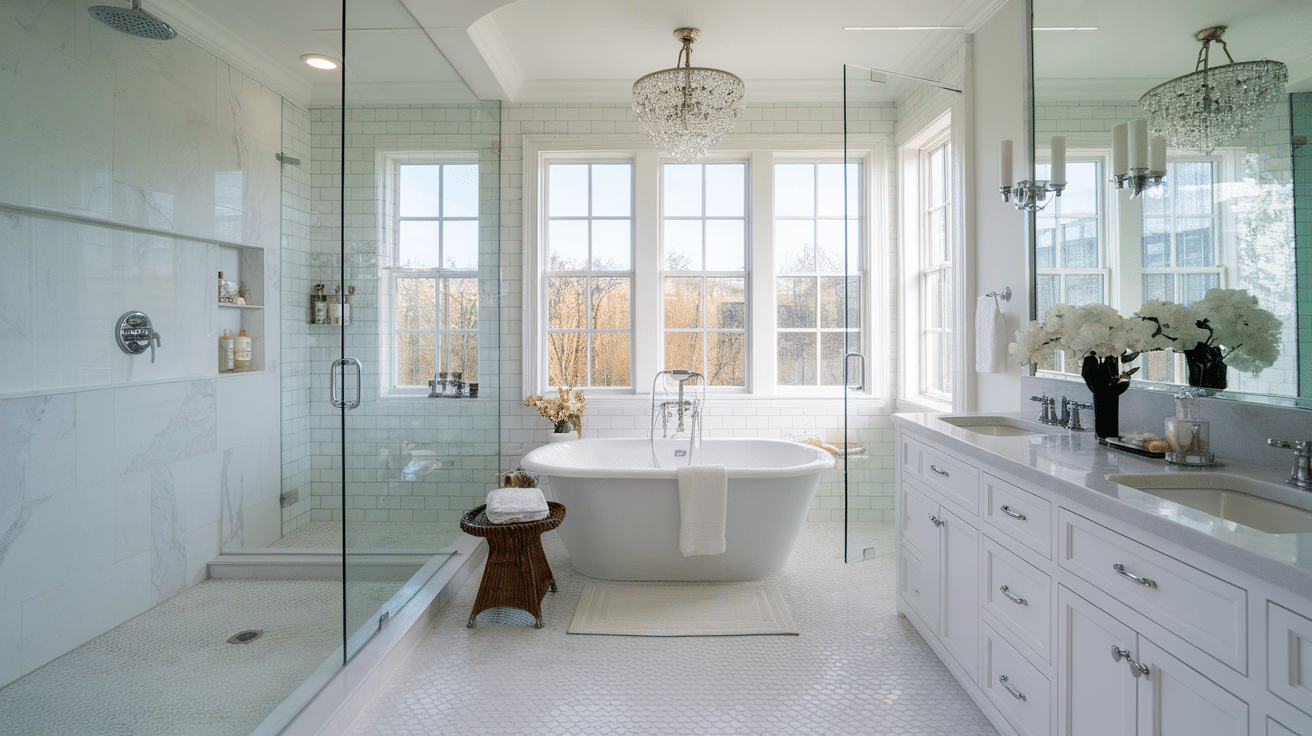
2. Freestanding Tub with Frameless Glass Surround
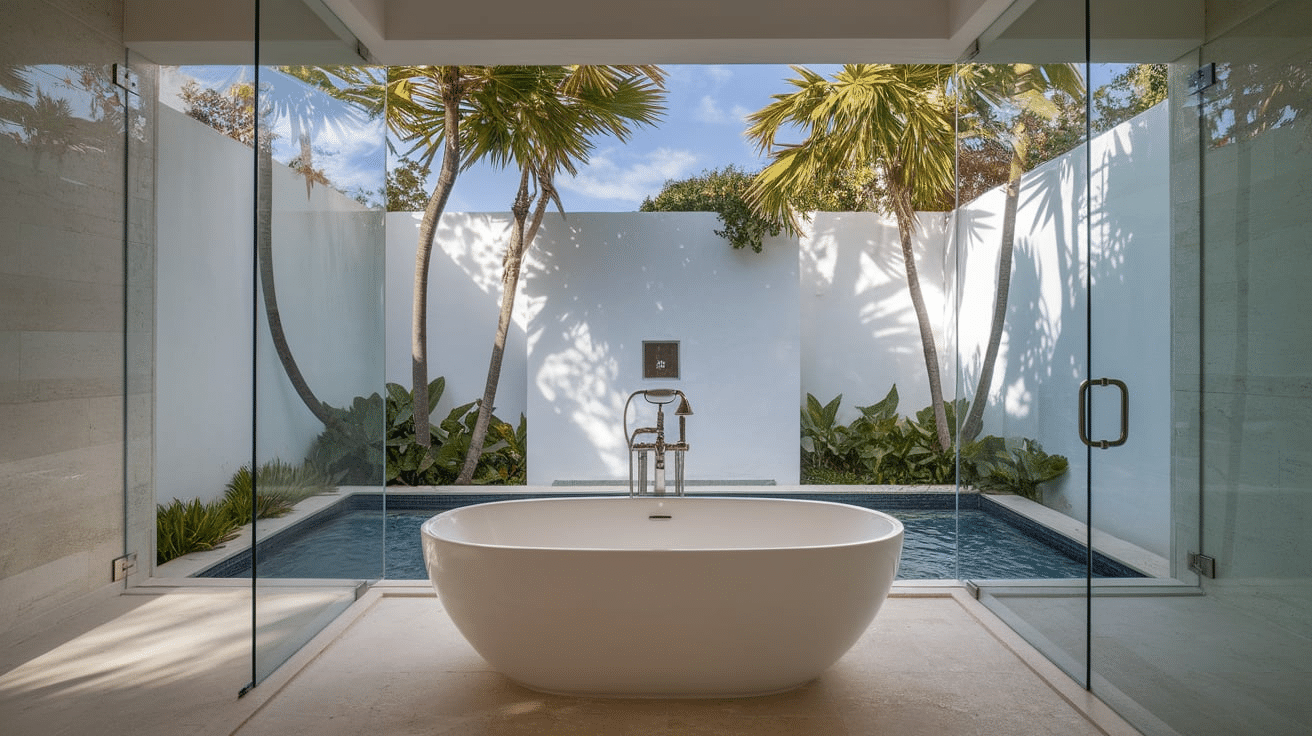
This layout puts a standalone tub at the center of attention, with clear glass panels nearby to contain shower spray. The open-top design lets in plenty of light while keeping water where it belongs.
This works best in bigger bathrooms where the tub can be placed away from walls, creating a spa-like feel.
3. Frameless Glass Half-Wall with Shower Bench
Adding a built-in seat to your shower area next to the tub makes it more useful, especially for people who need to sit while showering.
The half-wall glass design keeps the space open while still holding in shower water. The bench can also hold shower items and add a touch of comfort to your daily routine.
4. Frameless Glass and Tile Combo
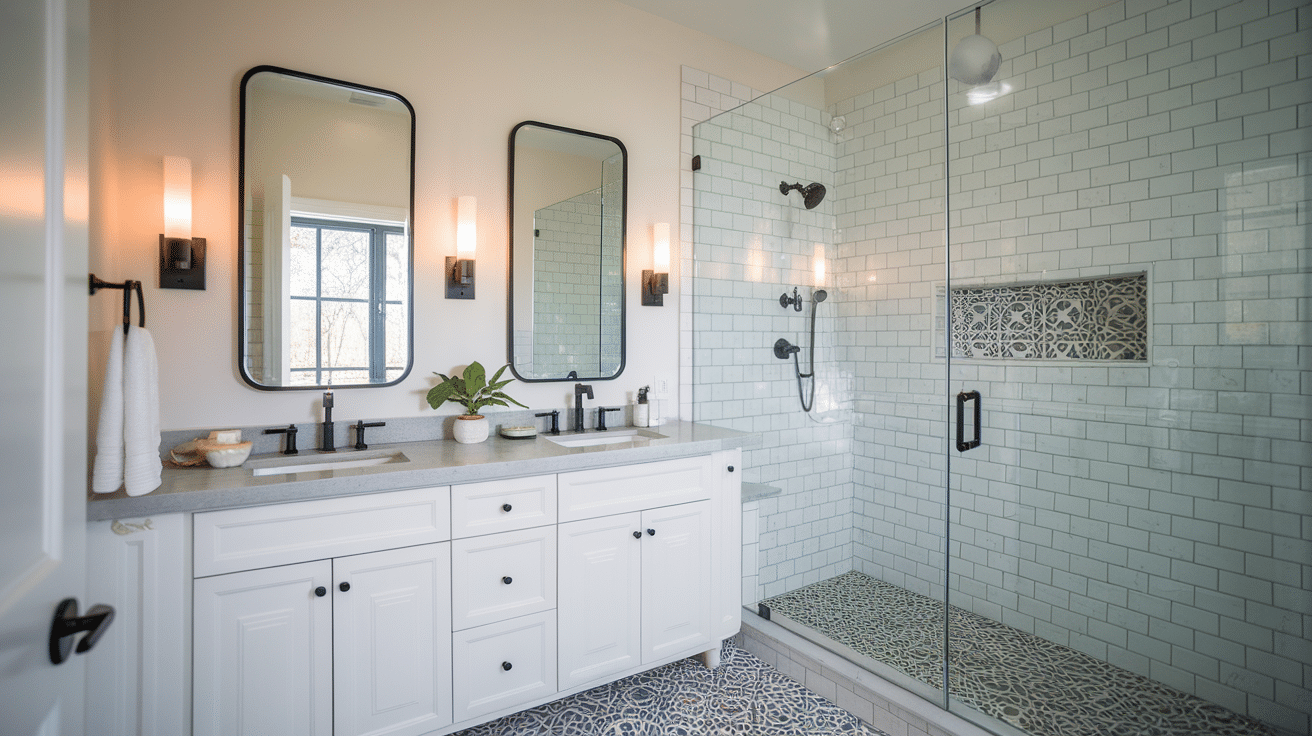
Pairing clear glass with eye-catching tile creates a balance of simple and fancy. The glass stays out of the way, letting your tile work shine through.
This works with many tile types, such as subway tiles for clean lines, mosaics for color, or stone for a natural look—all visible through the clear glass.
5. Corner Tub with Frameless Glass
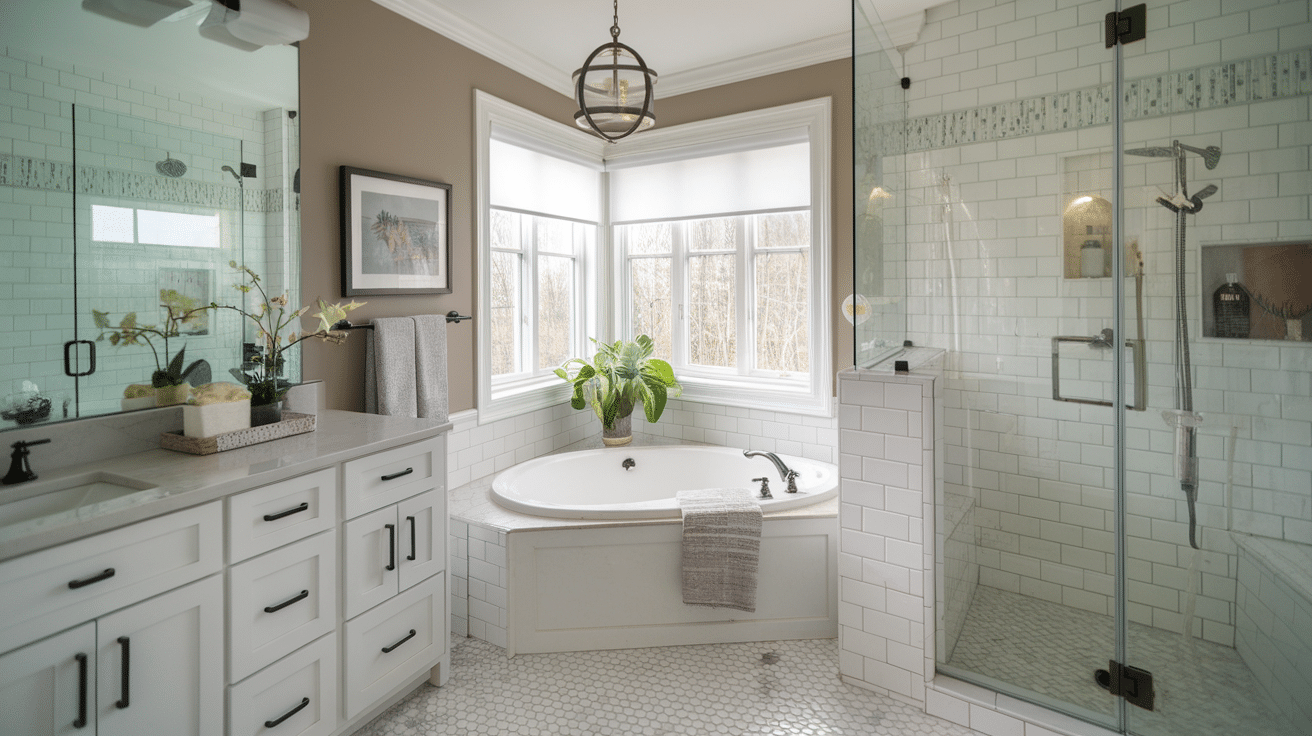
Putting your tub in a corner saves space, while the frameless glass shower next to it keeps the room feeling open. This layout makes good use of often wasted corner areas.
The glass panels can be set up to block water spray fully while keeping the bathroom feeling roomy and bright.
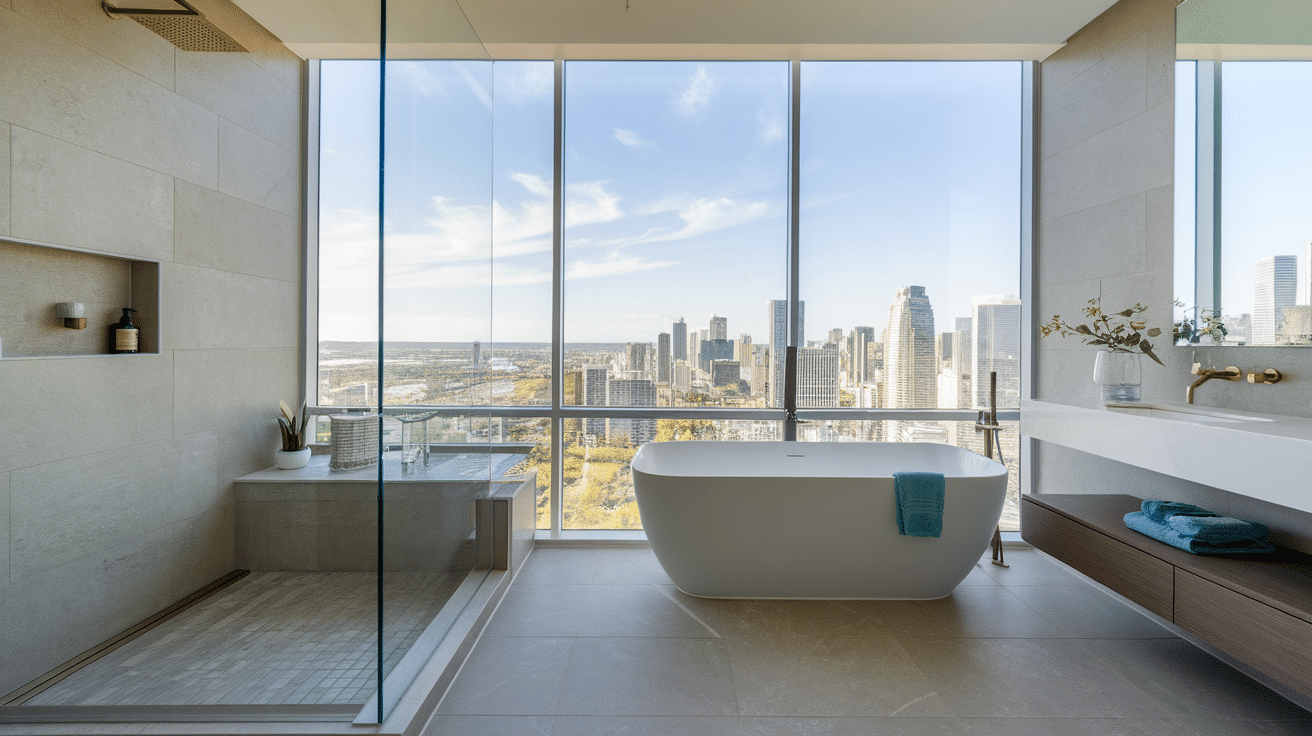
6. Frameless Glass Shower and Tub with Separate Zones
In bigger bathrooms, glass panels can split the room into different areas without walls. This creates a sense of order without closing off the space.
The glass dividers keep water in the shower zone while letting light flow throughout the bathroom, making for a bright, well-organized space.
7. Frameless Glass with Black or Matte Frame
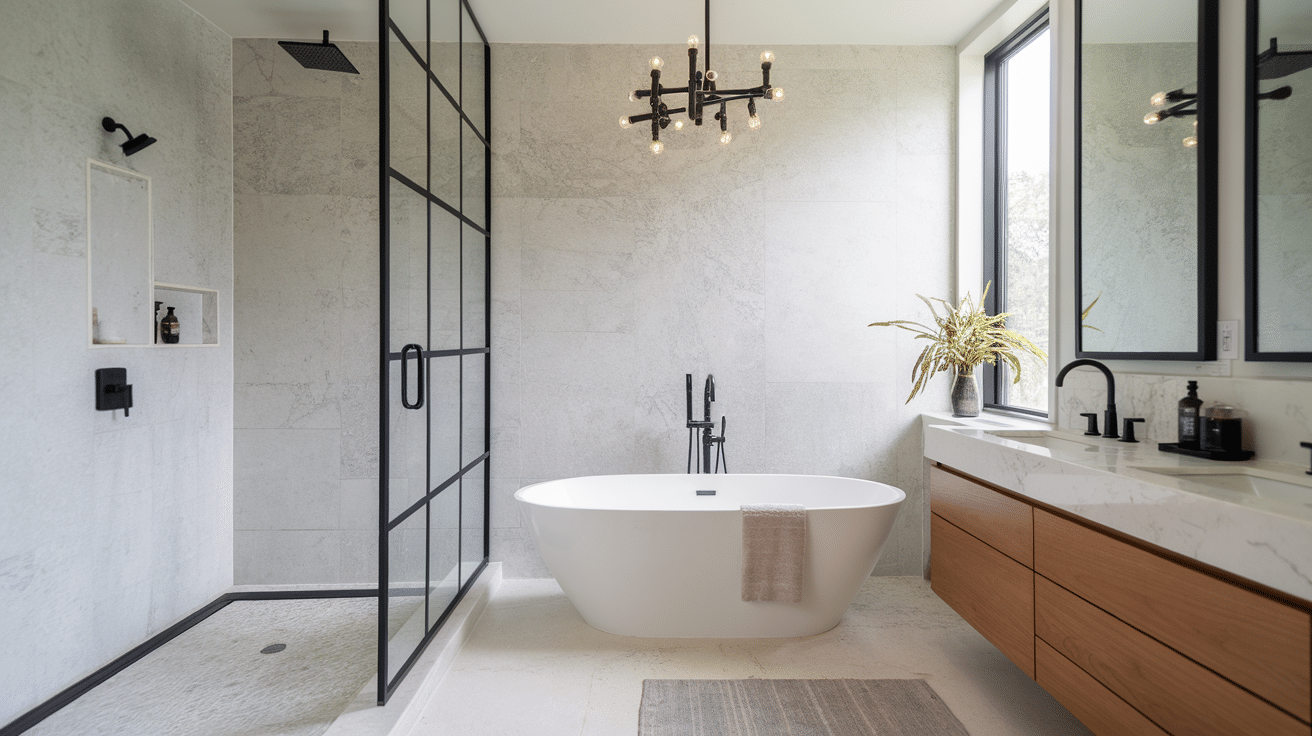
For a more bold look, thin black metal or matte-finish frames around clear glass panels add visual interest. This style brings a bit of contrast to the bathroom while still keeping the open feel of frameless glass.
The dark lines make a statement while framing your view of the shower and tub areas.
Choosing the Right Frameless Shower Door for Your Tub
Finding the perfect frameless shower door means looking at more than looks. The right door will fit your space correctly, keep water where it belongs, and last for many years.
Glass Thickness
Glass comes in different thicknesses, usually 3/8 inch or 1/2 inch. Thicker glass costs more but lasts longer and feels more solid.
Thinner glass works for smaller doors but may not be strong enough for larger openings. Make sure your walls can support the weight of the glass you choose.
Door Types
Sliding doors save space and work well in small bathrooms. They move along tracks without needing room to swing open.
Hinged doors open outward like regular doors, giving you the widest entry but needing clear floor space.
Bi-fold doors split the difference by folding as they open, taking up less room than hinged doors.
Customizable Options
Made-to-fit doors cost more upfront but often work better than standard sizes. Custom doors match your exact measurements, reducing leaks and fitting better.
You can also pick special glass types, handles, and hinges to match your bathroom style. Getting precise measurements from a pro helps ensure the best fit.
Installation Considerations and Tips
Putting in a frameless shower next to a bathtub requires careful planning and the right skills.
Before starting your project, consider these important points to help things go smoothly and avoid costly mistakes.
Hiring Professionals vs. DIY
Professional installers bring experience and the special tools needed for safe glass handling. They can fix problems like uneven walls and often provide warranties.
Costs range from $500 to $ 1,000, but save time and stress. DIY can save money, but risks costly mistakes or injury since glass panels are heavy and breakable.
Only try it if you have good skills with tools and precise measurements.
Step-by-Step Installation Overview
- Measuring: Take accurate measurements of the space to ensure the glass panels and door fit properly. This is crucial for a smooth installation and to avoid gaps.
- Waterproofing: Apply waterproof materials to the walls around the shower area. This step protects the surfaces from water damage and mold buildup.
- Marking: Mark where the supports will go on the walls. This ensures precise placement of brackets and panels.
- Drilling: Drill holes for the supports and brackets. Make sure to use the right drill bits and tools to avoid damaging the walls.
- Installing Brackets: Attach the wall brackets securely to the walls. These will support the glass panels, so they need to be firmly in place.
- Setting Glass: Carefully lift and position the glass panels into the brackets. Ensure they are level and aligned for the best fit.
- Adding Hardware: Attach the door hardware, such as hinges or handles. This completes the functional part of the shower door.
- Sealing: Seal all edges around the glass panels with waterproof caulk. This helps prevent leaks and ensures a clean, finished look.
Precision matters at every step, as small mistakes can lead to leaks or glass that doesn’t fit right. Allow 1-2 days for a complete installation.
Safety and Regulation
Building codes require tempered safety glass for all shower enclosures. The standard height is at least 72 inches, and proper sealing is needed to keep water contained.
Some areas require permits even for bathroom updates, so check local rules before starting. Water drainage slopes and proper door placement help prevent floor damage from leaks.
Maintenance and Care for Frameless Showers
Keeping your frameless shower looking clean and clear doesn’t have to be hard work. A few simple habits can help maintain that fresh, new appearance for years to come.
Cleaning Tips
Regular cleaning prevents buildup and keeps your glass shower looking new. Simple routines make a big difference.
- Squeegee after each shower to prevent water spots (takes just 30 seconds)
- Clean weekly with a white vinegar and water solution
- Use soft microfiber cloths to avoid scratching the glass
- Avoid harsh cleaners with ammonia or bleach
Glass Protection
Protective treatments make glass easier to clean by helping water slide off rather than stick and form spots.
- Water-repellent sprays need reapplication every 2-3 months
- Factory-applied coatings last longer but cost more upfront
- DIY kits are available at most home stores
- Professional treatments offer the longest-lasting protection
Conclusion
Frameless showers next to bathtubs are a great way to update your bathroom and make it feel bigger. This design works well in both small and large spaces, giving your bathroom a clean, modern look.
In this blog, we’ve shared design ideas, installation tips, and easy cleaning advice to help you choose the best option for your space.
If you’re remodeling or just making a few changes, a frameless shower can improve your bathroom’s style and function.
Interested in more ideas? Check out other blogs on our website for more helpful tips and inspiration for your home.