20 Easy Floor Painting Ideas to Refresh Your Space
Painting floors has become a popular way to update a room, and it’s easy to see why. It’s a preferred option that works on different types of floors.
With just a few coats of paint, you can completely change how a room looks. Fresh color or creating unique designs, painted floors offer endless possibilities.
In this blog, we’ll show you how painting your floors can change the look of a room. We’ll share floor painting ideas, tips on what to do and avoid, and why painting your floors might be the best choice to help you get started with your floor makeover!
Why Painting Your Floors is a Great Idea
Painting your floors might be just what you need when you want to give your home a fresh look without breaking the bank. Instead of spending tons of money ripping out old floors, a few coats of paint can make them look brand new.
The best part is that you can paint almost any floor – wooden floors, concrete in your basement, or even old tiles with the right preparation. It’s a project you can do yourself over a weekend.
You could choose a calm blue for your bedroom or a bright yellow for your kitchen, or try cool patterns like checkerboards or stripes. Floor painting also gives you control over how your home looks. Unlike pre-made flooring options, painted floors can match exactly what you want – the specific color, pattern, or design that fits your vision for the room.
Besides looking great, painted floors are super easy to clean- just a quick mop, and you’re done. If you choose lighter colors, they can also help brighten up dark rooms.
With some patience and care, your painted floors can become a favorite feature in your home for years to come.
Tools You’ll Need to Paint Your Floor
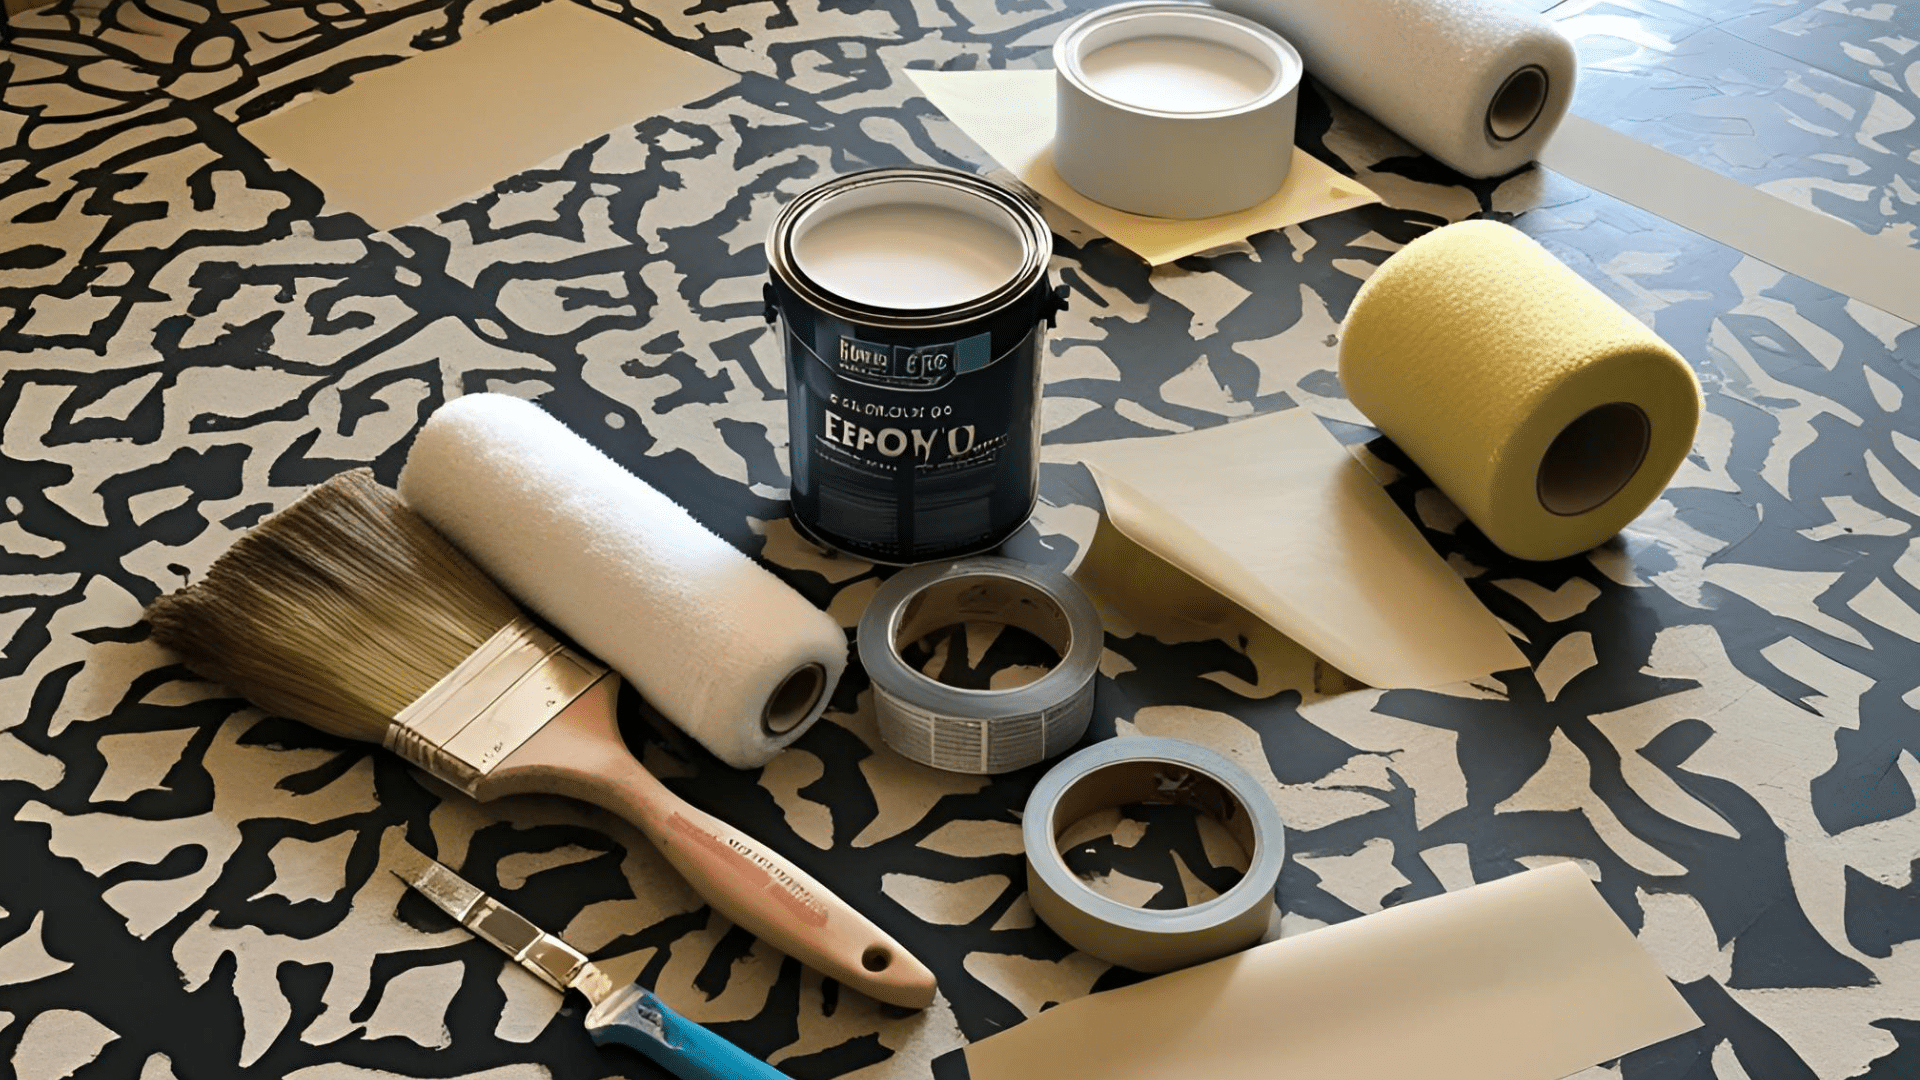
When painting floors, you’ll need to choose the right type of paint for your surface. Choose epoxy for concrete areas like garages and basements. Select enamel for wood and tile to create a hard glossy finish, or settle on chalk paint for a rustic look on wood or laminate (which requires a protective topcoat).
Essential tools include brushes for detailed edge work, rollers for efficient coverage of large areas, painter’s tape for clean lines, and stencils if you want decorative patterns.
Consider also using floor primer to improve adhesion and longevity, drop cloths to protect surrounding surfaces, and safety gear like gloves, masks, and goggles to protect yourself during the preparation and painting process.
Popular Floor Painting Ideas
There are plenty of ways to paint your floors, each giving your room a different feel. Here are some popular ideas to inspire you:
1. Checkerboard Pattern
A checkerboard floor design is a choice that never goes out of fashion. It works especially well in entryways, kitchens, bathrooms, or any space where you want to make a visual impact. The pattern adds character and can suit both classic and modern styles, depending on the colors you choose.
While black and white is the traditional combo, soft pastels or neutral tones can create a more subtle look. Painting a checkerboard floor does take a bit of planning and patience, but it’s a great way to add something new without the cost of new flooring.
How to Create a Checkerboard Floor Pattern:
- Clean the floor thoroughly and let it dry completely.
- Apply a primer if needed, and paint the base color across the entire floor.
- Let the base coat dry fully, preferably overnight.
- Measure and mark a grid of equal-sized squares using a pencil and ruler or chalk line
- Use painter’s tape to outline the squares that will be painted in the second color.
- Carefully paint the marked squares with two coats if needed.
- Allow the paint to dry between coats and before removing the tape.
- Once fully dry, apply a clear sealant to protect the finish.
2. Geometric Patterns
Geometric patterns are a great way to create modern designs on your floors. Shapes like triangles, hexagons, and chevrons add an energetic feel to any room. These patterns work especially well in areas like living rooms, kitchens, or home offices, bringing a creative touch to the space. You can go for a minimal look with just a few shapes or a more complex design to make a statement.
How to Create Geometric Patterns on Your Floor:
- Start by cleaning and prepping the floor.
- Use a tape measure to plan and mark out your pattern on the floor carefully.
- Use a pencil or chalk to lightly draw the design, making sure the shapes are evenly spaced.
- Apply painter’s tape along the lines of each shape to keep the edges sharp and clean.
- Paint inside the tape, using smooth strokes for even coverage
- Allow the paint to dry fully before removing the tape to reveal clean lines
- If needed, go over any edges that need a bit more definition after removing the tape
- Finish with a clear topcoat to protect your design and add a glossy finish.
3. Graphic Painted Floors
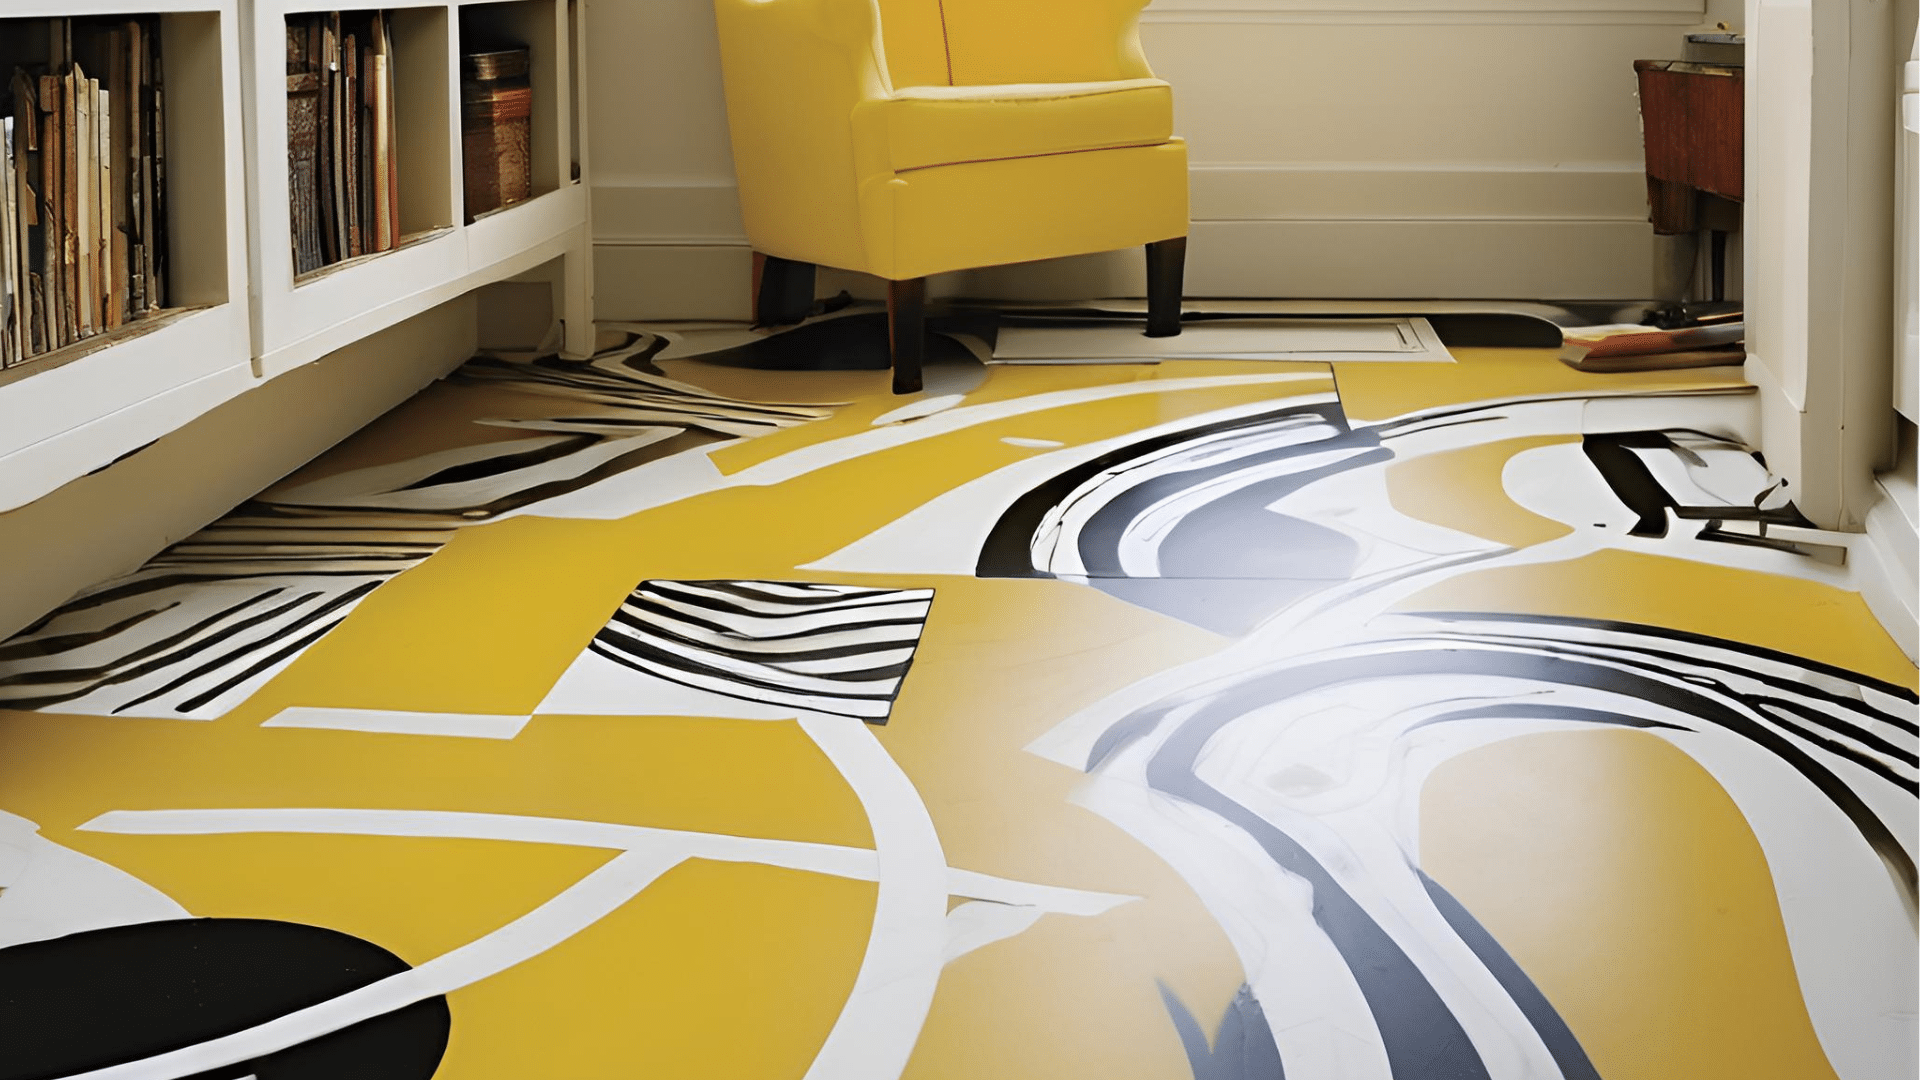
Graphic painted floors are an exciting way to add bold, creative designs to your space. This style offers endless possibilities for making your floors a standout feature.
Patterns like stripes, zigzags, or floral designs can be eye-catching elements in your home. For a more professional look, you can use stencils or create custom designs freehand. Whatever pattern you choose, graphic painted floors can really set the tone for the room and give it a personalized touch.
How to Create Graphic Painted Floors:
- Decide on your design (stripes, zigzags, floral, or custom).
- Clean the floor and sand lightly if needed. Apply primer if necessary.
- Measure and mark the design on the floor using a tape measure and pencil.
- Use painter’s tape to outline your design for clean edges.
- Apply the base color with a roller or brush and let it dry completely.
- Add more colors or details, allowing each layer to dry before applying the next.
- Carefully remove the painter’s tape once the paint is dry.
- Finish with a clear sealant to protect the design and let it dry fully.
4. Mosaic or Tile Illusions
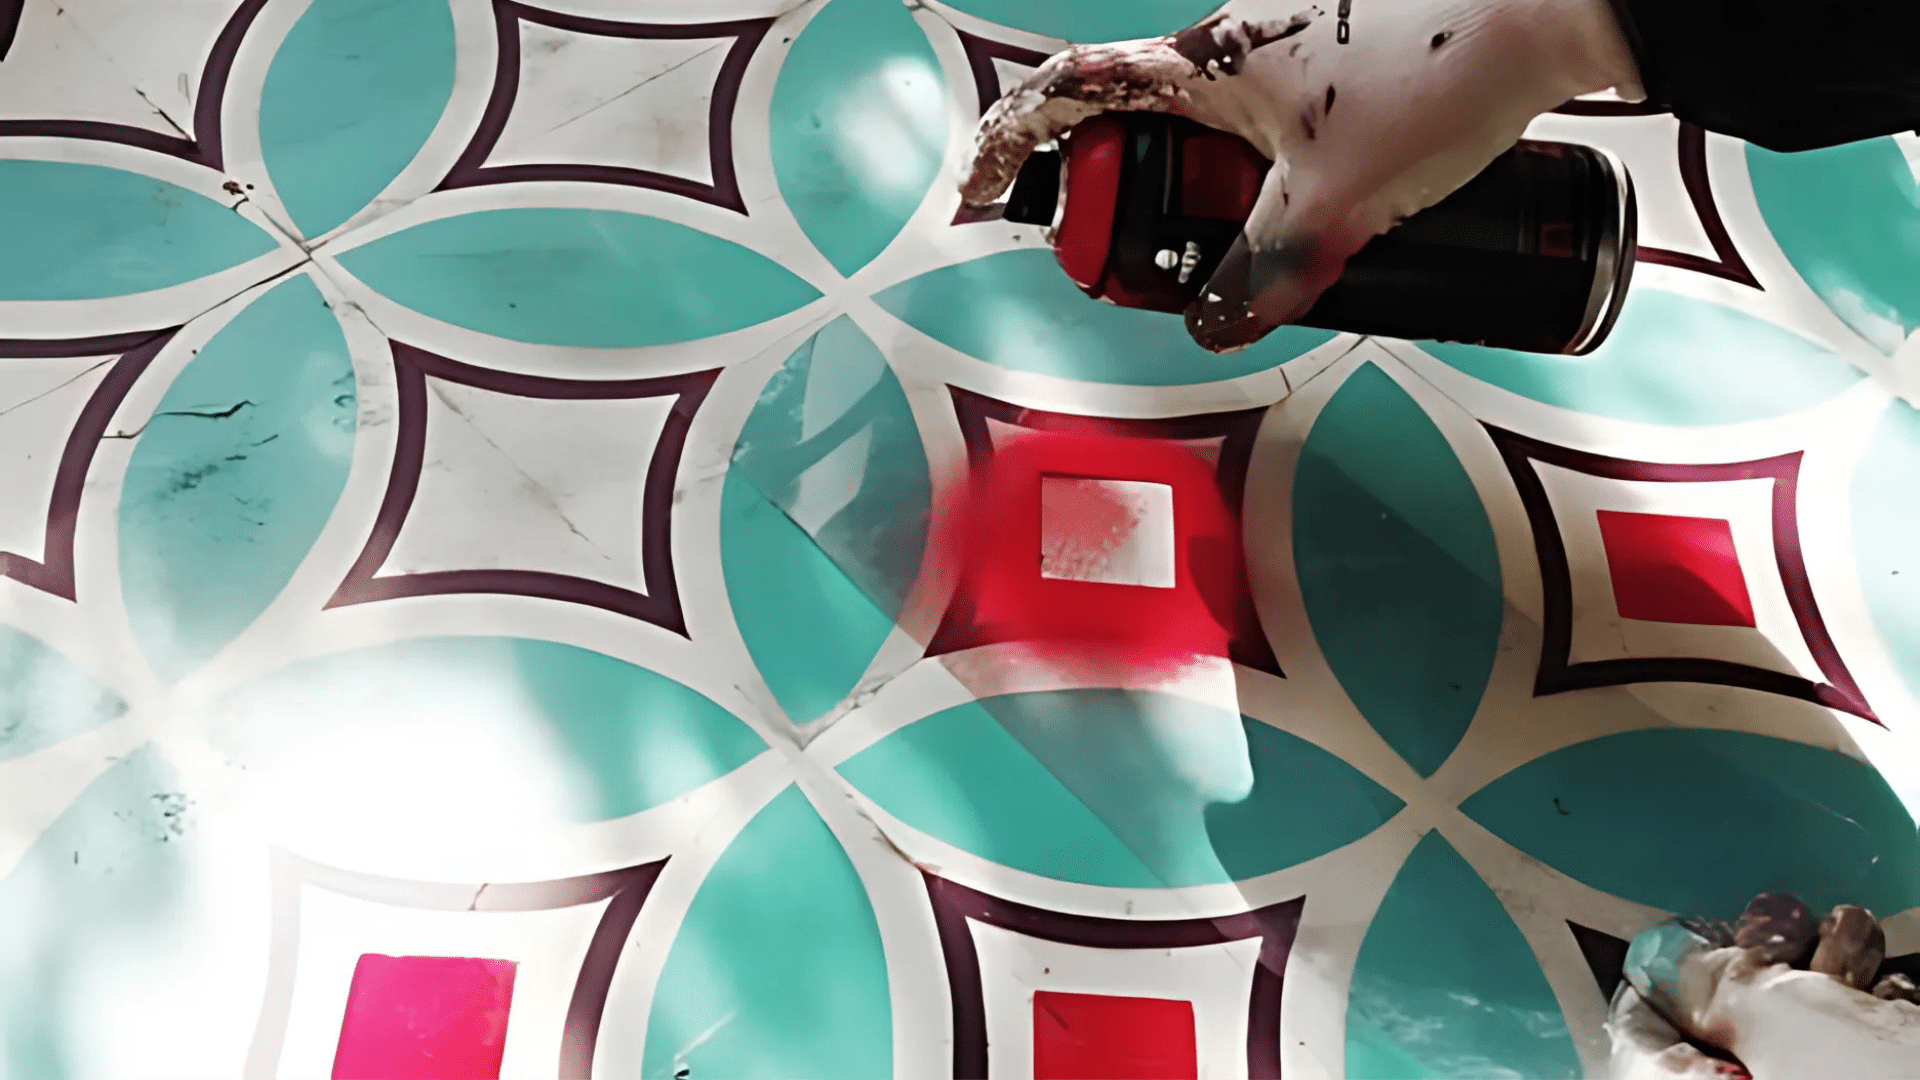
Creating the look of mosaic tiles with paint is a simple and fun way to add style to your floors without spending a lot of money. You can use stencils or paint by hand to create a design that looks like real mosaic tiles. This method lets you make a room feel more unique and lively while being affordable.
Mosaic illusions work great in bathrooms, patios, or kitchens. They help make a room feel more open and colorful. These designs are also a good choice for entryways or hallways, giving your home a personal touch.
How to Create Mosaic Tile Illusions:
- Choose a simple pattern or design, and decide if you want to use stencils or paint freehand.
- Clean the floor well to remove any dirt and dust. Sand lightly, if necessary.
- Lightly mark your design on the floor with a pencil or chalk.
- Use painter’s tape to outline the areas where you want sharp lines.
- Paint the design using a small brush for details and a roller for larger areas.
- Let each layer of paint dry completely before adding another coat.
- After the paint is dry, carefully peel off the painter’s tape to reveal clean edges.
- Apply a clear sealant to protect the design and keep it looking fresh. Let it dry fully before walking on it.
5. Solid Colors and Subtle Patterns
Solid-color floors are a great way to keep things simple and classy, especially for minimalist spaces. A monochrome floor can bring a sense of calm and order, making the room feel clean and spacious. It’s easy to maintain and works well with any furniture or decor style. Adding subtle textures or accents, such as a soft gradient effect or light patterns that blend into the floor, can add flavour without overwhelming the space.
How to Create Solid Colors and Subtle Patterns:
- Pick a color that fits the style and mood of the room.
- Clean the floor thoroughly and sand if necessary for better paint adhesion.
- Apply a primer and let it dry completely.
- Paint the floor with your chosen color, using a roller for even coverage.
- Allow the first coat to dry fully before applying a second coat.
- Let the paint dry completely, and then apply a clear protective finish to seal the floor.
6. Marble Effect
A marble effect on your floor can make any room look shiny and fancy without the expensive cost of real marble. By mixing shades of gray, white, and black, you can create a look that closely resembles natural marble.
This effect is perfect for adding luxury to your home, especially in spaces like bathrooms, entryways, or living rooms. The marble pattern gives a classy feel to any room and can be as simple or as dramatic as you want. It’s an easy way to upgrade your space with a high-end look.
How to Create a Marble Effect:
- Choose shades of gray, white, and black for your marble look.
- Clean the floor and sand it if needed for a smooth surface.
- Apply a primer to help the paint stick and let it dry.
- Paint the floor with your base color (usually white or light gray) and let it dry completely.
- Use a sponge or rag to apply different shades of gray, blending them while the paint is still wet.
- Add a little black to create depth, blending it gently into the gray and white.
- Let the paint dry fully once the marble effect looks good.
- Finish by applying a clear sealant to protect the floor and keep it easy to clean.
7. Faux Rugs
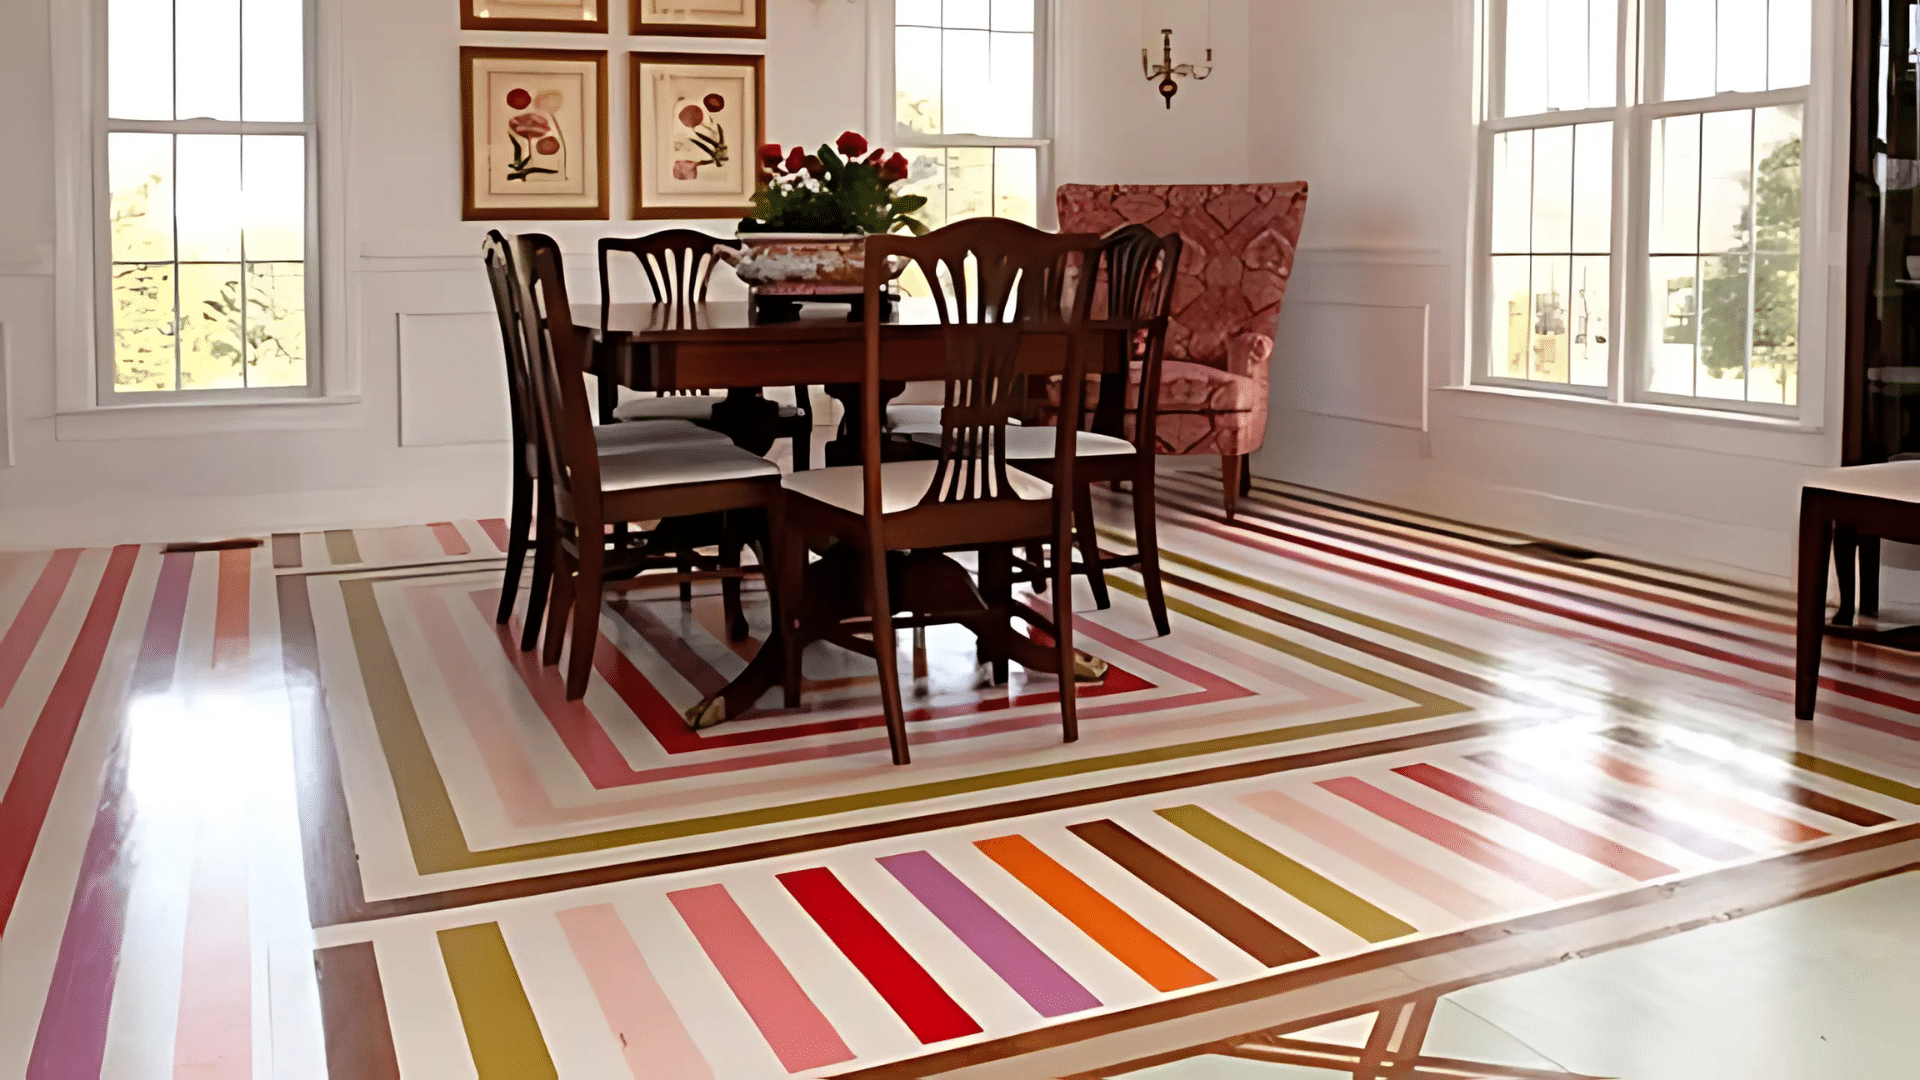
Painting a faux rug on your floor adds style to a room. It looks like a real rug but doesn’t need cleaning, or worry about slipping. You can paint a rug design in the middle of a room to make it look different. Faux rugs work great in places like living rooms, bedrooms, or dining rooms.
You can paint designs like Persian patterns, which have lots of colors and detailed shapes, or geometric patterns like squares, stripes, or chevrons for a modern feel. You can choose whatever style best fits your room.
How to Paint a Faux Rug:
- Choose a pattern, like a Persian design or geometric shapes, that fits your room.
- Clean the floor and sand it if needed to make it smooth.
- Mark where you want the rug to go, making sure it’s the right size for the room.
- Use painter’s tape to outline the shape of the rug.
- Paint the base color with a roller or brush.
- Once the base coat is dry, add designs or borders to your rug.
- Let each layer dry before adding more paint.
- Finish by applying a clear sealant to protect the rug.
8. Chevron Entryway
![]()
The zigzag design is eye-catching and modern, perfect for making a stylish first impression when people enter your home. You can use contrasting colors or subtle shades to match your home’s style. Chevron patterns also help guide the eye, making the entryway feel more open. It’s a simple way to add personality and flair to a small space without overcrowding it.
How to Paint a Chevron Pattern in an Entryway:
- Choose two colors that work well together, like black and white or soft tones like gray and beige.
- Clean the floor and sand lightly, if needed, to make sure the paint adheres well.
- Use a measuring tape and pencil to mark the width and height of each chevron stripe on the floor.
- Use painter’s tape to outline the zigzag lines, making sure the edges are sharp and even.
- Paint the first color inside the chevron shapes with a roller or brush, then let it dry completely.
- After the first color is dry, fill in the other sections with the second color, letting each layer dry.
- Once the paint is dry, carefully remove the painter’s tape to reveal clean lines.
- Finish with a clear sealer to protect the paint and keep it looking fresh.
9. Rustic or Weathered Look
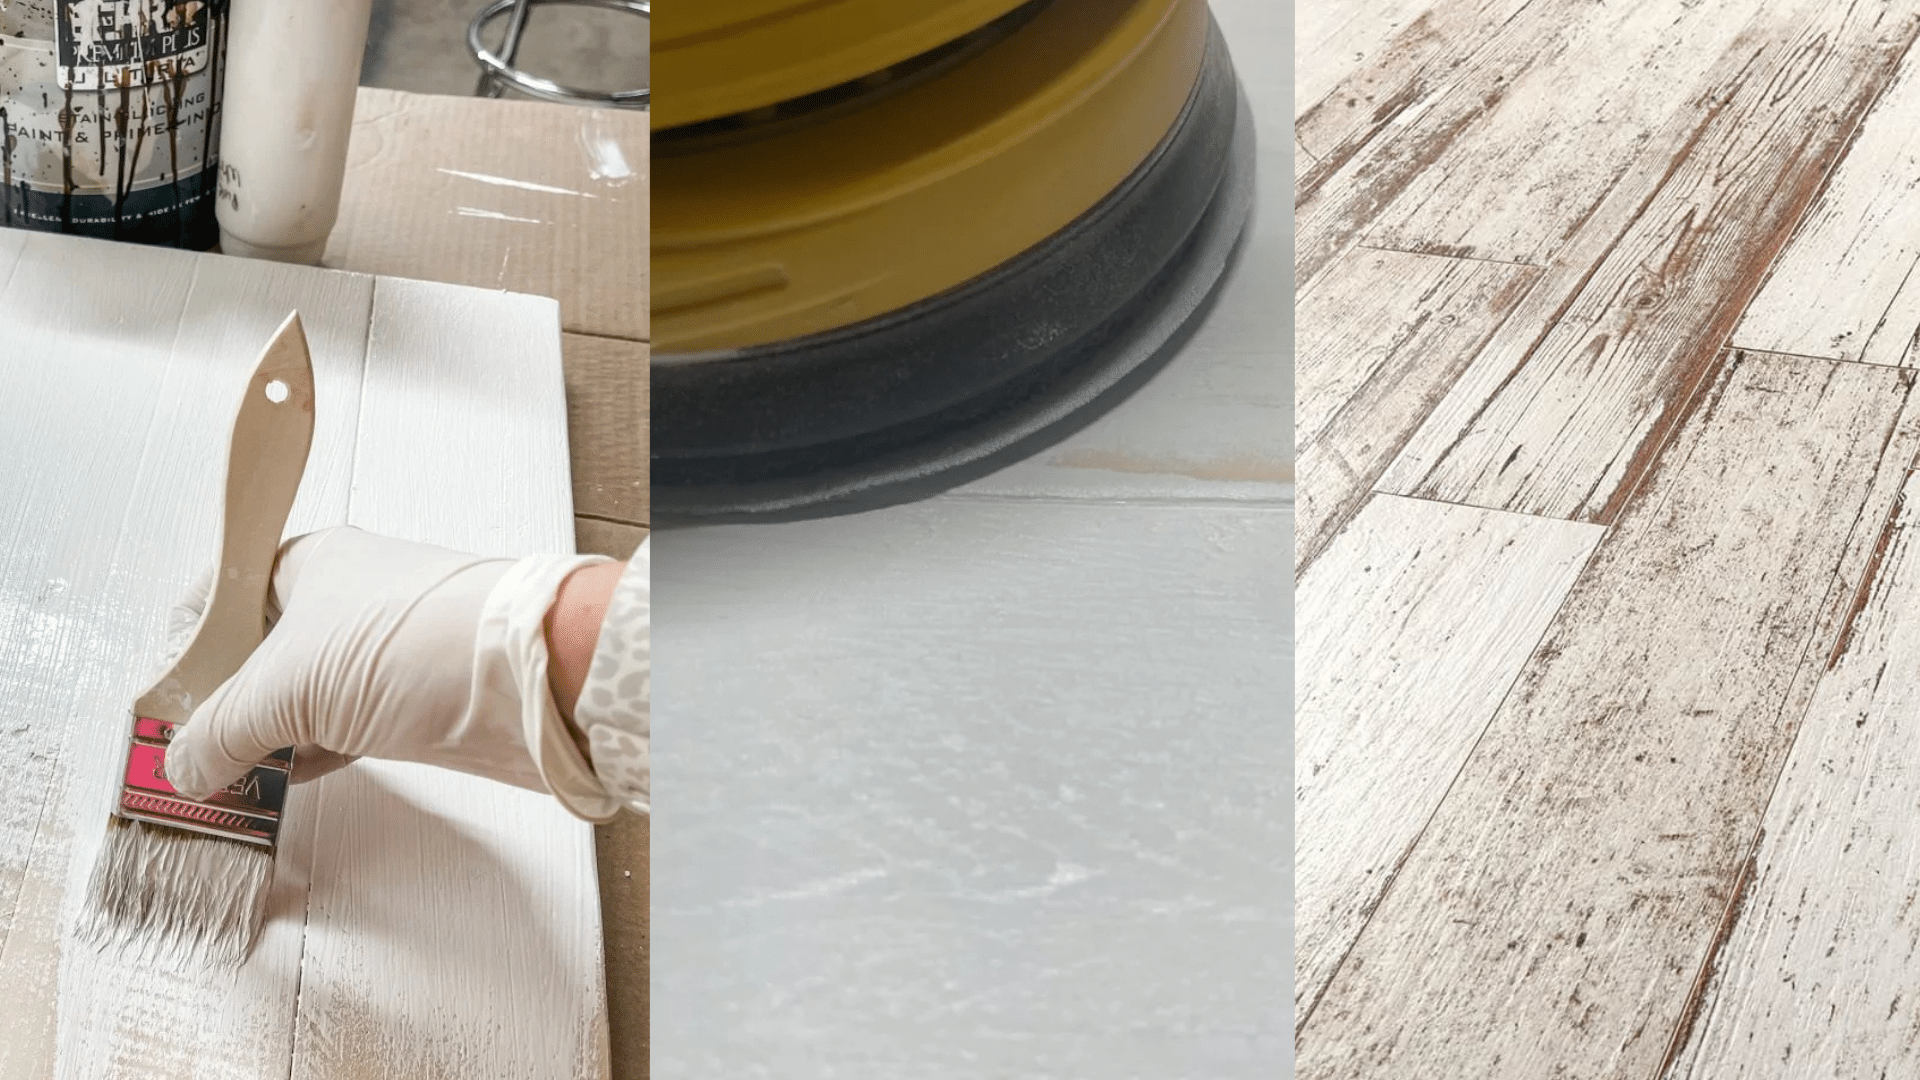
The rustic or weathered look gives your floor a cozy, old-fashioned feel. It makes the floor look like it’s been naturally worn down over time, adding warmth to the room. This style works great in spaces with a farmhouse or cottage feel. It creates a comfortable atmosphere that feels lived-in. The best part is, it doesn’t need to be perfect. The imperfections make the floor look better. You can make it as soft or bold as you want, depending on how much distressing you do. This painted floor will make your room feel warm and homely.
How to Create a Rustic or Weathered Look:
- Sweep and clean the floor to remove dirt and dust.
- Lightly sand the floor to help the paint stick.
- Paint the floor with a light color, like white or light gray, and let it dry.
- Once dry, apply a darker color, like brown or gray, over the top, but don’t cover the whole floor.
- Use a sanding block or steel wool to lightly sand areas, focusing on edges and corners.
- If needed, apply more dark paint and distress again until you get the desired look.
- Apply a clear sealer to protect the finish and let it dry fully before walking on it.
10. A Tiled Border
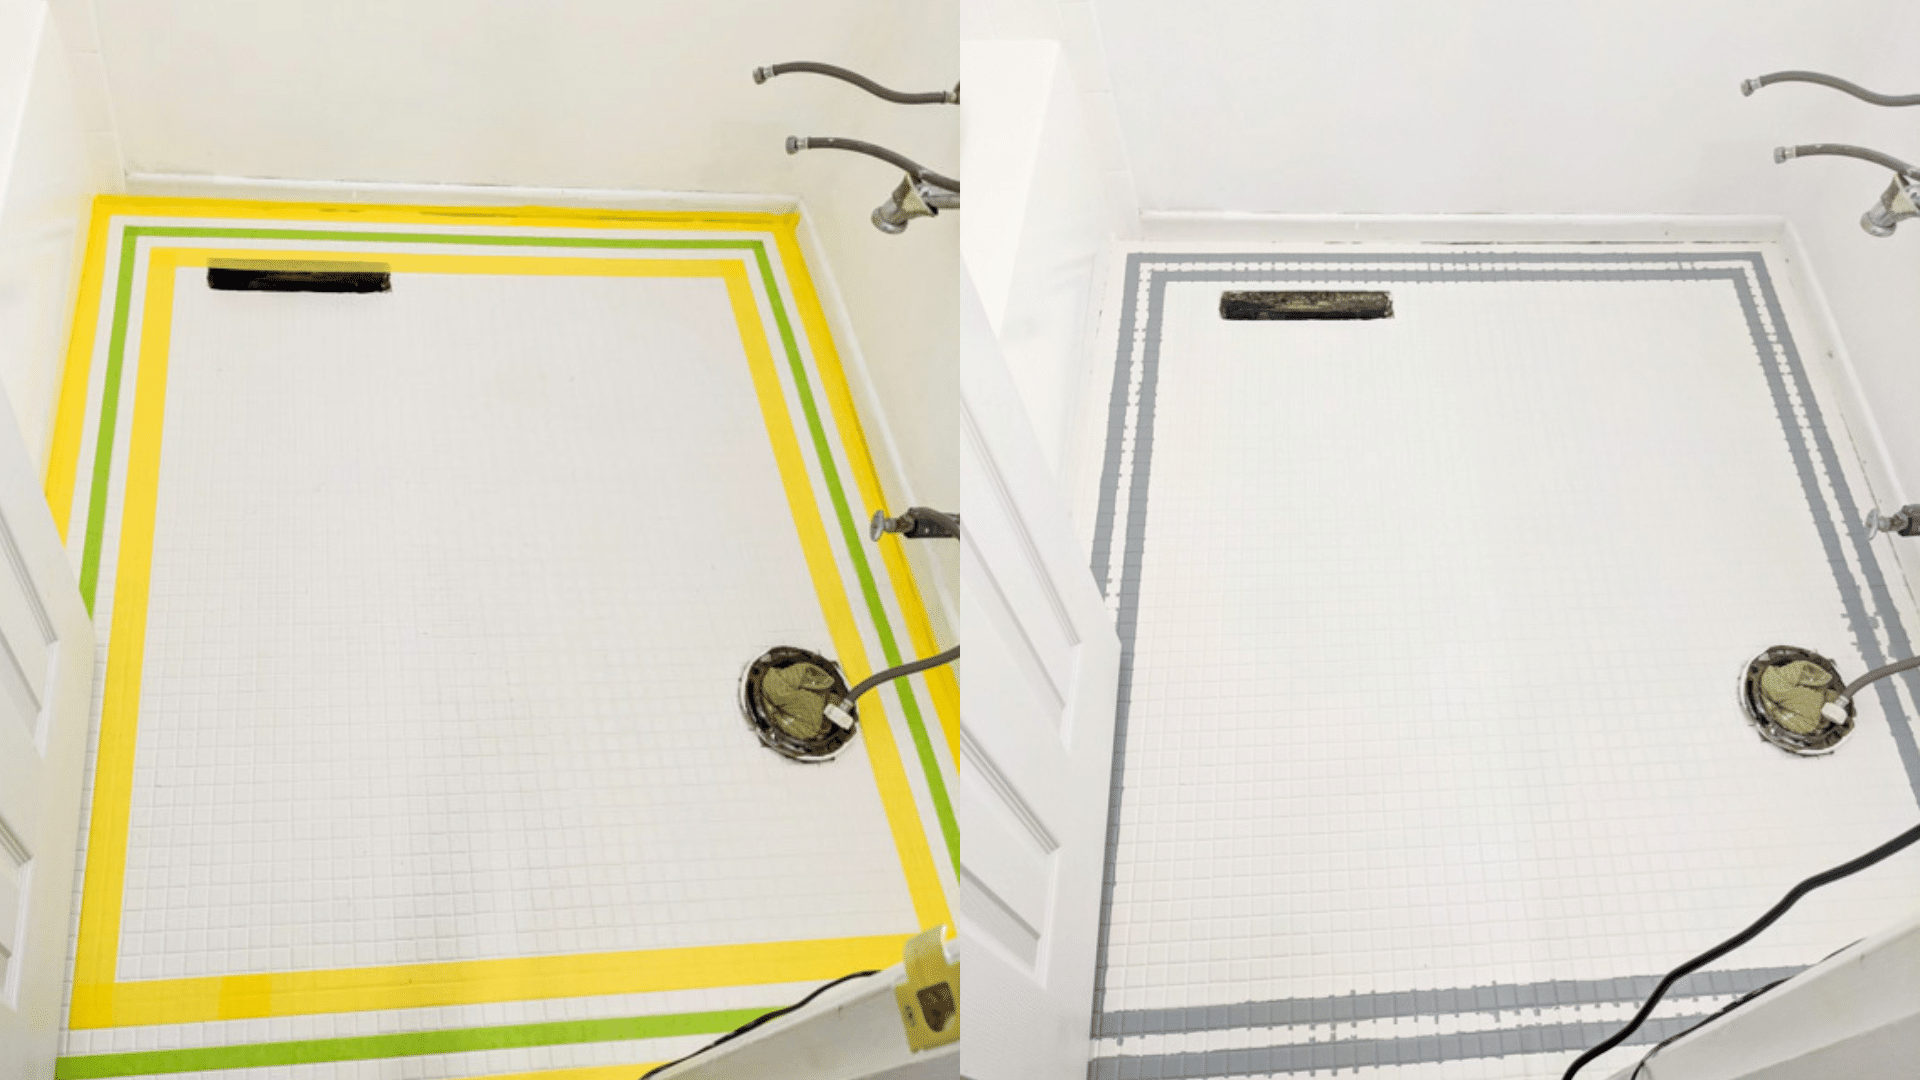
A tiled border is a simple way to add style to any room. It’s a great way to highlight the edges of the floor without covering the whole space. By painting a border around the room, you can create a look that mimics decorative tiles. It’s perfect, especially in areas like entryways or kitchens.
You can keep the border simple with one color or get creative with patterns and designs. This is a quick and affordable way to make your floor stand out while still keeping the room feeling open and fresh.
How to Paint Tiled Borders:
- Choose your colors or patterns for the border.
- Clean the floor and let it dry.
- Measure and mark where you want the border to go.
- Tape off the edges to keep the lines clean.
- Paint the border with even coats, letting each coat dry before adding more.
- Once dry, carefully remove the tape.
- Finish with a protective sealant to keep the border looking great.
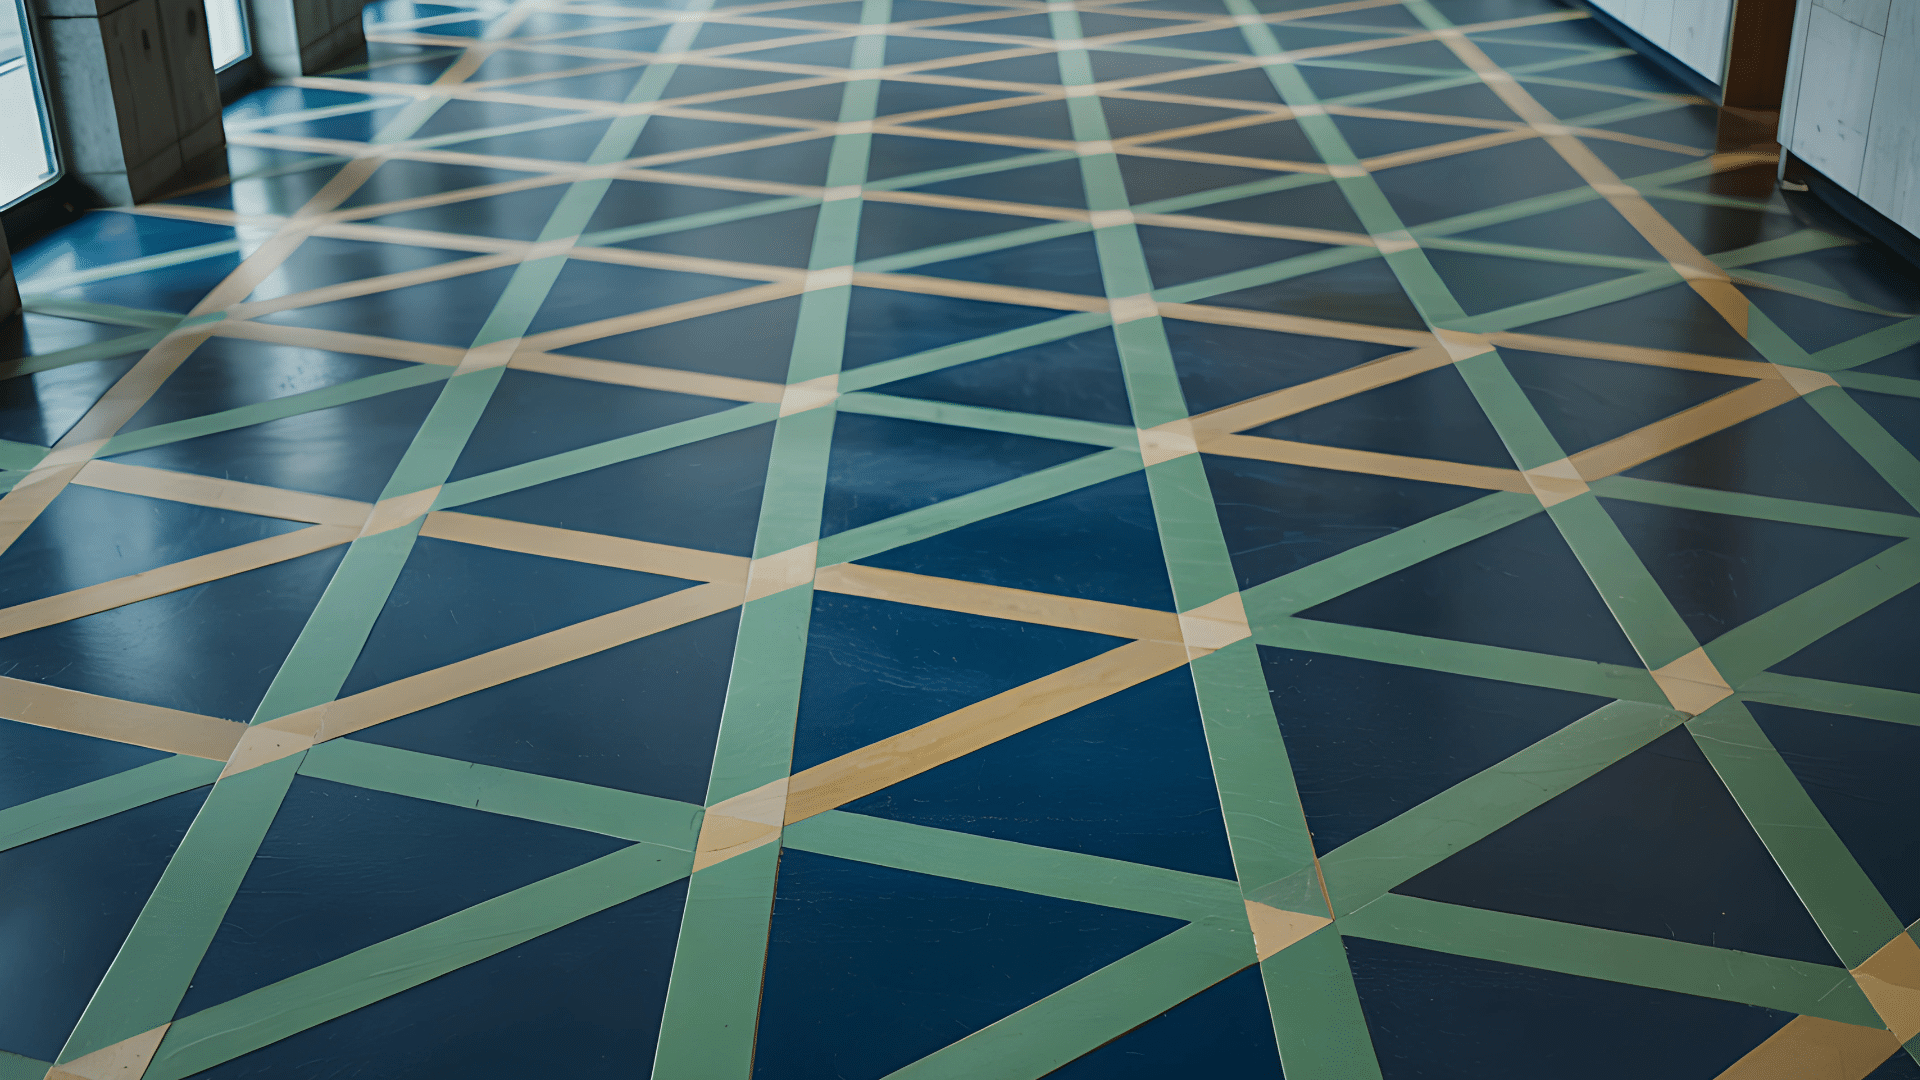
11. Trellis Patterns
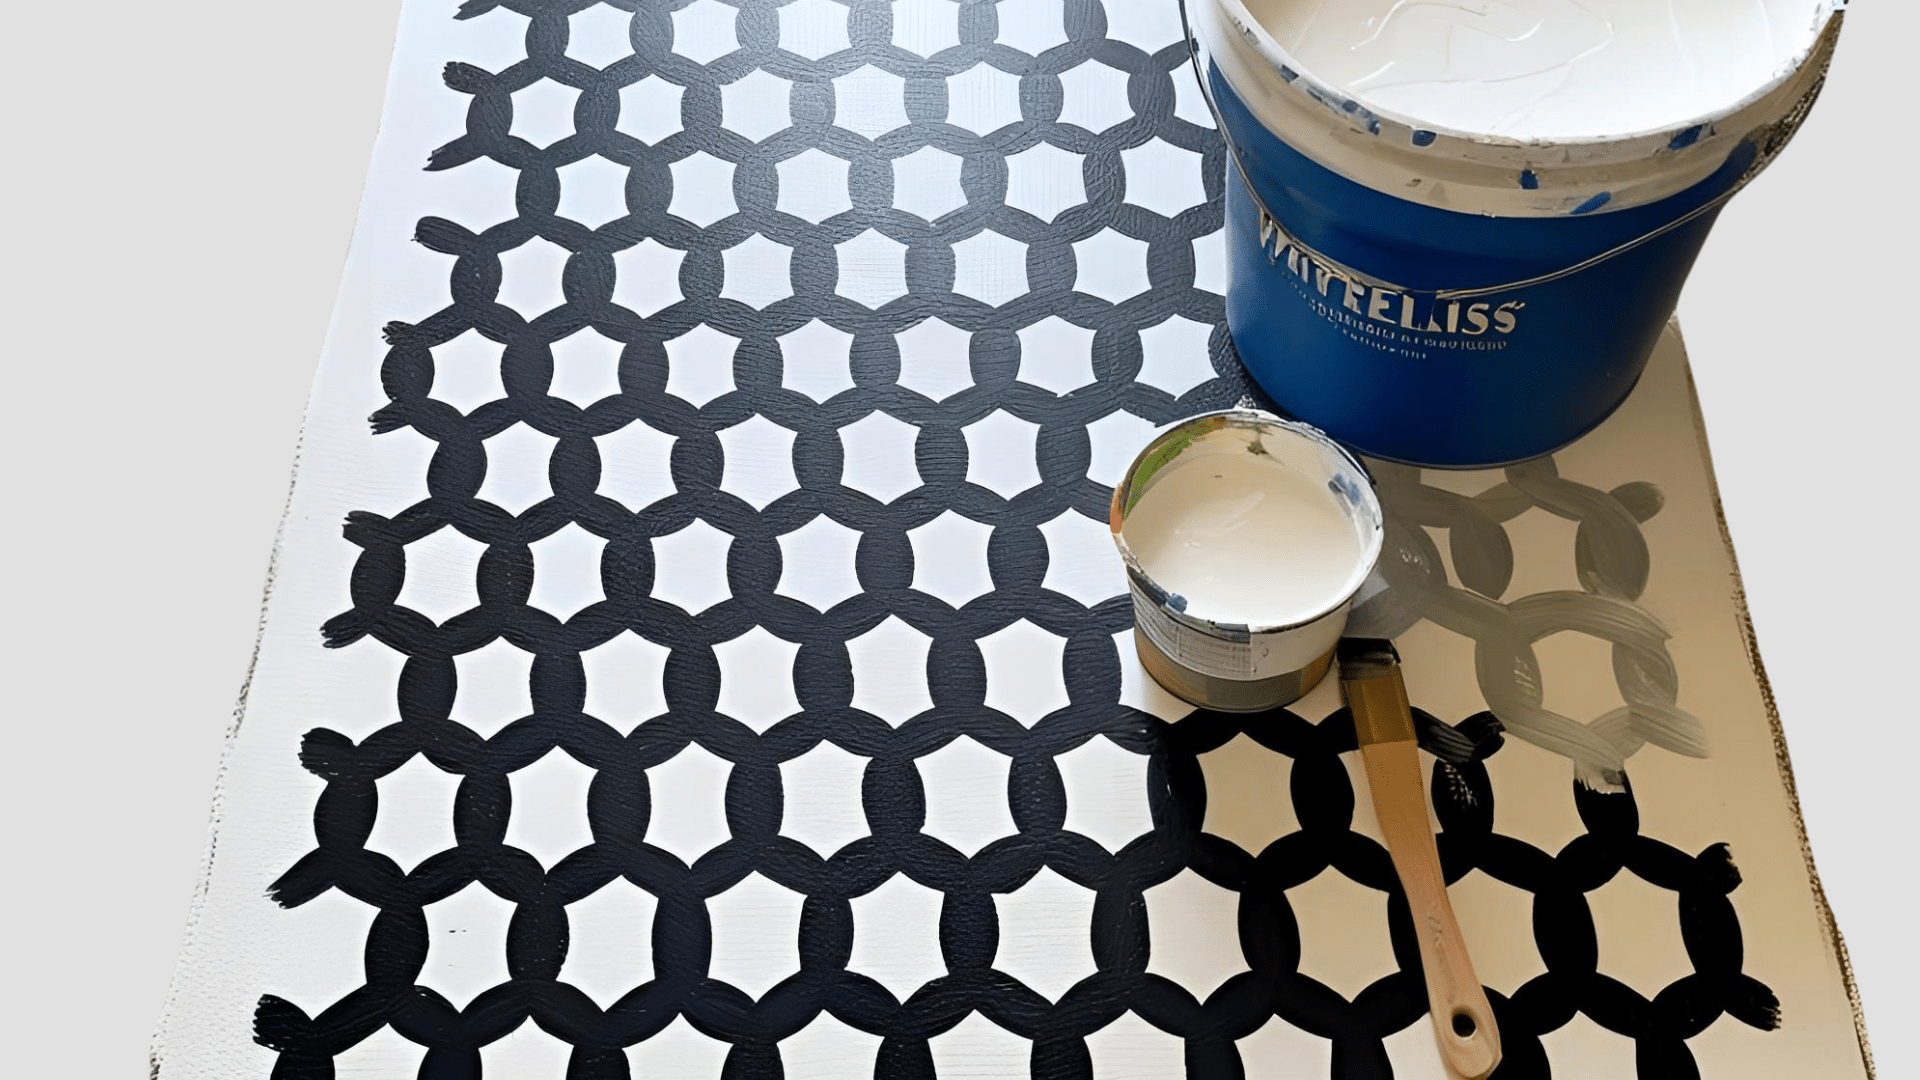
A trellis pattern adds a sophisticated and clean look to any room. It’s a simple design that can make the floor feel more open and inviting. A lattice or trellis pattern, especially in soft, neutral tones, gives the space a fresh, modern vibe without being too bold.
This style works well in living rooms, bedrooms, or even hallways, making the floor a subtle focal point.
How to Paint a Trellis Pattern:
- Choose soft, neutral colors like beige, light gray, or white for the trellis design.
- Clean and prep the floor for painting.
- Use a pencil to mark where the trellis design will go lightly.
- Tape off the edges and lines of the pattern to keep it neat.
- Paint the background color first, and let it dry completely.
- Once dry, paint the trellis design in a contrasting color, making sure the lines are clean.
- Let each layer dry before applying more paint.
- Remove the painter’s tape carefully when the paint is dry.
- Apply a clear sealer to protect the floor and finish the look.
12. Tartan Plaid
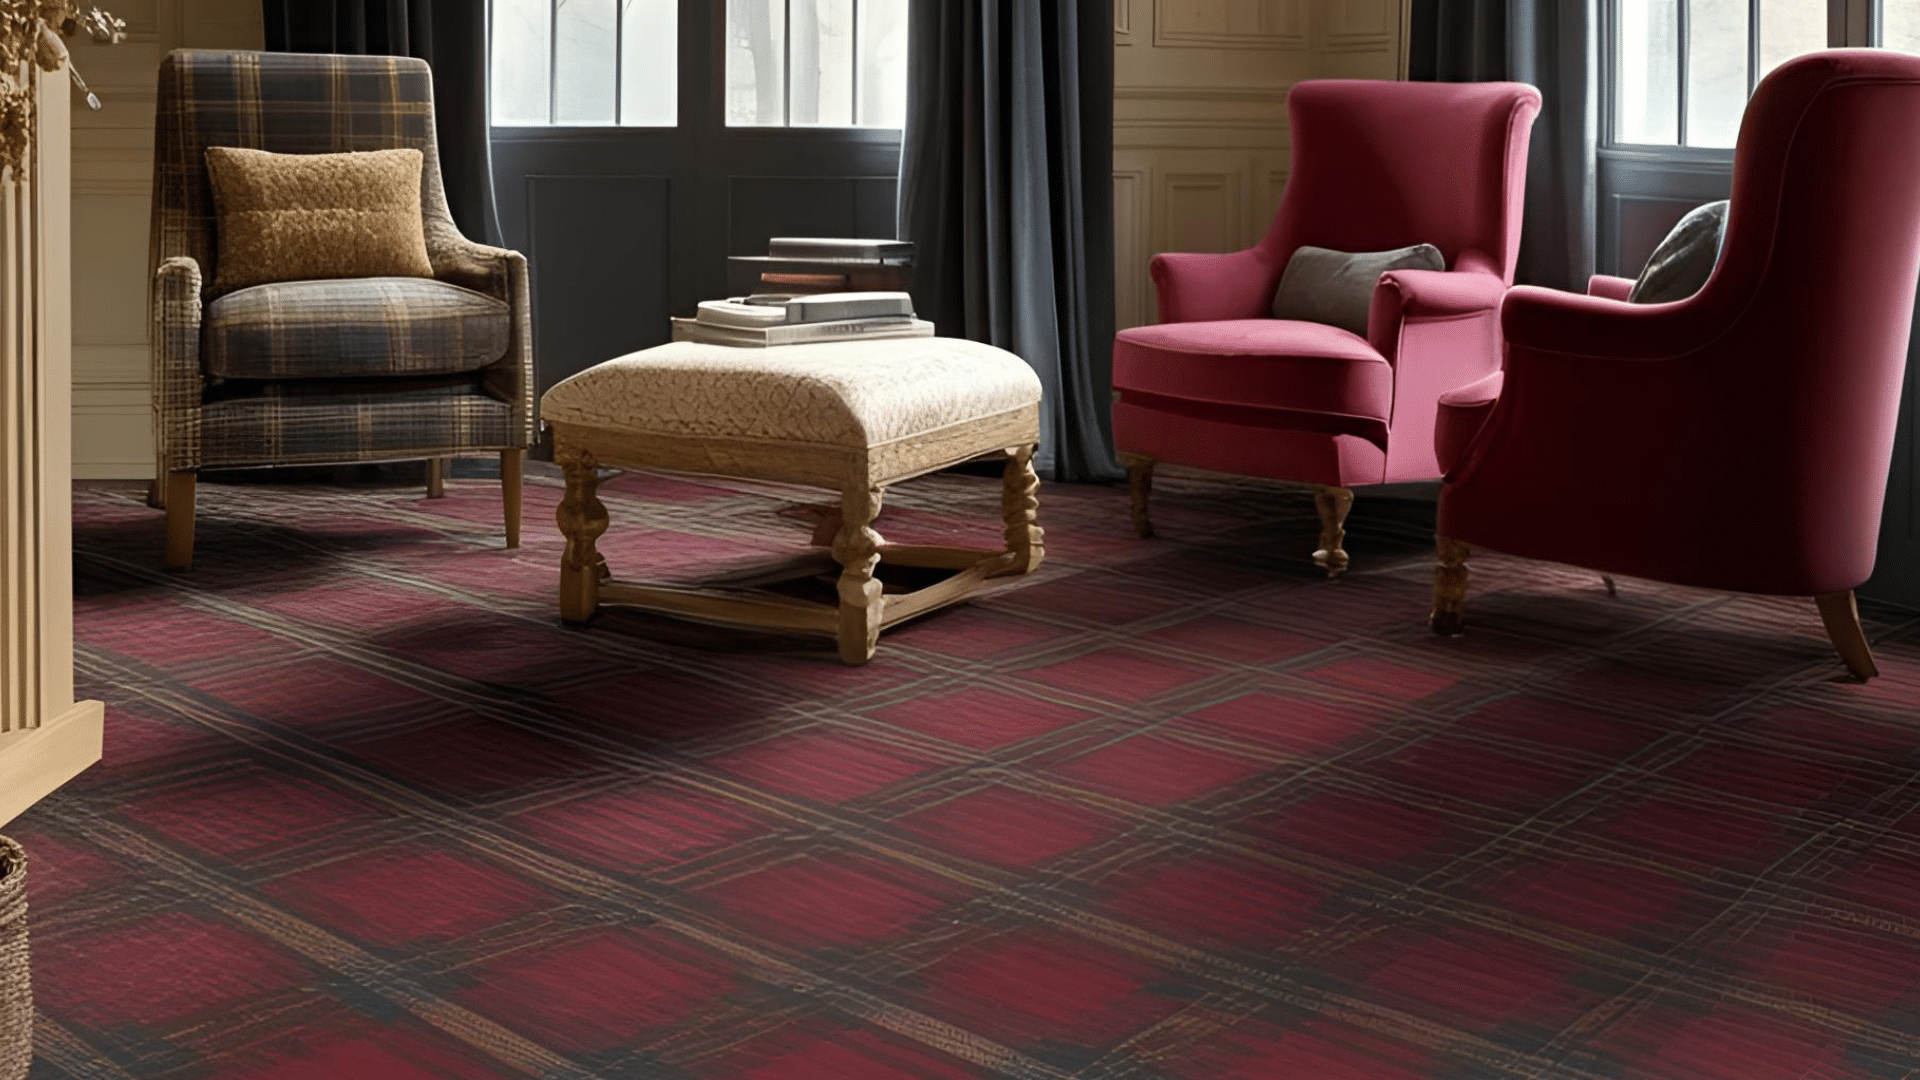
A tartan plaid pattern brings a cozy, traditional feel to any room. The classic design, with its crisscrossing lines in varying thicknesses and colors, adds warmth and charm to the floor. Tartan plaid works perfectly in spaces like living rooms, bedrooms, or even entryways.
The pattern is bold enough to make a statement but can still blend nicely with other décor. You can use classic colors like red, green, and blue or experiment with more muted tones for a softer look.
How to Paint a Tartan Plaid Pattern:
- Choose your plaid design colors. Traditional colors include red, green, and blue, but you can use any combination you like.
- Clean and prepare the floor to ensure the paint adheres well.
- Use a pencil and ruler to mark the lines where your plaid pattern will go.
- Tape off the edges and lines to create straight, clean stripes.
- Paint the wider stripes first, let them dry, and then paint the thinner ones.
- Apply multiple layers if needed, letting each coat dry before adding another.
- Carefully remove the painter’s tape once the paint is dry.
- Finish with a clear sealer to protect your tartan plaid design.
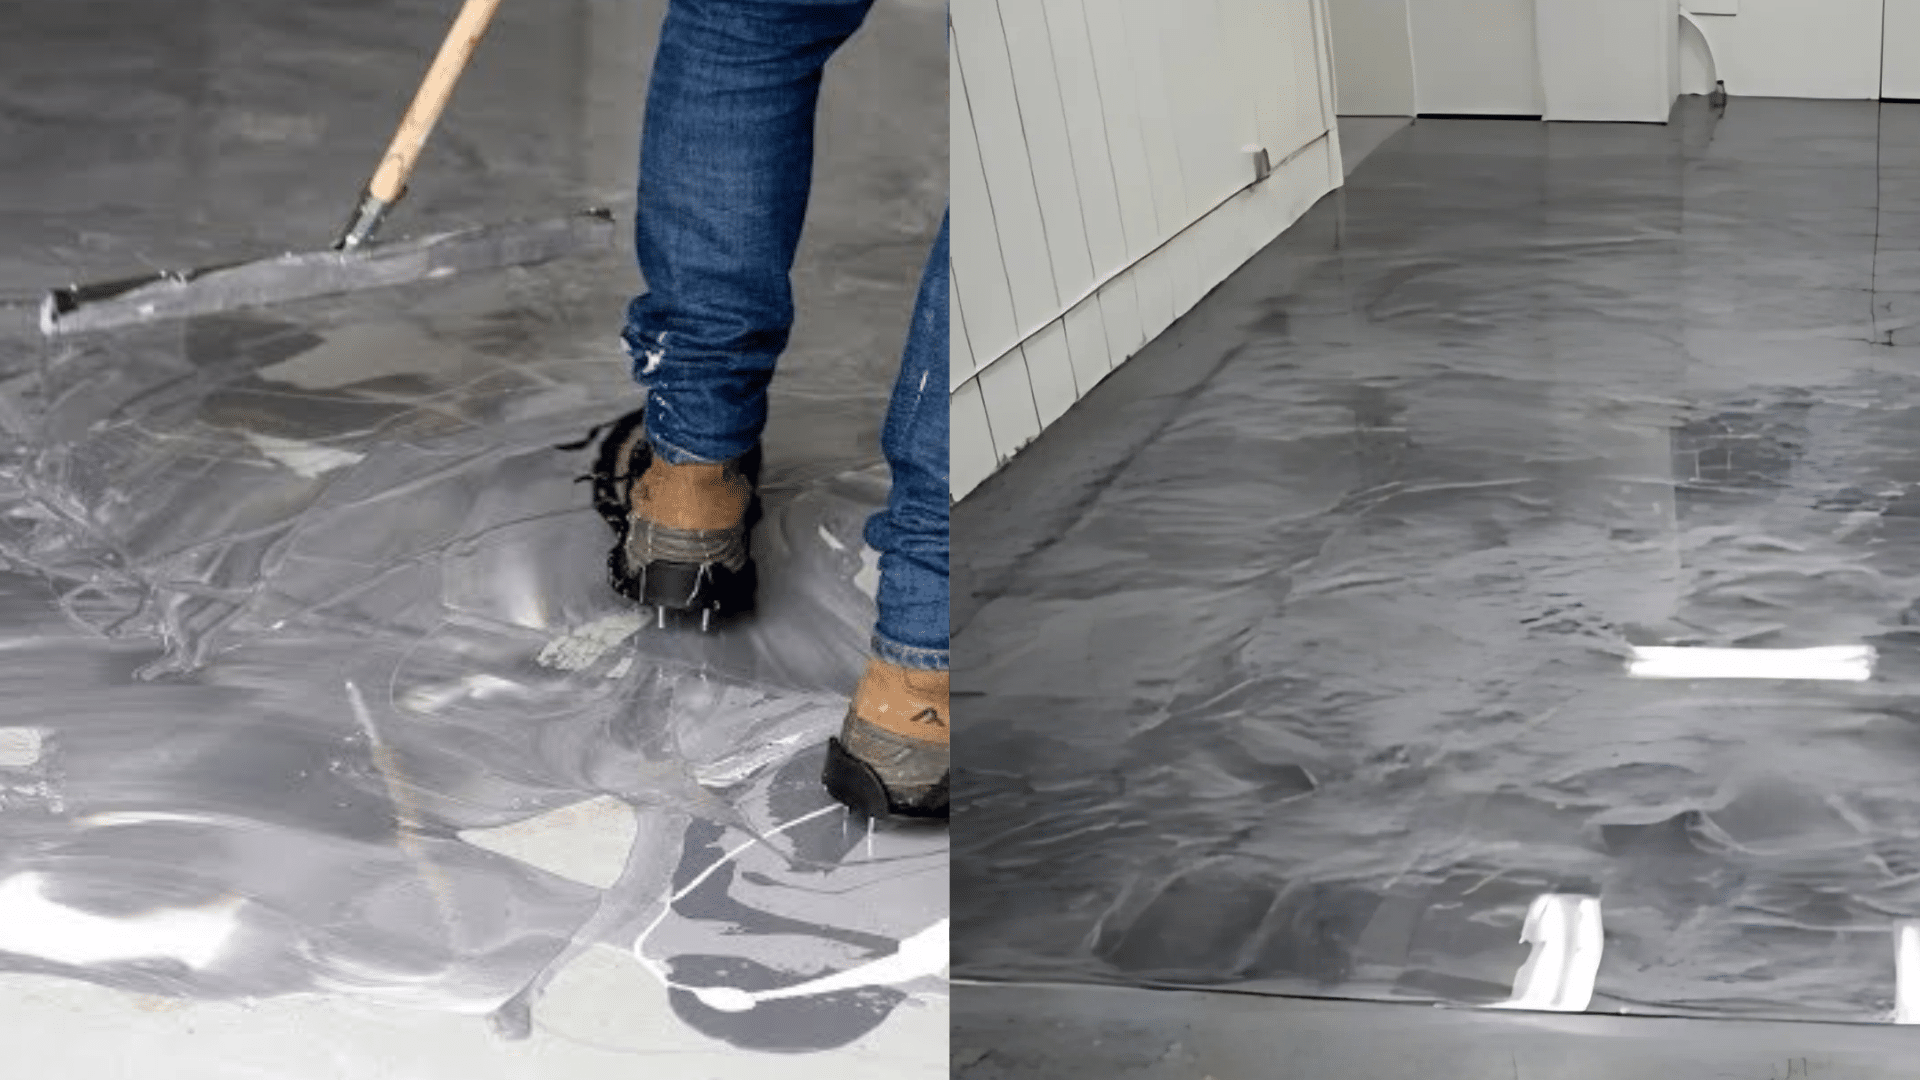
13. High-Gloss, High-Contrast
A high-gloss, high-contrast floor using resin gives your space a sleek, polished, and modern look. Resin provides a shiny, durable finish that enhances the contrast between dark and light colors, making the floor stand out even more.
The glossy, smooth surface reflects light, adding brightness to the room. This design works well in contemporary spaces like living rooms, kitchens, or entryways, giving the floor a clean and polished appearance that catches the eye.
How to Create a High-Gloss, High-Contrast Resin Floor
- Choose two contrasting colors, such as black and white or dark gray and light gray.
- Clean the floor thoroughly and sand it lightly, if needed, to ensure the resin sticks well.
- Apply a primer that’s suitable for resin and let it dry completely.
- Paint the floor with the darker color first, and let it dry before applying the second color.
- Use painter’s tape to define straight, clean lines between the two colors.
- After both colors are dry, mix the resin according to the manufacturer’s instructions.
- Apply a thin layer of resin over the entire floor, ensuring an even, glossy coat.
- Allow the resin to cure as per the instructions, ensuring it’s fully dry before walking on it.
14. Ombre Effect
An ombre effect is a smooth transition from one color to another, creating a sophisticated look. This style is great for bedrooms, bathrooms, or living rooms, adding depth and a sense of flow to your space.
How to Create an Ombre Floor:
- Clean and prep the floor.
- Choose two or more colors that blend well together.
- Apply the lighter color at one end of the floor and gradually transition to the darker shade.
- Blend the two colors with a sponge or brush while the paint is still wet.
- Let each layer dry before adding another coat.
- Apply a clear topcoat for protection.
15. Cloud Effect

A cloud effect on your floor creates a serene, dreamlike atmosphere. It’s perfect for bedrooms, nurseries, or any room where you want a calm and tranquil environment. Soft pastel shades are ideal for this design.
How to Create a Cloud Effect:
- Clean the floor and apply a light base color (white or pale blue).
- Use a sponge or rag to apply soft, swirling strokes of other light colors (pink, lavender, or light gray).
- Blend the colors gently to mimic the look of clouds.
- Let the paint dry and apply a clear topcoat for protection
16. Brick Wall Effect
Create the illusion of a brick wall on your floor for a rustic, industrial feel. This design adds texture and a unique aesthetic, perfect for entryways, kitchens, or loft-style apartments.
How to Create a Brick Wall Effect:
- Clean and prep the floor.
- Use painter’s tape to outline the brick shapes.
- Apply a base color (usually a warm, neutral tone like gray or beige).
- Use a stencil or freehand to paint the individual bricks with a darker color.
- Blend the paint for a natural brick look.
- Finish with a clear topcoat for durability and protection.
17. Stained Glass Effect
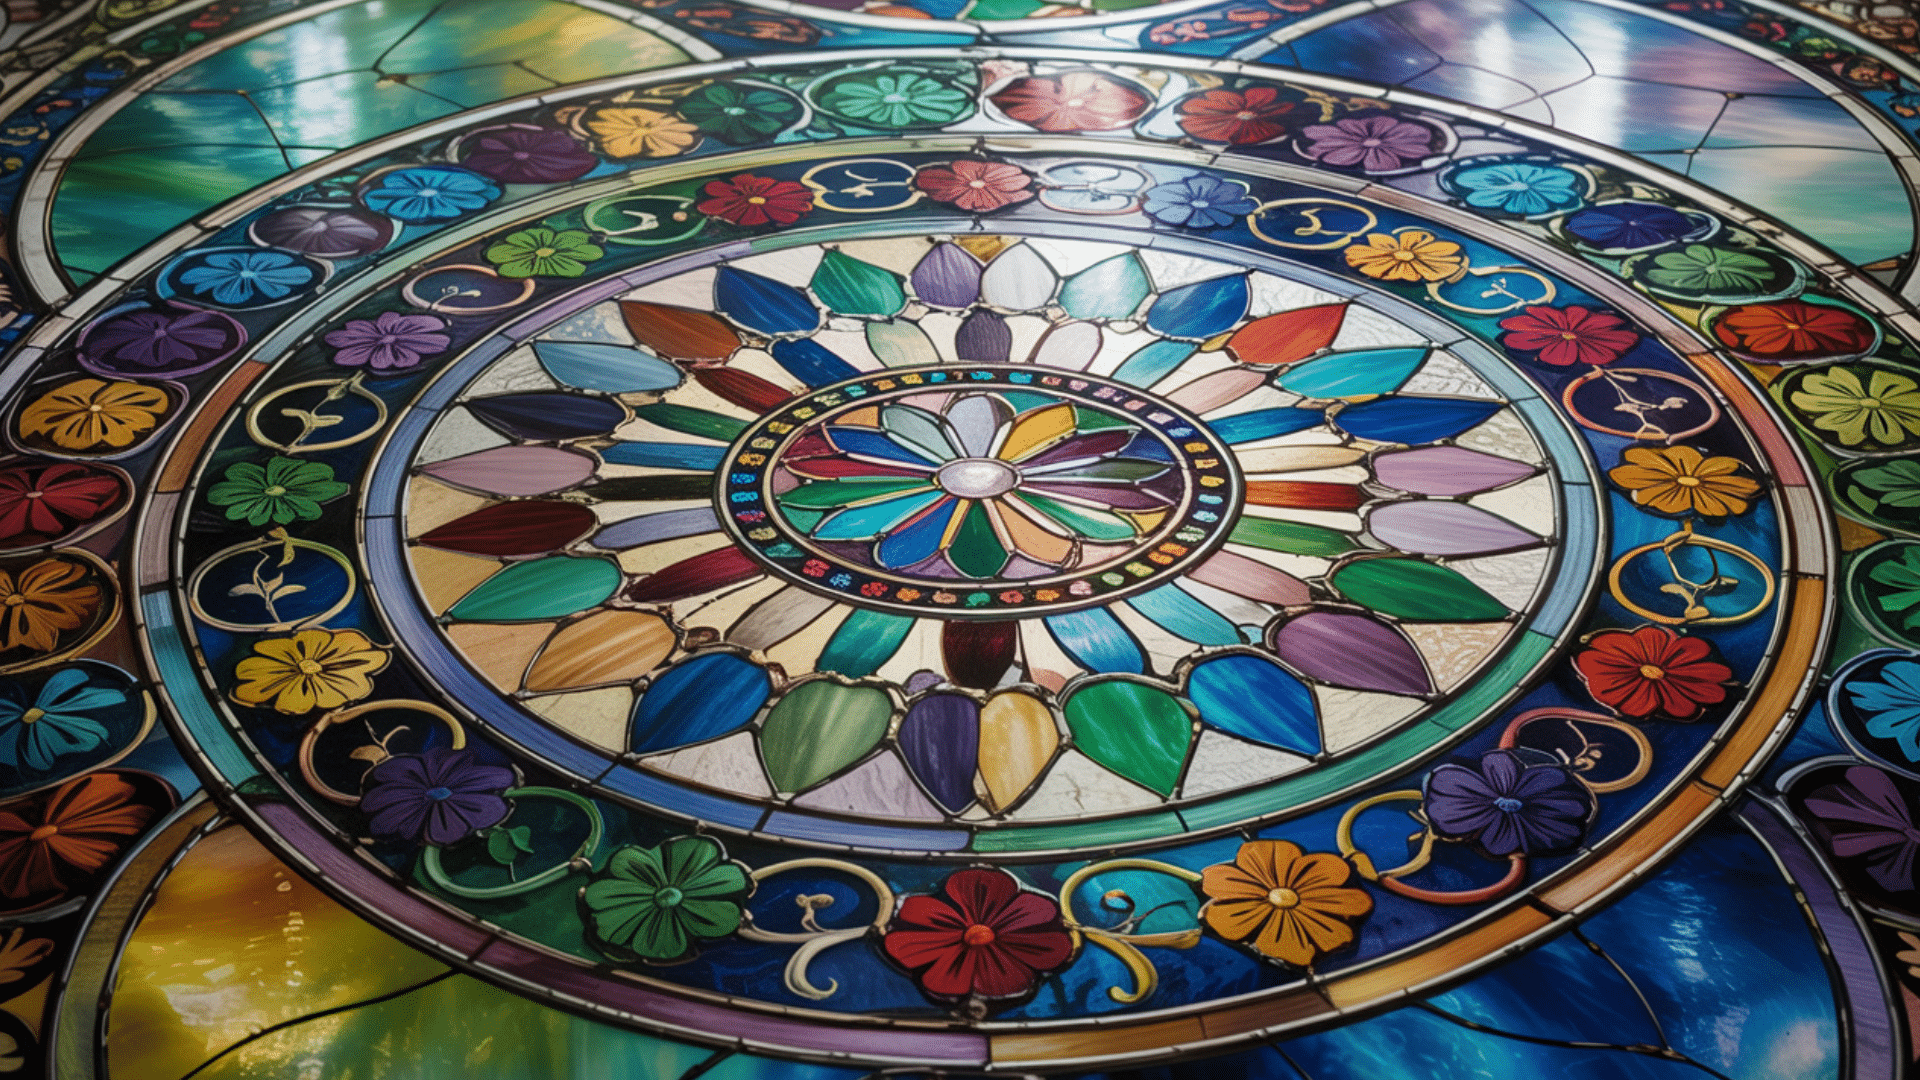
A stained glass effect on the floor can create a stunning, colorful focal point in any room. The vibrant colors and unique shapes mimic the beautiful look of stained glass windows, perfect for creative spaces like living rooms, entryways, or art studios.
How to Create a Stained Glass Effect:
- Clean and prep the floor.
- Use painter’s tape to outline the sections of the design, mimicking the shape of stained glass panes.
- Paint each section with bright, bold colors.
- Let each color dry fully before applying another.
- Add black lines or details to outline the stained glass sections.
- Apply a clear sealant to protect the design.
18. Farmhouse Plank Effect

Create the look of rustic wooden planks on your floor for a warm, farmhouse-inspired feel. This style is perfect for kitchens, dining rooms, or living rooms, bringing a cozy, homey vibe to the space.
How to Create a Farmhouse Plank Effect:
- Clean the floor thoroughly.
- Use painter’s tape to create long, straight lines that will mimic the look of wooden planks.
- Paint the planks with shades of brown, gray, or light tan.
- Use a sponge or rag to add a wood-grain texture to each “plank.”
- Allow the paint to dry fully, then apply a protective sealer.
19. Drip Painting Effect
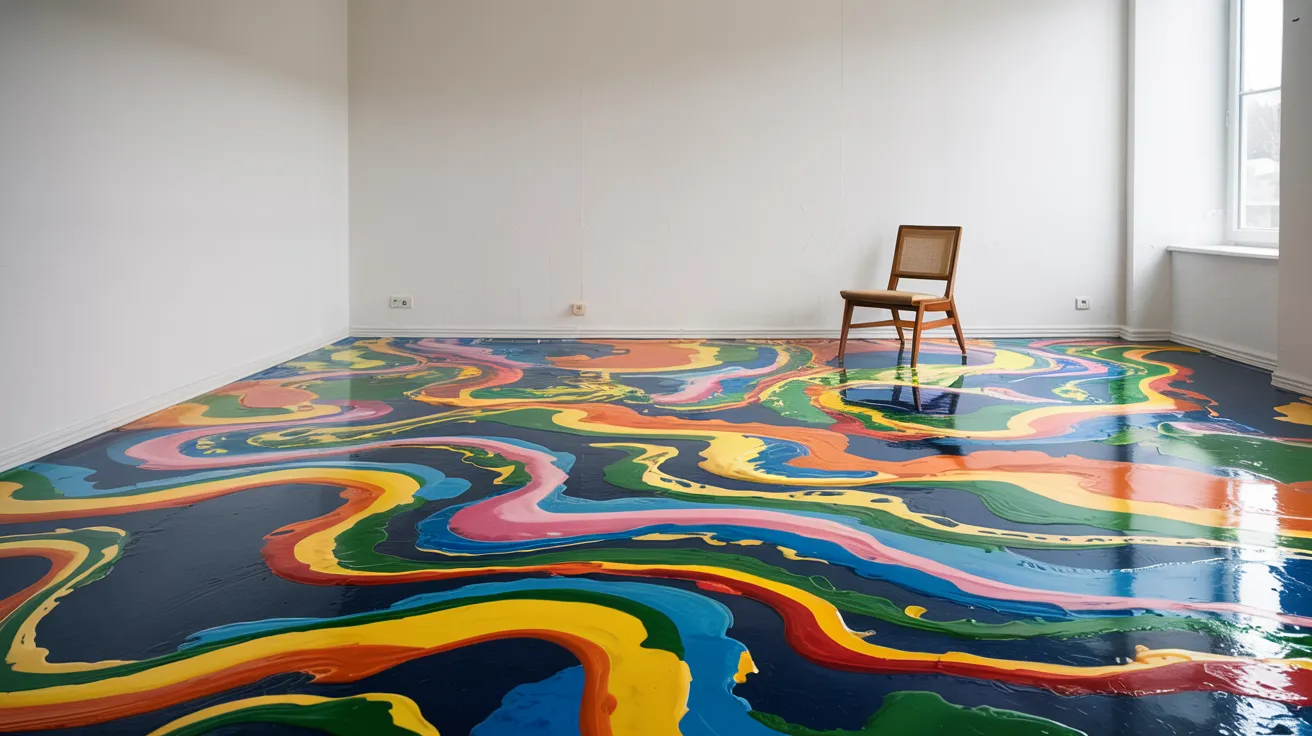
The drip painting effect adds an artistic and abstract look to your floor. It’s perfect for creative spaces like home offices, studios, or any room where you want to express bold, artistic flair.
How to Create a Drip Painting Effect:
- Clean and prep the floor.
- Pour or drip various colors of paint onto the floor using different brushes or droppers.
- Let the paint naturally drip and spread, creating a spontaneous look.
- Once dry, add additional layers if needed.
- Finish with a clear topcoat to seal the painting.
20. Patchwork Quilt Effect
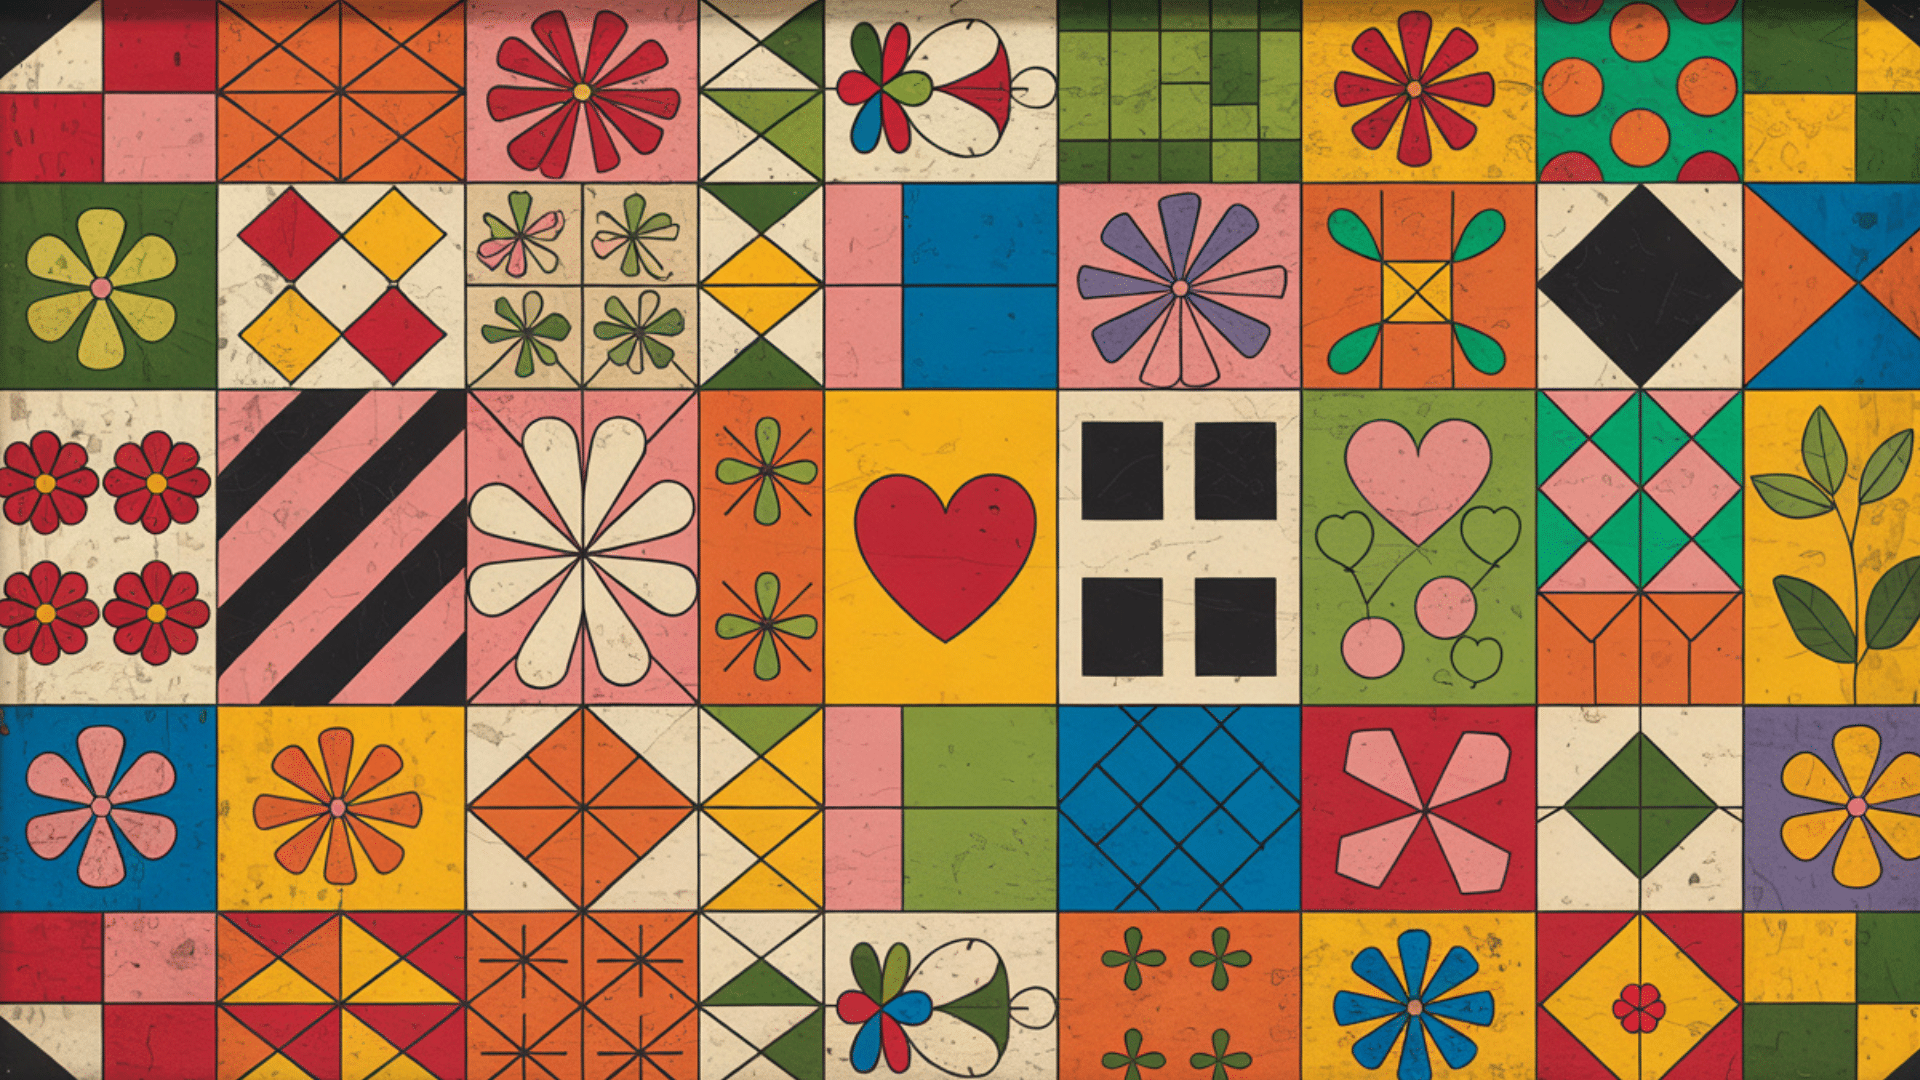
A patchwork quilt effect on the floor adds a cozy, homely feel. You can create this effect using a variety of colors and patterns, making it perfect for kitchens, bedrooms, or entryways that need a warm, inviting touch.
How to Create a Patchwork Quilt Effect:
- Clean and prep the floor.
- Draw out the sections for each “patch,” using a pencil or chalk.
- Paint each patch with different patterns or solid colors, like stripes, polka dots, or checkered patterns.
- Let each section dry before painting the next one.
- Once dry, apply a protective sealant to finish the floor.
DIY or Professional Help?
If you’re considering doing the floor painting yourself or hiring a professional, this table might help you compare both options. It shows the pros and cons of each choice so you can choose what works best for you.
| DIY | Professional Help |
|---|---|
| More affordable since you don’t pay for labor. | Experts do the job quickly and neatly. |
| You have full control over the design and process. | High-quality finish with fewer mistakes. |
| You can work at your own pace and schedule. | They have the right tools and equipment. |
| Great for smaller projects or if you enjoy doing it yourself. | Ideal for larger or complicated projects. |
| It can be a fun and rewarding experience. | Less time and effort needed on your part. |
| Takes time and effort, especially for larger areas. | It can be more expensive due to labor costs. |
| You may need to learn new skills or techniques. | You may have less control over the design. |
| The finish may not be as good as a professional job. | You have to wait for the professional to be available. |
| It can be tiring and hard work, especially for bigger projects. | Scheduling and availability can take time. |
| There is a chance of making mistakes. | They may not be able to match exactly what you envision unless clearly explained. |
Tips for a Successful Floor Painting Project
First, always use painter’s tape around the edges and corners. This will help you get clean, straight lines. Avoid painting when it’s too hot or humid.
This can cause the paint to dry too fast and look uneven. It’s also a good idea to test a small area first. This way, you can see how the paint looks and sticks before doing the whole floor.
Once the paint is dry, add a second layer of protective finish for better durability. This will help the floor last longer and resist scratches.
Finally, make sure the room is well-ventilated while you paint. This allows the paint to dry properly and reduces the fumes. With these tips, your floor painting project will turn out much better!
Maintenance and Care for Painted Floors
To clean painted floors without damaging the finish, it’s important to be gentle and use the right methods. Sweep or vacuum the floor regularly to remove dirt and dust, as this will help prevent scratches and keep the surface clean.
If you spill something, wipe it up right away with a soft cloth to avoid any stains. When it’s time to mop, use a damp mop, but don’t soak it wet. Too much water can weaken the paint and cause damage.
Avoid using rough scrubbers, steel wool, or tough brushes as they can scratch the surface. Instead, use a soft mop or cloth to clean.
For regular cleaning, choose a mild, non-abrasive cleaner that is safe for painted floors. Finally, let the floor dry fully before walking on it.
Common Mistakes to Avoid When Painting Floors
- Skipping sanding: Not sanding the floor first can make the paint peel off quickly. Always sand lightly to help the paint stick.
- Using the wrong paint: Don’t use regular wall paint. Use paint made for floors, which lasts longer and holds up better.
- Rushing between coats: Don’t apply new paint before the first coat dries. This can cause streaks and uneven color.
- Not sealing the floor: If you don’t add a protective sealant, moisture and foot traffic can damage the paint.
Overloading the roller: Too much paint on your roller can cause drips and uneven coverage. Use a light hand and apply thin layers.
Conclusion
Painting your floors is a great way to change the look of any room. It’s a project you can do yourself, or you can hire a professional to help.
There are many options for designs, from simple solid colors to creative patterns. Just make sure you take your time, follow the steps, and avoid common mistakes.
Using the right materials will make your floor last longer. No matter if choose DIY or professional help, you’ll be surprised at how much your floor can change the room.
Ready to get started? Go ahead and plan your project today to create a fresh new look in your home!