
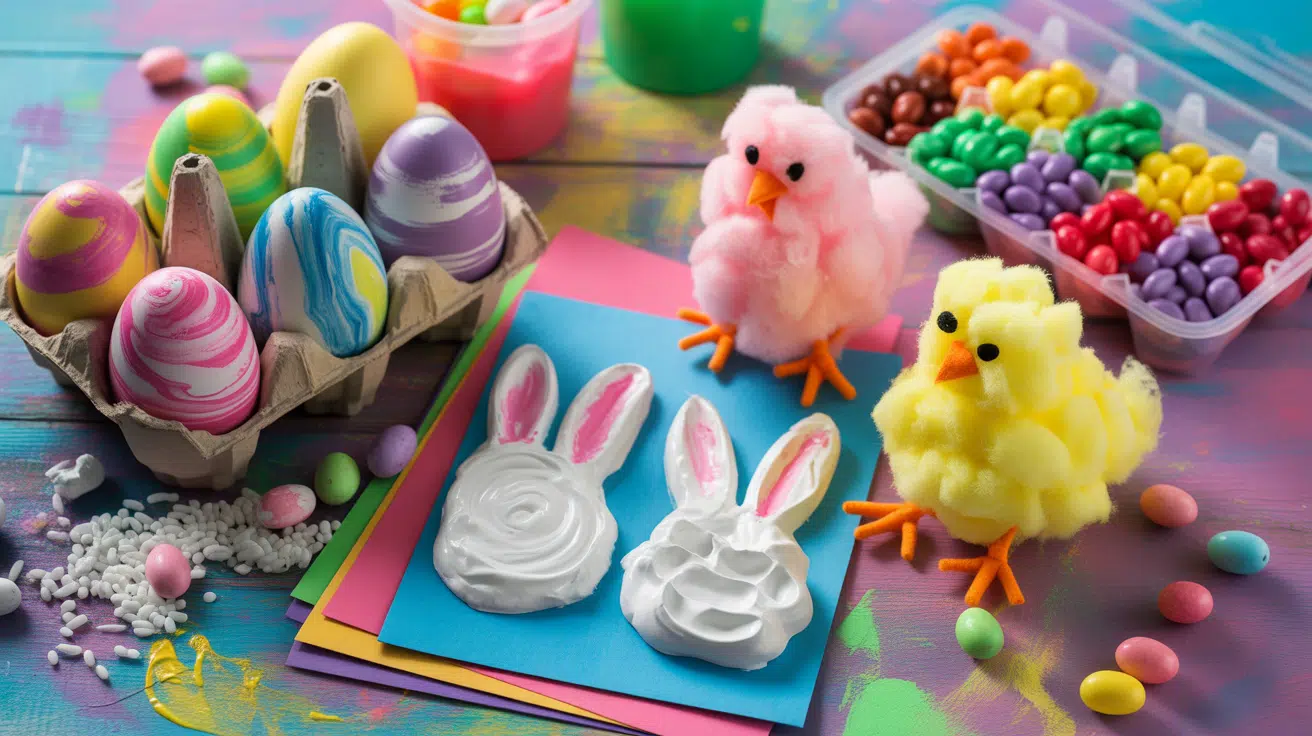
Easter Crafts for Toddlers: 60 Simple Ideas
Spring is here, and Easter is just around the corner. What better way to celebrate than with fun, hands-on crafts? Easter crafts for toddlers offer more than just colorful decorations.
They help little ones develop fine motor skills, practice hand-eye coordination, and build confidence with every swipe of a glue stick and every paint dab.
Crafting together creates special bonding moments you’ll both treasure. Your toddler feels proud showing off their bunny mask or handprint card.
The best part? You don’t need fancy supplies or artistic skills. Simple materials like paper plates, cotton balls, and washable paint are all it takes.
Ready to get started? Here are simple Easter crafts for toddlers that you can enjoy together. Each idea is designed for little hands and big imaginations. Let’s make this Easter creative and memorable.
Essential Craft Materials for Toddlers
Getting ready for Easter crafts with toddlers doesn’t need to be complicated. The right materials and a little prep work make everything smoother and more enjoyable for everyone.
| Material | Why It Works for Toddlers |
|---|---|
| Construction paper | Easy to tear, fold, and glue. Comes in bright colors. |
| Glue sticks | Less messy than liquid glue. Simple for small hands to use. |
| Washable paints | Safe and cleans up easily from skin and clothes. |
| Cotton balls | Soft, safe, and perfect for texture crafts. |
| Pom-poms | Fun to touch and easy to stick onto projects. |
| Pipe cleaners | Bendable and colorful. Good for simple shaping. |
| Safety scissors | Blunt tips protect little fingers during cutting practice. |
| Markers and crayons | Classic tools that toddlers can control well. |
| Paper plates | Cheap base for masks, faces, and other crafts. |
| Stickers | Instant fun with no mess. Great for quick projects. |
| Tissue paper | Tears easily and adds color without the need for precision. |
Egg-Themed Easter Crafts

Eggs are the classic symbol of Easter, and toddlers love decorating them in every way possible. These projects let your little one explore color, texture, and creativity.
1. Tissue Paper Collage Easter Egg
Tear colorful tissue into small pieces and glue them onto a paper egg shape. This simple activity helps toddlers practice their fine motor skills while creating a bright, textured design.
Materials Used: Paper egg template, colorful tissue paper, non-toxic glue stick, and safety scissors (adult-supervised)
Steps:
- Print or draw a large egg shape on paper
- Tear tissue paper into small pieces with your toddler
- Apply glue to sections of the egg and press tissue pieces down
2. Bubble Wrap Stamp Painted Egg
Dip bubble wrap in paint and press it onto paper for a fun dotted pattern. Kids love the popping texture and the surprise prints it makes.
Materials Used: Bubble wrap (small piece), washable paint, paper egg cutout, and paint tray or plate
Steps:
- Cut the bubble wrap into a manageable size
- Pour paint onto a tray and dip the bubble wrap
- Press bubble wrap onto the paper egg to create textured prints
3. Coffee Filter Dyed Egg Art
Use washable markers on coffee filters, then spray with water to watch colors blend. This craft is perfect for toddlers who love watching magic happen.
Materials Used: White coffee filters, washable markers, spray bottle with water, and paper towels (for drying)
Steps:
- Draw on the coffee filter with colorful markers
- Lightly spray the filter with water and watch the colors spread
- Let it dry, then cut into an egg shape
4. Sticker-Covered Cardboard Egg Cutout
Give your toddler an egg shape and let them fill it with stickers of all kinds. It’s mess-free, easy, and great for developing hand-eye coordination.
Materials Used: Cardboard egg cutout, assorted stickers (puffy, foam, paper), and optional markers or crayons
Steps:
- Cut a large egg shape from cardboard
- Hand your toddler a sheet of stickers
- Let them peel and stick freely all over the egg
5. Handprint Egg on Construction Paper
Press your child’s painted hand onto paper in the shape of an egg for a sweet keepsake. This craft captures a moment in time and makes a great gift for the family.
Materials Used: Construction paper, non-toxic washable paint, paintbrush or sponge, and wet wipes (for cleanup)
Steps:
- Paint your toddler’s hand with their favorite color
- Press their hand flat onto the paper in an egg outline
- Let it dry, and add the date on the back
6. Yarn-Wrapped Paper Egg Shape
Wrap colorful yarn around a cardboard egg and glue the ends down. This activity improves grip strength and introduces toddlers to patterns and colors.
Materials Used: Cardboard egg cutout, colorful yarn, child-safe glue, and tape (to secure starting point)
Steps:
- Tape one end of the yarn to the back of the egg
- Wrap yarn around the egg in different directions
- Glue the end down when finished
7. Salt-Dough Easter Egg Ornaments (Toddler-Safe Version)
Shape and decorate soft dough eggs that you can bake and keep. These make great keepsakes or decorations that last for years.
Materials Used: Flour, salt, and water (for dough), cookie cutters (egg-shaped), paint or markers (after baking), and ribbon (for hanging)
Steps:
- Mix the dough and roll it out flat
- Use an egg-shaped cutter to make shapes
- Bake according to the recipe, then let your toddler paint them
8. Felt Egg Matching Game (Large Felt Pieces)
Cut pairs of felt eggs in different colors for a simple matching activity. This quiet craft helps toddlers learn colors and improve memory skills.
Materials Used: Felt sheets (various colors), fabric scissors, a marker (to trace egg shapes), and a small basket (for storage)
Steps:
- Trace and cut two eggs of each color from felt
- Mix them up and lay them out flat
- Let your toddler match the pairs by color
9. Potato Stamp Easter Egg Art
Cut a potato in half and use it to stamp egg patterns on paper. It’s a fun way to introduce toddlers to printmaking with everyday items.
Materials Used: Large potato (halved), washable paint, paper or cardstock, and paper towels (for blotting)
Steps:
- Cut a potato in half and pat it dry
- Dip the flat side into the paint
- Stamp repeatedly onto paper to form egg shapes
10. Paper Plate Easter Egg Basket
Cut and decorate a paper plate, then add a handle for carrying treats. This craft doubles as both an art project and a functional basket for egg hunts.
Materials Used: Paper plate, markers, crayons, or paint, construction paper (for handle), and stapler or glue
Steps:
- Cut the paper plate into an egg or basket shape
- Decorate with colors, stickers, or drawings
- Attach a paper strip as a handle using glue or staples
Bunny-Themed Easter Crafts
Bunnies are adorable and always a hit with toddlers during springtime. These crafts bring fluffy friends to life with simple supplies.
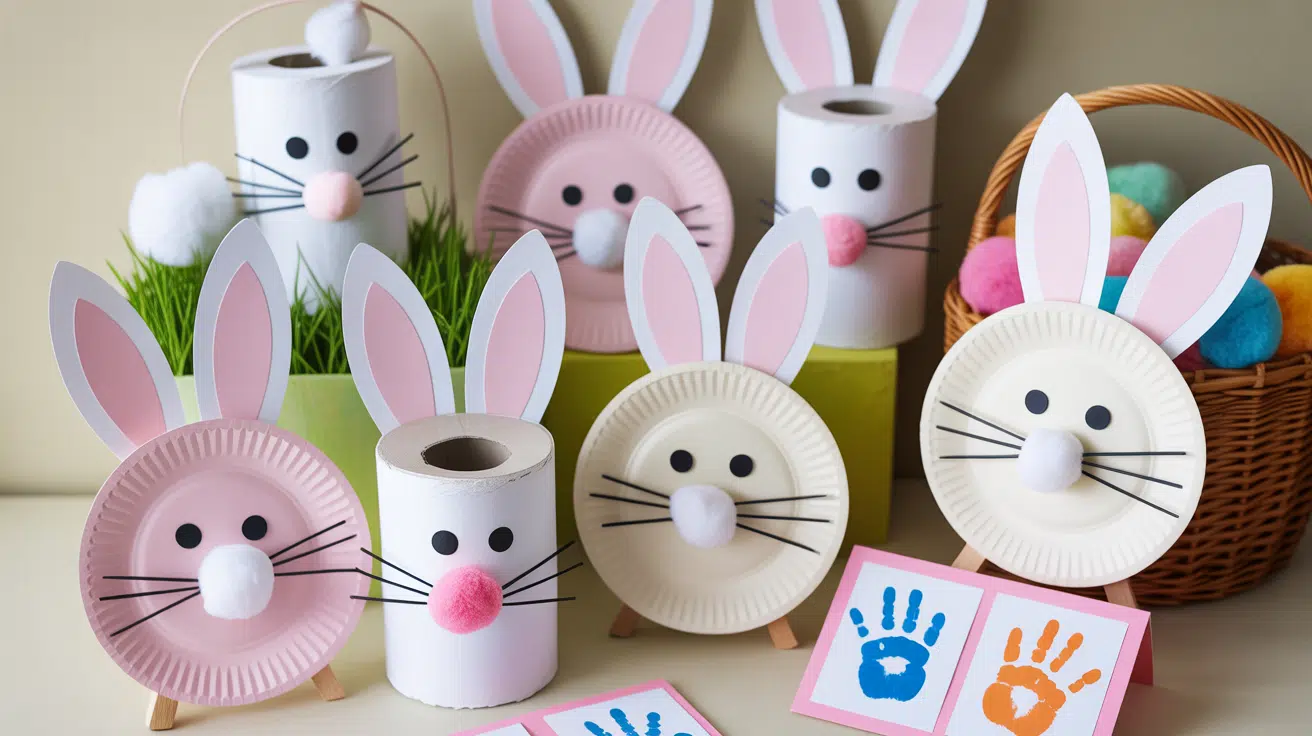
11. Paper Plate Bunny Face
Glue on ears, eyes, and a cotton ball nose to change a plate into a bunny. This quick craft is perfect for toddlers who love animals and textures.
Materials Used: Paper plate, construction paper (for ears), googly eyes, cotton balls, and glue stick
Steps:
- Cut two long ear shapes from construction paper
- Glue the ears to the top of the paper plate
- Add googly eyes and a cotton ball nose to complete the face
12. Toilet Paper Roll Bunny Treat Holder
Decorate a cardboard tube with ears and a face, then fill it with goodies. This functional craft turns into a cute holder for Easter treats or small toys.
Materials Used: Empty toilet paper roll, markers or paint, construction paper (for ears), and stickers or googly eyes
Steps:
- Decorate the toilet paper roll with markers or paint
- Cut and attach paper ears to the top
- Fill the tube with small candies or toys
13. Pom Pom Bunny Silhouette
Glue white pom poms inside a bunny outline drawn on paper. Kids love the soft, fluffy texture as they fill in the bunny shape.
Materials Used: White pom poms (various sizes), printed or drawn bunny outline, glue, and colored paper
Steps:
- Draw or print a simple bunny outline on paper
- Apply glue inside the outline
- Press white pom poms onto the glue until the bunny is filled
14. Bunny Ears Headband Craft
Attach paper ears to a headband strip so your toddler can hop around. This wearable craft makes pretend play even more fun during Easter celebrations.
Materials Used: Construction paper or cardstock, scissors, glue or tape, and a paper strip (for headband)
Steps:
- Cut two long bunny ear shapes from paper
- Attach ears to a paper strip sized to fit your toddler’s head
- Secure the strip around their head with tape or staples
15. Bunny Footprint Art (With Toddler’s Foot)
Paint the bottom of your child’s foot and press it down to create bunny ears. This adorable keepsake captures your little one’s tiny foot in a creative way.
Materials Used: Non-toxic washable paint, construction paper or canvas, paintbrush, and wet wipes (for cleanup)
Steps:
- Paint the bottom of your toddler’s foot
- Press their foot onto paper with toes pointing up
- Add a face and details below the footprint to complete the bunny
16. Cotton Ball Bunny Tail Card
Glue fluffy cotton balls onto a card to make a bunny’s puffy tail. This simple card craft is great for giving to grandparents or friends.
Materials Used: Cardstock or folded card, cotton balls, glue, and markers or crayons
Steps:
- Draw a bunny on the front of a folded card
- Glue cotton balls where the tail should be
- Let your toddler add extra decorations with markers
17. Bunny Mask (Pre-Cut Shapes for Toddler Glue)
Let your toddler glue ears, nose, and whiskers onto a mask base. This hands-on project helps with coordination and results in a fun wearable mask.
Materials Used: Pre-cut mask base, paper ears and whiskers, glue stick, and elastic string or popsicle stick
Steps:
- Provide your toddler with a mask base and pre-cut pieces
- Let them glue on ears, nose, and whiskers
- Attach an elastic or a stick so they can wear or hold the mask
18. Yarn Wrapped Bunny Ears on Headband
Wrap yarn around cardboard ears and attach them to a headband. This textured craft is perfect for toddlers who enjoy wrapping and winding materials.
Materials Used: Cardboard ear cutouts, colorful yarn, glue or tape, and a plain headband
Steps:
- Cut two ear shapes from cardboard
- Wrap yarn around each ear until covered
- Glue or tape the ears onto a headband
19. Felt Bunny Pom Pom Garland
String together felt bunny shapes with colorful pom poms for room decor. This craft doubles as both an activity and a festive decoration for your home.
Materials Used: Pre-cut felt bunnies, colorful pom poms, yarn or string, and a large needle (adult use only)
Steps:
- Lay out felt bunnies and pom poms in a pattern
- Thread them onto yarn with a needle (adult does this part)
- Hang the garland across a wall or doorway
20. Bunny Handprint Card
Press your toddler’s hand in paint to create bunny ears on a folded card. This sweet card is a memorable gift that shows how much your child has grown.
Materials Used: Folded cardstock, non-toxic washable paint, paintbrush, and markers (for details)
Steps:
- Paint your toddler’s hand and press it onto the card
- Let the handprint dry completely
- Add a bunny face below the fingers and write a message inside
Chick and Lamb-Themed Easter Crafts
Fluffy chicks and sweet lambs make springtime even more cheerful. These crafts are soft, fun, and full of texture for tiny fingers.
21. Paper Plate Chick with Handprint Wings
Add yellow paint and handprint wings to a paper plate for a cute chick face. This craft combines painting and printing for a fun sensory experience.
Materials Used: Paper plate, yellow paint, orange construction paper (for beak), googly eyes, and glue
Steps:
- Paint the paper plate yellow and let it dry
- Paint your toddler’s hands and press them on either side as wings
- Glue on googly eyes and an orange paper beak
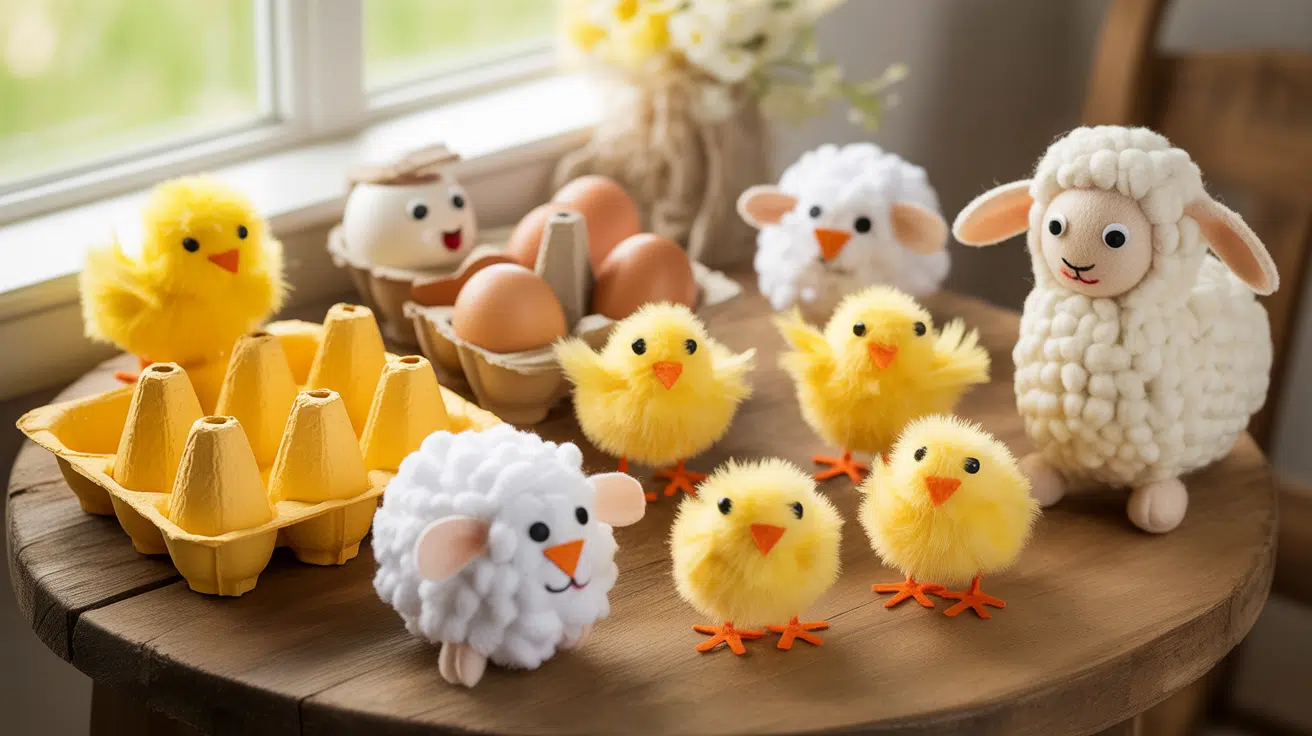
22. Cotton-Ball Lamb Craft
Cover a lamb shape with cotton balls for a soft, woolly texture. Toddlers love the fluffy feeling as they create their own cuddly lamb.
Materials Used: Printed or drawn lamb outline, cotton balls, glue, and black marker (for face and legs)
Steps:
- Draw or print a simple lamb shape on paper
- Apply glue to the body area
- Press cotton balls onto the glue until the lamb looks fluffy
23. Yarn-Textured Baby Chick on Paper
Glue yellow yarn pieces onto a chick outline for a fuzzy effect. This craft helps toddlers develop fine motor skills as they create texture.
Materials Used: Yellow yarn (cut into small pieces), chick outline on paper, glue, and orange paper (for beak and feet)
Steps:
- Draw or print a chick shape on paper
- Apply glue inside the chick outline
- Press small pieces of yellow yarn onto the glue
24. Pom Pom Chick Push Pin Craft
Press yellow pom poms onto a soft board to create a chick shape. This mess-free activity is perfect for developing hand strength and coordination.
Materials Used: Yellow pom poms, soft foam board or corkboard, push pins (adult supervision required), and marker
Steps:
- Draw a chick outline on the board
- Help your toddler push pins through pom poms into the board
- Fill the shape with yellow pom poms
25. Felt Lamb Finger Puppet
Sew or glue simple felt pieces into a lamb puppet that fits on little fingers. This craft turns into a fun toy for storytelling and pretend play.
Materials Used: White and black felt, fabric glue or needle and thread, cotton balls (optional), and googly eyes
Steps:
- Cut two lamb body shapes from white felt
- Glue or sew the edges together, leaving the bottom open
- Add cotton balls, eyes, and ears to complete the puppet
26. Egg Carton Baby Chick Treat Box
Paint egg carton cups yellow and add a beak and eyes for tiny chick containers. These little boxes are perfect for holding Easter treats or small toys.
Materials Used: Cardboard egg carton, yellow paint, orange construction paper, googly eyes, and glue
Steps:
- Cut individual cups from the egg carton
- Paint each cup yellow and let it dry
- Glue on googly eyes and an orange paper beak
27. Chick Footprint Art
Use yellow paint to stamp your toddler’s foot and turn it into a baby chick. This keepsake craft captures your child’s tiny footprint in an adorable way.
Materials Used: Yellow washable paint, white or blue construction paper, paintbrush, and markers (for details)
Steps:
- Paint the bottom of your toddler’s foot yellow
- Press their foot onto paper with toes pointing down
- Add eyes, a beak, and legs once the paint dries
28. Lamb Paper Bag Puppet
Decorate a paper bag with cotton balls and ears for a hand puppet. This craft is great for toddlers who love interactive play and storytelling.
Materials Used: Brown or white paper bag, cotton balls, construction paper (for ears and face), glue, and markers
Steps:
- Glue cotton balls all over the bottom flap of the bag
- Cut and attach ear shapes to the sides
- Draw or glue on eyes and a nose
29. Chick Sun Catcher with Tissue Paper
Stick yellow tissue paper onto clear contact paper in a chick shape for window art. The sunlight shining through creates a beautiful glowing effect.
Materials Used: Clear contact paper, yellow tissue paper (torn into pieces), scissors, and tape (for hanging)
Steps:
- Cut contact paper into a chick shape (sticky side up)
- Let your toddler press tissue pieces onto the sticky surface
- Cover with another layer of contact paper and hang in a window
30. Sheep Sticker Collage
Fill a sheep outline with white circle stickers for a textured woolly look. This no-mess craft is perfect for keeping toddlers busy while building fine motor skills.
Materials Used: Printed sheep outline, white circle stickers, black marker, and construction paper
Steps:
- Draw or print a sheep shape on paper
- Give your toddler a sheet of white circle stickers
- Let them peel and stick circles all over the sheep’s body
Basket and Container Easter Crafts
Toddlers love having their own special basket to collect eggs or treats. These container crafts are functional and fun to make together.
31. Coffee Filter Easter Basket
Fold and glue coffee filters into a small basket shape that your toddler can decorate. This delicate craft creates a unique basket perfect for holding small treats.
Materials Used: Coffee filters, glue, markers or paint, and a paper strip (for handle)
Steps:
- Fold coffee filters into pleats and arrange in a circle
- Glue the filters together to form a basket base
- Attach a paper handle and let your toddler decorate with markers
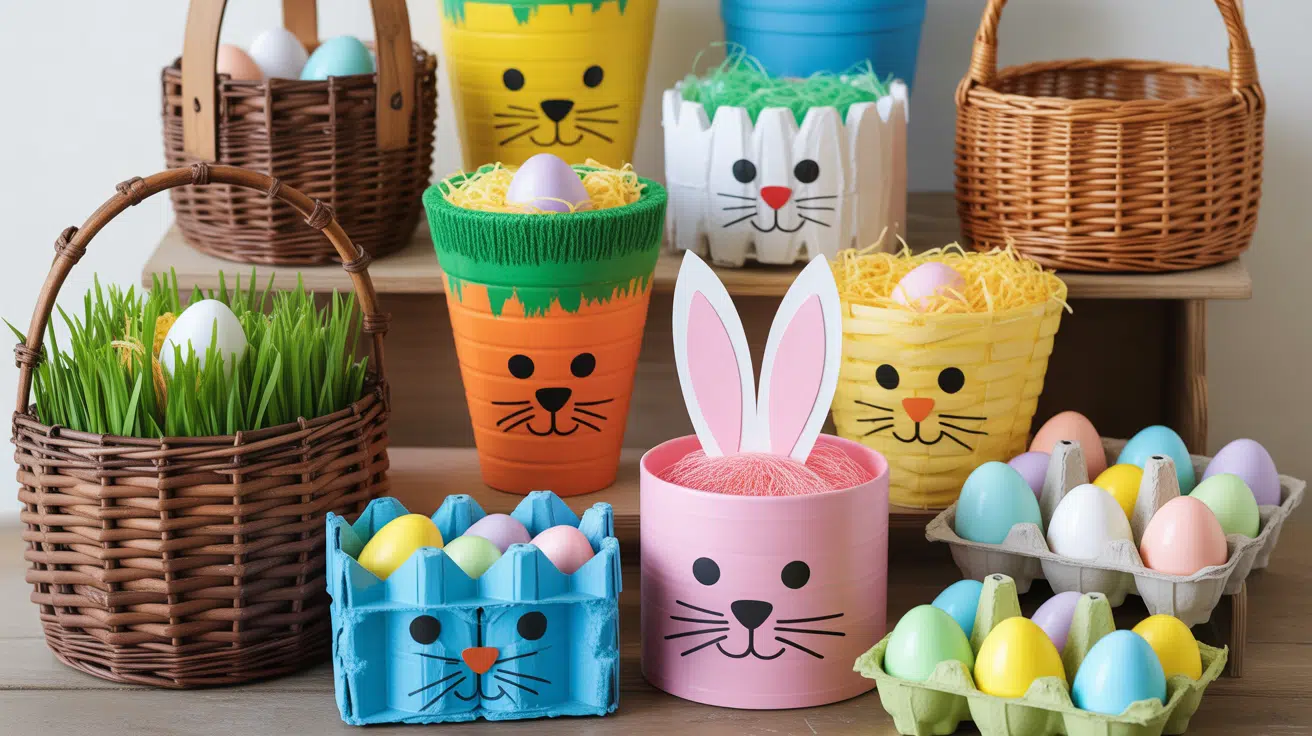
32. Recycled Milk Jug Carrot Basket
Cut and paint a milk jug orange, then add green paper at the top for a carrot container. This eco-friendly craft turns recyclables into festive Easter storage.
Materials Used: Clean empty milk jug, orange paint, green construction paper, scissors, and glue
Steps:
- Cut the milk jug to create a basket shape
- Paint the jug orange and let it dry completely
- Cut and glue green paper strips at the top to look like carrot leaves
33. Paper Weaving Easter Basket (Large Strips)
Weave wide paper strips together to form a simple basket. This intro to weaving helps toddlers learn patterns while creating something useful.
Materials Used: Colored construction paper (cut into wide strips), glue or tape, and a stapler
Steps:
- Cut paper into wide strips (1-2 inches)
- Weave strips over and under to create a mat
- Fold up the sides and secure with glue or staples
34. Tissue Box Bunny Basket
Cover a tissue box with paper and add bunny ears and a face. This quick transformation turns an everyday item into an adorable Easter container.
Materials Used: Empty tissue box, white paper or paint, construction paper (for ears), googly eyes, and glue
Steps:
- Cover the tissue box with white paper or paint it
- Cut and attach two long bunny ears to the top
- Add googly eyes and a pink nose to complete the bunny face
35. Felt Pouch Treat Holder, Bunny-Shaped
Sew or glue felt into a simple pouch in the shape of a bunny head. This soft holder is reusable and perfect for carrying small Easter goodies.
Materials Used: Felt sheets (white and pink), fabric glue or needle and thread, ribbon, and googly eyes
Steps:
- Cut two bunny head shapes from white felt
- Glue or sew the edges together, leaving the top open
- Add eyes, ears, and a tie with a ribbon
36. Popsicle Stick Easter Basket
Glue craft sticks together to form a basket shape, then paint them bright colors. This classic craft teaches basic building skills and creates a sturdy little basket.
Materials Used: Popsicle sticks, craft glue, paint or markers, and a pipe cleaner (for handle)
Steps:
- Arrange popsicle sticks in a square base and glue them together
- Build up sides by stacking and gluing more sticks
- Attach a pipe cleaner handle and decorate with paint
37. Egg Carton Nest for Mini Eggs
Cut apart egg carton cups and fill them with paper grass and small eggs. These tiny nests are perfect for displaying treats or small toys.
Materials Used: Cardboard egg carton, scissors, paint (optional), paper, grass or shredded paper, and small plastic eggs
Steps:
- Cut individual cups from the egg carton
- Paint the cups if desired and let them dry
- Fill with paper grass and nestle small eggs inside
38. Yarn-Wrapped Tin Can Carrot Container
Wrap orange yarn around a clean tin can and top with green paper leaves. This textured container is both beautiful and functional for Easter storage.
Materials Used: Clean tin can (edges smoothed), orange yarn, glue, and green construction paper
Steps:
- Apply glue around the tin can in sections
- Wrap orange yarn tightly around the entire can
- Cut and glue green paper strips at the top to look like carrot tops
39. Construction Paper Carrot Treat Bag
Fold and glue orange paper into a cone shape with green fringe on top. This simple bag is perfect for filling with candy or small surprises.
Materials Used: Orange construction paper, green construction paper, glue or tape, and scissors
Steps:
- Roll orange paper into a cone shape and secure with glue
- Cut green paper into thin strips to make fringe
- Glue the green fringe to the top opening of the cone
40. Decorated Cardboard Box Easter Basket
Let your toddler paint and sticker a small box to use as their special basket. This open-ended craft gives toddlers creative freedom to design their own unique container.
Materials Used: Small cardboard box, paint or markers, stickers, glue, and ribbon or paper (for handle)
Steps:
- Let your toddler paint or color the outside of the box
- Add stickers and decorations all over
- Attach a ribbon or paper strip as a handle
Window and Hanging Decor Easter Crafts
Brighten up your home with colorful decorations that toddlers can proudly display. These hanging crafts add festive cheer to any room.
41. Wax Paper Egg Sun Catcher
Place crayon shavings between wax paper sheets, then iron them to create colorful egg-shaped windows. The melted colors create a beautiful stained-glass effect when sunlight shines through.
Materials Used: Wax paper, crayon shavings, iron (adult use only), towel, and scissors
Steps:
- Sprinkle crayon shavings between two sheets of wax paper
- Cover with a towel and iron on low heat until crayons melt
- Cut into an egg shape and hang in a window
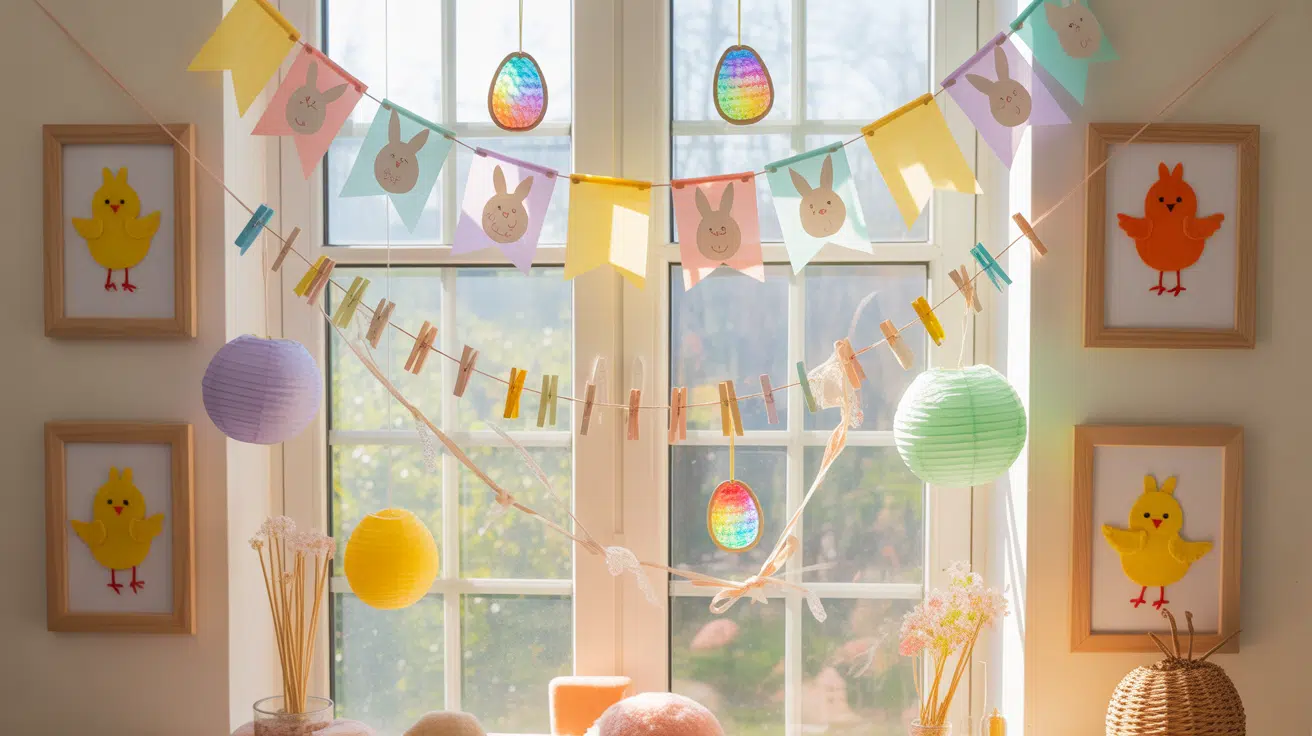
42. Tissue Paper Bunny Garland
String together bunny shapes made from colorful tissue paper across a wall. This festive decoration adds a pop of color to any room during Easter.
Materials Used: Colored tissue paper, scissors, string or yarn, glue, and tape
Steps:
- Cut bunny shapes from tissue paper in different colors
- Apply glue to the back of each bunny
- Press onto the string and hang it across a wall or doorway
43. Felt Bunny/Chick Banner
Cut felt into bunny and chick shapes and hang them on ribbon or string. This reusable banner can be stored and brought out every spring.
Materials Used: Felt sheets (various colors), scissors, ribbon or twine, and glue or needle and thread
Steps:
- Cut bunny and chick shapes from felt
- Attach each shape to the ribbon using glue or stitches
- Hang the banner across a mantel or wall
44. Egg-Shaped Paper Lantern (Battery Tealight Safe)
Create a paper egg shell and place a safe LED light inside. This glowing decoration adds a warm touch to evening celebrations.
Materials Used: Colored cardstock or construction paper, scissors, glue or tape, and battery-operated LED tealight
Steps:
- Cut and fold paper into an egg shape with cutout designs
- Secure the sides with glue or tape, leaving the bottom open
- Place an LED tealight inside and display it on a shelf
45. Window Cling Egg Shapes with Washable Paint
Paint egg shapes directly on windows with washable paint that peels off easily. This temporary decoration lets toddlers decorate windows without a permanent mess.
Materials Used: Washable window paint or tempera paint mixed with dish soap, paintbrushes, and sponges
Steps:
- Mix paint with a small amount of dish soap
- Let your toddler paint egg shapes and designs on windows
- Peel off when Easter is over and clean with water
46. Yarn Starburst Egg Hanging
Wrap yarn in a starburst pattern inside an egg-shaped frame. This geometric design creates an eye-catching piece of string art.
Materials Used: Cardboard egg frame, colorful yarn, scissors, and tape
Steps:
- Cut a large egg shape from cardboard and remove the center
- Tape one end of the yarn to the back of the frame
- Wrap yarn across the frame in different directions to create a starburst
47. Toilet Paper Roll Hanging Lamb Craft
Turn cardboard tubes into fluffy lambs and hang them with a string. These adorable danglers add a playful touch to any room.
Materials Used: Empty toilet paper rolls, cotton balls, black construction paper, googly eyes, string, and glue
Steps:
- Cover the toilet paper roll with glued-on cotton balls
- Cut and attach black paper for ears, face, and legs
- Thread the string through the top and hang it from the ceiling
48. Pom Pom Bunny Ear Curtain Tie Backs
Glue pom poms onto ribbon to create fun bunny ear shapes for curtains. This functional decor adds Easter charm while keeping curtains open.
Materials Used: Wide ribbon, white and pink pom poms, fabric glue, and safety pins or hooks
Steps:
- Arrange pom poms on ribbon in a bunny ear shape
- Glue the pom poms securely and let them dry
- Wrap around curtains and secure with pins or hooks
49. Handprint Chick Wall Art
Frame your toddler’s painted handprint chick for springtime wall decor. This keepsake art piece captures a moment in time you’ll treasure for years.
Materials Used: Canvas or thick paper, yellow paint, paintbrush, markers, and a frame
Steps:
- Paint your toddler’s hand yellow and press it onto the canvas
- Let the paint dry completely
- Add eyes, a beak, and legs, then place in a frame
50. Paper Chain, Spring Flower, and Egg Garland
Link colorful paper strips into chains with egg and flower cutouts attached. This classic craft is simple enough for toddlers and creates impressive decorations.
Materials Used: Colored construction paper strips, glue or tape, scissors, and string (optional)
Steps:
- Cut paper into strips and link them into a chain
- Cut out egg and flower shapes from paper
- Attach the shapes between chain links or hang separately on a string
Sensory and Process Focused Easter Crafts
These activities focus on exploring textures, colors, and movements rather than making perfect finished products. Toddlers learn best through hands-on sensory play.
51. Shaving Cream Marbled Easter Eggs (Safe Toddler Version)
Swirl food coloring into the shaving cream, then press paper eggs into the mixture. This messy play activity creates beautiful marbled patterns and offers sensory fun.
Materials Used: Shaving cream, food coloring, paper egg cutouts, shallow tray, and paper towels (for cleanup)
Steps:
- Spread shaving cream in a shallow tray
- Drop food coloring onto the cream and swirl with a stick
- Press paper eggs into the mixture and lift to reveal marbled designs
52. Puffy Paint Bunny Footprints
Mix shaving cream and glue to create puffy paint for stamping bunny-shaped prints. The thick, fluffy texture makes this craft extra exciting for little hands.
Materials Used: White school glue, shaving cream, food coloring (optional), mixing bowl, and paper
Steps:
- Mix equal parts glue and shaving cream in a bowl
- Add food coloring if desired
- Let your toddler stamp or paint bunny shapes that dry puffy
53. Cotton Ball, Fluffy Chick, Sensory Glue on Art
Let toddlers squeeze glue and press cotton balls onto a chick outline. This process-focused activity builds hand strength while creating soft texture.
Materials Used: Squeeze bottle glue, cotton balls, yellow construction paper with chick outline, and markers
Steps:
- Draw or print a chick outline on paper
- Let your toddler squeeze glue inside the outline
- Press cotton balls onto the glue to cover the chick
54. Jelly Bean Color Sorting into Egg Cup Craft
Sort colorful jelly beans by color into different sections of an egg carton. This activity teaches colors and sorting skills while doubling as a treat holder.
Materials Used: Egg carton, colorful jelly beans or pom poms, small bowl, and markers (to label colors)
Steps:
- Place mixed jelly beans in a bowl
- Let your toddler sort them by color into egg carton cups
- Label each cup with the matching color name
55. Sand-Glue Bunny Picture (Sandbox Style)
Draw with glue on paper, then sprinkle sand over it to create a textured piece of art. This craft brings the beach indoors with a springtime twist.
Materials Used: White glue, sand (craft or play sand), paper with bunny outline, and a tray (to catch excess)
Steps:
- Draw a bunny or let your toddler squeeze glue freely on paper
- Sprinkle sand generously over the glue
- Shake off excess sand and let the picture dry
56. Pom Pom Drop into Egg Carton (Fine Motor)
Practice dropping pom poms into egg carton cups for hand coordination. This simple activity builds important skills through repetitive play.
Materials Used: Egg carton, colorful pom poms, and a bowl or basket
Steps:
- Place the egg carton on a table
- Give your toddler a bowl of pom poms
- Encourage them to drop one pom pom into each cup
57. Rice-Filled Easter Sensory Bin with Hidden Eggs
Fill a container with colored rice and hide small plastic eggs for children to find. This sensory bin provides endless exploration and discovery.
Materials Used: Large plastic bin, uncooked rice (colored with food coloring), small plastic eggs, and scoops or cups
Steps:
- Fill the bin with colored rice
- Hide small plastic eggs throughout the rice
- Let your toddler dig, scoop, and search for hidden treasures
58. Scrap Paper Collage Rabbit Tails (Torn Pieces)
Tear scrap paper and glue the pieces onto a rabbit tail shape. This no-scissors activity lets toddlers practice tearing while creating a fluffy texture.
Materials Used: Scrap paper (white, pink, or colorful), glue stick, paper with a rabbit outline, and crayons
Steps:
- Draw a bunny with a large tail area on paper
- Let your toddler tear scrap paper into small pieces
- Glue the torn pieces onto the tail area
59. Glitter Glue Carrot Art (With Minimal Mess)
Use glitter glue pens to decorate carrot shapes without messy glitter. This contained craft gives the sparkle without cleanup hassles.
Materials Used: Orange construction paper (cut into carrot shapes), glitter glue pens, green paper (for tops), and glue stick
Steps:
- Cut carrot shapes from orange paper
- Let your toddler decorate with glitter glue pens
- Attach green paper strips at the top once dry
60. Large-Scale Mural
Tape a big sheet of paper to the floor and let toddlers paint a huge egg together. This collaborative art project encourages movement and creativity on a grand scale.
Materials Used: Large roll of paper or taped-together sheets, washable paints, paintbrushes, sponges, and painter’s tape
Steps:
- Tape a large piece of paper to the floor
- Draw a giant egg outline with a marker
- Let toddlers paint freely inside and outside the egg shape
 Important Safety Note:
Always use non-toxic, washable craft supplies labeled safe for young children. Supervise toddlers closely throughout the activity, especially when using small items like pom poms, beads, or buttons that could be choking hazards. If your child still puts objects in their mouth, avoid crafts with tiny parts entirely.
How to Choose Easter Crafts for Toddlers

Picking the right craft for your toddler makes all the difference between a fun activity and a frustrating one. Here are the Best Craft Types that match your child’s age.
| Age Range | Best Craft Types | What They Can Handle |
|---|---|---|
| 1 to 2 years | Simple sensory play, large stickers, and finger painting | Tearing paper, sticking large stickers, dabbing paint with hands or sponges |
| 2 to 3 years | Cotton ball gluing, stamping, and basic collages | Using glue sticks, pressing stamps, placing pom poms, and simple cutting with help |
| 3 to 4 years | Handprint art, paper plate crafts, and basic folding | Cutting with safety scissors, following 2 to 3 step directions, and more precise gluing |
| 4 to 5 years | Weaving, detailed decorating, and making puppets | Complex cutting, working independently, and combining multiple techniques |
Tips for Displaying and Celebrating the Crafts
Your toddler worked hard on their Easter crafts, so let’s make sure they get the spotlight they deserve. Here are simple ways to display, celebrate, and preserve these special creations.
- Fridge gallery: Use magnets to hang finished crafts on the refrigerator where your toddler can see them every day.
- Easter table centerpiece: Place crafts in the middle of your holiday table so everyone can admire them during meals.
- Window display: Tape sun catchers and colorful crafts to windows where sunlight makes them glow.
- Craft corner shelf: Dedicate a low shelf for your toddler to arrange their finished projects.
- Egg hunt markers: Use decorated paper eggs as clues or markers along your egg hunt path.
- Basket for collecting: Let your toddler use their handmade basket to gather eggs during the hunt.
- Party decorations: Hang the garlands and banners your toddler made for Easter gatherings.
- Place cards: Write names on decorated egg crafts to mark seats at your Easter table.
Summing Up
You now have fun Easter crafts for toddlers right at your fingertips. From colorful egg decorations to fluffy bunny faces, there’s something here for every toddler and every skill level.
Remember, the goal isn’t perfection. It’s about spending quality time together, building skills, and making memories that last.
Pick a few favorites that match your toddler’s interests and abilities. Gather your supplies, set up your craft space, and let the creativity flow. Your little one will feel so proud of what they create, and you’ll love watching them learn and grow.
Ready to start crafting? Choose one project from the list above and try it this week. Share your toddler’s creations with family and friends.
Want more fun activity ideas for little ones? Check out my other toddler craft guides and seasonal projects. Happy crafting this Easter season!


