DIY Upholstered Headboard: Step-by-Step Guide
You scroll through Pinterest, spot a gorgeous headboard, and instantly want it for your bedroom.
Then you see the price and close the tab. We’ve all been there.
But here’s something most people don’t realise: you can build that same headboard yourself.
No sewing, no complicated tools, no prior experience. Just a few basic materials, a staple gun, and a free afternoon.
It’s one of those projects that looks harder than it actually is. And once it’s up on your wall, it genuinely changes the whole feel of the room.
If you’re on a tight budget or enjoy making things yourself, this walkthrough covers everything from picking the right style to mounting it in place.
Let’s get into it.
Popular Types of Upholstered Headboards
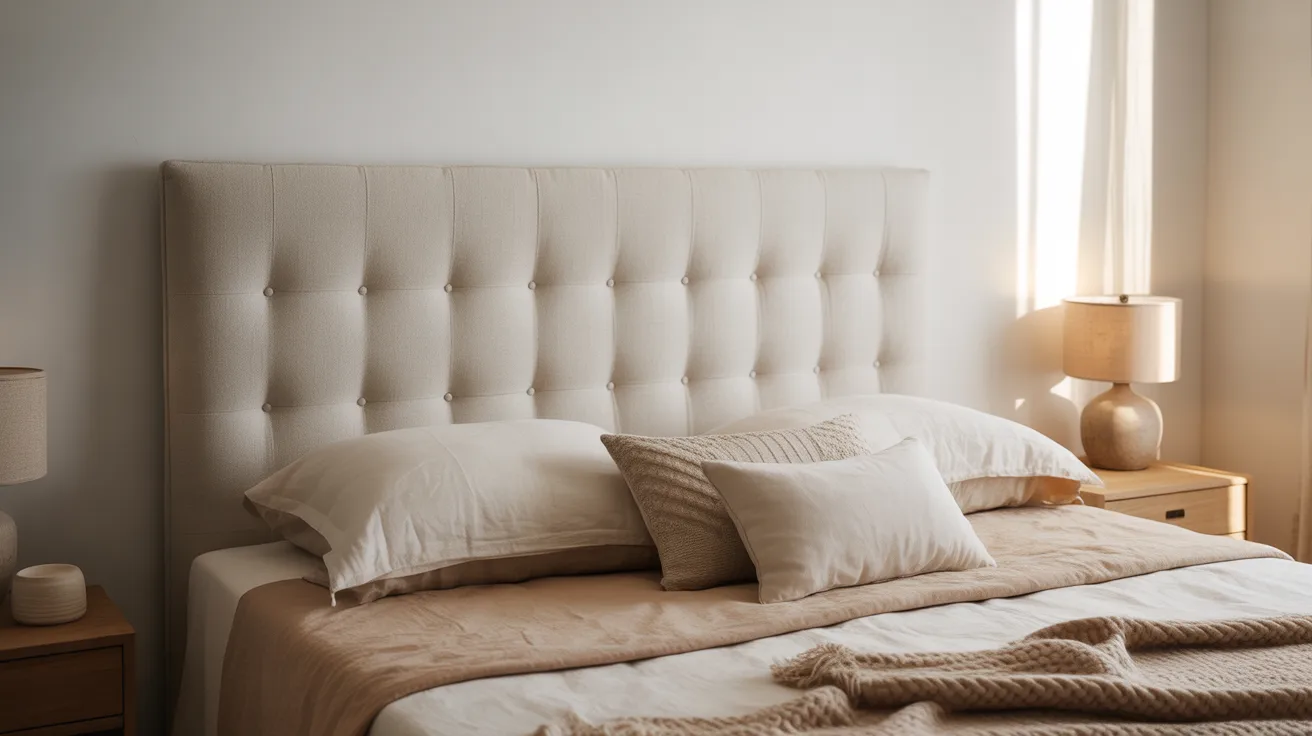
Getting the right upholstered headboard really does make a difference; it can pull a whole room together or completely change the vibe of your bedroom.
-
Shape: Upholstered headboards come in a variety of shapes, from clean rectangular panels and elegant arched curves to dramatic wingback styles and classic tufted designs. Your choice of shape sets the overall tone of the room, so pick one that complements your existing décor.
-
Mounting: You can mount it on the wall for a floating, modern look, attach it directly to your bed frame for easy setup, or build a freestanding version with legs if you prefer flexibility and no wall drilling.
-
Fabric: Fabric choice is where you can really personalize the piece. Linen and neutrals keep things calm and versatile; velvet and jewel tones add richness and drama; leather or faux leather brings a sleek, durable finish; while patterned or printed fabrics are a great way to make the headboard a true focal point.
It’s also worth considering practicality: cleaning upholstery made from linen or faux leather is far easier than maintaining delicate or patterned fabrics, especially in a bedroom setting.
There’s no wrong choice; it just comes down to what feels right for your space and your style.
Materials & Tools You’ll Need
Most of these are easy to find at your local hardware or fabric store, and having them all ready before you begin makes the process much smoother.
Before you start building your DIY upholstered headboard, gather everything you need:
- Plywood or MDF board
- Foam padding (2–3 inches thick)
- Batting
- Upholstery fabric
- Staple gun and staples
- Foam adhesive spray
- Jigsaw or circular saw
- Measuring tape, chalk & scissors
- Drill and mounting hardware
- Buttons, nailhead trim, or piping (optional)
Once you’ve got everything laid out, the build itself is pretty straightforward.
How to Make a DIY Upholstered Headboard: Step-by-Step
Building your own headboard doesn’t have to be overwhelming, break it down step by step and the whole thing becomes pretty manageable:
Step 1: Measure and Plan Your Headboard
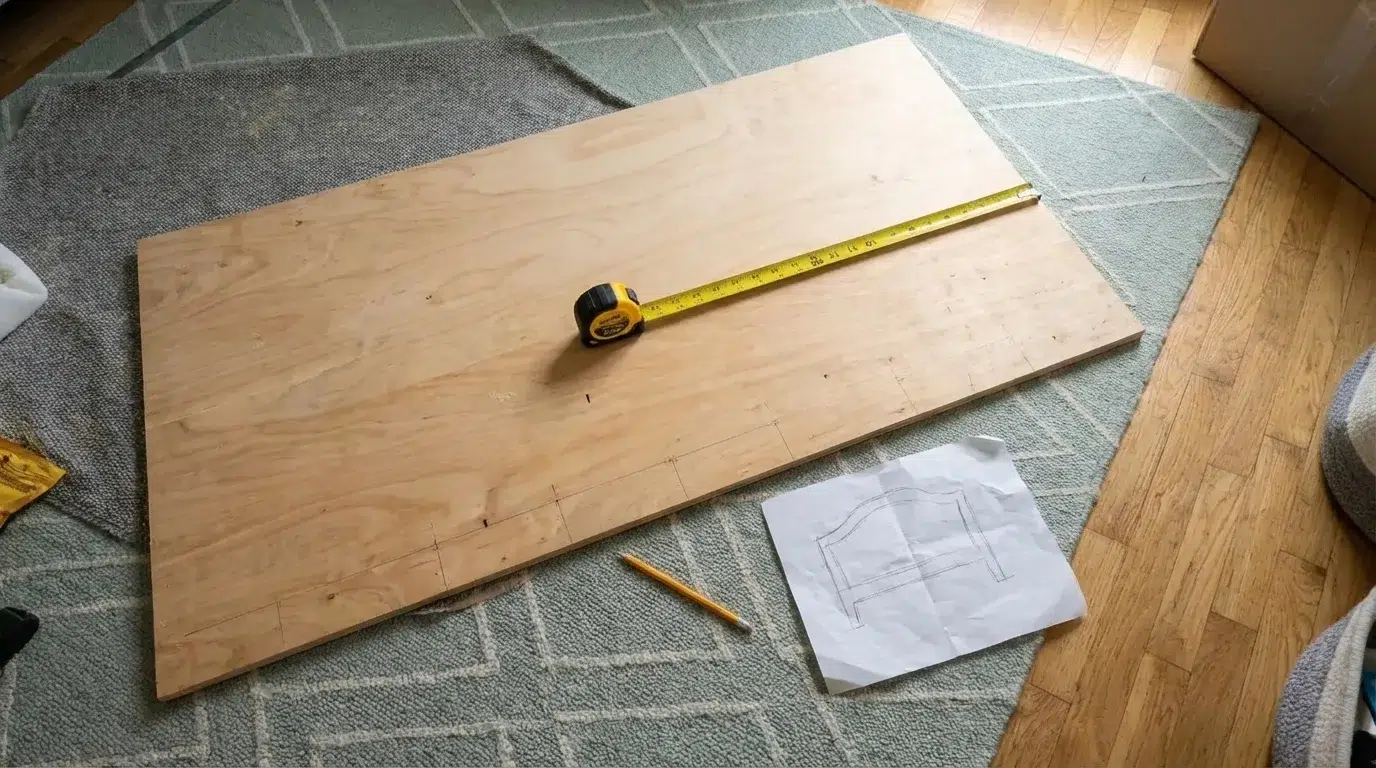
Start by picking the right size for your bed. A good rule of thumb, your headboard should be a few inches wider than your mattress.
Standard widths are 38″ for Twin, 54″ for Full, 60″ for Queen, and 76″ for King.
Aim for a height of 24–48 inches, depending on your ceiling and style. Sketch it out or print a template before cutting.
Step 2: Cut the Base Board
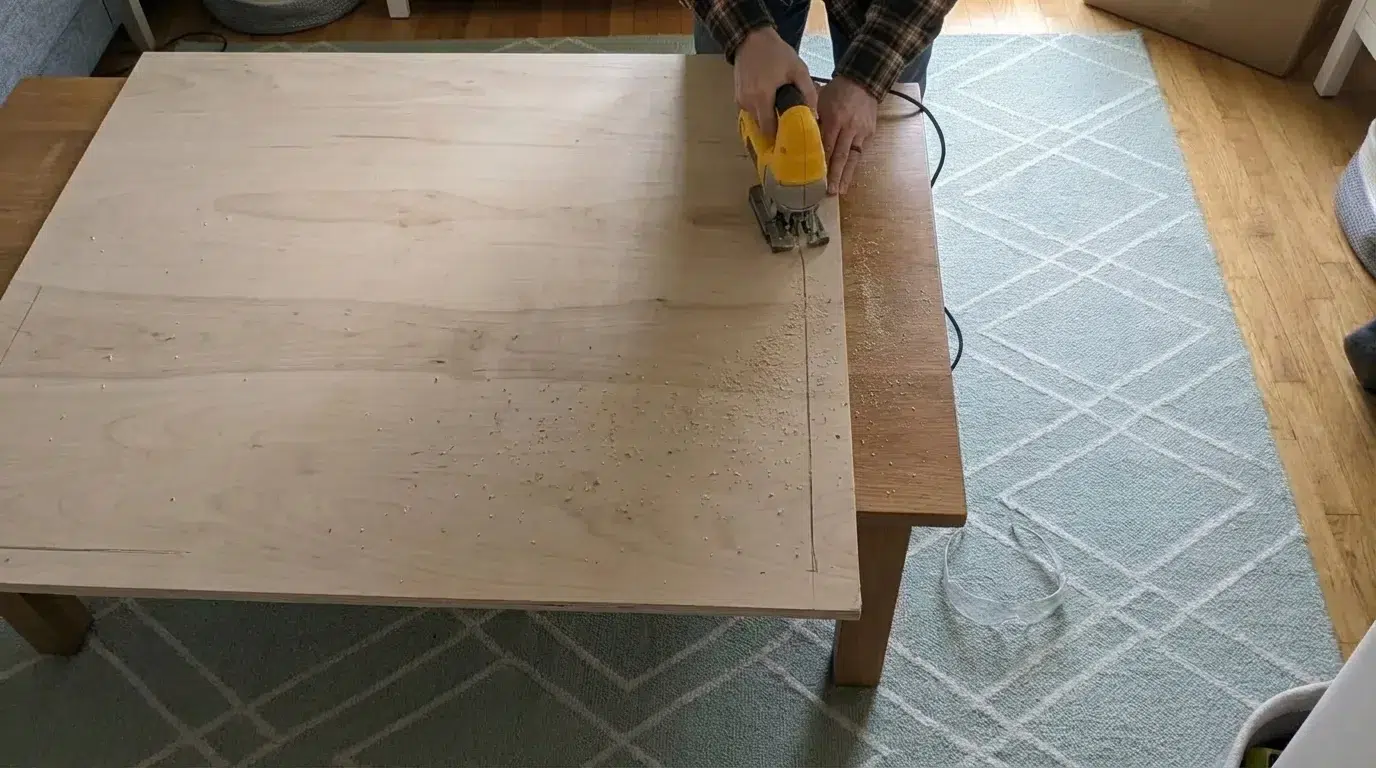
Use ¾-inch plywood or MDF, it’s sturdy and easy to work with. Cut a straight rectangle for a clean, modern look or use a jigsaw for an arched shape. Once cut, sand all the edges smooth so nothing snags your fabric later.
Step 3: Cut and Attach the Foam
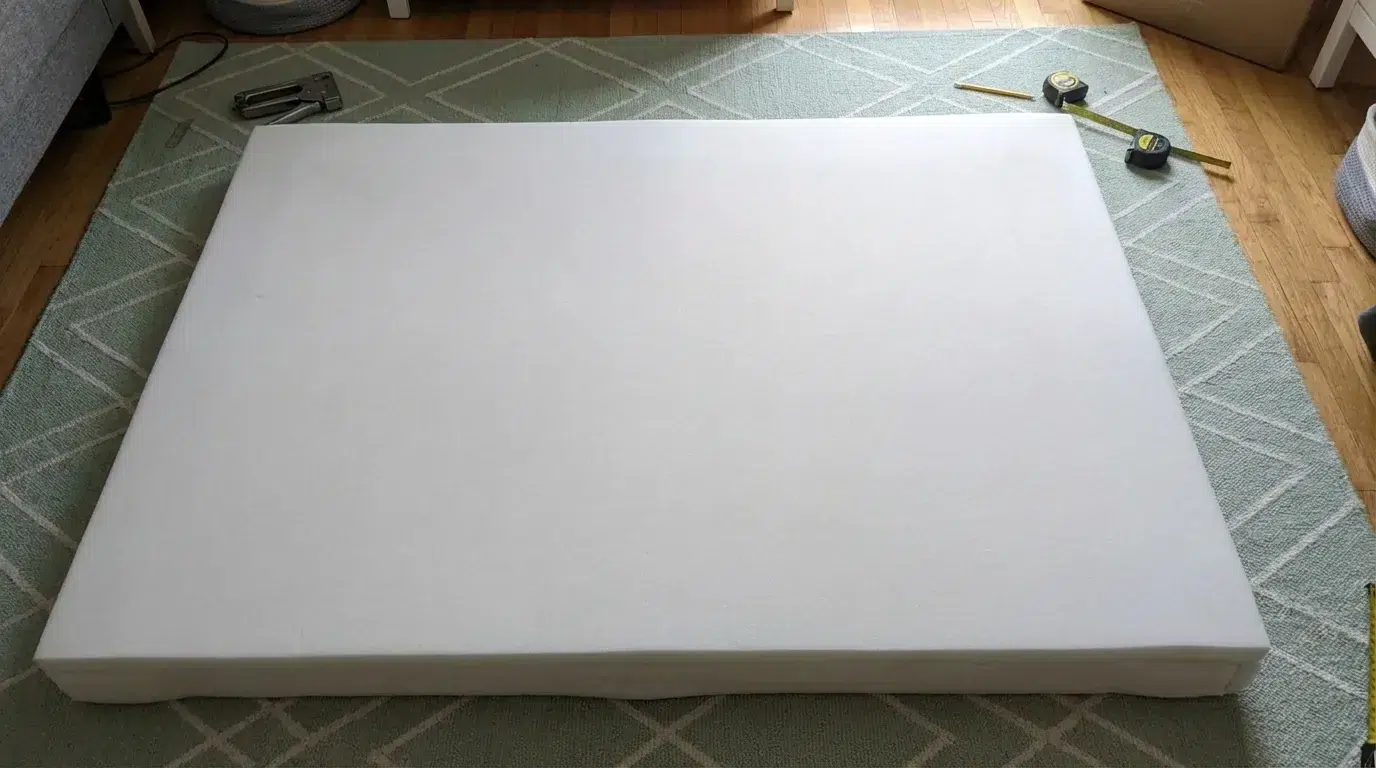
Cut your foam to match the board size exactly. A serrated knife or electric carving knife gives the cleanest cut. Spray foam adhesive on the board, press the foam down, and hold it for a few seconds. Layer two pieces of foam if you want it extra soft and plush.
Step 4: Wrap with Batting

Lay the batting flat, place the foam-side down on top, and pull the batting around to the back. Staple it in place, working from the center outward on each side. Pull it tight as you go, this is what gives your headboard that smooth, rounded look. Fold the corners like you’re wrapping a gift.
Step 5: Cut and Attach the Fabric
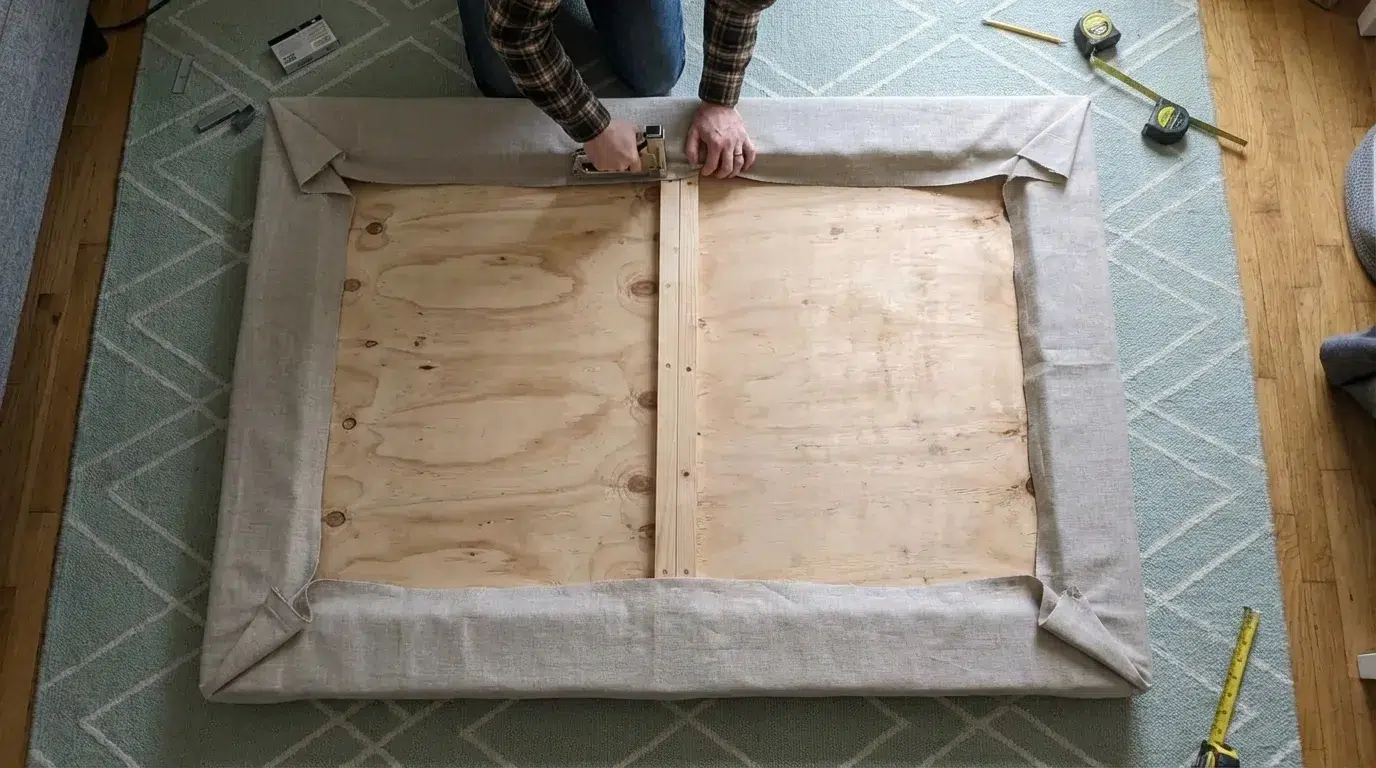
Cut your fabric at least 6–8 inches larger than the board on all sides. Lay it face-down on a flat surface, center the board on top, and start stapling from the middle of each side. Pull the fabric taut as you work toward the corners. Fold the corners neatly and staple them flat, no bunching.
Step 6: Add Decorative Details (Optional)
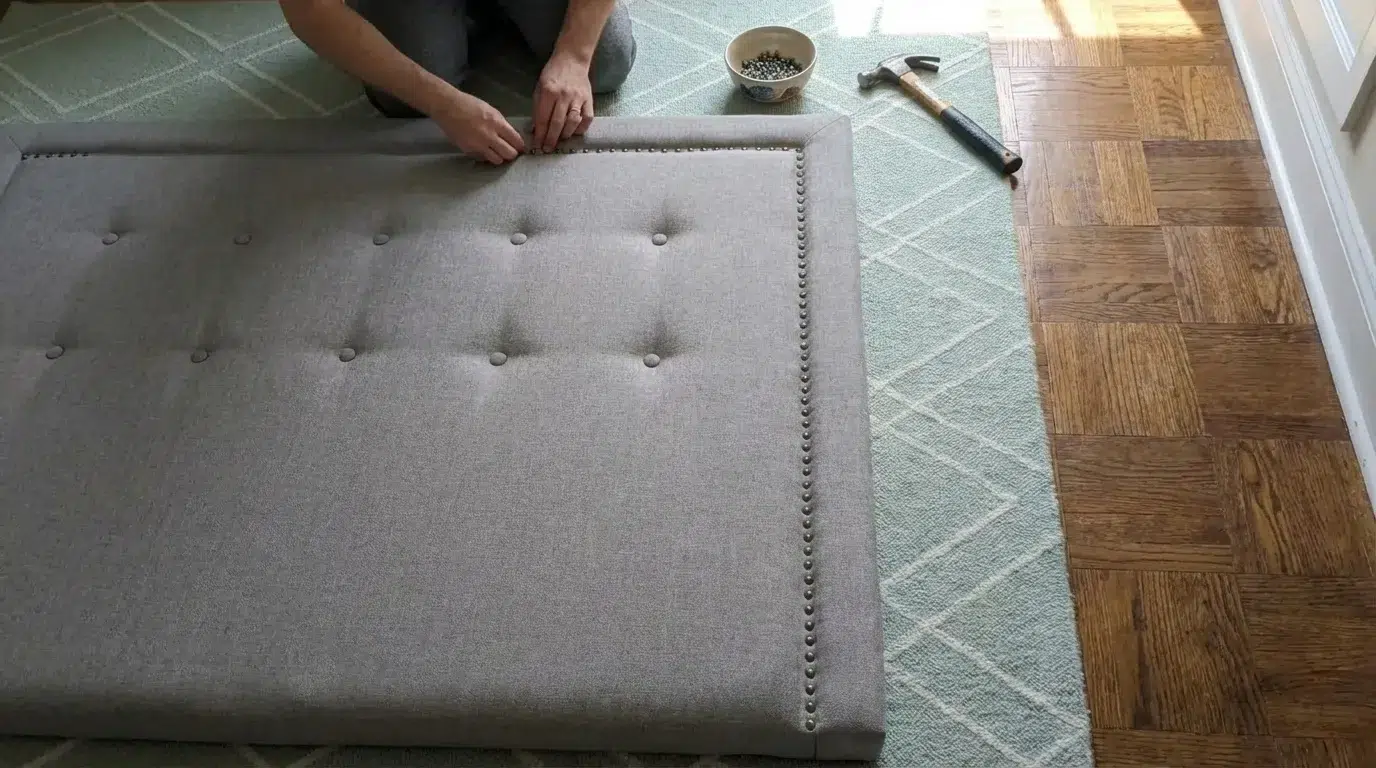
Want to take it up a notch? Try one of these finishing touches:
- Button tufting: mark a grid, push buttons through the fabric and foam using a long needle
- Nailhead trim: press individual nailheads along the edges for a classic look
- Piping or ribbon: glue or staple along the border for a clean, tailored finish
Step 7: Mount or Attach the Headboard
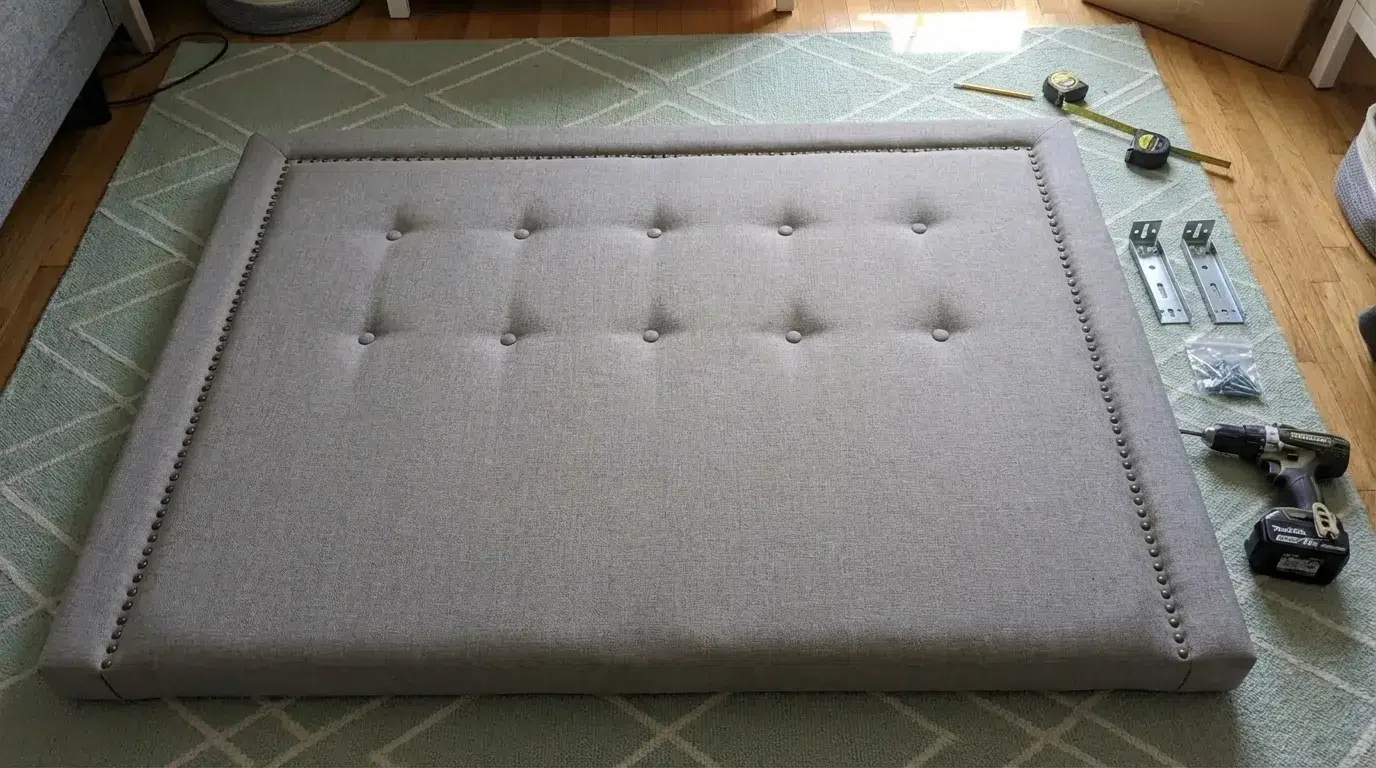
Choose how you want to hang or attach it:
- Wall-mounted: find the studs, drill in a French cleat or bracket, and hang the board
- Bed frame: drill holes at the base and bolt it directly to your frame
- Freestanding: attach furniture legs to the bottom so it stands on its own behind the bed
And that’s it, your DIY upholstered headboard is ready. Step back and enjoy the upgrade you just made with your own hands.
Estimated Budget Breakdown by Range
| Item | Budget (Under $50) | Mid-Range ($50–$100) | Premium ($100+) |
|---|---|---|---|
| Plywood or MDF board | $10–$15 | $15–$20 | $20–$30 |
| Foam padding | $10–$15 | $20–$30 | $35–$50 |
| Batting | $5–$8 | $8–$12 | $12–$20 |
| Upholstery material | $10–$15 | $20–$40 | $50–$100+ |
| Staple gun & staples | $8–$12 | $12–$20 | $20–$35 |
| Foam adhesive spray | $5–$8 | $8–$10 | $10–$15 |
| Decorative extras (optional) | — | $10–$20 | $25–$50 |
| Estimated Total | $40–$50 | $70–$100 | $120–$200+ |
A Few Ways to Save:
- Check Facebook Marketplace or thrift stores for leftover foam or fabric remnants
- Buy material by the yard from a fabric store rather than pre-packaged upholstery kits
- Reuse an old staple gun if you already have one at home
- Skip decorative trims on the first build; you can always add them later
No matter which range you’re working with, a DIY upholstered headboard will almost always cost less than buying a ready-made one.
Retail headboards in the same style typically run anywhere from $150 to $600+, so even a premium DIY build saves you a significant amount.
Common Mistakes to Avoid
Even a simple project can go sideways if you’re not careful. Knowing what to avoid ahead of time saves you a lot of frustration down the line.
-
Choosing the wrong fabric: Thin or slippery fabric shifts while stapling and never looks smooth. Always go for a medium-weight upholstery fabric.
-
Skimping on foam or skipping the batting: Without enough padding, your headboard will look flat and feel hard. Batting is what gives it that soft, polished finish.
-
Uneven stapling: Pulling the fabric unevenly leads to lumps and puckers that are hard to fix later. Always staple from the center outward and keep the tension consistent.
-
Not measuring before cutting: A headboard that’s too narrow or too short for your bed size can throw off the whole look of the room. Measure twice, cut once.
Avoiding these mistakes doesn’t take much extra effort, but it makes a noticeable difference in the final result.
A little patience and attention to detail go a long way when you’re building something meant to last.
Conclusion
Making a DIY upholstered headboard is one of the easiest ways to upgrade your bedroom without spending a lot.
With the right materials and a little patience, you can build something that looks completely custom-made, because it is. It’s the kind of project that feels rewarding from start to finish.
Take your time with the material and stapling, and don’t skip the batting.
Those two things make the biggest difference in how the final piece looks and feels. Once you’re done, step back and enjoy it. You built that.
And if you ever want a fresh new look down the road, simply re-upholster it with a different material; there’s no need to start from scratch. It’s that flexible.
If you’ve made your own DIY upholstered headboard or you’re planning to, drop a comment below. What style are you going for?
Frequently Asked Questions
How Long Does It Take To Make a DIY Upholstered Headboard?
Most people finish it in 2–4 hours. If it’s your first time, give yourself a full afternoon. Once you have all your materials ready, the process moves pretty quickly.
What Is The Best Fabric For an Upholstered Headboard?
Go for a medium-weight upholstery fabric, such as linen, velvet, or faux leather. These hold up well over time and staple smoothly. Avoid thin or stretchy fabrics, as they wrinkle easily and don’t stay in place.
Can I Make an Upholstered Headboard Without Sewing?
Yes, no sewing needed at all. The entire project is done with a staple gun. You simply wrap the fabric around the board and staple it to the back, just as you would wrap a gift.