DIY Ceiling Mount Shower Curtain Rod
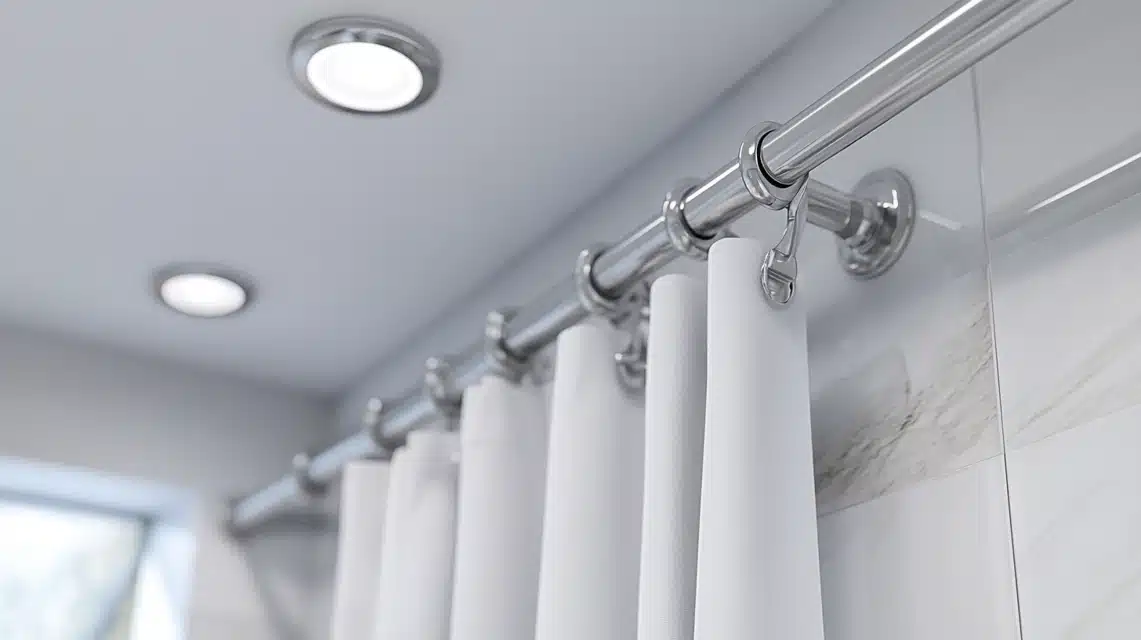
A ceiling-mounted shower curtain rod helps maximize space and provides a sleek, modern look that complements any shower setup.
As someone who loves DIY projects, I decided to take on the challenge of creating my ceiling-mounted rod.
In this guide, I’ll walk you through the entire process, from gathering materials to troubleshooting common issues so you can confidently install your shower curtain rod.
Whether you’re working with a sloped ceiling or looking for a durable, rust-resistant solution, this DIY project is both achievable and rewarding.
Stepwise Guide to Ceiling Mount Shower Curtain Rod
Safety Considerations
1. Securing Mounts into Ceiling Joists or Using Proper Anchors
Always anchor mounts into ceiling joists for stability. If joists are inaccessible, use heavy-duty anchors suitable for your ceiling type to ensure the rod is securely mounted.
2. Weight Limitations of Different Ceiling Types
Consider the weight capacity of your ceiling material (drywall, plaster, etc.). Use the right anchors and brackets designed for the ceiling type to support the rod and curtain.
3. Safe Use of Ladders and Tools When Working at Heights
Always use a stable ladder and wear non-slip shoes. Keep tools within reach and avoid overreaching. Ensure the ladder is on a level surface to prevent falls.
4. Checking for Hidden Electrical Wiring or Plumbing Before Drilling
Use a stud finder with wire detection or a circuit tester to locate hidden electrical wiring. To prevent accidents or damage, avoid drilling near known plumbing lines.
Step 1: Gather Materials
- Galvanized pipe and fittings (for the shower curtain rod)
- Ceiling-mounted brackets or support fittings
- Shower curtain rings (preferably open type)
- Paint (for pipe finishing)
- Carburetor or brake cleaner (to clean the pipe)
- Screws or clamps
- Measuring tape
- Drill and screwdriver
Step 2: Clean the Pipe
- Clean the galvanized pipe using a carburetor or brake cleaner to remove any oil residue from manufacturing.
- Spray the cleaner directly onto the pipe and wipe off any remaining oil, ensuring the surface is ready for painting.
Step 3: Paint the Pipe
- Once the pipe is cleaned, apply a coat of Rustoleum black gloss paint (or any desired color) for a sleek finish.
- Allow the paint to dry completely before moving forward.
Step 4: Measure the Space
- Measure the width of your shower. The pipe should be a few inches longer than the shower width for a proper fit.
- To ensure the shower curtain rod fits correctly, add an extra length (around 3.5 inches) to the measurements for both sides.
Step 5: Install the Ceiling Mount Brackets
- Attach ceiling-mounted brackets or fittings to the ceiling where you want the shower rod placed.
- Use a drill to insert screws into the ceiling and make sure the brackets are securely fastened.
Step 6: Assemble the Pipe Rod
- Connect the galvanized pipe fittings to the pipe, ensuring they match the measured length.
- The pipe will now act as the ceiling-mounted shower curtain rod, supported by the ceiling brackets.
Step 7: Attach the Shower Curtain Rings
- Slide the shower curtain rings onto the pipe before you mount it.
- Make sure the rings slide easily across the rod.
Step 8: Mount the Rod to the Ceiling
- Secure the assembled pipe with rings onto the ceiling-mounted brackets.
- Double-check that everything is tight and stable.
Step 9: Test the Setup
- Pull the shower curtain across the rod to ensure it moves smoothly and stays in place.
- Adjust the rod’s position to ensure it’s perfectly centered above the shower if needed.
Troubleshooting Common Issues

Rod Sagging
- Install additional ceiling supports for extra stability.
- Choose stronger materials, such as thicker metal rods or brackets, to handle the weight of the curtain.
Loose Brackets
- Use heavier-duty anchors designed for your ceiling type to ensure a secure hold.
- Double-check installation into ceiling joists, ensuring they are properly anchored.
Curtain Movement Issues
- Choose high-quality gliders or curtain rings that glide smoothly.
- Ensure the rod is level to prevent the curtain from bunching or shifting unevenly.
Summing Up
The above steps help you achieve a secure, functional, and stylish setup. Here is an overview of the main points covered in the blog.
- Materials Needed: Galvanized pipe, ceiling-mounted brackets, shower curtain rings, screws, and tools.
- Step-by-Step Instructions: Clear guidance on cleaning, painting, measuring, and installing the shower rod.
- Safety Tips: Mounts should be secured into ceiling joists using the right anchors, and hidden wiring or plumbing should be checked.
- Troubleshooting: Solutions for rod sagging, loose brackets, and curtain movement issues.
- Installation on Sloped Ceilings: Use adjustable brackets or extendable support arms for angled ceilings.
- Material Selection: For durability, choose rust-resistant materials like stainless or galvanized steel.
- DIY vs. Pre-Made Rods: Pros and cons of customizing a DIY rod versus buying a pre-made one.
If you found this guide interesting and helpful, consider exploring more DIY projects I have covered on my website.
Frequently Asked Questions
How Do I Handle Installation on Sloped or Angled Ceilings?
Adjustable ceiling brackets or extendable support arms can accommodate the slope, ensuring a secure fit and proper rod alignment with the shower area.
How can I Ensure the Rod is Securely Mounted and Safe?
Use heavy-duty ceiling brackets, ensure all screws are properly anchored into ceiling studs, and check the stability of the installation before use.
Which Materials will Prevent Rust and Increase Durability?
Opt for stainless steel, galvanized steel, or coated pipes. These materials resist rust and corrosion, ensuring long-lasting durability even in humid environments.
Should I DIY or Buy a Pre-Made Ceiling-Mounted Shower Rod?
DIY allows customization to fit your space and budget, while pre-made rods offer convenience and ease of installation with professional finishes but may lack customization.


