Built-In Bunk Beds 101: Inspiration, DIY Instructions, and Best Purchase Options
Built-in bunk beds offer a smart fix for small rooms. They use space well by stacking beds on top of each other. This guide will show you how to make your bunk beds step by step. We’ll cover everything from picking tools to adding the final touches.
I’ll share some design ideas for those who like different styles. You’ll find options from bright and clean looks to cozy farmhouse styles. If building isn’t your thing, don’t worry. We’ll also list some top brands you can buy from.
In this blog post, I will cover:
- Steps to make built-in bunk beds.
- Estimated cost to make built-in bunk beds.
- Built-in Bunk Beds Design Ideas.
- Options to Buy Built-in Bunk Beds.
- How to maintain and take care of Built-in Bunk Beds.
Whether you build or buy, this guide has you covered.
How to Make Built-in Bunk Beds?
Building your bunk beds can be fun and cost-effective.
Here’s a friendly guide to help you create a cozy sleep space for your kids or guests.
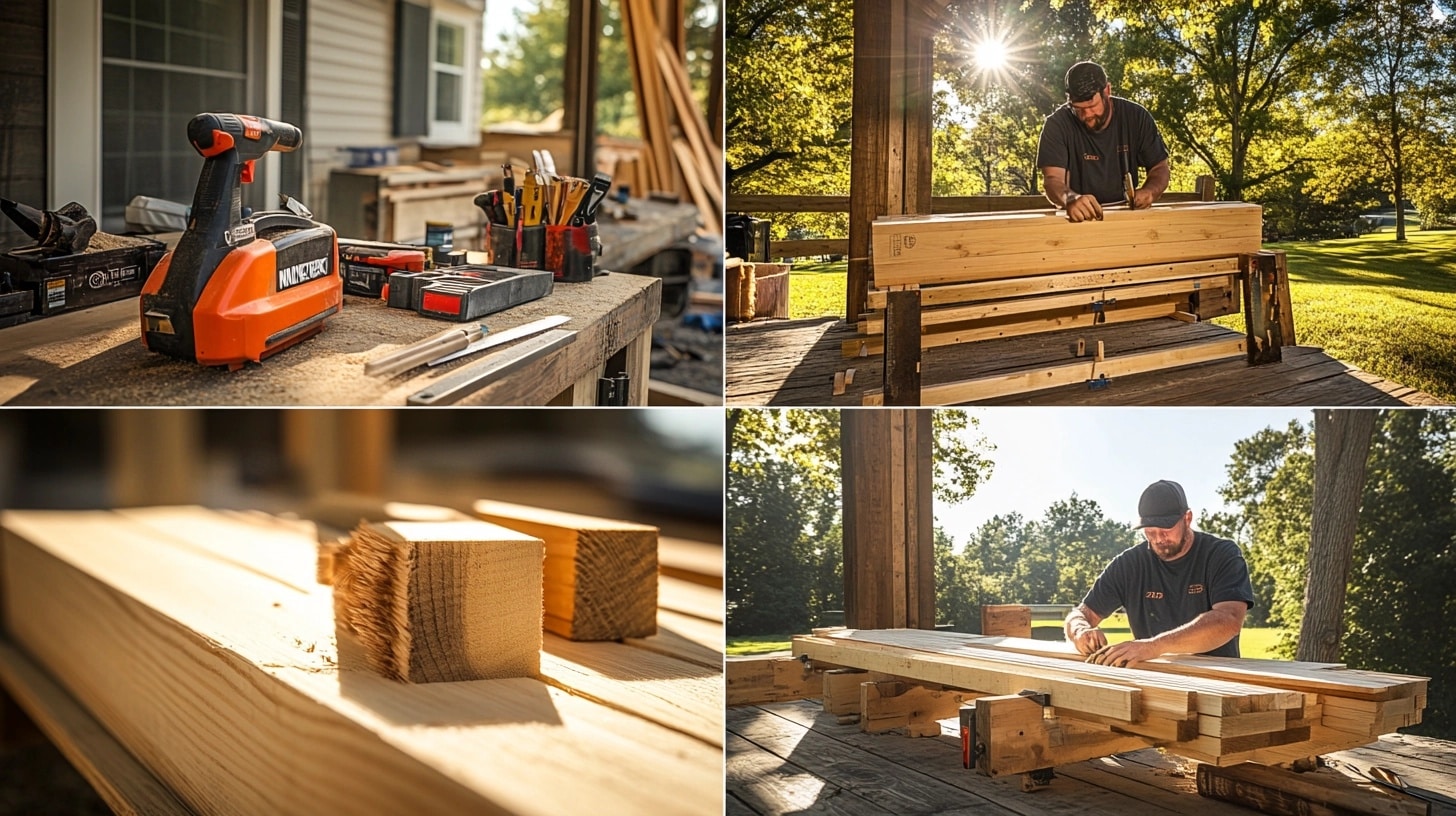
Material Required
| Category | Item | Description |
|---|---|---|
| Tools | Miter saw and circular saw | For cutting wood precisely |
| Power drill | For drilling holes and driving screws | |
| Nail gun | For securing plywood to the frame | |
| Stud finder | To locate wall studs for anchoring | |
| Bar clamps | To hold pieces in place while securing | |
| Long levels | Ensures frames are level and even | |
| Measuring tape | For accurate measurements | |
| Pencil | For marking measurements on wood | |
| Safety gear | Goggles and gloves for protection | |
| Wood & Hardware | 2×4″ boards | For building the mainframes |
| 1/2″ and 1/8″ plywood | For the bed platforms and undersides | |
| 2×2″ pine boards | For ladder construction and rails | |
| Primed 1×8″ boards | For trimming and finishing the fronts | |
| Structural screws (4″ & 5″) | Heavy-duty screws for wall anchoring |
Step 1: Build the Bottom Bunk Bed Platform
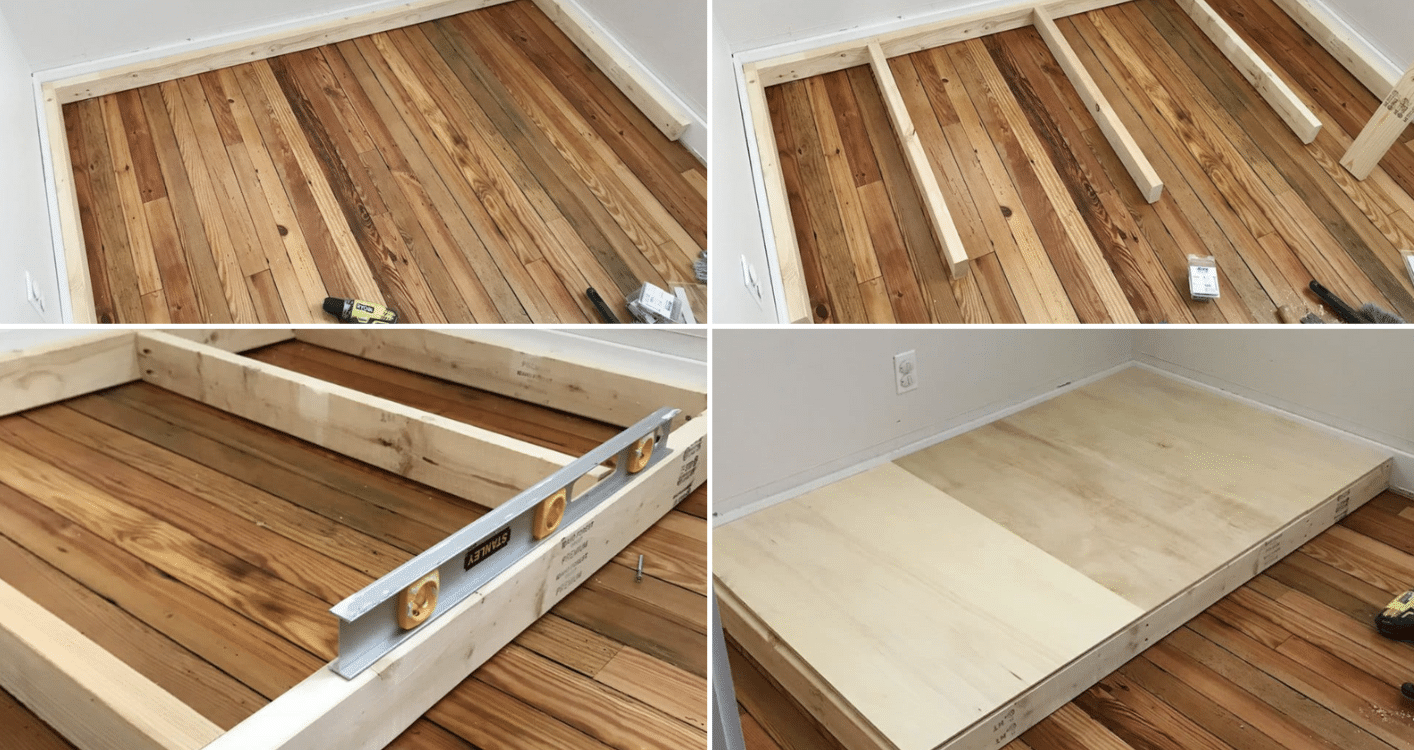
Start with the bottom bunk:
- Make a frame using 2×4″ boards.
- Cut wood to fit wall-to-wall.
- Add cross braces every 12 inches.
- Attach the front piece to complete the frame.
- Cover the mattress base with 1/2″ plywood.
Tip: Raise the platform a few inches off the floor for a nicer look.
Step 2: Slats In
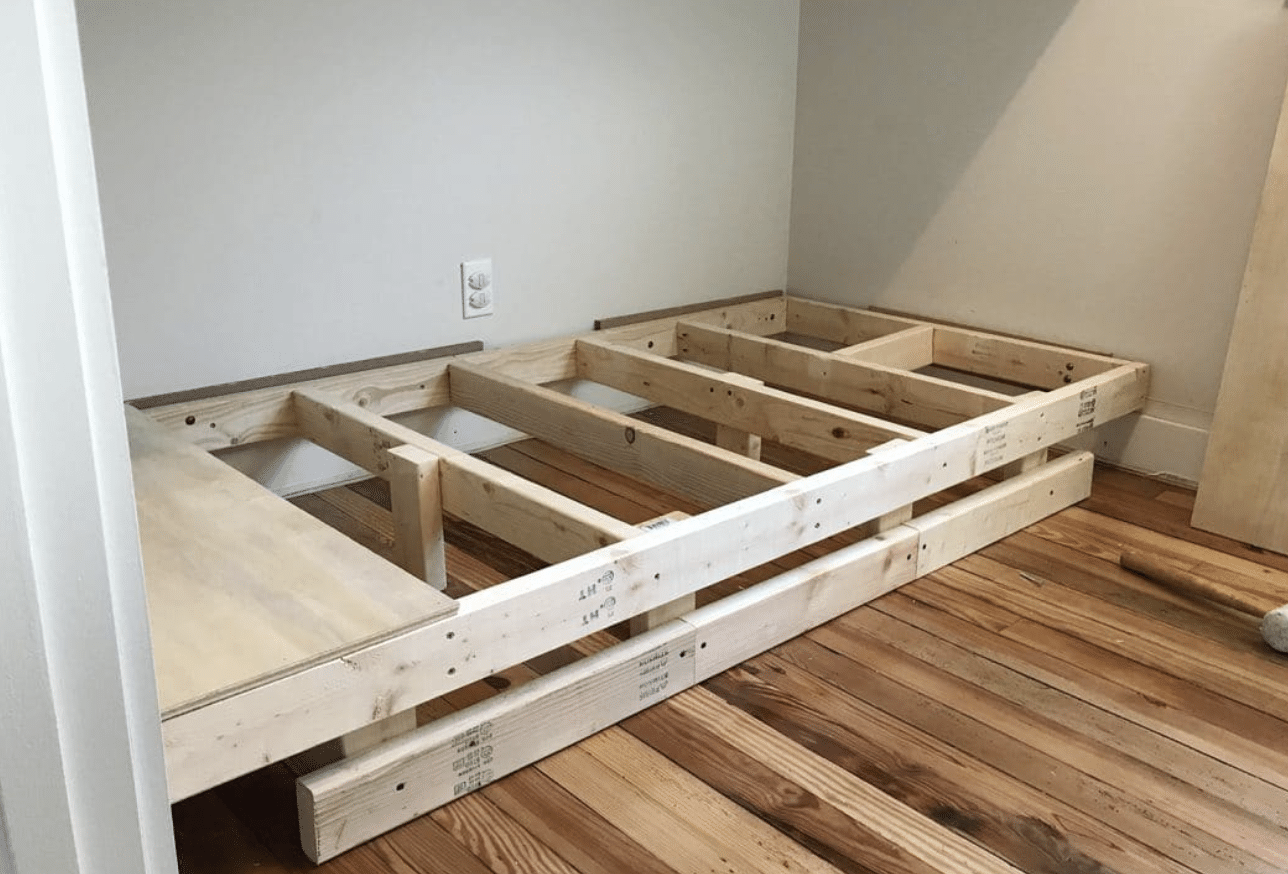
This step is part of building the frame.
The cross braces act as slats to support the mattress.
Step 3: Choose a Height for Your Top Bunk
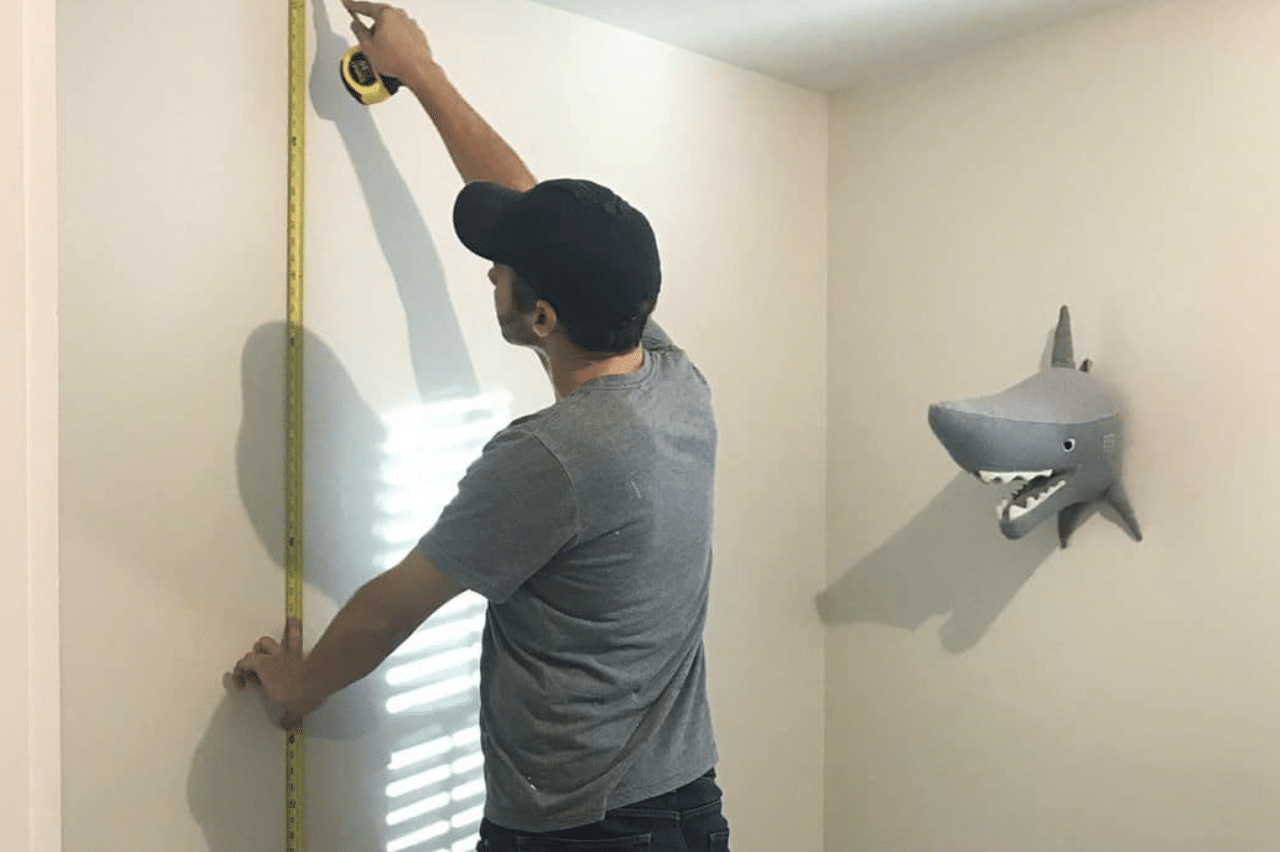
Consider these when picking the top bunk height:
- Equal headroom for both bunks
- Space for adults to sit on bottom bunk
- Not too much space on top to prevent jumping
Tip: Place the top bunk slightly higher than halfway up the wall.
Step 4: Build Your Floating Top Bunk
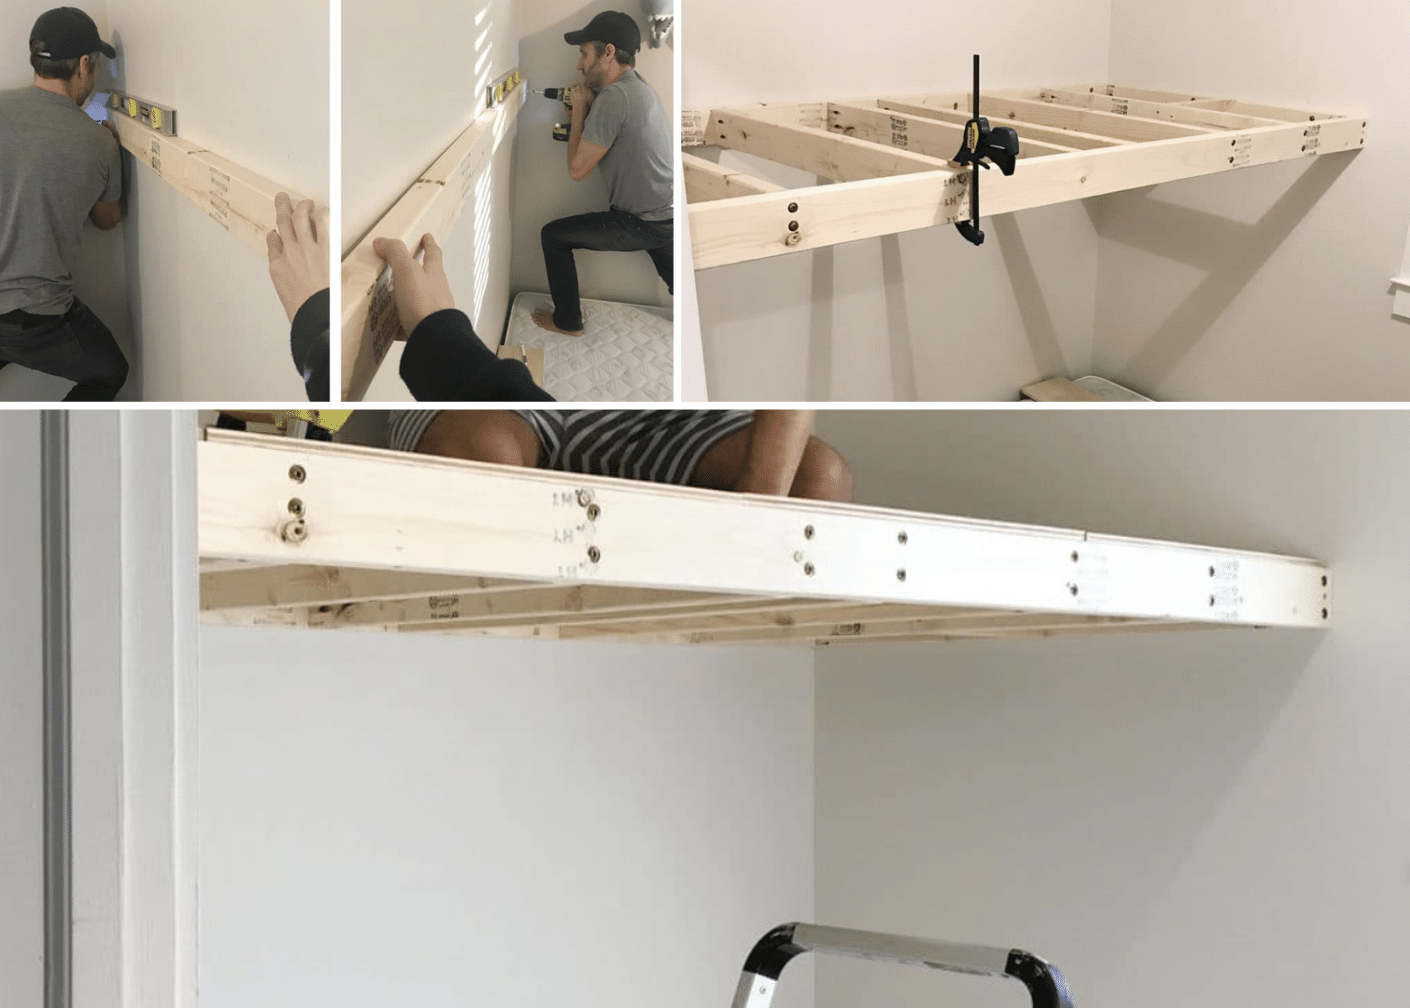
For the top bunk:
- Follow the same process as the bottom bunk.
- Use strong screws to attach it to wall studs.
- Ensure it’s level and stable.
- Add 1/2″ plywood for the mattress base.
Step 5: Build Your Ladder
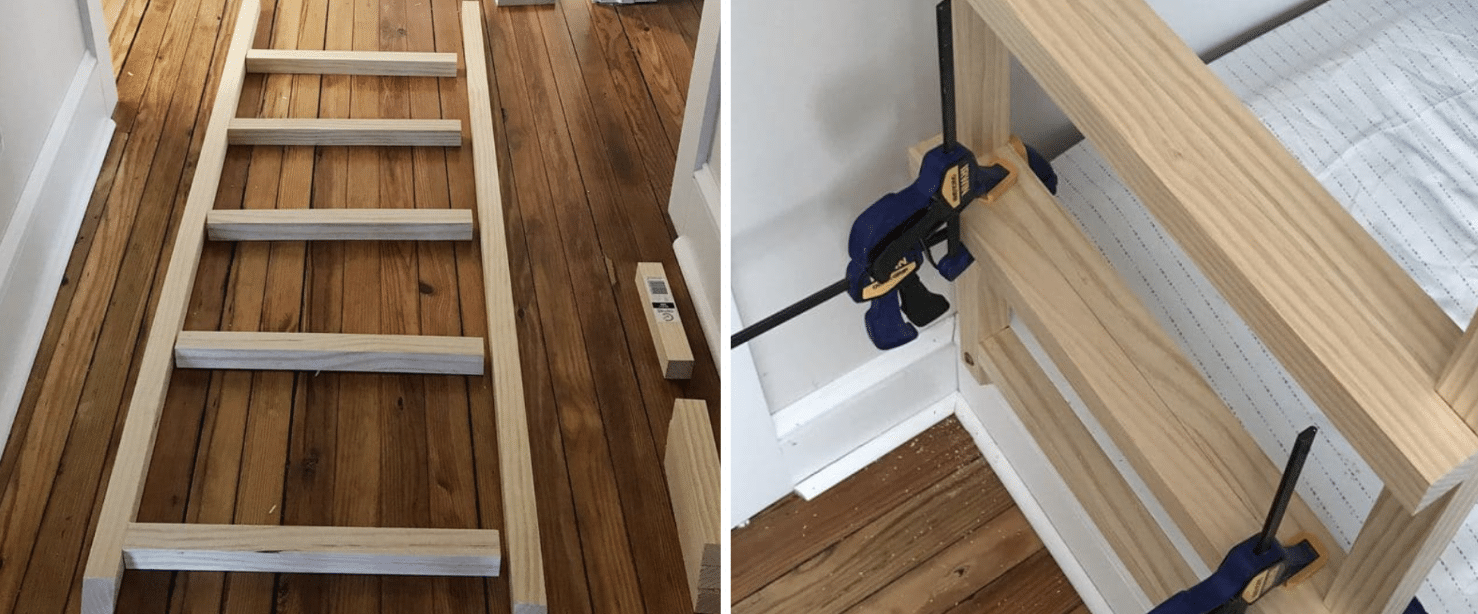
Create a sturdy ladder:
- Use 2×2″ pine boards.
- Make 18″ wide rungs, spaced 12″ apart.
- Use strong screws to join pieces.
- Sand edges for comfort.
Step 6: Adding Trim & Molding
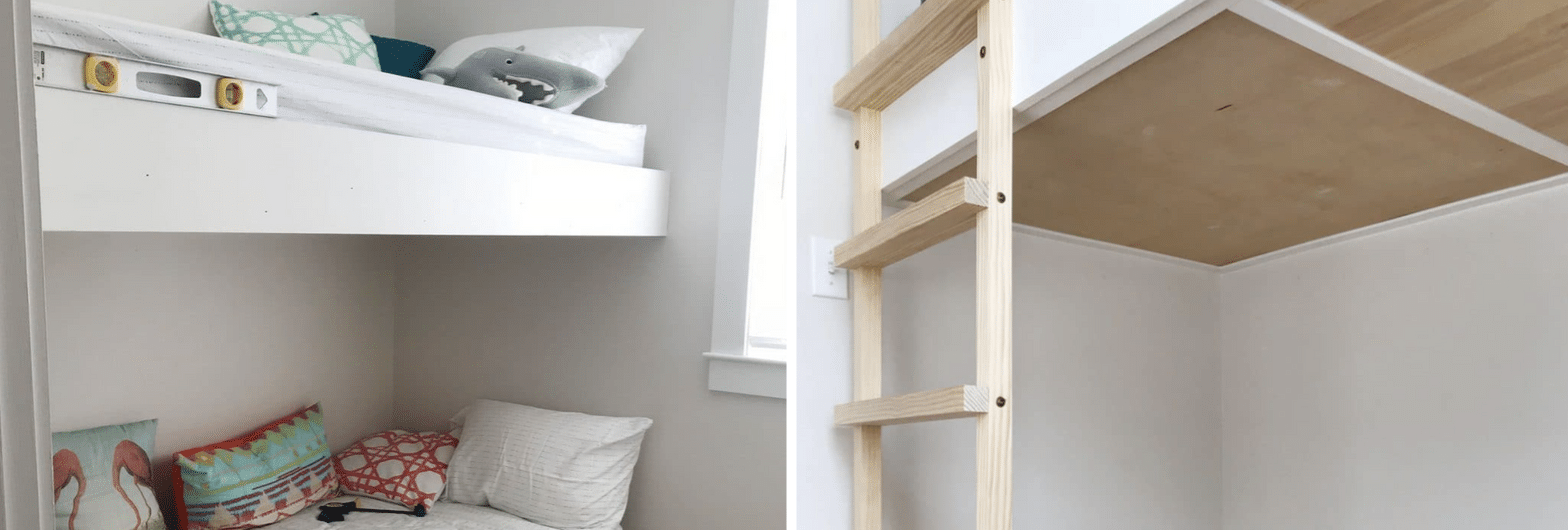
Make it look built-in:
- Add 1×8″ boards to the front of both platforms.
- Reinstall baseboards.
- Add 1/8″ plywood to the underside of top bunk.
- Use lattice strips for a finished look.
Step 7: Attach the Ladder & Build the Railing
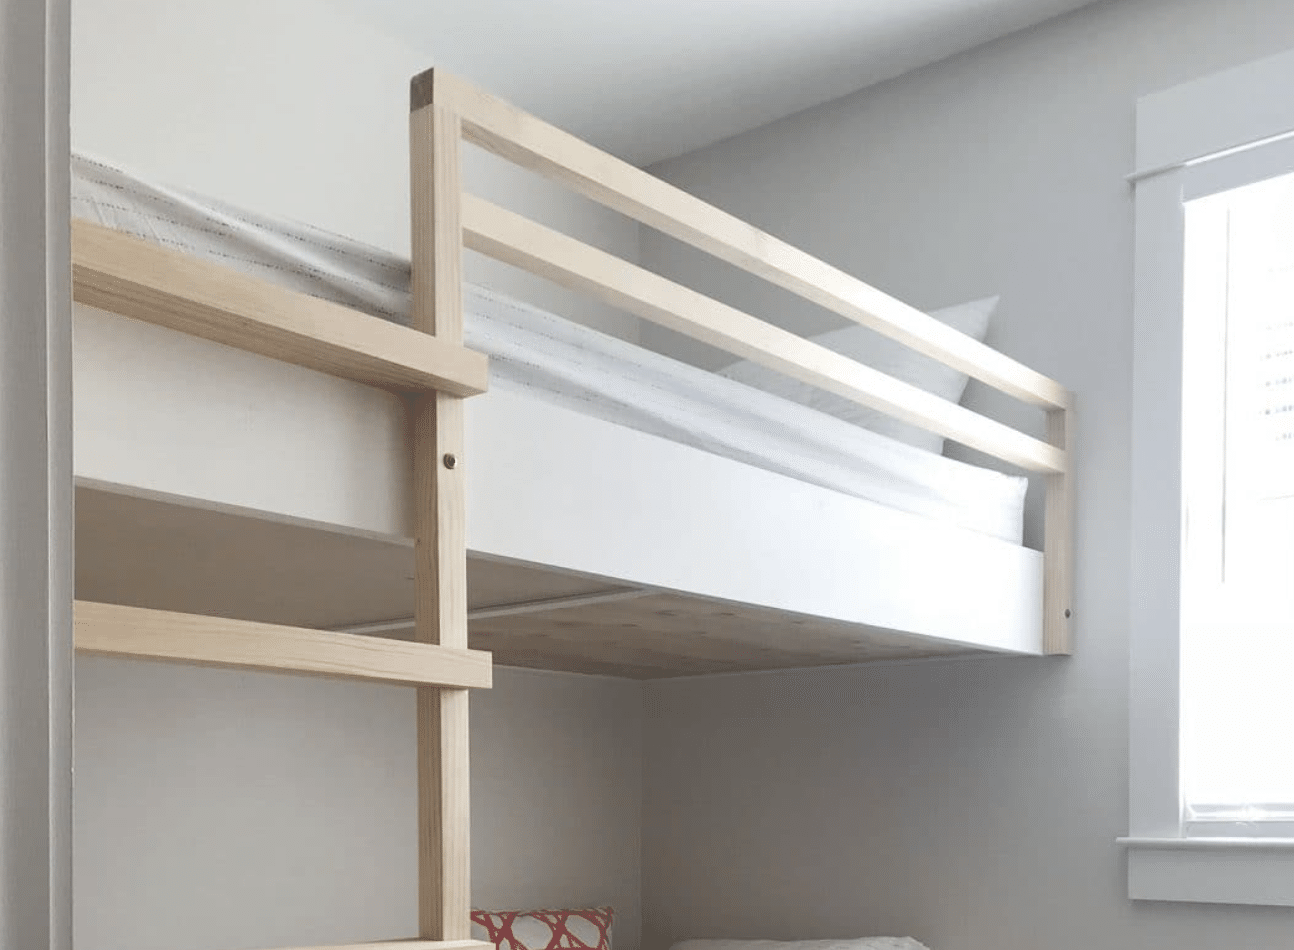
- Clamp the ladder in place.
- Secure it with screws.
- Add railings to the top bunk for safety.
Step 8: Stain the Ladder and Railings
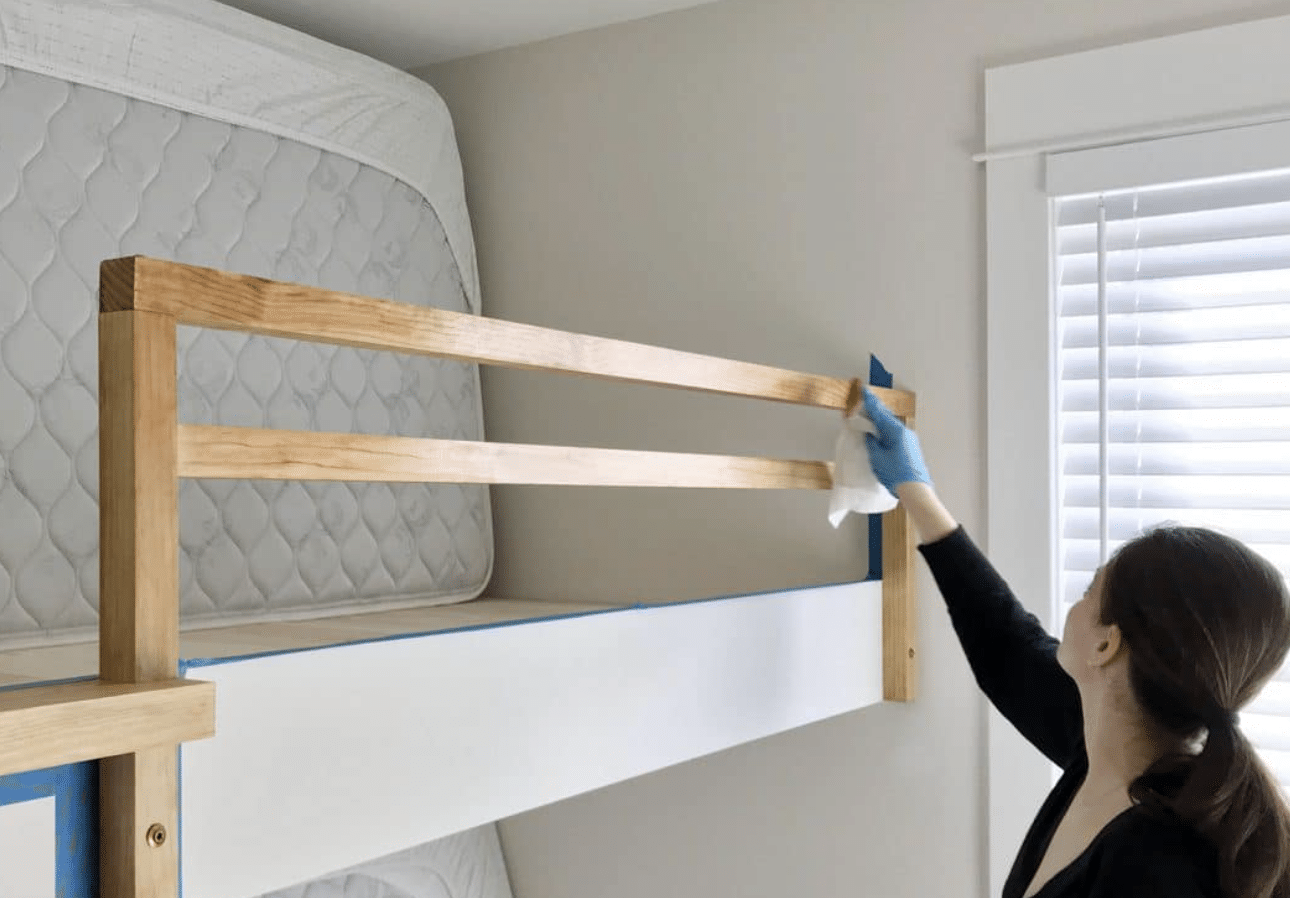
For a nice finish:
- Apply pre-stain wood conditioner.
- Use lighter stain on cut ends.
- Apply your chosen stain color.
- Add a final coat for the desired shade.
Step 9: Add Mattresses & Bedding!
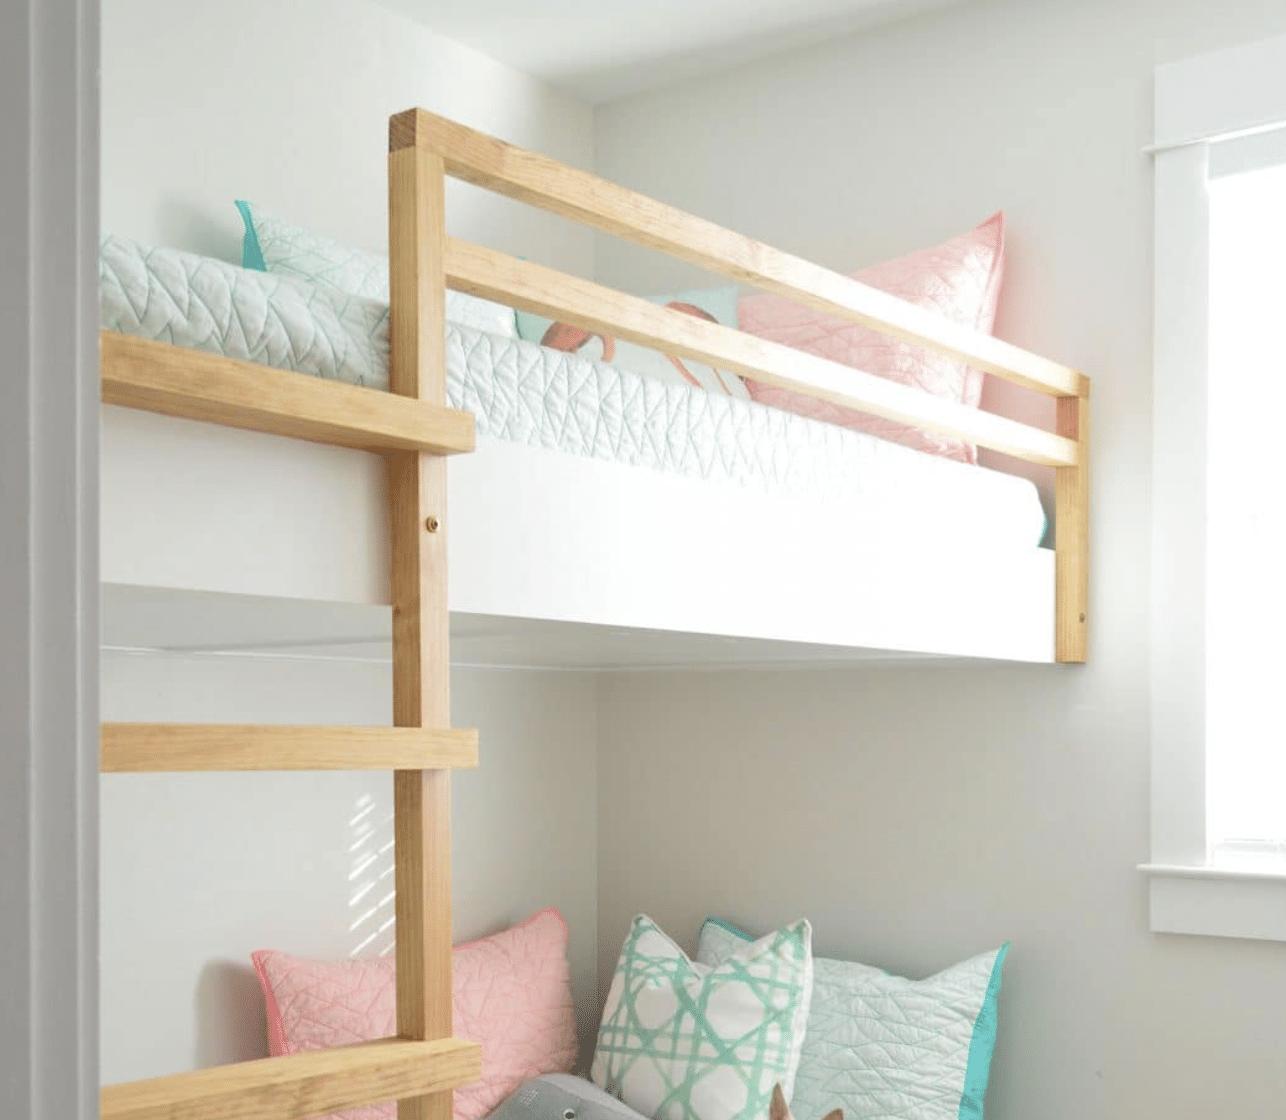
The fun part:
- Place mattresses on both bunks.
- Add comfy bedding.
- Let the kids (or guests) enjoy their new space!
Cost Breakdown for Built-in Bunk Beds
| Item | Estimated Cost Range | Description |
|---|---|---|
| Lumber (2x4s, plywood, trim) | $150 – $200 | For building the frame, platform, and trim |
| Hardware (screws, nails, brackets) | $30 – $50 | Includes structural screws, nails, and any required brackets |
| Stain or paint | $20 – $40 | For finishing the bunk beds to match the room decor |
| Ladder materials | $30 – $50 | Wood and hardware specifically for the ladder |
| Safety railing materials | $40 – $60 | Materials needed to build the railing around the top bunk |
| Mattress support (slats) | $20 – $30 | For additional support under the mattresses |
| Sandpaper and finishing supplies | $10 – $20 | Includes sandpaper and any extra supplies for smoothing and finishing |
| Total Estimated Cost | $300 – $450 | Excludes tools, mattresses, and bedding; cost varies by material quality |
Top Built-In Bunk Bed Ideas I Recommend for Every Family
After constructing your bunk beds, it’s time to focus on their appearance. Let’s explore some design ideas to help you create a practical and visually appealing space.
1. White and Bright: A Classic Choice
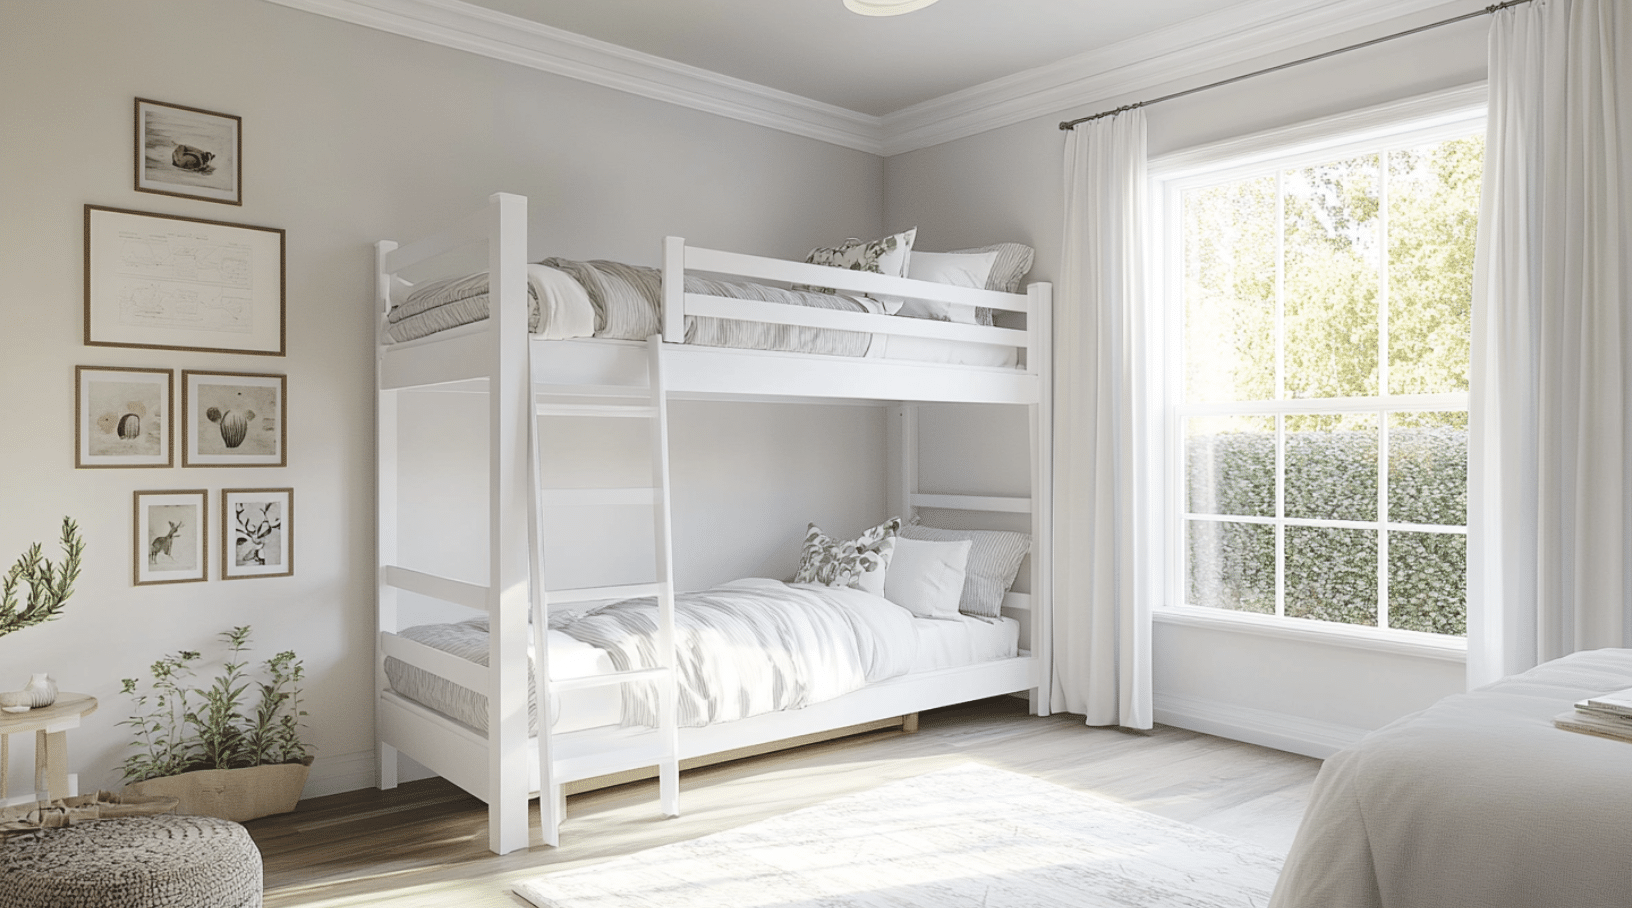
The white and bright design is a timeless option that can make any room more spacious and inviting. Start by painting the entire bunk bed structure white for a fresh look. Choose light-colored bedding to enhance the airy feel of the space.
Add pops of color with throw pillows or wall art to prevent the room from feeling too stark. For added functionality, install small, individual reading lights for each bunk. This style works particularly well in small rooms, helping them feel more open and cheerful.
2. Farmhouse Charm: Cozy and Welcoming
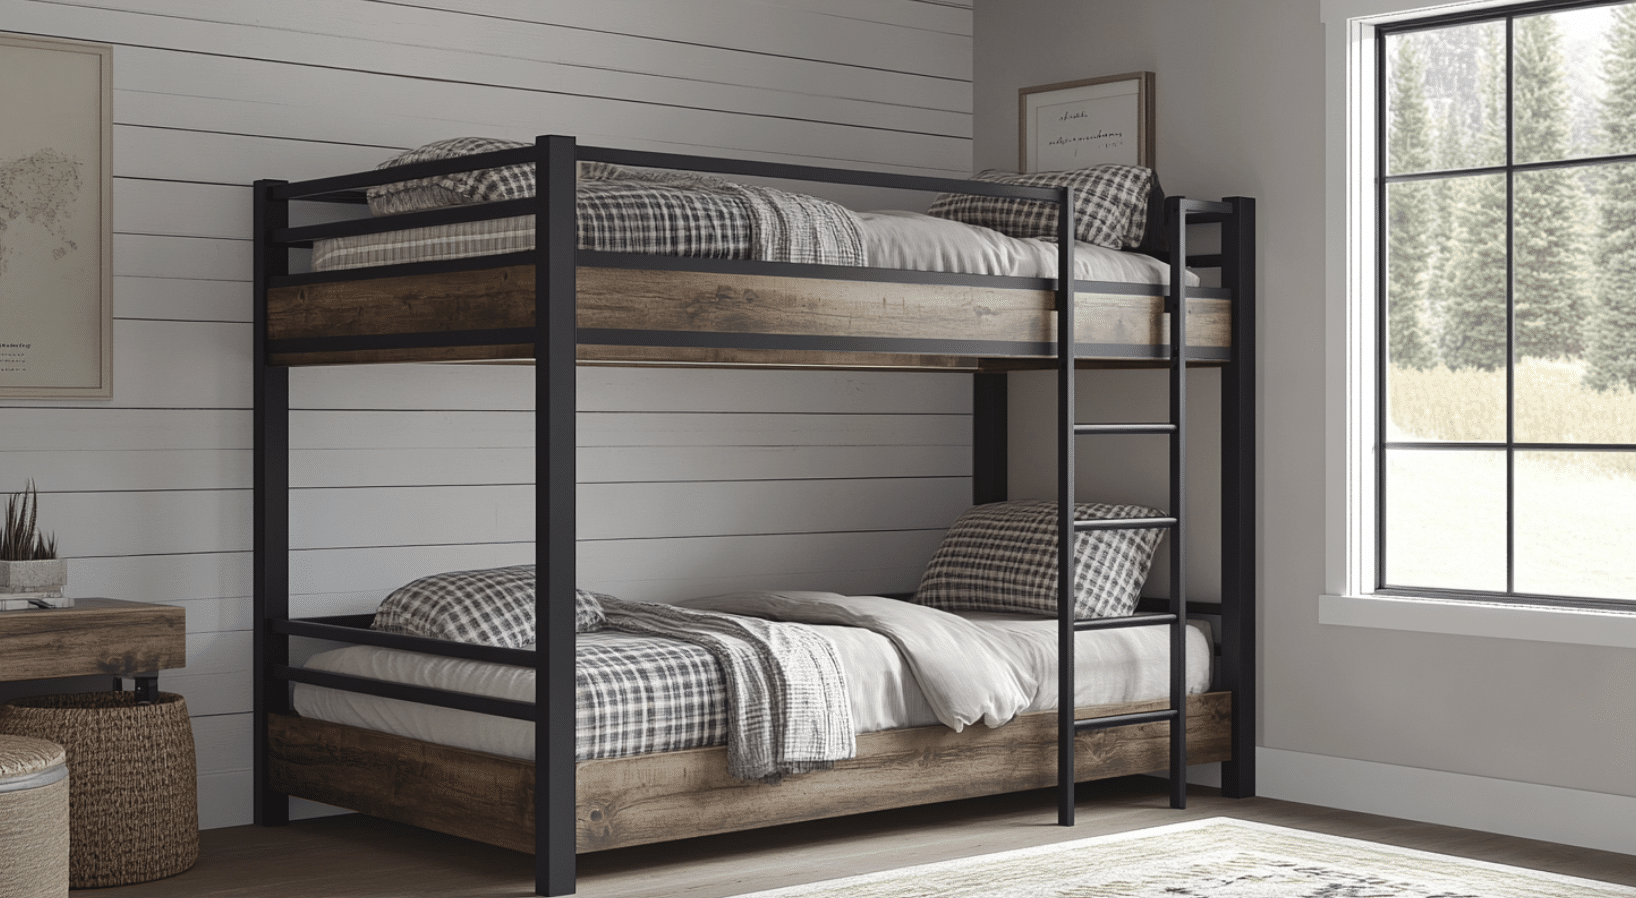
A farmhouse-inspired design will bring rustic warmth to your bunk beds. To create a cozy atmosphere, the frame should be made of natural wood tones or whitewashed finishes. Shiplap on the surrounding walls will add extra texture and character.
Choose an iron or black metal ladder for an authentic farmhouse touch. Complete the look with quilts or plaid bedding to enhance the homey feel. This style creates a welcoming environment that both kids and guests will appreciate.
3. Modern Minimalist: Sleek and Simple
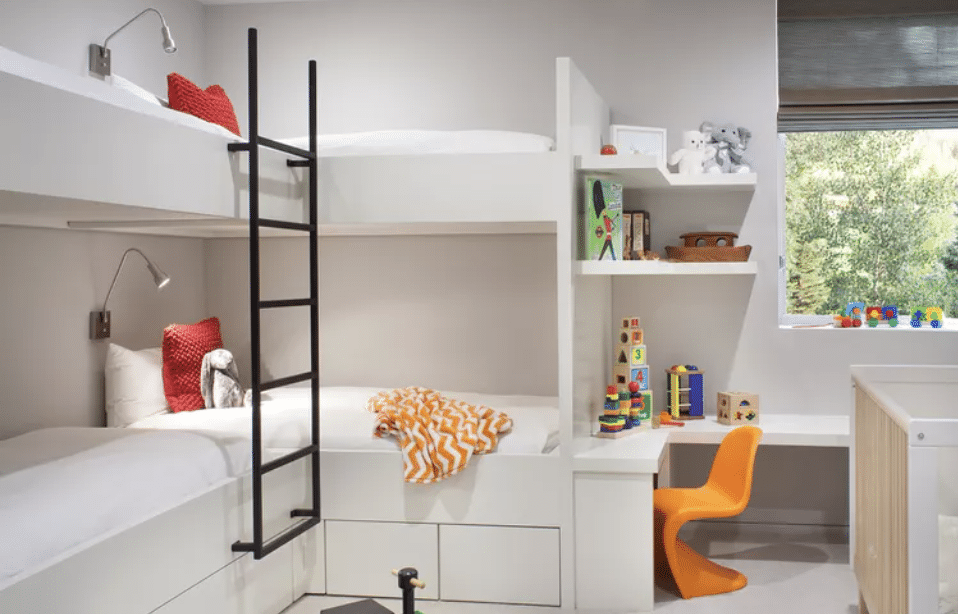
Focus on clean lines and a simple frame design for a contemporary look that fits well in urban homes. Choose a monochromatic color scheme for a cohesive appearance. Incorporate built-in shelves or storage to maximize functionality without cluttering the space.
Use minimalist bedding with subtle patterns or solid colors to maintain the sleek aesthetic. This style is perfect for creating a calm, uncluttered sleeping area.
4. Nautical Adventure: Fun for All Ages
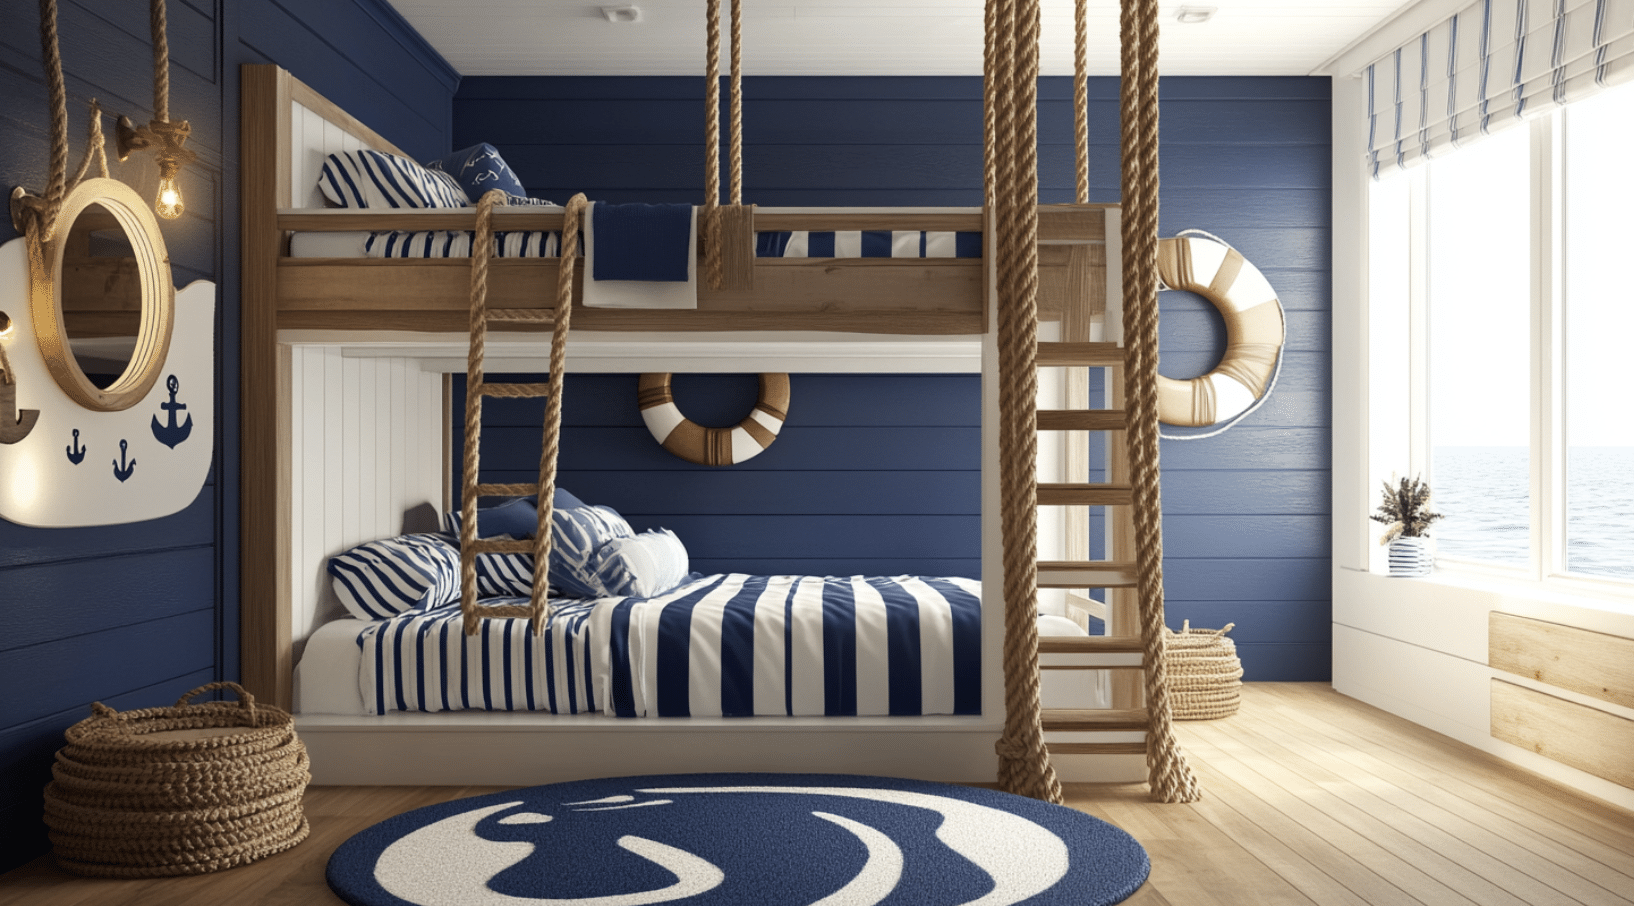
A nautical theme is ideal for beach houses or ocean-loving kids. Paint the frame navy blue and white for a maritime feel. Use rope for the ladder or railings to mimic a ship’s design.
If possible, add porthole-shaped windows or decals to enhance the nautical atmosphere. Choose bedding with stripes, anchors, or sea life prints to complete the look. This theme turns bedtime into a fun adventure, perfect for imaginative children.
5. Woodland Rustic: Bringing Nature Indoors
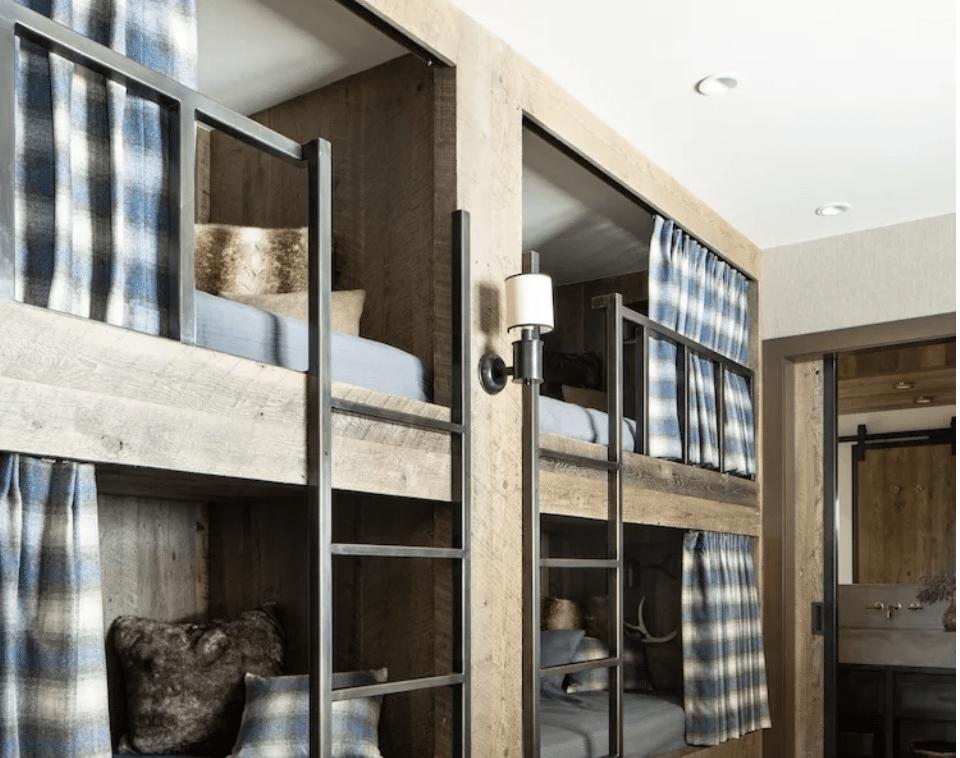
With a woodland rustic design, create a cabin-in-the-woods feel. Use rough-hewn wood for the frame to add texture and character. Apply a clear stain to keep the natural wood grain visible, highlighting the beauty of the material.
Create a ladder using tree branches for an authentic forest look. Choose bedding with woodland creatures or forest scenes to complete the nature-inspired theme. This design is great for nature lovers and can create a calming, retreat-like atmosphere in any room.
6. Side-by-Side Layout: Perfect for Shared Spaces
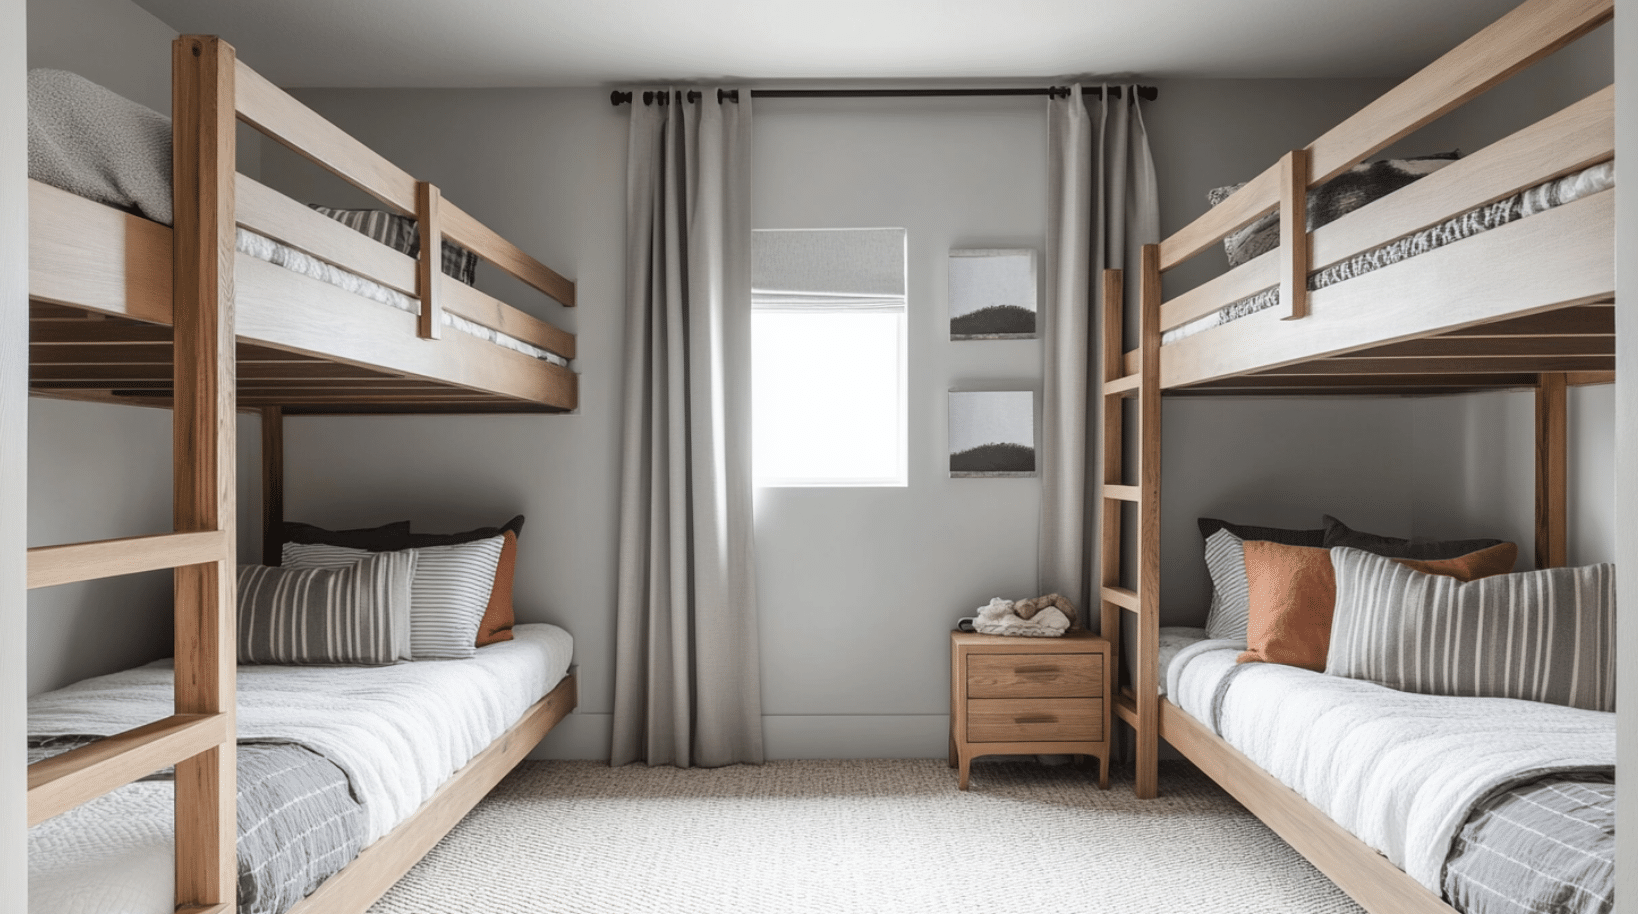
Consider a side-by-side layout when you have more floor space than wall height. Build the bunk beds parallel to each other instead of stacked. For convenience, add a shared nightstand or storage unit between the beds.
Use matching or coordinating bedding for a unified look. Install curtains that can be drawn for privacy when needed. This layout works well for siblings sharing a room or guest rooms needing to accommodate multiple people comfortably.
Best Options to Buy Built-in Bunk Beds
Disclaimer: These recommendations are based on personal preference and experience. None of the links provided are affiliated or sponsored.
1. West Elm Milo Bunk Bed
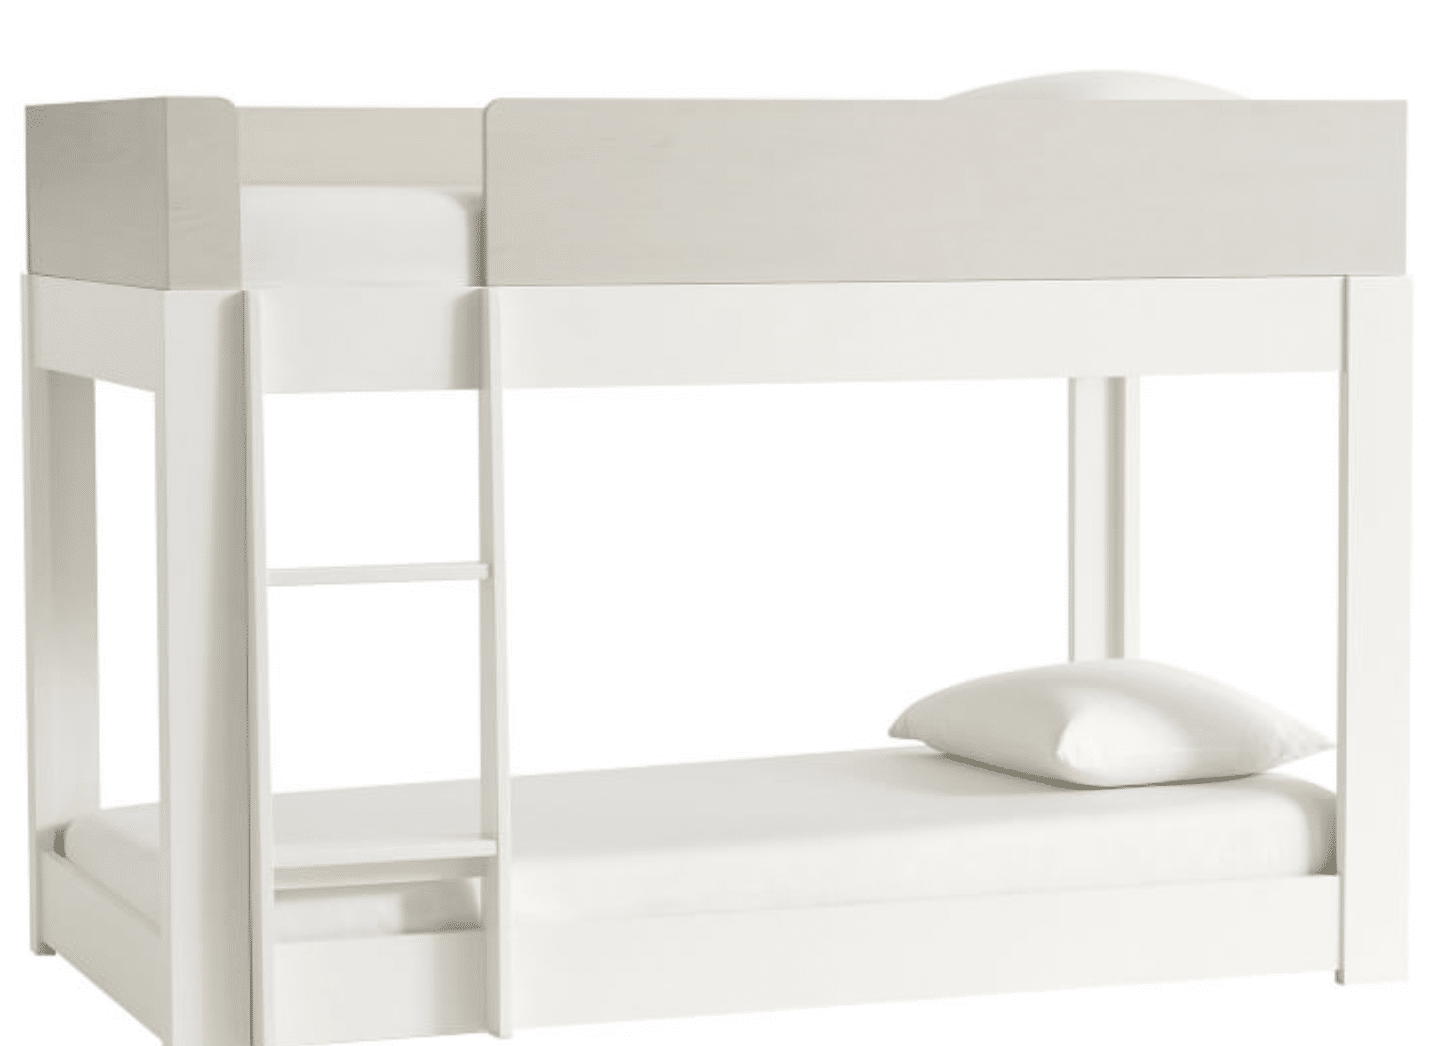
The West Elm Milo Bunk Bed combines modern design with safety features, making it ideal for growing children. Its GREENGUARD Gold Certification and Fair Trade manufacturing ensure eco-friendly, ethical production, appealing to families seeking stylish, responsible furniture choices.
Dimensions: 78″w x 44″d x 54.5″h
Colors: Pebble & simply White, Simply white
2. Max & Lily Staircase Bunk Bed
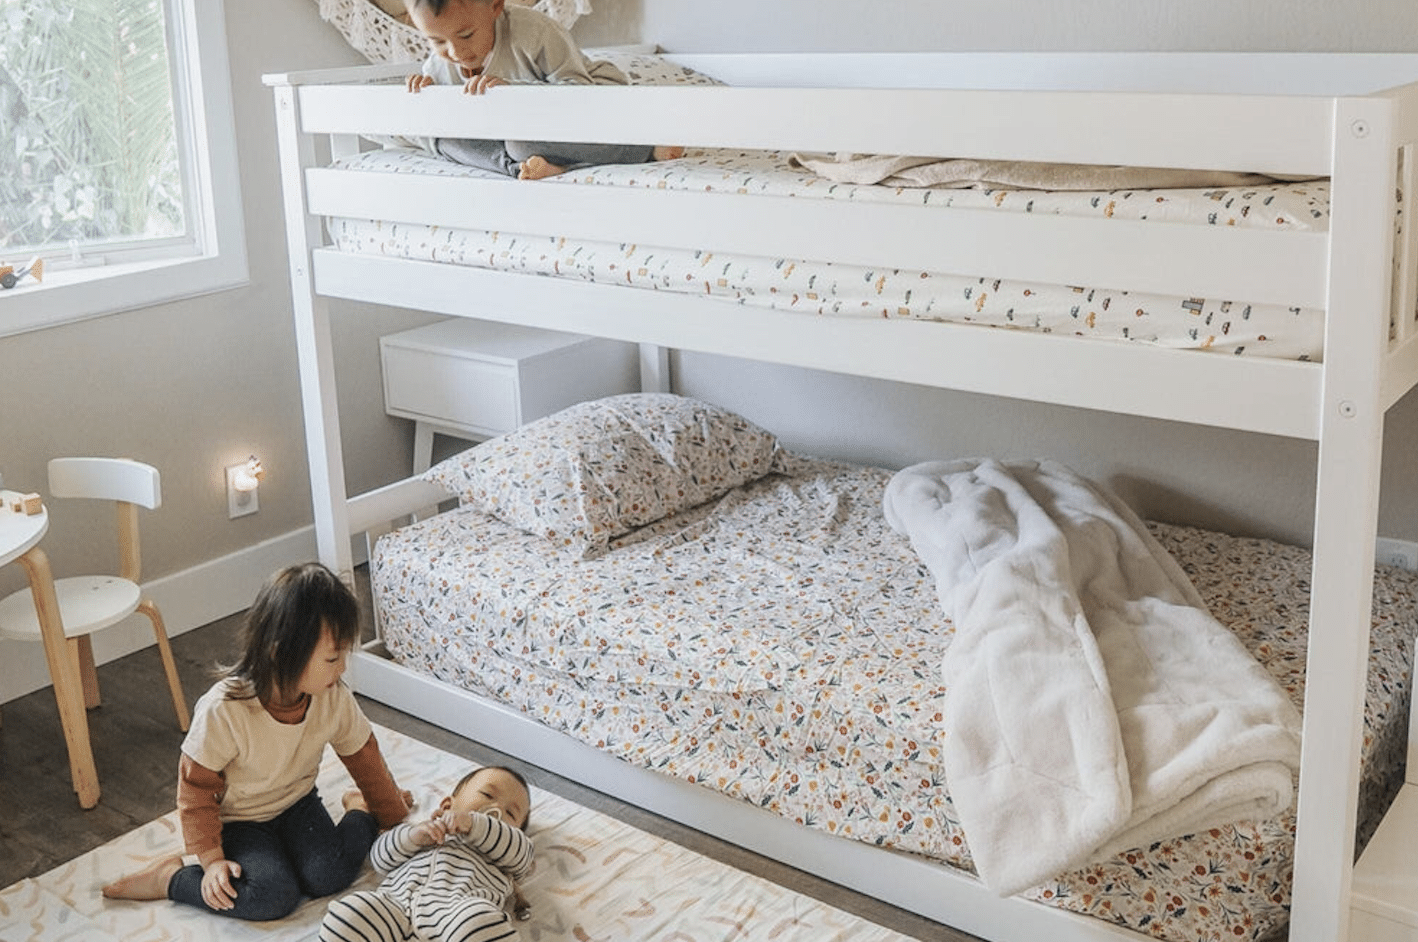
The Max & Lily Staircase Bunk Bed is a space-saving solution for small rooms, featuring a staircase with built-in storage. Its solid wood construction supports 400 pounds per bed, while GREENGUARD Gold Certification ensures a healthy environment.
Dimensions: 50″ h x 99.5′ l x 42.5″w
Colors: Grey, White, Pecan, Clay, Walnut
3. Harriet Bee Bolles Kids Bunk Bed
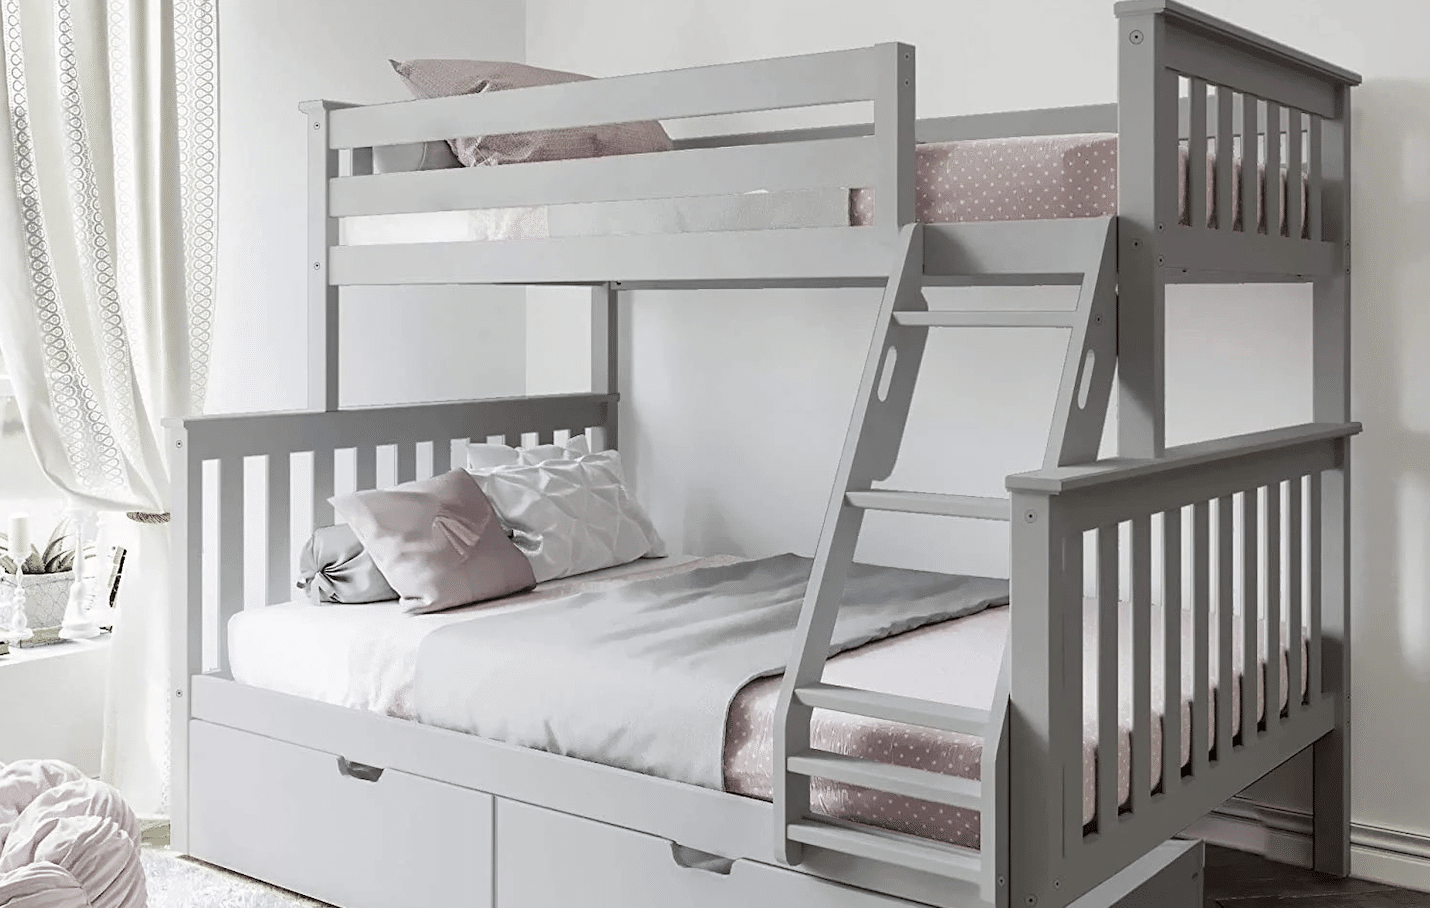
The Harriet Bee Bolles Kids Bunk Bed, made from knot-free New Zealand Pine, converts to separate beds and includes under-bed storage. With built-in safety features and a space-saving design, it’s ideal for growing families with rooms that have 8-foot or higher ceilings.
Dimensions: 65″h x 80″l x 57″w
Colors: White, Espresso, Gray, Natural, Blue
4. Babyletto TipToe Bunk Bed
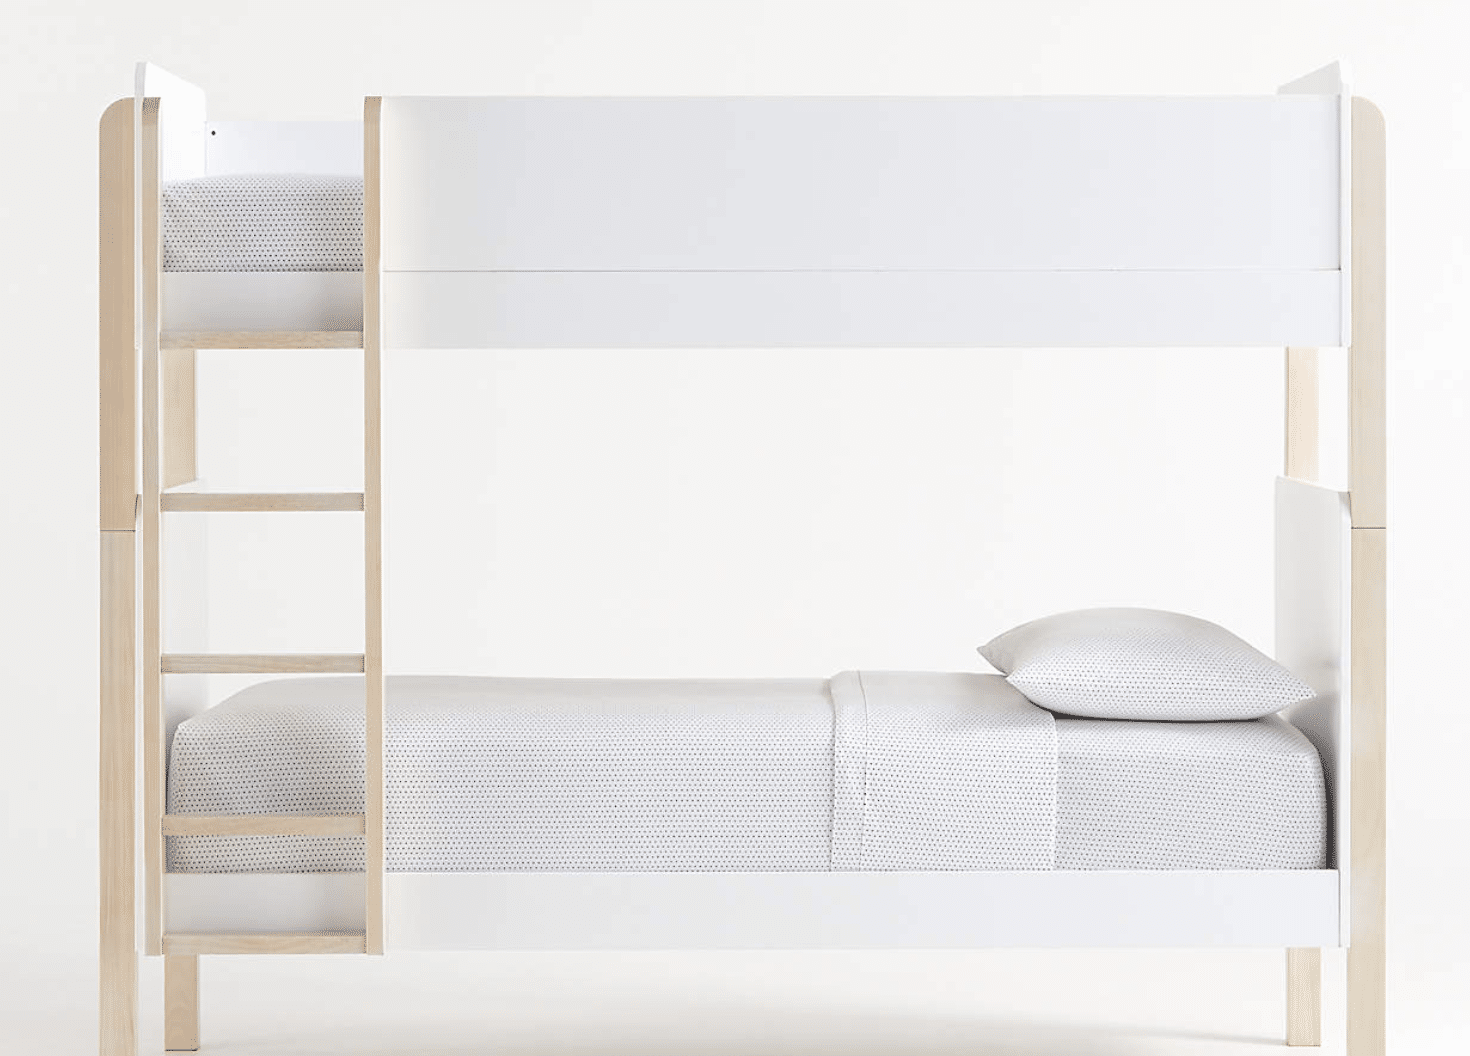
The Babyletto TipToe Bunk Bed offers versatility, converting from a bunk to separate twin beds with a movable ladder. Its Greenguard Gold-certified materials and stylish white and wood design make it a safe, attractive choice for modern kids’ rooms.
Dimensions: 67.75″h x 40.63″w x 81.5″d
Colors: Natural
Maintenance and Care
Proper maintenance of your bunk beds ensures they remain safe, sturdy, and look great for years to come. Here are some key tips to keep your bunk beds in top condition:
1. Regular Inspections
Perform monthly checks on your bunk beds. Look for loose screws, wobbly joints, or any signs of wear. Tighten any loose parts immediately to maintain stability.
2. Cleaning Routine
Dust the bunk beds weekly with a soft, dry cloth. For deeper cleaning, use a slightly damp cloth with mild soap. Avoid harsh chemicals that might damage the wood finish.
3. Mattress Care
Rotate mattresses every 3-6 months to ensure even wear. Vacuum them regularly to remove dust and allergens. Consider using mattress protectors to guard against spills and stains.
4. Wood Maintenance
Apply furniture polish or wood conditioner for wooden bunk beds every 6-12 months. This helps protect the wood and maintain its appearance.
5. Hardware Check
Periodically check all bolts, screws, and other hardware. Tighten any loose fittings. Replace any damaged or rusted hardware promptly to ensure safety.
6. Ladder and Guardrail Safety
Pay extra attention to the ladder and guardrails. Ensure they remain securely attached and show no signs of weakening. These are crucial for preventing falls.
7. Weight Limits
Always adhere to the manufacturer’s weight limits. Overloading the beds can lead to structural damage and safety hazards.
By following these maintenance tips, you can extend the life of your bunk beds and ensure they remain a safe and comfortable sleeping space for years to come.
Conclusion
As we wrap up our guide to built-in bunk beds, remember that these space-saving wonders offer more than a place to sleep. They create cozy nooks, fuel imagination, and solve room-sharing challenges.
Whether you build your own or buy a ready-made set, the key is picking a design that fits your space and your family’s needs. From the classic white-and-bright look to the adventurous nautical theme, there’s a style for every home.
Regular care and maintenance will keep your bunk beds safe and sturdy for years. So, as you plan your next home project, consider the charm and practicality of built-in bunk beds.
They might be the solution you’ve sought to make the most of your living space.


