Best Composite Deck Patterns: 31 Creative Ideas
Have you been staring at your backyard, wondering how to turn that empty space into something special? The right deck design can make all the difference.
But here’s the thing: composite decking isn’t just about picking a color anymore. It’s about patterns, layouts, and creative ideas that make your outdoor space uniquely yours.
Whether you’re building from scratch or renovating an old deck, the possibilities are wider than you think. Modern composite materials offer flexibility that traditional wood never could.
In this blog, I’ll show you composite decking ideas and patterns that combine style with smart planning.
From classic straight boards to bold geometric designs, you’ll find inspiration that fits your home and your skill level. Let’s get started.
Why Choose Composite Decking?
Composite decking has become the go-to choice. Composite boards resist fading, warping, and rot.
You won’t spend weekends staining or sealing. Most composite decks last 25 to 30 years with minimal care. They come in dozens of colors, from deep browns and grays to warm tans and even blues.
The textures mimic real wood grain, so you get the look without the hassle. When planning patterns, remember that composite materials have specific installation needs.
They expand and contract with temperature, so proper spacing matters. The structure underneath must support the pattern you choose.
And while composite costs more upfront than wood, the long-term savings on maintenance make it worth it. Your pattern choice should work with these material limits, not against them.
Composite Deck Patterns Ideas That Inspire
Explore 31 creative composite deck patterns that combine aesthetics with practicality. Each idea offers a fresh approach to designing decks that look amazing and last for years.
1. Classic Straight-Lay Deck

Run your boards in one direction for a clean, timeless look. This works with any home style and keeps costs down. It’s the most popular choice for first-time deck builders.
Installation Tips: Make sure your joists run perpendicular to your boards. Space them 16 inches apart for solid support.
2. Diagonal Board Layout

Angle your boards at 45 degrees to add movement. Small decks feel larger with this layout. The diagonal lines draw the eye outward. This creates an illusion of extra space.
Installation Tips: You’ll need extra material for cuts. Plan your joist layout to support diagonal spans.
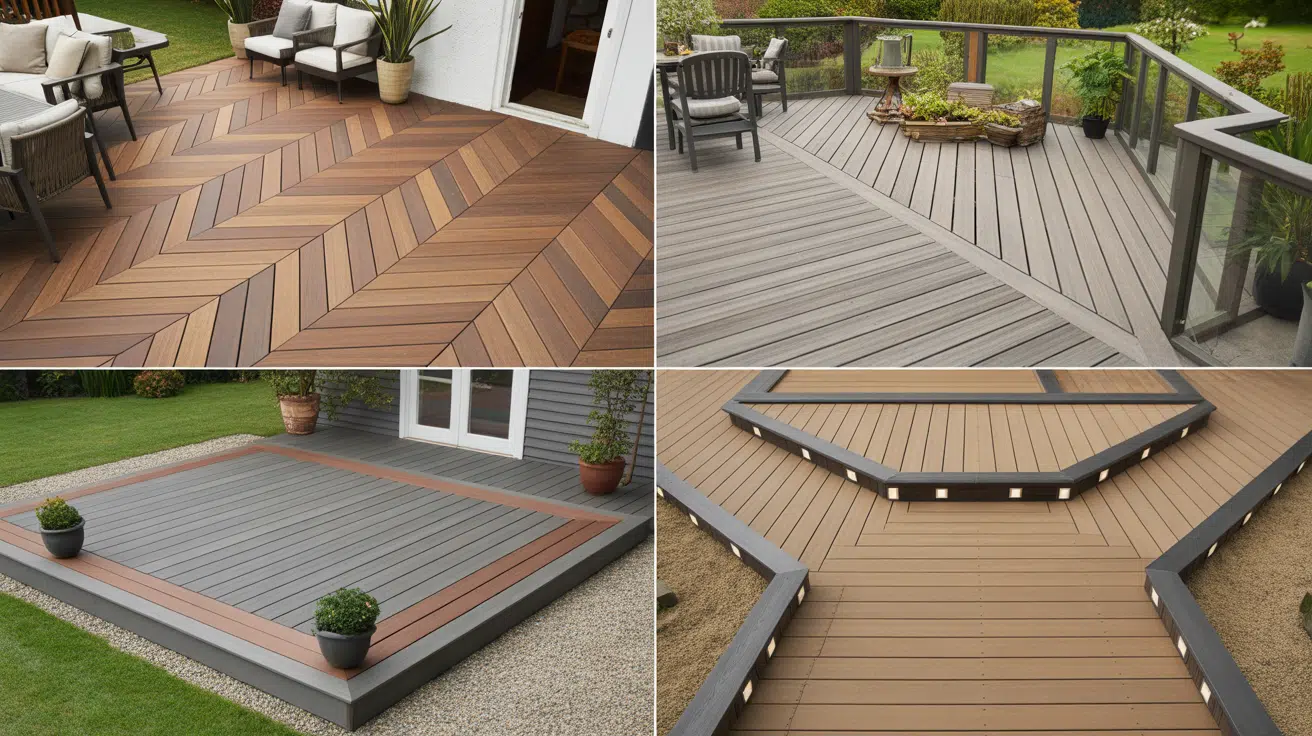
3. Herringbone Deck Pattern
Create a V-shaped zigzag that screams luxury. This pattern needs precise cuts and planning. It’s perfect for patios and high-traffic entertaining areas. The interlocking design adds strength and visual depth.
Installation Tips: Use a chalk line to mark your center point. Work outward from there for symmetry.
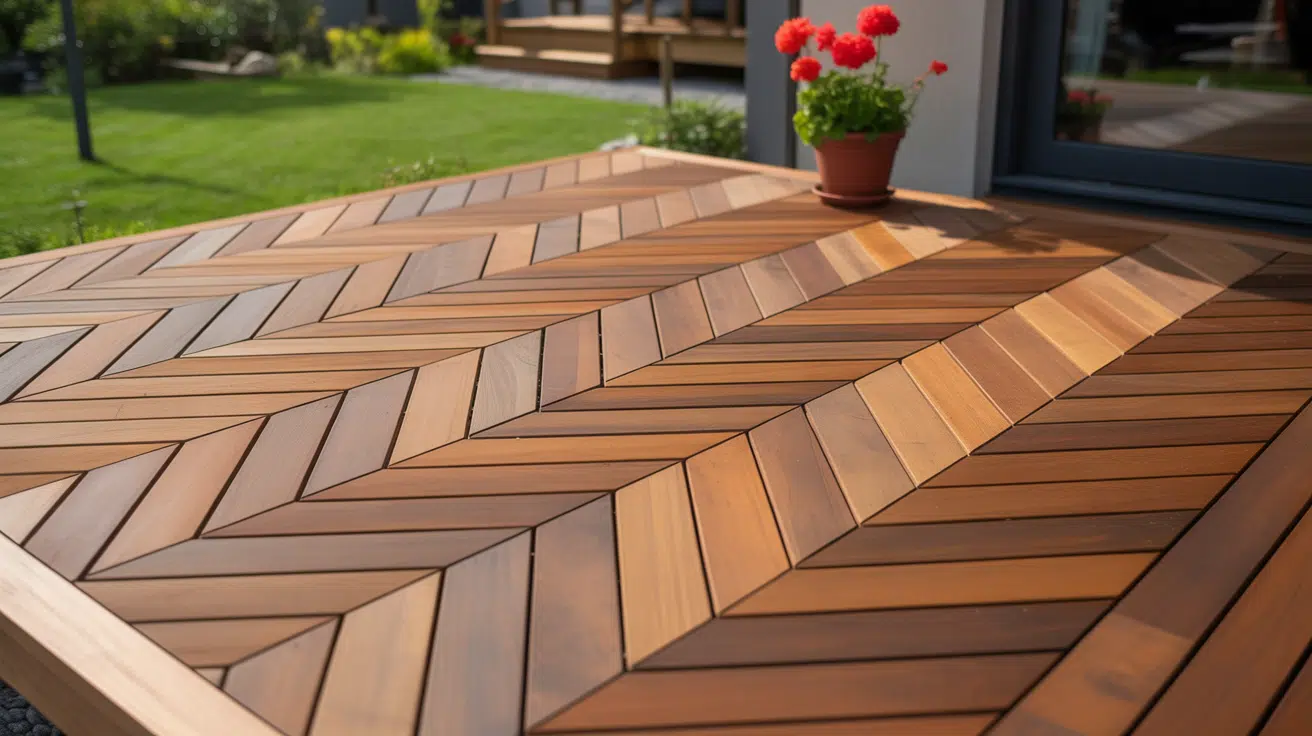
4. Chevron-Style Deck
![]()
This design is similar to herringbone but with pointed ends that meet perfectly. The lines flow outward beautifully. This pattern looks best on larger decks where the design can fully develop.
Installation Tips: Cut all boards at exact angles before you start. Even small errors show up fast.
5. Picture-Frame Border
Add a border around your deck’s edge using boards that run opposite to the main field. This creates a finished, polished appearance. The frame effect makes your deck look professionally designed.
Installation Tips: Install the border first, then fill in the center. This hides cut ends nicely.
6. Two-Tone Border Effect

Use two colors to create subtle contrast around the perimeter or between sections. This adds depth without overwhelming the space. Choose colors that complement your home’s exterior.
Installation Tips: Order samples to check colors in sunlight. What looks good indoors may surprise you outside.
7. Alternating Board Widths

Mix narrow and wide planks for a custom designer feel without complex cuts. This adds texture and breaks up monotony. You can use boards from the same color family or mix tones. The varied width creates a high-end look.
Installation Tips: Plan your width pattern on paper first. Random placement rarely looks good.
8. Multi-Directional Zones

Change the board direction between your dining area and lounge space to define zones. This works like invisible walls that separate functions. Each zone feels distinct while staying connected.
Installation Tips: Add blocking between joists where directions change. This provides needed support.
9. Curved Deck Design
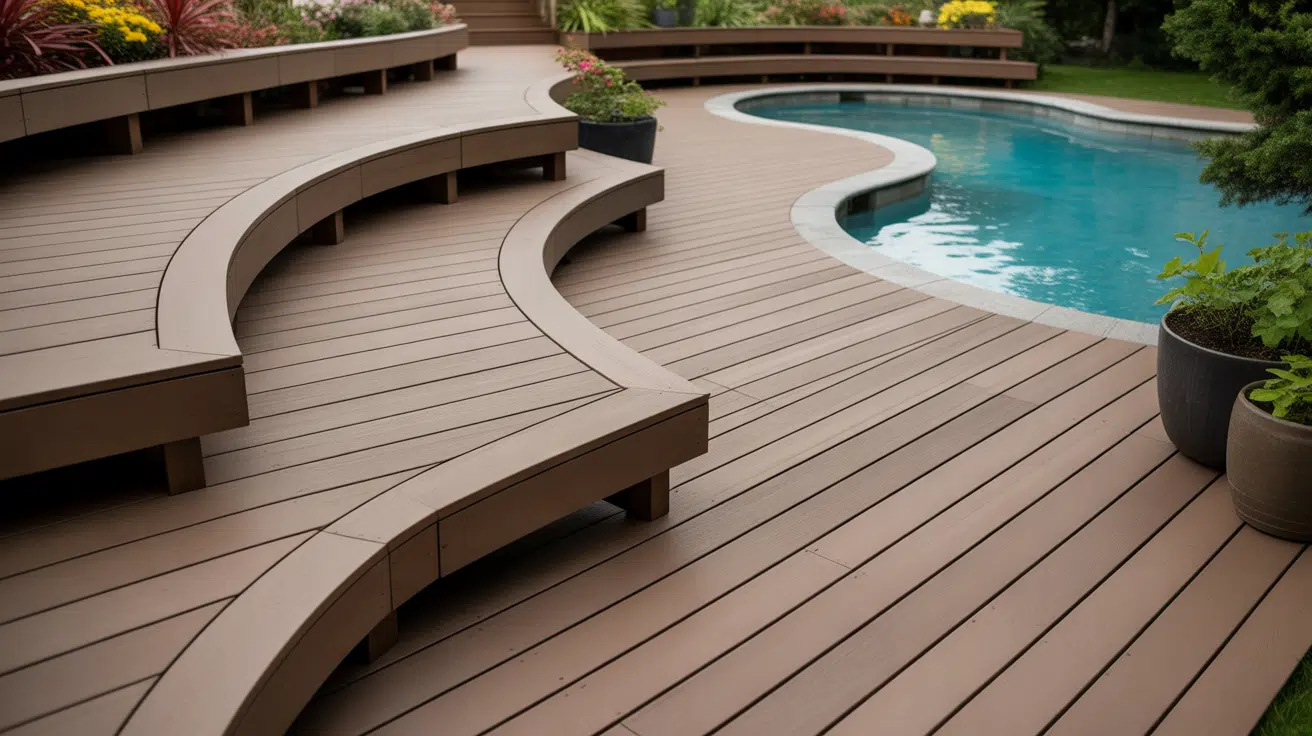
Use flexible composite boards to create flowing, organic shapes instead of sharp corners. Curves soften the overall look and blend better with landscaping. This design works beautifully around trees or pools.
Installation Tips: Soak boards in warm water for easier bending. Secure them while they’re still warm.
10. Deck with Built-In Lighting Lines
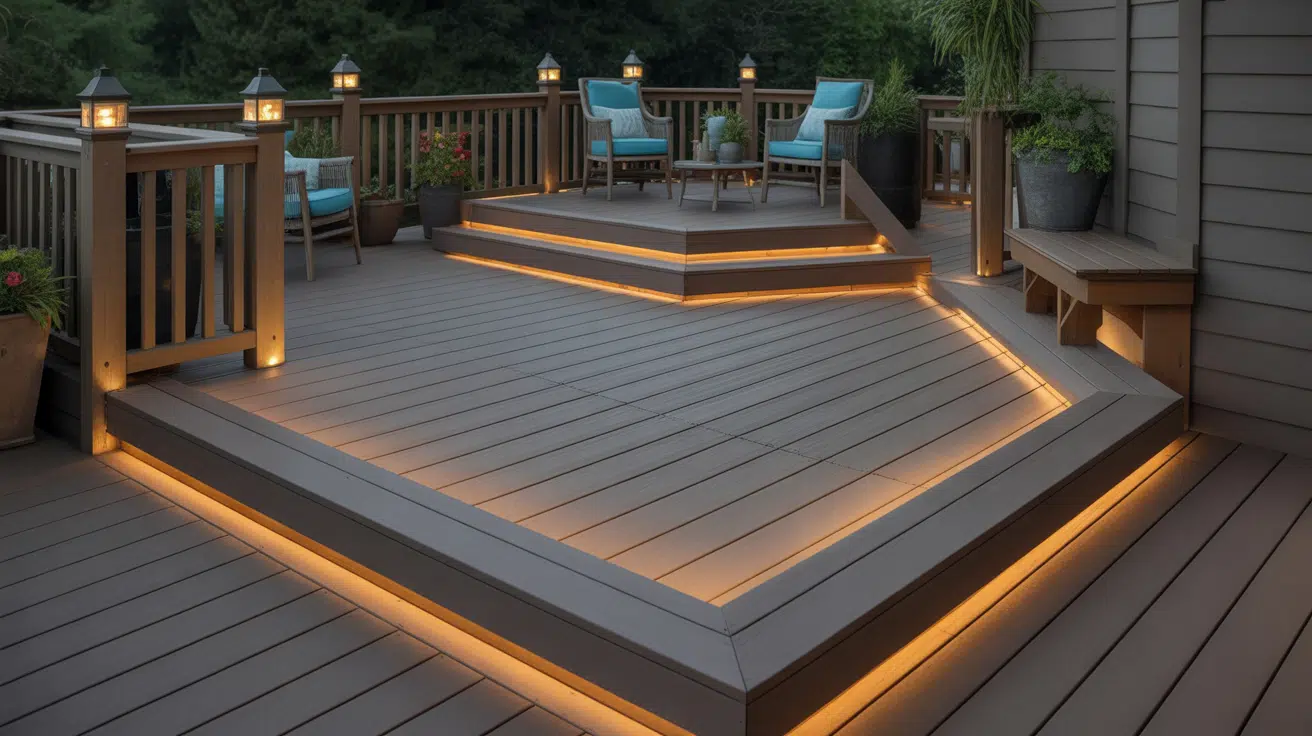
Install LED strips between boards or along borders for nighttime ambiance. Lighting extends your deck’s usable hours safely. It highlights your pattern choices after dark. Low-voltage systems are energy-efficient and simple to install.
Installation Tips: Run wiring during framing, not after. Waterproof all connections properly.
11. Inlaid Compass or Geometric Motif

Create a focal point with an inlay design in a different color or pattern. This becomes a conversation piece that makes your deck memorable. Choose shapes that reflect your personal style. Keep the design centered for maximum impact.
Installation Tips: Draw your design full-scale on paper first. Transfer measurements carefully to avoid waste.
12. Deck with Contrasting Inlay Strip

Separate zones with a single contrasting board color running through the deck. This simple technique adds visual interest without complexity. It’s less work than full pattern changes. The stripe guides the eyes and movement across the space.
Installation Tips: Install this divider board first as a guide for the sections on either side.
13. Board-Over-Board Transition Lines

Overlap boards at transitions to add depth and guide foot traffic naturally. This creates subtle level changes without full steps. It adds dimension to flat surfaces. The technique works well at doorways or zone edges.
Installation Tips: Ensure solid blocking underneath overlapped areas. These spots carry more weight.
14. Multi-Level Composite Deck

Combine different heights, steps, and platforms to add visual interest and function. Multiple levels work beautifully with sloped yards. Each level can have its own pattern or color. This maximizes usable space on challenging terrain.
Installation Tips: Plan drainage between levels. Water should flow away from your home.
15. Integrated Firepit Zone

Design a circular or square recess for a firepit using boards cut in a radial pattern. This creates a natural gathering spot built right into your deck. The surrounding pattern frames the fire feature.
Installation Tips: Check local codes for firepit placement. Use heat-resistant materials around the fire area.
16. Deck with Planter Box Edges

Frame built-in planters with composite boards in complementary tones. This softens hard edges with greenery while maintaining clean lines. Built-in planters eliminate tripping hazards from containers. .
Installation Tips: Line planter interiors with pond liner before adding soil. This protects the composite.
17. Built-In Bench Lines

Extend your decking boards vertically to create continuous seating that matches the floor. This saves space and looks seamless. Built-in seating can’t be moved around like furniture. It permanently defines the deck’s layout.
Installation Tips: Add extra blocking behind vertical boards for strength. Benches need solid support.
18. Deck-to-Path Transition Pattern
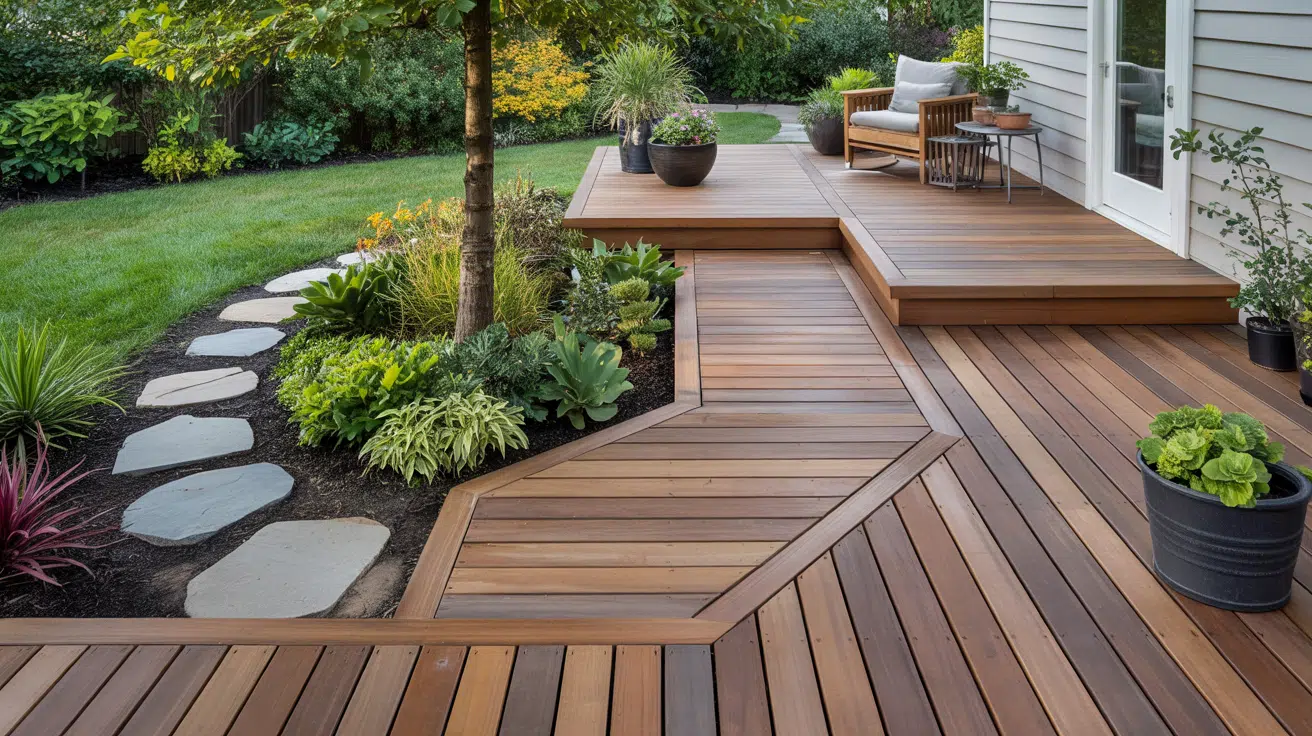
Shift the board direction where your deck meets a garden path for a smooth visual flow. This connects your deck to the landscape beyond. The direction change signals the transition naturally.
Installation Tips: Use the same composite material for the path if possible. This creates cohesion.
19. Raised Platform Deck

Use pattern changes to highlight elevated sections or stages on your deck. Raised areas add drama and function as focal points. They’re perfect for hot tubs or dining zones. The height difference creates natural separation.
Installation Tips: Frame platforms independently from the main deck. This allows for better structural control.
20. Floating Deck Design

Build a low-profile deck that sits close to the ground with a clean, simple board layout. Floating decks work great for flat yards. They need less structural support than raised decks.
Installation Tips: Level the ground thoroughly first. Floating decks show every ground imperfection.
21. Framed Stair Risers

Match your step pattern to your deck, then add a border highlight for definition. This makes stairs safer and more visible. The pattern continuity flows naturally from deck to ground. Framed risers look intentional and finished.
Installation Tips: Make risers slightly taller than the treads are deep. This feels more comfortable to climb.
22. Mixed-Color Mosaic Deck
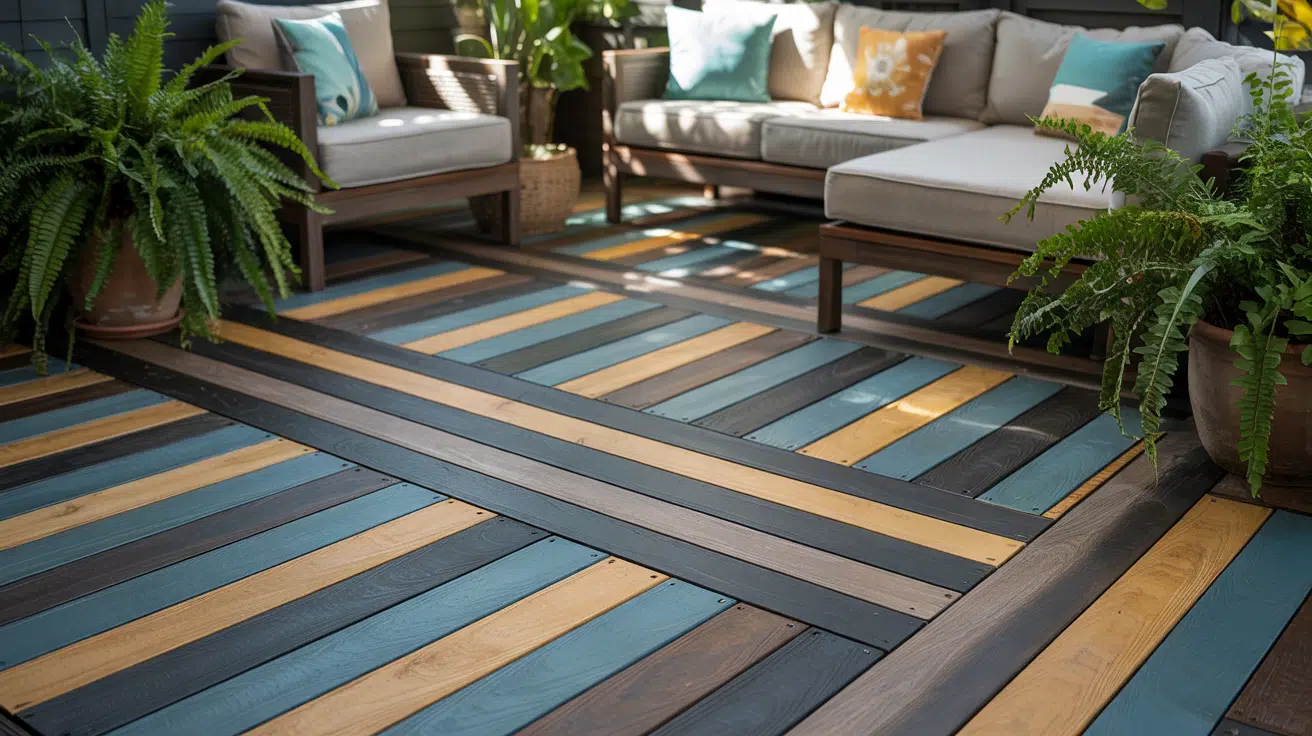
Play with three or more shades arranged in blocks or stripes for a bold personality. This approach suits artistic homeowners who want something unique. The color mix can reflect your home’s palette.
Installation Tips: Lay out your color pattern before fastening. Take photos from above to judge the effect.
23. Linear Deck with Metal Inset Strips

Add thin metal strips between composite boards for a modern industrial vibe. The metal catches light differently from the composite. This creates subtle shimmer and texture. It’s ideal for contemporary architecture.
Installation Tips: Use aluminum or stainless steel. These metals won’t stain composite materials.
24. Outdoor Dining Zone Deck

Anchor your dining space with darker boards laid diagonally for visual weight. This defines where the table belongs without walls. Darker colors hide food spills better. The diagonal pattern makes the zone feel special.
Installation Tips: Size this zone to fit your table plus three feet on all sides for chair movement.
25. Poolside Composite Deck
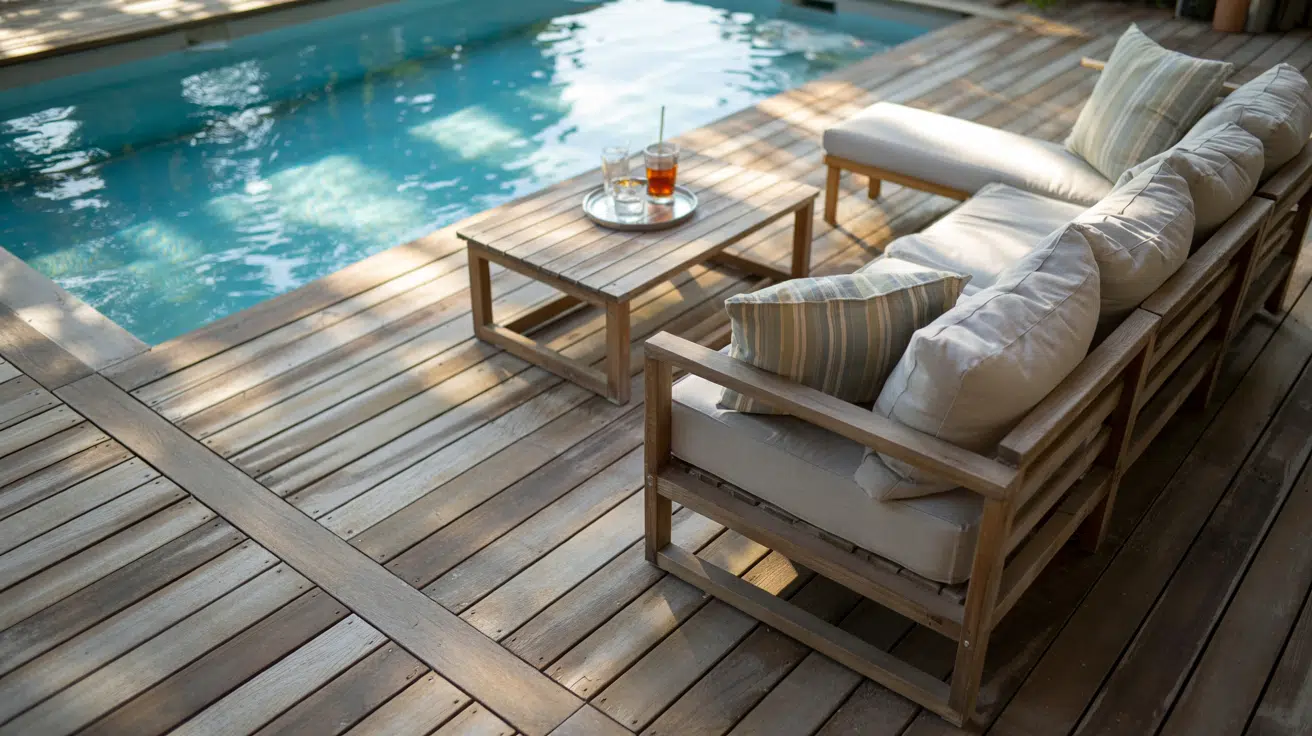
Choose slip-resistant boards with grooves and space them wider for water drainage. Safety comes first around water features. Textured surfaces provide grip when wet. Proper spacing prevents standing water.
Installation Tips: Slope the deck slightly away from the pool. This prevents water from pooling.
26. Pergola-Integrated Deck

Align your board direction with pergola beams overhead to satisfy symmetry. The parallel lines create visual harmony. This makes the whole structure feel planned and intentional. It’s pleasing to the eye from every angle.
Installation Tips: Install pergola posts during deck framing. Retrofitting is much harder.
27. Accent Lighting Corners

Place low-voltage lights at deck corners and stairs for safety and mood. Corner lights prevent trips and falls at night. They also highlight your deck’s shape beautifully. Warm white bulbs create an inviting atmosphere.
Installation Tips: Choose lights rated for outdoor use. Test them before you finish the deck.
28. Deck with Glass Railing Integration

Let your pattern shine through transparent railings that don’t block the view. Glass showcases your deck pattern from all angles. It’s perfect for properties with scenic views.
Installation Tips: Install railing posts precisely, as glass panels are unforgiving of misalignment.
29. Minimalist Grey Deck Boards

Go neutral with sleek grey tones that work with any exterior color scheme. Grey is timeless and won’t clash with future home updates. It complements both warm and cool color palettes. This choice keeps focus on furniture and landscaping.
Installation Tips: Grey shows dirt less than lighter colors. Still, plan access for easy cleaning underneath.
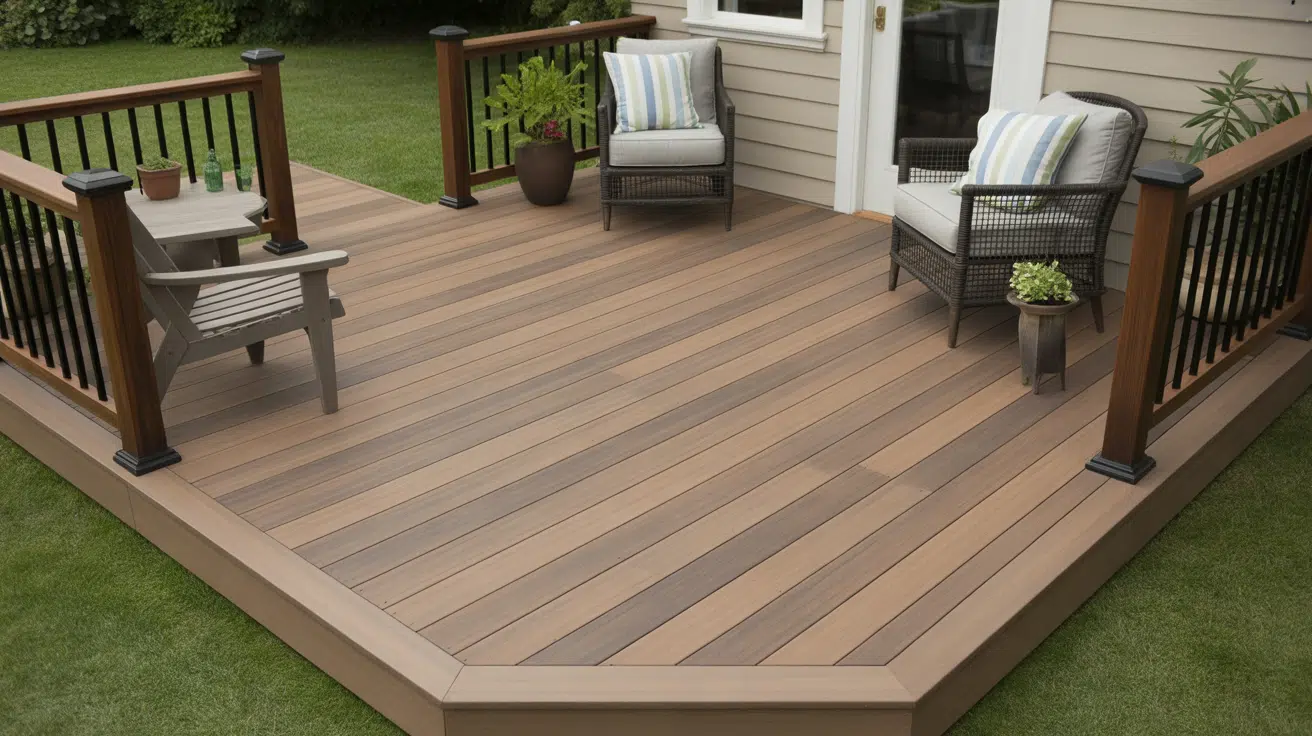
30. Rustic Brown Wood-Look Deck

Choose boards with heavy grain texture and weathered brown tones for a traditional feel. This mimics aged wood without the maintenance headaches. Brown tones feel warm and welcoming.
Installation Tips: Mix boards from different boxes during installation. This blends any color variation.
31. Bold Color-Block Deck Pattern

Divide your deck into sections using sharply contrasting colors for maximum impact. This is the most daring option on the list. Color blocks can separate functions dramatically. It’s not for everyone, but it makes a powerful statement.
Installation Tips: Use the lighter color for larger areas. Dark shades work best as accents.
Expert Tips for Implementing These Ideas
Designing composite decking isn’t just about creativity; execution is everything. Here are a few expert tips to make sure your composite decking ideas translate beautifully in real life.
- Plan board direction and subframe layout early to avoid costly mistakes later in the project.
- Mock up colors in natural sunlight since composite materials can look different in shade versus the sun.
- Account for expansion gaps and board overhangs as recommended by your manufacturer’s guide.
- Consider hidden fasteners to achieve that clean, seamless finish that showcases your pattern.
- Consult installation guides specific to pattern work, as some designs require extra blocking or support.
Summing It Up
Composite decking gives you a canvas for creativity that wood simply can’t match.
From simple, straight boards to complex geometric patterns, you can design something that fits your style and skill level
The key is planning ahead, respecting the material’s properties, and choosing patterns that work with your space. Remember that good patterns aren’t just about looks.
They guide foot traffic, define zones, and can even make small spaces feel larger. With proper installation and minimal maintenance, your deck will look great for decades.
Now comes the fun part: choosing which of these ideas speaks to you. What pattern are you most excited to try in your backyard?


