Before and After: 1960s Ranch House Interior Remodeling
When I first walked into this 1960s ranch house, peeling wallpaper and worn carpets greeted me at every turn.But beneath the dated surfaces, I saw the bones of a fantastic home waiting to be restored.
My six-month renovation turned this tired ranch into a modern family space while keeping its mid-century beauty. If you’re considering buying an older ranch house, this post will show you what’s possible.
I’ll take you through each step of our remodel, including:
- How we kept costs under control
- Which original features we saved
- Before and after photos of every room
As someone who’s lived through the dust and decisions, I’ll share honest tips to help your ranch renovation go smoothly.
Assessing the Original Layout and Design
When I walked into the house for the first time, I noticed that the small front windows made the living room feel dark.
The kitchen sat isolated behind walls, cut off from the rest of the home.
Brown carpet covered every bedroom floor, and wood paneling darkened the hallways.
The closed-off rooms created a boxed-in feeling that didn’t match how families use spaces today.
The kitchen was most telling, with its tight layout and barely enough room for one person to cook, let alone for family to gather.
But not everything needed changing. The house had good points, too.
Solid hardwood floors waited under that old carpet.
The brick fireplace stood strong as a natural centerpiece.
Even better, the foundation showed no signs of problems.
The main issues to fix were clear: The walls blocked natural light, and the outdated electrical systems couldn’t handle modern appliances.
Small closets needed better storage design and a closed floor plan that made spaces feel smaller than they were.
I spent time in each room, noting which original features we could update and which needed a fresh start.
Understanding these details helped me create our renovation plan to brighten spaces while maintaining the home’s basic character.
Opening Up: Creating an Open-Concept Living Space

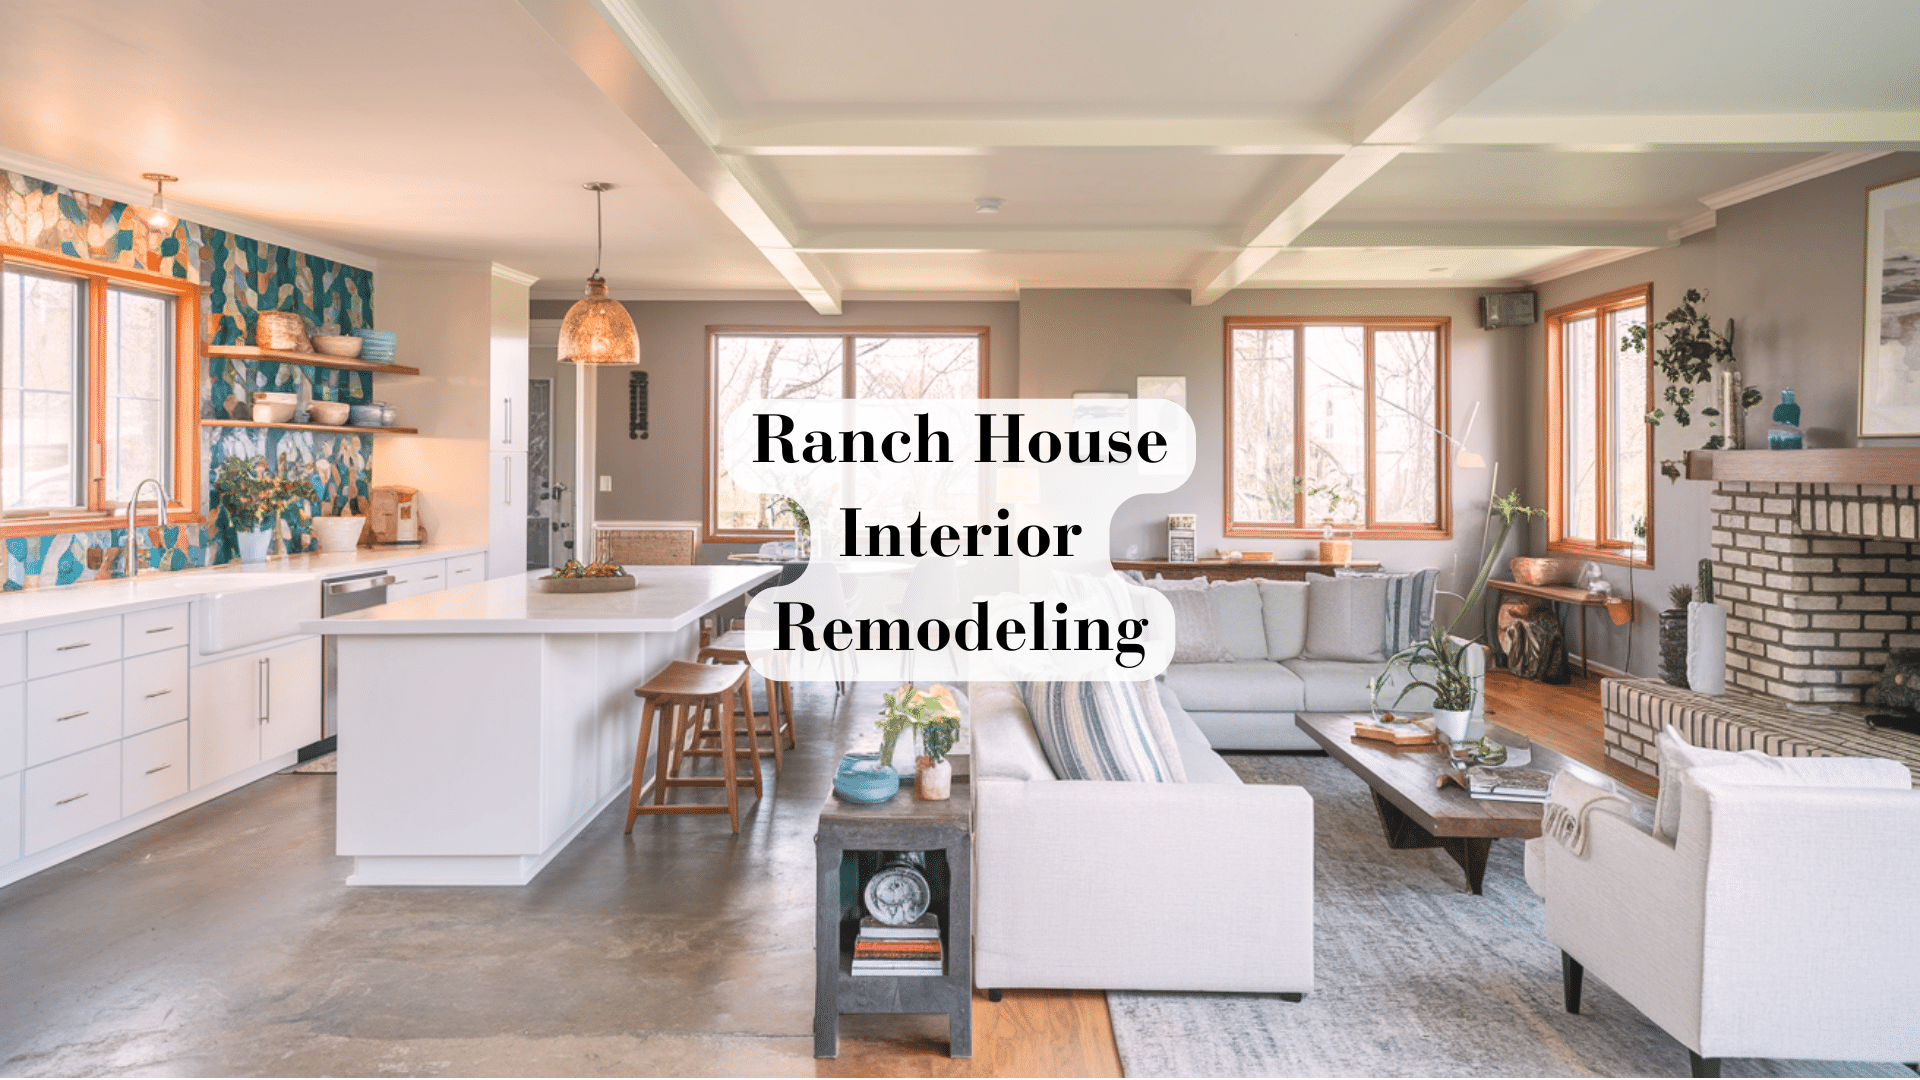
The biggest change came when we removed the walls between the kitchen, dining room, and living area.
This wasn’t as simple as swinging a hammer – we needed a structural engineer to check which walls could safely come down.
What We Found Inside the Walls
- Main support beams that needed steel reinforcement
- Old wiring that had to be updated
- Plumbing pipes we chose to move
The process took three weeks, but the difference was worth every dusty day.
Now, when I’m cooking in the kitchen, I can talk with family relaxing in the living room.
Natural light from the living room windows reaches the back of the house.
The new open layout changed how we use the space.
Kids do homework at the kitchen counter while I prepare dinner.
Friends gather around the island during parties instead of staying stuck in one room.
The whole main floor feels bigger, even though we didn’t add any square footage.
We kept the original archway between the front door and the living room.
It frames the space nicely and reminds us of the home’s history.
Adding wide-cased openings where the walls once stood helps each area feel defined while staying connected.
Small Changes that Made Big Differences
- Moving the refrigerator created better traffic flow
- Adding an island brought in extra counter space
- Installing recessed lights brightened dark corners
Modernizing the Heart: Kitchen Renovation

The old kitchen told its age through yellow counters and tired cabinets.
In planning the new space, I wanted clean lines and bright surfaces that would look fresh for years.
The New Layout Includes
- A 6-foot island with seating for four
- Double the counter space of the original kitchen
- Pull-out drawers for pots and pans
- A pantry wall with floor-to-ceiling storage
White shaker cabinets now line the walls, topped with quartz counters in soft gray.
I chose these materials for their timeless look and easy upkeep.
No special cleaners are needed – just soap and water to keep everything looking new.
The backsplash features subtle patterns created by white subway tiles laid in a brick pattern.
Under-cabinet lighting makes food prep easier and adds a warm evening glow.
I also considered installing floor heating in the kitchen, but ended up shelving that idea for a later date.
Smart Storage Solutions
- Corner cabinets with lazy Susans
- Deep drawers instead of lower cabinets
- A dedicated coffee station with hidden outlets
- Built-in recycling and trash bins
Appliances were chosen for their simple controls and reliability.
The gas range has basic knobs that anyone can use, while the French door refrigerator makes it easy to see all your food at once.
My favorite morning spot is now the window over the sink.
We made it larger to let in more light and add a backyard view.
A pull-down faucet and deep sink basin make cleaning big pots much easier.
Revitalizing Bedrooms and Bathrooms

Each bedroom started with removing the old carpet and refinishing the hidden hardwood floors beneath.
The warm wood tones set the base for creating restful spaces that feel fresh but not fussy.
Main Bedroom Updates
- New windows that open smoothly and seal properly
- Added closet organization with adjustable shelving
- Simple ceiling fan for better airflow
- Soft gray walls that work with any bedding colors
The attached bathroom needed the most work.
We gutted it completely, finding space to expand the shower by moving a linen closet.
The new layout includes a double vanity with plenty of storage underneath.
Simple white tiles in the shower keep the space bright, while wood-look floor tiles add warmth.
Guest Bathroom Improvements
- Updated plumbing for better water pressure
- Built-in medicine cabinet for extra storage
- A new tub with a curved shower rod
- Easy-clean porcelain tile floors
The kids’ rooms also received practical updates.
We installed deeper closets with low rods so they can reach their clothes.
Magnetic paint on one wall section allows them to display artwork without damaging the walls.
In both bathrooms, we chose fixtures that look good but don’t cost a fortune.
The chrome faucets and shower heads are basic models that work well and match everything.
Wall-mounted toilets make floor cleaning easier.
One small change made a big difference – we added exhaust fans with humidity sensors.
They turn on automatically when needed, keeping mirrors clear and walls dry.
The bedrooms and bathrooms now work better for everyone.
They’re not fancy, just well-planned spaces that make daily routines smoother.
Incorporating Mid-Century Modern Elements
The 1960s ranch style shaped our design choices.
We wanted to respect the home’s roots while making it work for today.
Clean lines and simple shapes guided our updates.
Original Features We Kept
- The living room’s brick fireplace
- Wood trim around windows
- Built-in shelves flanking the fireplace
- Wide window sills
Each room features a mix of old and new pieces.
We found a low-backed sofa for the living room that fits the style without looking dated.
Its simple form and tapered legs match the era, but fresh fabric makes it current.
Furniture Choices
- A round dining table with slim legs
- Simple wood chairs with clean lines
- Low dressers in the bedrooms
- Wall-mounted light fixtures with straight lines
Light fixtures played a big part in the style.
We picked simple glass globes for overhead lights and straight-lined sconces for the walls.
These small touches help tell the home’s story.
The walls also received careful consideration.
Instead of busy patterns, we used solid colors to make the furniture stand out.
The paint colors came from a 1960s design book: soft whites and warm grays that still look good today.
We mixed natural materials, like the original wood floors and new wood cabinets.
Brass and black steel metal accents add interest without looking fussy.
Every piece serves a purpose—nothing sits around just for show.
Anyone fixing their ranch house should start with good bones and build from there.
Keep the strong points of the old design and update the parts that matter most to your lifestyle.
Enhancing Natural Light and Ventilation
Bringing more sunlight into the house had the biggest impact on how the space felt.
We started by replacing the small original windows with larger ones that reached higher toward the ceiling.
Key Window Changes
- Added a big picture window in the living room
- Put in a glass door to the backyard
- Installed two solar tubes in dark hallways
- Replaced cloudy glass with clear double-pane windows
The difference shows up in our power bills, too.
More natural light means less need for electric lights during the day.
The new windows open fully, letting in fresh air when the weather’s nice.
The solar tubes work better than I expected.
These simple light channels bring sunshine into spots where regular windows wouldn’t fit.
They light up the hallway so well that we rarely turn on overhead lights until evening.
Ventilation Improvements
- New windows that tilt in for easy cleaning
- Screen doors on both entrances
- Ceiling fans in every bedroom
- A kitchen range hood that moves cooking odors outside
We put extra thought into the bathroom windows.
Frosted glass lets in light while keeping privacy.
A small window up high in the shower streams morning light without needing curtains.
The glass door to the backyard did more than bring in light—it made the yard feel like part of our living space.
Opening it during parties allows people to move easily between inside and outside.
These changes made the whole house feel more open and fresh.
Plus, good airflow means fewer stuffy rooms and lower air conditioning costs in summer.
Updating Flooring and Fixtures
Finding the original hardwood floors under the old carpet was like finding hidden treasure.
We spent a week sanding and finishing them, bringing out the warm oak tones flowing through the main living areas.
Floor Choices by Room
- Living areas: Restored oak hardwood
- Kitchen: Large format porcelain tiles
- Bathrooms: Non-slip ceramic tile
- Mudroom: Durable slate tiles
The kitchen floor needed extra attention.
We picked large tiles to reduce grout lines, making cleaning easier.
Dark grout hides dirt better than white, a tip our tile setter shared with us.
New Light Fixtures Include
- Recessed lights in the kitchen
- Simple pendant lights over the island
- Wall sconces in hallways
- Motion-sensor lights in closets
The bathroom fixtures required careful planning.
We chose middle-range faucets from a trusted brand.
They are not the cheapest or fanciest, but they look good and work well.
For our setup, floor-mounted toilets made more sense than wall-mounted ones.
Lessons We Learned
- Buy extra flooring material – you’ll need it for repairs
- Test grout color on a sample board first
- Check that light switches are placed at the right height
- Make sure ceiling fans are centered in rooms
One smart move was hiring an electrician to add more outlets.
Old houses never have enough power points.
Now, each room has outlets every six feet, which makes furniture placement much more flexible.
Before and After: Visual Journey of The Transformation
Let me walk you through each space and the changes we made. These photos tell the story better than words alone.
Living Room

Before: Dark wood paneling covered the walls, and thick curtains blocked the windows.
The brick fireplace wore outdated orange-brown paint.
After: Light walls brighten the space, and the cleaned and sealed original brick fireplace stands proud.
New windows and simple blinds welcome natural light.
Kitchen

Before: Yellow counters and brown cabinets made the space feel stuck in time.
Limited counter space left little room for cooking.
After: White cabinets and gray counters create a fresh look.
The new island adds work space and a spot for families to gather.
Main Bedroom

Before: Floral wallpaper and worn carpet gave the room a tired feel.
One small window limited natural light.
After: Soft gray walls and restored hardwood floors create a calm space.
A larger window fills the room with morning light.
<h2Conclusion
Looking back at our ranch house update, the changes went beyond just walls and windows.
This project taught me that good planning beats rushing ahead every time.
The clean lines and open spaces we created make daily life smoother and more comfortable.
For anyone thinking about fixing up their own ranch house, here’s what matters most:
- Take time to understand your home’s strong points
- Make a clear plan before you start
- Set aside extra money for surprise fixes
The best part?
This house works for how we live today while keeping some of its 1960s beauty.
It proves you don’t need a total teardown to make an older home feel fresh and work well.
If you have questions about remodeling your ranch, please leave them in the comments below.
I’d love to help you learn from our experience.
Frequently Asked Questions
How Much Did the Entire Ranch House Remodel Cost?
The full renovation cost $85,000, including labor and materials.
The kitchen and bathrooms accounted for the most, at $40,000.
We saved money by keeping the original hardwood floors.
How Long Should I Plan for A Similar Renovation Project?
Our project took 6 months from start to finish.
The kitchen took 3 weeks, the bathrooms 2 weeks each, and the rest of the time was spent on other spaces.
What Are the Most Common Problems when Renovating a 1960s Ranch House?
Old electrical wiring often needs complete replacement.
The plumbing might have corroded pipes.
Asbestos could be present in popcorn ceilings and floor tiles made before 1980.

