Bathroom Refacing Guide with Easy Tips and Ideas
Are you tired of your outdated bathroom but don’t have thousands to spend? There’s a better way!
Bathroom refacing is a smart way to get a new look without the high cost of full replacement.
In this guide, we’ll explain cabinet refacing and its comparison to other options.
You’ll learn when refacing makes more sense than replacing, what materials to use, and step-by-step instructions for doing it yourself.
We’ll also share design ideas to make your bathroom stand out, common mistakes to avoid, and how to keep your new cabinets looking great.
No matter if you’re on a budget or just want a quick update, bathroom refacing is the perfect step for a better bathroom.
What Is Bathroom Cabinet Refacing?
Bathroom cabinet refacing is a renovation method that keeps your existing cabinet frames while replacing the outer parts.
The process involves installing new doors and drawer fronts and covering exposed sides with matching materials.
This gives your bathroom a completely new look without the high cost and disruption of full replacement.
The original cabinet boxes stay in place, saving time and money, and refacing changes the look of your cabinets while keeping their basic structure intact.
Comparing Reface, Replace, and Refinishing
Let’s look at the table comparing the three ways to renovate your bathroom cabinets.
| Approach | What It Involves | Time Required | Cost Range | Pros | Cons |
|---|---|---|---|---|---|
| Refacing | Replacing doors, drawer fronts, and visible surfaces | 2-4 days | Moderate | Saves money while getting a new look; Less mess; Faster completion | Limited layout changes possible; Not ideal for damaged cabinets |
| Refinishing | Sanding and applying new paint/stain to existing surfaces | 3-5 days | Low | The most affordable option: Simple process | Limited visual change; Requires sound cabinet structure |
| Replacing | Removing old cabinets and installing brand-new ones | 1-2 weeks | High | Complete design freedom; Can fix structural issues; New materials throughout. | Higher cost, Longer installation time, More disruption to home |
When Refacing Is Better
Refacing makes the most sense when your cabinet boxes remain strong and solid.
Choose this option when you like your current bathroom layout but want updated looks. It works well for busy households that can’t handle weeks of construction.
The process creates less waste and dust compared to full replacement.
Many homeowners select refacing when their budget falls between basic refinishing and costly total replacement. It provides a middle-ground solution with good results.
Reface a Bathroom Cabinets: Step-by-Step
Let’s look at the steps and the materials needed to reface your bathroom cabinets.
Materials Required
The essential materials needed are:
- ¾” MDF or finished board – Used to create new cabinet doors and drawer fronts.
- ¼” plywood – Used for the bottoms of drawer boxes.
- Wood glue – To securely attach shaker trim without nails.
- Scrap wood or MDF – For building new drawer boxes inside the vanity.
- Pocket hole screws – For assembling drawer boxes and attaching structural pieces.
- Concealed/cup cabinet hinges – For mounting new cabinet doors.
- Drawer slides/runners – For smooth drawer operation.
- Screws (assorted sizes) – For attaching hardware.
- Wood filler – To fill gaps or joints in trim.
- Sandpaper (220 grit or finer) – To smooth surfaces before painting or staining.
- Primer and paint OR stain and sealer – For the final finish on the cabinet doors and frame.
Step 1: Evaluate and Plan Your Vanity Upgrade
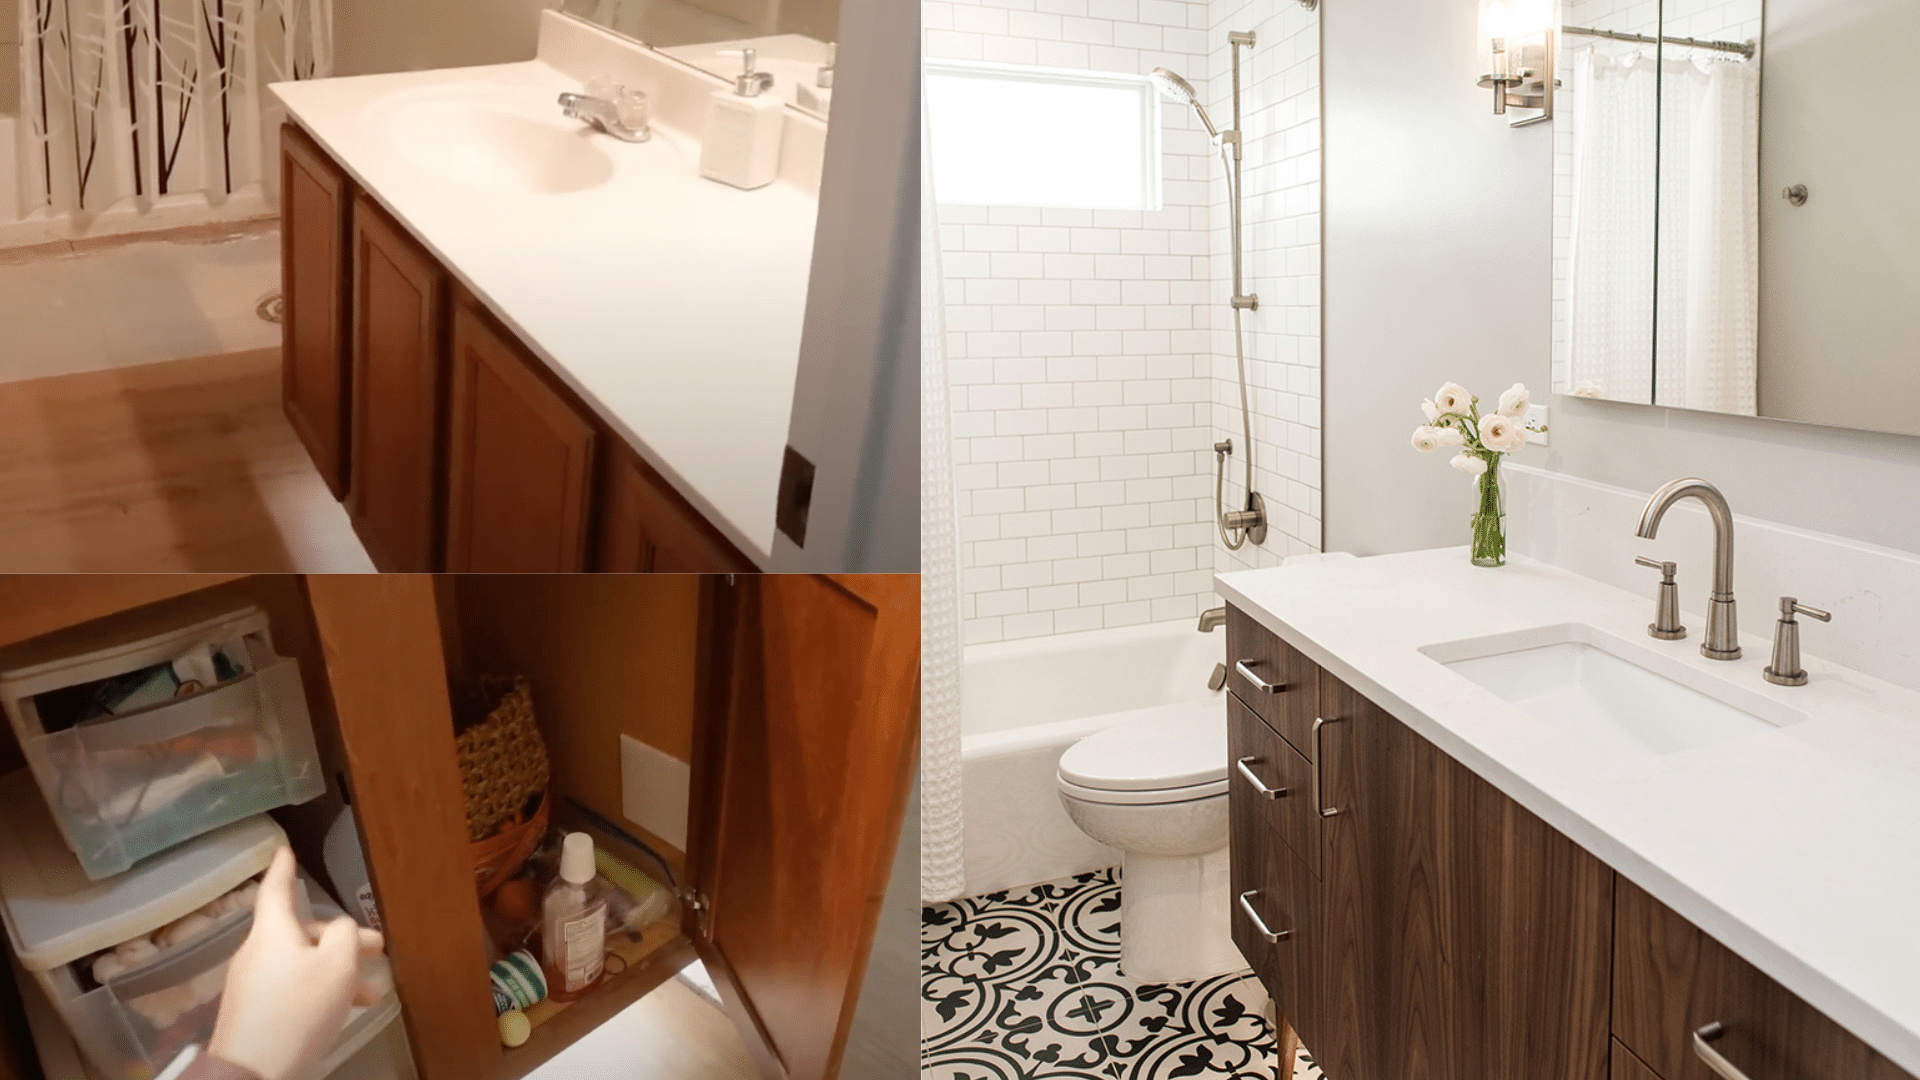
Look at your current vanity and consider what you want to change. It might be too low, have bad storage, or have ugly doors.
You can keep the main box structure but change the doors and improve storage to make it more functional.
Step 2: Remove Existing Cabinet Doors and Hardware
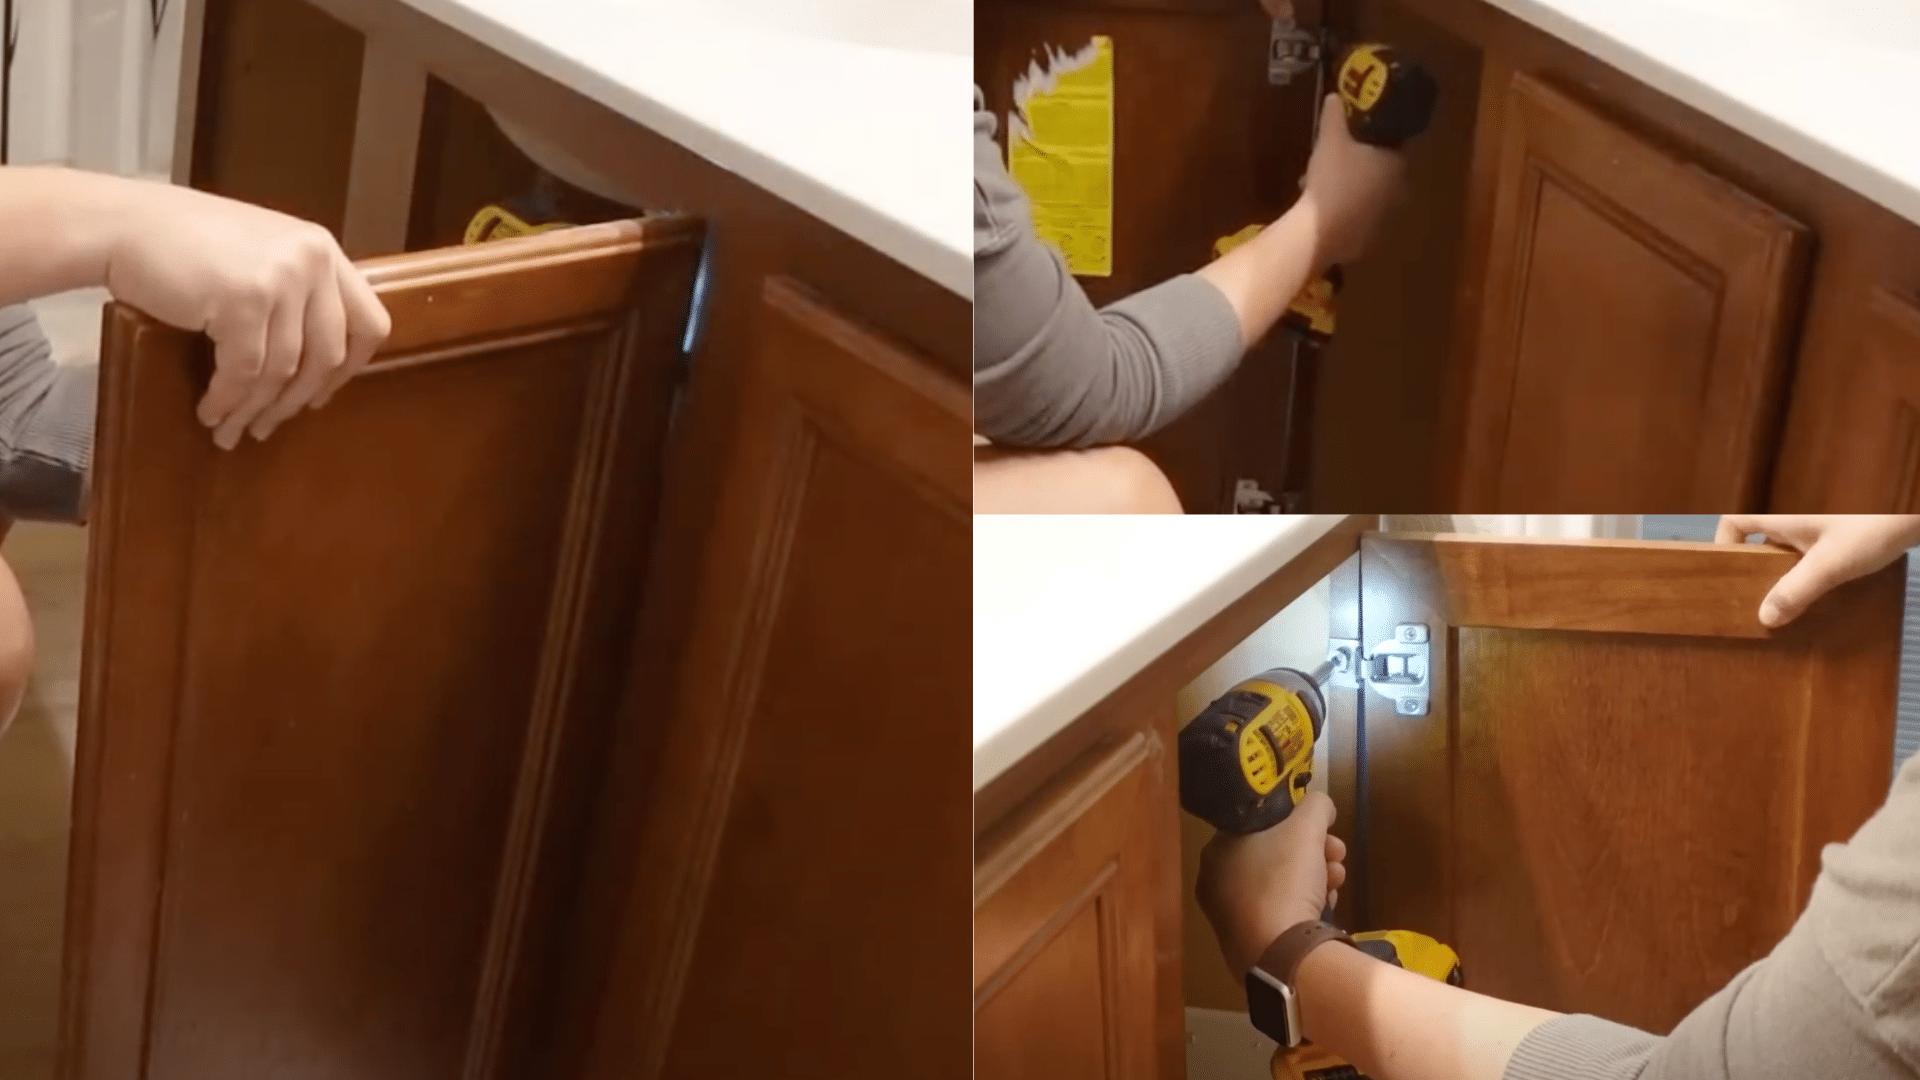
Unscrew all cabinet doors and drawer fronts. Look at the middle board (center stile) between the doors.
This might be glued or nailed. If you want wider doors, you may need to tap it gently with a hammer to remove it.
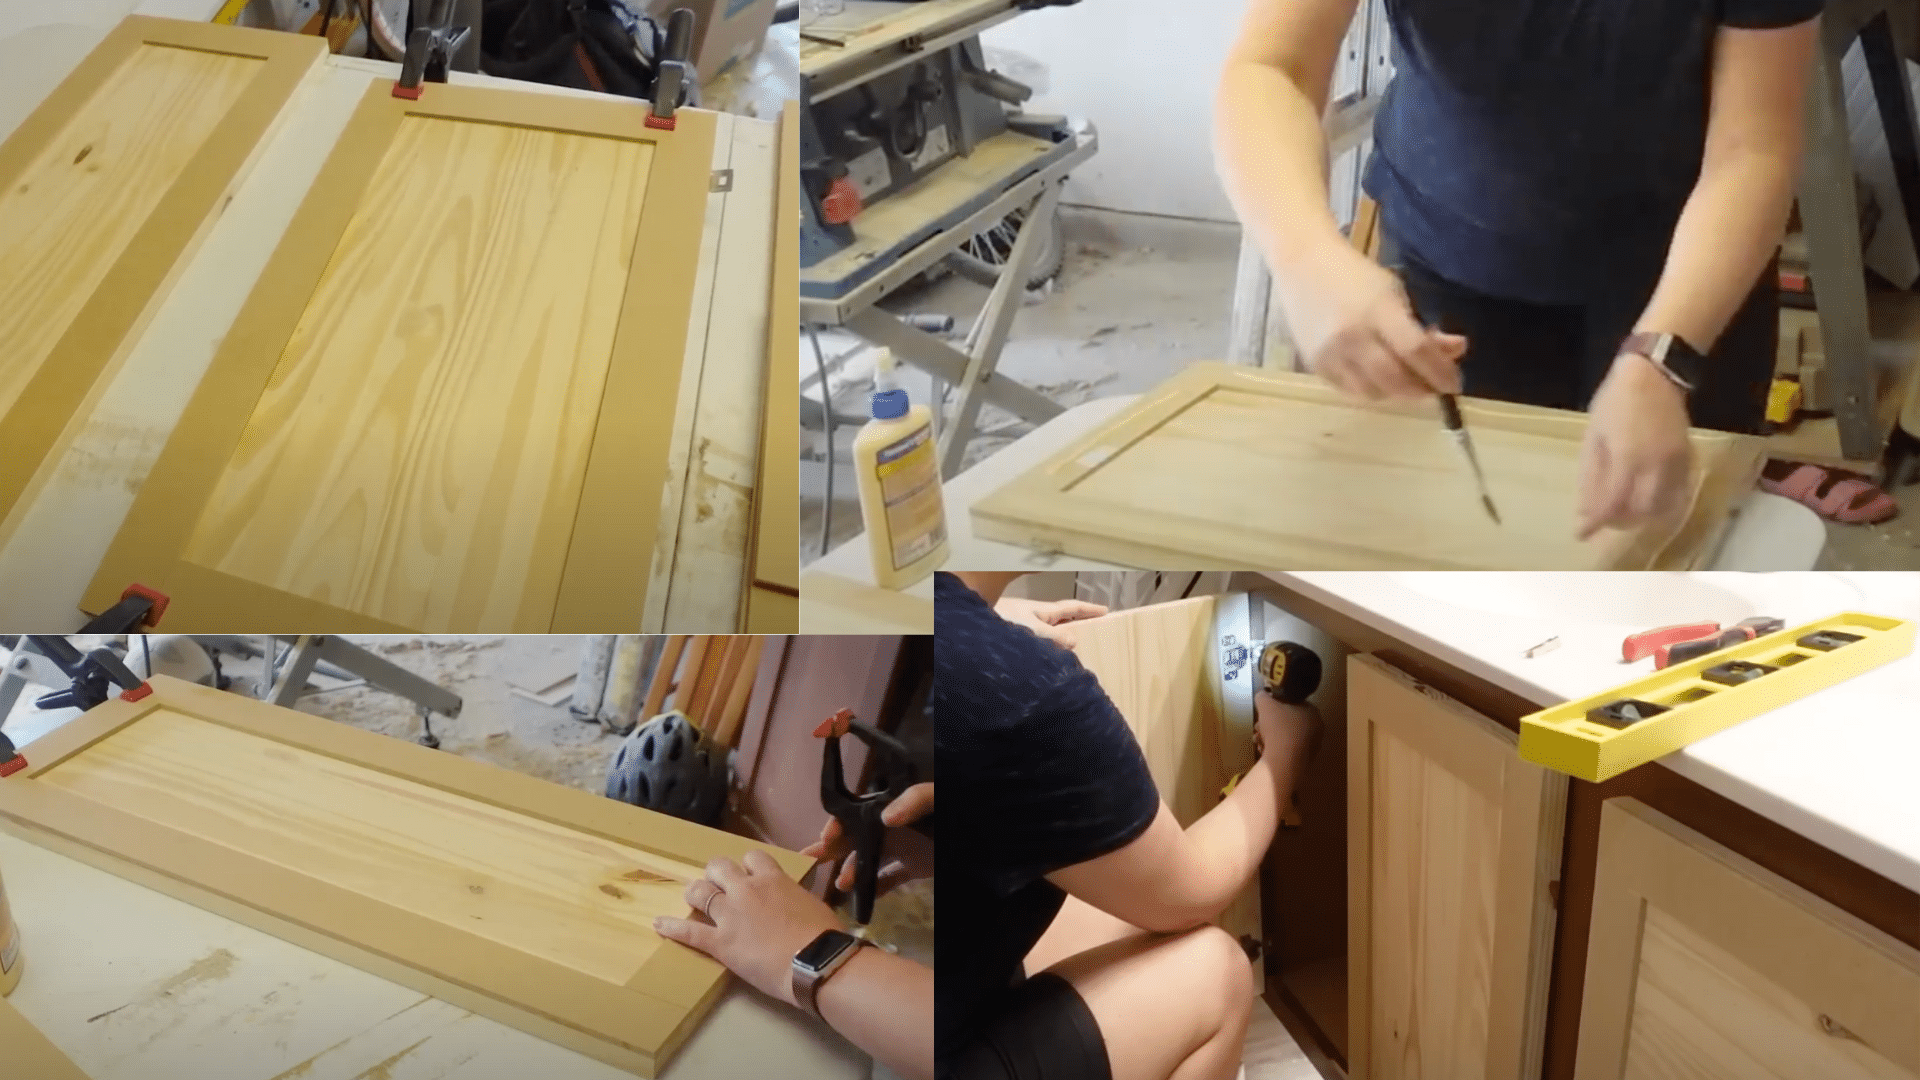
Step 3: Build or Order New Cabinet Doors
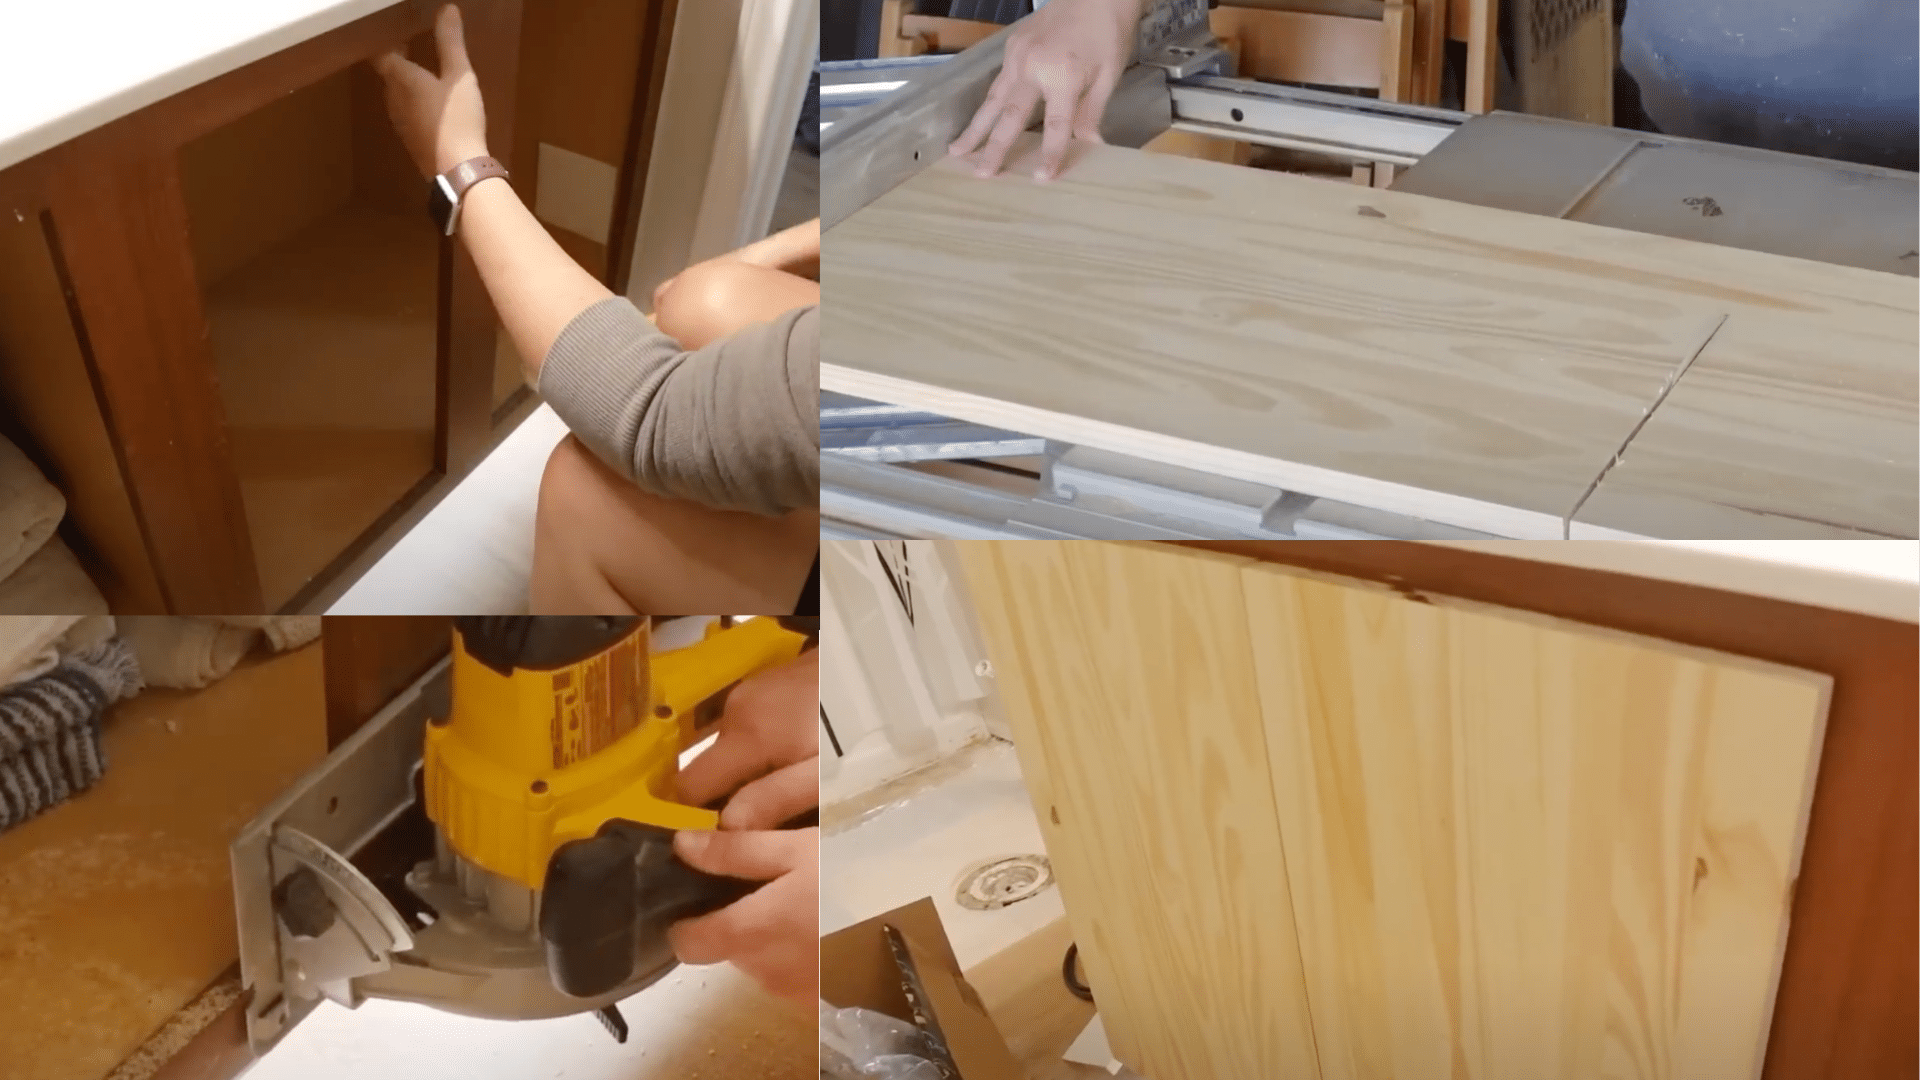
Measure your old doors to determine the size of your new ones. If you removed the center stile, make wider doors to fill the space.
Use a special tool called a hinge jig to make perfect holes for your door hinges.
Step 4: Build New Storage Drawers or Shelves
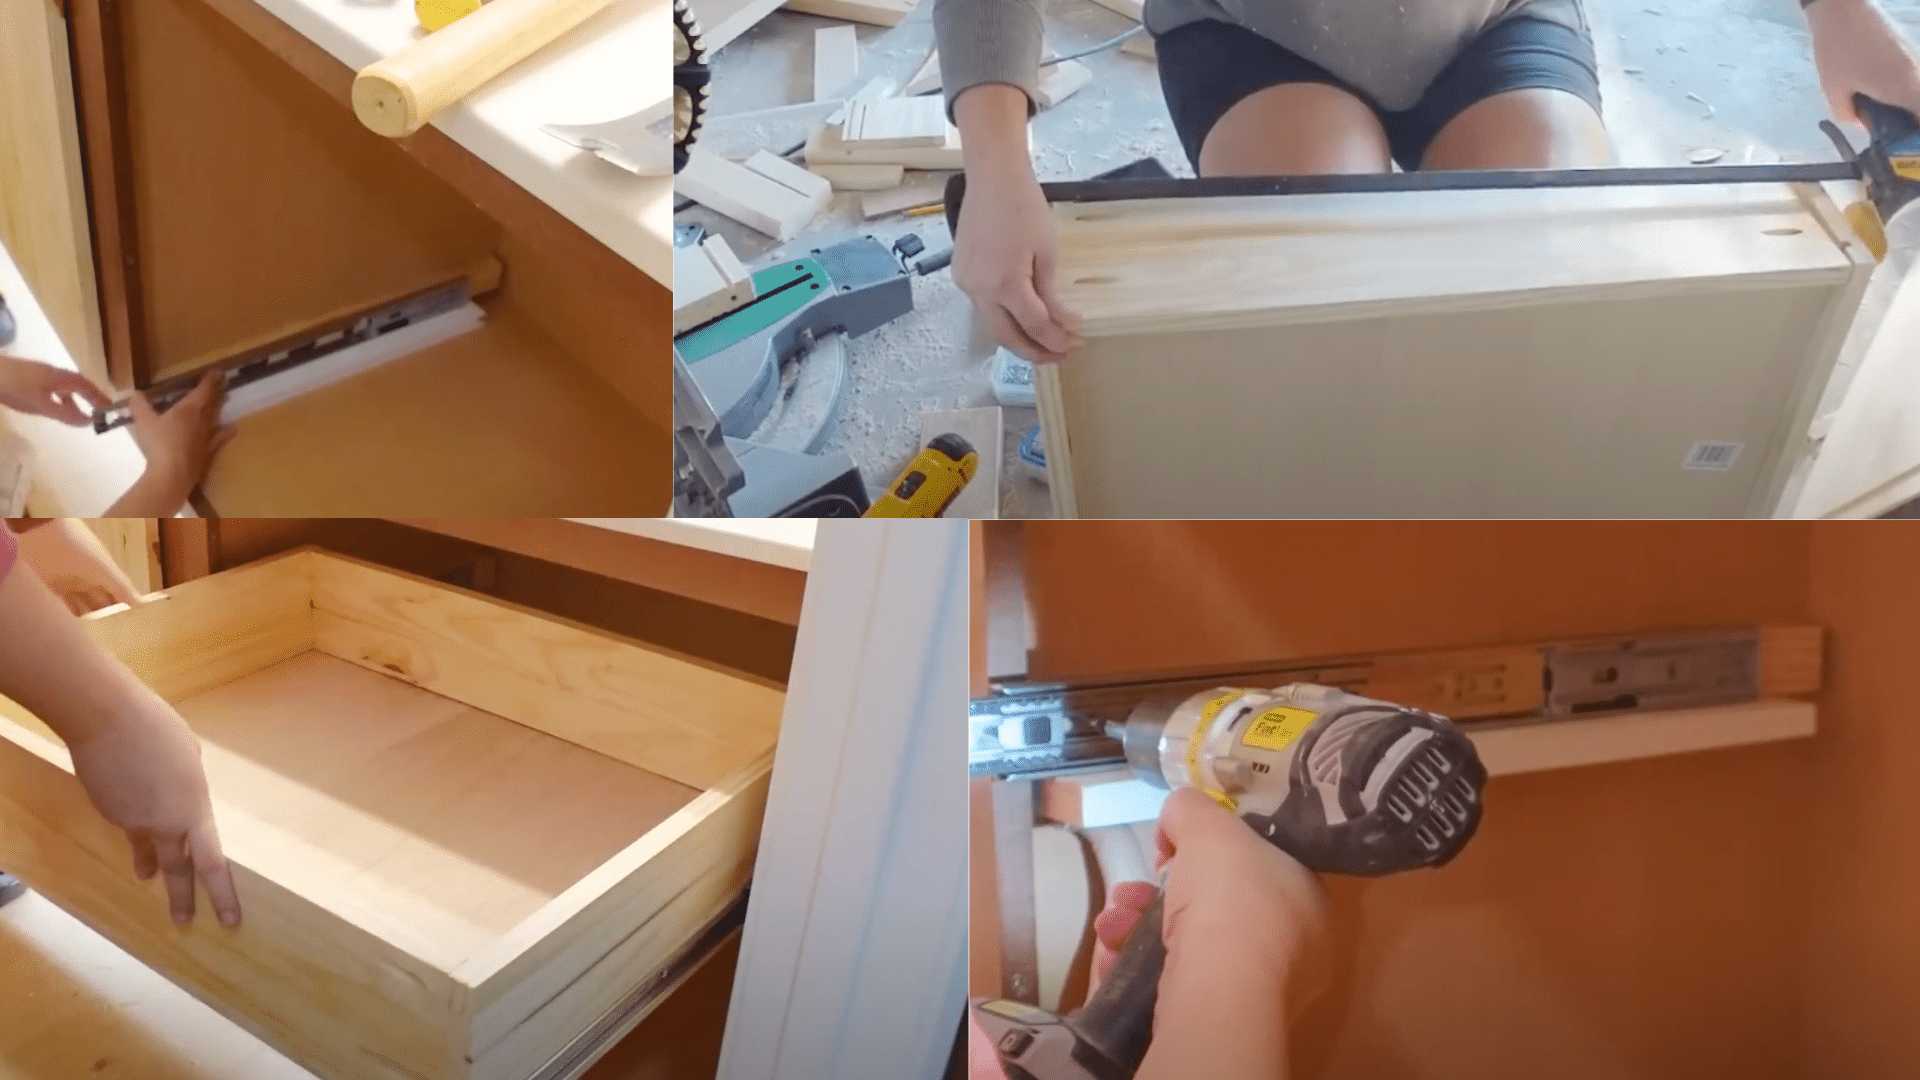
To reach things more easily, create pull-out drawers instead of regular shelves. Measure the space inside your cabinet for the drawer width.
Cut grooves in the sides for a thin plywood bottom. Put the sides around the bottom and screw them together.
Step 5: Install Drawers Inside Vanity
Put your drawer boxes in the cabinet and attach slides to make them open smoothly. Make sure everything is level and works well.
Wait to add the drawer fronts until after everything is in place.
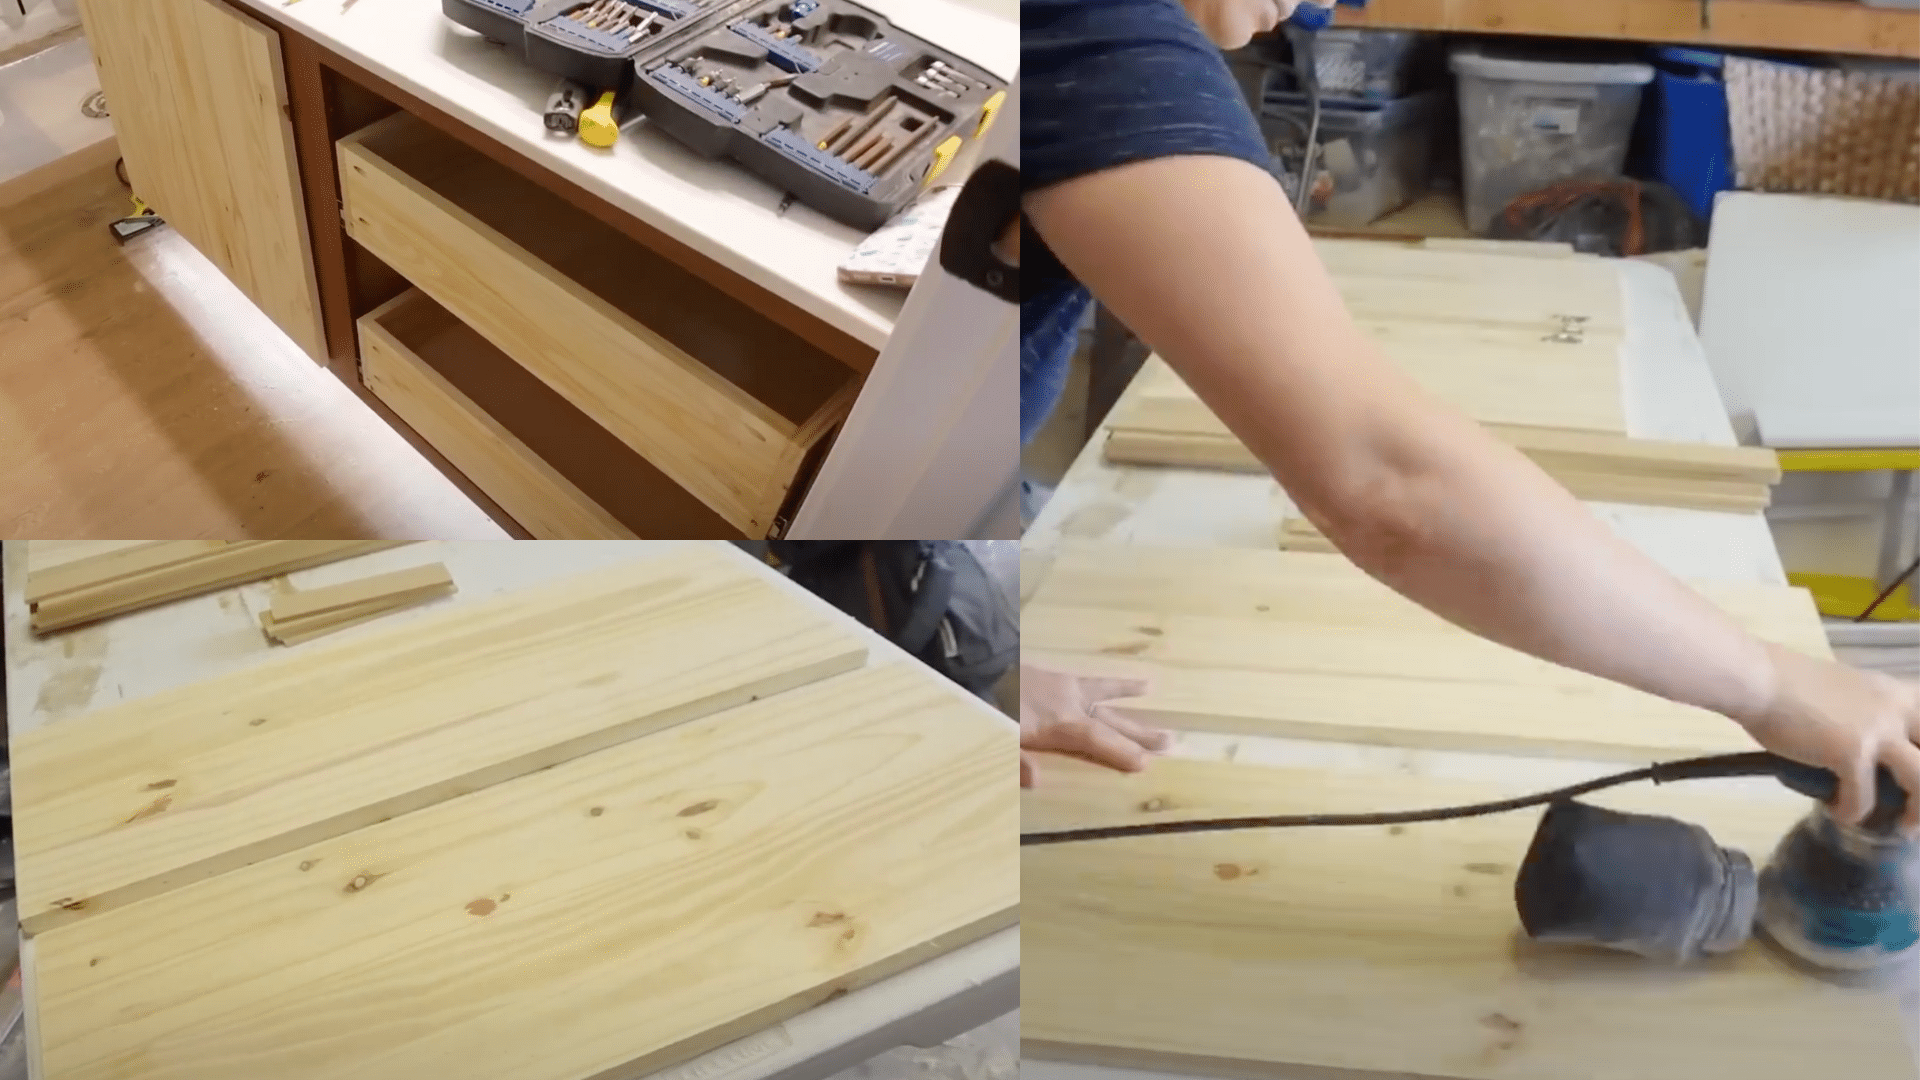
Step 6: Add Drawer Fronts and Cabinet Doors
Line up the drawer fronts with the drawer boxes and attach them. Before finishing, test your cabinet doors to make sure they fit properly.
For a matching look, use the same type of wood for drawer fronts and doors.
Step 7: Create DIY Shaker Style Fronts
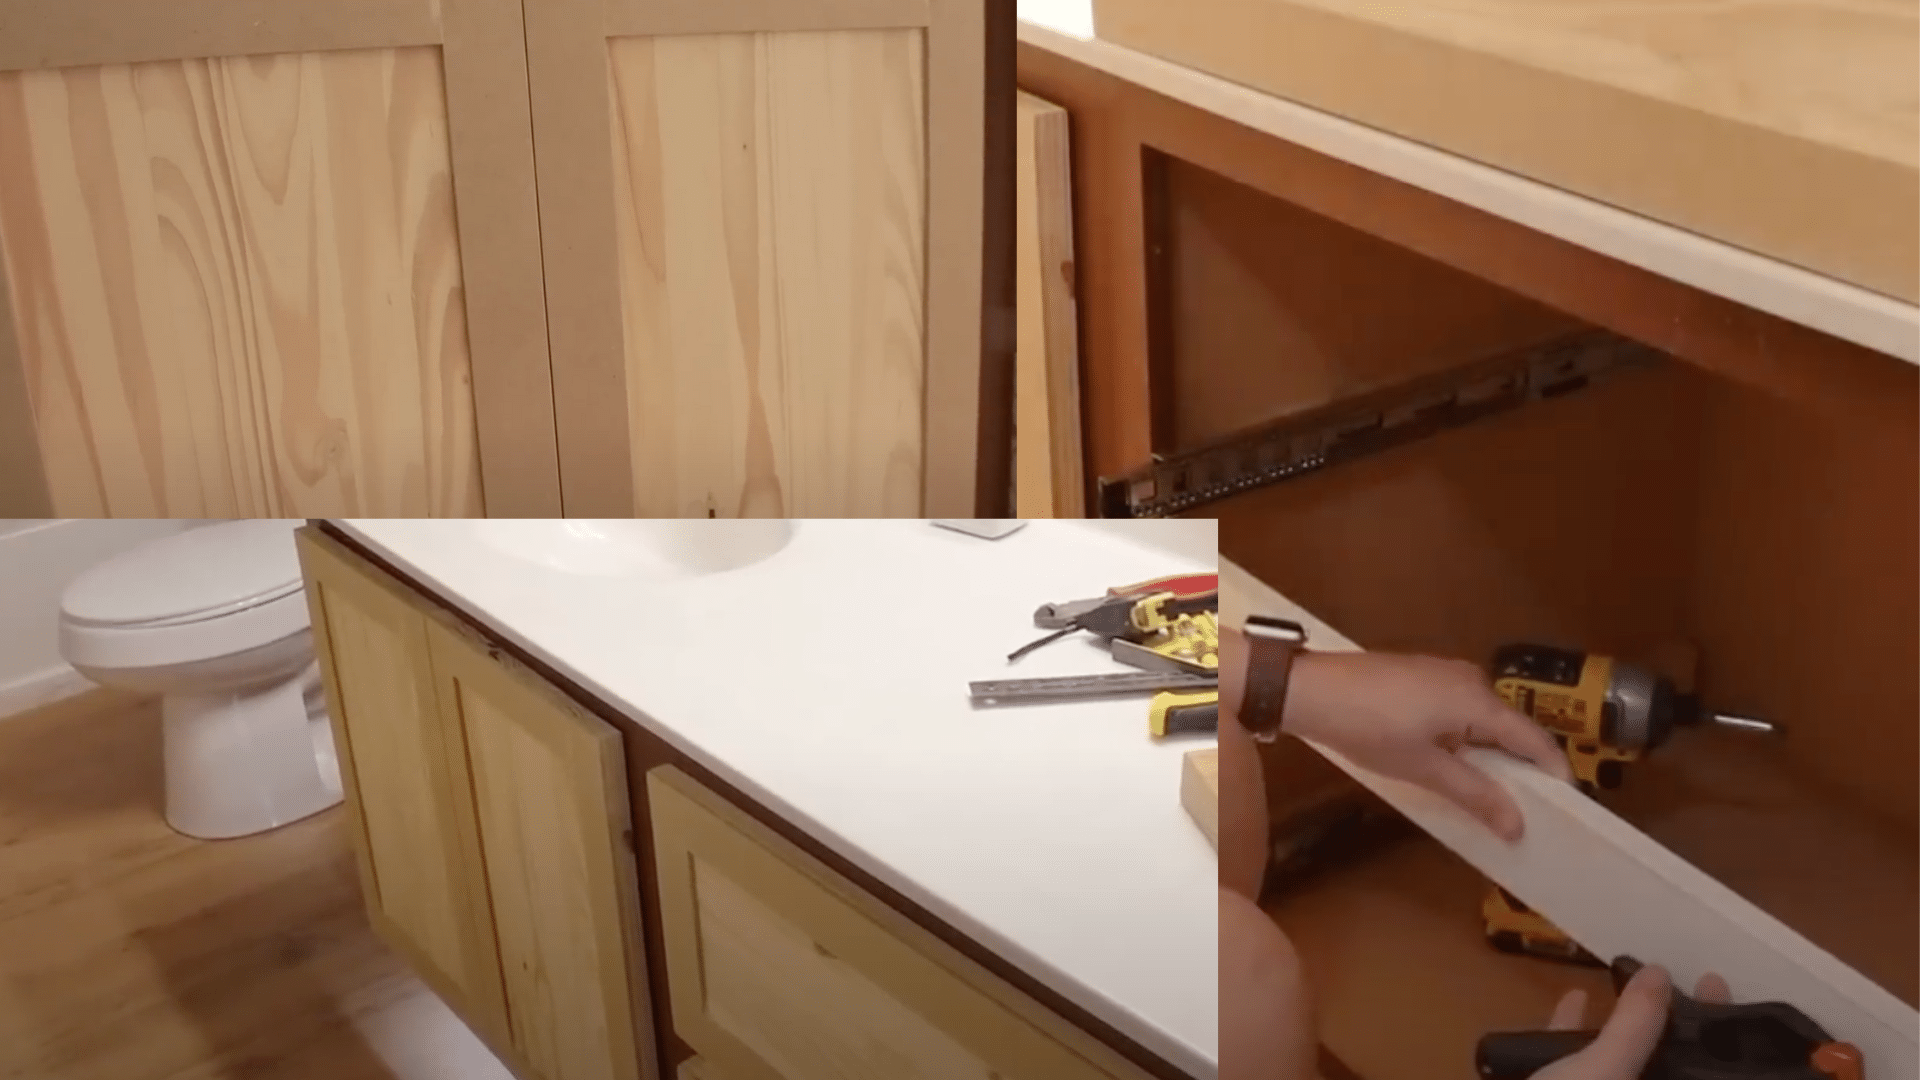
Cut thin boards into 2-inch strips. Sand your drawer and door fronts with fine sandpaper.
Glue the strips around the edges to make a frame. You don’t need nails—the glue will hold the thin trim pieces just fine.
Step 8: Final Touches and Adjustments

Add a board between drawers to make everything look neat.
Attach it to the cabinet frame using special pocket holes. This helps hide any gaps and gives your refaced vanity a clean, finished look.
Refacing Design Ideas
Learn about the refacing ideas for your bathroom that will make your bathroom look unique.
Color and Style Trends
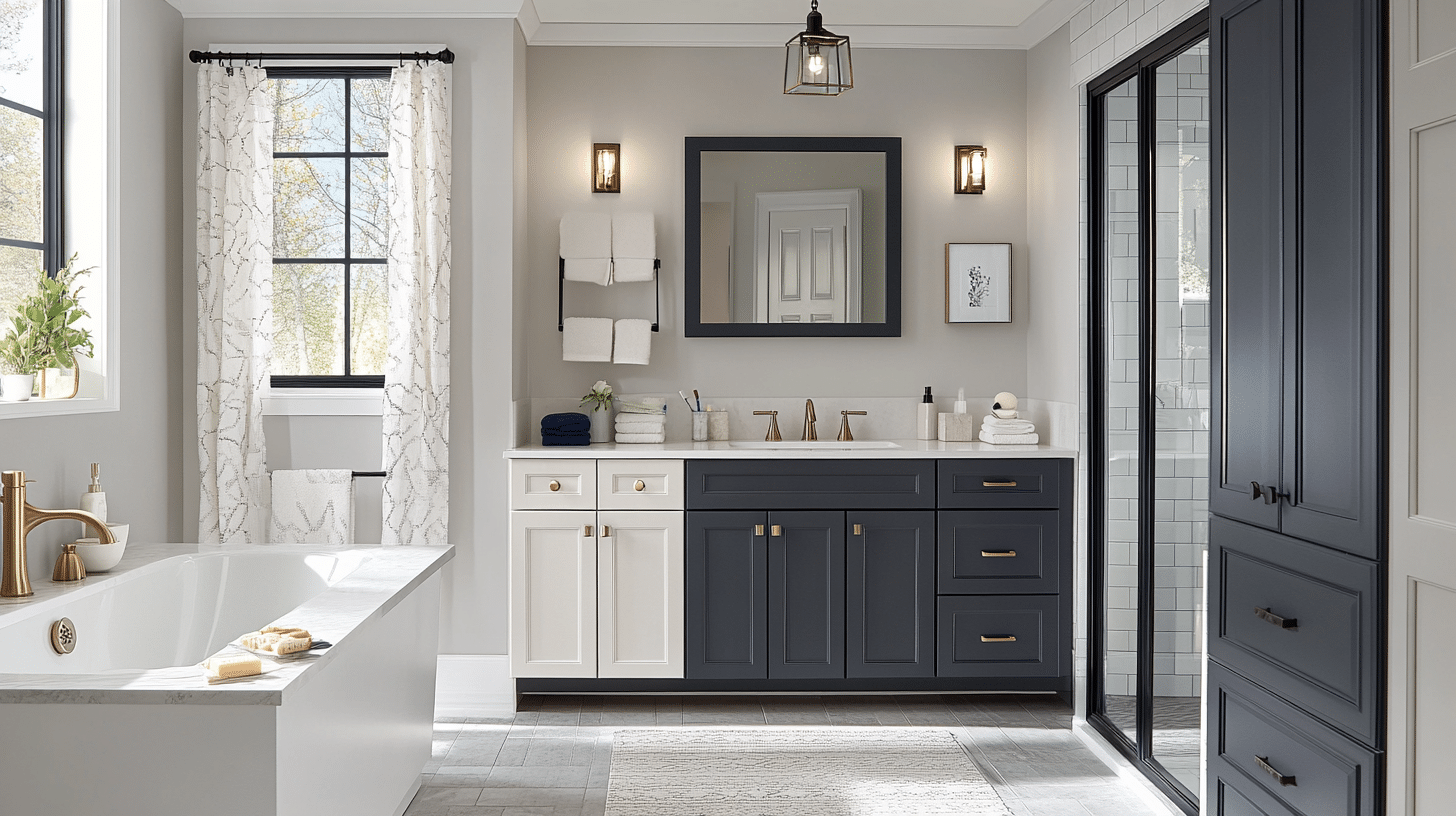
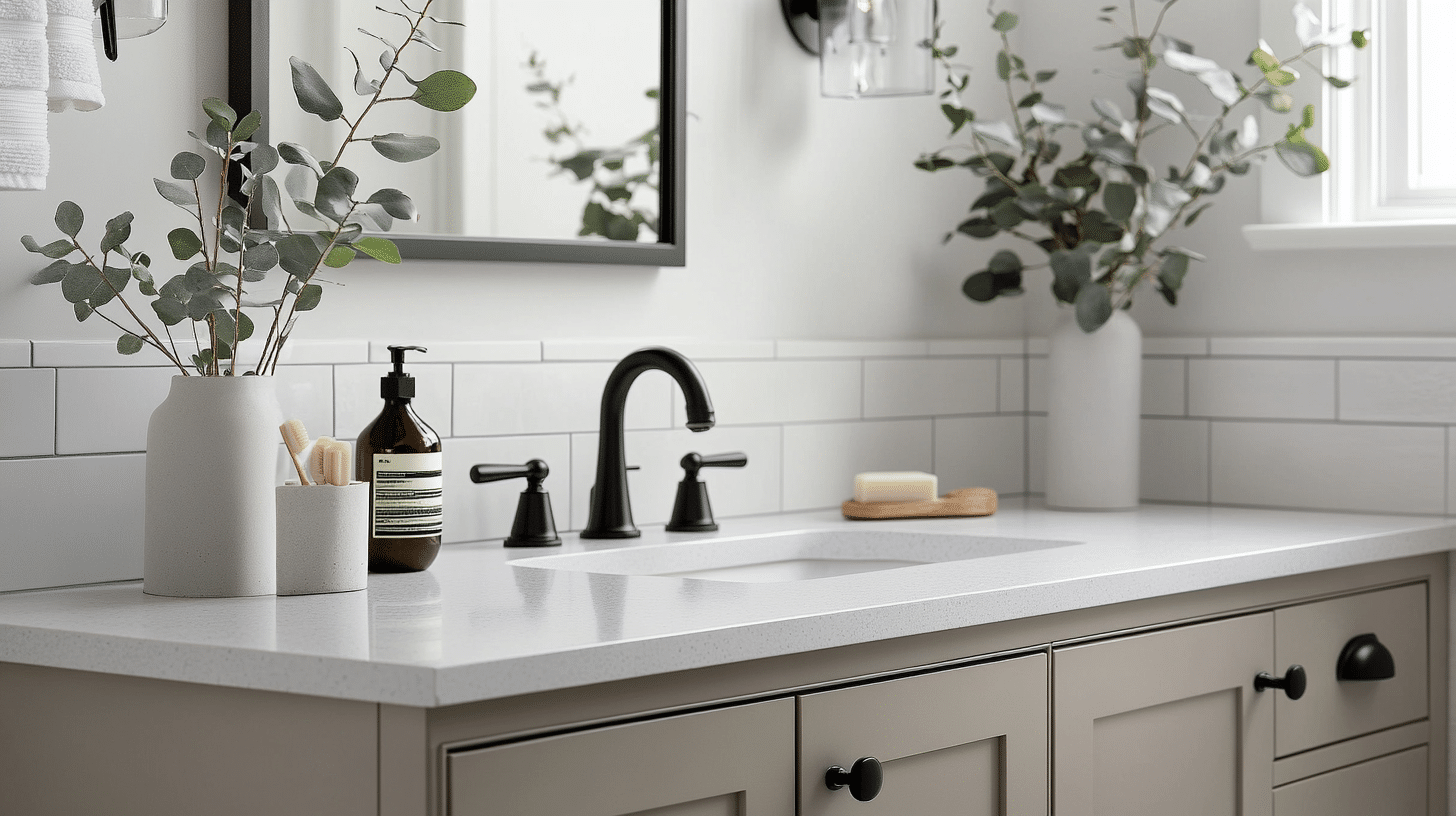
White and light gray cabinets remain popular for clean, bright bathrooms. Two-tone designs with darker lowers and lighter uppers add visual interest.
Matte finishes are replacing glossy ones, while simple hardware in black or brass complements most styles.
Navy blue and sage green also work well in bathroom spaces.
How to Match with Vanity, Tile, and Fixtures
Pick cabinet colors that work with your existing tile and fixtures. For white fixtures, almost any cabinet color works.
With colored fixtures, choose cabinets in neutral tones or complementary colors.
Match hardware finishes (like brushed nickel or matte black) with your faucets and shower fixtures for a put-together look.
Mixing Open and Closed Storage
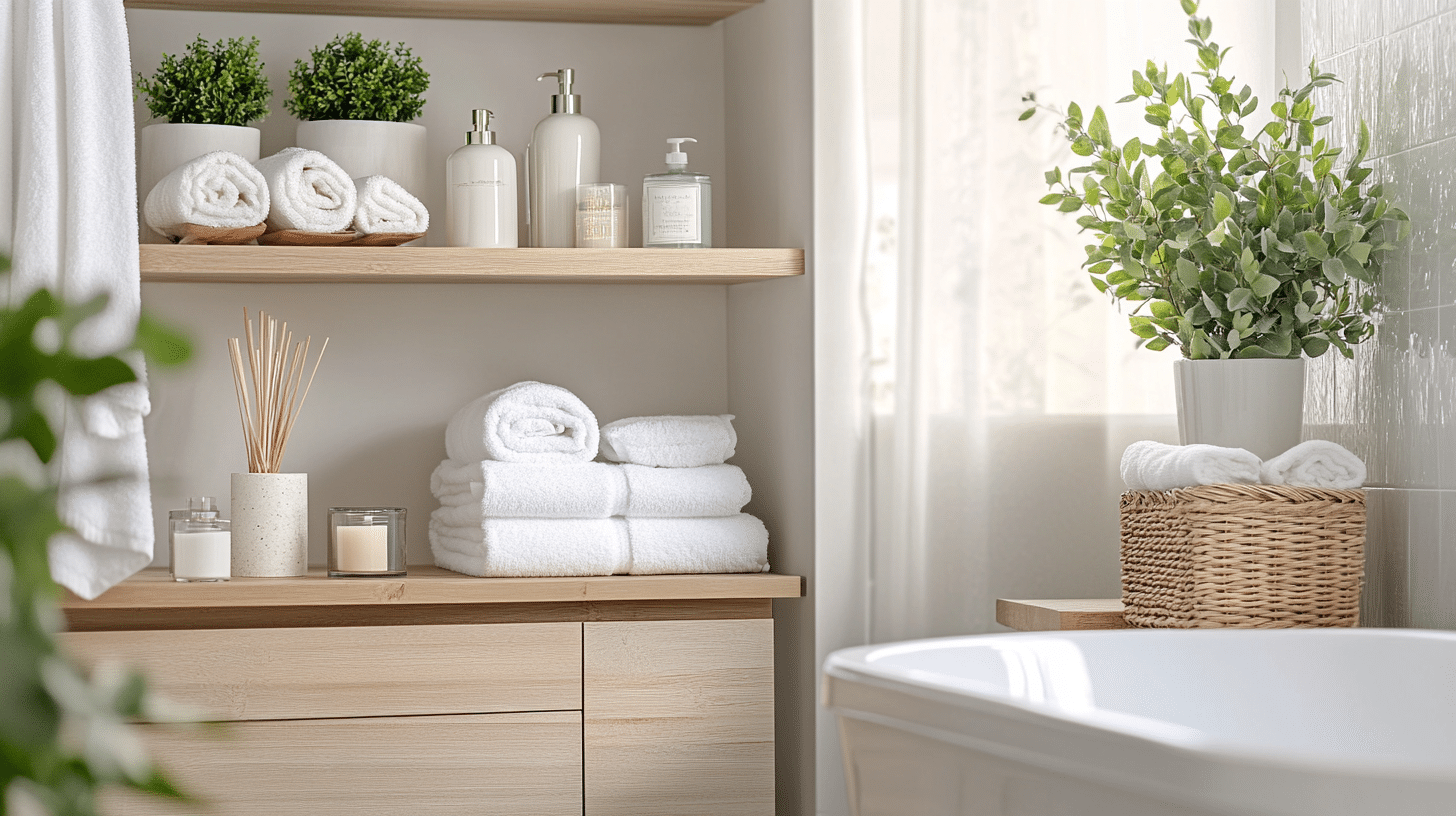
Combine closed cabinet storage with some open shelving for a modern look. Use closed cabinets to hide toiletries and cleaning supplies.
Add open shelves to display towels, plants, or decorative items. This mix will give your bathroom space both practical storage and visual appeal.
Lighting Considerations
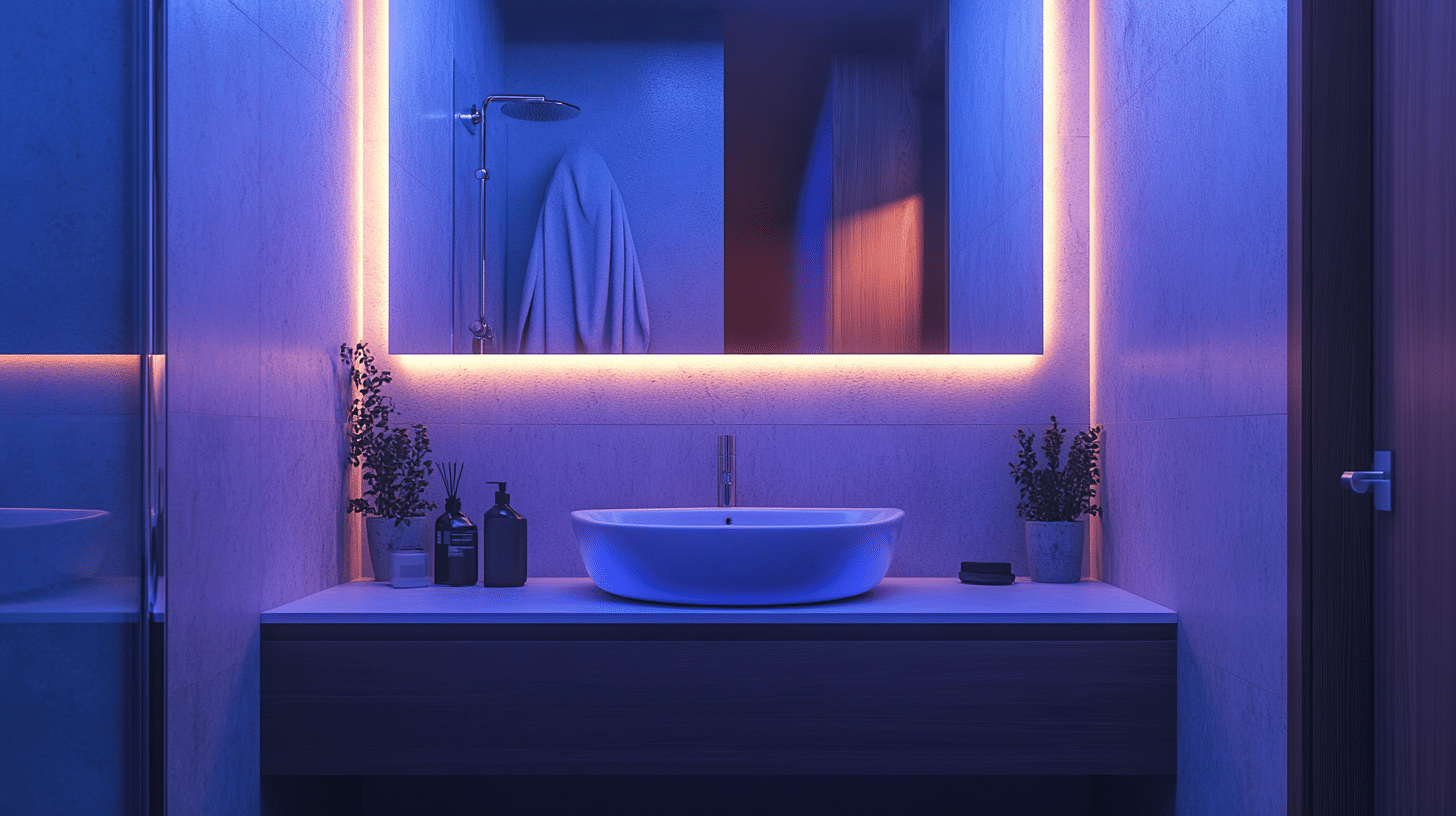
Good lighting makes refaced cabinets look better. Under-cabinet lights help you see inside drawers.
Sconces on either side of mirrors prevent shadows. For a modern touch, consider LED strip lights under floating vanities.
Make sure your lighting shows off your cabinet color correctly.
Personalizing with Hardware
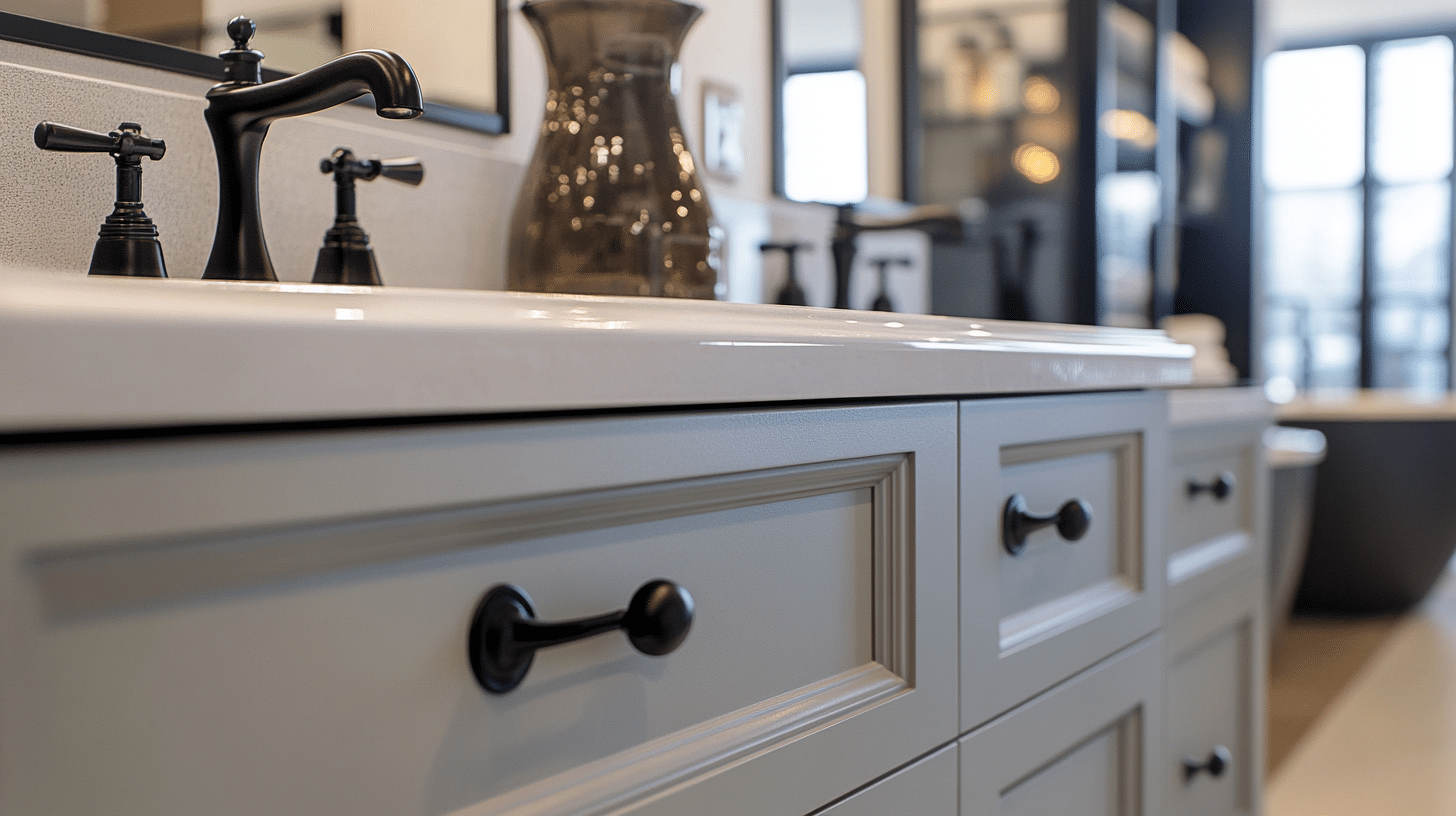
Cabinet handles and knobs can change the whole look of refaced cabinets.
Sleek bar pulls create a modern feel, while cup pulls add vintage charm. Knobs in unique shapes or materials like glass or ceramic add personal style.
Hardware is easy to swap if you want a change later.
Common Mistakes to Avoid
The common mistakes that people make, which you should know to avoid while performing the process.
- Buying the wrong size doors
- Not considering humidity
- Rushing through the veneer application
- Skipping proper surface preparation
- Using low-quality hardware that won’t last
Maintenance Tips After Refacing
Your refaced cabinets represent money and time invested in your home. Without proper care, moisture and cleaning products can damage them quickly.
Good maintenance keeps them looking new and extends their life, saving you from costly repairs or early replacement.
You do not want the refacing to go to waste after all the efforts you took to do that; thus, maintaining them after refacing is important.
- Wipe with mild soap and water. Avoid harsh chemicals
- How to extend the life of refaced cabinets
- Quickly fix small scratches with touch-up markers
- Keep cabinet hinges clean and tight
- Control bathroom humidity with proper ventilation
Wrapping Up
Bathroom refacing gives you a fresh look without tearing out everything in your space.
Now you know what it is, when to choose it, how to do it, and ways to make it look great.
Start by checking if your cabinet boxes are still in good shape. Then, pick colors and styles that match your bathroom’s other features.
Take your time with each step, and don’t forget about proper lighting and hardware to finish the look.
Are you ready to try bathroom refacing this weekend? With these tips and ideas, you can change your bathroom quickly and enjoy the results for years to come.