14 Amazing DIY Advent Calendar Ideas You Can’t Miss
Bought an Advent calendar last year for $40, and half the chocolates tasted like cardboard. I get it, store-bought options are pricey, generic, and often disappointing.
But here’s the good news: making your own advent calendar is easier than you think, costs less, and lets you fill it with things your family actually loves.
This guide walks you through creative DIY advent calendar ideas, from beginner-friendly kraft bag garlands to a detailed cardboard house village.
Each project includes a complete materials list, time estimate, and simple build steps. You can finish most in under two hours. Plus, you’ll create something reusable that saves money year after year.
Ready to make this December special? Let’s get started.
Cardboard House Advent Calendar: Step-by-Step
Follow these six simple steps to build your own miniature town, complete with 24 numbered houses ready to fill with treats.
Supplies and Tools Checklist
| Category | Items |
|---|---|
| Basics | Scissors, craft knife, cutting mat, ruler, hot glue, white glue, double-sided tape, washi tape, twine, ribbon |
| Decor | Number stickers, stencils, acrylic paint, markers, vinyl decals, felt sheets |
| Hardware | Pegboard, wooden dowels, magnets, mini clips, clothespins, label pulls, binder rings, hole punch |
Step 1: Cut Out the House Shape

Draw a small house (8 cm wide by 12 cm high) on your cardboard using a pencil and ruler. Add three flaps, each about 3 cm wide, on the sides and bottom edges. Cut carefully along the lines with your box cutter, keeping your ruler steady for straight edges.
Materials Used:
- Cardboard sheets
- Pencil
- Ruler
- Box cutter or craft knife
- Cutting mat
Step 2: Create Windows or Doors

Sketch a door or shutters on the front panel where you’ll place treats inside. Use your cutter to score the fold lines lightly without cutting all the way through. Fold gently along these scored lines to create neat, clean edges that open and close smoothly.
Materials Used:
- Pencil
- Box cutter or craft knife
- Ruler
Step 3: Decorate the House

Paint or color each house before you glue it together, as flat surfaces are easier to decorate. Add your chosen number (1-24) using stickers, stamps, or hand lettering. Get creative with colors, patterns, and holiday designs that match your style.
Materials Used:
- Acrylic paint or markers
- Number stickers or stamps
- Brushes
- Decorative supplies (glitter, washi tape, stencils)
Step 4: Assemble the House

Fold all three flaps inward toward the center of the house. Apply glue along each flap edge and press the sides together firmly. Hold for 30 seconds or until the glue sets and your house stands on its own.
Materials Used:
- Hot glue gun or white craft glue
- Glue sticks (if using hot glue)
Step 5: Make and Attach the Roof

Measure the width of your assembled house and cut a cardboard rectangle to fit. Score a line down the center so it folds into a peaked roof shape. Decorate the roof piece, then glue it onto the top edges of your house.
Materials Used:
- Cardboard
- Ruler
- Box cutter or scissors
- Glue
- Paint or markers for decoration
Step 6: Build the Calendar Display

Create all 24 houses, mixing up roof styles and heights for visual interest. Cut a large cardboard base and glue two layers together for extra stability. Arrange your houses in six neat rows of four, then glue each one securely to the base and fill with treats.
Materials Used:
- Large cardboard sheet (double layer)
- Hot glue or strong craft glue
- Optional: paint for background scenery
- Treats, candies, or small gifts
Video Tutorial
Special thanks to Amaryllis for providing valuable insights in their video, which I referenced while creating this guide.
Fillers: What to Put Inside an Advent Calendar DIY
The best fillers match your family’s interests and budget while keeping the daily surprise exciting. Here are ideas sorted by age group, plus non-candy options that work for everyone.
| Age Group | Ideas |
|---|---|
| Kids | Stickers, mini puzzles, story prompts, small toys, erasers, temporary tattoos, hair clips, bouncy balls |
| Teens | Lip balm, enamel pins, scrunchies, gift cards, nail polish, phone accessories, keychains, face masks |
| Adults | Tea bags, spice samplers, self-care notes, date-night coupons, coffee samples, lottery tickets, and inspirational quotes |
| Non-Candy Options | Acts of kindness cards, family challenges, holiday recipes, movie night vouchers, gratitude prompts, carol sing-along cards |
Budget Tip: Mix homemade items like handwritten notes with a few store-bought treats to keep costs low while adding personal meaning.
14 Creative DIY Advent Calendar Ideas for Families
Ready to find your perfect project? Browse through these 14 handmade advent calendar ideas, each designed for different skill levels, time commitments, and home styles.
1) Minimalist Kraft Bag Garland (Beginner Friendly)

This simple design works perfectly if you want something fast and stylish. The neutral brown bags suit any decor and hang easily on a mantel or wall. You can swap out the fillers each year without making a whole new calendar.
Materials:
- Mini kraft paper bags
- Number stickers (1 to 24)
- Twine or string
- Wooden clothespins
Time: 45 to 60 minutes
How-To Snapshot: Fill each bag with treats, press number stickers on the front, and clip them onto twine using clothespins. Hang the bags at different heights for a staggered, relaxed look.
2) Magnetic Tin Advent Board (Upcycled Altoids Style Tins)

Perfect for small apartments or dorm rooms with tight spaces. These reusable tins stick to any magnetic surface and look polished once painted. You can refill them year after year without any wear and tear.
Materials:
- 24 small metal tins
- Magnetic sheet or metal board
- Spray paint
- Number decals
Time: 2 hours
How-To Snapshot: Spray paint the tin lids in your favorite color, let them dry, and add number decals. Attach magnetic dots to the back of each tin and arrange them in a 6 x 4 grid on your board.
3) Fabric Pocket Wall Hanging (No Sew or Sew Options)

This soft calendar feels premium and folds flat for easy storage after the holidays. You can sew the pockets or use fabric glue if you prefer a no-needle approach. The canvas backing keeps it sturdy for years of use.
Materials:
- Canvas banner or heavy fabric
- Iron-on number transfers
- Fabric glue or sewing kit
- Wooden dowel for hanging
Time: 2 to 3 hours
How-To Snapshot: Cut and attach 24 fabric pockets to the canvas using glue or stitches. Press iron-on numbers onto each pocket, slide a dowel through the top, and hang it on your wall.
4) Rustic Envelope Ladder (Scandi Farmhouse Vibes)

A vertical display saves space and looks beautiful leaning against a wall or fireplace. The envelopes hold flat treats like gift cards, notes, or stickers. This style photographs well if you share holiday decor online.
Materials:
- Decorative wooden ladder or dowels
- 24 envelopes (kraft or patterned)
- Jute twine
- Mini clothespins or clips
Time: 60 to 90 minutes
How-To Snapshot: String envelopes along each ladder rung using jute and clips. Number each envelope and fill with flat surprises like kindness prompts or chocolate bars.
5) Library Card Drawer Boxes (Vintage Card Catalog Look)
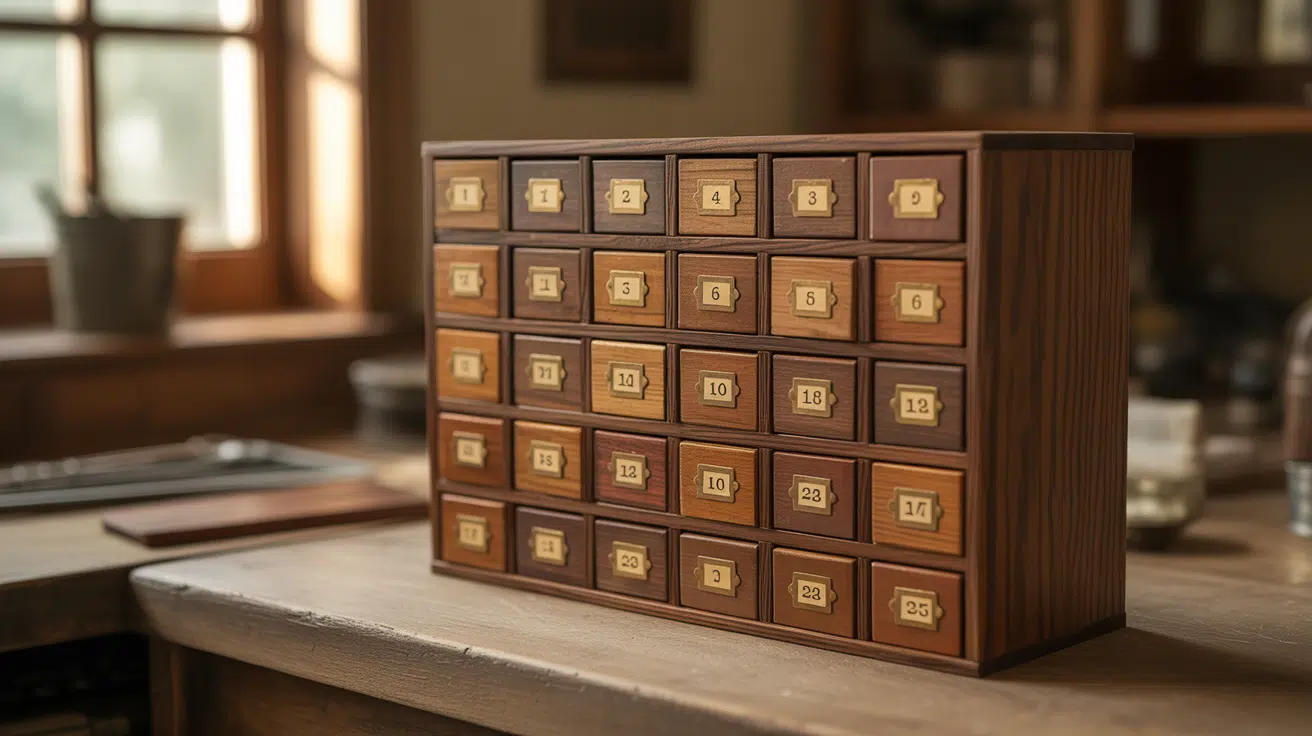
These miniature drawers give you a nostalgic library vibe with tiny label pulls. Stack them into a faux cabinet for a unique countertop display. Each drawer slides open to reveal a hidden treat inside.
Materials:
- 24 matchboxes
- Wood grain contact paper
- Mini label pulls or brads
- Number labels
Time: 2 hours
How-To Snapshot: Wrap matchbox sleeves with contact paper, attach small label pulls to each drawer front, and add numbers. Stack and glue the boxes into rows to form a cabinet shape.
6) Paper House Village (Mantel Display)
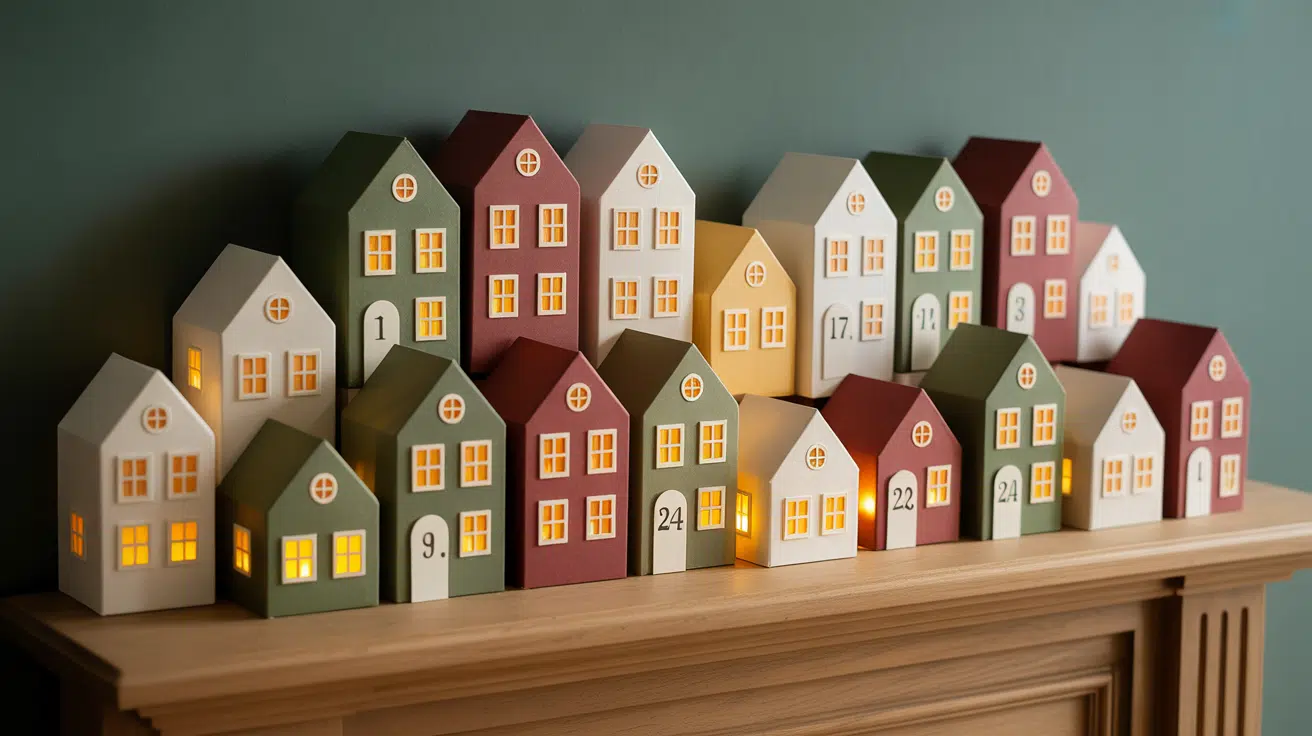
Create a tiny town that glows softly with LED tea lights tucked inside each house. The storybook charm makes this a centerpiece project for your mantel or entry table. Kids love opening a different door to a house each day.
Materials:
- Cardstock or thick paper
- House templates (printable or hand-drawn)
- Craft knife
- LED tea lights
Time: 2 to 3 hours
How-To Snapshot: Cut and score house shapes from cardstock, fold into 3D structures, and number each door. Place treats underneath and add LED lights inside for a warm glow.
7) Hanging Ornament Advent Tree (Wall or Branch)

This doubles as both a countdown and holiday decor for your living room. Hang ornaments at different lengths from a branch or dowel to create a tree shape. You can reuse the same ornaments and branches every December.
Materials:
- Tree branch or wooden dowel
- Ribbon or string
- 24 small ornaments or baubles
- Number stickers
Time: 60 minutes
How-To Snapshot: Tie numbered ornaments to your branch using ribbons of varying lengths. Arrange them to form a triangular tree silhouette and hang the branch on your wall.
8) Burlap Stocking Garland (Classic Cozy Look)

Mini stockings strung across a fireplace or doorway bring instant holiday warmth. The burlap texture feels rustic and cozy, and you can refill them each year. This works great for families who want a traditional look.
Materials:
- 24 mini burlap stockings
- Iron-on number transfers
- Ribbon or twine
- Clips or hooks
Time: 60 to 90 minutes
How-To Snapshot: Press numbers onto each stocking, clip them to a ribbon or twine garland, and tuck small gifts inside. Hang the garland across your mantel or along a wall.
9) Painted Pegboard Countdown (Modern and Modular)
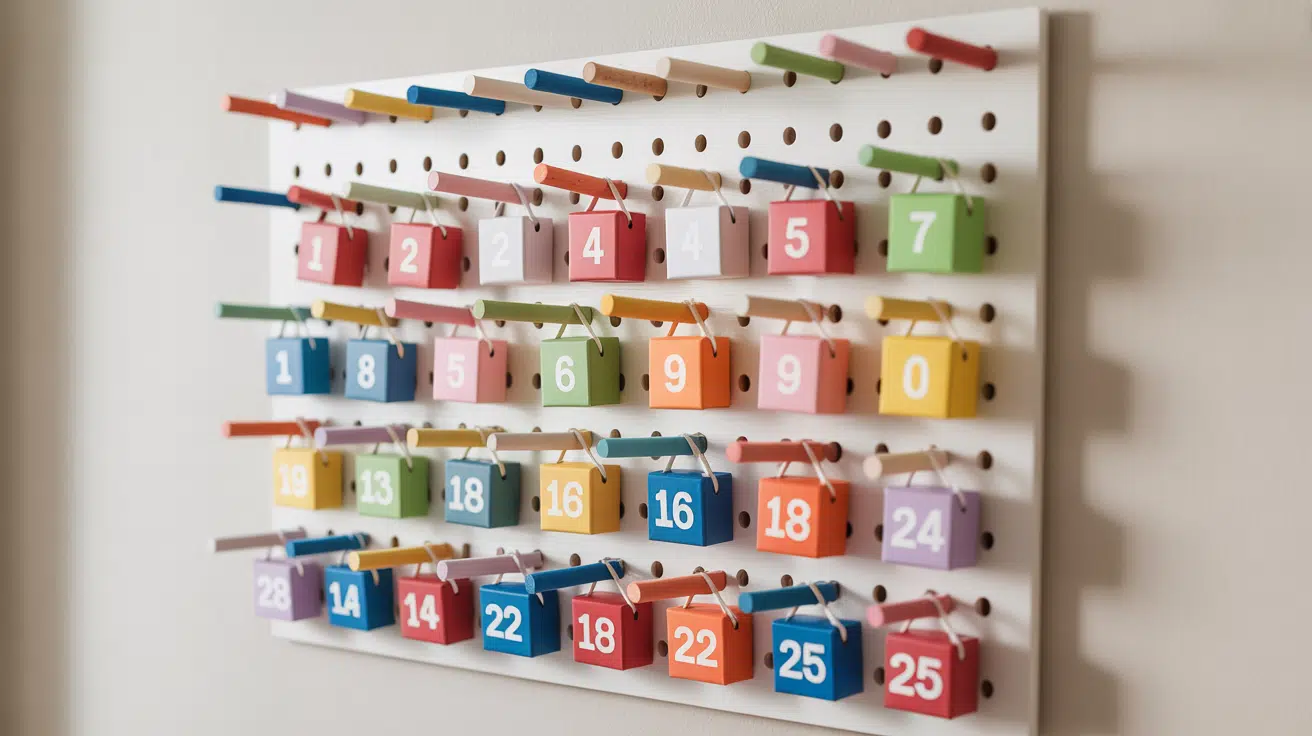
Clean lines and bright colors make this calendar feel modern and fresh. The pegboard lets you rearrange containers anytime or remove them after each day. It works well in playrooms, kitchens, or craft rooms.
Materials:
- Pegboard panel
- Dowel pegs
- 24 small favor boxes or bags
- Vinyl number stickers
- Paint (optional)
Time: 2 hours
How-To Snapshot: Paint your pegboard if desired, insert dowel pegs in a grid pattern, and hang numbered boxes or bags on each peg. Fill with treats and remove one container daily.
10) Chalkboard Frame with Treat Cones

This interactive calendar lets you write daily prompts or activities on the chalkboard surface. Twisted paper cones hold treats around the frame edges. Kids enjoy checking both the surprise and the daily challenge.
Materials:
- Chalkboard or frame with chalkboard paint
- Scrapbook paper for cones
- Washi tape
- Number stickers
- Chalk
Time: 60 to 90 minutes
How-To Snapshot: Roll paper into cone shapes, number them, and tape them around the chalkboard frame. Write daily prompts on the board and tuck treats into each cone.
11) Upcycled Sweater Pockets (Cozy Textures)

Turn old sweaters into soft, touchable pockets that add warmth to your decor. This sustainable option keeps textiles out of landfills and creates a one-of-a-kind calendar. The knit fabric feels cozy and inviting to little hands.
Materials:
- Old sweaters (various colors)
- Scissors
- Fabric glue or sewing supplies
- Backing fabric or felt board
- Felt numbers
Time: 2 to 3 hours
How-To Snapshot: Cut pocket shapes from sweater fabric, attach them to a sturdy backing using glue or stitches, and add felt numbers. Fill each pocket with small surprises.
12) Cookie Tin Tower (Treat Forward)

Nesting tins stacked together give you more room for bigger treats like cookies or small toys. Partition each tin into sections so you can rotate the tower daily to reveal the next surprise. This works great for families with multiple kids.
Materials:
- 3 to 4 nesting cookie tins
- Cardboard dividers
- Number decals
- Paint or decorative paper (optional)
Time: 60 minutes
How-To Snapshot: Divide each tin into sections using cardboard, label sections with numbers, and stack the tins. Rotate the tower each day to access the next numbered compartment.
13) Photo Flip Calendar (Memories Plus Surprises)

Add a personal touch by pairing family photos with daily treats or notes. Each page reveals a memory along with a small gift or activity idea. This becomes a keepsake you can look back on for years.
Materials:
- 24 printed photos (4 by 6 inches)
- Binder rings
- Hole punch
- Small envelopes or pockets
- Number stickers
Time: 60 to 90 minutes
How-To Snapshot: Print 24 family photos, number the backs, and punch holes in one corner. Attach small pockets or envelopes to each photo, bind with rings, and fill pockets with treats or notes.
14) LEGO Build a Day Countdown (For Makers)

Kids who love building will enjoy assembling a new mini creation each day. Pre-sort bricks into 24 containers so each day brings a different small project. By Christmas, they’ll have 24 tiny builds to display or play with.
Materials:
- Mixed LEGO bricks
- 24 small containers or bags
- Number stickers
- Instructions or idea cards (optional)
Time: 45 to 60 minutes
How-To Snapshot: Sort LEGO pieces into sets for 24 simple builds like trees, snowmen, or vehicles. Number each container, add building instructions if needed, and open one kit per day.
Keep Your Calendar Safe and Reusable
Want your Advent calendar to last for years? Score all fold lines with a ruler and craft knife before bending to get crisp, clean edges that won’t crack.
Reinforce corners and stress points with extra tape or glue to prevent tearing during use. Always use LED or battery-powered lights when building with paper and cardboard to keep your family safe from fire hazards.
When the holidays end, pack your calendar flat in a labeled storage tote so it stays protected and ready to pull out next December without damage.
The Bottom Line
Making your own advent calendar turns December into something more meaningful than store-bought options ever could.
You control what goes inside, how it looks, and how much you spend. From simple kraft bag garlands to detailed cardboard house villages, there’s a project here for every skill level and time budget.
Pick one design that matches your style and start gathering supplies this week. Your family will remember the calendar you made far longer than anything you buy in a store. The best part? You can refill and reuse it for years to come.
Which Advent calendar will you create this year? Share your favorite idea in the comments below, and don’t forget to save this guide for next December.
Happy crafting and happy holidays!