How to Design a Functional Indoor Golf Space
An indoor golf setup promises the game on demand, with no tee time and no weather to lose to. Then the ball clips the ceiling, the projector throws a shadow across the screen, and the hitting mat slides across a bare garage floor. A simulator is only as good as the room around it. Designing a functional indoor golf space means planning the dimensions, screen, projector, and flooring together before any equipment gets bolted into place.
Indoor Golf Has Moved Past the Driving Range
Hitting balls indoors is no longer a novelty reserved for country clubs. An estimated 6.2 million Americans swung a club in a golf simulator over the past year, a figure that has jumped 73% since before the pandemic, and roughly a third of those players have used a private setup inside someone’s home. The appeal is easy to understand: practice at midnight, play a bucket-list course in a snowstorm, and keep a swing sharp through the off-season without leaving the house.
A room that lets someone swing freely a few times a week turns an expensive gadget into a real part of a routine. That payoff only shows up if the space is built to be used, not tolerated. A cramped, badly lit corner gets abandoned within a month, no matter how good the launch monitor is.
Build the Hitting Bay: Screen and Enclosure
The screen is where the round actually happens, and it absorbs more abuse than any other component in the room. A driver sends the ball off the face at highway speed, and the screen has to take that impact thousands of times without tearing, bouncing balls back dangerously, or blurring the projected image behind it.
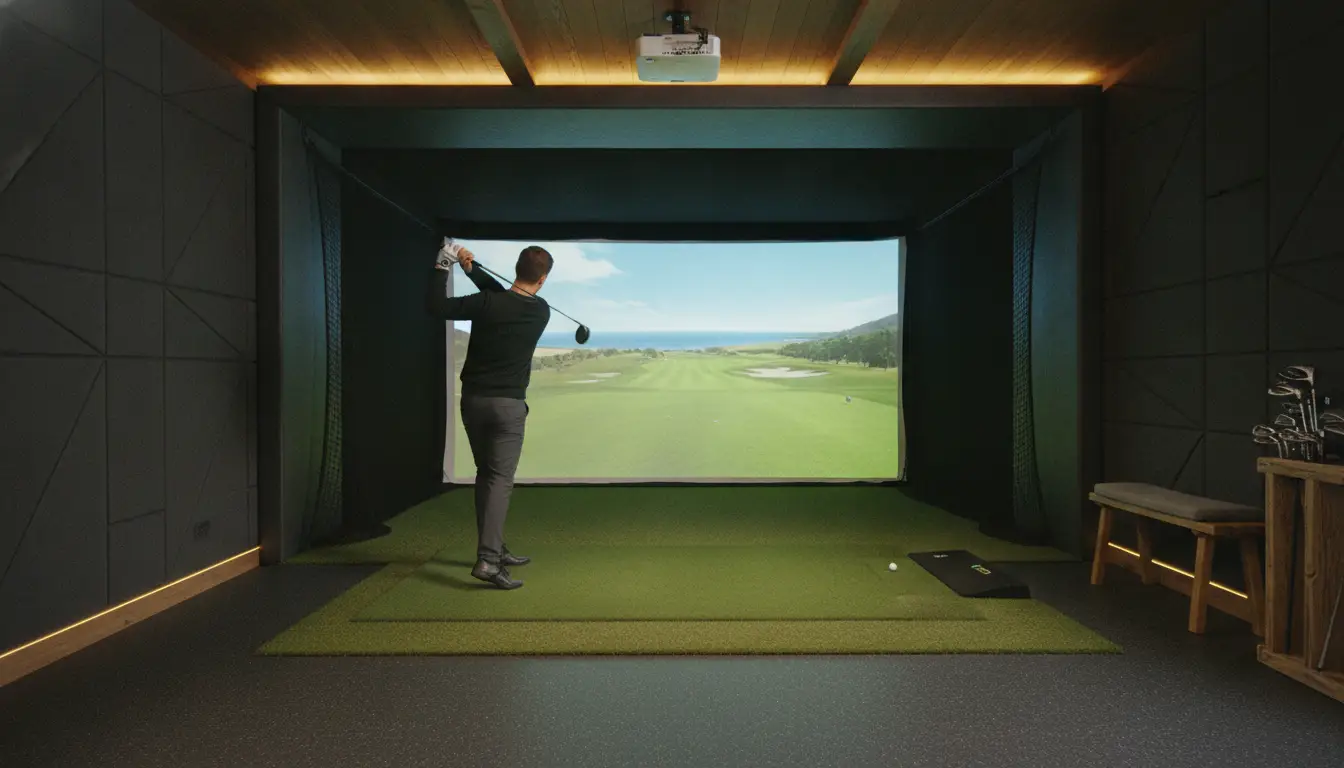
This is where improvising fails. Homeowners comparing enclosures can look at purpose-built golf impact screens rated for repeated driver strikes rather than stretching a tarp or bedsheet across a frame and hoping it holds. A proper screen sits taut inside an enclosure that catches mishits, with side and ceiling netting to stop the shot that sprays 30 degrees offline. Leave a few inches of standoff between the screen and the wall behind it so the material can give on impact instead of transferring force straight into the studs.
Frame the whole bay as one system: screen, enclosure, netting, and a hitting area wide enough that a stray shot stays contained. Cutting the enclosure to save space or money is how walls get dented, and how the setup ends up feeling unsafe to swing hard in.
Start With the Room, Not the Simulator
The most common mistake is buying the launch monitor first and forcing it into whatever space is left over. Reverse the order. The room sets the ceiling on what any simulator can do, so pick and measure the space before spending a dollar on tech.
Three locations do most of the work in home setups: a garage, a basement, or a spare room built for the purpose. Garages are popular because they usually have the footprint, but they rarely arrive with the finished floor, insulation, or climate control a year-round bay needs. Many builds start there and involve converting the space into a finished room, which can trigger permit and building-code requirements worth checking before the drywall goes up. Basements offer insulation and privacy while often falling short on ceiling height. A dedicated garden room or outbuilding gives the most freedom and carries the highest cost.
Whatever the location, judge it on four things: width, depth, ceiling height, and how easily you can control light and temperature. If a space fails badly on any one of them, it will fight you for the life of the setup.
How Much Space and Ceiling Height Do You Really Need?
Ceiling height is the one dimension that ends projects. If a full driver swing clips the ceiling, no screen, software, or launch monitor fixes it. Most golfers need at least 9 feet of clearance, and taller players want 10 feet or more. The only reliable test is to take a real driver swing in the actual space and watch the clubhead through the top of the arc, not to trust a tape measure alone.
Width matters because the bay has to suit whoever plays. A right-handed and a left-handed golfer swinging from the same spot both need room on their swing side, and side netting eats into the total. Depth has to cover the screen standoff, the hitting position, and enough distance behind the ball for the launch monitor to track it. These are rough working targets, not hard rules:
|
Dimension |
Minimum |
Comfortable |
|
Ceiling height |
9 ft |
10 ft or more |
|
Room width |
10 ft |
12 to 15 ft |
|
Room depth |
15 ft |
18 to 20 ft |
Treat the minimums as the point below which the experience starts to suffer, not a goal to aim for. A tight bay makes players instinctively shorten the swing to avoid the ceiling or walls, which trains a worse move and defeats the reason for practicing at home in the first place.
Get the Projector and Lighting Right
A short-throw projector mounted overhead keeps the golfer from casting a shadow across the screen at address. Measure the throw distance against the projector’s own specifications before mounting anything; too long and the image spills past the screen, too short and it can’t fill it. Aim for a projector bright enough to hold color and contrast in a room that has some ambient light, since not every space can be fully blacked out.
Lighting is the detail people skip and then regret on every shot. Overhead light that spills onto the screen washes out the picture and kills the contrast that makes the graphics readable. Position fixtures so they light the hitting area without landing on the screen, and use dimmable or zoned lighting so the bay can go darker than the rest of the room. A blackout blind on any window cuts glare and doubles as basic temperature control on a bright afternoon.
Plan Power, Wiring, and Launch Monitor Placement
A simulator draws on more outlets than people expect: the launch monitor, the projector, a PC or tablet running the software, and often a separate monitor or TV for the scorecard. Running all of that off one overloaded extension lead is both a fire risk and a reliability headache. Map the power needs during the build and add dedicated outlets where the equipment will actually sit, ideally with a few to spare for whatever gets added later.
Launch monitor placement depends on the type you buy. Overhead and ceiling-mounted units need clearance and a fixed mounting point, while units that sit beside or behind the ball need floor space and a clean line of sight to both the club and the ball.
These units exist to read the strike precisely, and the numbers move fast: the average golfer produces a driver ball speed of around 133 mph in Trackman’s data, with better players well past 160. Check the manufacturer’s spacing requirements against the room before committing to a layout, because a monitor squeezed too close to a wall or the mat reads that ball less accurately. Cable management is worth the extra hour: taped-down or channeled runs keep trip hazards off the hitting area and stop a stray shot from snagging a loose wire.
Choose Flooring That Protects the Room and Your Joints
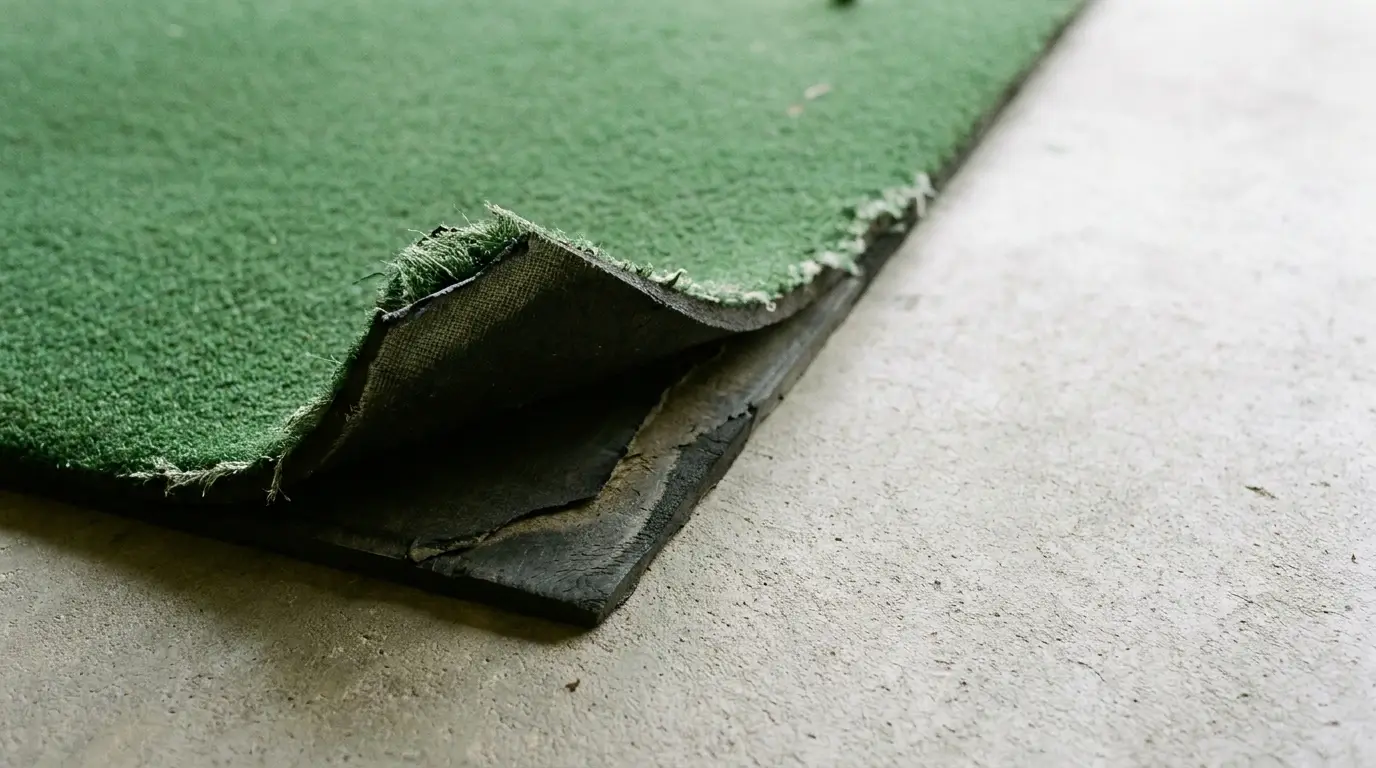
Concrete is unforgiving. The golf swing already asks a lot of the body, with lower-back trouble among the most common complaints golfers face, and repetitive swings straining the elbows and wrists. Hitting off a thin mat laid over a bare slab piles needless shock on top of that, and it chews through a mat quickly. Build the floor in layers instead: a shock-absorbing base such as rubber or foam underlay, then a quality hitting mat that lets the club interact with the turf without jarring on every strike.
Level matters as much as cushioning. A mat that sits proud of the surrounding floor changes the lie and skews the numbers the launch monitor reads, which quietly corrupts every practice session. Set the hitting surface flush with the standing area so the stance and strike stay honest. A putting strip or a run of short turf around the bay finishes the space and keeps loose balls from rolling into corners between shots.
Make It a Room You’ll Actually Use
Equipment gets all the attention, but comfort decides how often the room gets used. The same principles that make a comfortable, well-planned home office apply to a golf bay: a steady temperature, decent airflow, and a space that feels good to spend an hour in.
A garage that bakes in July or a basement that freezes in January will sit empty, so plan heating, cooling, or at least a fan and a heater into the build rather than adding them later. Sound is the other overlooked factor. Golf balls striking a screen are loud, and a hard-walled room amplifies every hit. Acoustic panels, or even heavy curtains, soften the noise enough to keep the peace with the rest of the household. Add a bench, a club rack, and a spot to set a drink, and the room becomes somewhere to linger rather than a machine to visit and leave.
Budget and the Mistakes That Cost the Most
Indoor golf spans a wide price range. A basic setup built around an entry-level launch monitor, a mat, a net, and a simple screen can come together for a few thousand dollars. A permanent, fully enclosed bay with a premium launch monitor, a mounted projector, and a finished room runs well into five figures. Decide which end you’re building toward before buying, because pairing a top-tier launch monitor with a bargain screen and an untreated room gives an unbalanced, frustrating result.
The mistakes that hurt most are the ones baked into the room early, before anyone notices them:
- Buying equipment before measuring real swing clearance at the ceiling.
- Skimping on the enclosure and netting, then repairing dented walls.
- Ignoring lighting and fighting glare on the screen every session.
- Laying a mat over bare concrete and paying for it in sore joints.
- Forgetting climate control and ending up with a room that sits unused half the year.
Each one of these is far cheaper to solve on paper than after the bay is built and the drywall is closed up.
Build the Room Before the Simulator
A functional indoor golf space is a room-design problem first and an equipment problem second. Get the dimensions, screen, projector, flooring, and comfort right, and even a modest launch monitor delivers a setup that plays like the real thing and earns the square footage it takes up. Measure the ceiling, plan the bay as one system, and build the room you’ll want to swing in every day, not just the week it’s new.