How to Install Cabinet Handles: A Step-by-Step Guide
Installing cabinet handles may seem simple, but getting them perfectly aligned makes a big difference in how your cabinets look and feel. A small placement mistake can lead to uneven handles, awkward use, and even long-term damage to the cabinet structure.
The good news is that with the right approach, you can install cabinet handles cleanly and accurately, even if you are a beginner. This guide walks through the exact steps, tools, and placement rules you need to follow.
By the end, you will know how to measure correctly, drill safely, and achieve a consistent finish that looks neat and works smoothly every time.
Understand Where Cabinet Handles Should Be Placed
Getting placement right before drilling ensures clean alignment and smooth use. Small errors at this stage are difficult to fix later, so follow these standard positioning guidelines used in most U.S. installations.
Cabinet Handle Placement Guide
| Cabinet Type | Handle Position | Distance From Edge | Why This Works |
|---|---|---|---|
| Upper Cabinet Doors | Bottom corner, opposite hinge side | 2.5 to 3 inches from bottom and side edge | Follows natural downward hand movement and keeps alignment consistent |
| Lower Cabinet Doors | Top corner, opposite hinge side | 2.5 to 3 inches from top and side edge | Makes doors easy to open and keeps spacing uniform |
| Drawer Fronts (Single Pull or Knob) | Centered horizontally and vertically | Center point of drawer front | Creates balance and distributes pulling force evenly |
| Wide Drawers (Long Pulls) | Centered horizontally | Vertically centered or slightly above center line | Keeps appearance balanced and prevents strain on one side |
| Shaker Cabinets | On the frame (stile or rail), not center panel | 2.5 to 3 inches from frame edge | Maintains visual alignment with cabinet structure |
| Slab Cabinets | Flexible, but keep consistent spacing | 2.5 to 3 inches from chosen edge | Clean look depends on consistency rather than frame alignment |
Quick Placement Standards (USA)
- Most professionals use 2.5 to 3 inches from the edge as the standard spacing.
- Longer pulls on doors are often placed 3 to 4 inches from the top or bottom edge, centered on the stile.
- Consistency across all cabinets matters more than slight measurement differences.
Using a consistent measurement across every cabinet ensures a uniform and professional finish.
Beginner’s Guide to Installing Cabinet Handles
Follow these steps to install cabinet handles correctly and keep everything aligned. Each step builds on the previous one, so do not skip any part.
Tools and Materials You’ll Need
Before you start drilling, make sure you have the right tools ready. Having everything prepared helps prevent mistakes and uneven placement.
Essential Tools
- Drill: For creating mounting holes in doors or drawers.
- Drill Bits: Match the bit size to the screw shaft diameter (not the head).
- Measuring Tape or Ruler: For consistent spacing from edges.
- Pencil: For clearly marking drill points.
- Level (Small Hand Level): Helps keep long pulls straight.
- Masking Tape (Optional But Helpful): Placed over drill spots to reduce surface chipping.
Recommended for Accuracy
- Cabinet Hardware Jig or Template: Ensures repeatable, consistent hole placement across multiple cabinets. Especially useful for large kitchens.
- Clamp (Optional): Holds the jig firmly in place while marking or drilling.
For Installation
- Screwdriver or Drill Driver: For tightening screws securely without overtightening.
- Cabinet Handles or Knobs: Make sure the screws included match the cabinet thickness.
If You’re Replacing Existing Handles
Start by removing the old handles with a screwdriver. The screws are usually on the back side of the door or drawer front.
Once they’re off, check the existing holes. If your new handles have the same hole spacing, you may not need to drill at all; just insert new screws and attach.
If the spacing is different, fill the old holes with wood filler, let it dry completely, sand smooth, and touch up the finish. Then follow the steps below to measure and drill new holes in the correct position.
Step 1: Choose the Correct Placement First

Place cabinet door knobs above the bottom rail, about 2.5 to 3 inches from the edge. For drawers, keep the bottom screw hole above the rail; for lower cabinets, reverse the placement.
Cabinet doors have joints built to absorb daily use, and handle placement directly affects how that force distributes. Set too low, the hardware puts pressure on weaker areas and loosens over time.
Getting the height right from the start keeps everything firm for years.
Step 2: Use a Template or Jig for Accuracy

Get a cabinet hardware template and place it on the corner of the cabinet door. Mark the hole positions using the template before drilling.
A template locks every handle into the same position, so you measure once and repeat without guesswork. Less room for error, faster installs, and consistent alignment across every door and drawer.
Step 3: Mark the Drill Points

Align the template properly on each door or drawer and use a pencil to mark the drill holes.
Before you drill, place a strip of painter’s tape over each marked point. This protects the surface from chipping, especially important on painted or laminate cabinets, where the finish can crack under the drill bit.
For drawers, first mark the center, then position the template before marking.
Marking errors are hard to undo once you’ve drilled. Take a moment to double-check each mark before moving on; it’s the easiest correction in the process.
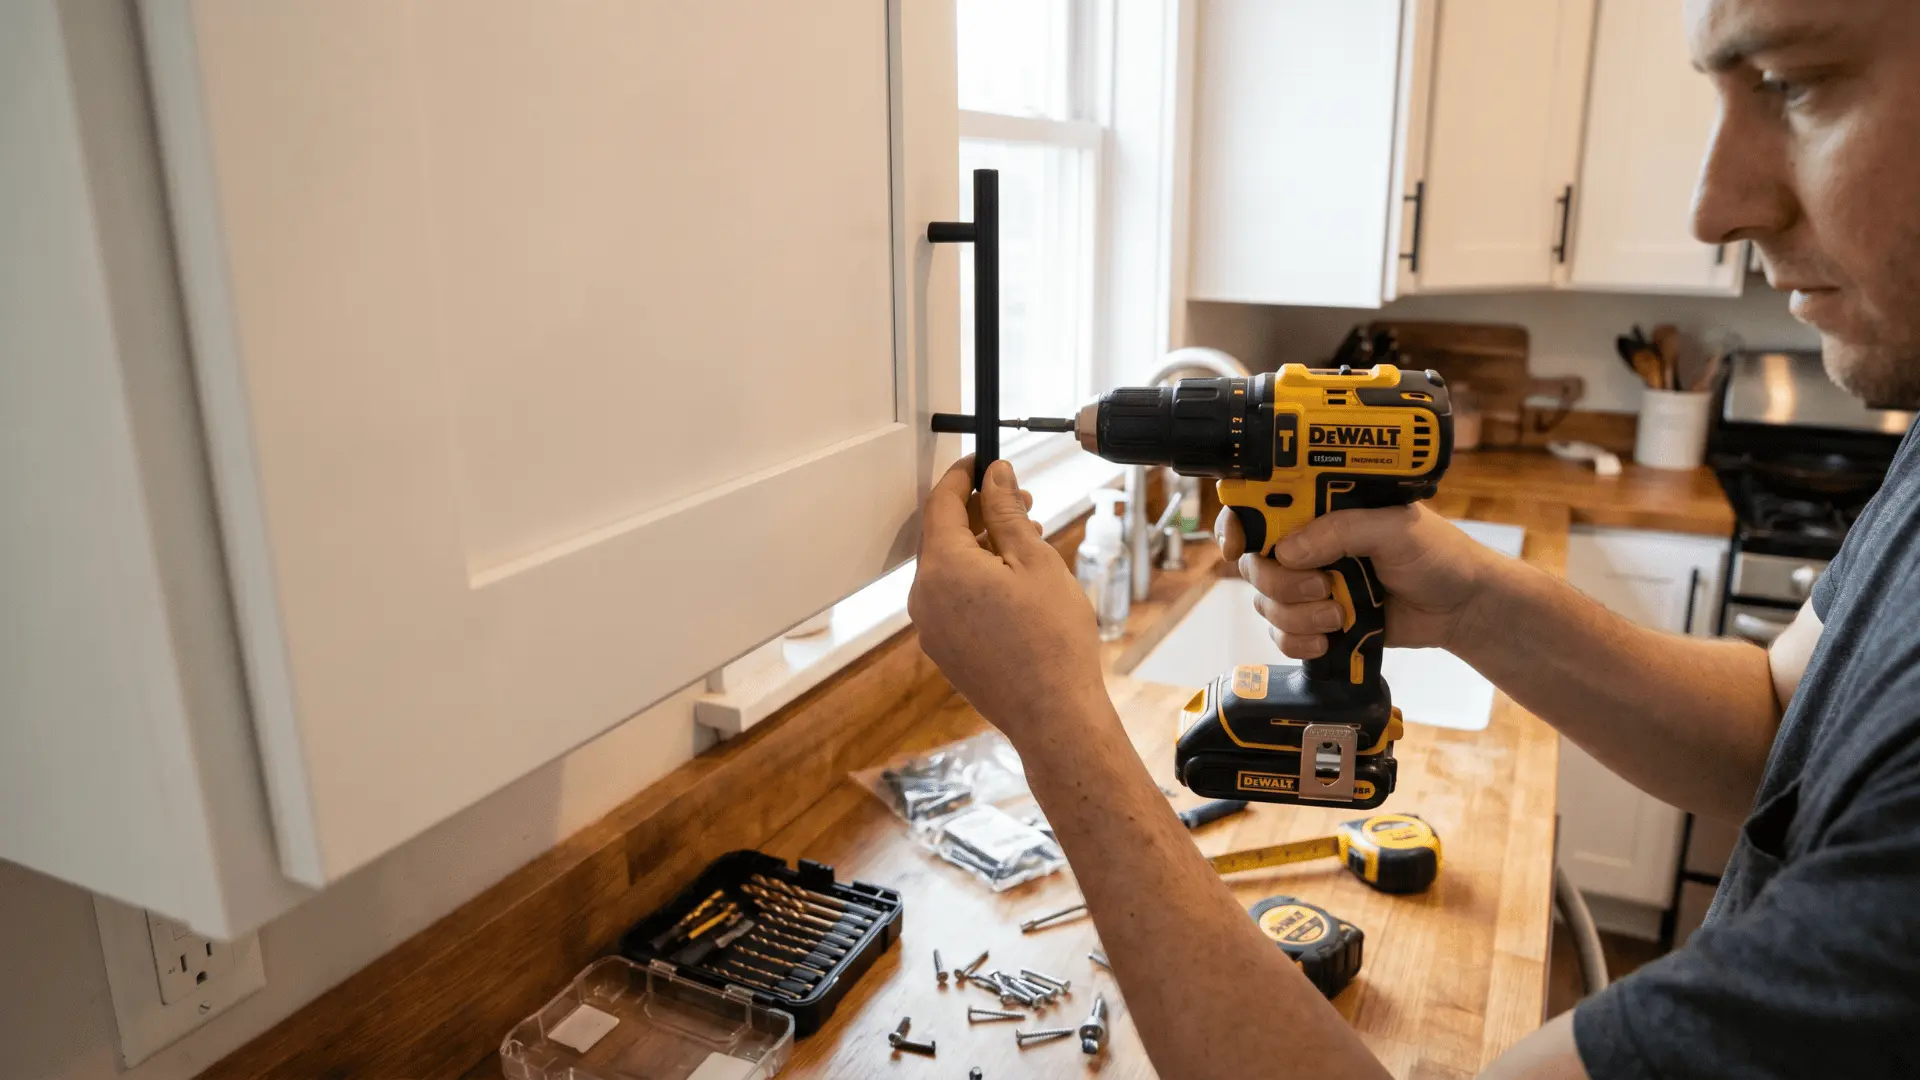
Step 4: Drill the Holes

Start with a smaller bit to create a pilot hole, then switch to the full-size bit. A 3/16-inch bit covers most standard cabinet hardware.
Keep the drill perpendicular to the surface and apply steady, even pressure. Don’t force it. As soon as the bit tip breaks through the back of the door, stop and finish the hole from the other side.
This two-step approach keeps the front surface from chipping or splintering.
Step 5: Install the Handles or Knobs

Insert the screws from the back of the cabinet and attach the handle or knob on the front. Tighten the screws until the handle feels secure, but avoid overtightening.
Too much torque can crack the cabinet surface, and loose screws make the handle wobble under use. Snug is the target, firm enough that nothing moves, but not so tight you’re stressing the material.
Step 6: Repeat Using the Same Template

Use the same template for all cabinets and follow the same marking and drilling process each time.
This keeps every handle in the exact same position, so everything lines up evenly. The result is a clean and uniform look across all cabinets.
Step 7: Final Check and Cleanup

Check that all handles are straight and properly tightened, then wipe away any dust from drilling.
A quick tug on each handle confirms it’s secure. If anything feels loose, tighten the screw now — it’s much easier than coming back to it later.
Watch this quick video to see the full installation process in action:
How to Position Handles Correctly on Different Cabinet Types
Correct placement varies slightly by cabinet type. Ignoring these differences results in poor usability and inconsistent visuals.
Cabinet Doors
Place handles on the side opposite the hinges. For upper cabinets, position them near the bottom corner, and for lower cabinets, near the top corner.
Placement opposite the hinges follows the natural arc of your hand when reaching to open a door. It cuts down on strain and keeps the same feel across every cabinet in the room.
Drawer Fronts
Place handles centered horizontally on the drawer. Use horizontal pulls for wide drawers and vertical pulls for narrow or tall drawers.
Centering distributes the pulling force evenly, so both sides of the drawer wear at the same rate. On wider drawer fronts, it also keeps the hardware from looking like it drifted to one side.
Slab and Frameless Cabinets
Slab doors have no visible frame, so there’s no rail to use as a reference point.
Place handles 2 inches from the bottom edge on upper cabinets and 2 inches from the top edge on lower cabinets. Keep the same distance from the side edge.
This keeps placement consistent across the flat surface and gives the hardware a clean, intentional look rather than looking like it was placed by guesswork.
Shaker Cabinets (Special Case)
Align handles with the rail edges and place them along the frame, not in the center panel.
Shaker cabinets have a visible frame, and handles placed in the center panel rather than aligned with the rail look off against that structure. Staying on the rail keeps the hardware visually connected to the design.
Using a Cabinet Hardware Jig vs. Freehand Installation
Choosing the right method affects how straight and consistent your handles look. Both options work, but the results can vary widely.
| Aspect | Cabinet Hardware Jig | Freehand Installation |
|---|---|---|
| What It Does | Guides drilling positions with fixed spacing | Requires manual measuring for each cabinet |
| Accuracy | High accuracy with consistent alignment | Prone to small measurement errors |
| Best Use Case | Multiple cabinets or precision work | Small projects or one-time installs |
| Speed | Faster after initial setup | Slower due to repeated measuring |
| Risk Level | Low risk of misalignment | Higher risk of uneven handles |
| Ease of Use | Simple once set up | Requires more attention and skill |
| Why Professionals Use It | Ensures uniform results and reduces errors | Less preferred due to inconsistency |
| Cost vs Time | Higher upfront cost, but saves time | Lower cost but takes more time and effort |
This format helps users quickly decide which method best suits their situation without having to read long explanations.
Common Mistakes and How to Avoid Them
Small mistakes during installation can ruin the final look and are hard to fix later. Knowing these issues in advance helps you avoid rework and damage.
- Misaligned handles from poor marking: Even a millimeter off on the first door shows up clearly when all the handles are lined up. A jig removes this risk entirely.
- Drilling from the back: Starting from the back side pushes material toward the front and chips the visible surface. Always enter from the front.
- Wrong screw length: A screw that’s too short won’t hold the handle securely. One that’s too long can push through the cabinet face. Measure your panel thickness and match the screw to it.
- Skipping Pilot Holes: Not using pilot holes can cause cracks and an imprecise installation. Always drill pilot holes first.
- Not Testing Placement Before Drilling: Drilling mistakes are hard to fix. Double-check placement with a template before drilling.
Fixing mistakes often requires filling holes and repainting, which rarely looks as clean as the original finish. Careful planning from the start saves time, effort, and materials.
Quick Checklist Before Finishing Installation
Before wrapping up, take a few minutes to check your work. This helps catch small issues before they become permanent.
- Alignment Check: Ensure all handles are evenly aligned across cabinets.
- Screw Tightness: Tighten screws securely without overdoing it.
- Surface Condition: Check for chips or cracks and clean the surface.
- Handle Stability: Ensure handles are firm and don’t move.
- Overall Consistency: Make sure spacing and placement match across cabinets.
Conclusion
Installing cabinet handles is a simple process when you follow the right steps and give yourself time at the start.
The measuring and marking phase is where most mistakes happen, and where most are easiest to prevent. Get that right, and the drilling and assembly steps almost take care of themselves.
Use a template, apply painter’s tape before you drill, and check alignment across every door before calling it done. Small habits like these are what separate results that look good today from results that still look good five years from now.
Frequently Asked Questions
Can You Install Cabinet Handles without a Jig?
Yes, you can install handles without a jig, but careful measuring is required for each cabinet. Even small errors can cause uneven alignment, especially across multiple doors or drawers.
What Drill Bit Size Should You Use for Cabinet Handles?
Use a drill bit that matches the diameter of the screw shaft, not the screw head. The correct size ensures a secure fit without making the handle loose.
How Do You Fix Misaligned Cabinet Handle Holes?
Fill the incorrect holes with wood filler, let it dry completely, then sand and refinish the area. After that, measure carefully and drill new holes in the correct position.