How to Make Terracotta Pots: Easy Step-by-Step Guide
Making terracotta pots at home sounds tricky, but it’s easier than you think. If you’ve ever wanted to craft your own plant pots without fancy tools or a studio setup, you’re in the right place.
I’ve been through the trial and error, so you don’t have to. In this blog, I’ll show you how to make terracotta pots from scratch using simple techniques, basic materials, and even things you already have at home.
You’ll learn how to prepare your clay, shape it by hand, fire it without a kiln, and finish it to a beautiful finish. Ready to get your hands dirty and make something real? Let’s dig in.
Why Make Your Own Terracotta Pots?
Creating terracotta pots at home offers a hands-on way to express your creativity while making something functional and beautiful.
It’s an eco-friendly alternative to mass-produced pots, allowing for complete customization in shape, size, and finish. Whether for gardening, décor, or gifting, handmade pots add a personal touch that store-bought ones often lack.
The process is accessible even to beginners, requiring only basic materials and tools. It’s not just about the result; it’s also about enjoying the slow, satisfying rhythm of crafting with your hands.
How to Make Terracotta Pots: Step-By-Step Guide
Learn how to use easy, beginner-friendly methods at home to turn raw clay into a finished terracotta pot.
What You’ll Need
Before you begin, ensure you have all the necessary tools and materials on hand to keep the process smooth and efficient.
- Terracotta clay
- Water
- Mixing container
- Flat surface or mat
- Cutting wire or thread
- Plastic wrap or a damp cloth
- Towel or sponge
Step 1: Prepare the Clay
Start with terracotta clay powder or pre-made clay. If using powder, pour it into a mixing container and slowly add water while stirring.
Keep adding water a little at a time until the clay feels soft, smooth, and easy to shape, similar to dough.
Next, knead the clay with your hands for 5–10 minutes. This helps remove air bubbles, which can cause cracks later. Press and fold it over itself repeatedly, just like kneading bread.
If you want a smoother texture, press the clay through a mesh sieve or screen to remove small lumps or stones before kneading. This step is optional but useful for finer work.
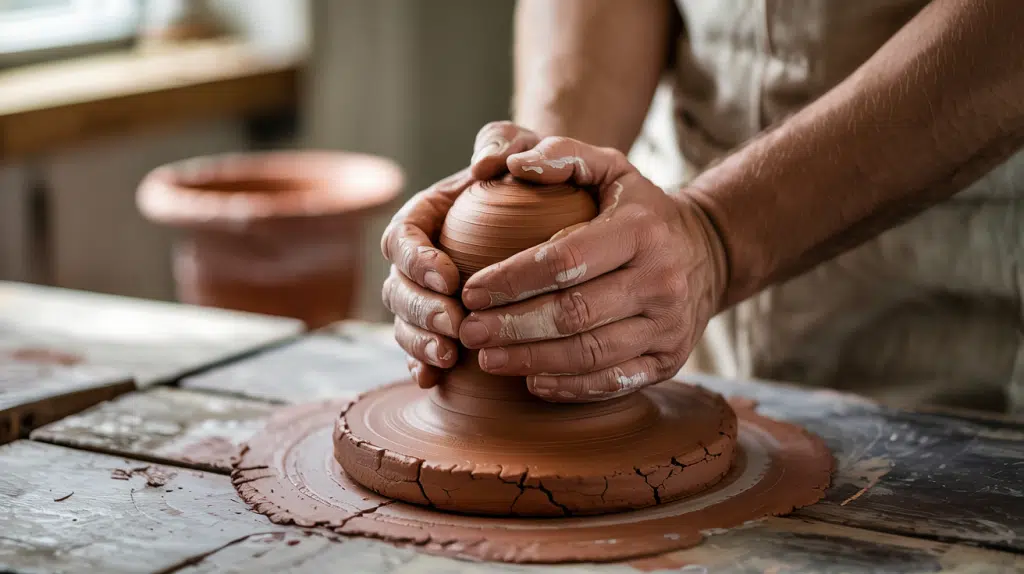
Step 2: Shape Your Pot
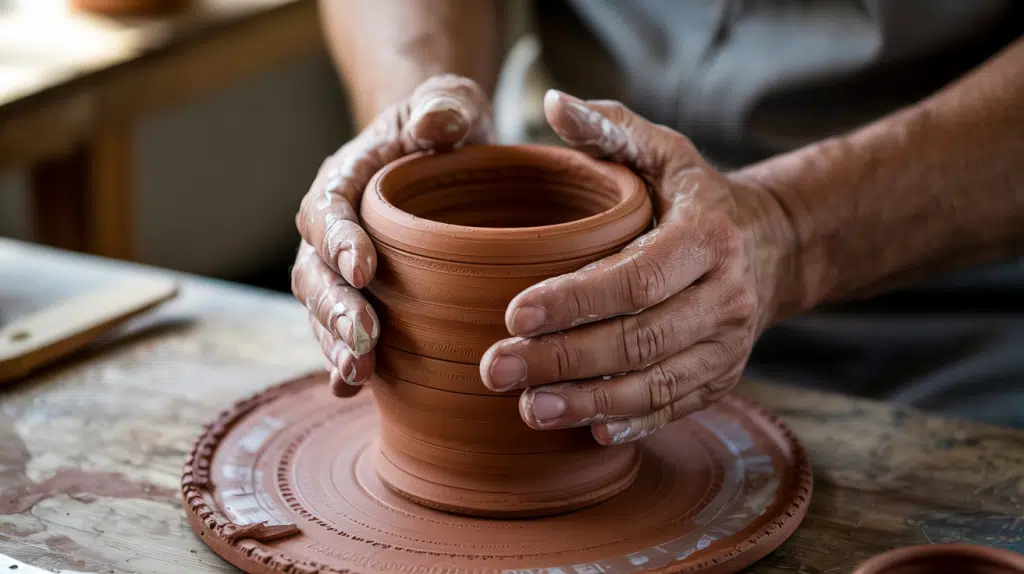
Shaping your terracotta pot can be done in a few simple ways, even without advanced tools.
The pinching method involves forming a clay ball and gradually pressing your thumbs into the center, gently pinching and turning to build the walls.
For the coiling method, you roll the clay into long ropes and stack them in spirals, smoothing each layer as you go.
Alternatively, you can hand-form the shape or press clay into a lined bowl or cup as a mold. Choose the method that best suits your comfort and desired pot style.
Step 3: Dry the Pot

After shaping your pot, let it dry slowly at room temperature. Place it in a dry, shaded area with good airflow. Avoid direct sunlight, which can cause cracks.
Depending on the size and thickness of the pot, drying can take one to three days. Flip the pot occasionally to ensure it dries evenly.
To test dryness, touch the pot; if it’s cool or damp, it’s not ready. Wait until it feels dry and firm all over before moving to the next step.
Step 4: Fire the Pot

Firing your terracotta pot is essential for strengthening and hardening it. If you have access to a kiln, heat it to around 1900°F to 2200°F and allow the pot to cool slowly afterward to prevent cracking.
For a lower-heat option, you can bake the pot in a kitchen oven at 350°F to 400°F for 1–2 hours; this won’t fully vitrify the clay but will firm the surface.
Pit firing is the most traditional method: place dried pots in a fire pit with dry wood, ignite, and let burn for hours. Once cooled, your pot is ready to use.
Clay Types for Making Pots: Alternatives to Terracotta
The type of clay you use makes a big difference in making terracotta pots. Here’s a quick comparison of common options.
| Clay Type | Pros | Cons | Best For |
|---|---|---|---|
| Terracotta Clay | Easy to shape, porous, great for plants | Needs firing (kiln or pit), slightly brittle if thin | Long-lasting plant pots |
| Backyard Clay (Natural) | Free, natural, traditional method | Takes time to find, clean, and test | Experimenting, budget projects |
| Air-Dry Clay (Store-bought) | No kiln needed, easy for crafts | Not waterproof, not food-safe, can crack with moisture | Decorative pots for indoor use only |
| Homemade Clay (Cornstarch mix) | Cheap, fun for kids, and crafts | Not strong or waterproof, not suitable for real use | Kids’ crafts, mini planters, ornaments |
Making Terracotta Pots Without a Kiln
Even without a kiln, you can complete your terracotta pot project at home using easy and accessible finishing methods.
Air-Drying Method
Air-drying is one of the most straightforward and most accessible ways to harden your pots, especially for indoor or decorative use.
- Place your shaped clay pot in a shaded, well-ventilated area.
- Let it dry slowly for 2 to 4 days to prevent cracks.
- Avoid direct sunlight during the drying process, as it may cause the clay to crack or split.
- Rotate the pot every so often to ensure even drying on all sides.
- Check for dryness by touching the surface; it should feel firm and no longer clammy.
- Once dry, seal the pot with a plant-safe finish like beeswax, linseed oil, or a clear matte spray.
Pit Firing Method
Pit firing is a traditional, low-cost method that uses open flame and natural materials to harden clay, perfect for stronger, rustic pots.
- Dig a shallow pit in a safe outdoor area away from structures.
- Line the base of the pit with dry wood or kindling.
- Carefully place your thoroughly dried pots inside the pit.
- Cover the pots with more wood, sawdust, or combustible material.
- Light the fire and let it burn intensely for several hours.
- Allow the pit to cool completely before removing the pots.
- Expect some natural color variation and texture from the flames; this is part of the beauty!
How to Decorate and Age Your Terracotta Pots
Give your pots a vintage look or add color to make them stand out. These simple techniques are perfect for indoor and outdoor projects.
Faux Aging Techniques
Give your terracotta pots an aged look with a few simple techniques; no need to wait years for natural wear.
A limewash, made by mixing garden lime with water, creates a chalky, time-worn finish when brushed on and left to dry.
For a more organic effect, try rubbing moss or leaves onto a damp pot, then lightly sanding it for a natural, layered texture.
Layering white or gray paint also works; apply in thin coats, let each dry, then sand sections for a faded, vintage feel. Always seal your pot if it will be used outdoors.
Painting, Sealing & Glazing
Add color, character, and durability to your terracotta pots with the right finishing techniques. For painting, choose safe options like acrylic, chalk, or mineral paints, especially if your pots will hold herbs or edible plants.
Avoid anything toxic. To protect your design and make the pots water-resistant, seal them with clear matte spray, linseed oil, or beeswax. This also helps prevent paint from peeling.
If you’re using a glaze, opt for food-safe versions for edible plants and standard glazes for decorative use. Always fire glazed pots if needed to ensure a durable, long-lasting finish.
Budget-Friendly & Beginner-Friendly Alternatives
Starting your terracotta pot doesn’t have to be expensive. You can use clay-rich backyard soil as a natural and low-cost alternative.
For indoor practice, homemade clay made from cornstarch, glue, vinegar, and lotion is great, though not suitable for outdoor use.
Pit firing is a traditional and budget-friendly way to harden pots without a kiln, while simple hand-shaping techniques like pinching or coiling require no tools at all.
These easy and affordable options are perfect for beginners looking to experiment without investing heavily in equipment or materials.
Common Issues and Fixes
While making terracotta pots is fun and fulfilling, a few common hiccups can occur. Here’s how to handle them with ease.
- Cracking During Drying or Firing: Let pots dry slowly in a shaded, cool place. Cover loosely with plastic initially and ensure they’re scorched before firing.
- Uneven Shapes or Collapsing Pots: Let the clay rest to firm up. Maintain even wall thickness. Beginners can use pinch or coil techniques for better control.
- Paint Peeling or Moisture Damage: Use a paint that is friendly to porous surfaces, such as acrylic. Always seal pots after decorating, especially if they will be used outdoors or for plants.
Conclusion
Making your own terracotta pots is a fun and rewarding DIY project that lets you express your creativity. With the simple steps I’ve shared in this guide, you now know how to make terracotta pots from scratch using basic materials and techniques.
Air-dry your pot or use the traditional pit-firing method, and you’ll create beautiful pieces for your plants, décor, or as gifts. Don’t forget to add your personal touch with painting, sealing, or faux aging.
Ready for more DIY inspiration? Check out other blogs on the website for more ideas.