How to Make Lavender Sachets: A Step-by-Step Guide
Have you ever opened a drawer and wished it smelled a little fresher, or thought about giving someone a handmade gift with a personal touch? I’ve been there too, and lavender sachets were the answer.
In this guide, I’ll show you exactly how to make lavender sachets, if you’re into sewing or prefer a no-sew method.
You’ll learn what you need, how to maintain the scent’s strength, and even how to package or sell them. Let’s dig in and make something worthwhile together.
Why Lavender Sachets are Worth Making at Home
Making lavender sachets yourself gives you total control over every detail, from the scent strength to the fabric’s look and feel.
You can choose calming blends, repurpose materials you already have, and craft something that’s both useful and beautiful. Store-bought versions can’t match the personal touch or cost savings.
Additionally, they’re a joy to give, for small celebrations, thoughtful gestures, or everyday freshness.
Homemade sachets aren’t just budget-friendly; they’re deeply satisfying to make and easy to customize for any occasion or season.
How to Make Lavender Sachets: Step-by-Step Guide
Follow these simple instructions to create both sewn and no-sew lavender sachets using basic tools and materials. Choose the version that fits your time, skills, and comfort level.
Method 1: Sewn Lavender Sachets (Beginner Friendly)
This method involves basic stitching and is suitable for individuals who are comfortable using a needle or a sewing machine. It gives a firm, secure finish with a simple, handmade feel.
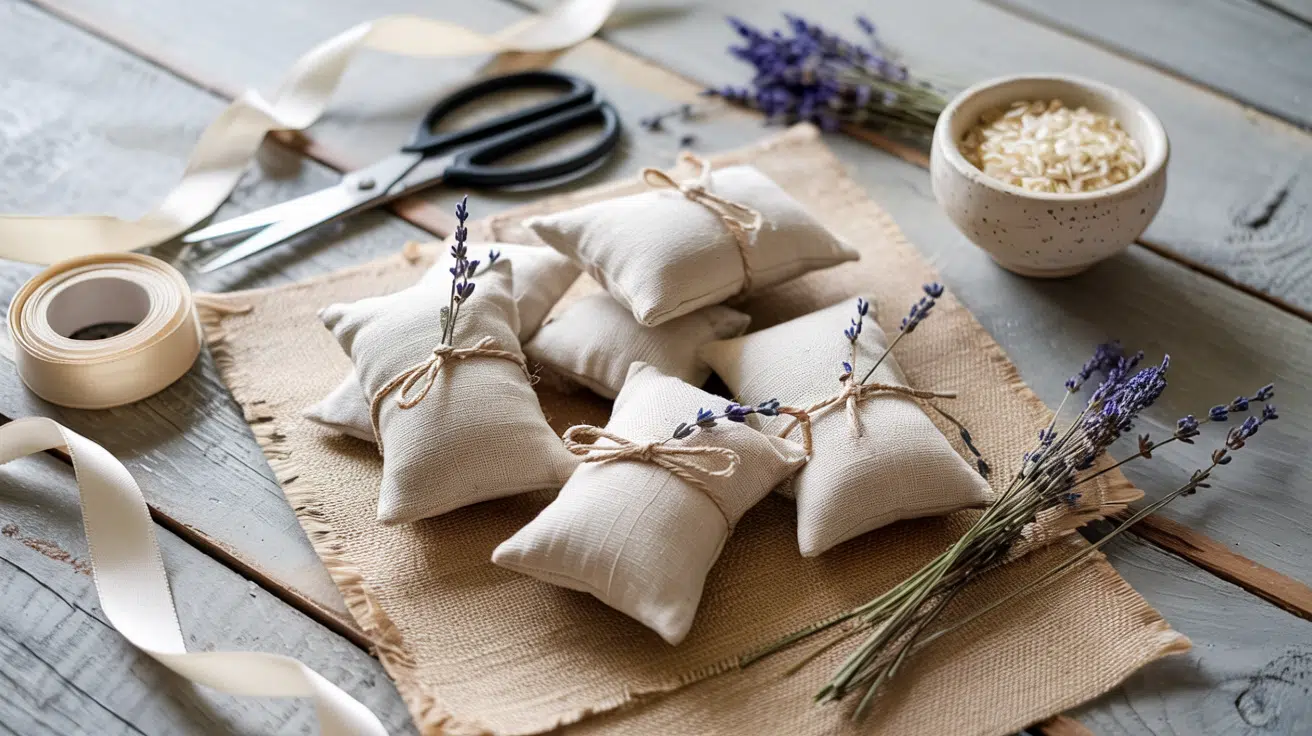
Gather Your Materials
- Dried lavender buds (store-bought or homegrown)
- White rice (used as a filler and scent extender)
- Cotton fabric (preferably breathable and patterned)
- Rotary cutter or scissors
- Cutting mat and ruler
- Iron (optional, for smoothing fabric)
- Sewing machine or hand needle and thread
- Pins
- Paper (for making a funnel)
- Tape
- Ribbon (for optional bundling)
Step 1: Cut the Fabric

Cut two equal-sized fabric squares, each measuring 5 inches by 5 inches. Use a rotary cutter and ruler on a cutting mat for accuracy. Trim away the fabric selvage before measuring.
Press the pieces flat with an iron to remove wrinkles, which makes sewing easier. If you want a firmer feel, you can add lightweight interfacing, though it’s not necessary.
Stack the squares evenly so the edges line up perfectly before moving on to pinning and sewing.
Step 2: Sew Three Sides

Place the fabric squares right sides together and pin them in place. Leave a 2-inch gap on one side, mark this opening with double pins so you don’t accidentally sew it shut.
Use a ¼-inch seam allowance and sew around the edges, starting at one pin and ending at the other. Pivot carefully at each corner with the needle down. Backstitch at the start and end to secure your seam.
Trim the corners diagonally to reduce bulk when turning.
Step 3: Turn Right Side Out

Turn the stitched fabric inside out through the opening. Gently push out the corners using a pencil, paintbrush, or small dowel to get clean edges. This gives the sachet its final shape.
Press it flat with an iron to smooth the seams and prep the pouch for filling. If there are loose threads, trim them now. Double-check the corners and opening to make sure everything is properly aligned before adding the scented mixture inside.
Step 4: Fill the Sachet

Place the funnel into the sachet’s opening and begin by adding a scoop of rice. This gives the sachet weight and helps the scent last longer. Follow with dried lavender, shaking gently to settle the mixture.
You don’t need to fill it all the way; leave about 1 inch of space at the top so it’s easy to sew closed. If anything spills, tap the pouch gently on a surface to settle the contents evenly.
Step 5: Sew the Sachet Closed

Close the opening by stitching it shut using your sewing machine or a hand needle. Align the open edge and sew across it neatly with a straight stitch. If sewing by hand, use small, even stitches to secure it well.
Once stitched, gently massage the sachet to distribute the filling evenly throughout. This helps the scent spread and ensures a more balanced shape. Trim any excess threads to keep the sachet tidy and finished.
Step 6: Finish and Bundle (Optional)
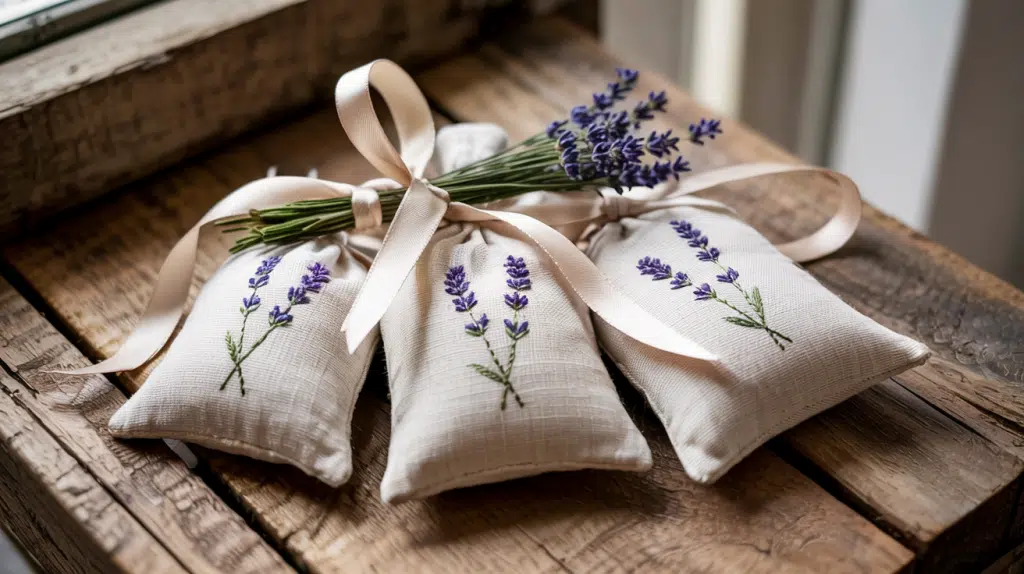
If making multiple sachets, stack them by size or shape. Use a ribbon to tie them into a neat bundle. You can arrange them evenly or slightly off-center for visual interest.
Wrap the ribbon around, cross underneath, then tie a bow on top. Trim any excess ribbon for a clean look. This bundled set makes a nice display for a closet, shelf, or gift. It’s an easy way to give your sachets a polished final touch.
Watch the full video below to see each step in action and follow along as you create your lavender sachets.
Method 2 – No-Sew Lavender Sachets
This method is perfect for kids, quick projects, or those who prefer a glue-and-go solution. It requires no stitching and uses pre-made pouches or alternatives.
Tools and Materials for No-Sew Sachets
- Cotton fabric (lightweight, breathable; scraps or fat quarters work well)
- Paper or cardboard template (for tracing sachet shape)
- Pencil or fabric marker (for marking cutting lines)
- Aleene’s Fabric Fusion Peel & Stick Tape (or similar fabric-safe adhesive tape)
- Pinking shears or fabric scissors (to cut and prevent fraying)
- Dried lavender buds (main scented filler)
- Optional: essential oil (to boost fragrance)
- Scrap paper (to make a funnel)
- Stamps, fabric patches, or peel-and-stick labels (for optional decoration)
- Ribbon or twine (for bundling multiple sachets as a gift)
Step 1: Choose and Prepare Your Fabric

Begin by selecting fabric in your preferred color or pattern. You can mix and match coordinating or contrasting fabrics. Cut your fabric into your chosen sachet size, commonly a square or rectangle.
Create a cardboard or paper template to trace your shape for consistency.
Use a pencil to lightly mark the cutting lines on the wrong side of the fabric. This ensures clean lines for applying the adhesive tape and helps maintain even sizing across multiple sachets.
Step 2: Apply Fabric Tape Along the Edges

Using Aleene’s Fabric Fusion Peel & Stick Tape, apply adhesive along three edges of the shape you just traced, leaving one side open for filling later.
Press the tape firmly along the drawn lines, being careful not to overlap corners. Instead, butt the edges of tape strips together to prevent peeling or glue sticking in unintended areas.
This setup will hold the fabric in place without sewing while keeping the sachet cleanly sealed on the inside.
Step 3: Cut the Fabric and Secure the Seal

After applying the tape, cut your fabric along the outer edge of the marked shape. Press the tape down well to make sure it adheres fully. Remove the paper liner from only the three taped sides, leaving the top open.
Place the second piece of fabric (wrong side down) over the sticky tape, aligning the edges. Use pinking shears to trim the fabric along the tape line. This not only finishes the edge but also helps prevent fraying.
Step 4: Customize Your Sachet (Optional)

Before filling the sachet, add any decorative details, such as stamps, fabric patches, or printed words. You can stamp words like “calm” or “breathe” directly onto the fabric using fabric-safe ink.
If you’re missing a stamp (like the “O” in “harmony”), get innovative, substitute it with a small heart stamp or a different design.
For a layered look, you can use peel-and-stick sheets to cut out extra fabric shapes and apply them like appliqué decorations.
Step 5: Fill the Sachet with Lavender

Create a quick funnel by rolling a piece of paper into a cone and securing it with tape; it doesn’t have to be perfect, just functional. Insert it into the open side of your sachet.
Add a scoop of white rice for structure, then top it with dried lavender for fragrance. Add 2–3 drops of essential oil for a more pungent aroma.
Be sure to leave about an inch of space at the top. This simple funnel method keeps your process smooth and spill-free.
Step 6: Seal the Last Side of the Sachet

Peel off the final backing strip from the tape along the open edge. Press the top side of the fabric firmly down to close the sachet. Check for any gaps and ensure all edges are secure.
If needed, trim the final edge with pinking shears to match the others. Press the fabric edges together with your fingers to reinforce the seal. Your sachet should now be fully closed, no sewing required.
Step 7: Gift or Use Your Sachets

Your no-sew lavender sachet is now ready to use. You can’t tuck it into a drawer, suitcase, or even carry it in your bag. These are especially great for gifting, stack several together, tie with ribbon, and share with friends.
For personal use or as thoughtful gifts, these sachets bring a simple, fragrant touch to any space without requiring a single stitch.
For a more detailed walkthrough of the process, check out the video below:
How to Make the Scent Last Longer
Proper handling and occasional maintenance help your lavender sachets retain their aroma over time, eliminating the need for frequent replacement.
Preservation Tips
To help the fragrance stay noticeable for weeks or months, follow these simple practices before placing sachets in storage areas:
- Store sachets in airtight containers before use
- Add orris root as a fixative
Refreshing Old Sachets
Over time, the aroma of dried lavender may weaken. To restore scent, gently squeeze the sachet a few times to release trapped oils. You can also reapply one or two drops of essential oil to the filling or outside of the pouch.
Let it sit for a few minutes before using it again. Avoid oversaturating, as this may cause the fabric to become damp and reduce airflow. Repeat this process every few weeks as needed.
Innovative Ideas and Styling Inspiration
Use simple methods to personalize your lavender sachets with various fabrics, shapes, and decorative details that match your personal taste or special occasions, such as weddings or seasonal events.
Decorative Touches
You can decorate sachets with embroidery to add initials or small patterns. Rubber stamps with fabric-safe ink also work well for printing clean shapes.
Fabric markers or paint pens are easy to use for drawing directly onto the fabric. Try using stencils for cleaner designs. These methods allow you to keep each sachet unique.
Add buttons, lace, or trim around the edges for added detail, while maintaining a natural-looking and straightforward overall style.
Seasonal or Themed Sachets
Match the style of your sachets to specific occasions by choosing colors, fabric prints, or shapes that suit the event. For weddings or baby showers, use light colors, gentle patterns, or even custom tags.
Around holidays, try using red and green fabric or snowflake patterns.
You can make themed bundles for fall, spring, or summer using seasonal scents like rosemary or citrus alongside lavender. These small details help make your sachets more fitting for specific moments.
Packaging & Gifting Ideas
After finishing your lavender sachets, take a moment to package them with care, especially if you plan to share or store them.
A tidy presentation helps preserve the scent and adds a thoughtful finish. You can adjust your packaging to match the season, occasion, or the look of the sachets themselves.
How to Present Your Sachets
Choose packaging that fits the purpose. For single sachets, use small glass jars with labels or wrap them in kraft paper and tie with twine for a natural look. Cotton or organza drawstring bags offer a soft, lightweight option.
For grouped sets, place multiple sachets in a recycled box or paper pouch. Select packaging materials that can be easily reused or recycled.
Simple, well-planned details help your sachets feel more personal and well-prepared.
Build a Side Income with DIY Lavender Sachets
Turning lavender sachets into a small business can be a practical and rewarding venture. They are low-cost to make, easy to package, and appeal to a wide range of customers.
If you’re selling online, at local markets, or offering them as part of a service, sachets can fit various business models. Focus on quality ingredients, simple presentation, and consistent scent.
Clear labeling and thoughtful bundling help build trust. With minimal materials and effort, this product can offer repeat value, especially when paired with related home or wellness items.
Conclusion
Now that you know how to make lavender sachets, you’re ready to create beautiful, fragrant pouches for yourself or as thoughtful gifts.
Whether you choose the sewn or no-sew method, I’m sure you’ve learned easy, effective ways to add a personal touch to your space.
Keep your sachets fresh by following the tips I’ve shared on scent preservation. Don’t forget, customizing them is a fun way to make them truly your own.
If you’re looking for more easy, creative DIYs, check out my other blog posts for simple, fun, and practical projects.