10×12 Shed Plans: Your Dream Build!
Tired of tripping over garden tools in your garage or hunting for holiday decorations in random corners? I’m here to help you build the perfect storage solution with these 10×12 shed plans that give you compact but roomy space.
If you’re a weekend warrior looking for your first big DIY project or someone who just needs more storage without the headache, I’ve got you covered.
I’ve put together everything you need to succeed, including detailed blueprints, complete materials lists, step-by-step building instructions, and realistic cost breakdowns.
You don’t need to be a master carpenter to tackle this project. With basic tools and my clear plans, you’ll have a sturdy, great-looking shed that’ll make your neighbors jealous.
What Makes 10×12 the Perfect Shed Size?
A 10×12 shed gives you 120 square feet of space that works for almost any storage or workspace need. You can fit lawn mowers, garden tools, holiday decorations, and still have room to walk around comfortably inside.
This size works great as a workshop for woodworking or crafts, a home gym with basic equipment, or even a quiet hobby space. It’s big enough to be useful but not so huge that it dominates your backyard.
Most residential lots can easily accommodate a 10×12 shed without looking crowded or overwhelming the landscape. Many areas don’t require building permits for structures under 120 square feet, though you should always check your local rules first.
10×12 Shed Plans and Their Types
There are three different 10×12 shed designs that work for different yards and building skill levels. Each plan comes with complete materials lists, detailed drawings, and step-by-step instructions to make your build successful.
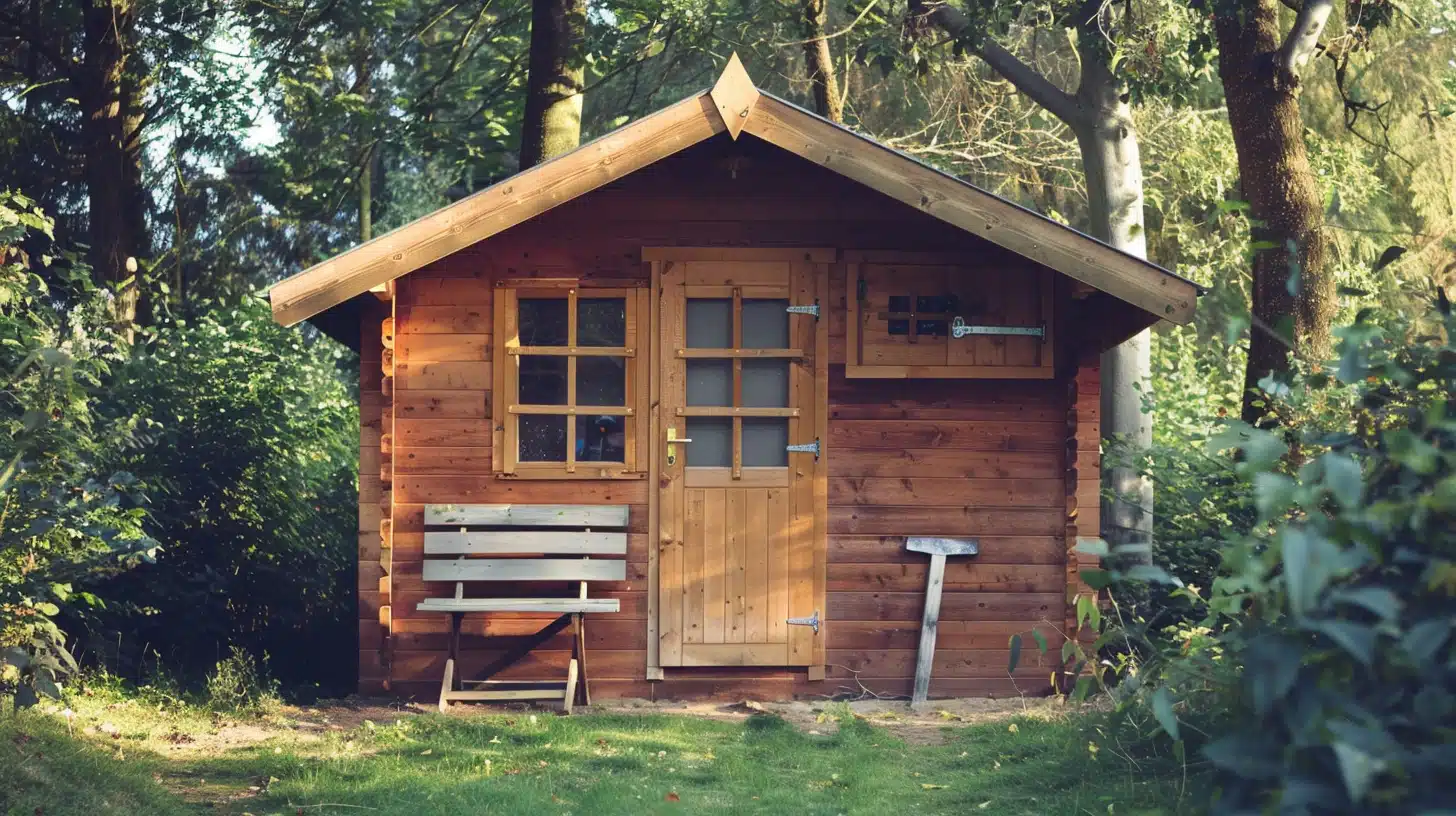
Gable Roof Shed Plan (with Materials List)
This shed has a classic pitched roof with more vertical space inside — perfect for loft storage or better airflow.
- Features: Traditional look, great water runoff, space for overhead shelves or vents.
- Schematic: Includes front, side, and top views with labeled framing and dimensions.
- Cost Estimate: Around $2,000–$3,000, depending on your local material prices
Lean-To Shed Plan
This 10×12 design saves space by leaning against a wall or fence — great for narrow yards or side-of-house setups.
- Best For: Side yards or tight spots with limited clearance.
- Beginner Friendly: Simple angles and layout make it ideal for first-time builders.
- Space Saver: Perfect when you want storage without blocking your yard or view.
Barn-Style Shed Plan (with Loft Potential)
A gambrel roof adds charm and bonus space. This design provides you with more headroom and an optional loft.
- Best For: Storing tall items, garden tools, or building a loft area.
- Design Perks: The dual-slope roof adds height without widening the footprint.
- Materials Included: Framing, roof trusses, smart floor decking, and vertical or horizontal siding options.
Material List for 10×12 Shed Build
This complete materials list covers everything you need to build a solid 10×12 shed from foundation to finish.
Having all your materials ready before you start makes the building process much smoother and faster.
| Category | Materials Needed |
|---|---|
| Lumber & Framing | 2×6 or 2×8 floor joists (pressure-treated), 2×4 or 2×6 wall studs, 2×8 roof joists (16″ on center), rim joists and support beams, header boards for windows/doors |
| Flooring | SmartFloor decking panels (OSB or composite) |
| Walls & Siding | OSB wall sheathing, horizontal siding panels (custom match optional) |
| Roofing | Roof felt paper (underlayment), roofing nails, shingles or metal roofing panels, fascia, and soffit trim boards. |
| Doors & Windows | Double garden-style doors, black frame window |
| Fasteners & Hardware | Wood screws, galvanized nails, metal brackets and hurricane ties (if needed), door hinges and latches |
| Tools Needed | Circular saw, miter saw, nail gun or hammer, level and tape measure, drill and bits, ladder. |
Double-check quantities based on your specific design and local building codes and regulations. Some materials, such as metal brackets, may not be necessary depending on your area’s wind and snow loads.
Step-By-Step Guide: 10×12 Shed Plans
Building a 10×12 shed can be broken down into five main phases, taking you from foundation to finished structure. Each step builds on the previous one, so getting each phase right makes the next one much easier.
Step 1: Prep the Foundation and Level the Floor

Start with a flat and sturdy base. In the video, the concrete slab had a 1.5-inch slope, so they used shims to level the floor before building.
A slab is strong, but a gravel pad also works if you’re on a tighter budget. Just make sure your floor base is even.
Bonus Tips:
- Use a long level to check for sloping.
- Shim low spots before adding floor joists.
- Anchor corners if you expect strong winds.
Step 2: Frame and Build the Shed Floor

Once the slab was leveled, the builders added floor joists and SmartFloor decking. SmartFloor is water-resistant and holds up better than basic plywood.
Even spacing between joists is important to prevent sagging. This step builds the base for everything else.
Bonus Tips:
- Mark joist spacing lines before placing them.
- Choose moisture-resistant decking if you live in a wet area.
- Nail or screw decking down tight for a solid feel.
Step 3: Frame and Stand the Walls

Walls were built on the ground and then lifted into place. Allow for windows and doors during the framing process.
Once upright, the crew braced the walls so they stayed strong and square before moving on to the roof.
Bonus Tips:
- Label each wall section to avoid confusion.
- Use extra hands when raising the walls.
- Brace corners to keep them from shifting.
Step 4: Build the Roof and Add Sheathing

Heavy snow in the area meant they used 2×8 rafters, spaced 16 inches apart. After the roof frame, they added OSB sheathing and felt paper. Overhangs on all sides help keep rain off the walls and make the shed look finished.
Bonus Tips:
- Use thicker joists in snowy or windy areas.
- Plan roof angles and cuts before installing.
- Cover OSB with felt paper to keep moisture out.
Step 5: Finish With Doors, Siding, and Trim

Double doors, horizontal siding, and clean trim finished off the shed. A black window added natural light.
Inside, tall walls (up to 9 feet high) provided ample space. It looked great and worked well for storing gear or using as a workspace.
Bonus Tips:
- Match siding to your house if possible.
- Install corner trim to hide cut edges.
- Paint or seal the siding before the weather hits.
Watch How To Do It: 10×12 Shed Plans Video Tutorial
Cost and Build Time Estimate
Here’s a quick breakdown of the cost and time needed to build a 10×12 shed. It covers DIY and professional options.
| Cost Level | Estimated Cost Range (USD) | Time Needed (DIY Builders) |
|---|---|---|
| Budget (DIY) | $2,000–$3,000 | Weekend to 1 week |
| Mid-Range | $4,500–$5,000 | Weekend to 1 week |
| Premium | $5,000–$7,800 | Installed by professionals |
This table can help you plan your spending and allocate the necessary time. Choose the option that fits your skills, schedule, and budget.
NOTE: Costs and build times listed here are merely estimates and can vary based on location, materials, weather, and your skill level.
10×12 Shed Interior Layout Ideas

How you arrange the inside of your 10×12 shed depends on what you plan to use it for most often. Smart layout planning helps you make the most of your 120 square feet of space.
- Open storage layout keeps the entire floor clear for large equipment like riding mowers, ATVs, or seasonal items that need lots of room.
- Workshop setup with a workbench along one wall and tool storage above gives you a dedicated space for projects and repairs.
- Split-use design divides the space in half, with storage on one side and workspace on the other for maximum flexibility.
- A vertical storage system uses wall-mounted shelves, pegboards, and overhead racks to store smaller items without taking up floor space.
Consider your primary activities before you begin building, so you can plan for electrical outlets and lighting in the optimal locations. You can always modify the layout later, but it’s easier to get it right from the beginning.
Tips for Success
These simple tricks will save you time and prevent costly mistakes during your 10×12 shed build. Following these basics separates successful DIY builders from those who end up frustrated and have to start over.
- Use a framing square and level constantly to keep everything straight and square from the very beginning.
- Label each piece of lumber with pencil marks before cutting so you don’t mix up similar-sized boards.
- Double-check all door and window opening measurements before cutting to avoid wasting expensive lumber.
- Take photos of your progress at each step so you can remember how things fit together later.
These habits might seem like extra work at first, but they speed up your build in the long run. Professional builders use these same techniques because they know prevention beats having to fix mistakes after the fact.
Wrapping It Up
With these 10×12 shed plans, we’ve covered everything from choosing the perfect size to hammering the last nail on your shed. You now have the blueprints, materials list, building steps, design options, and money-saving tips to make this project a huge success.
Don’t let this project intimidate you; it’s doable with basic tools and your free time. Thousands of DIYers have built amazing sheds using these same techniques and lived to tell about it.
Your storage problems are about to become ancient history, and you’ll have the satisfaction of building something incredible with your own hands. Grab those plans and start building your dream shed this weekend!