
How to Build Strong Roof Rafters Step by Step
Ever looked up at a roof and wondered what’s holding it together? I’m here to help you understand roof rafters, one of the key parts of that hidden support system.
If you’re building, repairing, or just trying to figure things out, knowing how rafters work can save you time, money, and frustration. You’ll learn what they do, the different types, how to size and space them, and how to install them step-by-step.
By the end, you’ll know exactly what keeps your roof strong and steady. All set? Here’s how to begin.
Key Functions of Roof Rafters
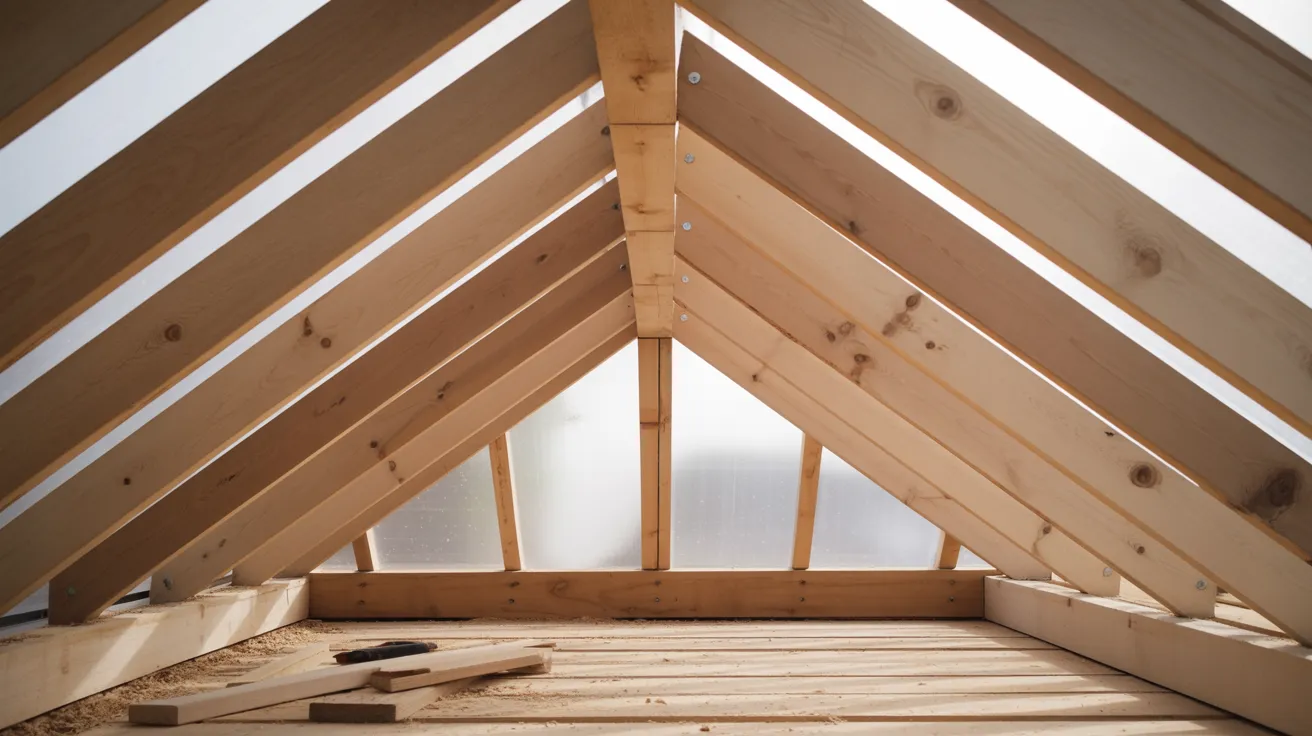
Roof rafters play a central role in the strength and shape of a building’s roof. These sloped beams extend from the ridge to the wall plate, forming the main support structure for the upper roofing layers.
Load-bearing role: Rafters carry the full weight of the roofing system, including shingles, snow, rain, and any occasional loads, such as maintenance tools. A properly installed system transfers these forces safely to the load-bearing walls, reducing structural strain and preventing failure.
Support for roof decking: Rafters create a strong foundation for roof decking materials such as plywood or OSB. These panels provide the surface for shingles or tiles. Without proper support from rafters, decking can sag or warp, resulting in leaks and insulation issues.
Creating roof slope: Rafters define the pitch or slope of the roof, helping rain, snow, and debris slide off. The hill also influences attic headroom, airflow, and the roof’s overall profile. Steeper slopes are especially useful in areas with heavy precipitation.
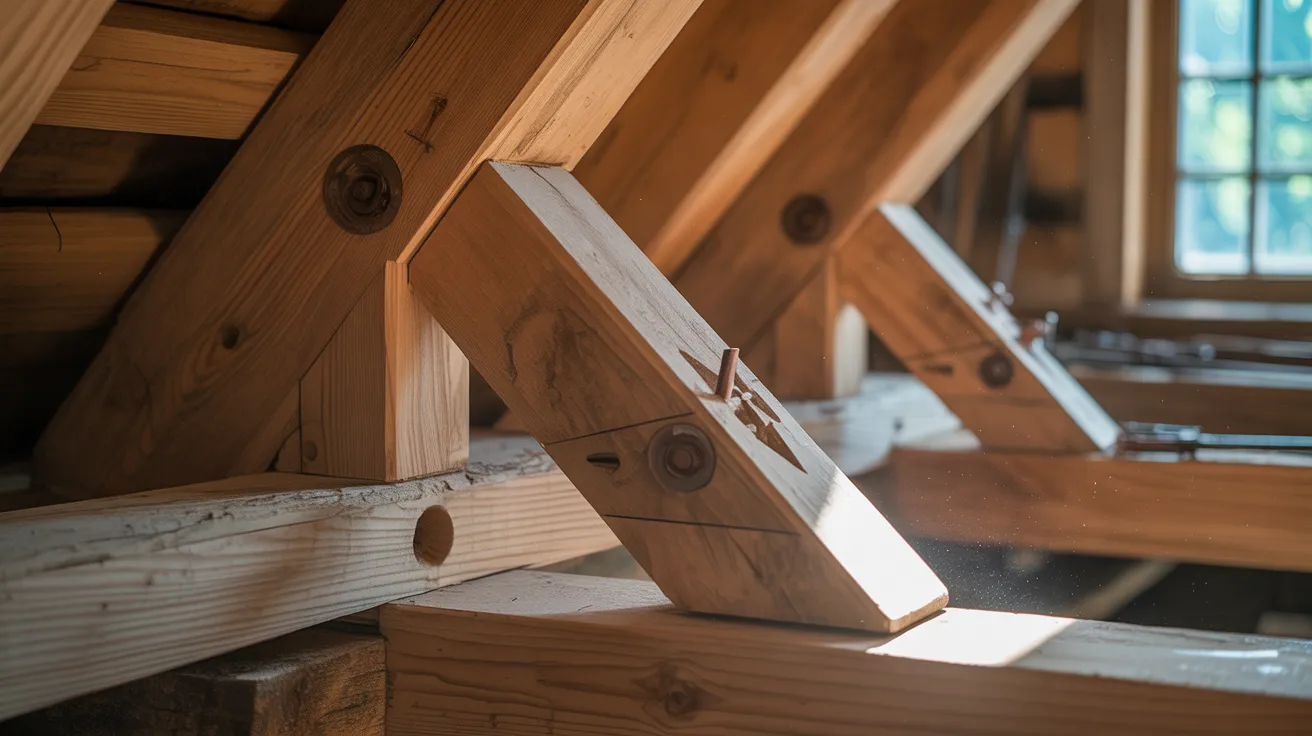
Aesthetic framing value: In some designs, rafters are left exposed instead of being concealed by ceilings or soffits. This is common in rustic buildings, barns, or homes with vaulted ceilings. Exposed rafters and rafter tails add visual depth, highlighting the craftsmanship of the roof structure.
Types of Roof Rafters
Not all rafters serve the same purpose. When building or repairing a roof, it’s essential to understand the various types and their respective functions.
Each type of rafter plays a specific role in the structure. Understanding their differences helps ensure the framing is accurate and the roof is properly supported.
1. Common Rafter
Common rafters are used in basic roof designs, such as gable and shed roofs. They run from the top ridge down to the wall plate.
These rafters form the roof’s slope and support its load. They are typically spaced evenly to maintain structure and stability. Each rafter is often cut on-site, which allows adjustments during framing.
If one becomes damaged, it can be replaced without affecting the rest of the roof. Common rafters are frequently chosen for garages, small homes, and sheds due to their straightforward layout and practical use.
2. Hip Rafters

When your roof has sloping sides, you’ll need hip rafters. I use these on hip roofs where the top ridge meets the corners of the structure. They run diagonally and help shape the outside edges of the roof.
If you’re working with a more complex roof, you’ll see that hip rafters take more weight, so you’ll need thicker or doubled boards. I always ensure the cuts are accurate because even a small mistake can throw off the entire angle.
You’ll also need to support these rafters well at both ends. If you’re building in a windy area, hip rafters help make the roof more stable by reducing the number of flat sides.
3. Valley Rafters
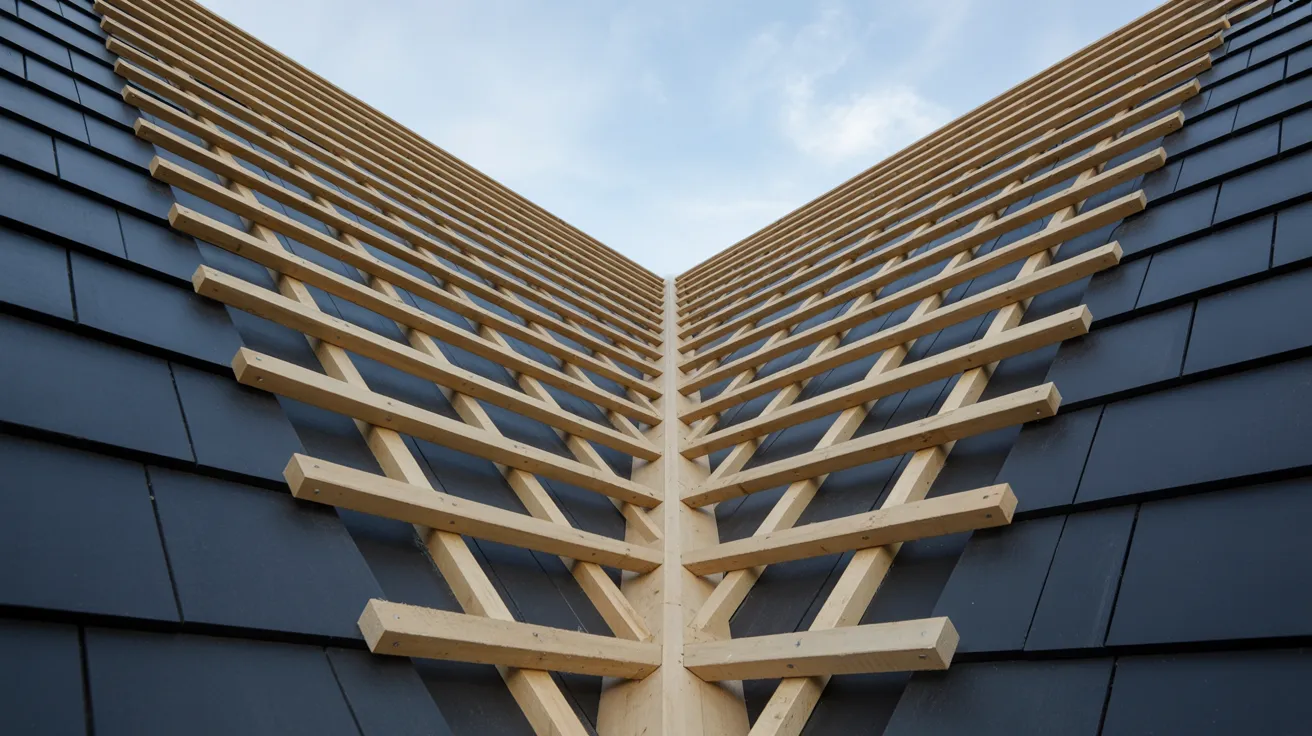
Valley rafters are used when two roof sections meet at an inside corner. They run from the top ridge down to the eaves, forming a V-shaped channel that directs water flow.
Jack rafters are attached to both sides of the valley rafter. Because valleys collect significant runoff, strong boards and proper waterproofing are essential. If not sealed correctly, this area is prone to leaks.
Careful planning and solid materials are important when framing this section, as it requires precise alignment and added support.
4. Jack Rafters
Jack rafters are shorter sloped boards used in roofs with hips or valleys. Unlike full-length rafters, they do not run from the ridge to the wall.
Instead, they connect to either a hip or a valley rafter. Hip jack rafters span from the wall to the hip, while valley jack rafters extend from the ridge to the valley.
These rafters fill in gaps between main rafters and provide critical support, ensuring the roof deck is even and properly reinforced across all sections.
5. Flying Rafters

Flying rafters, also known as barge rafters, are used when a roof has open gable ends. These rafters extend beyond the wall and support the overhanging section of the roof. Unlike other rafters, they are not connected directly to the ridge.
They often hold the fascia board and help create a clean edge along the roofline. While they do not carry as much structural load, proper bracing and secure fasteners are important, especially in areas exposed to strong winds.
Flying rafters also contribute to the finished appearance of the roof’s edge.
How to Set up Roof Rafters: Step-by-Step Guide
Before setting up the rafters, it’s important to gather the right materials. Choosing the right type of wood or support will make the frame stronger and last longer.
Materials Used for Rafters
If you’re framing a roof, the right material makes your work easier and keeps the structure solid. Below are the types I’ve worked with that can help you decide what’s best for your build:
1. Traditional Wood Types (2×6, 2×8, Cedar, Pine): When framing by hand, 2×6 or 2×8 pine works well, it’s easy to cut, strong, and widely available. Cedar is another solid option, especially for damp areas. These boards suit sheds, garages, or full-size homes. Each piece can be adjusted during the build, making on-the-spot fixes simple.
2. Laminated Veneer Lumber (LVL): For longer spans without extra supports, LVL is a solid choice. It’s built from thin wood layers glued together, which keeps it straight and strong. LVL works well for roofs needing open interior space and resists twisting or bending better than solid boards. It’s useful in homes where attic space matters or when framing needs to follow tight layout plans.
3. Metal Rafters: Metal rafters work well in large buildings, open sheds, or places where wood won’t hold up. They’re strong, resist bugs, and handle tough weather. In humid areas or low-maintenance builds, metal can be a smart pick. Just note—they’re harder to cut and shape, so plan ahead and check all cuts before you start.
Step-by-Step Instructions
Before getting started, make sure all your materials are ready and your layout is marked. A steady, level base will make each step smoother.
Step 1: Set the Ridge Board in Position

Start by lifting your ridge board to the correct height and securing each end to temporary supports. This piece runs along the roof peak and anchors the top of every rafter.
Keep it level and centered; if it’s off, every rafter will be off too. Use a level and a tape measure to double-check your line before attaching it. You can brace it on ladders or posts until the rafters are fastened.
Step 2: Mark Rafter Placement on the Ridge

Once the ridge board is up, use a speed square to mark where each rafter will sit. These marks help you space the rafters evenly, with 16 inches or 24 inches apart.
Start at one end and work your way down, drawing clear lines across the ridge board for each pair. An accurate layout keeps your roof frame neat and balanced.
Step 3: Measure and Cut the Rafter

Start by marking the plumb cut at the top of the rafter using your chosen pitch. From that mark, measure down to lay out the birdsmouth notch where the rafter rests on the top plate.
Use a speed square or framing square to draw both the vertical and seat cuts. Once marked, measure and cut the rafter to its full length.
Use a circular saw for straight cuts and a jigsaw to clean corners. Always test-fit before making duplicates.
Step 4: Cut Out the Notch in the Rafter

Now that the layout is marked, cut the birdsmouth notch by making two clean cuts. Remove the triangle with a jigsaw or handsaw.
Make sure the notch fits snugly on the top plate without rocking. A good fit keeps the whole rafter steady once nailed. Always wear safety gear when cutting notches by hand.
Step 5: Frame and Install Rafters Starting From the Ends

Begin by installing the end rafters on both sides of the roof; these help support and steady the ridgeboard. Line them up with your marks and secure them to both the ridge and the top plate.
Once the ends are set, continue down the ridge, placing each rafter according to your layout. Use nails or brackets to fasten them.
Check your spacing as you go and make sure each rafter fits tightly and level before moving to the next.
Step 6: Add Cross-Braces for Extra Support

Once all rafters are in place, install cross-braces between them to prevent sway and add strength. Nail them at a slight angle between opposite rafters or from rafter to ridge post.
These braces reduce movement and keep the frame from shifting in high winds or over time. Make sure braces are snug and secure at both ends.
Once you’ve gone through the steps, it helps to see the process in action. Check out this simple tutorial to watch each part come together.
Sizing and Spacing Guidelines for Roof Rafters
Before you start cutting, make sure your rafter size and spacing match the needs of your roof. This step keeps the frame safe and helps everything fit without wasting wood.
- Always check size and spacing before cutting any boards.
- Use 2×6 or 2×8 boards for short spans. For longer spans or heavier roofing, use 2×10 or 2×12.
- Closer spacing (like 16″ on center) works well with smaller boards. Wider spacing (like 24 inches) requires stronger boards.
- Rafter size depends on the span, slope, weight of the roofing, and type of wood. Southern Pine and Douglas Fir are commonly used.
- If using heavy roofing like tile or metal, pick larger boards than you would for lighter materials like shingles.
- Always check a span table or use a framing calculator to ensure the rafter size matches your slope and spacing.
- Follow local codes for spacing, wood size, and roof load limits.
- Cut a few extras in case of wrong cuts or damage during framing.
Comparing Roof Rafters to Other Frames

When framing a structure, understanding the difference between roof rafters, trusses, and joists helps you choose the right option for your layout. Each one supports a different part of the roof or floor and serves a specific purpose.
1. Rafters
Rafters are single boards cut and placed on-site to form the slope of a roof. It is helpful for smaller builds where adjustments may be needed during the framing process.
Each board is measured and cut by hand, which takes more time but allows for precision. Rafters are often used in sheds, cabins, and roof styles that include open attic space for airflow or future use.
2. Trusses
Trusses are made off-site from several boards connected in a triangle. They’re fast to install and span long distances without bending. Since they arrive ready to place, trusses don’t allow for layout changes during framing.
Builders often use them in larger houses, garages, or shops where roof framing needs to go up quickly. Trusses work best in roof plans that don’t include usable attic space or storage above.
3. Joists
Joists run flat between walls and help hold up floors and ceilings. They’re installed in rows, spaced evenly, and sized to match the weight they need to carry. Most homes, porches, and decks include joists to support flooring or drywall.
They’re simple to measure, easy to trim, and help keep the structure level. Because they carry heavy loads, joists must be spaced and secured with care to prevent sagging.
Quick Comparison: Rafters vs. Trusses vs. Joists
When working on a project, choose between rafters, trusses, or joists based on the specific structural needs. If you’re planning a build, understanding how these components differ can help you make informed decisions.
| Feature | Rafters | Trusses | Joists |
|---|---|---|---|
| Use | frame sloped roofs | Install full roof frames | support floors/ceilings |
| Flexibility | Easy to adjust on-site | Fixed shape | Can trim as needed |
| Speed | Slower setup | Faster to install | Quick layout |
| Cutting | Cut each board | No cutting | Some trimming |
| Span | Good for small/medium roofs | Great for wide spans | Best for flat spans |
| Cost | More wood, more labor | Less wood, faster build | Low cost, low effort |
| Best For | Custom roofs | Big, fast builds | Floor and ceiling framing |
Common Mistakes to Avoid
- Incorrect Rafter Spacing: Spacing rafters too far apart can compromise the roof’s support system, leading to sagging or structural failure. Adhere to recommended spacing guidelines, typically 16 or 24 inches apart, to ensure adequate support.
- Using Undersized Rafters: Selecting rafters that are too small for the span or load can result in bending or breaking. Refer to span tables to select the appropriate rafter sizes for your specific roof design.
- Improper Fastening: Failing to use the correct type or number of fasteners can weaken connections. Ensure all rafters are securely fastened with appropriate nails or screws to maintain stability.
- Neglecting Ventilation: Inadequate attic ventilation can lead to moisture buildup, which in turn can result in rot and mold. Incorporate proper ventilation systems to allow air circulation and prevent damage.
- Poor Quality Materials: Using low-grade or inappropriate wood can compromise the strength of rafters. Select high-quality, treated lumber that is suitable for your climate and local building codes.
Final Thoughts
Understanding roof rafters is important if you’re building or maintaining a roof. They form the backbone of the structure, giving it strength and shape.
By learning the types of rafters, what materials to use, and how to install them properly, you can build a roof that lasts. Accurate measurements and solid materials make all the difference.
If you’re undertaking a roofing project, refer back to the sections on rafter types and installation steps for a quick review.
For more tips and how-to guides, check out the other posts on roofing and construction.