
DIY Mailbox Post: Build Your Own
Building your mailbox post is a fun and rewarding DIY project. It saves you money and adds a personal touch to your home.
You can choose from styles like traditional, modern, or decorative designs, allowing you to select materials that match your taste. It’s an easy project that doesn’t require advanced skills.
The satisfaction of completing it yourself is unbeatable. Plus, with options like swinging mailbox posts, you can make the project even more unique.
In this guide, we’ll walk you through different styles to help you choose the best option for your home and curb appeal.
Choosing the Right Mailbox Post Design
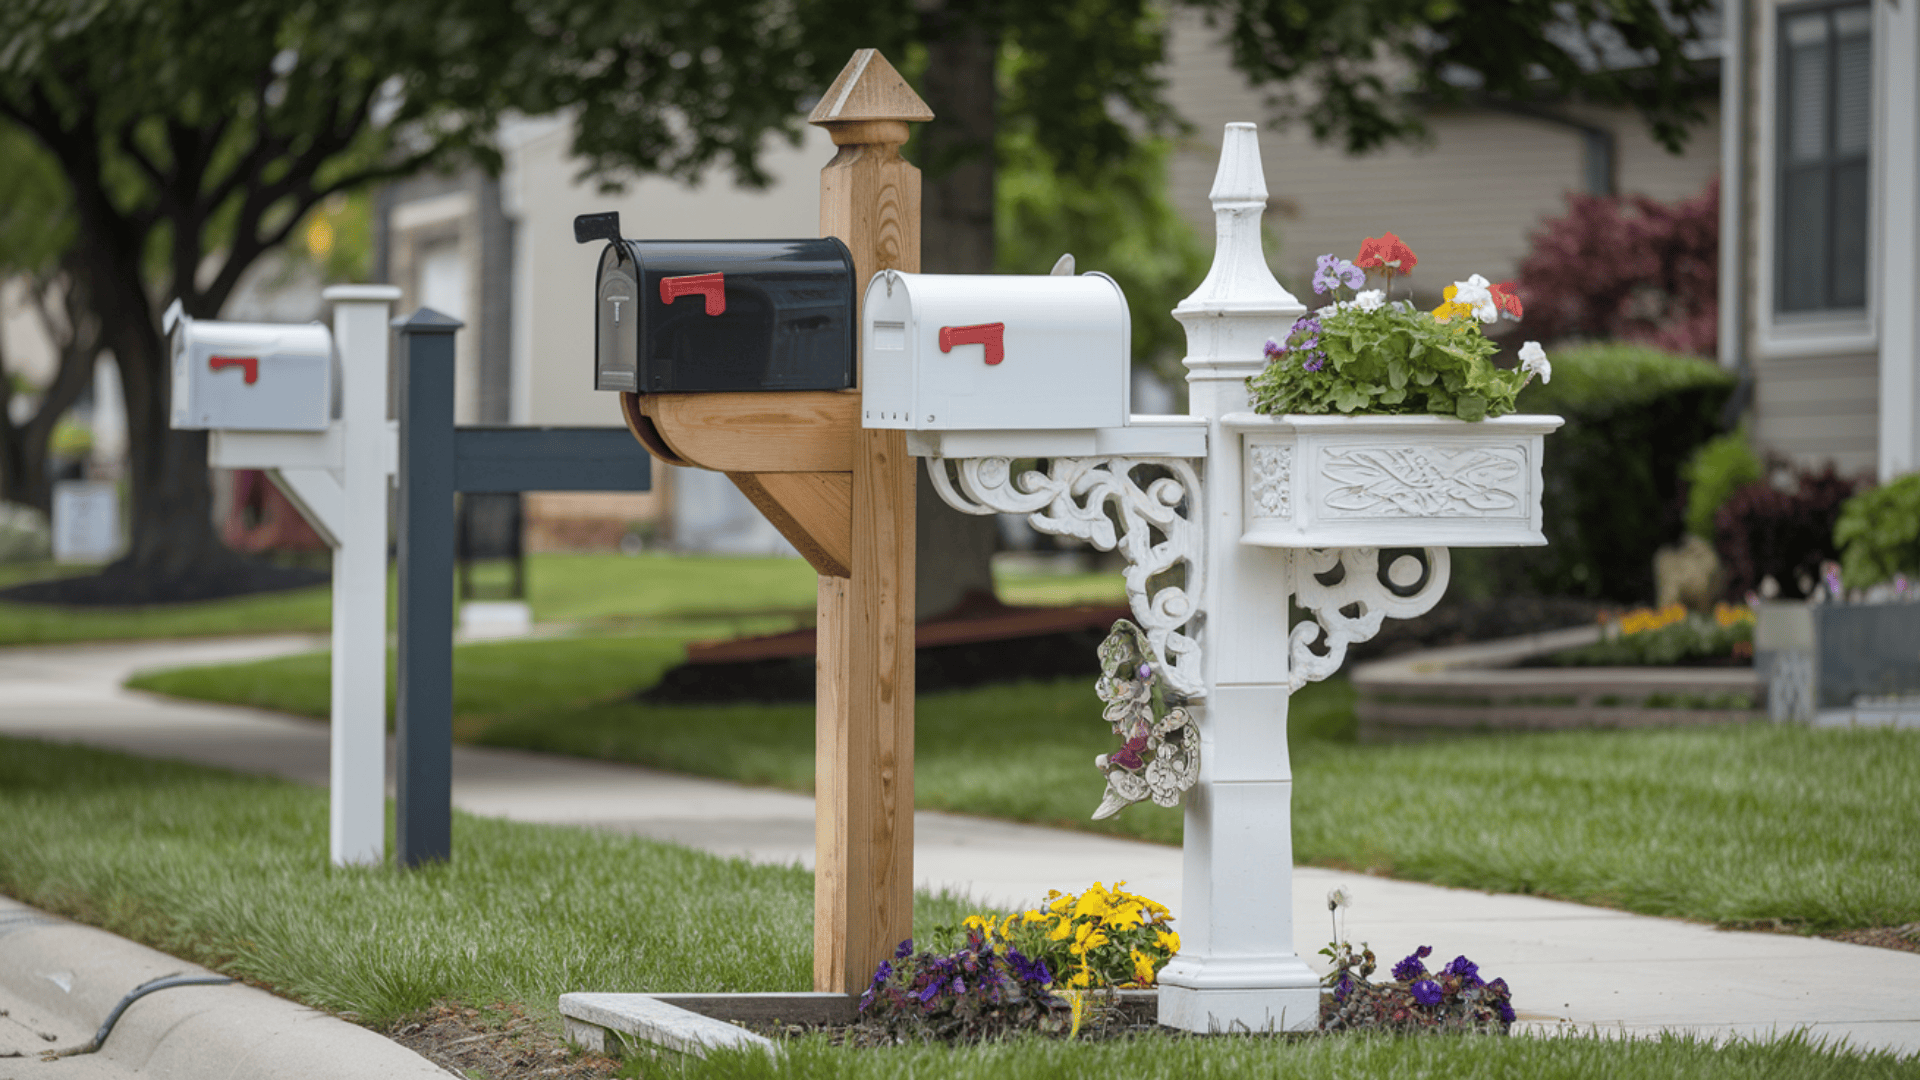
Traditional Wooden Post
- A classic choice, perfect for homes with a traditional look.
- Easy to build and customize with paint or stain.
- Sturdy and reliable for all weather conditions.
Swinging Post (Snowplow-Resistant)
- Ideal for areas with heavy snow or traffic.
- The post swings out of the way to avoid damage from snowplows.
- Provides extra protection while still being functional.
Decorative Planter Mailbox Post
- Combines beauty with functionality.
- Adds curb appeal with space for plants or flowers.
- Great for those who want a unique, eye-catching mailbox.
Modern Farmhouse or Mid-Century Mailbox Post
- A stylish, sleek design for modern or farmhouse-inspired homes.
- Features clean lines and a minimalist look.
- Can be paired with trendy or vintage mailbox designs for a perfect match.
Choosing the right design depends on your home’s style and needs. Each option offers different benefits, so choose the one that best suits you!
Materials and Tools You Will Need
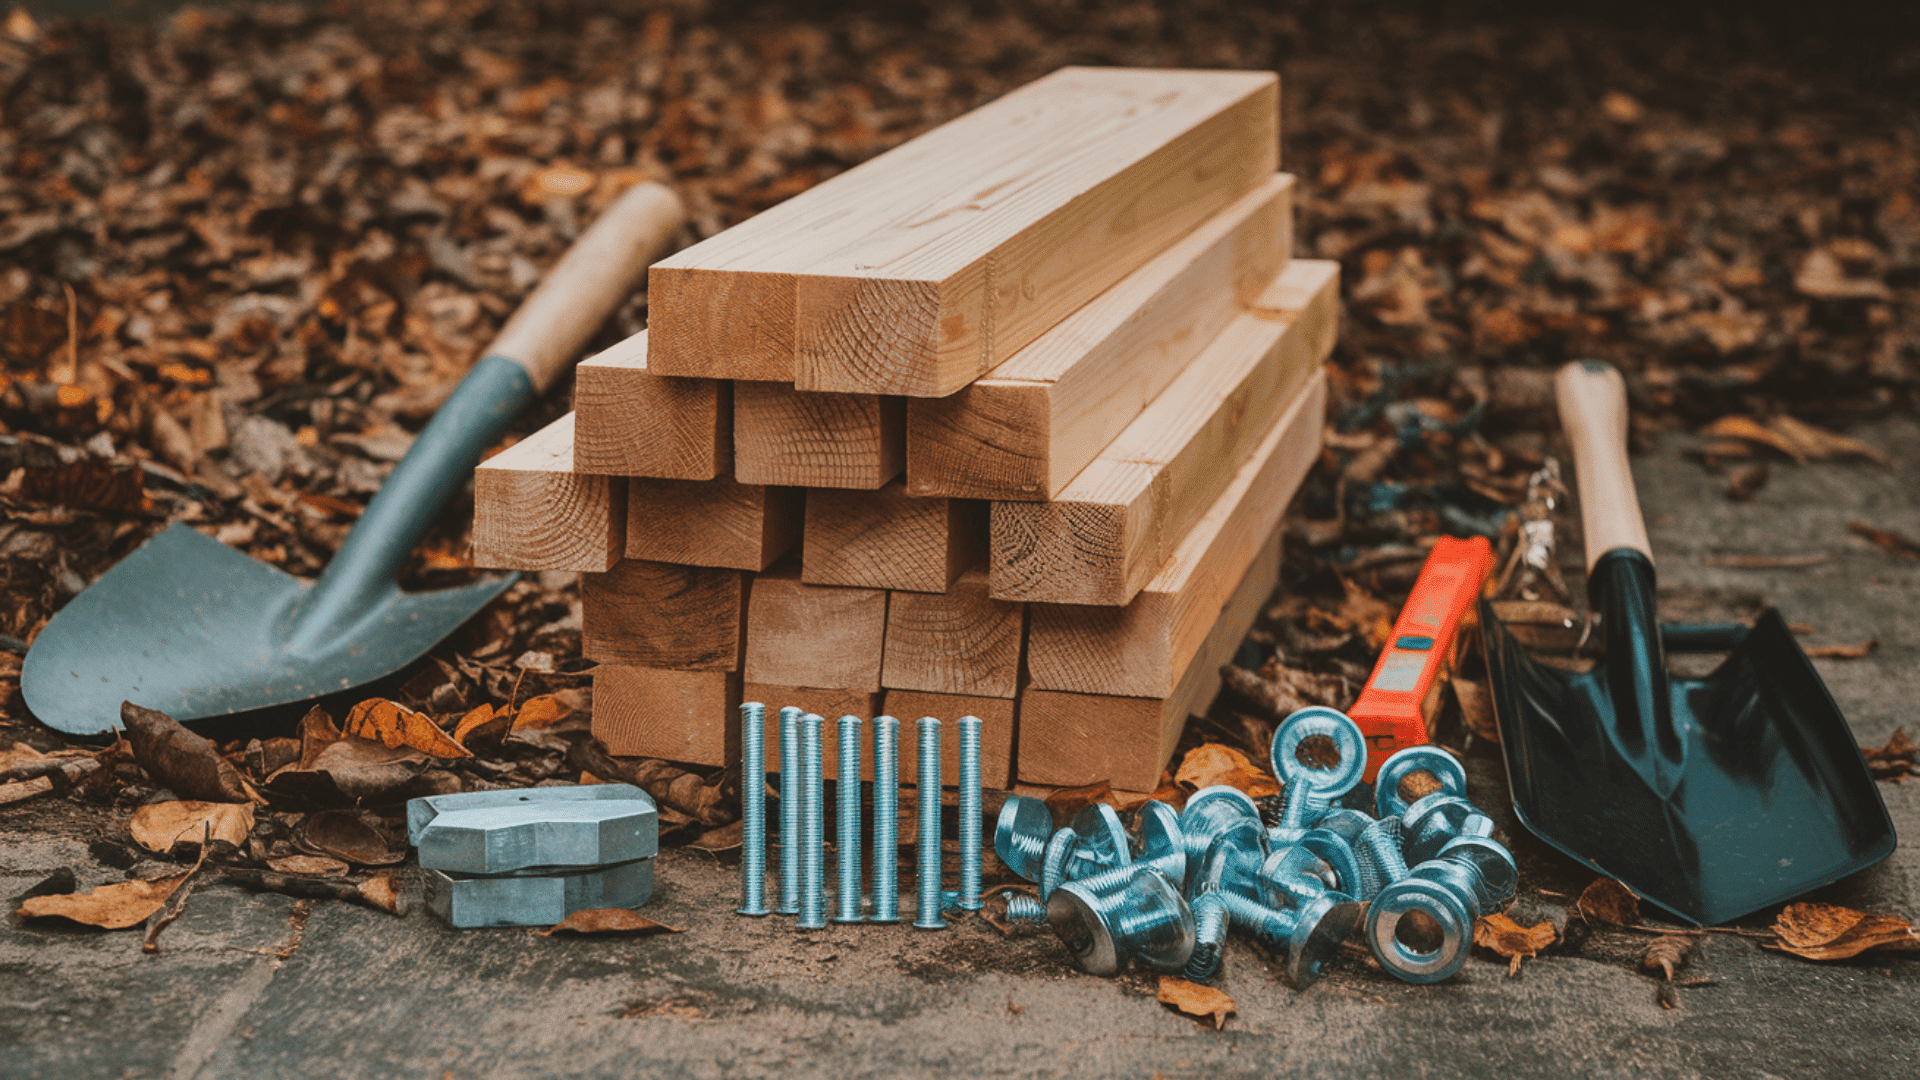
Wood Types (Pressure-Treated vs. Natural Wood)
Pressure-Treated Wood
Pressure-treated wood is designed to resist rot, termites, and decay, making it ideal for outdoor use.
It’s especially beneficial in areas with heavy rain or humidity, where natural wood might wear down quickly.
This type of wood requires less maintenance, as it’s built to handle the elements.
Natural Wood
Natural wood offers a more classic, rustic look that many homeowners love.
However, it needs regular sealing or staining to protect it from the weather. It can be more prone to rot and wear over time without proper maintenance, especially in outdoor environments.
Screws, Bolts, Brackets, and Reinforcement Options
Screws and Bolts
When choosing screws and bolts for your mailbox post, it’s essential to pick rust-resistant options to ensure long-lasting strength.
Heavy-duty bolts are ideal for firmly securing the post and providing extra stability, especially when dealing with larger or heavier posts.
Brackets and Reinforcement
Metal brackets secure the post to the base and prevent shifting.
For additional support, you can add reinforcement options such as corner braces, especially for heavier posts or posts facing high winds or rough weather.
Concrete vs. Alternative Anchoring Solutions
Concrete
Using concrete provides a solid and stable foundation for your mailbox post, ensuring it stays in place for many years.
Concrete is particularly useful in areas where heavy winds, snow, or rain might impact the stability of the post. It creates a reliable, permanent installation that can withstand tough outdoor conditions.
Alternative Anchoring Solutions
Alternatively, anchoring solutions like quick-setting concrete or gravel can be used if you prefer a quicker and simpler setup. These options are less time-consuming but still offer decent stability.
Ground anchors or post spikes are also great alternatives to traditional concrete for temporary or easier-to-move installations.
How to Build a Simple Wooden Mailbox Post
1. Measure and Cut the Wood
- Measurement: Measure the height of the post, typically 5 to 6 feet tall, depending on your preference and mailbox size.
- Cutting: Cut the wood to the right size using a saw. Also, cut a smaller piece for the base to fit securely in the ground.
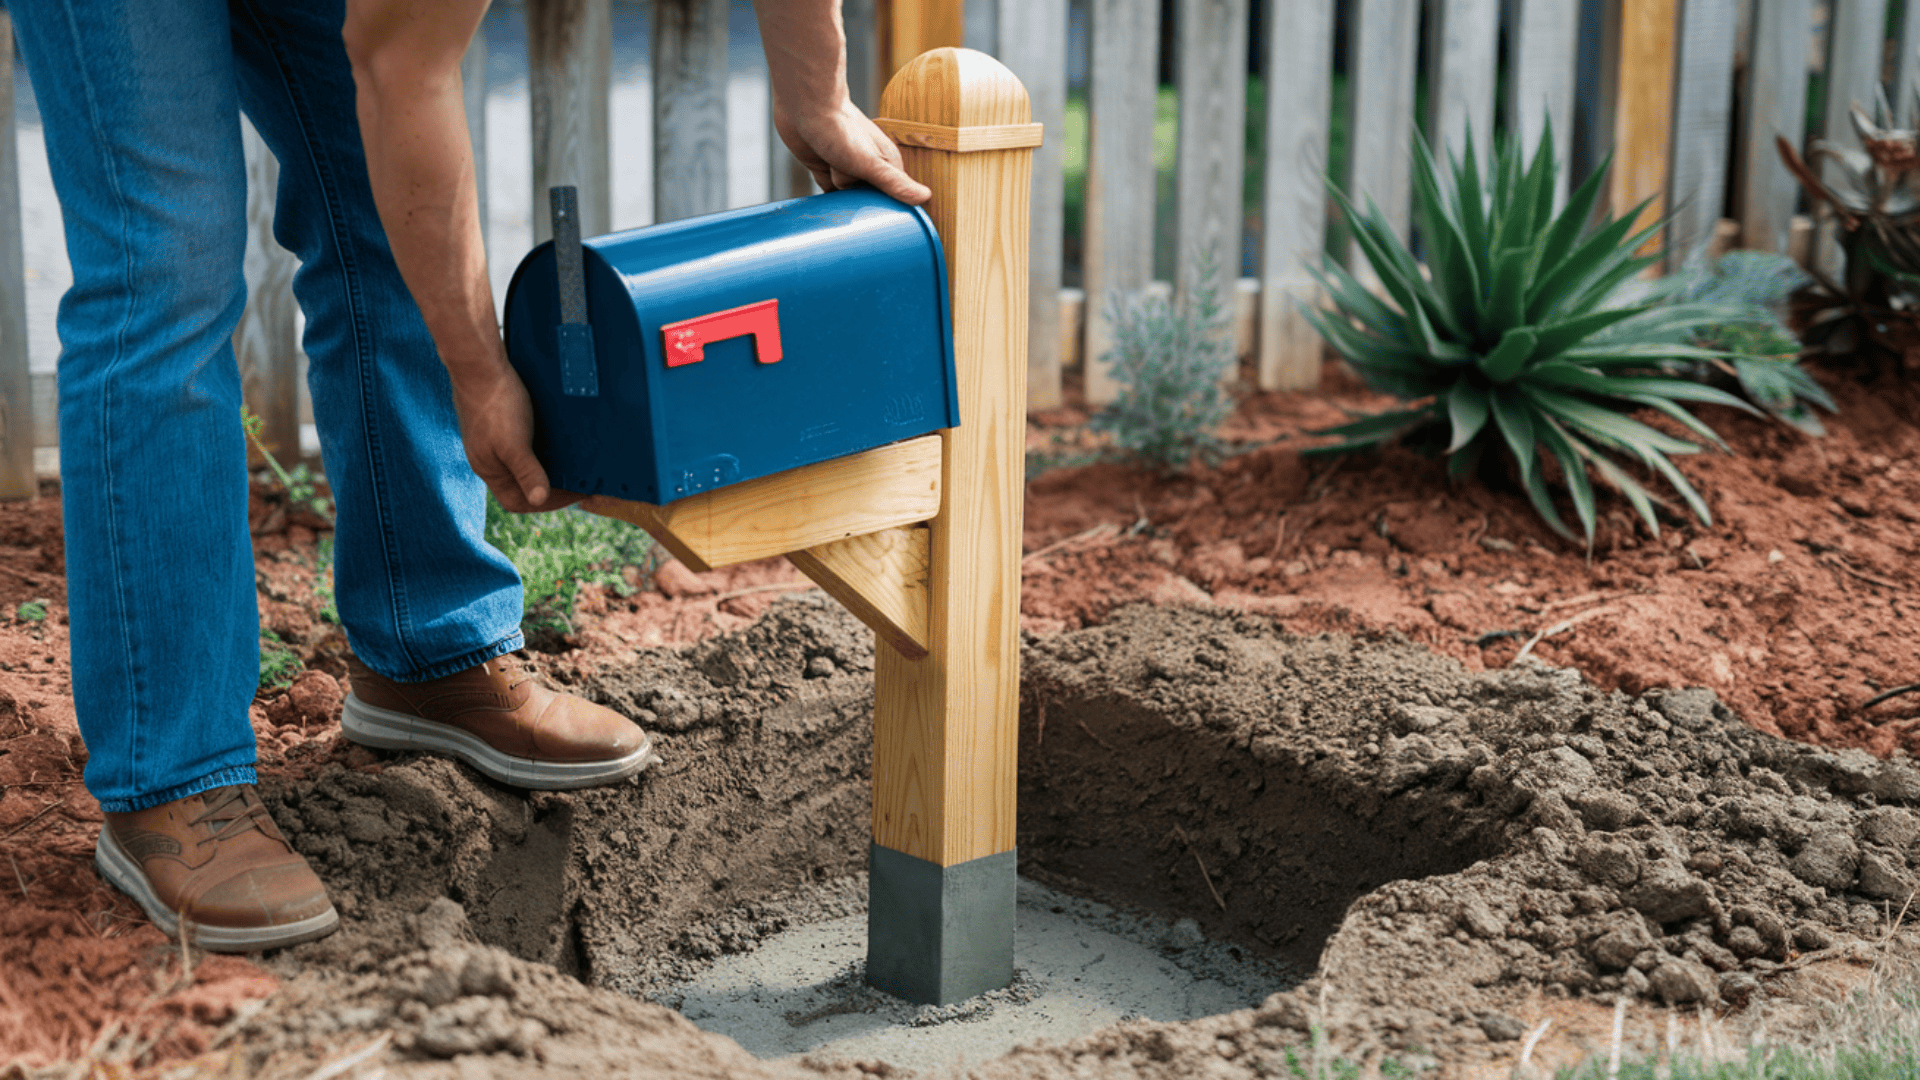
2. Prepare the Hole for the Post
- Digging: Use a post hole digger or shovel to dig a hole that is 2 to 3 feet deep to give the post a stable foundation.
- Width: The hole should be 6 to 8 inches wide to ensure there’s enough space around the post for stabilization.
3. Insert the Post
- Placement: Carefully place the post into the hole, making sure it’s centered and straight.
- Leveling: Use a level to make sure the post stands perfectly upright in all directions.
4. Add Concrete or Stabilizing Material
- Concrete: Pour concrete into the hole around the post, filling it completely to secure the post in place.
- Setting: Allow the concrete to set for 24-48 hours before moving on. For faster installation, gravel can be used but it provides less stability.
5. Attach the Mailbox
- Securing: Once the post is securely in place, attach the mailbox to the top of the post using screws or bolts.
- Tightening: Tighten the screws or bolts well to make sure the mailbox is stable and won’t come loose over time.
6. Seal or Paint the Post
- Sealing: Apply a coat of wood sealant to protect the post from water and weather damage.
- Painting: Alternatively, paint the post with exterior paint for added protection and to match your home’s style. Let it dry completely before using the mailbox.
7. Final Check
- Inspection: Once everything is dry, check that the mailbox is at the correct height, 41 to 45 inches from the ground.
- Stability: Double-check the post to make sure it’s standing firm and that the mailbox is securely attached.
Now, your mailbox post is sturdy, weatherproofed, and ready for use.
Installing a Sturdy Mailbox Post
How Deep Should the Post Be? (Recommended Depth)
The depth of the mailbox post is crucial for ensuring stability. The recommended depth for setting the post in the ground is at least 2 to 3 feet.
This ensures the post has enough support to withstand strong winds and heavy use.
Consider digging deeper in areas with freezing temperatures to prevent the post from shifting due to frost heaving.
Setting the Post in Concrete vs. Alternative Stabilizing Methods
Setting the post in concrete offers the most secure option for long-lasting stability.
Pour concrete into the hole and allow it to set completely before attaching the mailbox. This will provide a solid base that can withstand weather and wear.
Alternatively, you can use stabilizing options like quick-setting concrete or gravel if you prefer a quicker or simpler method.
These materials set faster and offer good support, but they might not be as strong as full concrete in extreme weather conditions.
Preventing Wobbling and Leaning Over Time
During installation, it’s important to ensure the post is level to prevent wobbling and leaning. Use a level to check that the post is perfectly vertical.
Once the post is in place, add extra support with brackets or reinforcement options like corner braces to secure it firmly.
Over time, check for any shifts or instability, especially after heavy storms or frost. Reinforcing the base occasionally can help keep the post sturdy.
Weatherproofing and Durability Tips
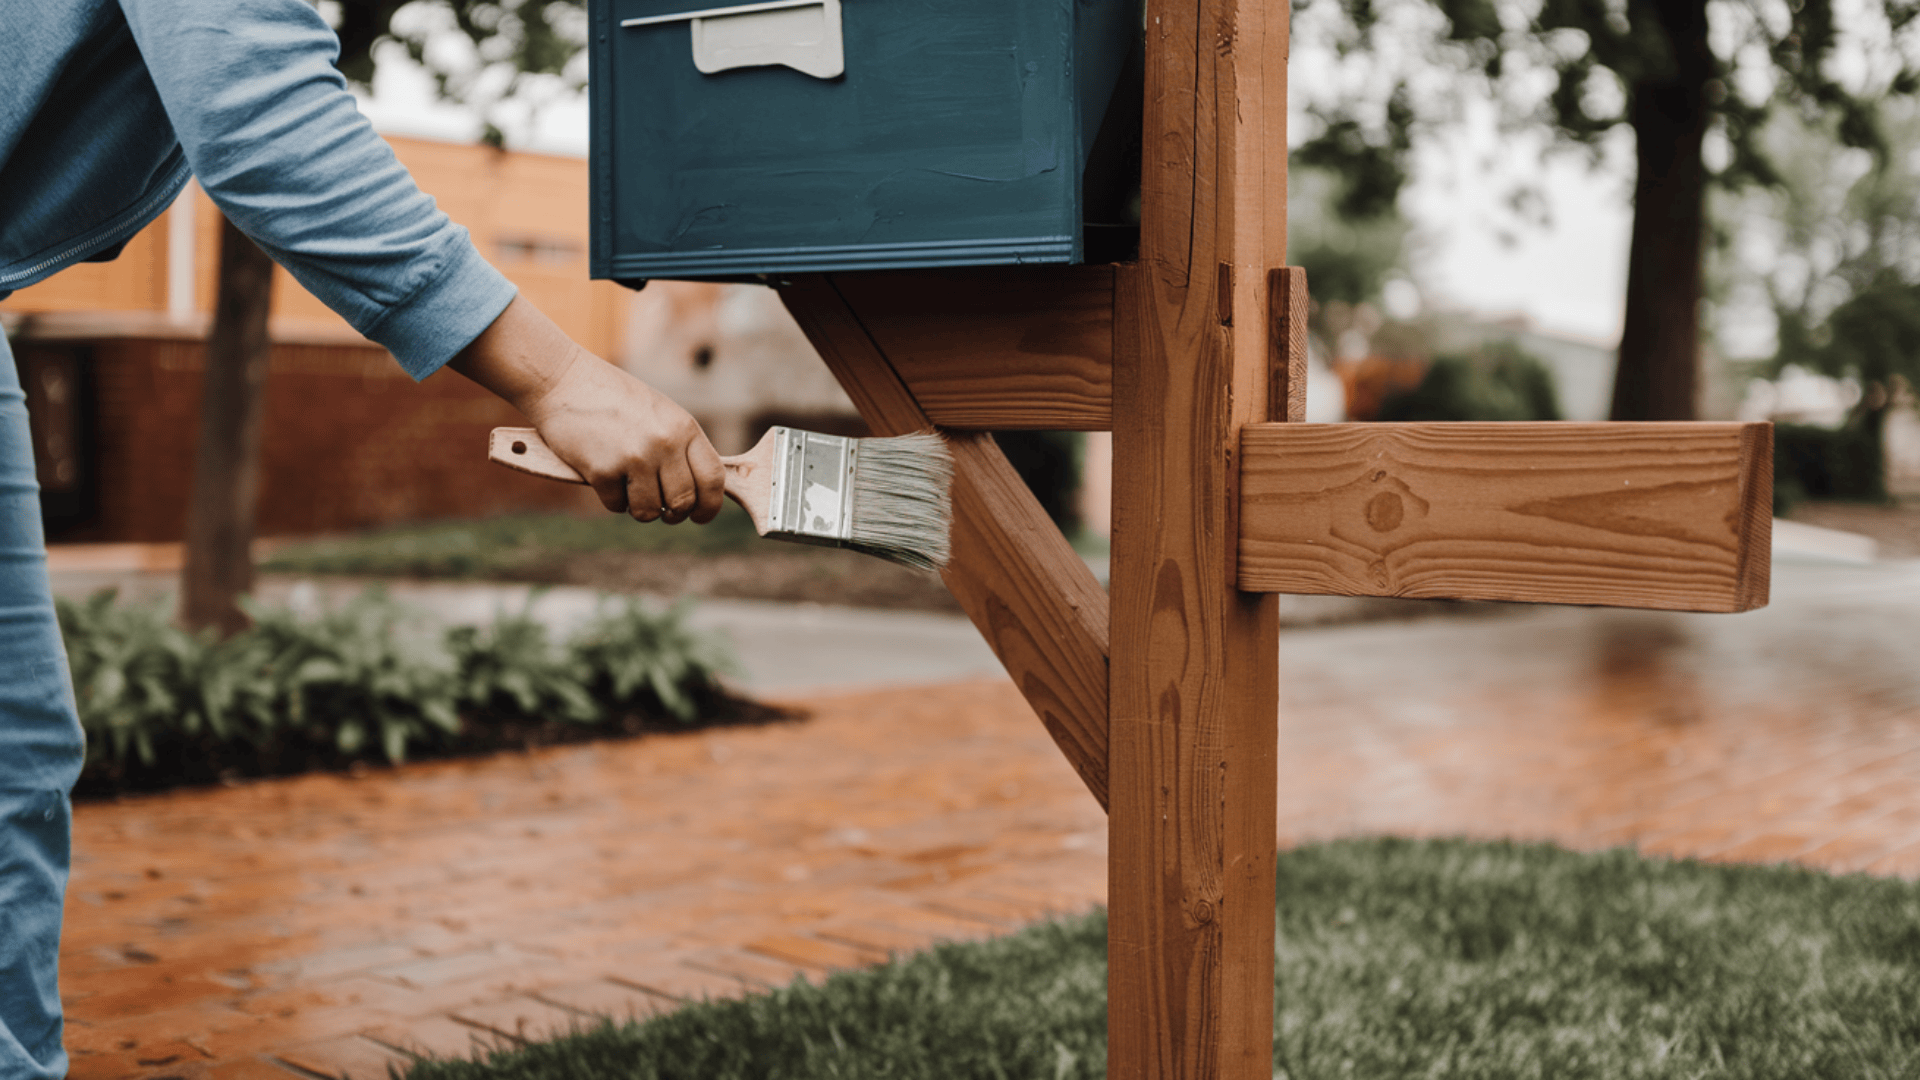
- Sealing: Use a weather-resistant sealant or exterior paint to protect the wood.
- Maintenance: Reapply sealant or paint every couple of years.
- Reinforcement: Add metal brackets or corner braces for extra strength.
- Rust-Resistance: Ensure metal reinforcements are rust-resistant for long-term use.
- Protection: Choose pressure-treated wood or apply a wood preservative to prevent rotting.
- Inspection: Regularly check for pest damage, like termites or ants.
- Prevention: Treat wood with pest-repellent solutions if needed.
- Upkeep: Perform regular maintenance to keep the post in great condition.
USPS Regulations and Mailbox Placement Guidelines
- Height from Ground: Mount the mailbox 41 to 45 inches from the ground to the bottom of the mailbox for proper delivery.
- Distance from Curb: The mailbox should be placed 6 to 8 inches from the curb to ensure easy access for the mail carrier without leaving their vehicle.
- Safety Considerations: Ensure the mailbox post is secure and won’t shift or cause any accidents. Avoid sharp edges or protruding parts to prevent injuries. Keep the area around the mailbox clear of obstacles to allow safe and easy mail delivery.
Common Mistakes to Avoid
Incorrect Post Height or Depth
Setting the mailbox post at the correct height and depth is important for proper mail delivery and stability.
The post should be mounted 41 to 45 inches from the ground and buried at least 2 to 3 feet deep.
Setting the post too shallow or high can lead to instability or difficulty in delivering mail.
Weak or Unstable Anchoring
A mailbox post needs strong anchoring to stay secure in the ground.
Using concrete or other stabling methods ensures that the post won’t wobble or lean over time.
Avoid using weak or temporary solutions like gravel or loose soil, as they won’t provide enough support to withstand harsh weather conditions.
Using Untreated Wood
Untreated wood is more susceptible to rotting, warping, and pest damage.
For outdoor projects, it’s best to use pressure-treated wood or apply a protective sealant to natural wood.
Without this protection, the post will deteriorate quickly, shortening its lifespan and requiring frequent replacements.
Creative DIY Mailbox Post Ideas
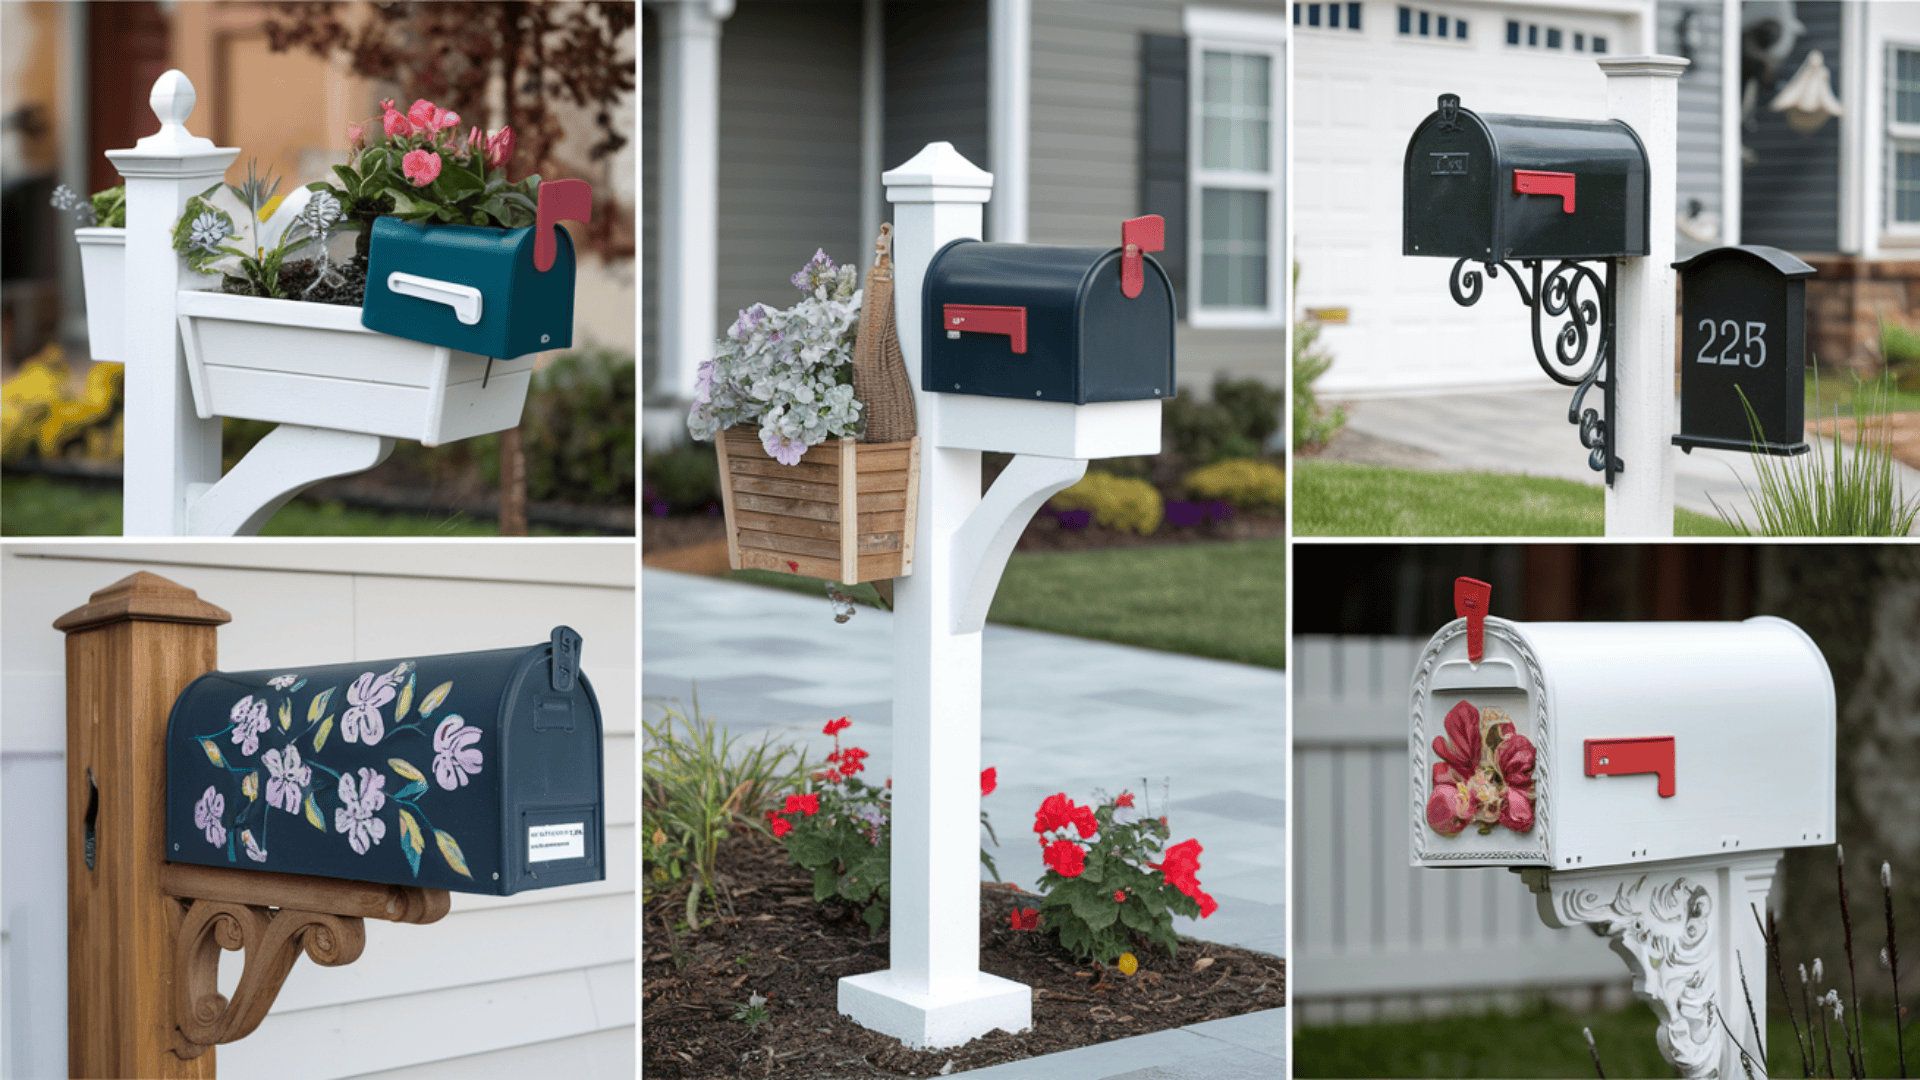
Planter-Style Mailbox Posts
A planter-style mailbox post combines functionality with beauty. Its base can be topped with a planter box, which allows you to grow flowers, herbs, or small shrubs.
This adds color and charm to your mailbox while creating a welcoming touch for your home. You can customize the planter with your favorite plants to suit the seasons.
Modern or Farmhouse-Inspired Designs
Consider building a modern or farmhouse-inspired mailbox post for a sleek and stylish look.
A simple, clean design with straight lines or a rustic wooden post with metal accents can fit a variety of home styles.
These designs are perfect for creating a contemporary or cozy farmhouse feel that blends with your home’s exterior.
Custom-Painted and Decorative Options
Add a personal touch with custom-painted or decorative mailbox posts. You can paint the post in bold colors or add unique patterns and designs that reflect your personality.
From adding your house number to painting fun patterns, this option allows for endless creativity.
You can even incorporate decorative elements like small sculptures, flags, or holiday-themed decorations.
Conclusion
Building your own mailbox post is a simple yet rewarding DIY project.
Start by choosing the right design, ensuring the post is the correct height and depth for stability.
Use durable materials like pressure-treated wood, and secure the post properly with strong anchors like concrete. Remember to weatherproof your post for lasting durability.
Feel free to get creative with your design— choose a planter-style post, a modern look, or a custom-painted design. The possibilities are endless. Your mailbox post will be a unique and functional addition to your home.
Want more DIY inspiration? Read other helpful blogs on our website for more home improvement ideas and tips.


