15 Best Chalk Paints for Furniture
Last month, I painted my old dresser with chalk paint, and I wish I had known more before starting. That’s why I wrote this guide – to help you feel confident about your furniture painting project.
Chalk paint is a special type of paint that sticks well to furniture and creates a soft, matte finish. Unlike regular paint, it doesn’t need much preparation work, which saved me hours of sanding and priming.
From my own projects, I’ve found that chalk paint works well on wood, metal, and even plastic furniture.
The paint dries quickly, and you can create both smooth modern looks and textured vintage styles. Plus, you can fix mistakes easily – a huge relief when I made a few goofs on my first try.
In this guide, I’ll share everything I learned about chalk paint: how to choose the right type, prepare your furniture, apply the paint correctly, and protect your finished work.
I’ll also tell you what supplies you really need and what you can skip. Let’s get started with your furniture makeover.
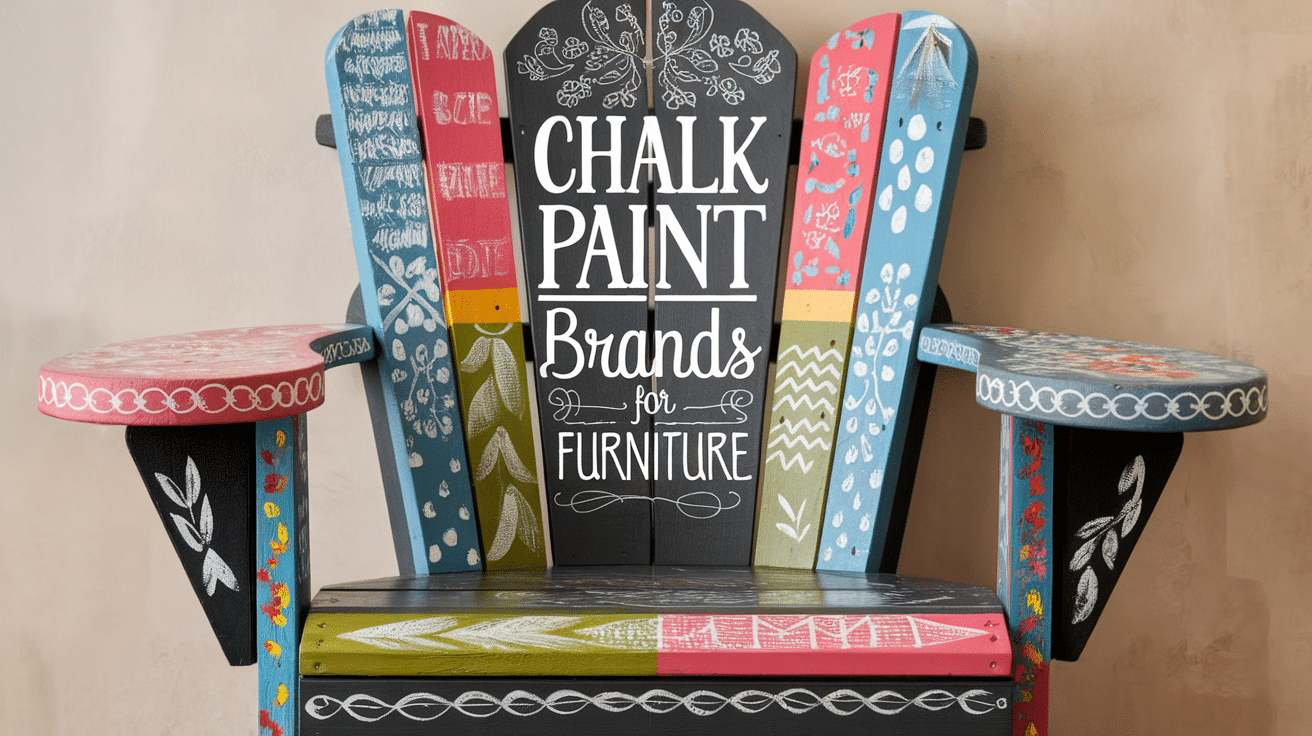
Best Chalk Paint Brands for Furniture
1. Annie Sloan Chalk Paint
I recently used Annie Sloan Chalk Paint on an old dresser, and I’m absolutely in love with the result. The paint went on so smoothly without any need for sanding or priming.
I chose a soft gray for the body and a bright white for the drawers, and the contrast was stunning. The color range is incredible, and the finish is perfectly matte, giving it that vintage vibe I wanted.
The only downside I noticed was that it can be pricey, but the quality definitely justifies the cost.
Pros
- No Prep Work Required: One of the most significant advantages is that you don’t need to sand or prime your furniture before using this paint. It adheres well to most surfaces like wood, metal, and even plastic, saving you time and effort.
- Smooth Application: The paint applies very smoothly, even on uneven or textured surfaces, providing a flawless, professional-looking finish.
- Durable and Long-Lasting: When sealed properly with wax or lacquer, the finish is highly durable, resistant to wear and tear, and will last for many years.
Cons
- Price: Annie Sloan Chalk Paint is relatively expensive compared to other brands, which can be a consideration for larger projects. The high price might be a deal-breaker for some, especially if you’re on a tight budget.
- Requires Waxing or Sealing: Although the paint provides a beautiful matte finish, it requires a separate waxing or sealing step for added protection, which can add time to your project and sometimes affect the overall durability.
2. Rust-Oleum Chalked Ultra Matte Paint
I decided to try Rust-Oleum Chalked Ultra Matte Paint for my nightstand, and I’m really impressed with the results.
The matte finish is perfect, and it covers the surface well in just two coats. It was super affordable compared to other chalk paints, which made it a good option for a budget-friendly DIY project.
The only issue I ran into was that it took a little longer to dry than I expected, but overall, I love how it looks.
Pros
- Affordable: Rust-Oleum provides a budget-friendly option without sacrificing quality. This makes it ideal for anyone looking to give their furniture a makeover without breaking the bank.
- Matte Finish: The ultra-matte finish is perfect for anyone who loves a clean, rustic, or modern look without any gloss or shine.
- Great Coverage: It provides solid coverage in just two coats, which saves you time on your project.
Cons
- Limited Color Range: While it offers a solid selection of neutral tones, the color range is more limited compared to other premium chalk paint brands. If you’re looking for bright or unique colors, this might not be the best option.
- Drying Time: The paint takes longer to dry than some other brands, which can make it a bit inconvenient if you’re looking to complete your project in one day. Patience is key with this product.
3. FolkArt Home Decor Chalk Paint
I recently painted an old side table with FolkArt Home Décor Chalk Paint in a soft lavender, and it turned out beautifully.
The coverage was fantastic, and the paint went on smoothly. It’s perfect if you’re looking for an affordable chalk paint that still performs well.
However, I did find that the finish wasn’t as durable without a topcoat, so I sealed it with wax for protection. It definitely gave the table a fresh, vibrant feel.
Pros
- Affordable: FolkArt provides an excellent price point, making it a great choice for DIYers on a budget. You get good-quality paint without the high cost of premium brands.
- Great Coverage: The paint has a good consistency and coverage. It goes on smoothly and is effective in hiding imperfections on the surface, even on old furniture.
- Versatile: It works well on a wide range of surfaces, including wood, metal, and ceramic, which makes it perfect for various DIY projects.
Cons
- Requires Sealing: While the paint itself is smooth and beautiful, it’s not the most durable on its own. You’ll need to apply a sealing coat of wax or topcoat to ensure it holds up well in high-use areas.
- Limited Finish Options: It mostly offers matte finishes, so if you’re seeking a glossier finish, this brand might not meet your needs.
4. Americana Chalky Finish Paint
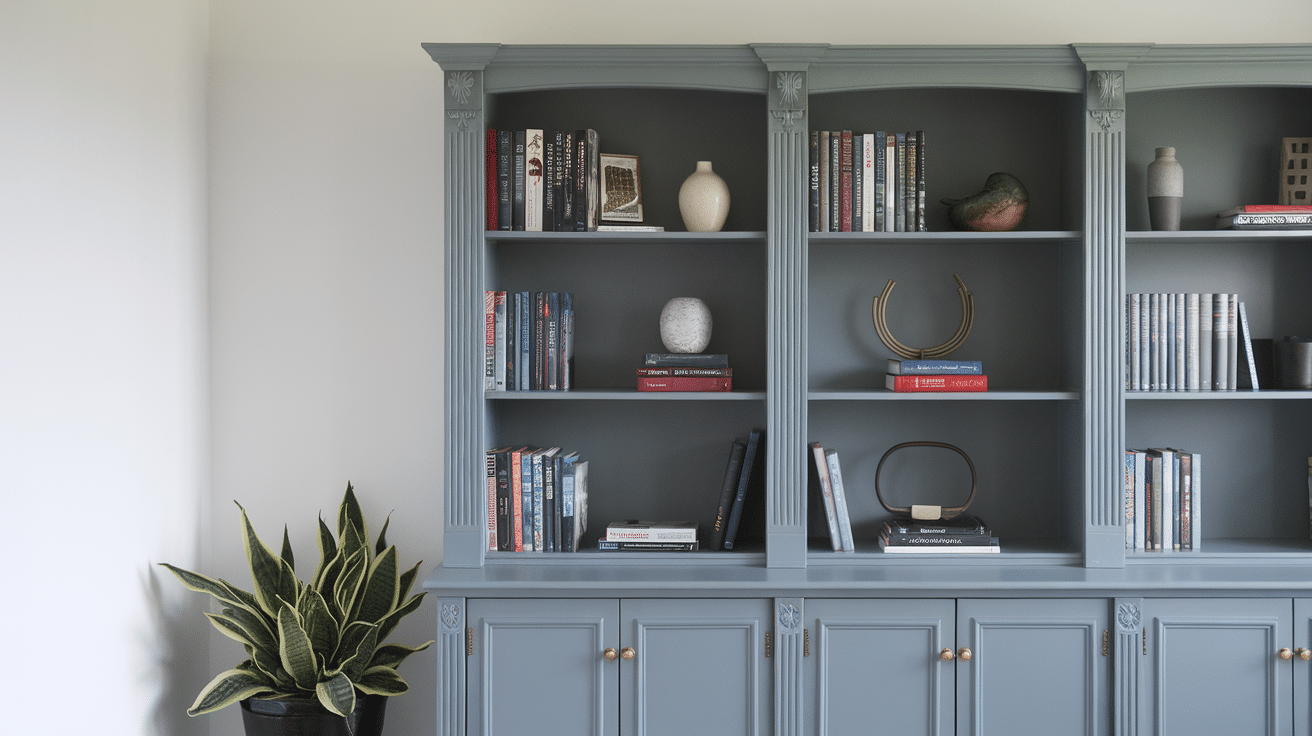
I used Americana Chalky Finish Paint to refresh a vintage bookshelf, and I couldn’t be happier with the result.
The paint applied smoothly and dried quickly, allowing me to finish the project without delay. The wide range of colors helped me find the perfect shade to complement my room.
However, I did need to apply a few coats for full coverage, especially in the darker areas.
Pros
- Vibrant Color Range: Americana offers bright and bold shades, as well as more subtle hues, giving you many options to choose from depending on the look you’re going for.
- Quick Drying: The paint dries faster than many other chalk paints, which is great if you’re eager to complete your project quickly.
- Great for Distressing: It’s ideal for achieving a vintage or shabby-chic look because it distresses beautifully, revealing the underlying wood and creating that worn antique feel.
Cons
- Needs Multiple Coats: While the coverage is decent, some colors may need multiple layers to fully cover dark wood or other surfaces, which can extend your project time.
- Requires Sealing: To ensure the longevity of the paint, you will need to seal it with a topcoat, especially if your furniture will experience heavy use.
5. Dixie Belle Chalk Paint
I recently used Dixie Belle Chalk Paint to makeover an old dresser, and I’m really pleased with how it turned out.
The paint was easy to apply and dried quickly, and I didn’t need to do much prep work.
The color I picked, a soft mint green, really brightened up the room. However, I did need to apply two coats for full coverage, and I noticed it worked best when sealed with wax.
Pros
- Easy to Use: Dixie Belle is known for being beginner-friendly. The paint is smooth and doesn’t drip or run, making it perfect for those new to furniture painting.
- Variety of Colors: The brand offers a huge variety of shades, including some beautiful vintage-inspired colors that work well for any décor style.
- Eco-Friendly: It’s made from non-toxic ingredients, so it’s safe to use in homes with kids and pets.
Cons
- Pricier Than Some Brands: While still affordable compared to premium paints, Dixie Belle Chalk Paint is more expensive than other budget-friendly options.
- Needs Waxing or Sealing: Like most chalk paints, you’ll need to wax or seal the finish for protection, especially if the piece will be in high-traffic areas.
6. Country Chic Paint
I decided to give Country Chic Paint a try on an old sideboard, and I couldn’t be happier. The application was smooth, and it offered a nice, soft matte finish.
The variety of colors available is fantastic, and I went with a pastel mint color. The best part is how eco-friendly it is.
The only downside I encountered was that the coverage wasn’t as solid on dark wood, requiring a few more coats to achieve a completely opaque look.
Pros
- Eco-Friendly and Safe: Made from non-toxic ingredients, it’s perfect for indoor projects and homes with children or pets. You won’t need to worry about harmful fumes while you work.
- Wide Range of Finishes: Country Chic offers a range of finishes, from matte to satin, allowing you to pick one that suits your design needs.
- Smooth Application: The paint goes smoothly, offering a professional-looking finish, even for beginners.
Cons
- Requires Multiple Coats: This paint may need more than one coat to cover the area for darker surfaces or deep hues, especially on darker furniture.
- Needs Sealing: Like many chalk paints, it requires sealing for durability, which can add an extra step to your project.
7. Valspar Chalky Finish Paint
I tried Valspar Chalky Finish Paint on an old coffee table, and the results were surprisingly good.
It’s a budget-friendly option that still provides decent quality, especially if you’re working on a smaller project.
The coverage was solid, and I only needed two coats for a rich finish. The only downside I found is that the color options are somewhat limited compared to premium brands.
Pros
- Affordable: Valspar offers a more budget-friendly chalk paint, which makes it great for those looking to update a piece without spending a lot of money.
- Great Coverage: It provides excellent coverage in just a couple of coats, saving time on your project.
- Smooth Finish: The paint leaves a smooth, matte finish that works well for many types of furniture.
Cons
- Limited Color Range: The color palette isn’t as expansive as some premium brands, so your choices are more restricted.
- Requires Sealing: As with most chalk paints, Valspar needs to be sealed to maintain its durability and finish, adding a step to the process.
8. General Finishes Chalk Style Paint
I used General Finishes Chalk Style Paint to repaint an old dining table, and I’m amazed at how professional it looks.
The paint went on beautifully, and the results were smooth and flawless. One of the standout features was that I didn’t need to wax it afterward, which saved a lot of time.
However, it’s a bit on the pricier side compared to other options, so I reserved it for my more high-end projects.
Pros
- Premium Quality: Known for its superior coverage and finish, General Finishes provides a durable, professional result that’s perfect for higher-end furniture projects.
- No Waxing Required: Unlike other chalk paints, General Finishes Chalk Style Paint doesn’t require waxing to seal, which makes it a quicker option.
- Smooth Finish: The paint applies beautifully, creating a flawless, even finish without streaks or brush marks.
Cons
- Expensive: While it’s high-quality, the price is higher than other brands, which might be prohibitive for larger projects or DIYers on a budget.
- Limited Availability: This brand isn’t as widely available in all stores, so you may need to order online or find a specific retailer.
9. Martha Stewart Chalk Paint
I recently used Martha Stewart Chalk Paint on an old chair and was impressed by how easily it went on. It offered a smooth finish, and the colors were exactly what I was looking for.
I went with a rich teal for a bold pop of color. The paint also dried faster than many other chalk paints, making it perfect for a quick transformation. However, the price point is a bit high for some of the smaller projects.
Pros
- Smooth Application: Martha Stewart Chalk Paint goes on effortlessly, leaving a flawless, even finish that’s ideal for beginners.
- Quick Drying: This paint dries quickly, which is great for DIYers who want to finish their projects in a short amount of time.
- Vibrant Colors: The brand offers an array of bold, rich colors that can make your furniture pop.
Cons
- Higher Price: This paint is more expensive than some other options, which might deter those looking for a budget-friendly solution.
- Limited Finish Options: The primary finish is matte, so if you’re seeking something shinier, you’ll need to apply a topcoat.
10. Rust-Oleum Milk Paint
I decided to give Rust-Oleum Milk Paint a try on an old dresser I wanted to revamp, and I absolutely loved it. The finish gave the piece a soft, vintage feel, perfect for my rustic bedroom.
The paint applies beautifully, and the finish looks like it has been aged naturally, which is just what I was hoping for.
The only downside I encountered was that it required a bonding agent, which added an extra step.
Pros
- Authentic Vintage Look: Rust-Oleum Milk Paint offers an authentic, aged finish, making it perfect for creating vintage or rustic furniture.
- Eco-Friendly: It’s made from natural ingredients and is a non-toxic, eco-friendly option for your home.
- Great for DIYers: The paint is easy to use, especially for those who want to achieve a distressed, shabby-chic look.
Cons
- Requires Bonding Agent: Unlike other chalk paints, you may need to use a bonding agent to ensure the paint adheres properly to some surfaces, which can add cost and complexity.
- Limited Color Options: The brand offers fewer color choices than premium chalk paints, limiting design possibilities.
11. Fusion Mineral Paint
I used Fusion Mineral Paint to restore a vintage cabinet, and I couldn’t be happier with the results. The paint provided an exceptional, long-lasting finish that didn’t require waxing or sealing.
It’s perfect for high-use furniture because it’s self-sealing, making the project easier and less time-consuming. However, it is a bit on the expensive side, so I only used it for projects I knew would get a lot of wear.
Pros
- Self-Sealing: Fusion Mineral Paint doesn’t require a separate sealing step, which makes it incredibly convenient for quick projects.
- Durable and Long-Lasting: It offers a highly durable finish that’s resistant to scratches and damage, making it perfect for high-traffic areas.
- Great Coverage: This paint provides excellent coverage, often needing only one or two coats for a flawless finish.
Cons
- Expensive: It’s one of the more expensive chalk paint options available, which may deter budget-conscious DIYers.
- Limited Finish Options: The finish is smooth but not ultra-matte, which may not suit those looking for a more rustic, chalky look.
12. Kilz Chalk Style Paint
Kilz Chalk Style Paint worked perfectly on my old nightstand, giving it a fresh, matte finish. The coverage was great, and I only needed two coats for full opacity.
The paint was easy to work with, and it dried fairly quickly, which helped me complete my project in a day.
However, I found that it didn’t distress as well as other chalk paints, so it’s not the best choice if you’re aiming for a rustic, vintage look.
Pros
- Affordable: Kilz provides a cost-effective option for chalk paint, making it great for DIYers on a budget.
- Good Coverage: It offers solid coverage, and you can get a nice finish with just two coats.
- Easy to Apply: The paint is easy to apply, making it great for beginners who want a simple and quick project.
Cons
- Needs Sealing: To protect the finish and ensure its longevity, you’ll need to apply a sealing topcoat, which adds time to the process.
- Not Ideal for Distressing: If you’re looking to distress the piece for a shabby-chic or vintage look, this paint may not provide the best results.
13. Behr Chalk Decorative Paint
I used Behr Chalk Decorative Paint for a small bookshelf makeover and was very impressed by the results. The coverage was good, and the paint adhered well to the wood.
It dried quickly, allowing me to finish the project in just a few hours. However, the finish wasn’t as durable as some of the higher-end chalk paints, and I found myself needing to reseal it after a few months.
Pros
- Quick Drying: Behr’s chalk paint dries faster than most other brands, which is perfect for time-sensitive projects.
- Affordable: It’s one of the most budget-friendly options available without sacrificing quality.
- Easy to Use: The paint applies smoothly and doesn’t require too much effort to achieve a solid, even finish.
Cons
- Needs Sealing: To extend the life of the finish, sealing is essential, especially in high-use areas.
- Not as Durable: While the finish looks nice initially, it may not hold up as well over time, especially on furniture that’s frequently used.
14. The Real Milk Paint Company
I tried The Real Milk Paint Company on an old cabinet, and it gave the piece an authentic vintage feel.
The natural finish is perfect if you’re aiming for a rustic or farmhouse look. It’s also an eco-friendly option, which I loved.
However, it requires mixing with water, and the process can be a bit tricky if you’re new to powdered paints.
Pros
- Natural Finish: It offers a natural, authentic finish that’s ideal for creating a vintage, rustic, or farmhouse look.
- Eco-Friendly: Made with non-toxic ingredients, it’s a safe choice for those concerned with the environment.
- Wide Range of Pigments: The brand offers a wide range of natural pigments to choose from, allowing you to create the perfect custom shade.
Cons
- Requires Mixing: The paint comes in powdered form, which needs to be mixed with water. If you’re not used to this type of paint, it might be a bit tricky.
- Coverage Issues: It may require multiple coats for full coverage, especially on darker surfaces or if you’re working with vibrant colors.
15. Lamp Black by Miss Mustard Seed’s Milk Paint
I used Miss Mustard Seed’s Lamp Black Milk Paint for an old dresser, and it turned out beautifully. The finish was rich and deep, giving the piece a modern, sleek look.
However, the paint requires mixing with water, and that can sometimes lead to uneven consistency if not done carefully. Despite that, I love the durability and smooth finish it gave my dresser.
Pros
- Rich, Deep Colors: Lamp Black offers a stunning, deep black color that works wonderfully for modern, industrial, or vintage-style furniture.
- Durable Finish: Once sealed, it holds up well and protects against wear.
- Great Coverage: It covers well in one or two coats, depending on the surface and the desired finish.
Cons
- Requires Mixing: This paint comes in powdered form and needs to be mixed with water, which can be a bit of a hassle for those who aren’t familiar with powdered paints.
- Price: It is on the more expensive side, so it’s best suited for high-end or smaller projects.
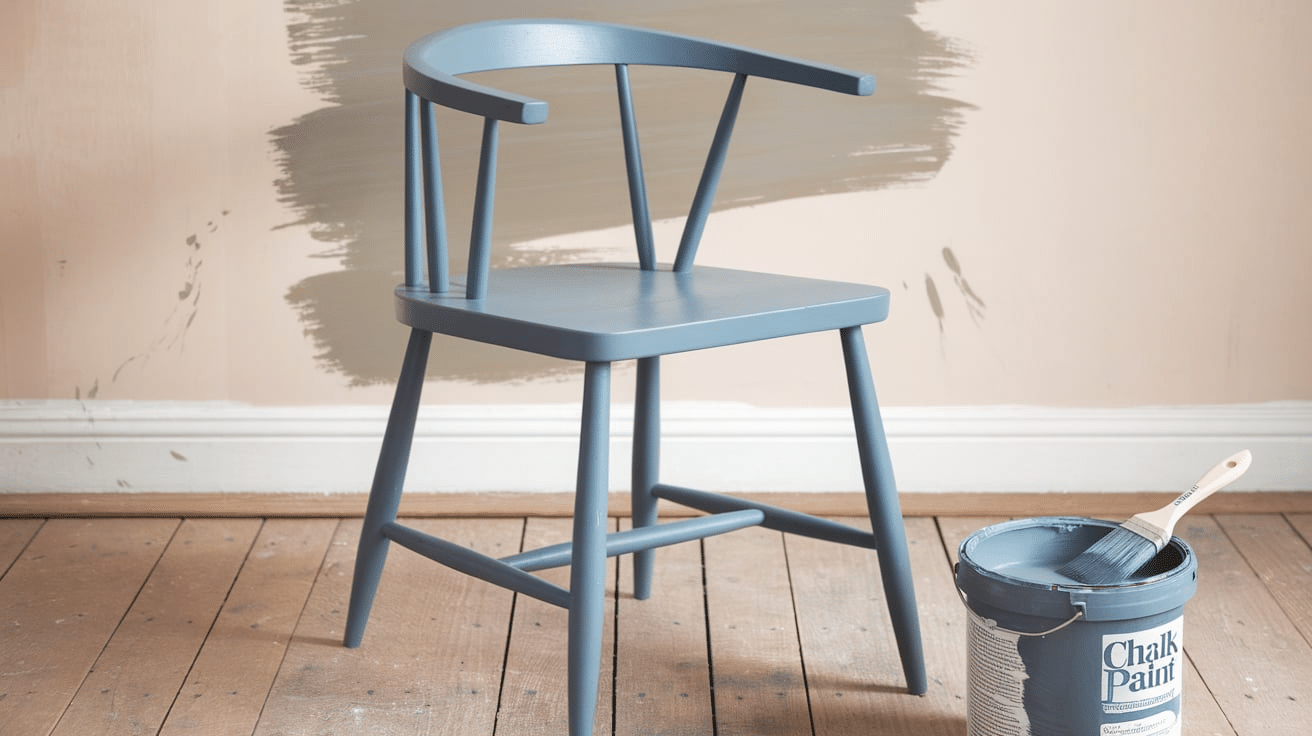
Factors to Consider When Choosing the Best Chalk Paint
After painting several pieces in my home, including my kitchen cabinets and living room sideboard, I want to share what I learned about picking the right chalk paint.
I’ll walk you through the key things that really matter.
Coverage and Durability
My first attempt at painting a coffee table taught me a lot about coverage. I tried a cheap brand that needed four coats – what a waste of time.
Now I use paints that cover well in two coats. From my tests on different pieces, I’ve found that quality chalk paint should hide dark colors underneath without too many layers.
For durability, I always check if the paint can handle daily use. The paint I used on my kitchen chairs has held up perfectly against spills and scratches for six months now.
Ease of Application
I’ve worked with both thick and thin chalk paints, and here’s what I know: thicker isn’t always better. The best chalk paint spreads smoothly without leaving brush marks.
When I painted my bathroom vanity, I used paint that went on like butter – no clumps or streaks. The right consistency should coat your brush well but not drip everywhere.
If you need to thin the paint, a bit of water works fine – I usually add one tablespoon at a time until it feels right.
Color Range and Finish Options
Looking through paint samples for my bedroom dresser, I noticed that different brands offer various finish options.
Some give a very flat look, while others have a slight sheen. I prefer paints with a true matte finish for my vintage pieces, but I chose a paint with a subtle sheen for my modern console table.
The color should stay true when it dries – I once used a paint that looked very different after drying, which was quite disappointing.
Drying Time and Curing Process
The time between coats really matters – I learned this while painting my dining room chairs. Most chalk paints I’ve used dry to the touch in about 30 minutes, but don’t rush the second coat.
I wait at least an hour between coats for the best results. Full curing takes longer, I wait 24 hours before gentle use and a full week before placing heavy items on painted surfaces.
When I painted my entryway bench, I gave it three days before letting my kids use it, and it’s held up great.
Remember, these insights come from my real experiences with different chalk paints.
Each project taught me something new about what works and what doesn’t.
Take your time choosing the right paint – it makes all the difference in getting the results you want.
How to Apply Chalk Paint to Furniture?
I’ll share the step-by-step method that I’ve refined after painting several pieces in my home & what worked for me, including the mistakes I made so you can avoid them.
Step 1 – Prepare Your Furniture
Last week, before painting my old dresser, I learned that preparation makes a big difference. My process:
- I wipe down the furniture with a damp cloth to remove dust and dirt
- For extra-grimy surfaces, I use a mix of warm water and gentle soap
- I remove any loose hardware – I keep screws in a labeled sandwich bag
- I check for loose parts and tighten them
- I fill holes or dents with wood filler
- I let everything dry completely – I wait at least 2 hours
Tip: Clean extra well around handles and edges where oils from hands build up. I once skipped this and the paint didn’t stick properly.
Step 2 – Apply the First Coat of Chalk Paint
When I painted my bedroom side tables, I learned some useful techniques:
- I stir the paint well – no shaking, as this creates bubbles
- I use a good-quality brush – my favorite is a 2-inch flat brush
- I start with thin coats – thick paint shows brush marks
- I paint in the same direction as the wood grain
- I work in small sections, about 2 feet at a time
- I let the first coat dry for 1-2 hours
Tip: I wrap my brush in plastic wrap during breaks to keep it from drying out.
Step 3 – Sanding for a Smooth Finish
After messing up my first project with too much sanding, here’s what I do now:
- I wait until the paint feels completely dry
- I use 220-grit sandpaper and sand very lightly
- I focus on any rough spots or drips
- I wipe away dust with a clean cloth
- I apply the second coat
- I sand again if needed after the final coat
Tip: Don’t press hard when sanding – I once sanded right through to the wood and had to start over.
Step 4 – Sealing and Protecting the Painted Surface
After ruining my first coffee table by skipping this step, I now always seal my work:
- I make sure the paint is fully dry (24 hours minimum)
- I choose between wax or poly sealer based on use:
- Wax for low-traffic items
- Poly sealer for tables and chairs
- I apply sealer with a clean cloth in thin layers
- I wait between coats (following product instructions)
- I let it cure fully before heavy use
- For wax, I buff after it dries for extra shine
Tip: I learned to test sealers on a hidden spot first – some can slightly change the paint color.
Remember, your first piece might not turn out perfect – mine didn’t. But each project gets better as you learn what works best for you and your style.
Chalk Paint Finish Ideas for Furniture
When I started playing with different chalk paint finishes, I found there’s more to it than just slapping on paint.
I’ll share some of the techniques that I’ve tried in my own home and it gave me fantastic results.
Vintage and Distressed Finish
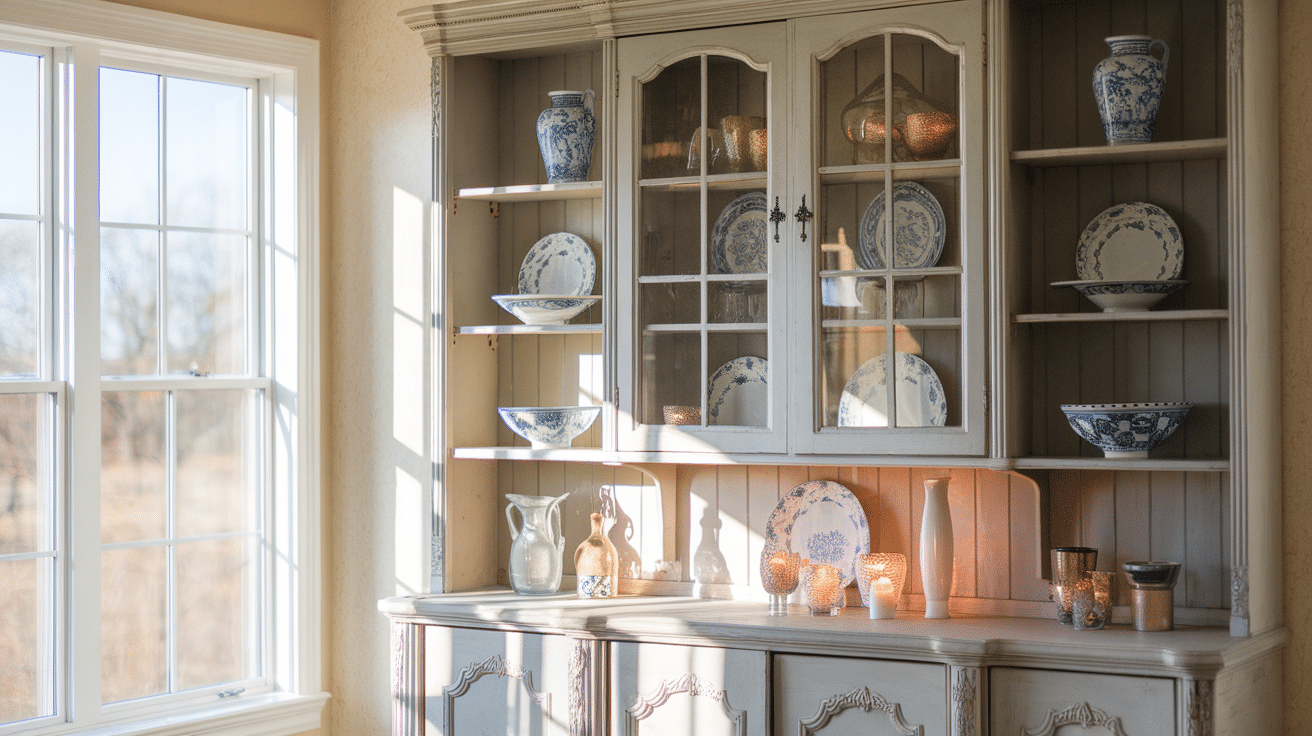
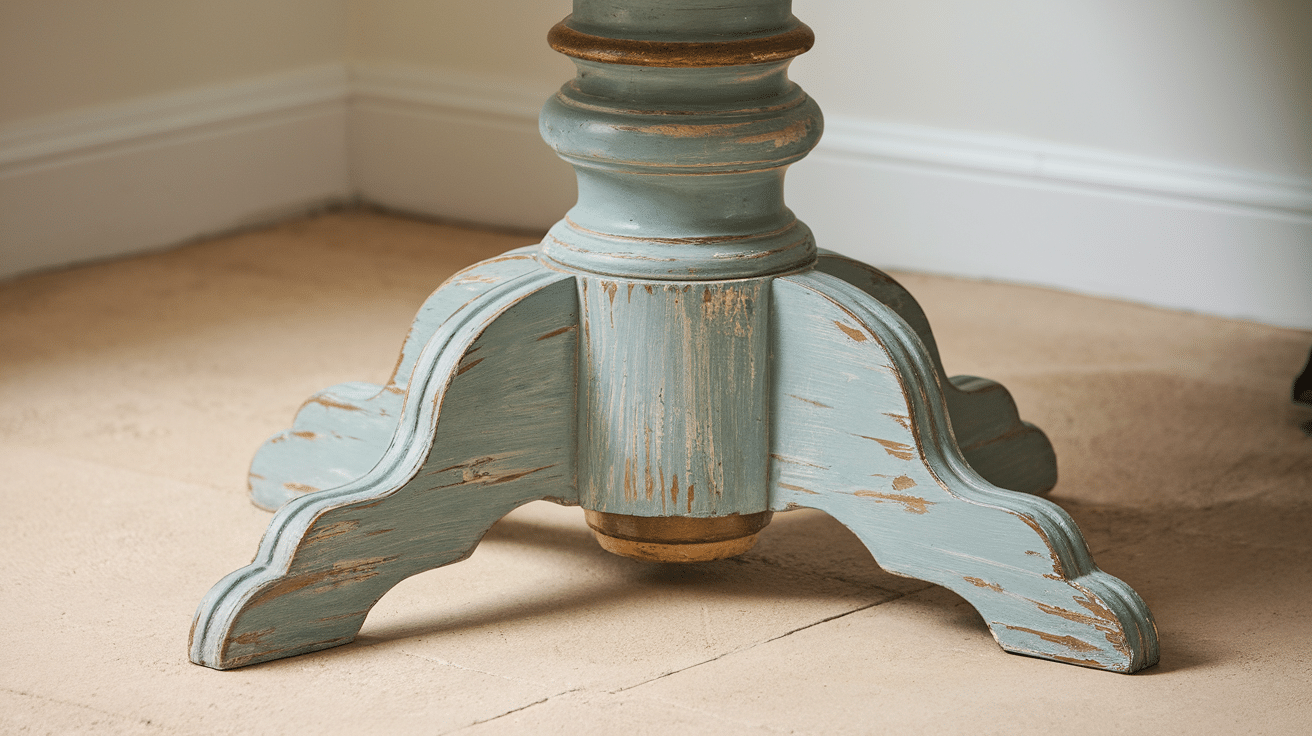
My old china cabinet became a showpiece using this method. I started with two coats of light gray chalk paint, letting each layer dry fully.
Then came the fun part – I used medium-grit sandpaper on edges and corners where natural wear would occur. The original wood peeking through created that perfect time-worn look.
For extra character, I rubbed dark wax into the distressed areas – this trick makes the worn spots look aged rather than freshly sanded.
The wax settled into all the little nooks, giving depth to the piece. I learned not to overdo the distressing though – my first attempt looked more beaten up than vintage because I got carried away with the sandpaper.
Modern and Sleek Finish
My office bookshelf needed a clean, current look. Getting this finish right took patience, but the results were worth it.
I applied three thin coats of pure white chalk paint, sanding lightly between each layer with fine-grit sandpaper. The key was using long, steady brush strokes, all going in the same direction.
I chose a clear poly sealer instead of wax for this piece – it gave me that subtle sheen that is perfect for modern style without looking glossy.
The surface turned out smooth as glass.
Tip: I used a foam roller for the final coat to avoid brush marks.
Rustic and Textured Finish
The most forgiving finish I’ve tried was on my kitchen table base. I started by painting in different directions, deliberately letting brush strokes show.
After the first coat dried, I dabbed on a second coat using a dry brush technique – just a bit of paint on the brush creates a wonderful texture.
To enhance the rustic feel, I mixed two similar colors – cream and pale gray – applying them randomly. This created subtle color variations that look like years of wear.
When I sealed it, I used clear wax, working it into the entire texture. The result resembles an old farmhouse piece that’s been loved for generations.
Working with these finishes taught me that taking my time makes all the difference. Each layer needs proper drying time, and rushing just leads to problems later.
I keep samples of my favorite finishes on scrap wood – they help me show others exactly what I’m planning for their pieces. They’re great practice before tackling big projects.
These techniques transformed my furniture from basic to beautiful, and each piece tells its own story now.
Remember, the best finish is one that makes you smile every time you see it – that’s how I feel about my china cabinet every morning.
Conclusion
After painting over 20 pieces of furniture in my home, I can tell you that chalk paint has made updating old pieces simple and fun.
I’ve learned that quality paint and proper preparation matter more than fancy techniques.
Choose paint based on how you’ll use the piece – tougher finishes for tables and chairs, basic finishes for shelves and decor.
Don’t rush between coats, and always seal your work. Keep your first project small – it helps build confidence.
Remember, there’s no single “best” chalk paint. My kitchen cabinets needed a different type than my bedside tables. Start with a test spot, take your time, and enjoy the process.
The joy of giving new life to old furniture makes every project worth the effort. If you make mistakes, don’t worry – I still do, and they’re easy to fix with chalk paint.
Frequently Asked Questions
How Do You Apply Chalk Paint Without Brush Marks?
Based on my experience with multiple furniture pieces, the secret is using thin coats and the right brush. I add a tiny bit of water to the paint – about a tablespoon per cup – and apply with long, steady strokes.
Using a good-quality flat brush and maintaining a wet edge while painting has given me the smoothest results.
What Surface Can You Not Use Chalk Paint On?
From my trials and errors, I’ve found that very flexible materials like rubber or silicone don’t work well.
While chalk paint sticks to most surfaces, I avoid using it on outdoor furniture exposed to rain or items that bend and flex. Metal, wood, glass, and even laminate have worked great for me when properly prepared.
Should I Sand Between Coats of Chalk Paint?
In my projects, light sanding between coats with 220-grit sandpaper has given me the best finish. I just go over it gently – not pressing hard – to knock down any bumps or brush marks.
However, if you want a more textured look, you can skip this step. I’ve done both, and each creates a different but lovely finish.
Why Is My Chalk Paint Cracking When It Dries?
I’ve faced this issue when I applied the paint too thickly or in very hot weather. From my experience, cracking happens when the top layer dries faster than the bottom.
I solve this by using thinner coats, painting in moderate temperatures, and letting each layer dry completely before adding the next one.
How Long Does Chalk Paint Last On Furniture?
From my oldest pieces, which I painted three years ago, I can say chalk paint lasts well with proper sealing. My kitchen table is used daily and still looks fresh because I used poly sealer.
However, pieces I sealed with wax in high-traffic areas needed touch-ups after about a year. The key is matching the sealer to how much wear the piece will get.