15 Creative Painted Nightstand Ideas
When I looked at my old, worn-out nightstand last month, I knew it needed more than just cleaning.
My bedroom felt dull, and I wanted to make a change without spending hundreds on new furniture. That’s when I tried my hand at painting my nightstand – and I’m glad I did.
Why painting a nightstand makes sense? It’s budget-friendly and gives you full control over the style.
After finishing mine, I saw how this simple update brought fresh life to my bedroom. The best part? I spent less than $50 on supplies, and the whole project took just a weekend.
In this guide, I’ll walk you through everything I learned about painting nightstands. From selecting the right paint to applying the final coat, I’ll share my hands-on tips and techniques.
I made some mistakes along the way, so you won’t have to. If you’re looking to transform your nightstand, I’ve got you covered with practical steps that actually work.
Best Paint Types for Nightstands
After testing different paints on my nightstands, I can share what really made a difference.
I spent weeks learning about each type, and here’s what I found out – not from reading online, but from actual hands-on work in my garage.
Chalk Paint for a Vintage Look
My first try was with chalk paint on an old oak nightstand. I picked it because I didn’t need to sand the surface first – what a time-saver.
The paint went on thick and covered everything in two coats. Here’s what stood out to me: the finish had this soft, matte look that made my modern nightstand look like a cherished family piece.
Tip: I learned that you need a good wax coating on top to protect it. When my kids spilled water on it, the wax coating saved the paint from getting damaged.
Acrylic Paint for Durability
For my guest room nightstand, I chose acrylic paint. It took more prep work – I had to sand and prime first – but the results were worth it.
The paint dried quickly between coats, and I finished the whole project in one day.
What really impressed me was even after six months of daily use, the surface hasn’t chipped or scratched, even when my cat jumped on it with her claws out.
I used two thin coats and a clear sealer, which gave me a finish that looked professional.
Spray Paint for a Smooth Finish
The last nightstand I painted was with spray paint, and it surprised me the most. I was worried about drips, but by keeping the can 12 inches away and using steady strokes, I got a finish that looked like it came from a factory.
What I found helpful? I sprayed in my backyard on a calm day and used a cardboard box as a spray booth to control overspray.
The paint dried in 30 minutes between coats, making it my quickest project.
Remember how I mentioned my experience with each type? All these paints worked well but for different reasons.
My chalk-painted nightstand still looks great in my main bedroom, the acrylic one handles daily abuse in the guest room, and the spray-painted piece gives my office a clean, modern look.
Pick the one that matches what you need – there’s no wrong choice here.
Creative Painted Nightstand Ideas
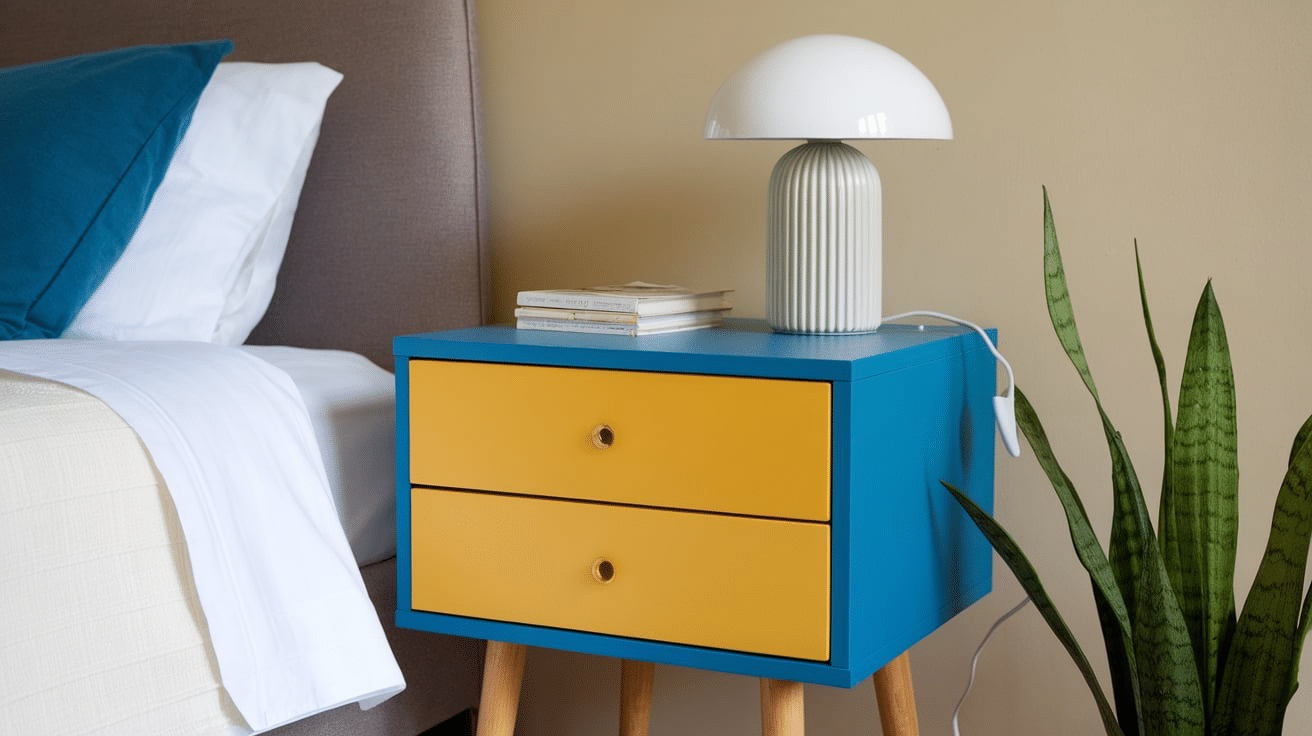
1. Two-Tone Painted Nightstand
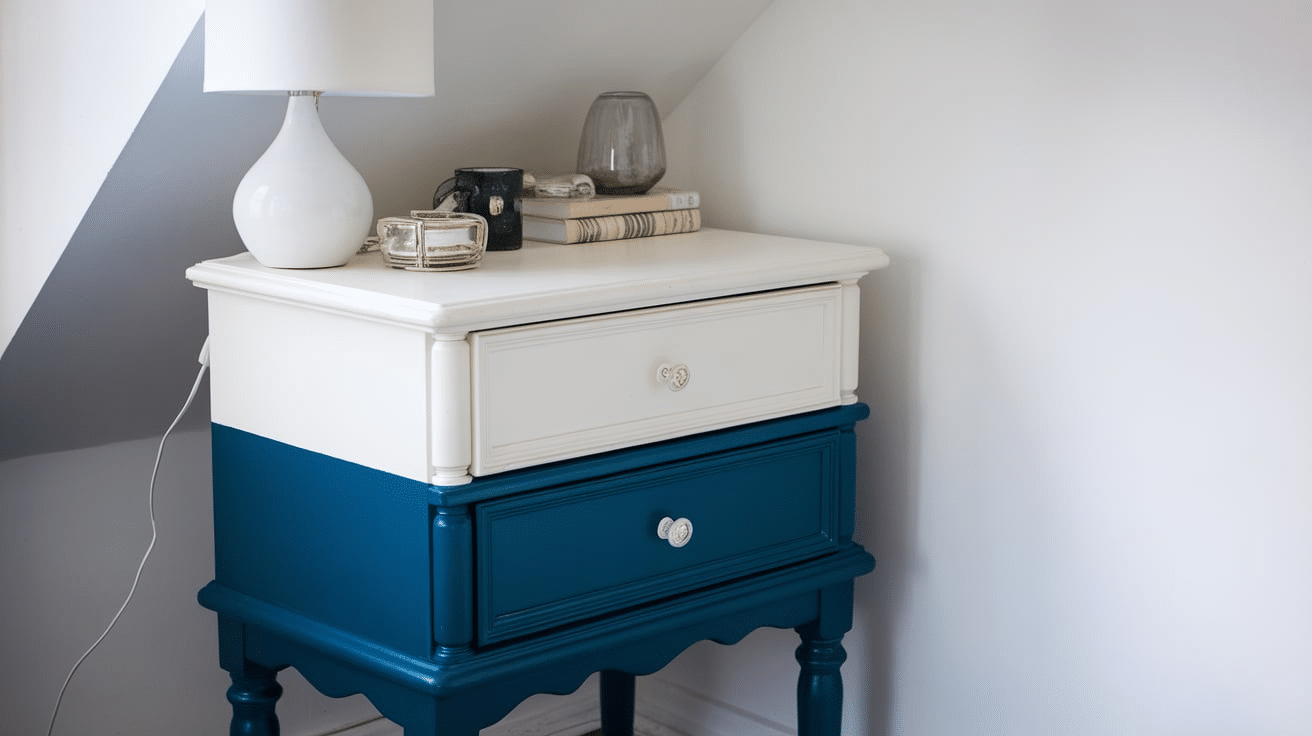
I recently gave my old nightstand a fresh, modern look with a two-tone paint job. I used a deep navy color on the bottom and white on the top for a sleek, contemporary vibe.
Steps to follow:
First, I sanded the nightstand to remove any old finish and make the surface smooth. After cleaning it with a damp cloth, I applied painter’s tape to section off the areas I wanted to keep separate.
I chose navy blue for the bottom half of the nightstand and white for the top. After applying the first coat of navy, I let it dry completely before doing the same for the white top section.
Once both sections were dry, I carefully peeled off the painter’s tape.
To give it a finished look, I sealed the entire nightstand with a clear coat of varnish for extra protection. It turned out to be a simple yet stunning makeover.
2. Ombre Painted Nightstand
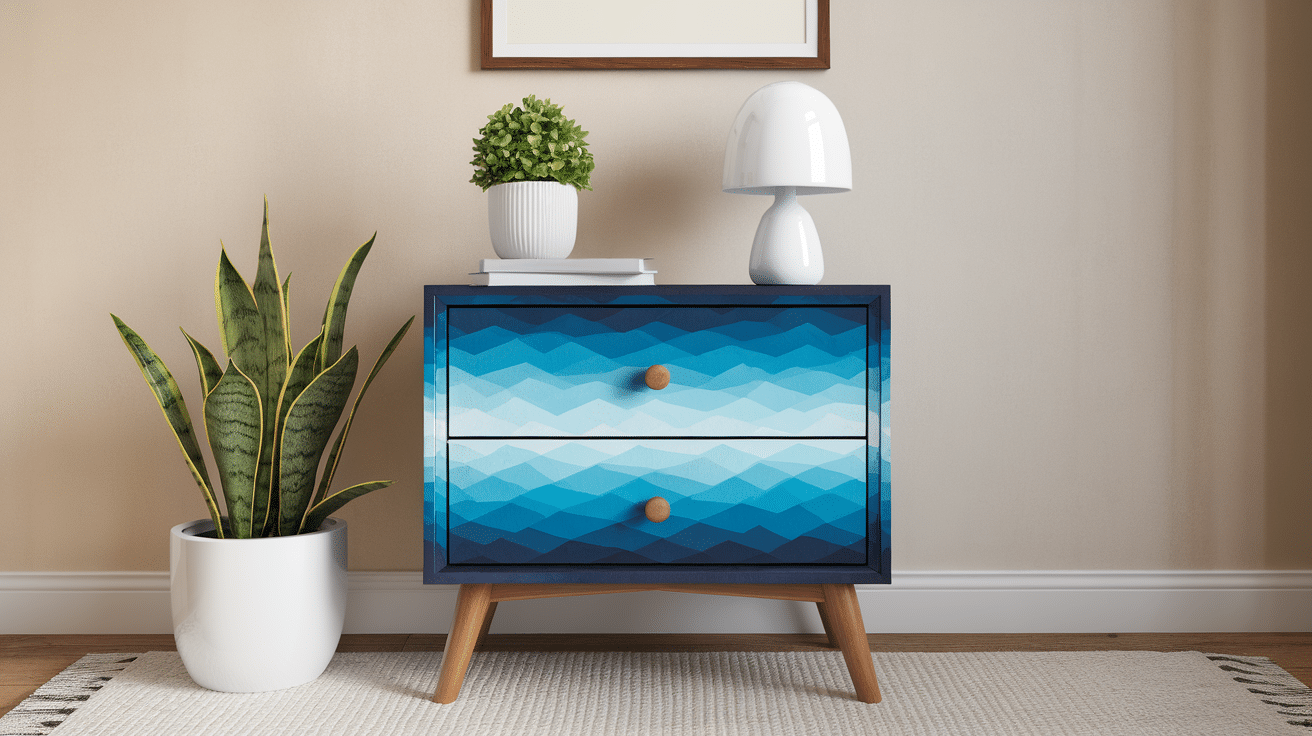
I was inspired to create a calming ombre effect on my nightstand, transitioning from a soft lavender at the top to a deeper purple at the base. It adds a unique touch to my room.
Steps to follow:
I began by sanding the nightstand to smooth out any imperfections.
After cleaning it off with a damp cloth, I decided on two shades of purple – a light lavender for the top and a deeper plum for the bottom.
I painted the bottom half with the plum color first and let it dry completely.
Then, using a sponge, I applied the lavender color starting from the top and gently blended it into the plum.
To get a seamless blend, I worked quickly, using a circular motion to mix the two colors. After everything dried, I sealed the surface with a clear, matte finish to ensure durability.
It was a fun project and definitely made the nightstand stand out in the room!
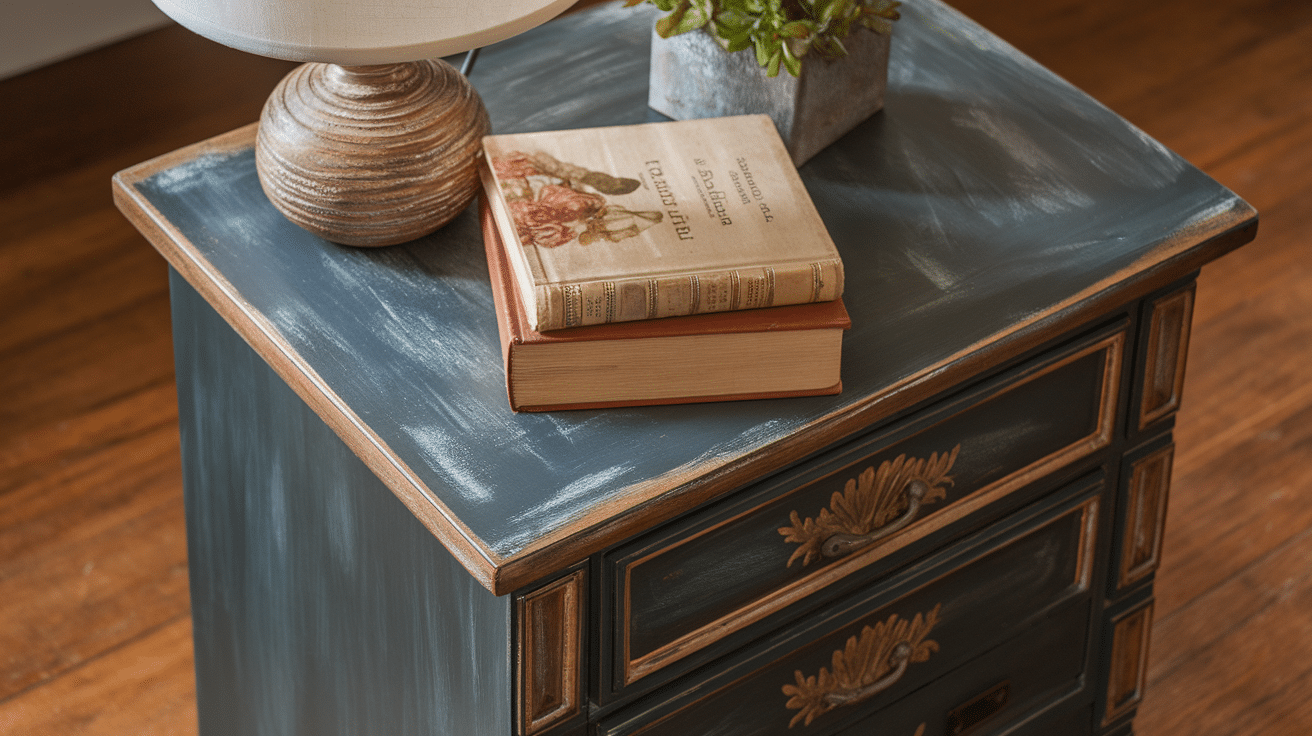
3. Distressed Vintage Nightstand

I was going for a rustic look in my bedroom, so I decided to distress my nightstand. It has an antique feel, with layers of paint showing through the worn edges.
Steps to follow:
I started by sanding the nightstand down, ensuring it had a smooth surface for painting. Then, I applied a base coat of soft beige and allowed it to dry.
Once the beige was set, I painted over it with a darker brown for a more vintage effect.
After the second coat dried, I used fine-grit sandpaper to gently distress the edges and corners, revealing some of the beige beneath.
I also lightly sanded the flat surfaces for a worn, antique look.
After dusting off the surface, I sealed it with a clear wax to protect the finish. The result was a beautiful, rustic nightstand.
4. Geometric Pattern Painted Nightstand
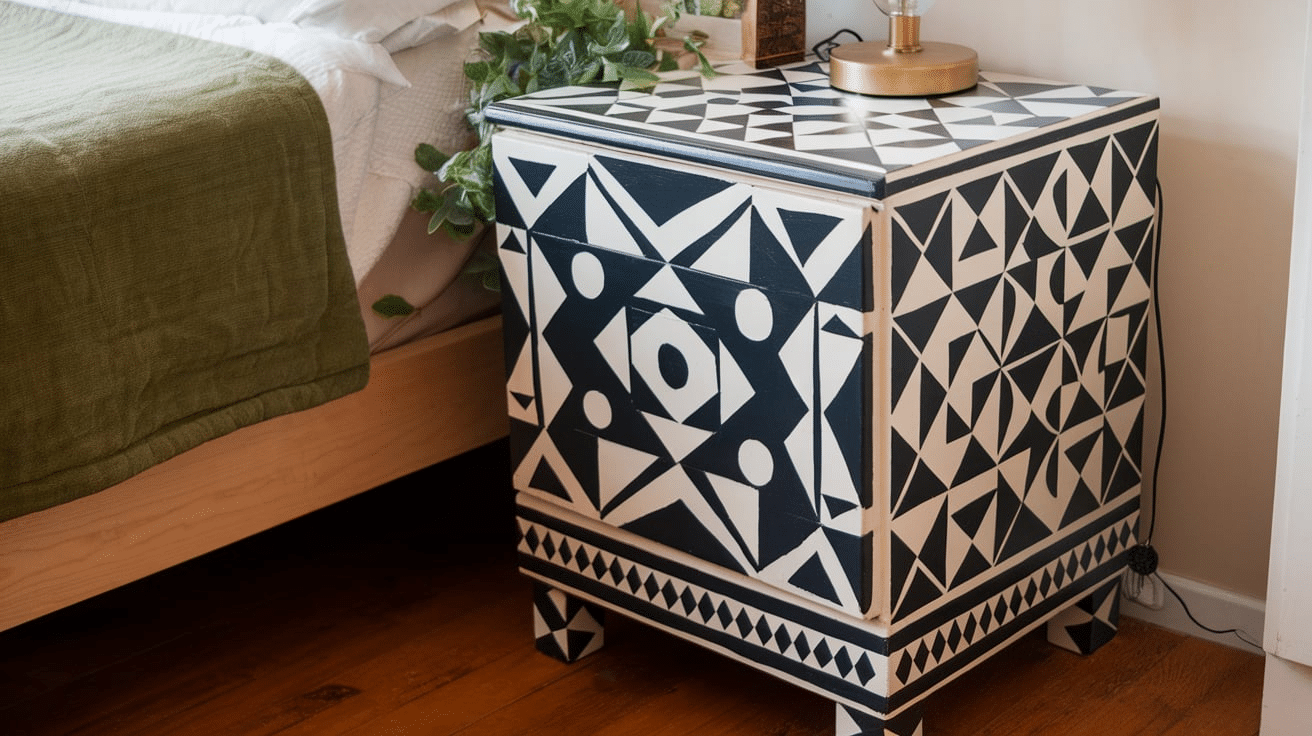
I wanted to add a playful, contemporary twist to my nightstand, so I decided on a bold geometric pattern in black and gold.
It completely transformed the piece into an eye-catching focal point.
Steps to follow:
I started by sanding the nightstand and applying a coat of matte black paint as a base.
Once dry, I used painter’s tape to create geometric shapes on the surface, mixing triangles, squares, and lines.
I painted the shapes with metallic gold paint, ensuring the lines were clean and crisp. After removing the painter’s tape, I let the paint dry completely.
To give it a glossy finish, I applied a clear varnish over the entire nightstand. It turned out beautifully with a sleek, modern aesthetic!
5. Stenciled Floral Painted Nightstand
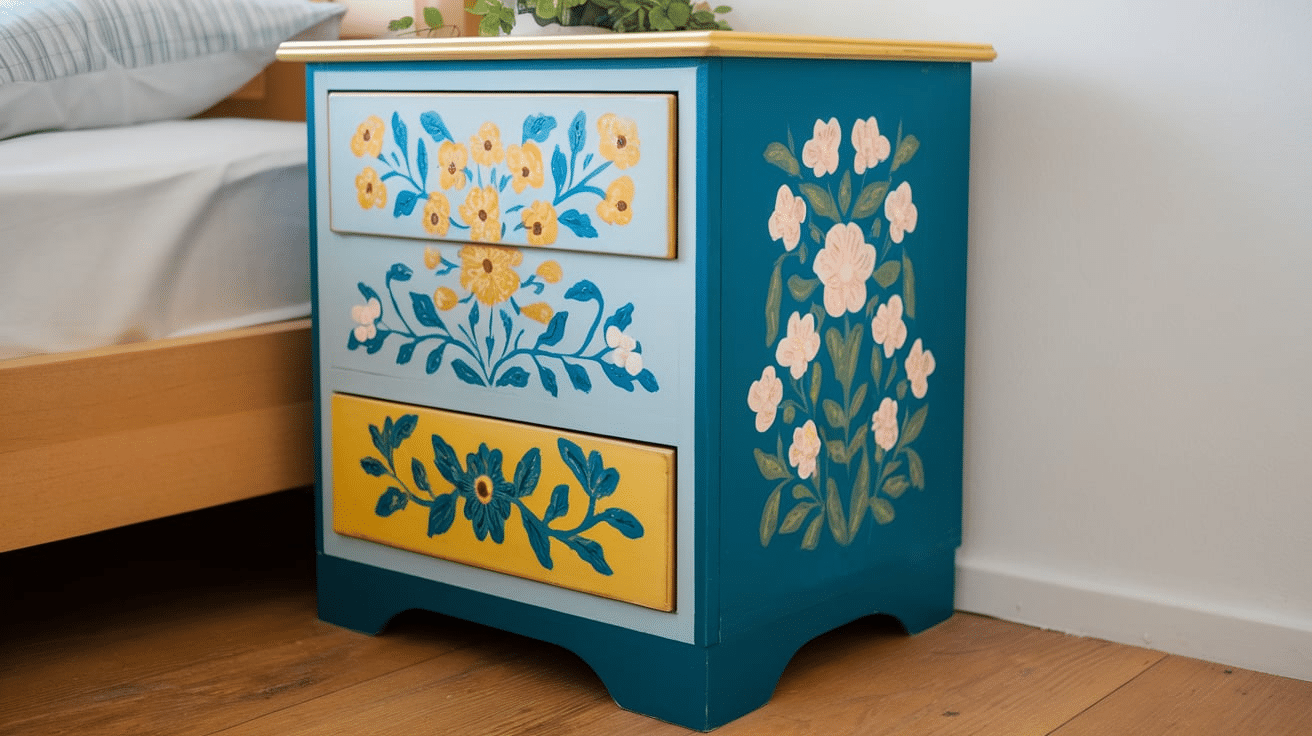
I love adding delicate floral designs to my furniture, so I chose a soft blue color for the base and stenciled white flowers on the front of my nightstand. The results were charming and feminine.
Steps to follow:
I began by sanding the nightstand to prepare it for painting. I applied a coat of light blue paint and let it dry thoroughly.
Afterward, I used a floral stencil and white paint to carefully apply a floral pattern to the front drawers.
I made sure to press the stencil firmly in place so the design would be crisp. Once the paint dried, I carefully peeled off the stencil.
For a final touch, I sealed the design with a matte clear coat. It added a soft, vintage vibe to my room.
6. Chalk Paint Nightstand
I decided to use chalk paint on my nightstand for a smooth, matte finish that would give it a modern, shabby chic vibe. It was incredibly easy to apply and gave my furniture a whole new life.
Steps to follow:
First, I lightly sanded the surface to remove any glossy finish. After cleaning the dust off, I applied a coat of chalk paint in a soft gray color.
Once the first coat dried, I applied a second layer for complete coverage. I didn’t need to prime it, which was a huge time-saver.
After drying, I lightly distressed the edges using sandpaper for a vintage, worn look. To seal it, I used clear wax, buffing it on the surface to give it a matte, soft touch.
The end result was a beautiful, timeless piece!
7. Color-Blocked Nightstand
I wanted to create a modern, minimalist look, so I decided on a color-blocked design with black, white, and gray. This style has a contemporary, artsy feel and perfectly complements my bedroom decor.
Steps to follow:
I began by sanding the nightstand to create a smooth base. After cleaning it, I taped off different sections of the piece to create a block pattern.
I used black for the bottom, white for the top, and gray for the drawers. I made sure to apply two coats of paint for a rich finish.
Once the paint was dry, I carefully removed the tape and sealed the nightstand with clear matte varnish for a sleek and polished look.
The color-blocking technique made it look fresh and modern!
8. Marble Effect Painted Nightstand
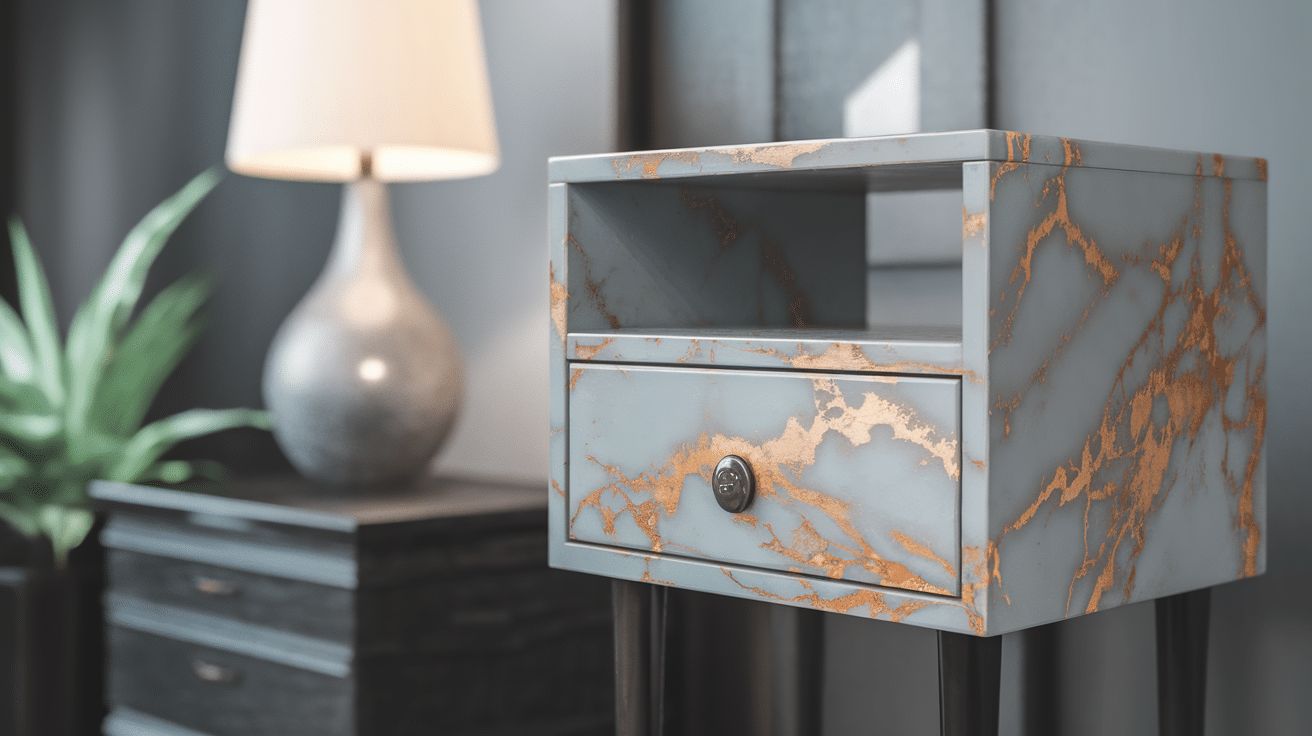
For a sophisticated touch, I decided to create a faux marble effect on my nightstand. The marble finish transformed the piece into something soft and luxurious without the price tag.
Steps to follow:
I started by sanding the nightstand to remove the old finish and create a smooth surface. After cleaning it, I applied a white base coat and let it dry completely.
Using a dry brush, I added gray streaks to mimic the veins of marble. To enhance the marble look, I used a sponge to blend the gray veins, creating a soft, natural look.
After everything dried, I sealed the surface with a clear coat to give it a glossy, marble-like finish. It added such a refined and soft feel to the room.
9. Metallic Painted Nightstand
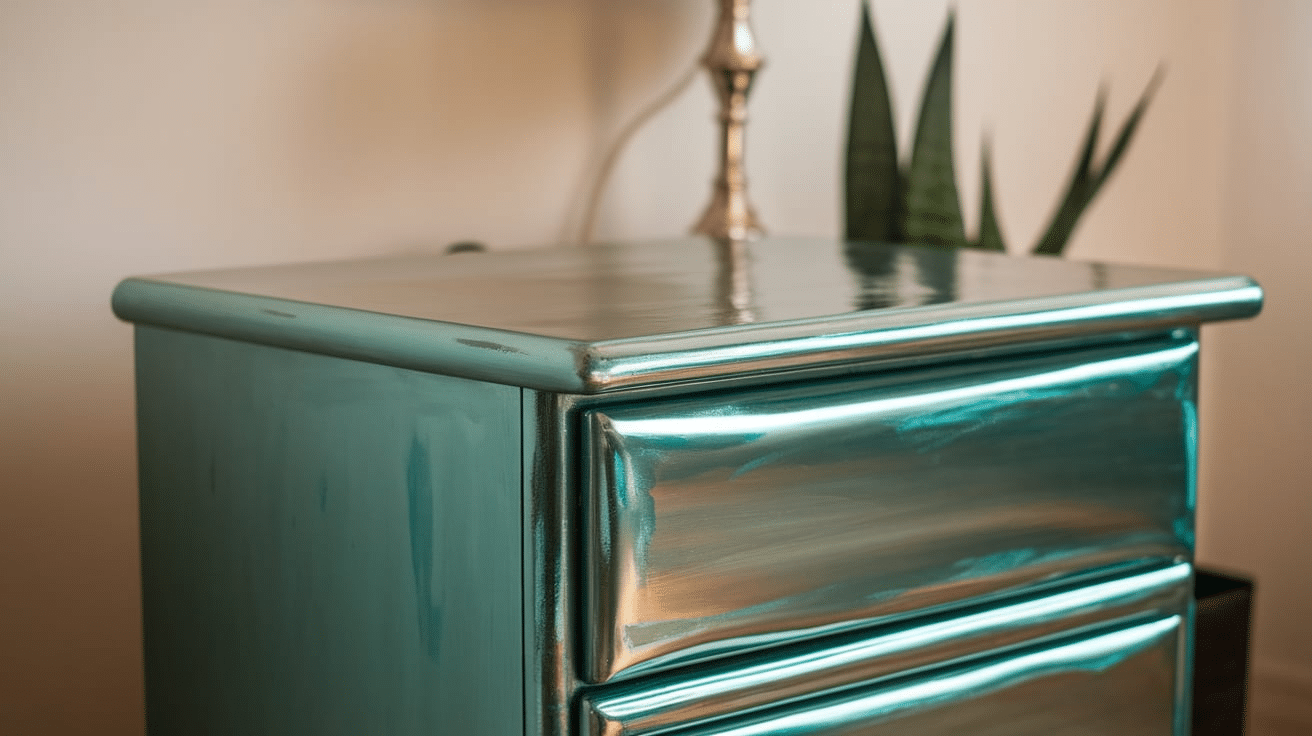
I wanted to add some glamour to my bedroom, so I opted for a metallic gold nightstand. The shine from the metallic finish gave it an opulent look, and it really elevated the overall space.
Steps to follow:
I started by sanding the nightstand to ensure it was smooth and clean. After wiping it down, I applied a primer that would work well with metallic paints.
Once it dried, I used a metallic gold paint and applied the first coat. I let it dry and then applied a second coat for even coverage.
After the paint dried completely, I sealed it with a high-gloss clear coat to add a beautiful shine.
The gold finish was bold yet sophisticated, and it really added a luxurious touch to my room.
10. Bold Striped Nightstand
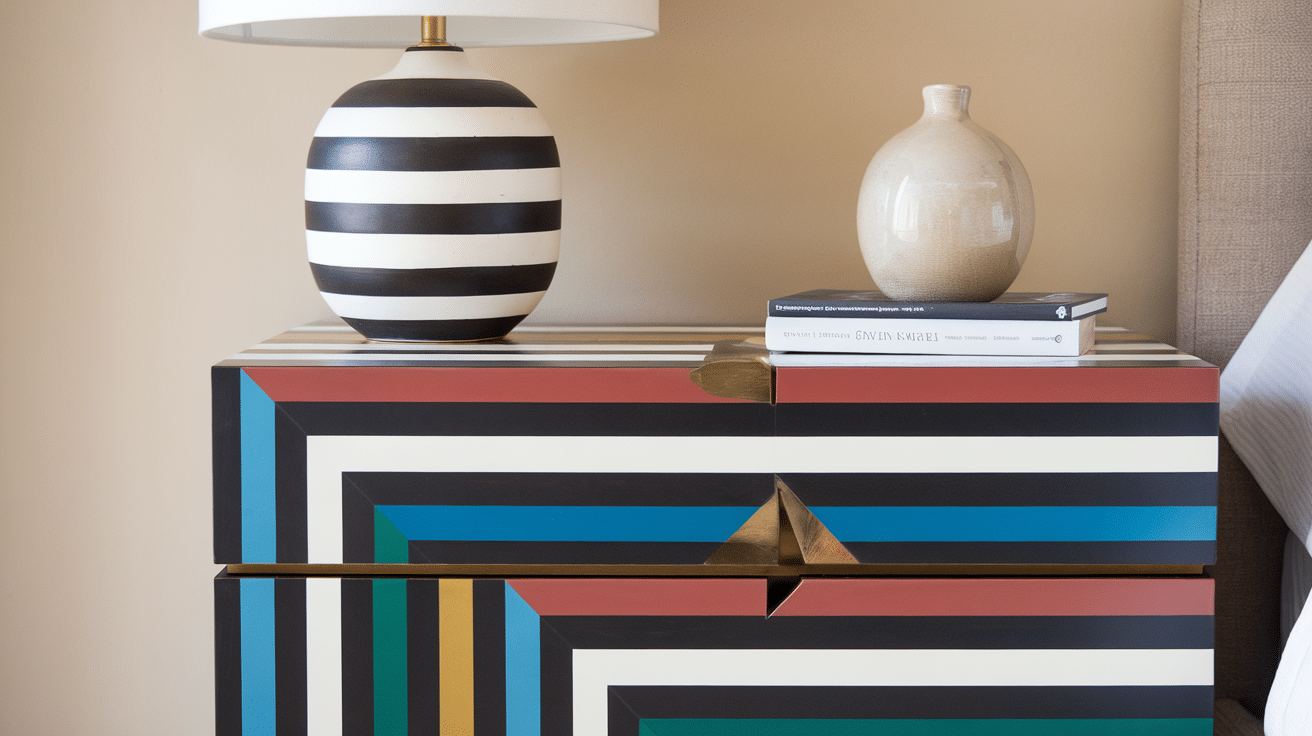
For a playful and bold design, I chose to paint my nightstand with alternating thick stripes in black and white. The stripes give it a dynamic, modern look that pairs well with my contemporary decor.
Steps to follow:
I began by sanding the surface of the nightstand for a smooth finish. After cleaning it, I applied a white base coat and let it dry.
Once the white paint was dry, I used painter’s tape to mark out even, thick stripes along the surface.
I painted the exposed areas with black paint, making sure to press the tape firmly to avoid bleeding.
After the paint dried, I removed the tape carefully. I then sealed the entire piece with a clear matte varnish to protect the finish. The bold stripes really made my nightstand stand out.
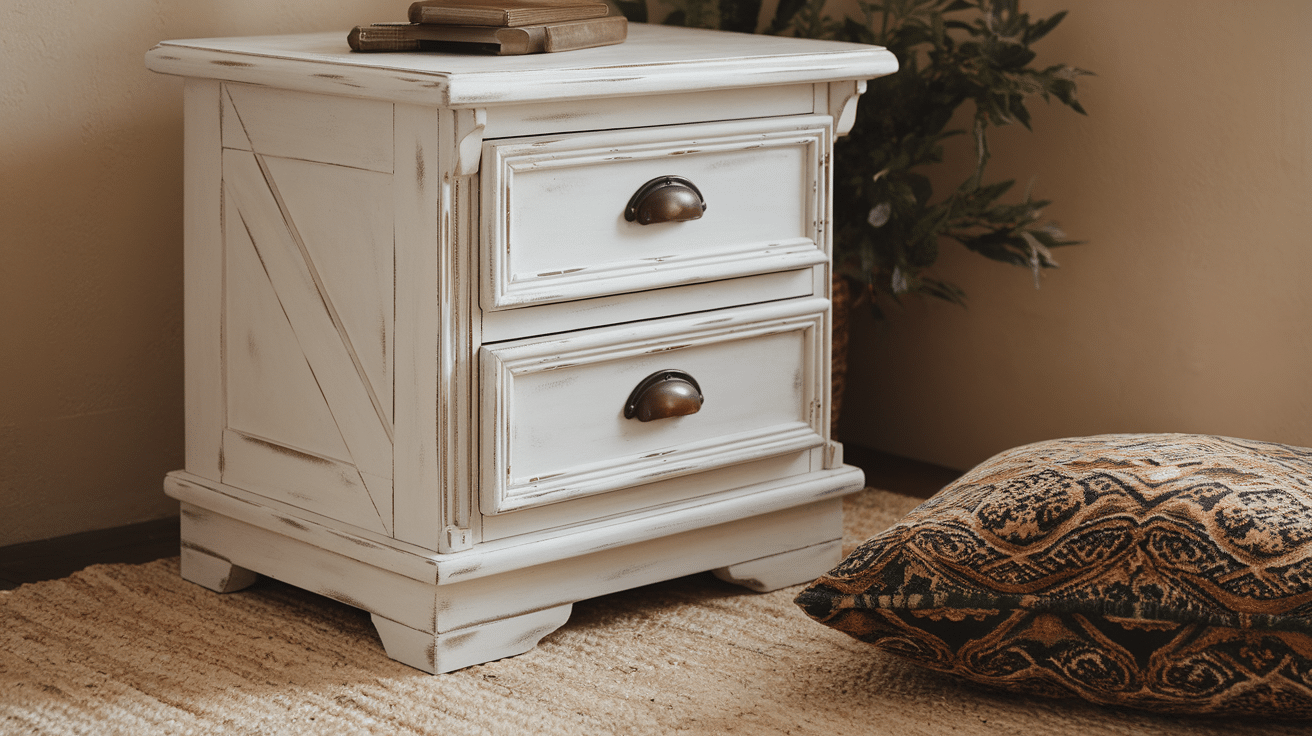
11. Antique White Painted Nightstand
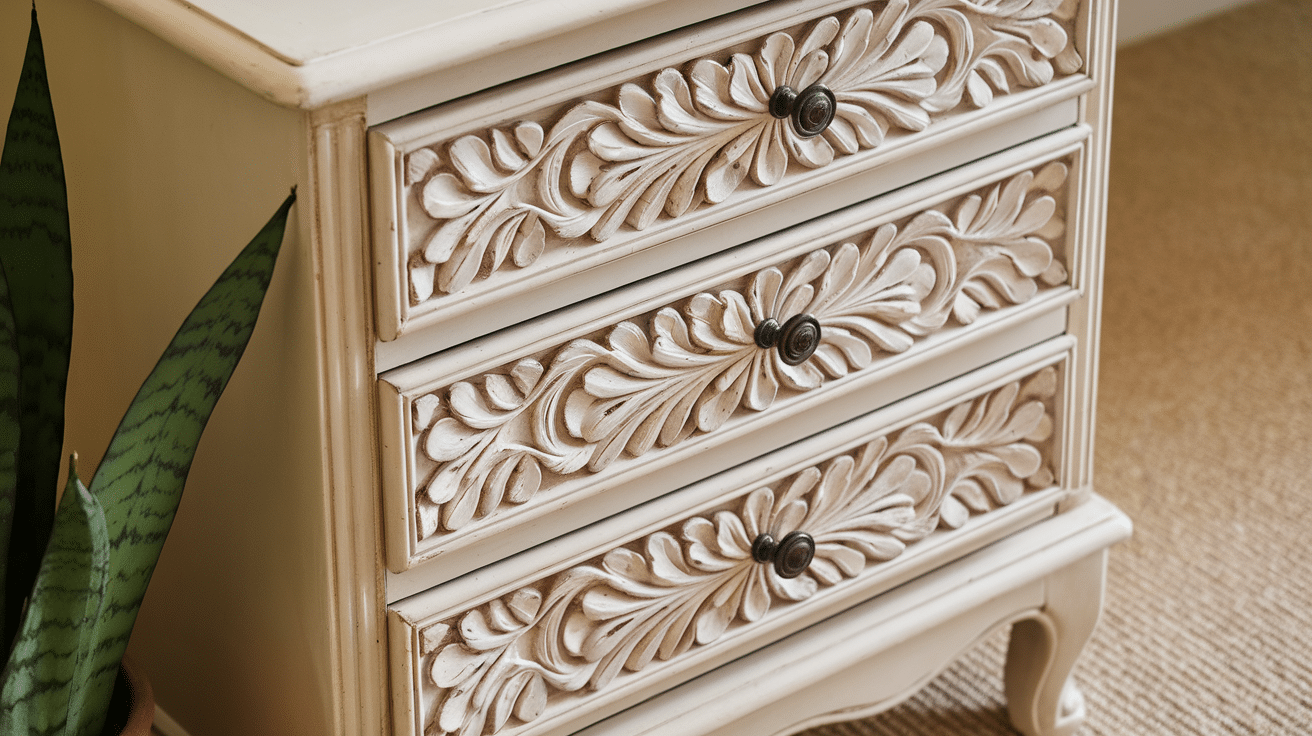
I wanted a soft, classic look for my nightstand, so I went for an antique white finish. The subtle shade added softness and blended perfectly with the rest of my vintage-inspired bedroom.
Steps to follow:
I began by sanding the nightstand to remove any previous finish and to smooth the surface.
After cleaning off the dust, I applied a coat of antique white chalk paint.
Once the first coat dried, I added a second layer for full coverage. To give it a weathered look, I distressed the edges slightly with sandpaper.
I sealed the nightstand with clear wax for a smooth, soft finish. The result was a timeless, charming piece that fit perfectly in my room.
12. Tropical-Inspired Painted Nightstand
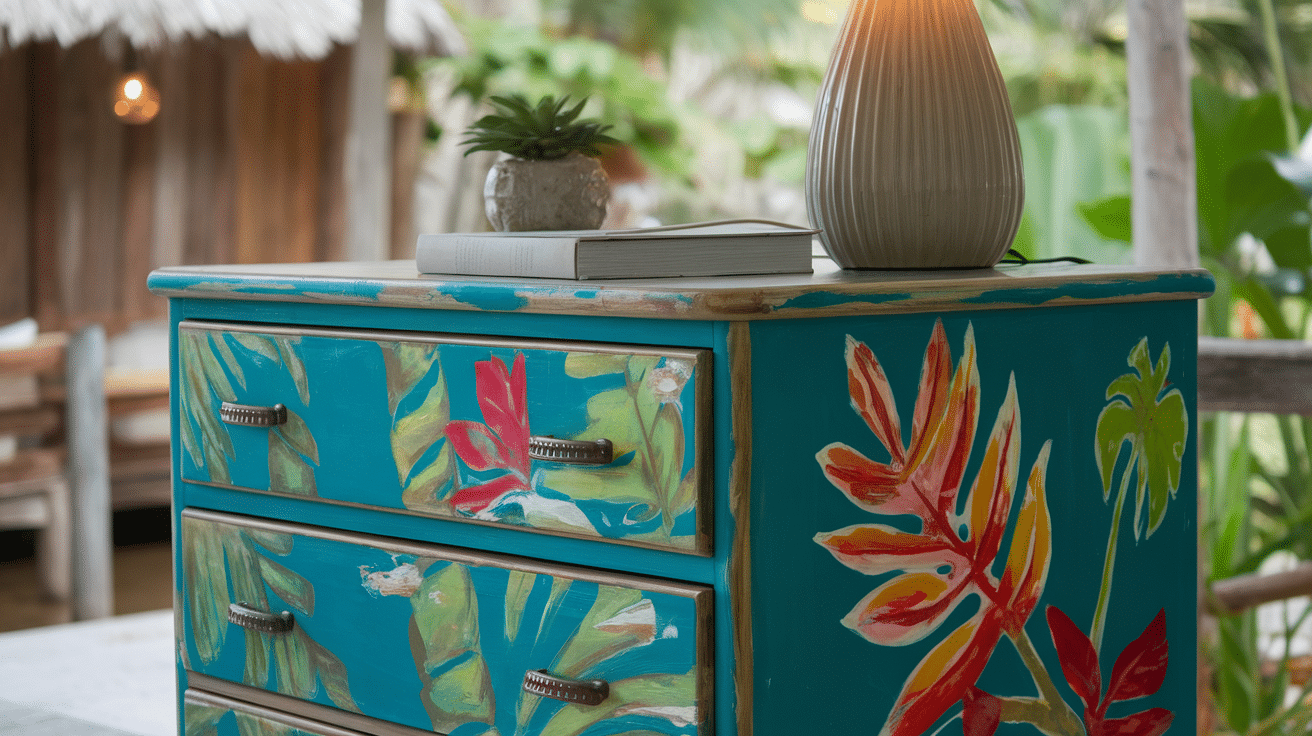
I was in the mood for something fun and fresh, so I painted my nightstand with a tropical-inspired color palette. Bright teal and coral made it look like a piece of paradise right in my bedroom.
Steps to follow:
I started by sanding the nightstand and cleaning it to remove any dust.
After applying a primer, I painted the top half of the nightstand in a bright coral color, and the bottom half in a rich teal.
I allowed the first coat to dry before adding a second layer for a vibrant finish. Once everything was dry, I added a protective clear coat to seal the paint.
This tropical-inspired nightstand now brings a cheerful, refreshing vibe to my space.
13. Shabby Chic Painted Nightstand
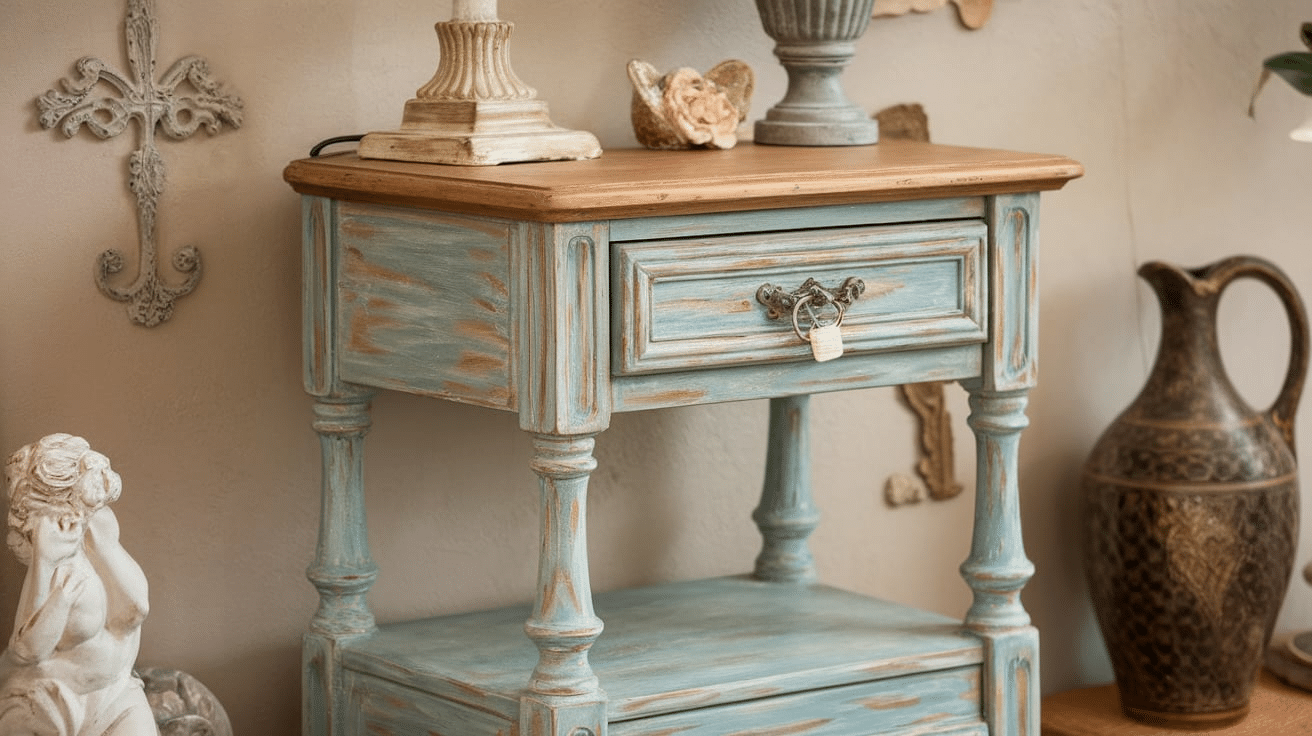
I wanted to add a cozy, vintage touch to my room, so I created a shabby chic nightstand. The weathered, soft pastel finish gives it a romantic, lived-in feel that fits beautifully with my decor.
Steps to follow:
I began by sanding down the nightstand to remove any old finishes and smooth the surface.
After cleaning, I applied a pastel pink base coat.
Once that dried, I added a layer of white paint and allowed it to dry completely. To achieve the distressed shabby chic look, I lightly sanded the edges and areas that would naturally show wear.
I sealed the piece with clear wax for a matte, soft finish. It transformed my nightstand into a charming piece of furniture.
14. Chalkboard Painted Nightstand
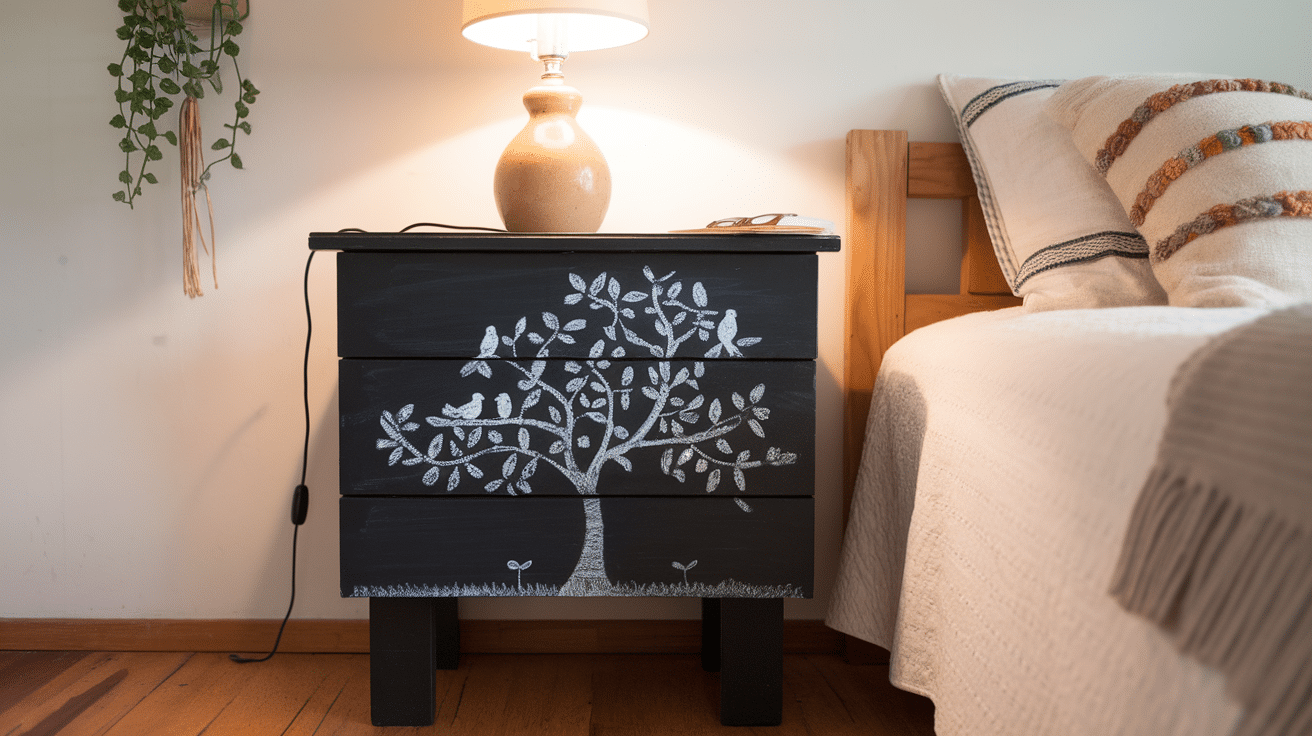
I wanted something functional yet stylish, so I painted my nightstand with chalkboard paint. Now, I can leave little notes or quotes on it, adding a fun and interactive element to the room.
Steps to follow:
I started by sanding the nightstand to make the surface smooth and clean.
After wiping off the dust, I applied a coat of chalkboard paint to the entire surface, including the top and sides.
I let it dry completely and then applied a second coat for an even finish.
After allowing it to cure for 24 hours, I rubbed a piece of chalk over the surface and wiped it off to condition the paint.
Now, I can write little reminders or fun quotes on my nightstand whenever I like!
15. Whitewash Painted Nightstand
I wanted a rustic, beachy feel for my bedroom, so I opted for a whitewashed look for my nightstand. The light, airy finish gave it a serene and relaxed vibe that perfectly suits my coastal decor.
Steps to follow:
I started by sanding the nightstand to prepare the surface for painting.
After cleaning it, I applied a thin layer of white paint and wiped it off with a cloth immediately, leaving behind a soft, washed effect.
I repeated this process a few times to build up the whitewashed look, ensuring I kept the wood grain visible.
Once I was happy with the finish, I sealed it with a clear matte varnish to protect the paint. The final result was a light, beachy vibe that brightened up my room.
Common Mistakes to Avoid When Painting Nightstands
Skipping the Sanding Process
My first big mistake? I got too excited and skipped sanding on my first nightstand. I thought, “How bad could it be?” Well, pretty bad.
The paint bubbled up in spots and started peeling after just two weeks.
I had to strip it all off and start over. What I do now? I use 150-grit sandpaper first, then 220-grit for a smooth finish.
The extra 20 minutes of sanding saves hours of fixing problems later.
The only time I skip sanding is when I use chalk paint, but even then, a light scuff helps the paint stick better.
Using the Wrong Type of Paint
I once used leftover wall paint on a nightstand because I thought “paint is paint.” Big mistake. It felt sticky for weeks, and everything I put on it stuck to the surface.
Tip: furniture needs paint made for wood and heavy use. When I redid it, I picked paint made for furniture, and the difference was clear.
The new paint dried properly and created a hard surface that could handle my phone, glasses, and water glass without sticking or marking.
Rushing the Drying Time
This mistake cost me the most time and money. I put my lamp and books back on the nightstand after just 4 hours because the surface felt dry.
The next morning, I found ring marks where the lamp stood and dents from my books.
My current routine: I wait 24 hours between coats and give the final coat 72 hours to fully cure.
Yes, it tests my patience, but my latest nightstand has been perfect for months now.
I’ve made plenty of other small mistakes too, but these three were the biggest problems.
Now I keep a small fan running in the room to help with drying time, and I always check the weather forecast – humidity can really mess up the drying process.
Take it from someone who learned these lessons through trial and error: a little patience goes a long way in getting a finish that lasts.
Conclusion
I’ve painted many nightstands in my home, and each project taught me something new.
The right paint choice really matters – chalk paint for that old-world charm, acrylic for long-lasting results, or spray paint for a smooth look.
Through my mistakes and successes, I’ve found that taking time with prep work and letting each coat dry fully makes all the difference.
When I rushed the process, I always regretted it. But when I followed the proper steps, my painted nightstands became pieces I’m proud to display.
Remember, you don’t need fancy tools or expensive materials to get great results. A good sanding job, the right paint, and patience are your best friends.
Start with one nightstand, take your time, and learn from the process.
Trust me, the satisfaction of seeing your finished piece in your bedroom makes it all worthwhile.
Frequently Asked Questions
How Long Does It Take for Paint to Fully Dry on a Nightstand?
Based on my experience, a painted nightstand needs about 24-72 hours to dry completely. The time varies with humidity and paint type.
I wait 24 hours between coats and give the final coat 3 full days before putting items on top.
What Kind of Prep Work Do I Need Before Painting?
From my projects, good prep includes cleaning the surface with soap and water, sanding with 150-grit then 220-grit sandpaper, wiping off dust, and using a primer unless you’re using chalk paint.
I spend about an hour on prep for each nightstand.
Can I Paint Over a Previously Painted Nightstand?
Yes, you can. I’ve done this several times. Just sand the old paint to create a smooth surface, clean off the dust, and apply your new paint.
If the old paint is peeling, you’ll need to strip it first – I learned this after having to redo an entire project.
What’s the Best Way to Prevent Brush Marks?
In my projects, I prevent brush marks by using a high-quality brush, thinning the paint slightly if needed, and applying thin coats in one direction.
For my last nightstand, I used a foam roller for the flat surfaces and got great results.
Do I Need to Seal the Paint After I’m Done?
From my experience, it depends on the paint type. Chalk paint definitely needs a wax or sealer. For acrylic and spray paint, I use a clear water-based sealer if the nightstand will get heavy use.
My sealed nightstands have lasted much longer than the unsealed ones.