How to Waterproof a Tub Flange Easily
Tub flanges can leak and cause water damage in your bathroom. I’ve dealt with this problem myself, and I know how frustrating it can be to see water seeping through the walls or floor.
But don’t worry – fixing it isn’t as hard as you think.
I want to show you exactly how to waterproof your tub flange correctly. With some basic tools and materials, you can protect your bathroom from water damage in just a few hours.
In this guide, I’ll walk you through the proper steps to seal your tub flange.
I’ll share the materials you’ll need, the process I use, and helpful tips to ensure you do it correctly the first time.
What is a Tub Flange & It’s Types
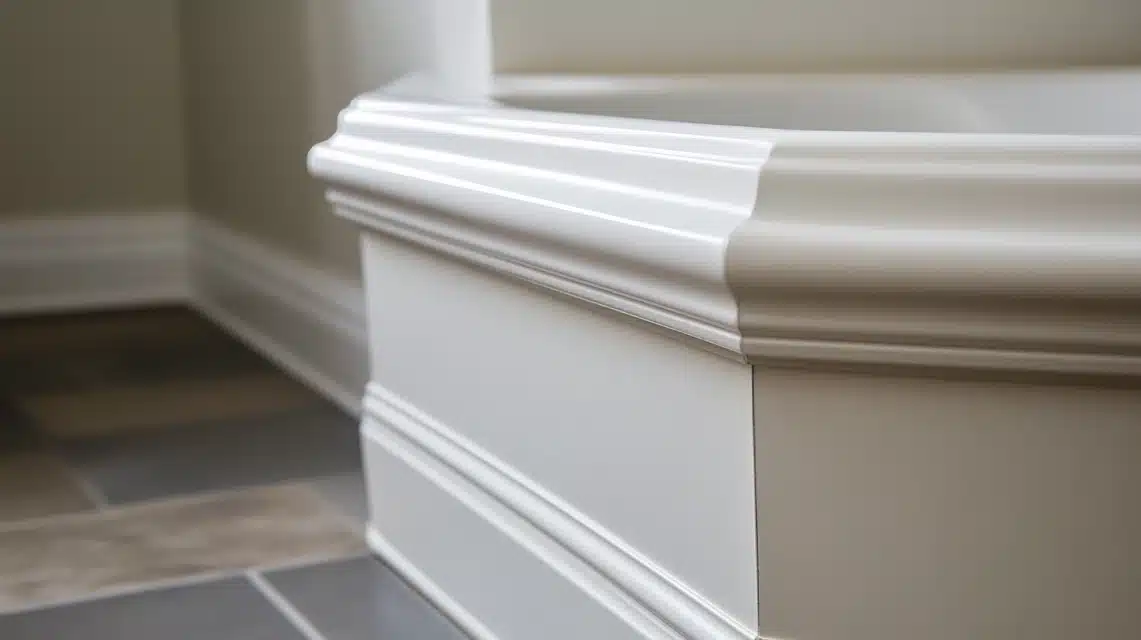
A tub flange is a special rim around the edges of your bathtub that sits against the wall. It’s like a protective shield—it keeps water from sneaking behind your tub and damaging your walls.
- Integral Flanges: These are built right into the tub. They’re part of the tub’s structure and work really well to keep water out.
- Nailing Flanges: These stick out from the tub and have holes for nails or screws. I find these super helpful because they let you secure the tub firmly to the wall studs.
- Screw-On Flanges: You can add these after installing the tub. They’re useful if you need to upgrade an older tub without a built-in flange.
The main job of any flange type is to create a watertight seal between the tub and the wall. This simple but important part keeps your bathroom dry and damage-free.
How to Prepare Your Bathroom Set-up for Waterproofing
- First, I remove everything from around the tub – shower curtains, bath mats, and any items on nearby shelves. Water damage is messy, so I like keeping my stuff safe and out of the way.
- Next, I clean the area around the flange thoroughly. I use a basic cleaning solution to wipe away any dirt, soap scum, or old caulk. The surface needs to be spotless for the waterproofing to stick properly.
Then, I gather my tools and materials in one spot:
- Clean rags
- Cleaning solution
- Waterproofing membrane
- Utility knife
- Caulk gun
- Measuring tape
Last but not least – I make sure the bathroom is well-ventilated. I open a window or run the fan because some waterproofing materials smell strong.
This setup usually takes me about 30 minutes, but getting everything ready before starting the main job is worth the time.
How to Waterproof the Tub Flange?
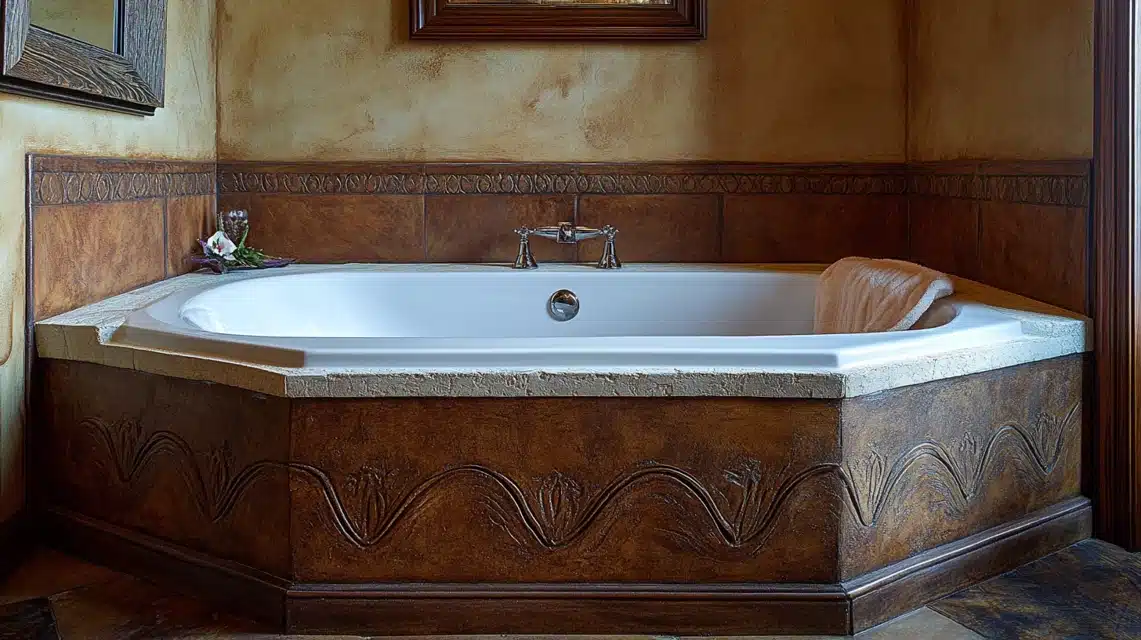
Method 1: Membrane Application
First, I measured and cut the waterproofing membrane to fit around the flange. I make sure it extends at least 6 inches up the wall and 2 inches over the tub lip.
Then, I carefully press the membrane into place, making sure there are no air bubbles or wrinkles.
Method 2: Liquid Waterproofing
I start by applying a thin, even coat of liquid waterproofing with a brush. I work in small sections, making sure to cover every part of the flange.
After letting the first coat dry for about 2 hours, I add a second coat for extra protection.
Method 3: Caulk Sealing
After the main waterproofing is done, I apply a line of silicone caulk where the flange meets the wall. I use my finger to smooth it out, creating a neat, water-tight seal.
This gives an extra layer of protection against water seepage.
Method 4: Corner Treatment
The corners need special attention. I use pre-made corner pieces or cut small membrane sections to fit these tricky spots.
I overlap the pieces by at least 2 inches to ensure no water can get through.
Method 5: Final Sealing
Once everything else is done, I apply a final bead of caulk along the top edge of the membrane where it meets the wall.
This creates a complete seal that stops water from getting behind the waterproofing.
Important Tips I’ve Learned
- Let each layer dry fully before adding the next
- Don’t skip the corners – they’re often where leaks start
- Press out any air bubbles you see in the membrane
- Keep the bathroom dry for 24 hours after finishing
Remember to check your work carefully when you’re done. I always run my hand along all the seals to ensure everything feels smooth and secure.
An Approximate Investment While Doing So
| Item | DIY Cost | Professional Cost |
|---|---|---|
| Waterproofing Membrane | $30-45 per roll | Included |
| Liquid Waterproofing | $25-35 per gallon | Included |
| Quality Silicone Caulk | $8-12 per tube | Included |
| Utility Knife | $5-10 | N/A |
| Caulk Gun | $6-15 | N/A |
| Measuring Tape | $5-10 | N/A |
| Cleaning Supplies | $10-15 | N/A |
| Labor Costs | N/A | $200-400 |
| Materials | N/A | $100-150 |
| Additional Waterproofing (if needed) | N/A | $50-100 |
| Total | $85-140 | $350-650 |
Money-Saving Tips
- Buy slightly more materials than you think you need
- Good quality tools can be reused for other projects
- Proper installation saves money on future repairs
- Basic tools might be available to borrow from friends
The DIY route saves a lot of money if you’re comfortable doing the work yourself. But if you’re unsure, paying for professional installation can prevent costly water damage later.
Installing Backer Board Around the Tub Flange
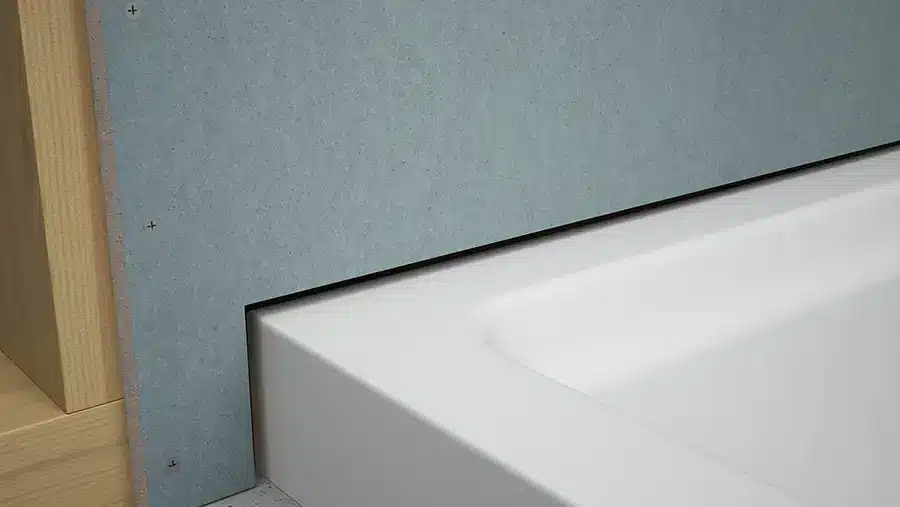
Basic Materials You’ll Need
- Cement backer board
- Moisture-resistant screws
- Galvanized roofing nails
- Utility knife
- Tape measure
- Level
- Drill/screwdriver
Step-by-Step Process
- Measuring and Cutting: I start by measuring the wall space around the tub flange. I make sure to cut the backer board so it sits about 1/8 inch above the tub flange. This small gap helps prevent water from wicking up.
- Test Fitting: Before I attach anything, I do a test fit of the cut pieces. I check that everything lines up properly and the boards sit flat against the wall studs.
- Bottom Row Installation: I place the first piece at the bottom, right above the tub flange. I use galvanized roofing nails to hold it temporarily in place while I get ready to screw it in.
- Securing the Board: I put screws every 6-8 inches along the studs. I make sure not to place screws too close to the edges – about 3/4 inch away works well.
- Upper Rows: After the bottom row is secure, I work my way up to the next pieces. I keep checking with my level to make sure everything stays straight.
- Corner Treatment: At corners, I make sure the boards meet cleanly. I leave a small 1/8 inch gap at these joints too.
Tips From My Experience
- Wear a dust mask when cutting backer board
- Score both sides before breaking the board
- Use a support block when making long cuts
- Check stud locations and mark them on the wall above
- Pre-drill holes if you’re working near the edges
This whole process usually takes me about 2-3 hours for a standard tub surround. Take your time with the measurements – they’re the key to a good installation.
Some Common Mistakes to Avoid
- Skipping the cleaning step – trying to waterproof over dirt or old caulk pretty much guarantees failure.
- Not waiting long enough between coats – rushing the drying time leads to weak spots and future leaks.
- Using regular caulk instead of silicone – standard caulk won’t stand up to constant water exposure.
- Forgetting to check the corners – missing these spots is like leaving the door open for water damage.
- Making the membrane too short – not extending it far enough up the wall invites water to seep behind.
- Working in a humid bathroom – waterproofing needs a dry environment to cure properly.
How to Put Tile Over the Waterproofed Tub Flange
| Step | Action |
|---|---|
| 1. Planning the Layout | • Mark a level line above the flange • Lay out tiles on the floor to plan the pattern • Check for necessary cuts to avoid odd-sized pieces |
| 2. Applying the Mortar | • Mix thin-set mortar to a peanut butter-like consistency • Spread mortar evenly with a notched trowel • Ensure mortar grooves go in the same direction |
| 3. Setting the Tiles | • Start with the bottom row, pressing each tile firmly into the mortar • Place spacers between tiles for even gaps • Use plastic shims to keep a small gap above the tub flange |
| 4. Around the Flange | • Ensure enough mortar for a good bond, but not too much to fill the gap between the tile and tub flange |
| 5. Cutting Edge Tiles | • Measure carefully for edges or corners • Cut tiles to fit • Measure twice, cut once to save time and materials |
| 6. Final Steps | • Let the mortar dry for 24 hours • Remove spacers • Apply grout • Seal the gap with silicone caulk for a water-tight seal |
Conclusion
Now you know all about waterproofing your tub flange! I hope my personal tips and step-by-step guide have shown you that this isn’t as tough as it seems.
Remember, taking care of your tub flange is much easier than dealing with water damage later. The few hours you spend on proper waterproofing can save you from costly repairs down the road.
Want to learn more about bathroom maintenance? Check out my guide on preventing bathroom mold and mildew. Or, if you’re planning a bigger project, take a look at my complete bathroom renovation tips.
Feel free to leave a comment below if you have questions about your specific tub flange situation. I’d love to help you get the job done right!
Frequently Asked Questions
How Do I Waterproof the Gap Between My Tub Flange and The Cement Board?
I use alkali-resistant mesh tape over the gap first. Then, I apply two thin coats of liquid waterproofing membrane, letting each layer dry completely before moving on.
Are There Specific Products or Tapes Recommended for Waterproofing the Tub Flange?
I prefer fiberglass mesh tape and liquid membrane products like RedGard or Hydro Ban. These create a reliable water barrier and bond well with the flange and board.
Should the Backer Board Go Over or Stop Above the Tub Flange?
The backer board should stop about 1/8 inch above the tub flange. This small gap prevents water from wicking up while still allowing proper coverage with waterproofing materials.

