Easy DIY Curtain Rods: Materials and Instructions
Looking at my bare windows used to make me feel frustrated. I spent hours searching for curtain rods that matched my style and budget. But after seeing the prices, I knew there had to be a better way.
Here’s something you might not know: You can make beautiful curtain rods at home for less than half the cost of store-bought ones. The best part? They’ll look just as good.
I want to show you how to create your own curtain rods with simple materials from your local hardware store.
By following my step-by-step guide, you’ll save money and add a personal touch to your home decor.
Ready to start this fun home project with me? Let’s get going!
Getting Your Window Measurements Right
Getting the right measurements for your curtain rods is easier than you might think. Let me walk you through the process I use to get it right every time.
Start by measuring your window’s width from the outside edges of the frame. Add 8 to 12 inches extra on each side – this allows your curtains to open fully without blocking any light. For my windows, I usually add 10 inches on each side, which gives me plenty of room.
For height, measure from the top of your window frame. Place your rod 4 to 6 inches above the frame. This trick makes your windows appear taller. Trust me, it’s a small change that makes a big difference!
For large windows over 72 inches wide, you’ll need a center support bracket.
I learned this the hard way – without proper support, longer rods can sag in the middle.
Quick Tips for Measuring:
- Use a metal tape measure for better accuracy
- Write down all measurements
- Double-check your numbers before buying materials
- Mark your measurements on the wall with a pencil
For bay windows or corner windows, measure each section separately. Remember to account for how the curtains will overlap at the corners.
Tips for Choosing the Right DIY Curtain Rods
Let me share what I’ve learned about picking the perfect materials for your DIY curtain rods. After making several sets myself, I know which options work best.
Smart Material Picks for Your Curtain Rods:
| Material Type | Cost (10ft) | Best For | Watch Out For |
|---|---|---|---|
| Electrical Conduit | $4-6 | – Most indoor windows, Heavy curtains, Long spans | Can dent if dropped |
| Wooden Dowels | $8-12 | – Light curtains, Small windows, Natural look | May warp over time |
| PVC Pipe | $5-7 | – Light fabrics, Bathroom curtains, Kid’s rooms | Bends with heavy curtains |
| Copper Pipe | $20-25 | – Statement looks, Modern spaces, Medium curtains | Needs regular cleaning |
Let me share what I’ve learned using these materials:
Electrical conduit is my top pick – it’s strong and doesn’t break the bank. I used it in my living room, and it’s held up perfectly for two years now.
Wooden dowels look lovely but need more care. I put one in my guest room, and it works great with lighter curtains.
PVC is perfect for my bathroom – it handles humidity well, but I wouldn’t use it for heavy drapes.
Copper pipe looks stunning but costs more. Plus, my fingerprints show up every time I touch it!
The rod’s thickness matters too. I recommend:
- 1/2 inch diameter for light to medium curtains
- 3/4 inch diameter for heavier fabrics
- 1 inch diameter for extra-wide windows
Here’s a money-saving tip: Look in the plumbing section instead of the curtain hardware area. I found similar materials there at a third of the cost.
For finials (those decorative end pieces), try:
- Wood balls from the craft store
- Pipe end caps
- Drawer knobs
- Cork stoppers
Pick brackets that match your rod size. I’ve found that simple L-brackets work well and cost less than fancy ones.
Tools and Materials Needed
| Tools Required | Materials Needed |
|---|---|
| Tube cutter | Electrical conduit pipe |
| Hot glue gun | Drawer knobs or finials |
| Drill | Spray paint |
| Screwdriver | Wall hooks |
| Measuring tape | Curtain rings with clips |
| Pencil | Screws |
| – | Compression coupling (if needed) |
How to Make Your Own DIY Curtain Rods: Easy Instructions
1. Measuring and Planning
The first step is getting your measurements right. Add 12 inches on each side of your window width for curtain stack-back space.
For windows with angles, add an extra foot for each 90-degree turn. Remember – it’s better to have a bit extra length than too little.
2. Preparing Your Materials
- Cut your conduit to size using a proper tube cutter (not an old one like I did!)
- If you need to join pieces, use compression couplings to connect them
- Clean the conduit surface before painting
- Apply spray paint in thin, even coats
- Let each coat dry completely before handling
3. Adding Decorative Elements
First, slide on your curtain rings – this is important because you can’t add them later!
Then work on the finials:
- Clean the ends of your conduit
- Apply hot glue to the inside of your chosen knobs
- Press knobs firmly onto the conduit ends
- Hold for 30 seconds until glue sets
Making It All Come Together: Installation Steps
Let me share my hands-on experience with installing these rods – trust me, it’s simpler than you might think!
Before you grab those screws, mark your bracket spots carefully. I place a wall hook every 3 feet to prevent any sagging. Start by marking the end brackets 4-6 inches out from your window frame.
For the perfect height, measure 4-6 inches above your window frame. Use a pencil to mark your spots, then grab your drill. Make pilot holes first – this prevents wall damage and makes screwing in hooks easier.
When securing the hooks, use a level to keep everything straight. Check that all hooks line up perfectly. Once they’re in place, lift your rod (with rings already attached) and rest it securely in the hooks.
Test the rod’s stability by sliding your curtain rings back and forth a few times. If anything wobbles, tighten those screws!
For a more detailed tutorial on how to make and install your own DIY curtain rods, check out the video below:
Other DIY Curtain Rod Projects
1. The Cozy Wooden Dowel Option
This is perfect if you love that warm, natural look in your home. I’ve found that 2-inch thick dowels work best for most curtains. You can find these at any hardware store for about $15-20 for an 8-foot piece.
Quick Tips:
- Pick a dowel that’s straight as an arrow – any curves will show
- Sand until it feels smooth as silk
- Use wood conditioner before staining
- Two coats of polyurethane make it last longer
For a more detailed tutorial on how to make and install your own DIY curtain rods using wooden dowels, check out the video below:
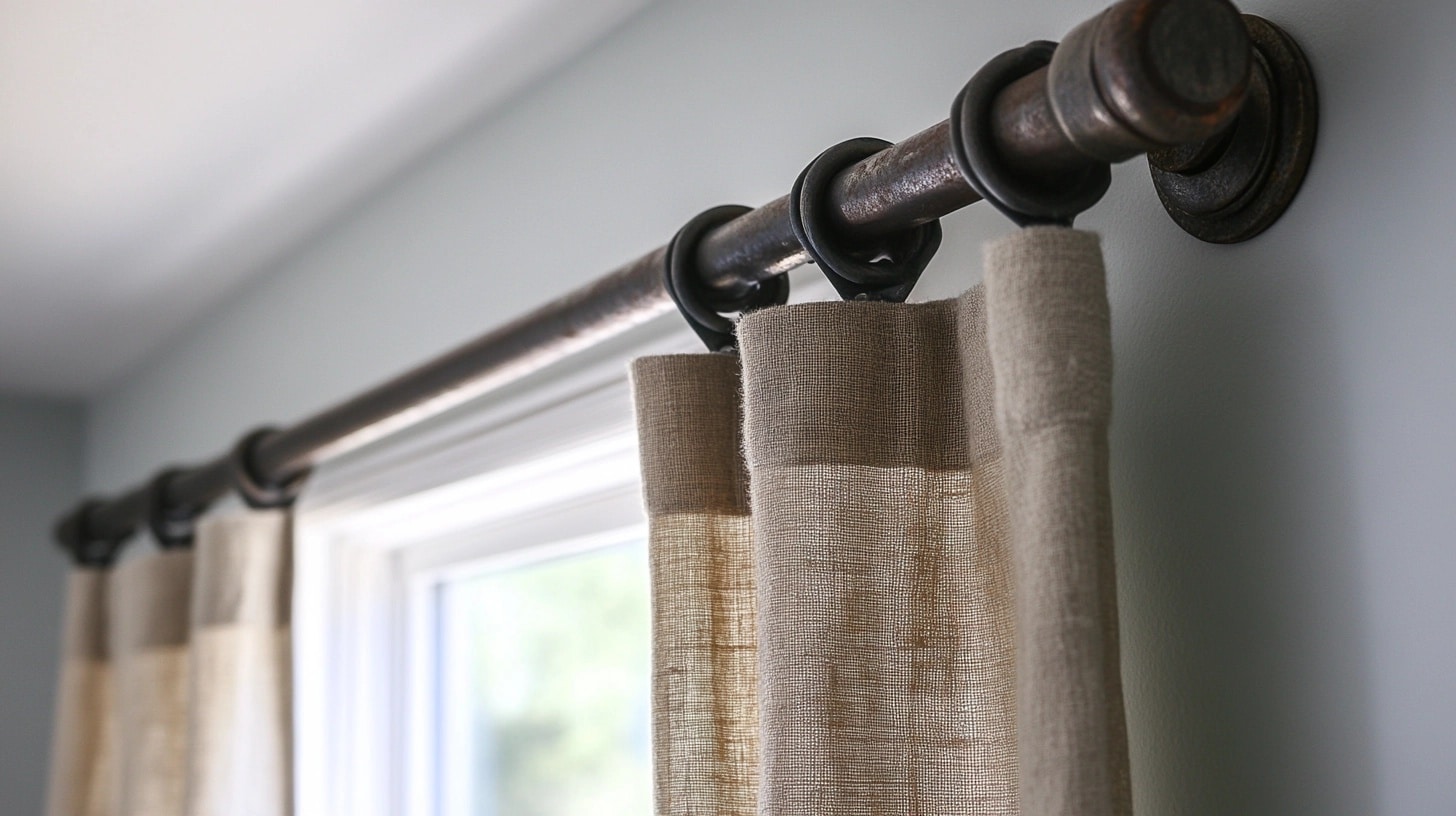
2. The Industrial Pipe Look
This style has saved me tons of money and looks super cool. Black iron pipes from the plumbing section cost about half what fancy curtain rods do.
Smart Tips:
- Wash pipes with vinegar to remove that oily coating
- Buy pipes slightly longer than you need
- Ask the store to cut and thread the pipes
- Paint with metal primer first if you want to change the color
For a more detailed tutorial on how to make and install your own DIY curtain rods using an industrial pipe, check out the video below:
3. No-Drill Solutions
Perfect for renters or temporary setups. These options work great for lightweight curtains, and you won’t lose your security deposit!
Helpful Tips:
- Get tension rods rated for more weight than you need
- Clean mounting surfaces with alcohol first
- Replace adhesive strips every 6 months
- Test in a hidden spot first
For a more detailed tutorial on how to make and install your own DIY curtain rods without using a drill, check out the video below:
Keeping Your Curtain Rods Looking Fresh and Working Well
Let me share some care tips I’ve learned from maintaining different types of curtain rods. These tricks have kept mine looking good as new!
Indoor Rod Care: Every few months, I do this simple routine:
- Wipe the rods with a dry cloth to remove dust
- Check if brackets feel loose
- Test the glide of curtain rings
- Look for any spots where finials might need more glue
For Metal Rods: I found this works best:
- Clean with mild soap and water when needed
- Dry right away to stop rust spots
- Add a thin coat of furniture wax for extra shine
- Check for rust spots near bracket points
Wooden Rod Tips: Here’s what keeps mine looking great:
- Dust weekly with a soft cloth
- Re-apply wood polish every 6 months
- Keep away from direct sunlight
- Watch for any cracks or splitting
Outdoor Rod Special Care: For my patio curtain rods-
- Clean monthly with soap and water
- Apply rust protector twice a year
- Tighten brackets after stormy weather
- Take down curtains during harsh weather
One last tip: Keep spare finials and brackets handy – they’re like spare buttons for your curtains!
Summing It Up
Creating your own curtain rods isn’t just about saving money – it’s about adding your personal touch to your home.
With these simple projects, you can turn basic materials into beautiful window treatments that match your style perfectly.
I hope these tips and methods have shown you how simple it can be to make your own curtain rods. Whether you choose wood, metal, or no-drill options, the right choice is the one that works for your space and skill level.
Ready to start your project? Remember to measure twice, gather all your materials first, and take your time with installation.
If you try any of these ideas, I’d love to hear how they worked for you in the comments below!


