How to Reverse Door Hinges: A Complete DIY Guide
Want to change how your door opens? Let me help you switch those hinges the right way. A door’s swing direction affects how you use your space; changing it can make life much easier.
Most folks ask me, “Can I really change my door’s direction?” The answer is yes—with the right steps and tools, you can flip that swing to better suit your needs.
In this guide, I’ll walk you through each step of switching your door hinges. You’ll learn what tools you need, how to check if your door can be changed, and how to make it happen. Plus, I’ll share tips to dodge common mistakes and keep your door working perfectly.
Ready to improve your space? Let’s get started.
Understanding Door Swing Direction
Your door’s swing direction affects how you use your space. Before you start any changes, you must know what kind of door you have. Let’s break this down into simple terms.
Inswing vs. Outswing: What’s the Difference?
How your door moves can greatly affect how you use your room. The main types are:
When you have an inswing door, it opens into the room. Think about most bedroom doors—you push them in to enter. This setup works well in spaces where there is plenty of room inside.
An outswing door opens toward you when you enter. You’ll often see these on exterior doors or in smaller spaces. They save indoor space but need clearance outside.
Left-Hand vs. Right-Hand Doors: Which One Do You Have?
Stand on the side where the door opens toward you. Look at the hinges. Here’s what to check:
If the hinges are on your left, you have a left-hand door. When you pull it open, the door moves to your left side.
If the hinges are on your right, that’s a right-hand door. When you open it, the door moves to your right.
This detail matters because it affects how you switch the hinges.
Why People Change Their Door Swing
People often switch their door swings for practical reasons. Some want to use wall space for furniture better, and others need to improve access for family members who use mobility aids.
Changing room layout might mean your current door swing blocks traffic flow. Sometimes, a simple switch in direction makes a room work better for everyone.
Safety Considerations and Building Codes You Should Know

Understanding safety rules helps protect your home and family before you start modifying your door. Let’s review the key points.
Why It’s Important to Follow Building Codes
Building codes exist to keep everyone safe. These rules set clear standards for door installations and changes. When you follow building codes, you prevent accidents in your home. Your insurance stays valid, and your home maintains its value. Most importantly, you meet all legal requirements for your area.
Structural Considerations: What to Keep in Mind
Your door frame needs proper support for safe operation. Start by looking for cracks near the frame. The wall should feel firm around where the hinges will go. Make sure the wall studs can support the new hinge spots.
Next, check the frame itself. Measure to see if it’s square. Look closely for any wood rot or damage that could cause problems. The frame must stay stable when you move the door’s direction. Small issues now can become big problems later if you don’t fix them.
Consulting Local Building Codes: A Must!
Talk to experts before starting work. Each area has specific needs for door installations. You might need permits before making changes. Some places have special rules about door direction.
Your local building department can tell you about width rules and height standards. They know what kind of hardware you must use. Getting their approval first saves both time and money later.
Step-by-Step Guide to Reversing Door Hinges
Let me walk you through this home task with clear steps based on real experience.
Getting Ready
First, gather your tools. You’ll need:
| Tool | Purpose |
|---|---|
| Screwdriver | To unscrew and remove door hardware and hinges. |
| Chisel | To square off old hinge mortises and clean them. |
| Drill | This is for drilling new holes for hinges and hardware. |
| Sandpaper | To smooth and finish the mortised areas after patching. |
| Primer | Apply to patched areas for sealing and prepping. |
| Graphite (pencil) | Mark the center of the strike plate and deadbolt for accurate hole placement. |
| Glue | To fill gaps and blend the wood when patching mortises. |
Step 1: Taking Off the Door
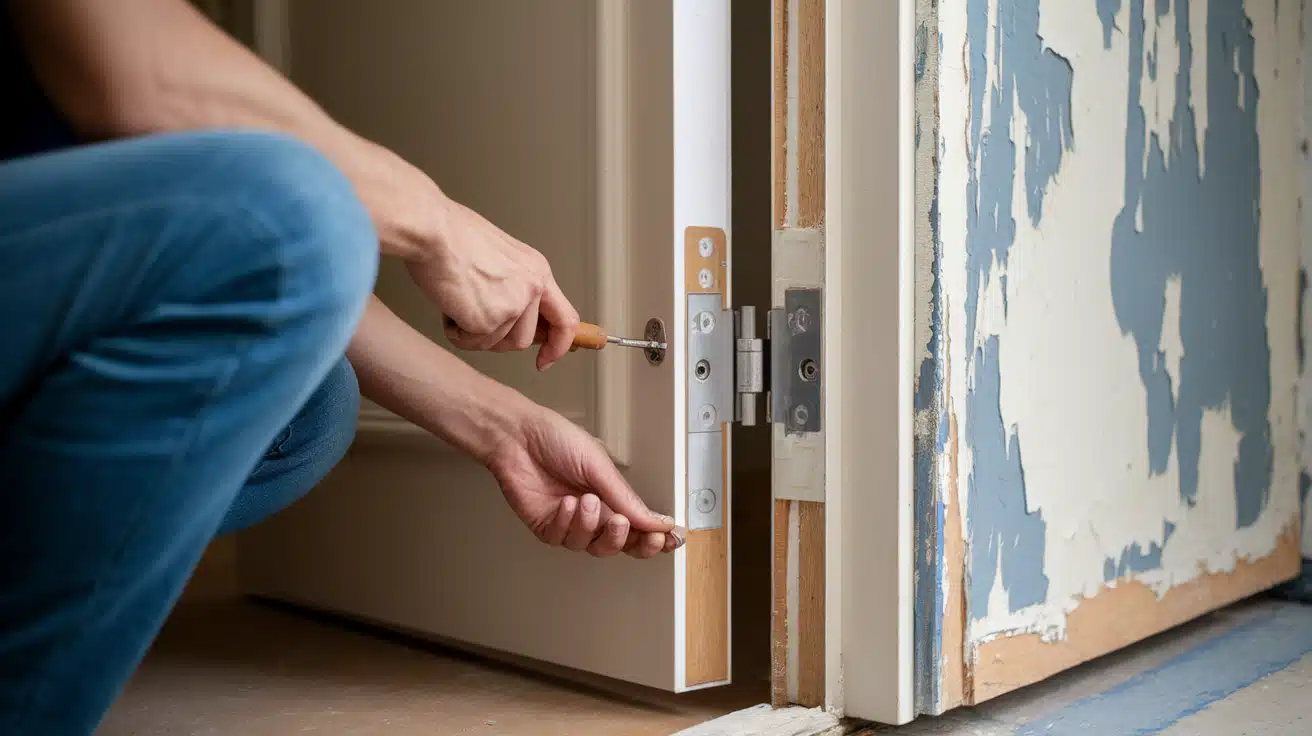
Start by removing your door. Tilt it toward you and pull out the pins from the hinges. Then, take off all the hinges and keep the screws safe.
Step 2: Working with Hinges
Now comes the main part. Put the hinges on the opposite side of the door. Fill old spots with wood filler and sand them smooth. Add a coat of primer to seal these spots.
Step 3: Changing the Hardware
Your door’s strike plate needs attention. Turn it so the slanted edge faces the door frame. Switch the key side for the deadbolt to match your new door swing.
Step 4: Bottom Strip Adjustment
Look at the bottom of your door. Please remove the weather strip, turn it around, and put it back. This keeps your door sealed properly.
Step 5: Putting the Door Back
This step needs care. Hold the door up and check how it lines up—Mark where your new hardware will go. The door should hang straight with even gaps all around.
Step 6: Frame Work
Check your door frame next. Move your measurements from the old hinge spots to the new ones. Chisel the old spots until they’re smooth.
Last Steps
Shape the new hinge spots carefully. Here’s a good tip: Put graphite on the strike plate and deadbolt. Close the door – the marks will show exactly where to drill.
Open and close your door several times. It should move smoothly without sticking, and the latch and deadbolt should click in place without force.
Remember: Take your time with each step. A careful job now will ensure that your door will work well for years to come.
Video Tutorial
Watch the full YouTube tutorial video below on how to reverse door hinges.
Additional Tips and Tricks for Reversing Door Hinges
Let’s look at helpful tips that make your door project smoother and more successful.
Use a Pencil for Precise Marking
Good marking makes all the difference in your results. Start with a sharp pencil to get clean, thin lines. When marking hinge spots, press the hinge right against the wood and trace its outline.
For hardware spots, measure twice before you mark. Check both sides of the door to make sure your marks line up properly. Small mistakes in marking can lead to poor door fit.
A ruler helps keep your lines straight. Mark your screw holes with little x’s so you know exactly where to drill. Clean marks mean clean cuts and better results.
Consider Professional Help for Complex Doors
Some doors need extra care. Solid wood doors weigh a lot and need special handling. If your door feels too heavy, call someone who can safely move it.
Special doors with glass panels or special finishes might need expert care. Old doors often have odd sizes that don’t match today’s standards. A pro knows how to work with these tricky cases.
Stop and call an expert if you see any water damage or wood rot. These problems need fixing before you change any hinges.
Maintenance Tips After Reversing Hinges
Keep your door working well with simple checks. Watch how it closes. If it starts to drag or stick, tighten the screws. Put a drop of oil on the hinges if they begin to squeak.
Look at the gaps around your door each season. They should stay even all around. If you see changes, adjust the hinges right away. Small fixes now stop big problems later.
Clean your door and hardware regularly with a soft cloth. Check the weather strip at the bottom – it should touch the floor but not drag. Fix loose screws as soon as you find them.
Good care makes your door last longer. Check it every few months to catch small issues early. Listen for new sounds – they often mean something needs attention.
Conclusion
Changing your door’s swing direction can improve the efficiency of your home. The process requires careful planning and attention to detail, but it’s a task many homeowners can handle.
Remember that safety comes first. Always check your local building codes and ensure your new door swing meets all requirements. Take time with each step, from marking the hinges to testing the final fit.
Watch for signs that your door needs adjustments after the change. Regular checks help catch small issues before they grow. With proper care, your newly reversed door will serve you well.
Your time on this project pays off in better room flow and easier daily life. Small changes like this often bring the biggest improvements to how we use our homes.


