30 Inspiring Funky Furniture Painting Ideas
My journey into painting furniture began when I found an old wooden dresser by the curb.
What started as a simple makeover became a passion for turning basic pieces into colorful conversation starters.
Each project taught me new techniques for adding personality to plain furniture.
Now, my home features pieces that tell stories through color and pattern.
These ideas come from three years of trying different painting methods and styles.
Creative Funky Painted Furniture Ideas
1. Rainbow Bookshelf
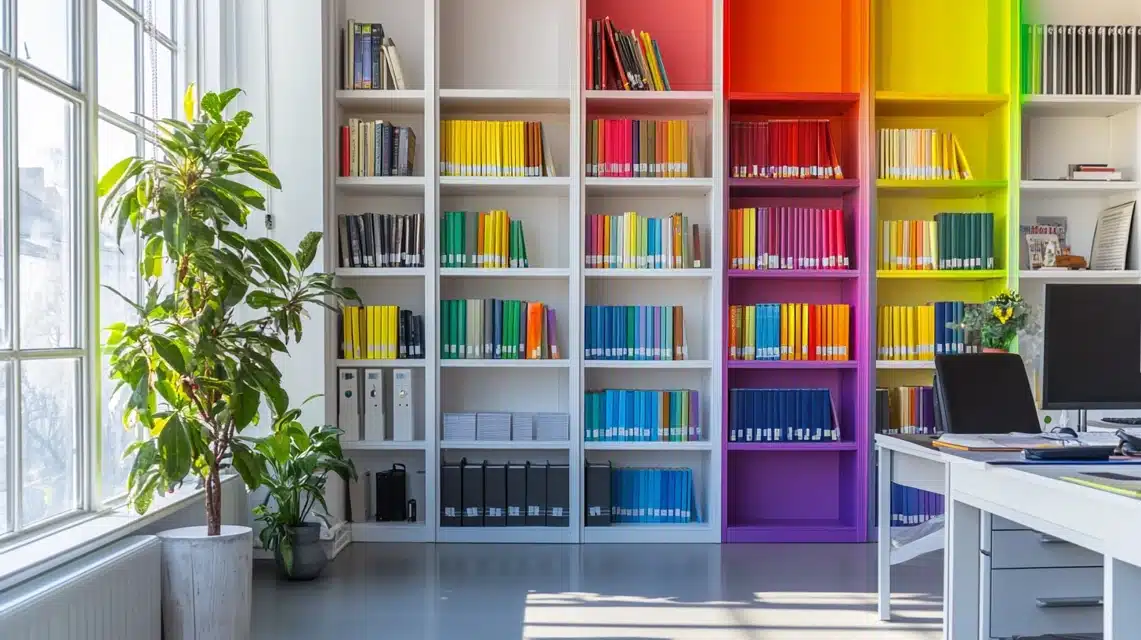
I turned a basic brown bookshelf into a cheerful storage piece that brightens my office.
Each shelf shows off a different color, moving from red at the top to purple at the bottom.
The white sides help the colors stand out while keeping the look clean.
My books now organize by color, creating a living art piece that changes as I add new reads.
Small paint touch-ups keep it looking fresh even with regular use.
Setup Tips:
- Clean surfaces thoroughly with soap and water.
- Sand each shelf smooth before painting.
- Apply primer for true color results.
- Use painter’s tape for clean lines.
- Add clear coat for protection.
2. Color Blend Dresser
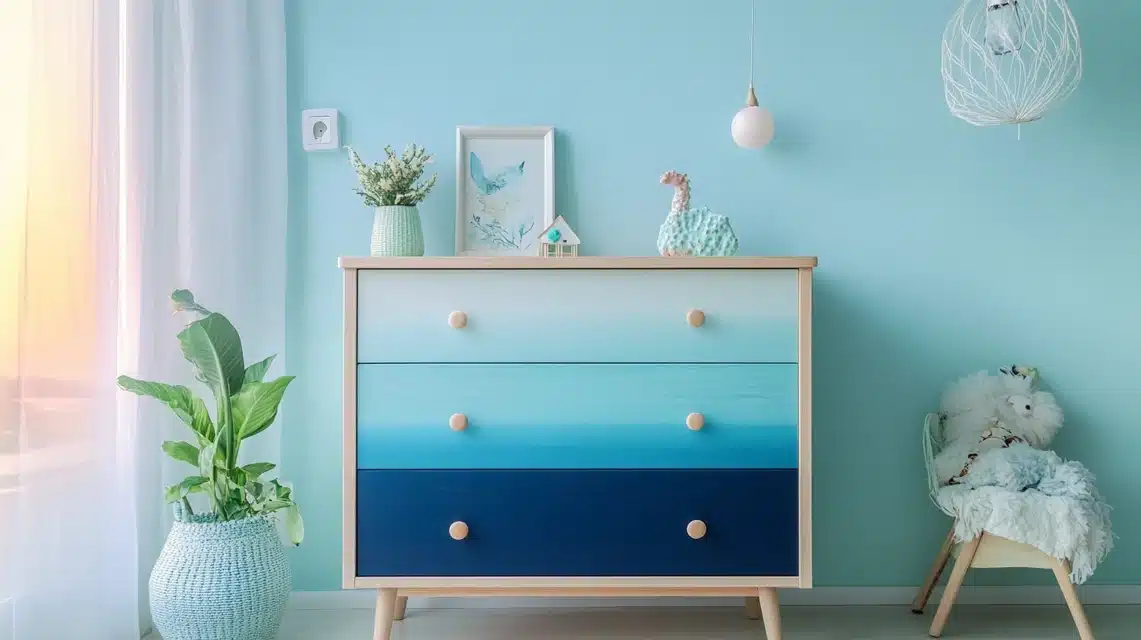
I created smooth color changes across my dresser drawers, flowing from light blue to deep navy.
Each drawer shows a slightly deeper shade, making the piece look like a water painting.
My guests often ask how I achieved the smooth blend between colors.
The dresser now serves as my bedroom’s main focal point, replacing artwork.
The light wood trim frames each drawer’s color perfectly.
Setup Tips:
- Mix paint shades before starting.
- Work while paint stays wet.
- Paint in long, smooth strokes.
- Number drawers for proper order.
- Test colors on spare wood first.
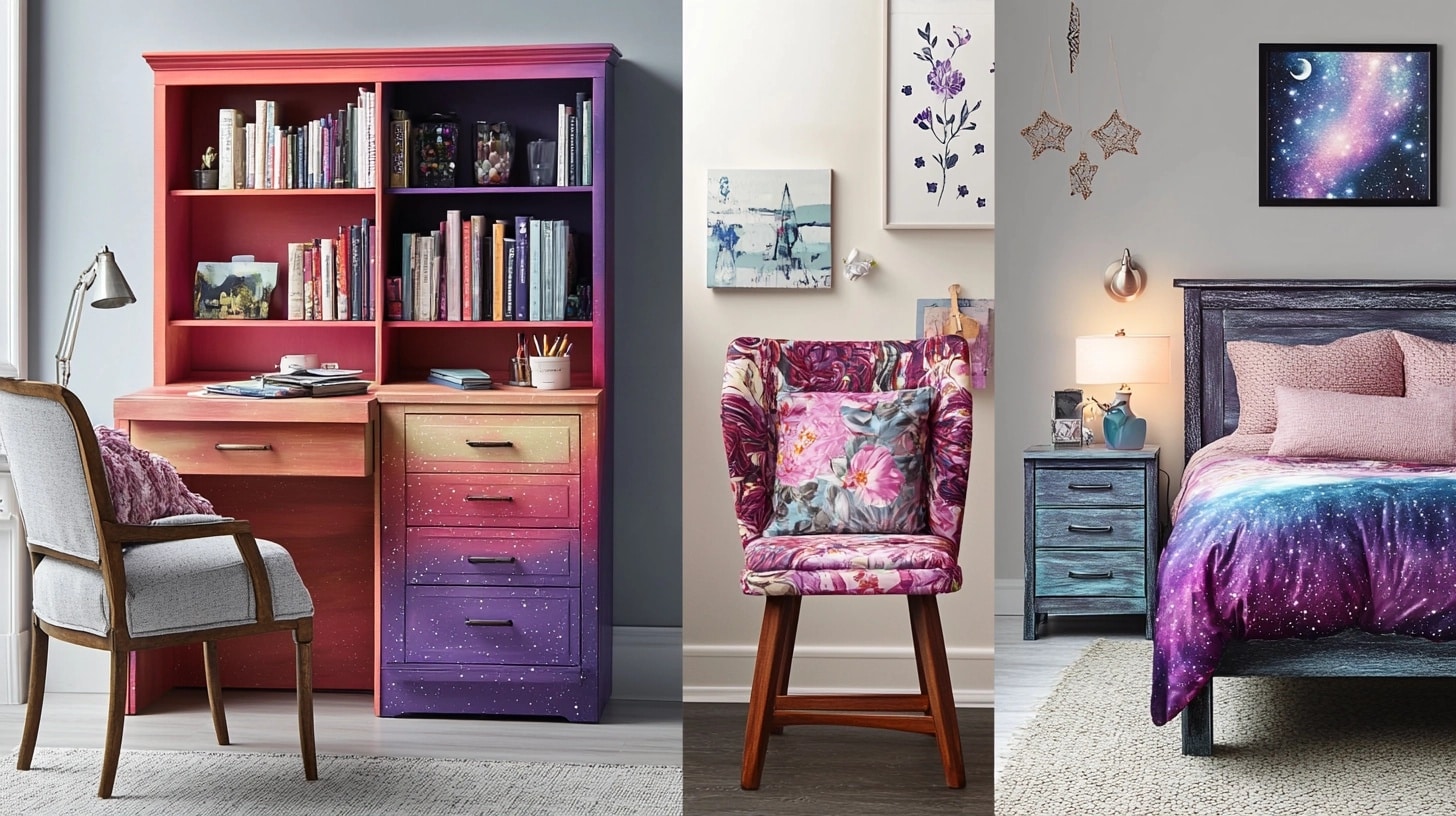
3. Space-Themed Desk
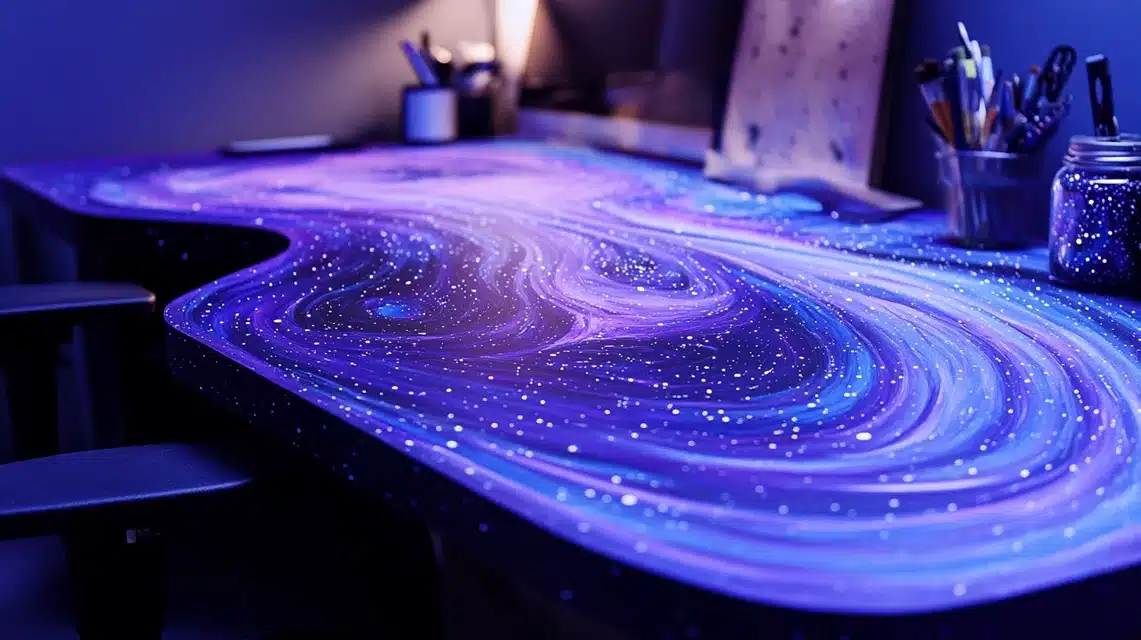
I painted my study desk with swirling purples and blues to mirror the night sky.
White dots and swirls create star patterns across the surface.
Small touches of silver paint add sparkle to certain areas.
The sides feature deeper blue shades that fade into the top design.
Clear coating keeps the surface smooth for writing.
Setup Tips:
- Start with a dark base coat.
- Layer colors while wet.
- Use small brushes for stars.
- Apply several clear coats.
- Add non-slip pads underneath.
4. Square Pattern Table
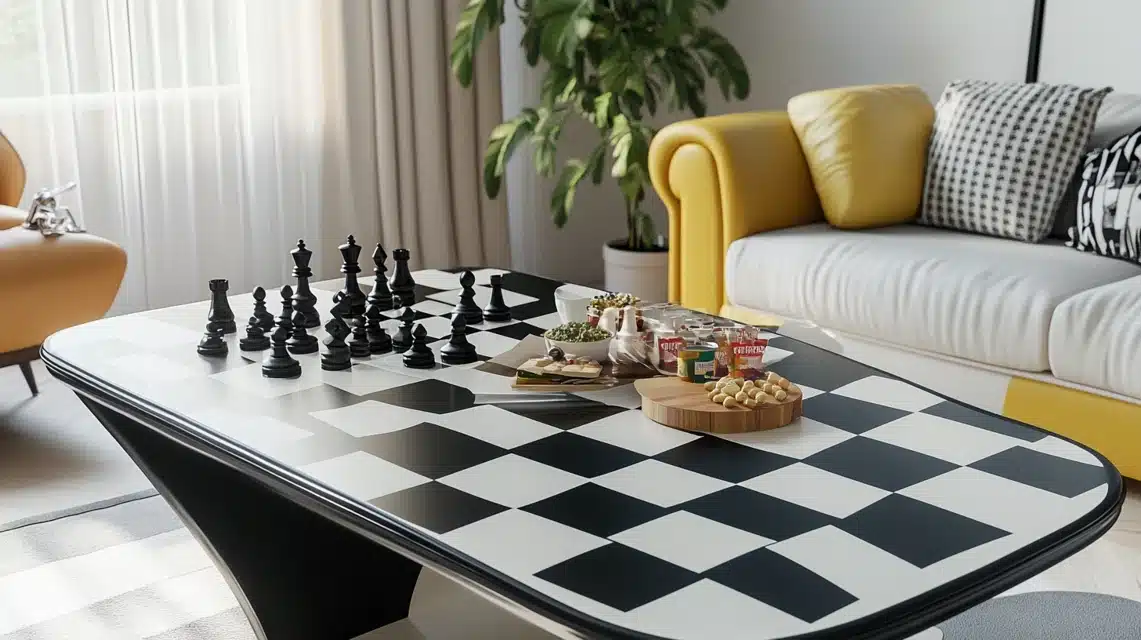
I turned my plain coffee table into a game board design using black and white squares.
The pattern makes the table useful for both chess games and serving snacks.
Painting each square took time but created perfect spacing.
The black border ties the whole design together.
Guests often gather around it for impromptu game nights.
Setup Tips:
- Measure squares carefully.
- Use quality painter’s tape.
- Apply thin, even coats.
- Sand between layers.
- Seal with a strong top coat.
5. Shape Design Night Stand
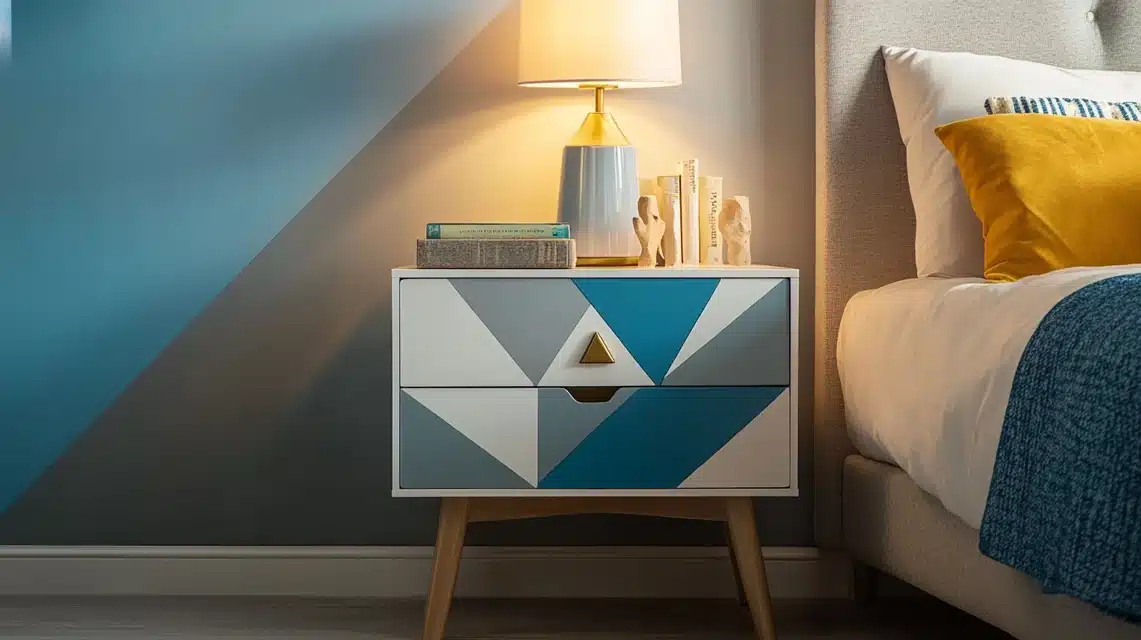
I added life to a basic nightstand using three colors in simple shapes.
The front shows triangles in blue and white against a gray background.
Clean lines between colors make the design look sharp.
The top remains solid white for setting drinks and books.
This small piece now adds style to my bedroom corner.
Setup Tips:
- Draw shapes before painting.
- Keep designs simple.
- Paint light colors first.
- Let each section dry fully.
- Use sturdy brushes for edges.
6. Garden Pattern Chair
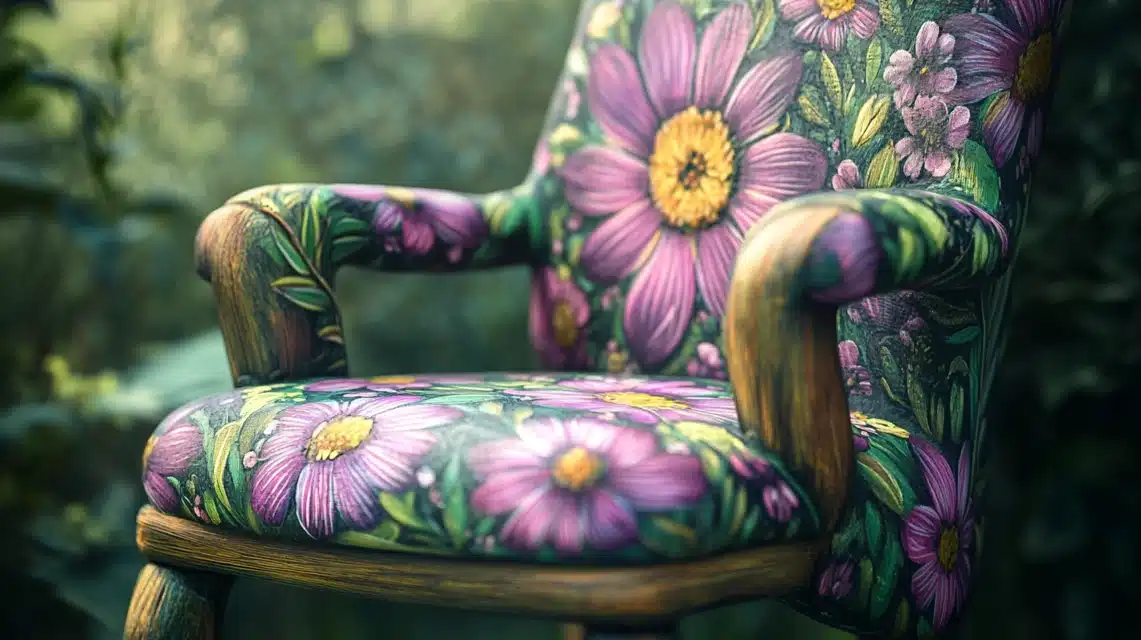
When I found this plain wooden chair at a yard sale, I knew it needed something special.
My weekend project became a blooming masterpiece, with hand-painted pink and purple flowers stretching up the chair’s back.
The seat features a soft green background that makes the petals stand out.
I added small yellow centers to each flower, creating depth in the design. Sometimes, in the morning light, guests mistake them for real blooms.
The chair now sits in my reading nook, bringing a touch of garden charm indoors, even during winter months.
After many compliments, I started painting matching pieces for friends.
Setup Tips:
- Start with two coats of light background paint.
- Practice flower shapes on paper first.
- Build colors from light to dark shades.
- Paint details after base designs dry.
- End with water-resistant coating.
7. Wild Print Storage Unit
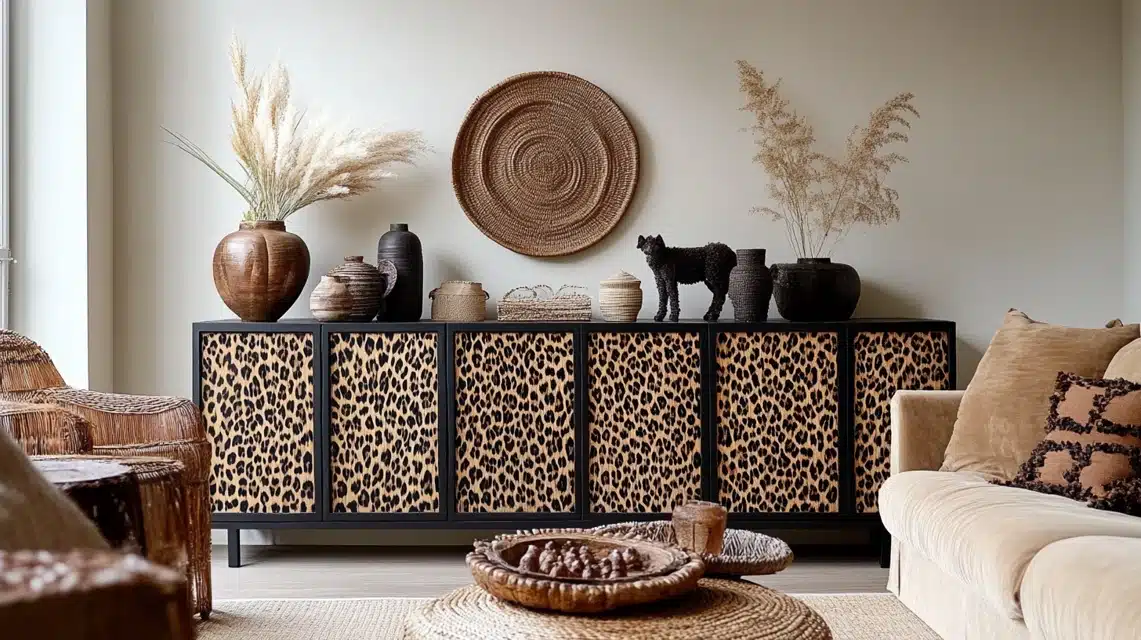
My plain white storage cabinet needed personality, so I embraced my wild side. Using paper templates, I created a pattern across the doors that caught everyone’s eye.
The design flows across both doors in brown and tan shades, making it look like one continuous piece.
I added small spots of black paint for depth and contrast.
This piece now serves as more than storage – it’s become the talking point of my living room. The pattern even inspired the rest of my room’s color choices.
Setup Tips:
- Create paper pattern guides.
- Test paint colors together first.
- Work in small sections at a time.
- Keep design flowing across doors.
- Use detail brushes for final touches.
8. Spotted Dresser Design
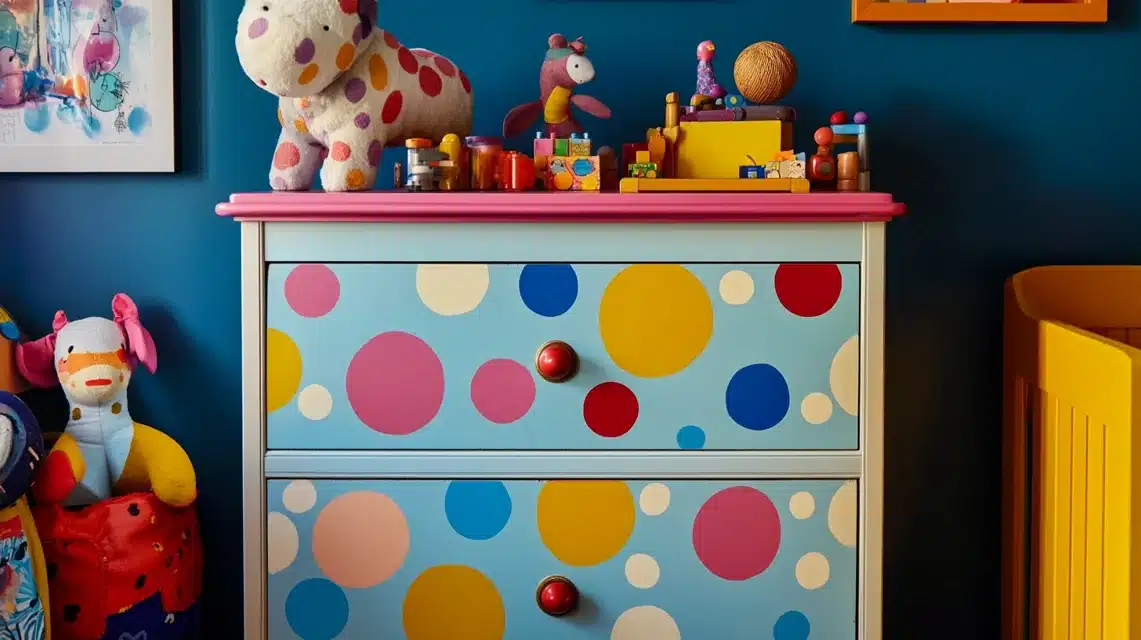
Looking at my grandmother’s old dresser, I imagined something playful and bright.
Over three days, I transformed it with spots of various sizes in shades of blue, yellow, and pink. The white background makes each spot seem to float on the surface.
Every drawer tells a different story – some spots cluster together while others dance apart.
The top features larger spots that seem to spill down the sides. My daughter says it looks like happy confetti frozen in time.
Even the original brass handles shine brighter against their new spotted backdrop.
Setup Tips:
- Plan spot placement carefully.
- Use round sponges for perfect circles.
- Layer colors for depth.
- Keep some spots overlapping.
- Protect with a durable top coat.
9. 70s Style Side Cabinet
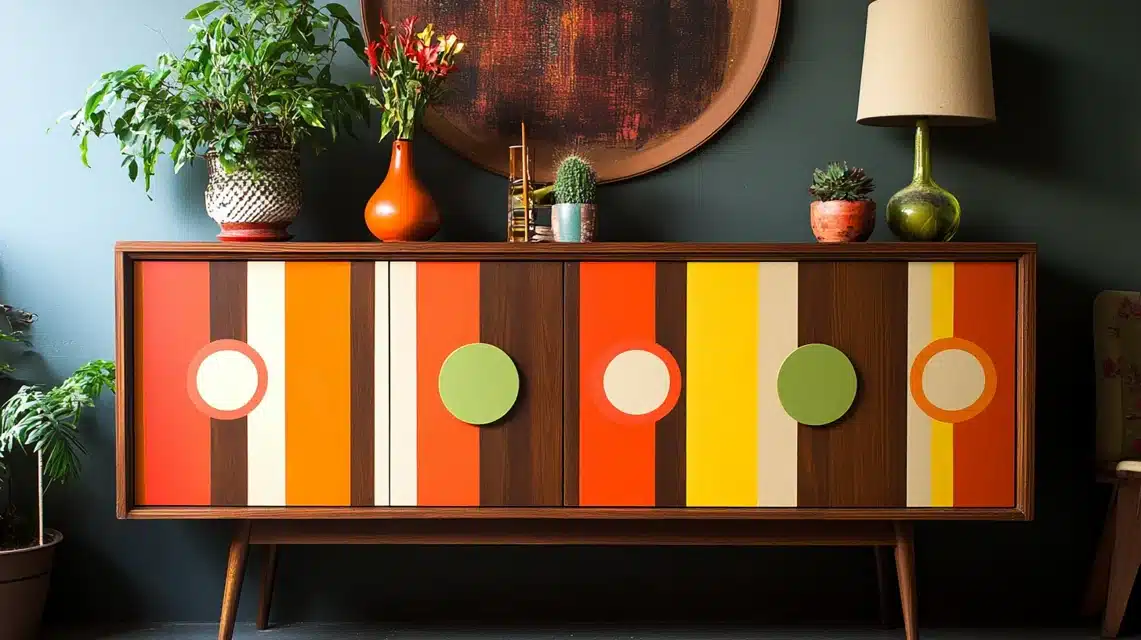
My thrift store cabinet became a time machine to my favorite design era.
The piece now sports warm brown bands and deep orange sections that remind me of sunset.
I painted thick stripes in different widths, letting each stand out against the light wood.
Green accents near the handles create focal points that draw the eye across the design.
Small painted circles break up the stripes, adding playful touches to the serious lines.
The finished piece brings warmth to my dining room corner while holding table linens and special occasion dishes.
70s Style Cabinet Tips:
- Prepare wood with oil-based primer for better color grip.
- Mix paint with floating medium for smoother stripe edges.
- Create paper templates for repeating patterns.
- Use wood grain direction to guide stripe placement.
- Build up colors in thin layers for rich depth.
10. Paper Art Table
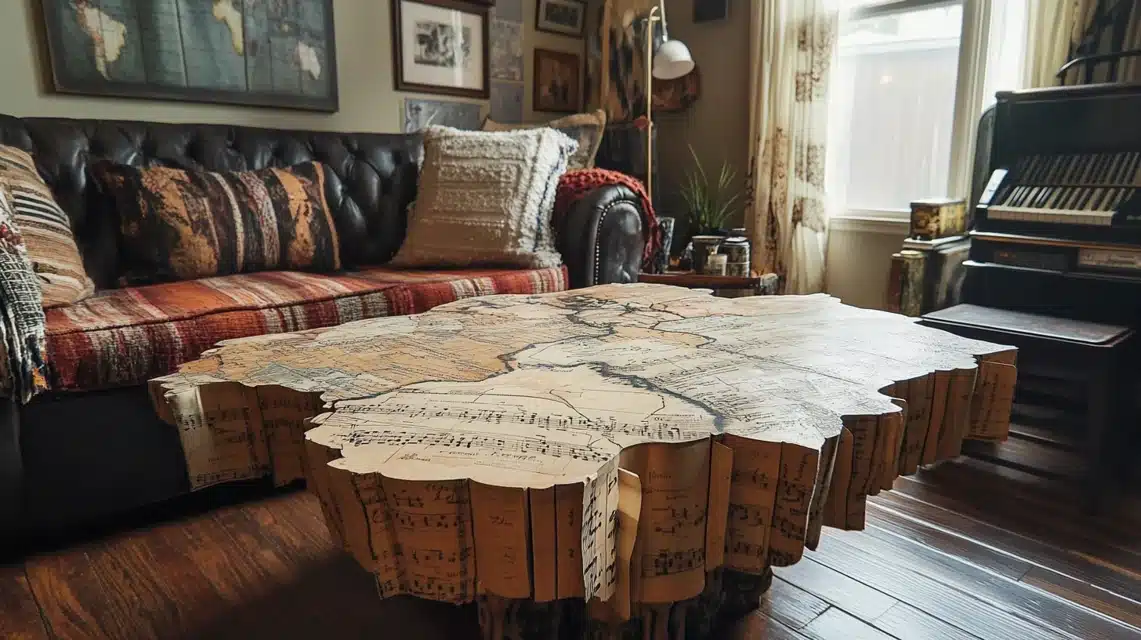
My coffee table transformation started with a collection of old maps and music sheets.
Each piece of paper found its perfect spot on the surface, creating layers of stories and songs.
I spent hours arranging the pieces until they formed a flowing pattern across the top.
Clear coating helps protect the design while creating depth that makes the papers look floating.
Guests often spend time reading snippets of music or finding familiar place names on the maps.
The table has become both a useful surface and an invitation to explore.
Paper Art Tips:
- Soak paper in tea for the aged effect.
- Apply special glue that won’t wrinkle the paper.
- Layer different paper types for texture.
- Seal edges with clear nail polish first.
- Sand between clear coat layers.
11. Shiny Metal Look Chair
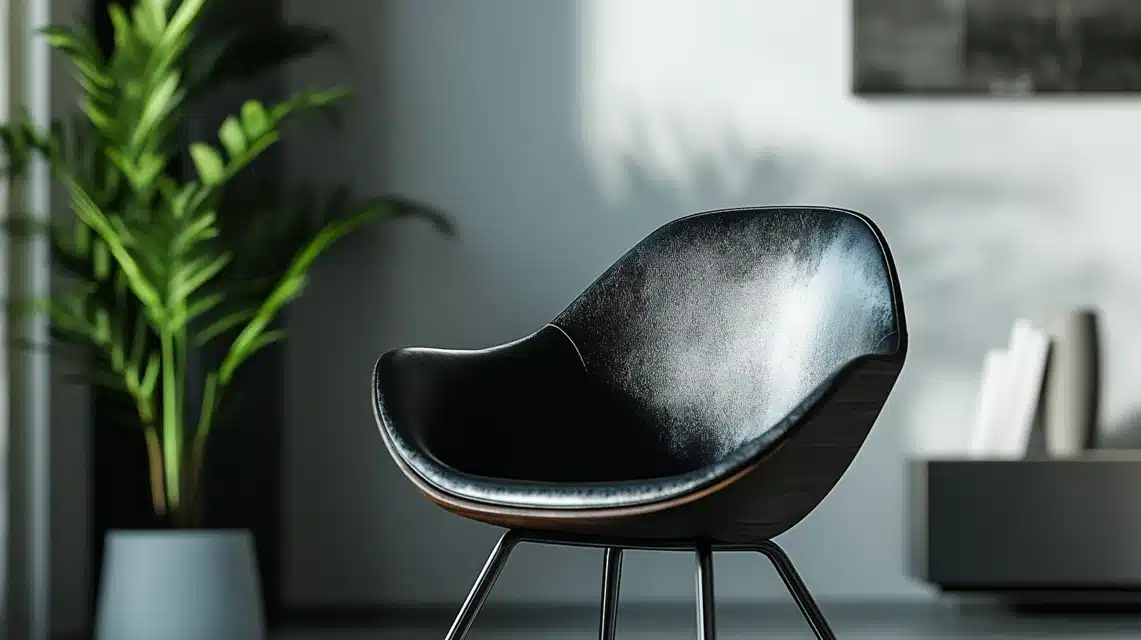
My basic wooden chair needed something bold, so I gave it a metal-like finish.
The paint catches light from every angle, making the chair glow from within.
I worked in small sections to keep the finish smooth and even across all surfaces.
The seat has extra coats to protect it from regular use while maintaining its shine.
The finished chair looks like an art piece but stays practical for daily use.
Even after months of use, the surface keeps its special gleam.
Metal-Look Tips:
- Start with a black base coat for depth.
- Mix fine glitter into the paint for a subtle sparkle.
- Buff between layers with a special cloth.
- Apply the paint in a cross-hatch pattern.
- Use car wax for the final shine.
12. Multi-Line Storage Unit
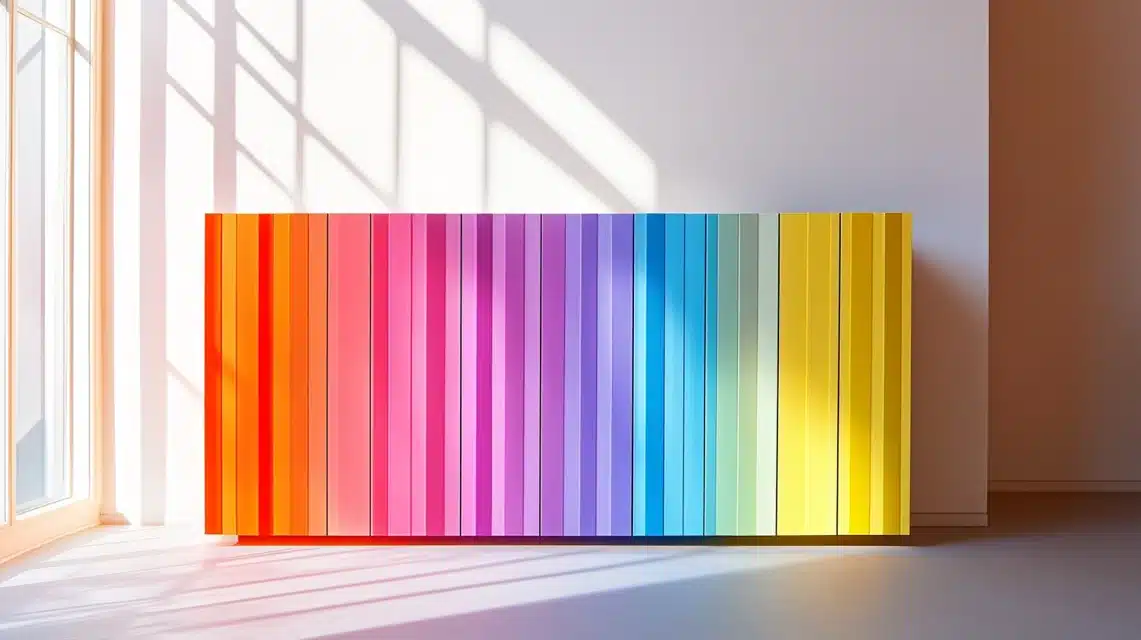
I turned my plain storage unit into a linear masterpiece using five different paint colors.
Thin lines run vertically across the doors, each carefully measured and taped.
The colors shift from light to dark, creating movement across the surface.
Each stripe stands alone but works as part of the larger pattern.
The handles got special treatment with small painted dots that match the stripes.
My morning coffee routine now includes admiring how sunlight plays across the lines.
Line Pattern Tips:
- Create guide marks with chalk string.
- Mix paint with flow aid for crisp edges.
- Use drafting tape for the thinnest lines.
- Paint every other line first.
- Seal with UV protective coating.
13. Fun Art Coffee Table
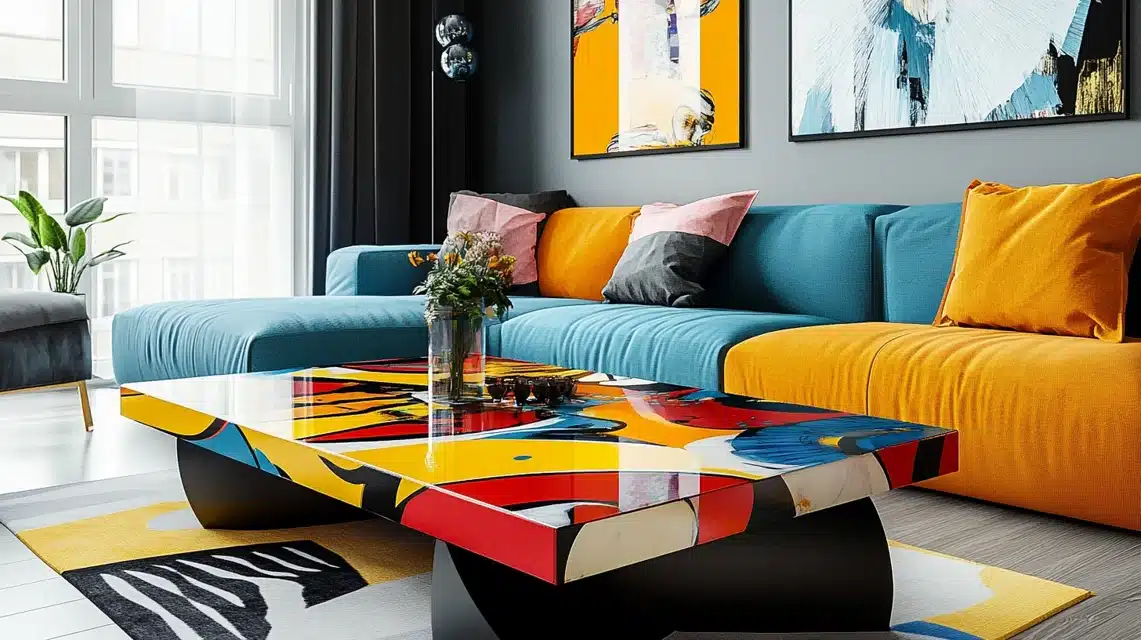
My old coffee table turned into a walking art show with splashes of color.
I let shapes flow naturally, mixing curves with sharp angles in bright shades.
Each section tells its own story while connecting to nearby colors.
The surface now changes appearance depending on where you sit.
Friends say looking at it feels like visiting an art museum.
Every gathering brings new interpretations of the patterns.
Art Table Tips:
- Build texture with modeling paste first.
- Layer colors while slightly wet.
- Use silicon tools for unique patterns.
- Add a clear glass top for protection.
- Create raised edges to contain the design.
14. Writing Board Desk Top
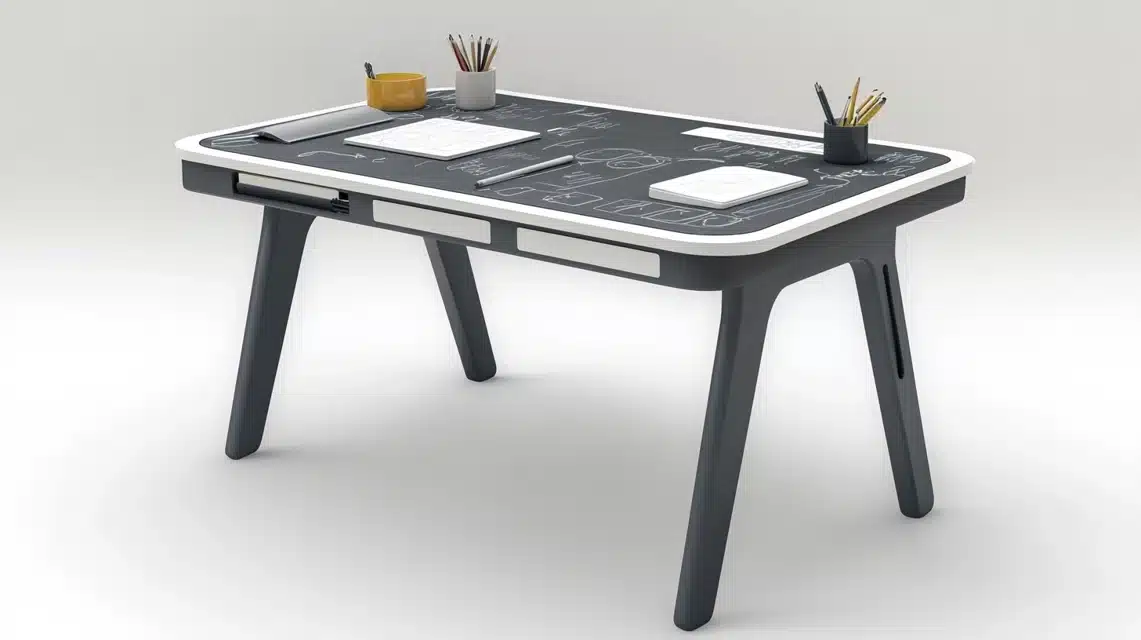
I transformed my old study desk into a message center with special black paint.
The smooth surface lets me write notes directly on the desk during work sessions.
I painted the legs in solid gray to keep focus on the useful top surface.
Small painted borders in white create spaces for different task lists.
Having a writing surface right at hand changed how I plan my days.
The desk now serves as both a workspace and a planning center.
Writing Surface Tips:
- Mix special grit into the base coat.
- Roll paint in multiple directions.
- Let cure for three days before use.
- Create a template for divided sections.
- Apply the magnetic paint layer first.
15. Street Art Storage
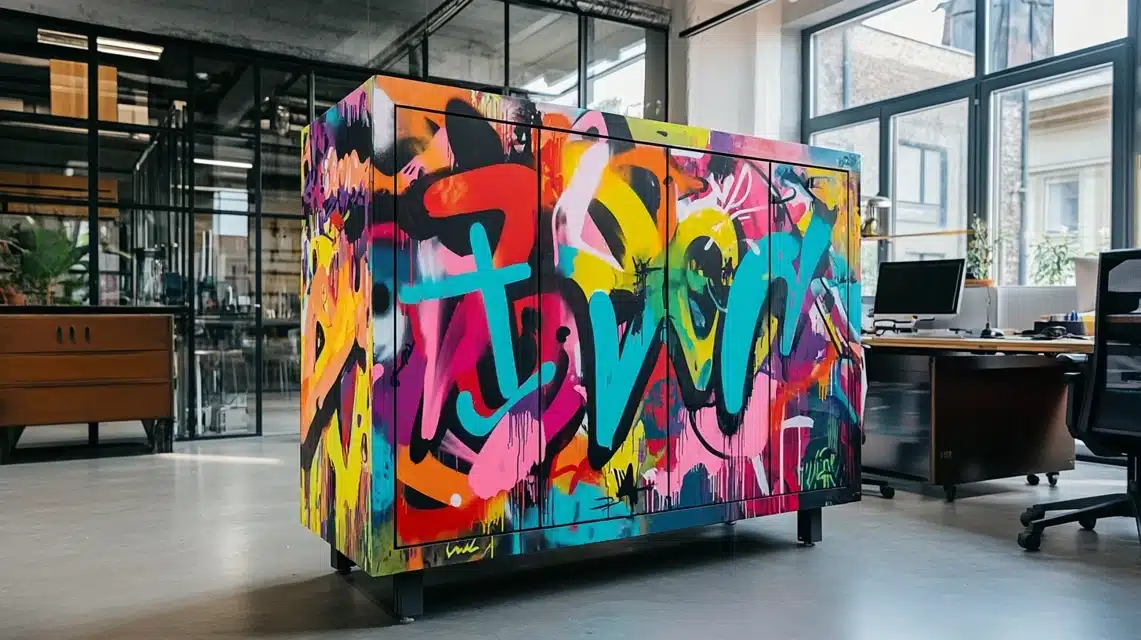
My plain cabinet now looks like it belongs in a modern art gallery.
Bold colors pop against each other in shapes that seem to move.
I used special caps on paint cans to control the paint flow perfectly.
The design wraps around corners, making the piece look different from every angle.
Small details painted in white make certain areas stand out more.
This piece brings energy to my otherwise quiet home office.
Street Style Tips:
- Practice spray control on cardboard.
- Create paper stencils for clean edges.
- Build colors from dark to light.
- Use paint caps of different sizes.
- Add a clear coat between layers.
16. Paint Flow Table
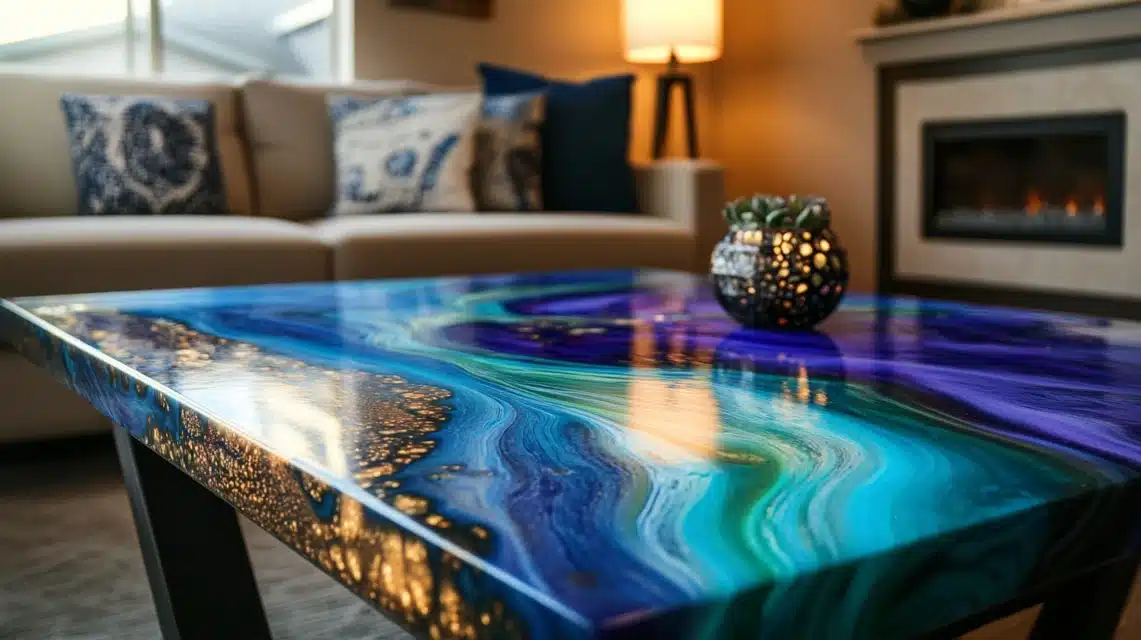
I created a table where colors seem to melt into each other naturally.
Starting from the center, I let paint flow outward in blue, purple, and green waves.
The colors mix where they meet, creating new shades no brush could paint.
White lines appear where colors are pulled apart, adding a natural pattern.
The surface looks like moving water caught in a moment.
Everyone asks how it’s done, but each piece turns out unique.
Flow Technique Tips:
- Mix paint with a special flow medium.
- Use a heat gun for bubble removal.
- Tilt surface for controlled movement.
- Add silicone for cell creation.
- Cure in dust-free space.
17. Comic Book Reading Chair
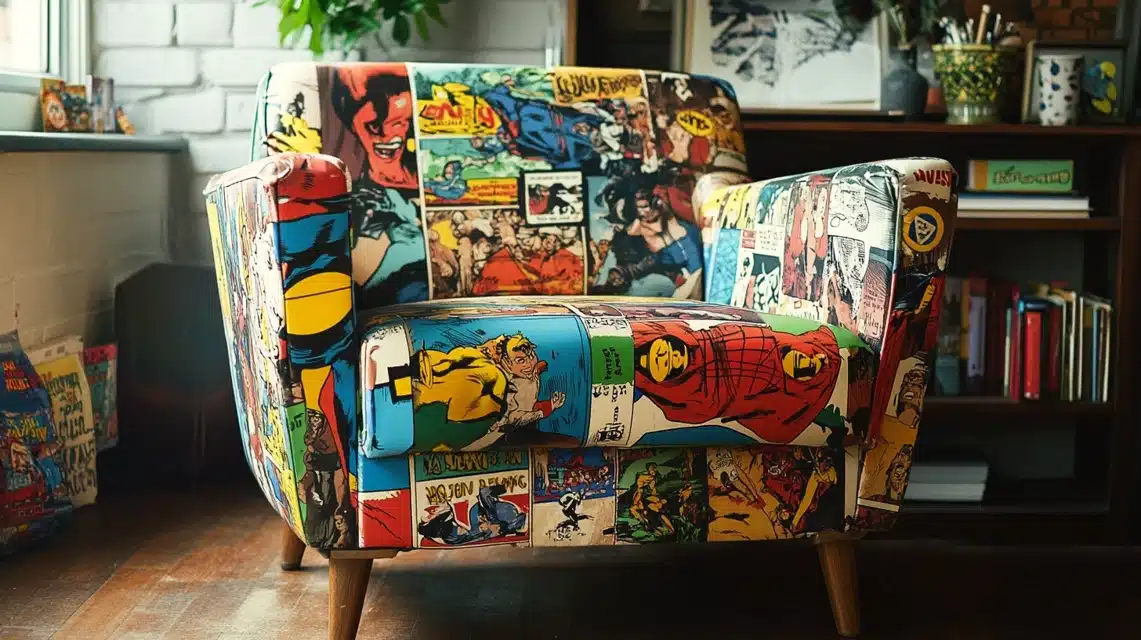
I covered this old armchair with pages from my favorite childhood comic books.
Each panel flows into the next, telling pieces of different stories across the surface.
The arms feature action scenes, while the back shows quieter story moments.
I carefully chose panels that work together in both color and story flow.
Reading in this chair feels like being wrapped in memories of favorite tales.
The finished piece brings smiles to fellow comic fans who visit.
Comic Chair Tips:
- Sort panels by color scheme first.
- Create paper template layouts.
- Use book-binding glue for flexibility.
- Seal edges with a special corner tool.
- Add fabric protector spray last.
18. Circle Pattern Design
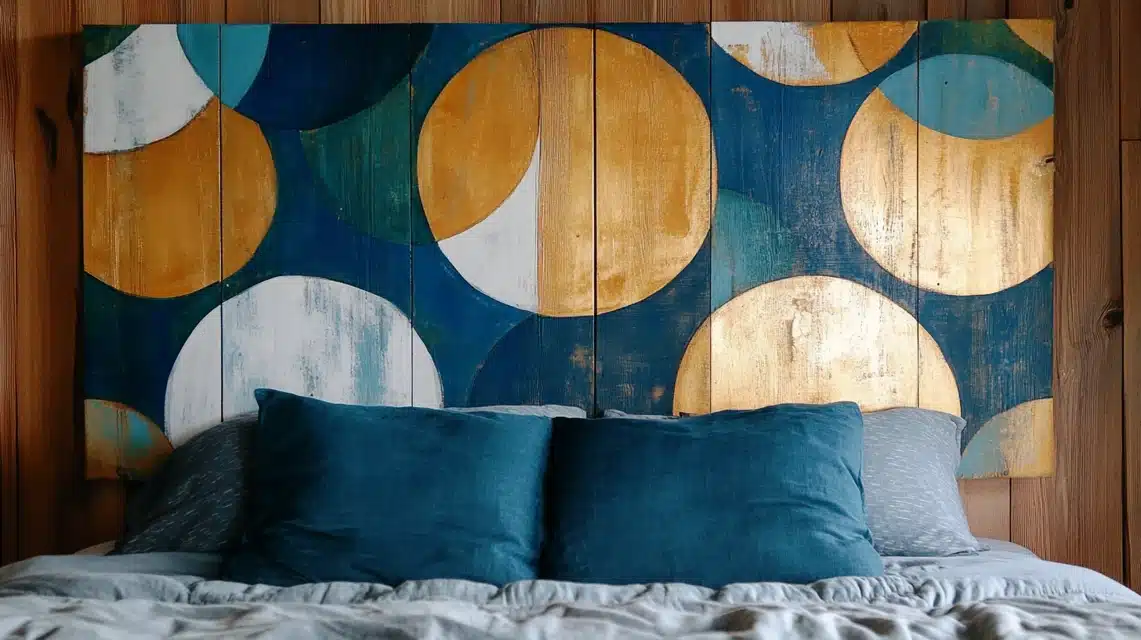
I painted flowing circles across my headboard, each one connecting to others.
The pattern started small in the center and grew outward naturally.
Blue and gold circles overlap to create new shapes between them.
Morning light creates shadows that make the circles seem to float.
The design changes appearance throughout the day as light moves.
This pattern turned a plain bed into the room’s main feature.
Circle Design Tips:
- Use different-sized serving bowls as guides.
- Paint odd numbers of circles for balance.
- Mix metallic powder in a clear coat.
- Layer colors while still tacky.
- Create depth with shadow effects.
19. Bright Color Bench
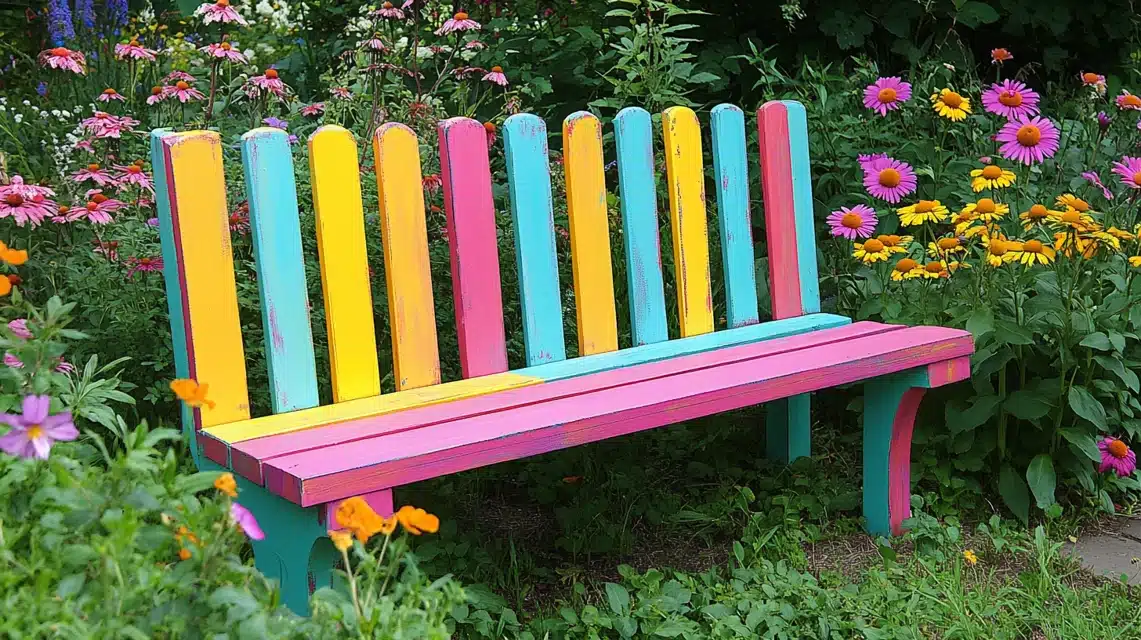
My garden bench needed life, so I chose colors that pop against green plants.
Each slat shows a different bright shade that stands out in natural light.
The colors remind me of summer flowers in full bloom.
Special outdoor paint keeps the colors true through all weather.
Birds seem drawn to the bright perch in my garden.
This bench turned a plain corner into a garden focal point.
Bright Bench Tips:
- Sand deeper than usual for paint grip.
- Apply marine-grade primer first.
- Use the color wheel for shade selection.
- Add UV protection between layers.
- Seal the end grain three times.
20. Pattern Cut-Out Design
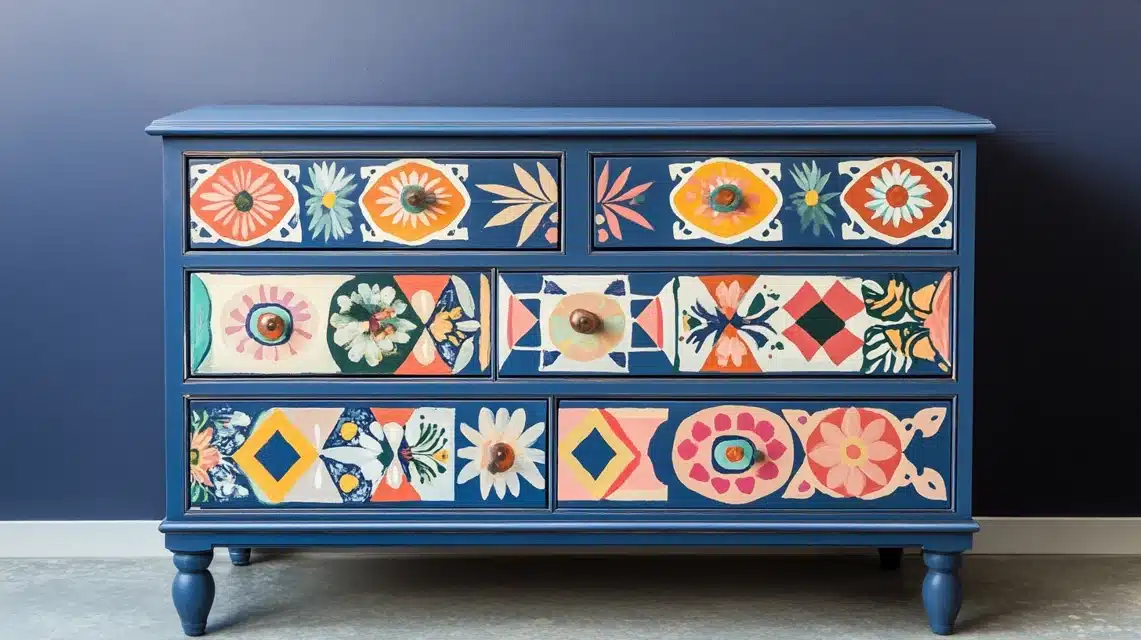
I made my blank dresser drawers come alive with cut-out pattern shapes.
Each drawer shows a different motif, yet all work together as one piece.
The patterns remind me of tiles I saw during my travels in Morocco.
Light colors pop against the dark blue background I chose as a base.
Small gold touches highlight special spots in each pattern.
When sunlight hits the dresser, it casts patterned shadows on my wall.
Pattern Tips:
- Make reusable plastic stencils.
- Press stencils with special tape edges.
- Mix paint with fabric medium for sharp lines.
- Layer patterns in odd numbers.
- Seal with a fabric-friendly top coat.
21. Soft Color Block Cabinet
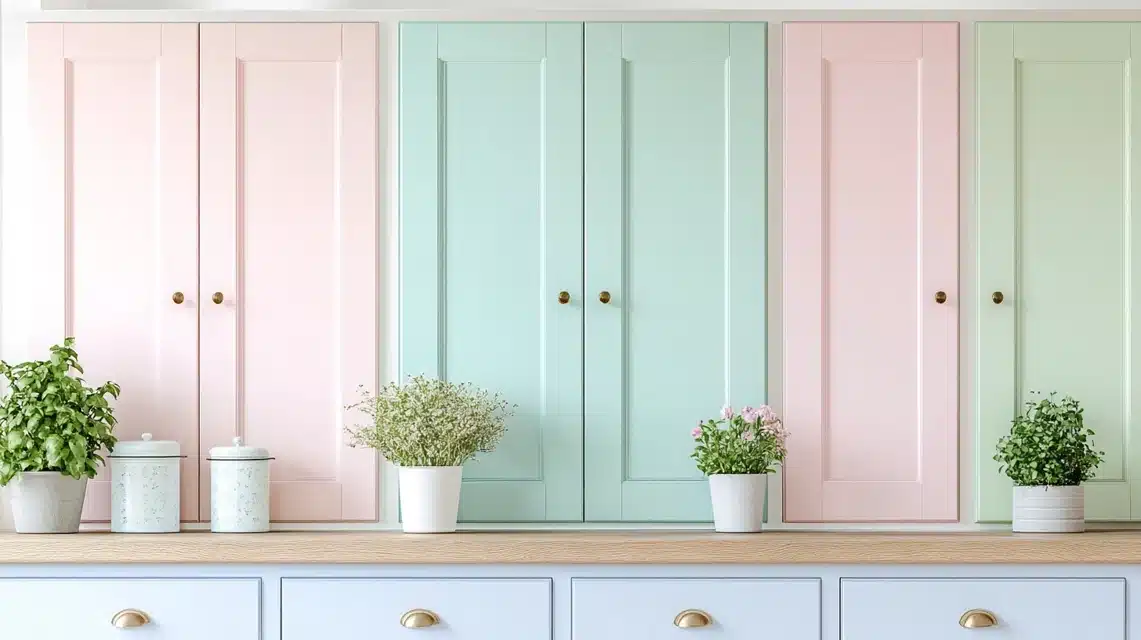
My kitchen needed something gentle yet fun to brighten the space.
Each cabinet door wears a soft shade that reminds me of ice cream.
The colors blend into each other where they meet, creating smooth changes.
I kept the wood grain visible through the paint for extra texture.
The piece brings warmth to my kitchen without overwhelming the space.
Friends say it makes them feel happy just looking at it.
Soft Color Tips:
- Thin paint with a water-based medium.
- Build color in five thin layers.
- Brush in the direction of wood grain.
- Keep wet edges for blending.
- Add pearl powder for a gentle shine.
22. Mixed Style Chest
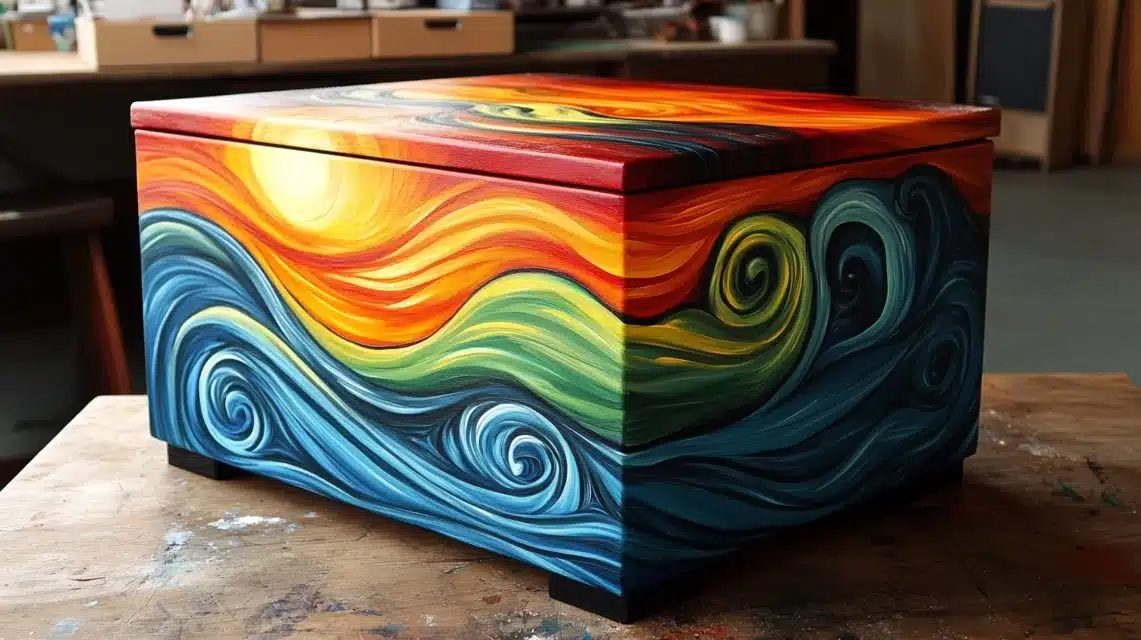
I combined two painting styles on one chest, making each half unique.
The left side shows flowing paint movements in ocean colors.
The right side features clean lines in sunset shades.
Where the styles meet, they blend into something completely new.
The top unifies both sides with elements from each design.
Opening each drawer reveals a different color surprise inside.
Style Mix Tips:
- Plan division lines with a laser level.
- Create texture barriers between styles.
- Use different brush types for each side.
- Mix custom colors for blending areas.
- Apply a specialized mood-changing top coat.
23. Paint Splash Seating
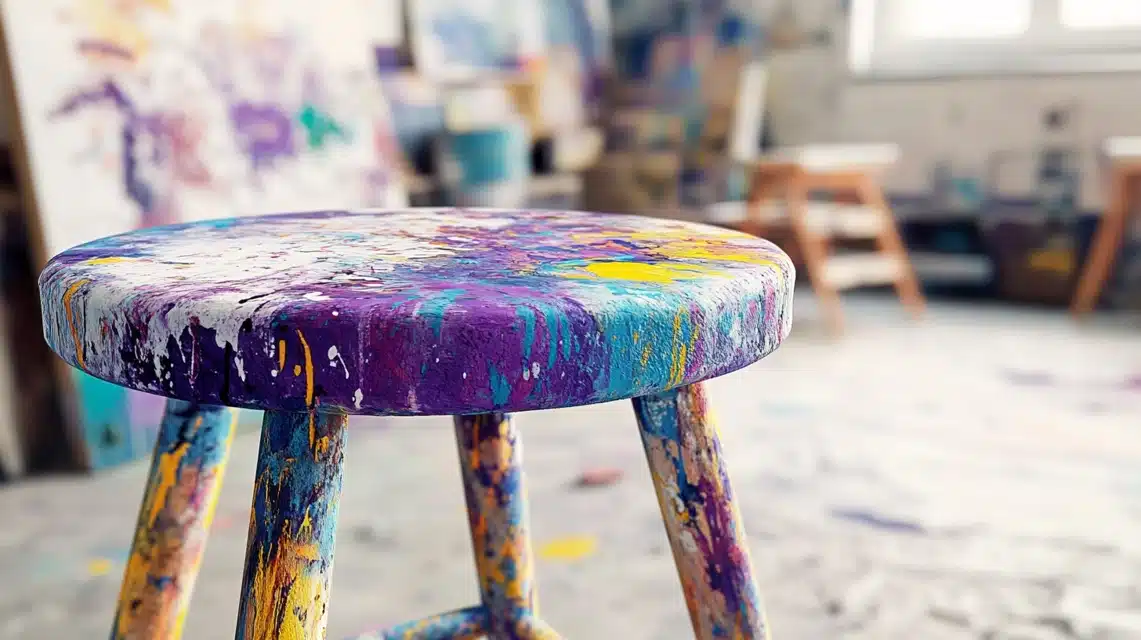
I turned a plain wooden stool into a piece that looked like moving art.
Each color splash tells the story of its path across the surface.
Purple meets blue in unexpected places, creating new color stories.
White spots peek through where colors dance around each other.
The legs feature tiny splashes that seem to climb upward.
Even the underside got special treatment with paint droplets.
Splash Effect Tips:
- Create splash zones with masking fluid.
- Control paint thickness for different effects.
- Use compressed air for natural spreads.
- Build layers from light to dark.
- Seal with flexible coating.
24. Big Circle Design Desk
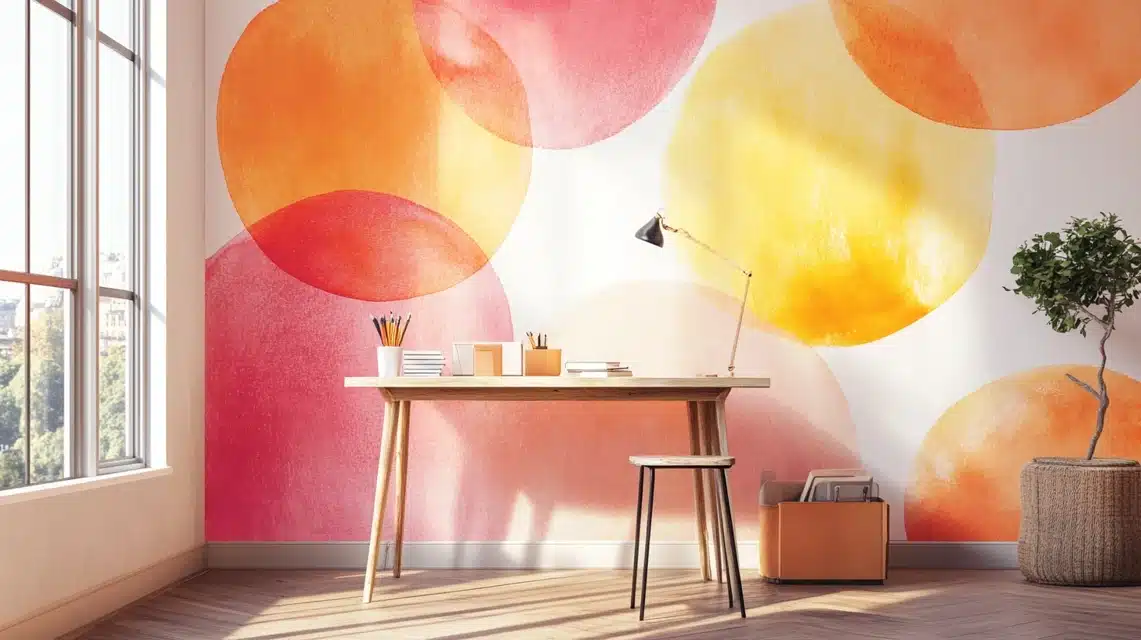
I watched my old desk transform as I added oversized circles in morning colors.
Pink and orange circles overlap like sunrise clouds across the surface.
Some circles stay bold, while others fade softly into the background.
The edges blur just enough to make the shapes feel soft and welcoming.
Small white circles float between larger ones, adding depth to the design.
This desk makes starting work each morning feel more peaceful.
Circle Tips:
- Cut circle guides from firm cardboard.
- Mix colors with glazing liquid.
- Create shadow effects with dry brushing.
- Layer circles in size order.
- Add depth with a pearl finish.
25. Arrow Pattern Table
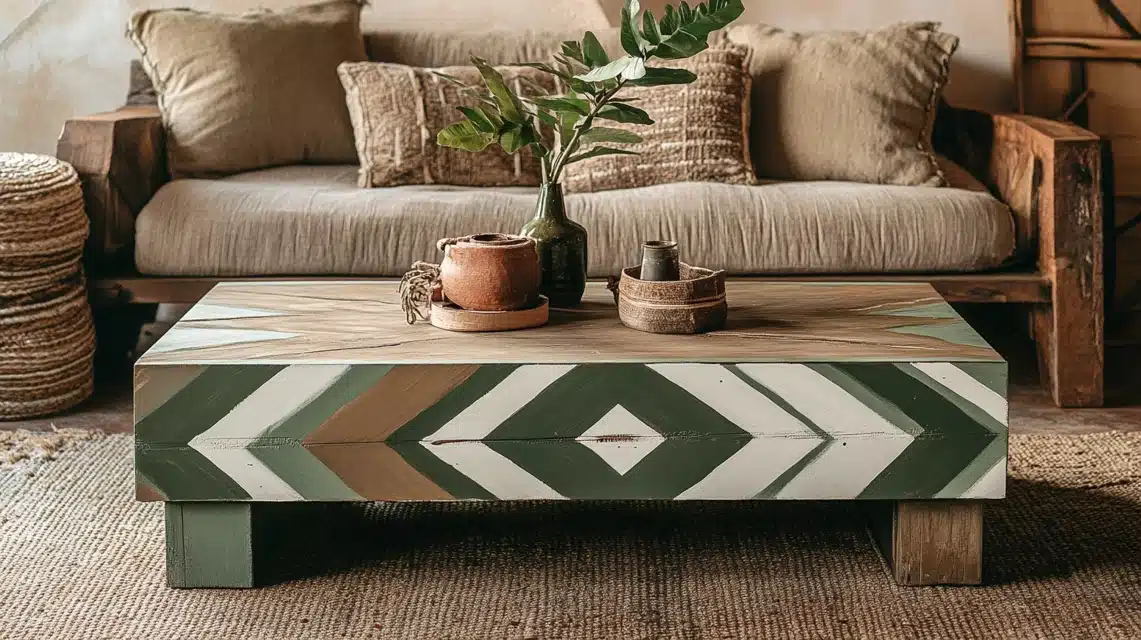
I painted arrows that seemed to move across my coffee table’s surface.
Each arrow points to the next, creating a flowing pattern around the edges.
The colors shift from dark to light as they travel around the table.
Small dots mark the spaces where arrows meet, adding extra detail.
The pattern makes the table look different from every sitting angle.
Guests often trace the arrows with their fingers while chatting.
Arrow Design Tips:
- Draw a pattern with chalk pencils first.
- Use angle tools for perfect points.
- Create movement with color shifts.
- Add metallic touches at crosspoints.
- Protect with a non-yellowing finish.
26. Nature Color Storage
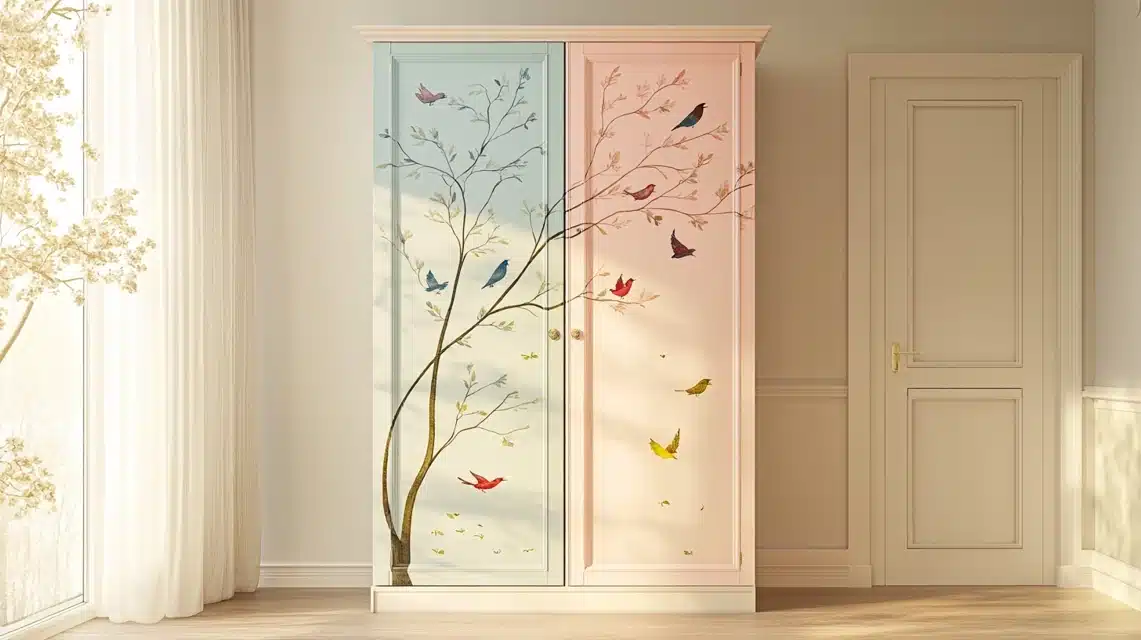
I painted tree branches that stretch across my wardrobe doors in morning mist colors.
Small birds perch on the branches, their bright feathers catching light.
The background fades from soft pink at the top to gentle blue at the bottom.
Tiny painted leaves seem to flutter between the branches.
Some birds look ready to take flight while others rest peacefully.
Opening the doors reveals small painted nests hidden inside.
Nature Paint Tips:
- Study real bird colors from photos.
- Mix special paint for feather texture.
- Layer branch shadows for depth.
- Create leaf stamps from sponges.
- Add bird sparkle with tiny glass beads.
27. Pink Stone Look Table
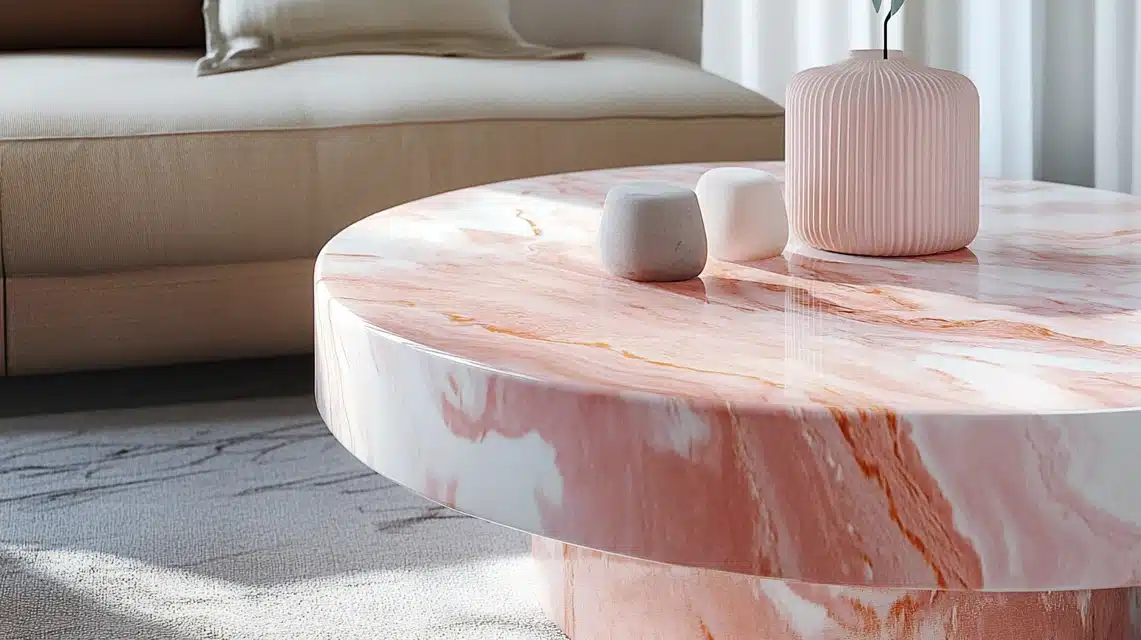
I gave my side table a look of pink stone using special painting methods.
The surface shows subtle color shifts like real stone catching the sunlight.
Tiny lines cross the surface, mimicking natural stone patterns.
The edges fade to deeper pink, creating a natural border.
White spots appear like crystal formations in real stone.
The table feels both modern and natural in my living room.
Stone Effect Tips:
- Create a base with textured primer.
- Dab colors with a natural sponge.
- Add crystal effects with salt.
- Build depth with paint washes.
- Seal with stone-look finish.
28. Music Room Chair
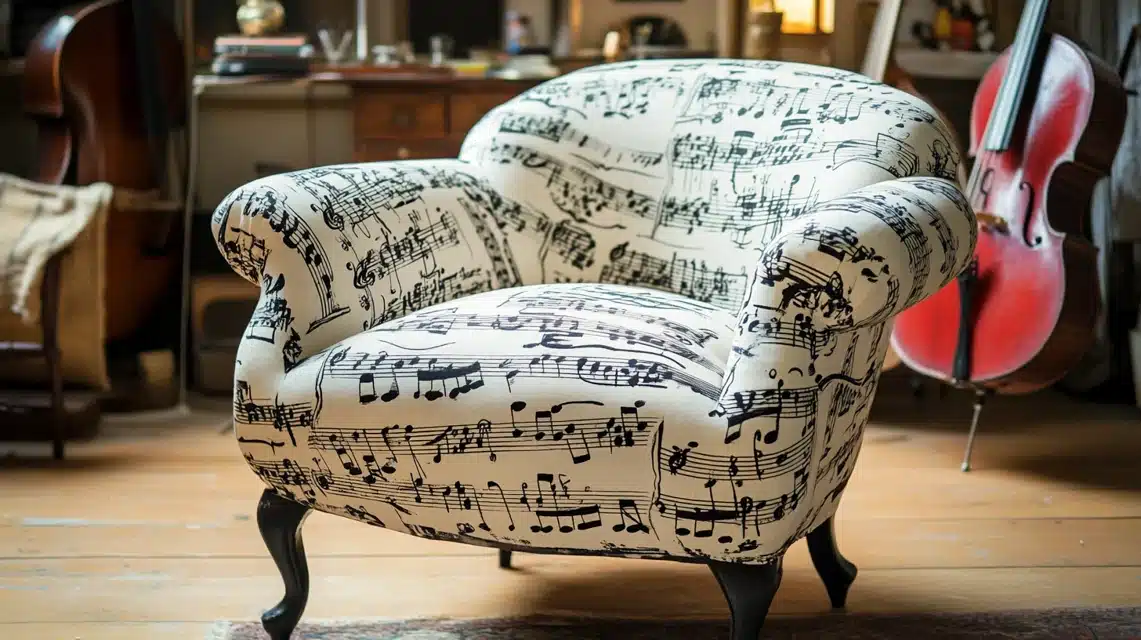
I covered this chair in painted music notes that flow like a real song.
The notes start small at the bottom and grow larger as they rise.
Black notes stand bold against the white background, creating real sheet music looks.
Small red accents mark special spots in the painted song.
The music wraps around every surface, even under the seat.
Musicians who visit try to play the song from the chair.
Music Design Tips:
- Print sheet music guides first.
- Use music stamp set for accuracy.
- Create movement with note sizing.
- Add staff lines with a pin striping tool.
- Protect with music paper coating.
29. Carry Case Side Table
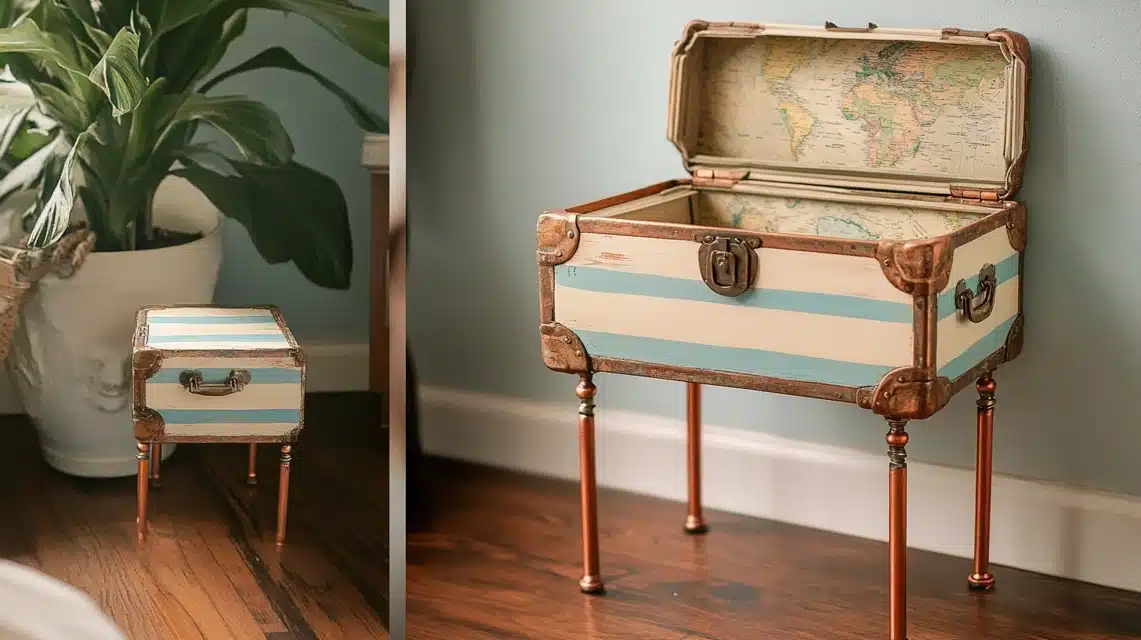
I found an old travel case and turned it into a table that tells stories of past journeys.
The outside wears stripes in sand and sea colors that remind me of beach trips.
Inside the lid, now mounted on hinges, hides a secret storage space with painted maps.
The legs, made from copper pipes, got a special paint treatment to look aged.
Each corner features small painted tags showing different destinations.
Opening the table becomes a journey through painted memories.
Travel Case Tips:
- Prep metal parts with special primer.
- Create weathered effects with salt spray.
- Paint map details with a fine liner brush.
- Add compass details with stencils.
- Seal with travel-worn finish effect.
30. Night Sky Bed Frame
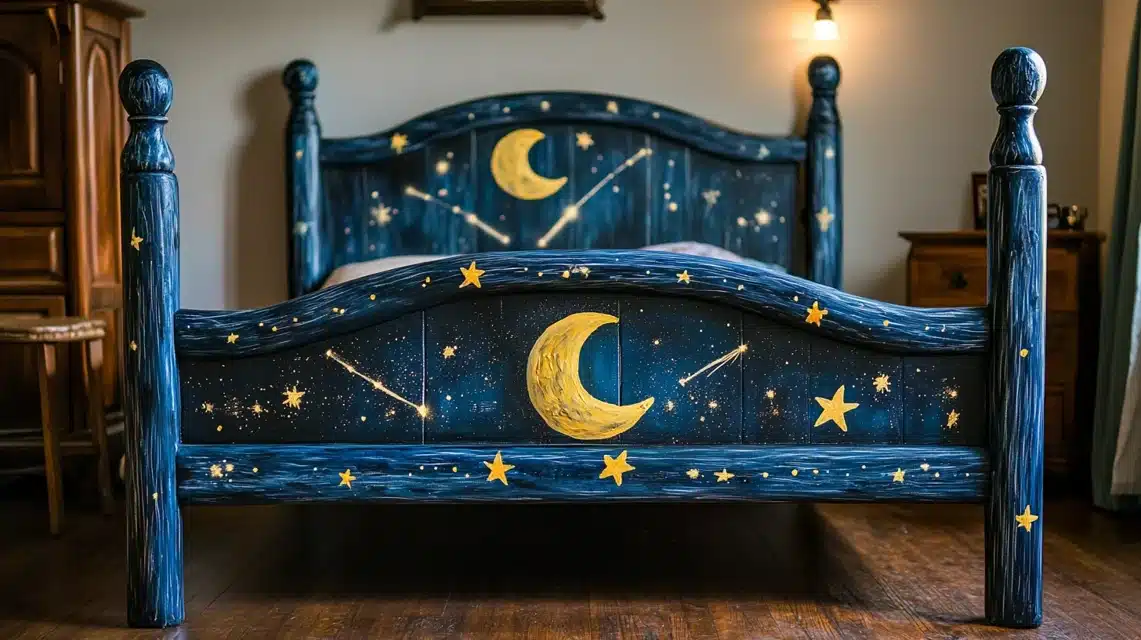
I painted my bed frame to match the view outside my window at night.
Dark blue fades into black, with spots of white creating stars and planets.
Small clouds painted in silver float across the headboard.
The footboard shows a rising moon in gentle yellow light.
Shooting stars streak across the side rails in metallic paint.
Falling asleep feels like drifting into the painted sky.
Night Sky Tips:
- Build colors in thin, dark layers.
- Create star clusters with a splatter tool.
- Use glow paint for special stars.
- Add cloud texture with wool daubers.
- Seal with a star-shine top coat.
Conclusion
My journey through furniture painting taught me that every piece holds possibility.
These thirty projects changed not just my furniture but how I see color and design in my home.
Each project built my skills from simple starts with basic paint to trying new methods.
The best part remains seeing visitors’ faces light up when they spot these unique pieces.
I learned that perfect lines matter less than creating something that brings joy.
Some pieces took several tries, but each attempt taught valuable lessons.
The paint-splattered drop cloths in my workshop tell stories of discoveries and happy accidents.
When I look around my home, each painted piece reminds me that creativity knows no limits.
Remember, every piece of furniture offers a blank canvas for your ideas to come alive.
Start small, be bold with color choices, and most importantly, enjoy the creative process.
Frequently Asked Questions
How Can I Give My Old Furniture a Funky, New Look?
Start with a solid cleaning and sanding. Pick colors that make you happy, not just what’s popular.
Try simple patterns first – stripes or dots work well for beginners.
Test your paint colors on the furniture’s bottom to ensure they work together.
What Are Some Creative Ideas for Painting Furniture?
Mix colors in ways that tell your story.
Paint drawers in different shades, add patterns to flat surfaces or create simple shapes that flow across the piece.
Nature themes, like leaves or clouds, work well for first-time painters. Keep your first project simple but meaningful.
Which Painting Techniques Are Best for a Whimsical Style?
When starting out, hand-painting simple patterns works better than complex designs.
Try using round sponges for dots, tape for stripes, or stencils for repeated patterns.
Build your design slowly, adding one element at a time. Let each layer dry fully before adding the next.
Where Can I Find Tutorials for Beginners on Furniture Painting?
Local paint shops often offer basic classes, and many craft stores have free painting workshops on weekends.
Look for simple online videos that show the whole process from start to finish.
Pick tutorials that match your skill level and show clear steps.
Can I Buy Unique, Hand-Painted Furniture Pieces Online?
Local artists often sell painted pieces through craft fairs and social media.
Many small shops offer custom painting services where you can share your ideas.
Ask about the paint type used and care instructions when buying painted furniture. Look for pieces that come with clear photos of all sides.

