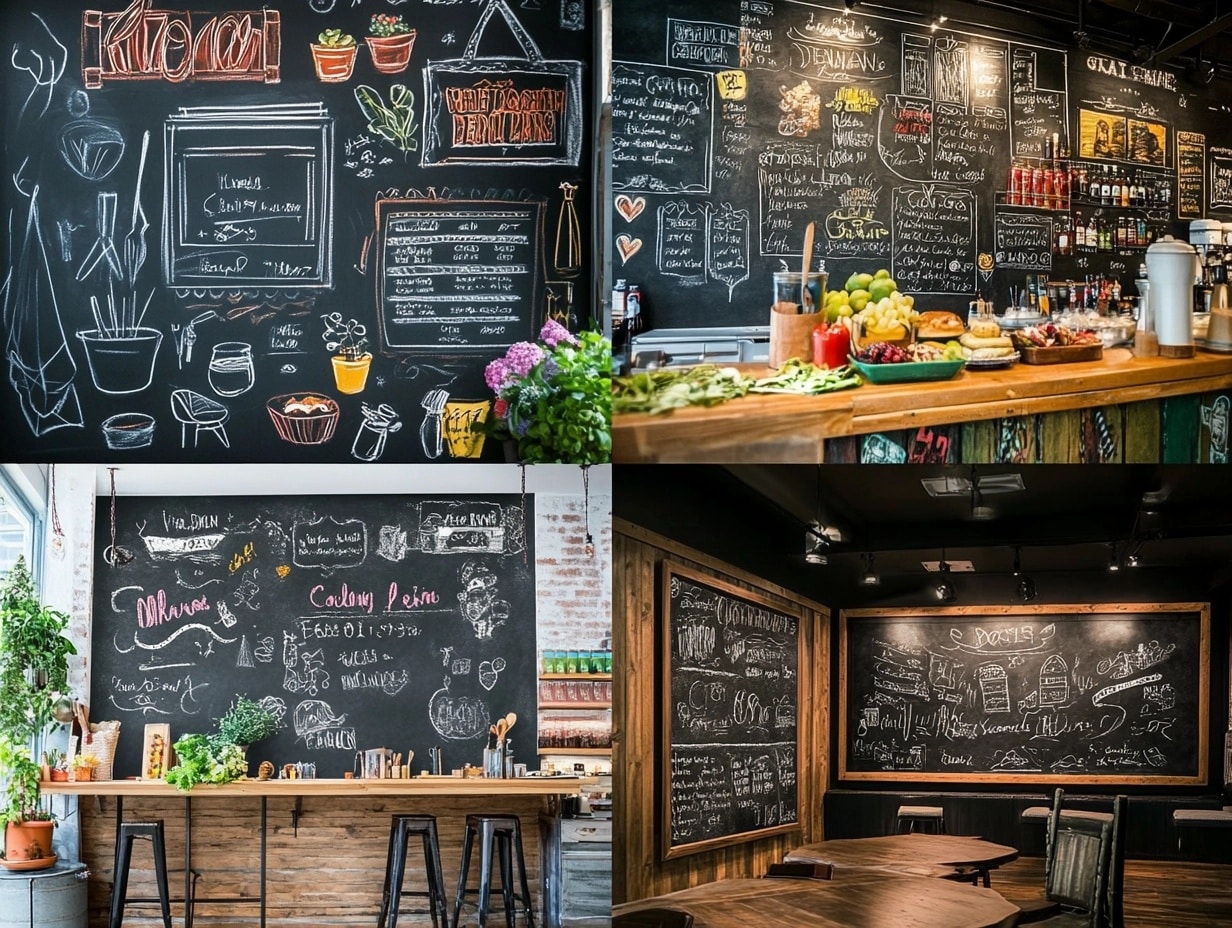
18 Unique Ways to Use Chalkboard Paint Wall in Your Home
After transforming dozens of walls with chalkboard paint, I’ve discovered endless possibilities for creative expression.
Each project brings unique challenges and rewards, turning plain walls into interactive spaces.
The key lies in proper preparation and understanding how chalkboard paint behaves on different surfaces.
Let me share my experiences and detailed steps for each creative application.
What is Chalkboard Paint?

My first experience with chalkboard paint changed how I view functional wall finishes.
This specialized coating transforms surfaces into writable, erasable spaces like traditional chalkboards.
Unlike regular wall paint, it creates a slightly textured, matte surface that grabs chalk marks while allowing easy cleaning.
I’ve experimented with every variety available. Traditional latex-based versions offer the most durability for large walls.
Spray options work perfectly for smaller projects and curved surfaces.
Magnetic versions containing metal particles add another layer of functionality. The newest tintable options let me match any color scheme while maintaining that essential chalk-friendly surface.
Many people confuse chalkboard paint with chalk paint, but they serve different purposes.
While chalk paint creates a soft, vintage finish for furniture, chalkboard paint specifically makes surfaces writable.
Through countless projects, I’ve learned each type has its perfect application.
Chalkboard Paint Wall Ideas
1. Kitchen Accent Wall
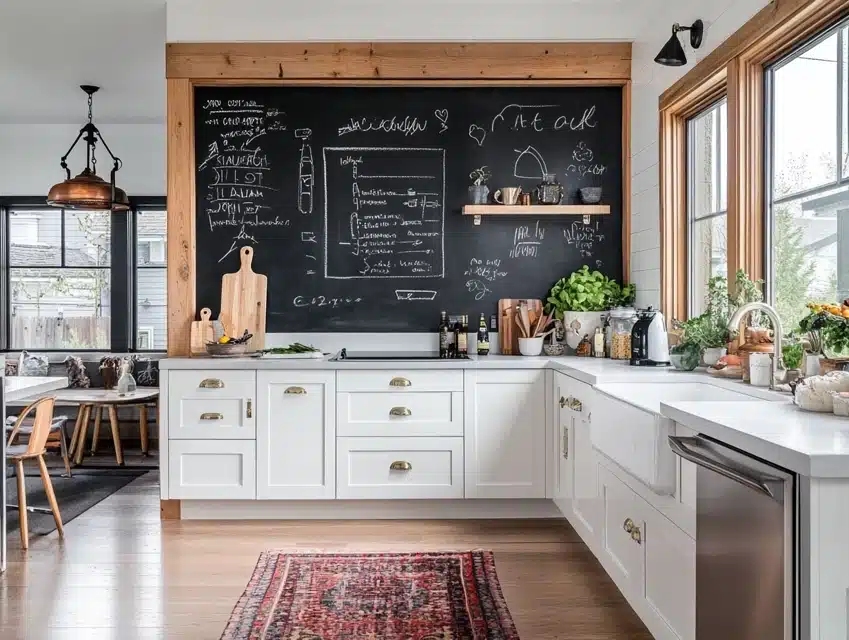
I turned my kitchen’s empty wall into a daily practical message center that my family uses.
The dark surface creates a striking contrast against the white cabinets.
My grocery lists and meal plans stay organized while adding style to the space.
Guests often comment on how the wall makes our kitchen feel more welcoming.
The surface has lasted three years, and it is regularly used and cleaned.
DIY Steps:
- Clean the wall thoroughly with TSP solution.
- Sand surface smooth, removing all texture.
- Apply primer specifically for chalkboard paint.
- Paint two thin coats, waiting 24 hours between each.
- Season the surface by rubbing the chalk sideways.
- Create sections using paint tape for the organization.
- Add a wooden frame for a finished look.
2. Kids’ Room Creative Wall
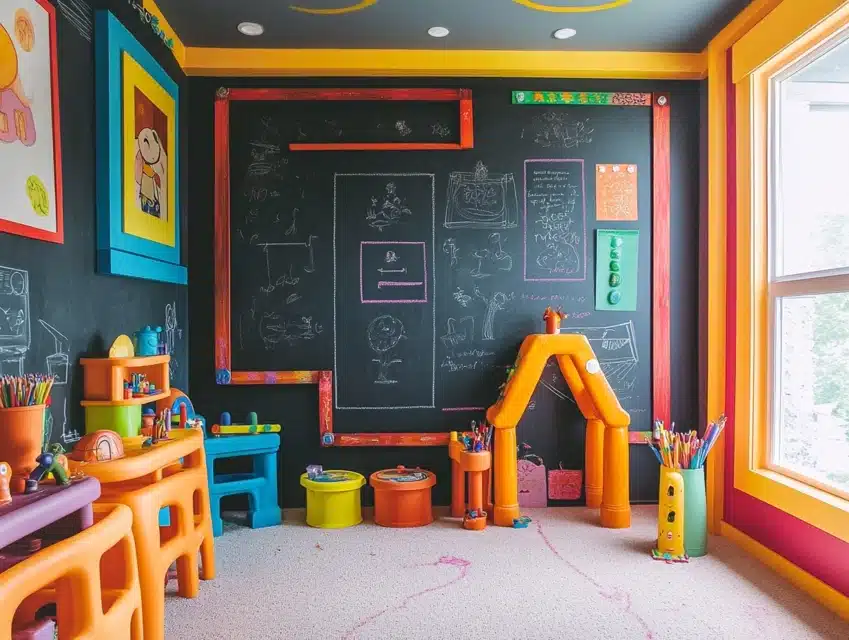
I transformed my daughter’s plain white wall into an endless canvas for imagination.
The full wall application gives plenty of space for drawing at different heights.
Adding frames painted in bright colors creates designated spaces for different activities.
The wall becomes a backdrop for storytelling and art practice.
Regular cleaning keeps the surface fresh for new creations.
DIY Steps:
- Remove switch plates and outlet covers.
- Fill any holes with spackling compound.
- Apply two coats of primer made for kids’ rooms.
- Roll chalkboard paint in thin, even layers.
- Create colorful borders using acrylic paint.
- Add measuring marks for height tracking.
- Install chalk holders at kid-friendly heights.
3. Calendar Wall Organization
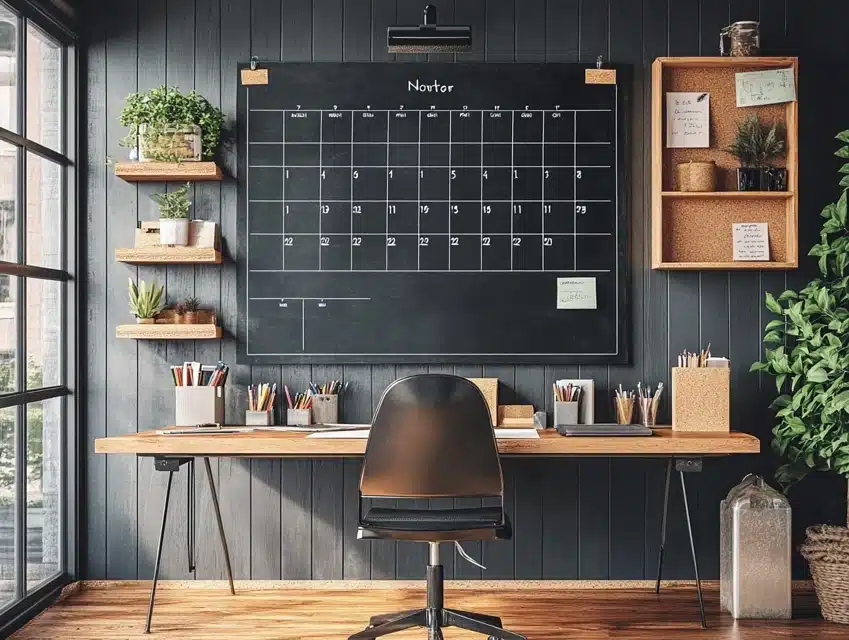
My home office needed a better planning system, so I created this oversized calendar.
The large squares make writing and erasing easy while keeping everything visible.
I added a notes section on the side for extra reminders.
The permanent grid lines help maintain neat organization.
This setup saves paper while keeping schedules clear.
DIY Steps:
- Measure and mark perfect squares for calendar days.
- Use level to ensure straight lines throughout.
- Paint the base coat of chalkboard paint first.
- Create a permanent grid using paint markers.
- Add month header space at the top.
- Install a cork strip for pinning items.
- Make a template for quick monthly setup.
4. Living Room Art Gallery
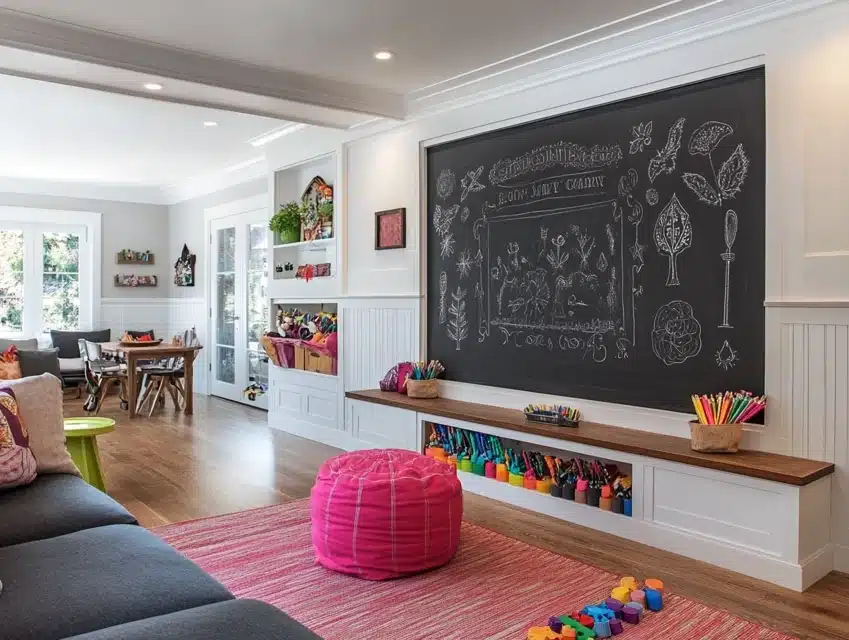
I created this conversation piece that changes with our moods and seasons.
The wall becomes a backdrop for parties and gatherings.
Guests enjoy adding their artistic touches during visits.
Different colored chalks create stunning visual effects.
The space feels alive and ever-changing.
DIY Steps:
- Test wall texture for smooth finish needs.
- Apply multiple thin coats for the best coverage.
- Create a raised border with decorative molding.
- Install hidden lighting to highlight the artwork.
- Add a small shelf for chalk storage.
- Keep cleaning supplies nearby but hidden.
- Create templates for regular designs.
5. Office Productivity Wall
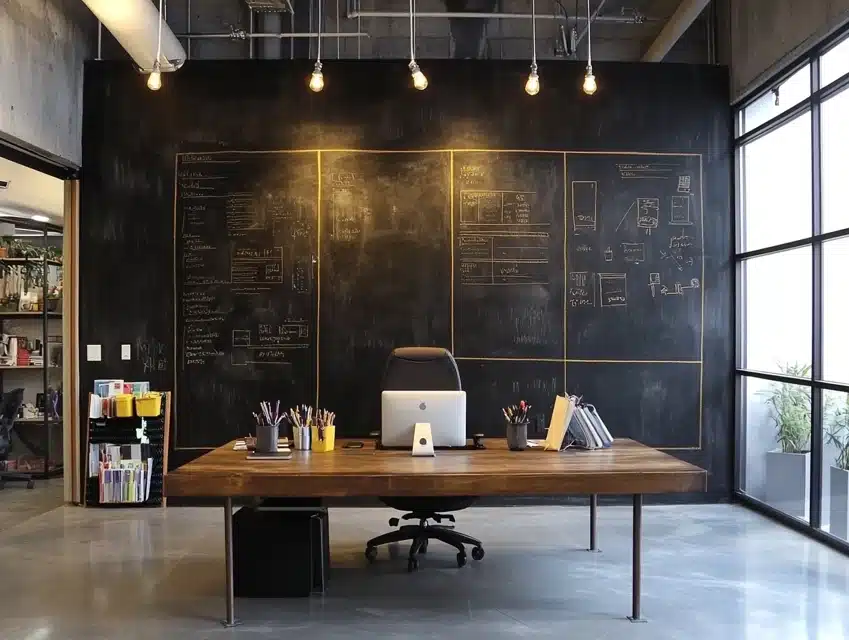
I designed my office wall to boost creativity during brainstorming sessions.
The dark surface reduces eye strain during long work hours.
Different sections help organize various project stages.
The wall has become central to my daily workflow planning.
Client meetings become more interactive with this visual aid.
DIY Steps:
- Test the wall surface for any repairs needed.
- Apply magnetic primer for added functionality.
- Paint smooth, even coats of chalkboard paint.
- Create divided sections using gold paint lines.
- Install hidden supply storage nearby.
- Add task lighting above writing areas.
- Create a template for weekly planning setup.
6. Interactive Entryway
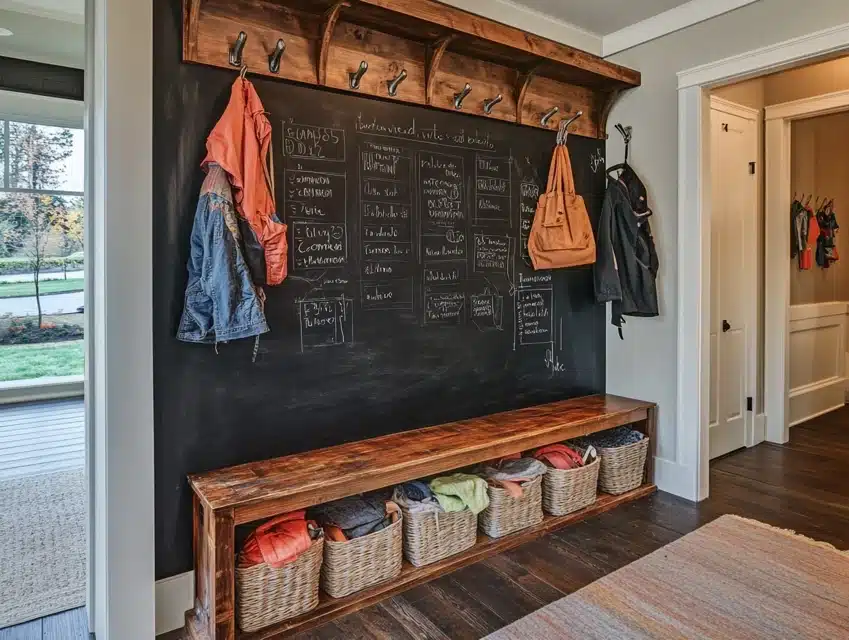
My entryway wall turned into our family’s communication hub.
Messages and reminders stay visible as family members come and go.
The space feels more welcoming with personal greetings.
Adding hooks below creates a functional message center.
Weekly cleaning keeps the surface fresh for new notes.
DIY Steps:
- Prep the wall by filling nail holes.
- The sand surface is completely smooth.
- Apply primer designed for high-traffic areas.
- Paint two thin coats with a foam roller.
- Install decorative frame around edges.
- Add coat hooks below the message area.
- Create sections for different family members.
7. Rustic Dining Room Display
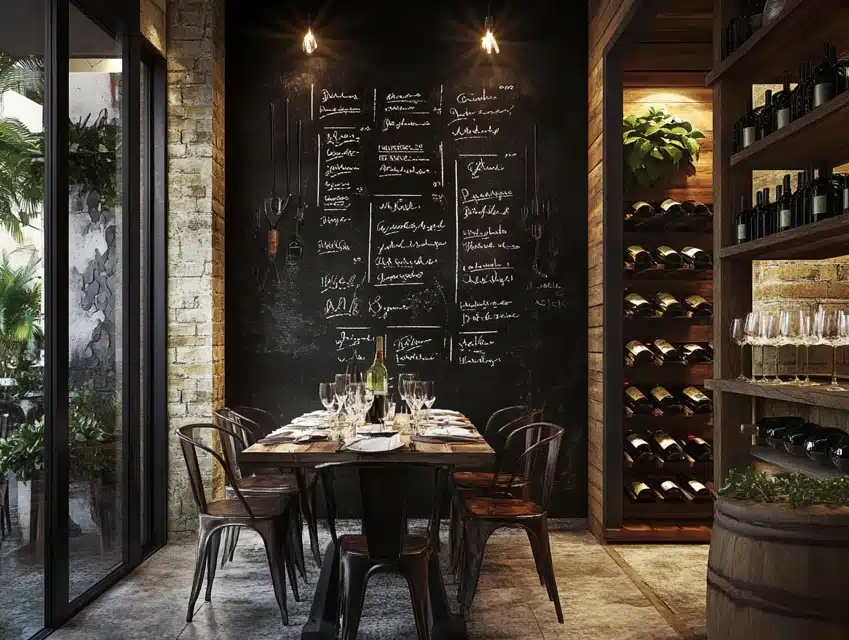
I created this feature wall to showcase our weekly menus and wine selections.
The dark surface contrasts beautifully with our wooden furniture.
Dinner parties become more special with handwritten menus.
The rustic frame adds farmhouse charm to our space.
Guests often comment on the unique dining atmosphere.
DIY Steps:
- Clean the wall and repair any damage.
- Apply textured primer for a rustic effect.
- Paint multiple thin coats of chalkboard paint.
- Create a wooden frame from reclaimed lumber.
- Install subtle accent lighting.
- Add wine glass rack below.
- Create a template for menu layouts.
8. Home Bar Menu Wall

I transformed the wall behind our home bar into an ever-changing cocktail menu that adds professional flair to our entertaining space.
The dark surface creates the perfect contrast for colorful chalk art that showcases our signature drinks.
Each section features different categories – one for classic cocktails, another for seasonal specials, and a space for wine and beer offerings.
My guests love reading through the creative drink descriptions while waiting for their beverages.
The wall has become a focal point during parties, often inspiring conversations about cocktail recipes and mixing techniques.
DIY Steps:
- Clean the wall surface with a degreasing solution thoroughly.
- Apply heavy-duty primer suitable for high-moisture areas.
- Paint three thin coats for durability in a bar environment.
- Install LED strip lighting for menu visibility.
- Create permanent sections using paint markers.
- Add protective coating for easy cleaning.
- Install a small shelf for specialty chalk storage.
9. Bedroom Headboard Feature
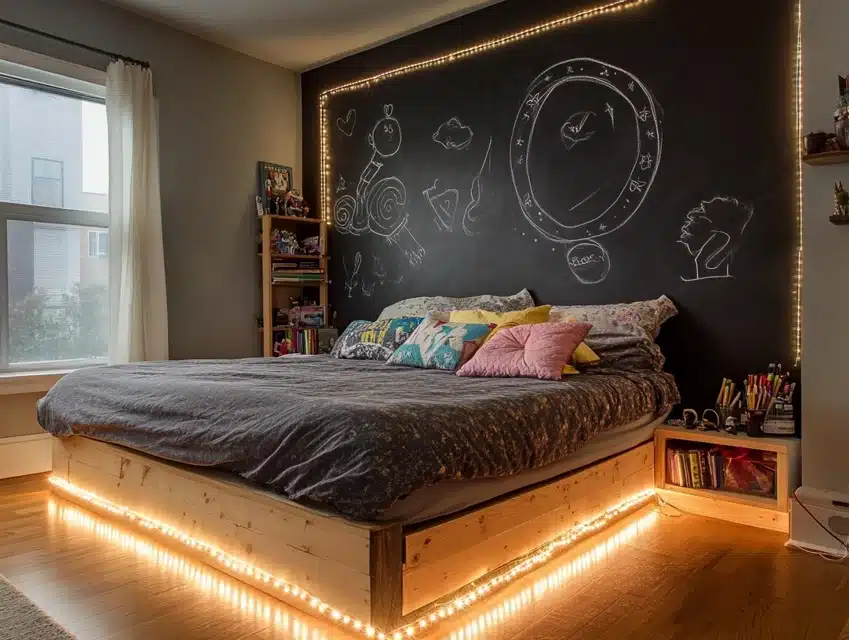
My bedroom needed a focal point, so I created this stunning chalkboard headboard wall that extends from floor to ceiling behind our bed.
The surface provides endless opportunities for changing the room’s mood through different artwork and quotes.
I often draw seasonal designs that complement our bedding choices, making room decoration versatile.
The wall doubles as a dream journal where I can quickly jot down ideas that come in the night.
Soft lighting installed at the edges creates a magical glow against the dark surface, especially in the evening hours.
DIY Steps:
- Test wall texture and sand completely smooth.
- Apply sound-dampening primer for a better sleep environment.
- Paint multiple thin coats extending past bed width.
- Install dimmable LED strips around the edges.
- Create height markers for consistent designs.
- Add floating shelves for chalk and supplies.
- Install headboard frame if desired.
10. Pantry Door Organization
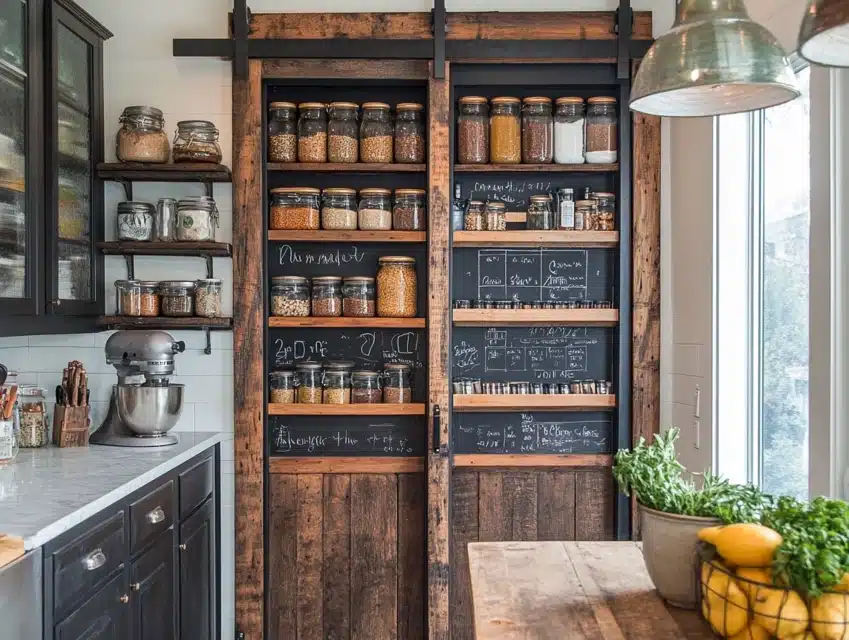
I converted our plain pantry door into an efficient organization system that completely transformed our kitchen storage habits.
The entire door surface becomes a dynamic inventory list that changes as we use and replace items.
Creating designated zones for different food categories makes grocery shopping and meal planning much easier.
The bottom section features a rotating meal plan that helps us use pantry items efficiently.
Even the door edges have narrow strips of chalkboard paint for quick notes and reminders.
DIY Steps:
- Remove the door and lay flat for painting.
- Sand the entire surface, including the edges.
- Apply primer specifically for painted surfaces.
- Paint both sides if desired for extra functionality.
- Create permanent grid lines for the organization.
- Install door bumpers to protect the paint.
- Add a small chalk holder to the door frame.
11. Garage Organization Wall
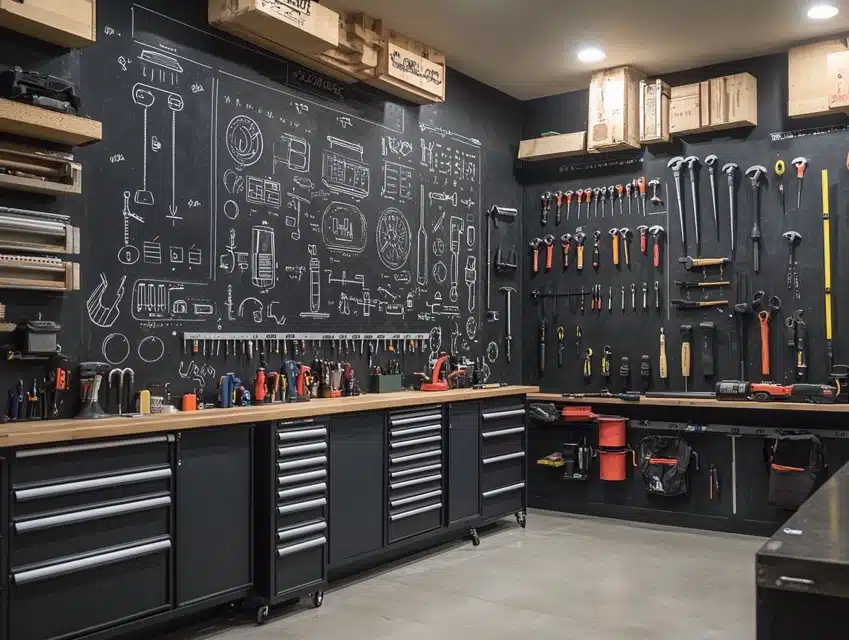
I converted the main wall of my garage into a comprehensive tool organization system that revolutionized my workshop space.
The dark surface extends from floor to ceiling, creating perfect contrast for detailed diagrams and measurements of ongoing projects.
Each section is carefully divided into zones – one for tracking tool inventory, another for project plans, and a special area for maintenance schedules.
The wall has become essential for keeping track of borrowed tools and lending dates.
Monthly cleaning and updates help maintain clear visibility of all information, especially in the dusty garage environment.
DIY Steps:
- Clean the wall thoroughly to remove all grease and grime.
- Apply heavy-duty primer suitable for garage conditions.
- Paint extra coats for durability in the workshop setting.
- Create a permanent grid system for the organization.
- Install proper task lighting above work areas.
- Add tool silhouette outlines for easy storage.
- Create dedicated project planning sections.
12. Seasonal Celebration Wall
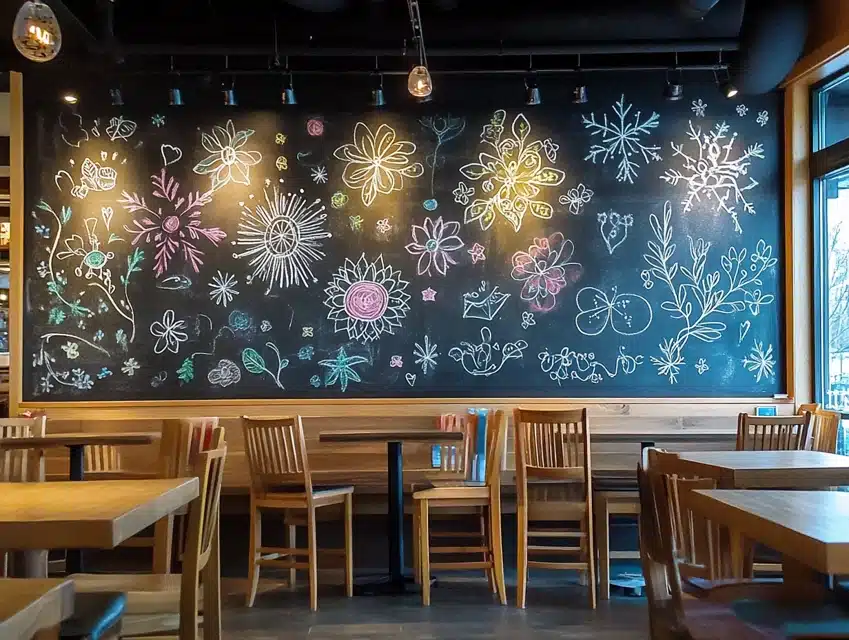
I designed this wall to be our family’s year-round celebration canvas, changing its appearance completely with each passing season.
The large surface is a backdrop for holiday gatherings, featuring intricate chalk art that captures each season’s spirit.
Spring brings flowering branches and bird designs, while winter showcases snowflakes and holiday themes.
Fall displays colorful leaf patterns, and summer bursts with beach and garden motifs.
The wall has become our family’s visual calendar, marking time through creative seasonal transitions.
DIY Steps:
- Prepare the wall with smooth surface primer.
- Apply multiple thin coats for the perfect texture.
- Create subtle permanent markers for the design layout.
- Install adjustable accent lighting.
- Add a frame with seasonal decorative elements.
- Create templates for quick seasonal changes.
- Set up hidden storage for chalk art supplies.
13. Café Corner Creation
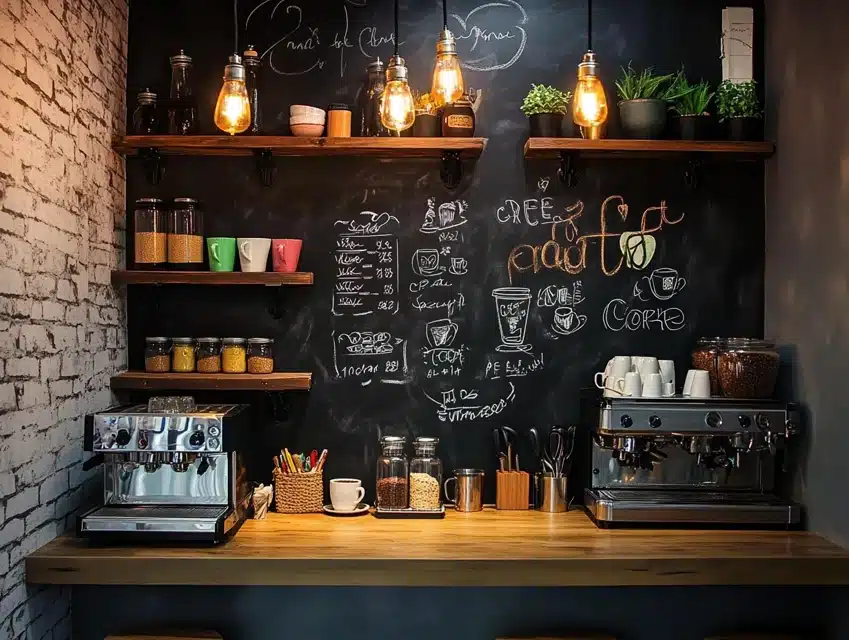
I transformed an unused kitchen nook into a charming café corner that brings the ambiance of a coffee shop right into our home.
The wall features our daily coffee specials, favorite breakfast items, and quotes about morning rituals.
Small shelves display our coffee mug collection against the dark background, creating a professional café feel.
The space has become our favorite morning gathering spot, with coffee-themed artwork and pricing lists like real cafés.
Weekly updates to the menu keep the space feeling fresh and exciting for families and visitors alike.
DIY Steps:
- Test wall area for moisture resistance.
- Apply primer suited for the kitchen environment.
- Paint several thin coats for durability.
- Install floating shelves for coffee supplies.
- Create permanent menu sections with paint markers.
- Add vintage-style lighting fixtures.
- Install coffee cup hooks and display areas.
14. Nursery Growth Wall
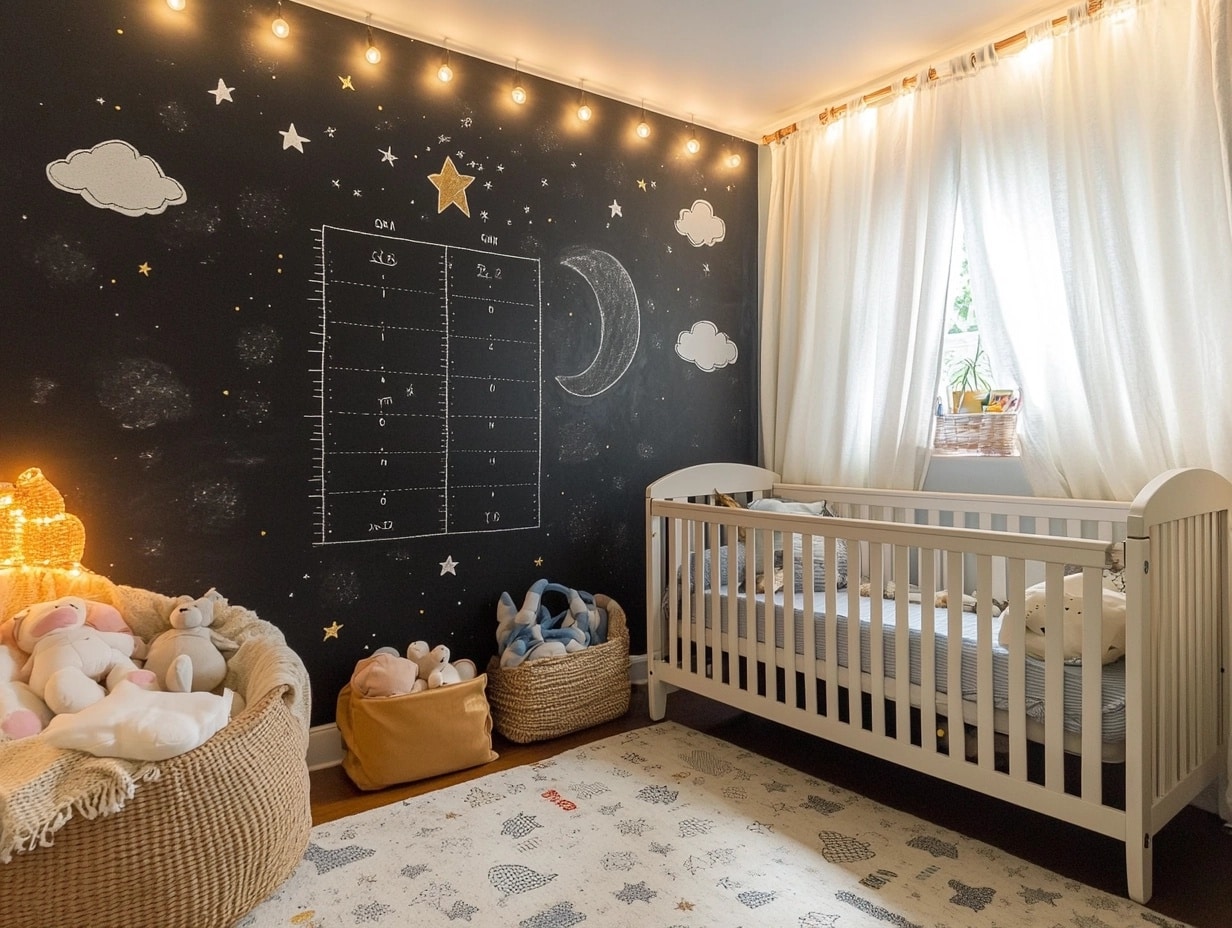
I created a special wall in my baby’s nursery, documenting every precious milestone and growth measurement.
The chalkboard paint’s gentle matte finish softens the room’s atmosphere while providing the perfect backdrop for monthly photos.
Each height marking becomes a permanent record of our little one’s growth, accompanied by special notes about achievements and funny moments.
Small clouds and stars painted in permanent white create a dreamy frame around the measuring area.
The wall transforms from a simple height chart to a detailed memory keeper as our baby grows.
DIY Steps:
- Test paint samples for zero VOC content.
- Apply baby-safe primer and let cure completely.
- Paint multiple thin coats with proper ventilation.
- Create permanent measuring lines with paint pens.
- Install monthly photo area markers.
- Add decorative elements that won’t wash away.
- Create template for milestone documentation.
15. Bathroom Beauty Wall
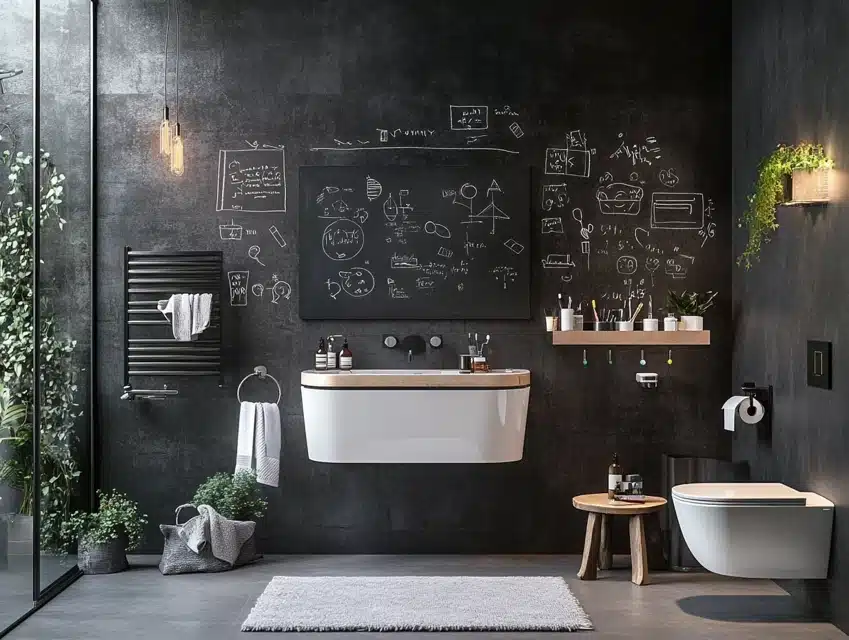
I transformed our bathroom wall into an inspiring space that brightens every morning routine.
The chalkboard surface, specially treated for high-moisture environments, displays daily affirmations and beauty tips.
A dedicated section holds our family’s morning schedule, eliminating bathroom timing conflicts.
Small drawings of product organization help everyone keep their items in the proper places.
The wall includes a special area for guests to leave fun messages or doodles during visits.
DIY Steps:
- Prepare the wall with mold-resistant primer.
- Apply moisture-barrier underlayment.
- Paint extra coats for bathroom conditions.
- Install proper ventilation system.
- Create a water-resistant border design.
- Add special coating for humidity protection.
- Install specialized chalk holders.
16. Laundry Room Lists
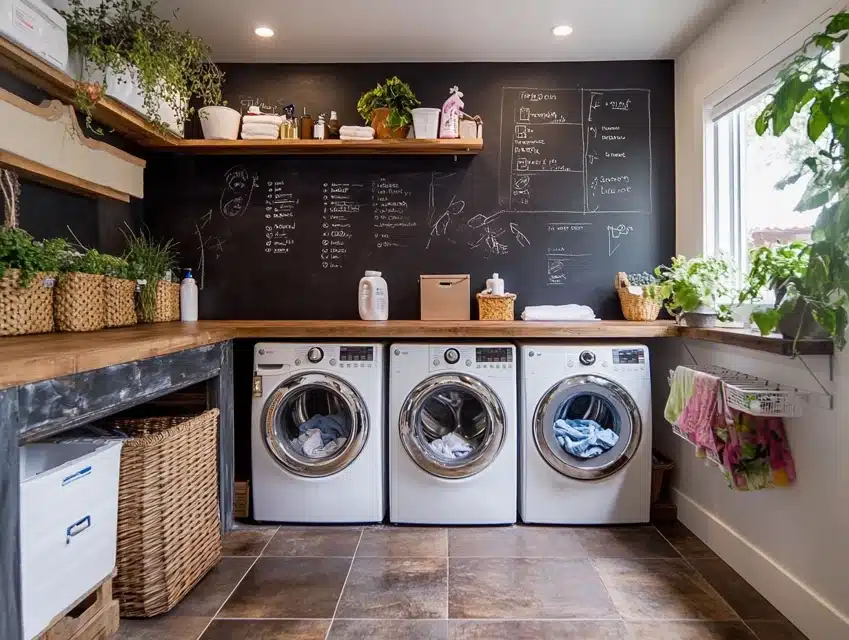
I redesigned our laundry room with a functional chalkboard wall that makes washing clothes feel less like a chore.
The surface features permanent sections for sorting instructions, stain removal guides, and weekly laundry schedules.
Special symbols remind family members about checking pockets and separating colors.
A dedicated space tracks missing socks with humorous “wanted” posters.
The wall includes a chart showing which family members’ loads are progressing.
DIY Steps:
- Clean the wall thoroughly with a degreasing agent.
- Apply primer suited for high-humidity areas.
- Paint multiple coats for heavy-use durability.
- Create permanent sections for instructions.
- Install a fold-down drying rack nearby.
- Add clothing care symbol guide.
- Create a lost-and-found tracking area.
17. Study Space Success Wall
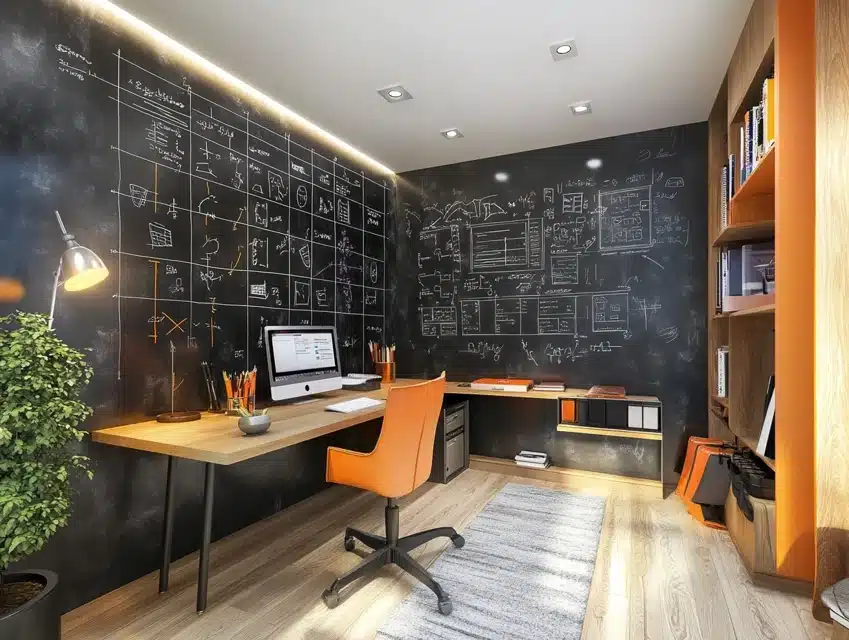
I designed this learning wall to make homework and studying more engaging and interactive.
The surface spans from floor to ceiling and is divided into distinct zones for different subjects—math problems on top, vocabulary in the middle, and project planning at the bottom.
Permanent grid lines help with geometry and graph work, while the smooth surface makes erasing and redrawing effortless.
Special boxes drawn in permanent marker create dedicated spaces for daily assignments and upcoming test dates.
The wall features a “celebration corner” where academic achievements get special recognition.
DIY Steps:
- Test the wall for flatness and repair any bumps.
- Apply education-grade primer for frequent use.
- Paint multiple thin coats for an optimal writing surface.
- Create permanent subject division lines.
- Install adjustable task lighting.
- Add magnetic strip for hanging papers.
- Create template for weekly study planning.
18. Photo Backdrop Design
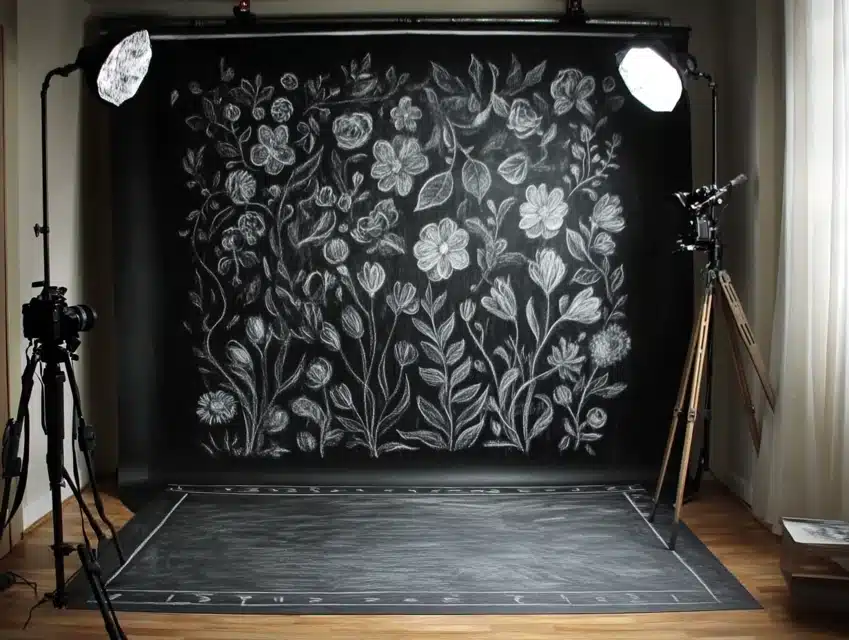
I transformed an entire wall into a dynamic photo studio backdrop that changes with every special occasion.
The surface extends wider than standard camera frames, allowing multiple pose positions and group shots.
Carefully placed permanent markers help me center designs quickly for each new backdrop theme.
The wall includes hidden storage for photography props and chalk supplies.
Special lighting installed at strategic angles eliminates glare while highlighting chalk art designs.
DIY Steps:
- Prepare the wall with ultra-smooth surface primer.
- Apply multiple thin coats for a perfect finish.
- Create a subtle marking grid for design centering.
- Install a professional photo lighting system.
- Add hidden storage solutions for supplies.
- Create height markers for proper posing.
- Install backdrop support hooks.
Final Tips for Success:
- Always test the paint in small areas first
- Keep chalk supply variety for different effects
- Document successful designs with photos
- Maintain a regular cleaning schedule
- Create templates for favorite designs
Benefits of Using Chalkboard Paint
1. Versatility in Home Decor
After installing hundreds of chalkboard walls, I’ve seen them work in every room style.
Traditional homes use them for classic message centers with elegant frames.
Modern spaces incorporate geometric chalkboard shapes for dramatic effect.
Even minimalist designs benefit from a chalk surface’s clean lines and simple beauty.
My rustic-style projects often feature rough wooden frames around smooth chalkboard centers.
2. Encouraging Creativity and Interaction
I’ve watched quiet family spaces transform into hubs of activity.
Children naturally gravitate toward these interactive walls, creating endless artwork.
Adults rediscover their playful side, leaving messages and drawings for others.
Family game nights take on new life with wall-sized scoreboards and drawing games.
The surface encourages spontaneous creativity that digital screens can’t match.
3. Practical Organization Solutions
My kitchen installations quickly become command centers for busy families.
Weekly meal plans, shopping lists, and schedules stay visible and easily updated.
Home offices benefit from large-scale project planning spaces.
Students use their walls for study guides and homework planning.
Even small spaces work better with vertical organization options.
4. Personal Expression Opportunities
Each wall becomes a reflection of its users’ personalities.
Seasonal decorations change with simple chalk art updates.
For special occasions, you can get custom backdrops without a permanent commitment.
Family milestones and memories get documented in creative ways.
The surface adapts to changing needs and styles over time.
5. Cost-Effective Design Impact
Compared to other wall treatments, chalkboard paint offers remarkable value.
One wall can serve multiple purposes throughout its lifetime.
Updates and changes need only chalk, not expensive materials.
Maintenance costs stay low with simple cleaning methods.
The investment continues paying off through years of use.
Conclusion
After creating dozens of chalkboard walls, I’ve found they bring a unique personality to any space.
The versatility of chalkboard paint allows endless creativity while adding practical functionality.
Success comes from proper preparation and patience during application.
Each project taught me new techniques for better results.
Remember that your wall can always be updated or changed as needs evolve.
The joy of chalkboard walls lies in their ever-changing nature—they grow and adapt to your space and lifestyle.
If you’re unsure, start with a small area and let your creativity guide the project’s evolution.
With proper care, your chalkboard wall will provide years of functional beauty and creative expression.
Frequently Asked Questions
Is Chalkboard Paint Good for Walls?
Yes, chalkboard paint works well on most wall surfaces. From my experience, it’s most successful on smooth, properly primed walls.
With proper preparation and maintenance, it lasts for years.
For best results, just ensure good ventilation and low humidity in the room.
How to Put Chalkboard Paint on Walls?
Start with thorough cleaning and sanding. Apply quality primer specifically for chalkboard paint.
Use a foam roller for smooth coverage, applying 2-3 thin coats rather than one thick coat.
Wait 24 hours between coats. Season the surface by rubbing the entire wall with chalk and erasing before use.
What Is the Best Thing to Paint a Chalkboard On?
Smooth, non-porous surfaces work best. In my projects, drywall, wood, metal, and even glass have proven excellent bases.
Avoid textured walls or surfaces with lots of movement.
Always test in a small area first and use proper primers for each material.
Is It Difficult to Paint Over Chalkboard Paint?
No, but it requires proper preparation. Sand the surface lightly, apply a quality primer (usually two coats), then paint with your chosen color.
I’ve found that oil-based primers work best for completely covering chalkboard paint.
Multiple thin coats provide better coverage than one thick coat.
Can You Make Any Color of Chalkboard Paint?
Yes, though traditional black or dark green work best for contrast. I’ve successfully used navy, dark gray, and even deep purple.
Remember that lighter colors may show chalk residue more prominently.
Test chalk visibility on your chosen color before committing to a large area.


