DIY Sideboard: Step-by-Step Construction Guide
Want to build a piece that fits your space perfectly? A DIY sideboard might be your answer. I built my first one last year, which changed how I store items in my dining room.
Building your sideboard puts you in control. You pick the size, style, and storage for your home. Plus, it costs less than buying one from a store.
Don’t worry if you’re new to woodworking. This guide breaks down each step to help you create a solid, good-looking piece. I’ll share what I learned from making several DIY sideboards, including tricks that save time and prevent mistakes.
Ready to start? Let’s walk through what you need to know. From picking your design to adding the final touches, you’ll learn how to build a sideboard that looks like it came from a high-end store.
Why Build Your Sideboard?
I built my first DIY sideboard last year, and let me tell you – it was worth every minute. Many people ask me if making their own furniture makes sense. The answer depends on what you value most.
Cost Comparison of DIY vs. Buying a Sideboard
Store-bought sideboards often come with hefty price tags. A basic model costs $500, while higher-end pieces cost $2,000 or more.
In contrast, a DIY sideboard typically costs between $200 and $400 in materials. This includes:
- Wood (usually $100-150)
- Hardware ($30-50)
- Finishing materials ($40-60)
- Tools (if you need to buy them: $50-100)
The money you save can go toward better materials or other home projects. Plus, you control the quality of each piece that goes into your DIY sideboard.
Benefits of a Custom DIY Sideboard
Making your sideboard puts you in charge of every detail. You pick the size that fits your space – no more settling for “close enough.”
Want specific compartments for your items? You can add them. Do you need a certain height to match other furniture? You can build it precisely. The choice of wood, finish, and hardware stays in your hands.
I made mine slightly taller than standard to fit my height. I don’t have to bend down as much when getting items. These small touches make a big difference in daily use.
The quality factor matters, too. When you build a DIY sideboard, you can:
- Select premium wood that lasts longer.
- Use stronger joints than mass-produced pieces.
- Add extra support where needed.
- Fix any issues right away.
Store-bought pieces often use cheaper materials to cut costs. With your DIY sideboard, you know exactly what goes into it. My first DIY sideboard still looks great after years of use.
Materials and Tools You’ll Need to Build Your Sideboard
| Category | Item | Details |
|---|---|---|
| Materials | Stock Wall Cabinets | (2) 36in x 30in x 12in |
| Birch Plywood | (1) 3/4in x 4ft x 8ft | |
| Edge Banding | For covering plywood edges | |
| Pine Board | (1) 1in x 3in x 8ft | |
| Furniture Legs | (6) Legs (2 packs purchased) | |
| Furniture Leg Hardware | (2 packs purchased) | |
| Hardware | Screws, nails, etc. | |
| Tools | 1 1/4in #8 Construction Screws | For securing parts |
| 2in Brad Nails | For nailing components | |
| Miter Saw | For precise angle cuts | |
| Table Saw | For straight cuts on plywood | |
| Wood Glue | For bonding wood pieces | |
| Wood Filler | To fill nail holes | |
| Sander | For smooth finishing | |
| Paint Sprayer (Optional) | The link provided to a budget option | |
| Nail Gun | For securing with nails | |
| Safety Glasses | Eye protection | |
| Drill | For pilot holes and screwing | |
| Iron | To apply edge banding | |
| Extra Fine Finish Saw Blade | Recommended brand: Diablo | |
| Hardware Install Template | For accurate hardware placement |
Step-by-Step Guide to Creating Your Sideboard
Building a sideboard lets you create exactly what you want. Here’s how to make it happen, step by step.
Step 1: Connect Your Cabinet Bases – The Foundation
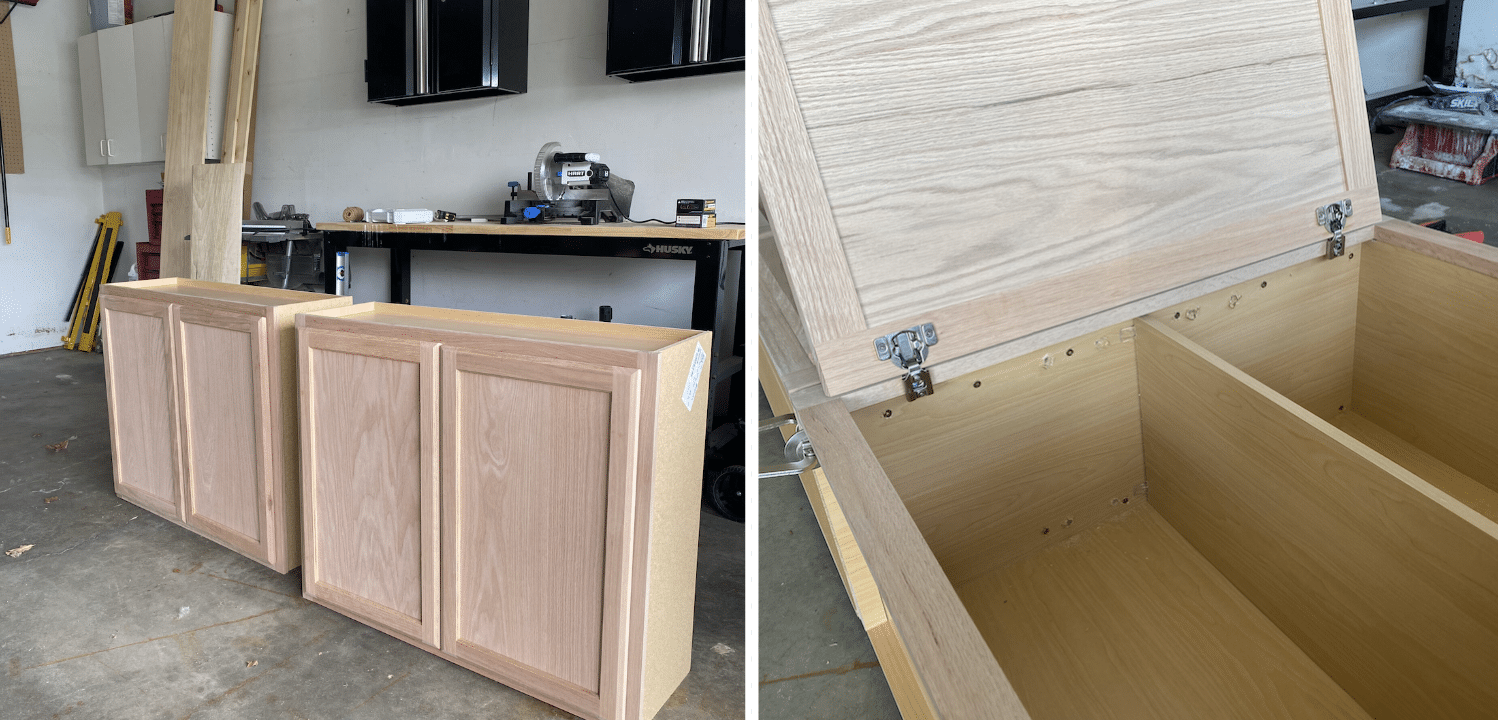
Getting the base right sets up your whole project for success. I’m sharing what I’ve learned from making several DIY sideboards.
You’ll need:
- Stock cabinets
- Support boards
- Wood screws
- Level
- Drill
First, place cabinets on a flat surface. Check they’re level side-to-side and front-to-back. Add support boards between cabinets and screw them in place.
Pro tip: Use shims if your floor isn’t perfectly level. This small step prevents future issues.
Step 2: Give It Legs – Adding Sturdy Support
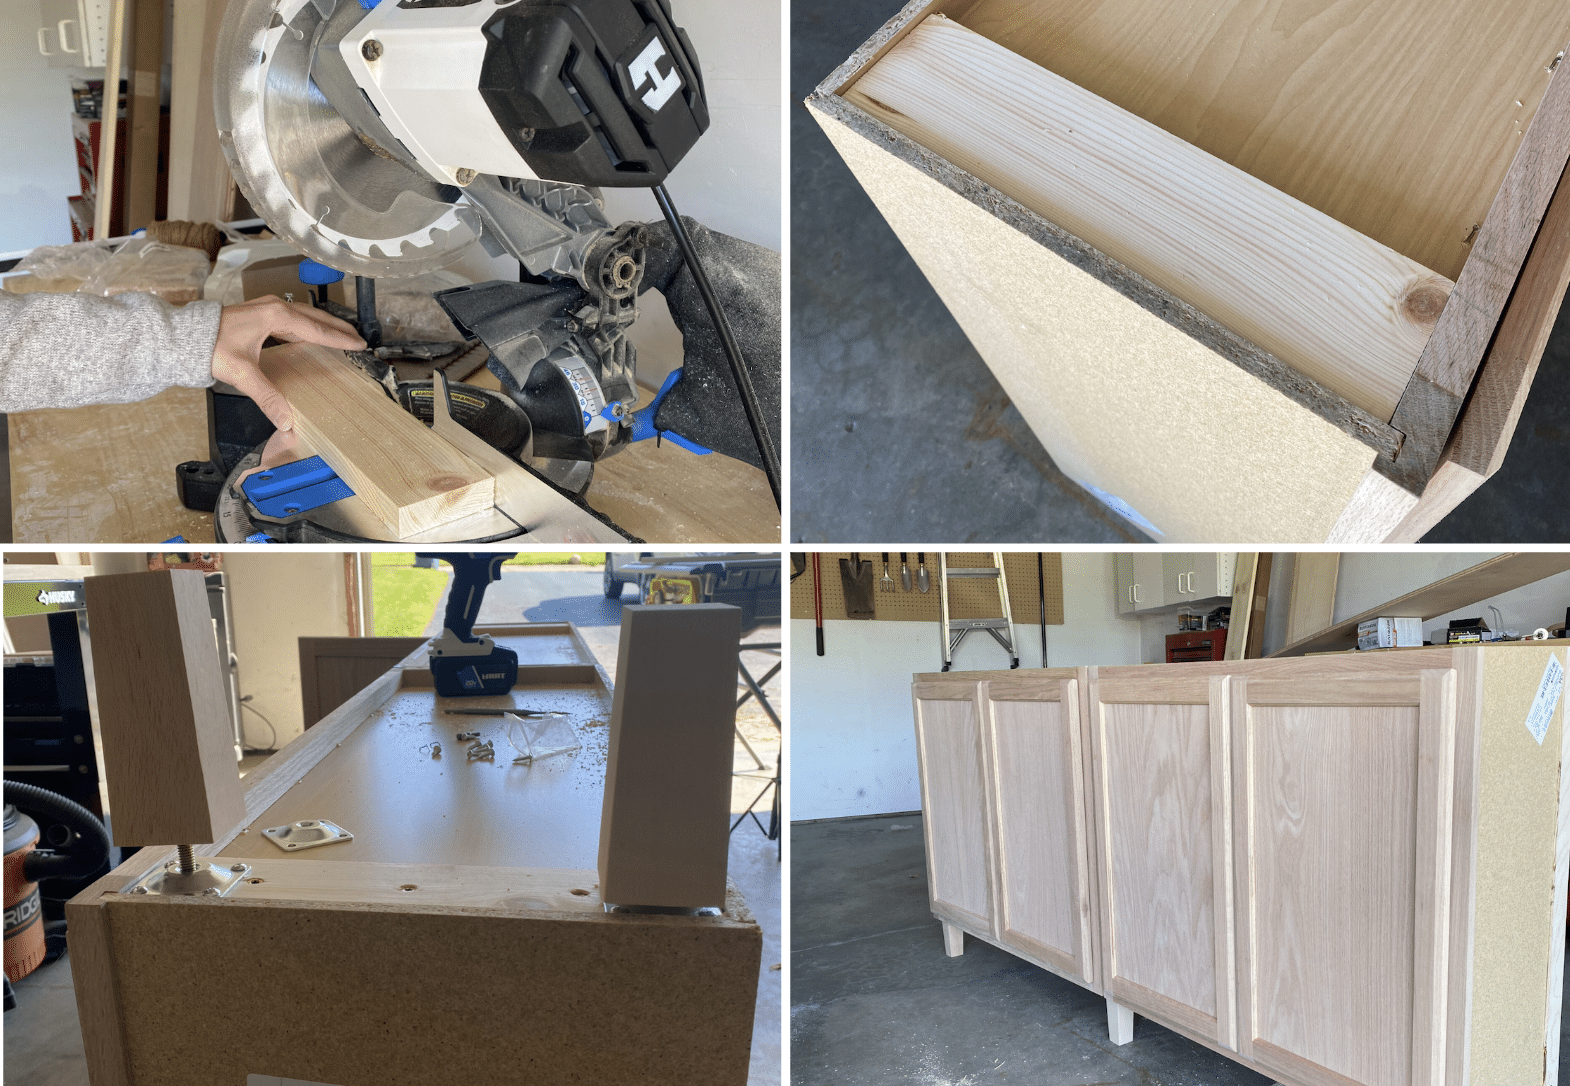
Good legs make your sideboard stable and give it the right height.
Steps for success:
- Mark leg positions carefully
- Install mounting plates
- Attach legs firmly
- Check level from all sides
Test stability before moving on. A slight wobble now becomes bigger when the project is done.
Step 3: Style the Top and Sides – Building the Frame
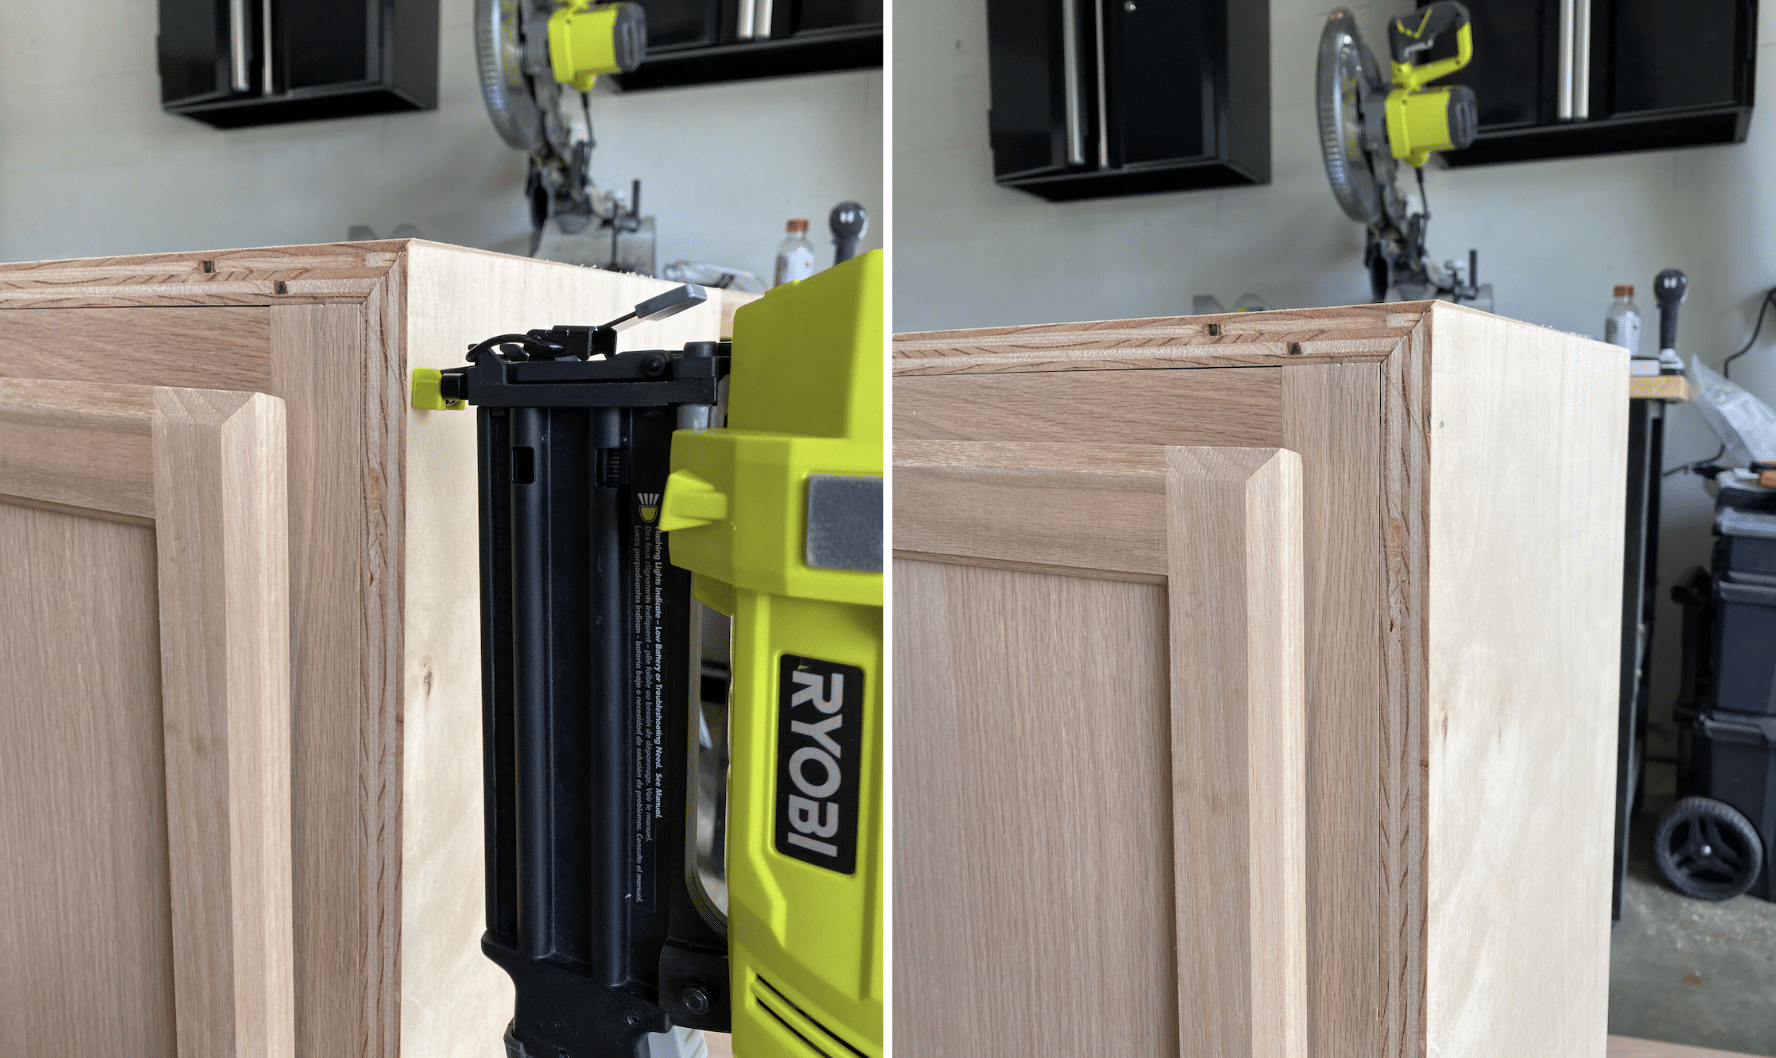
This step brings your sideboard’s shape to life.
For the perfect fit:
- Measure cabinet width plus overhang
- Cut plywood with care
- Test placement
- Attach with glue and nails
Want mitered edges? Cut each piece at 45 degrees for clean corners.
Step 4: Perfect the Edges – Adding the Banding
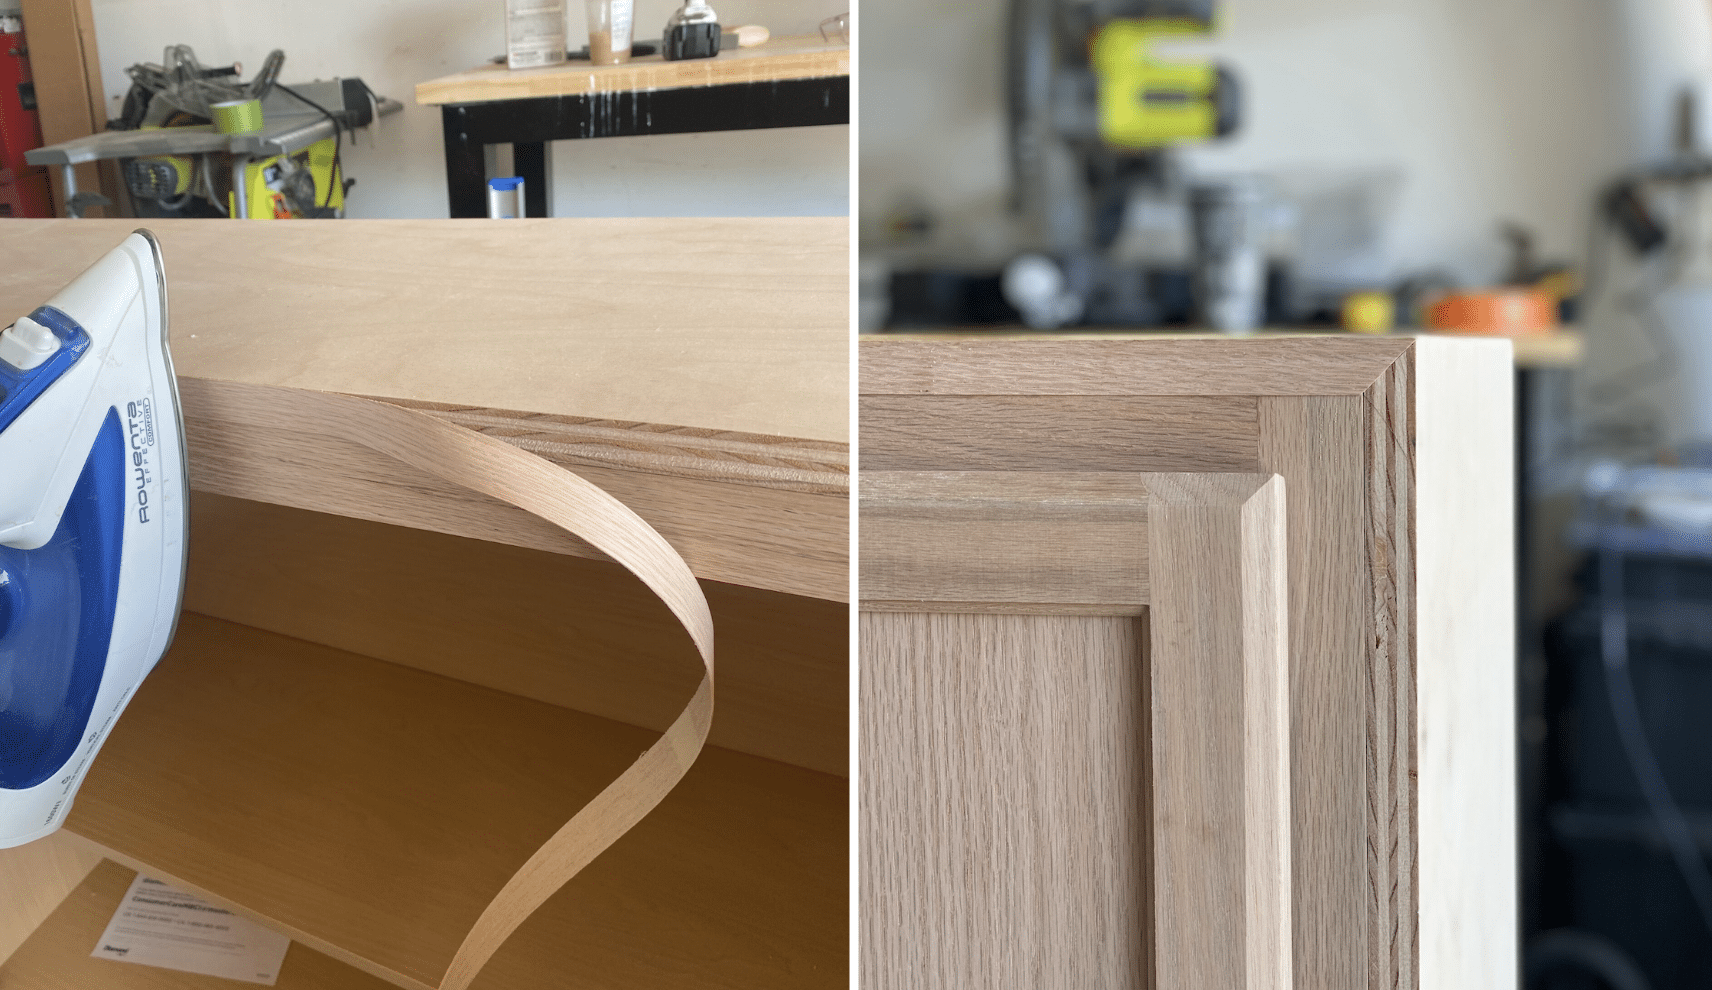
Edge banding makes plywood look like solid wood. Here’s my tried-and-true method:
- Cut banding slightly long
- Set iron to medium heat
- Press banding on slowly
- Let cool, then trim
Work in small sections for best results. Take your time – rushing shows in the final product.
Step 5: Smooth Out the Details – Filling & Sanding
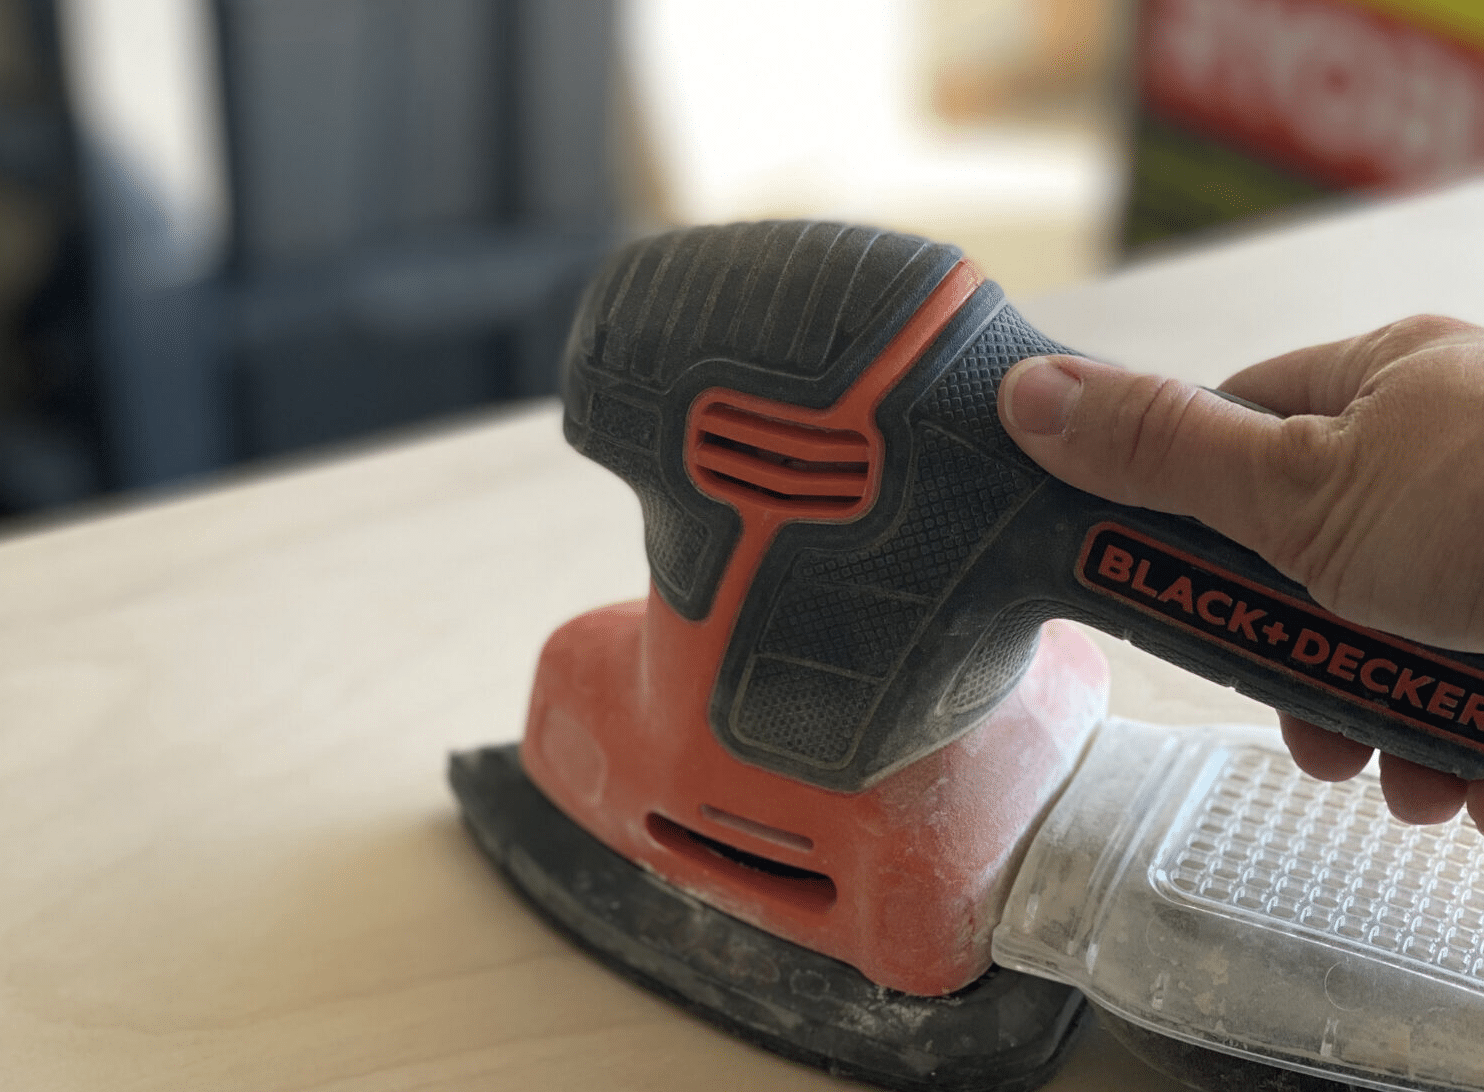
This step turns good into great. Patient sanding makes all the difference.
The process:
- Fill holes with wood filler
- Let it dry fully
- Sand with medium grit
- Switch to fine grit
- Clean dust thoroughly
Feel the surface as you go. Your hands often catch what your eyes miss.
Step 6: Add Your Color – Paint or Stain to Personalize
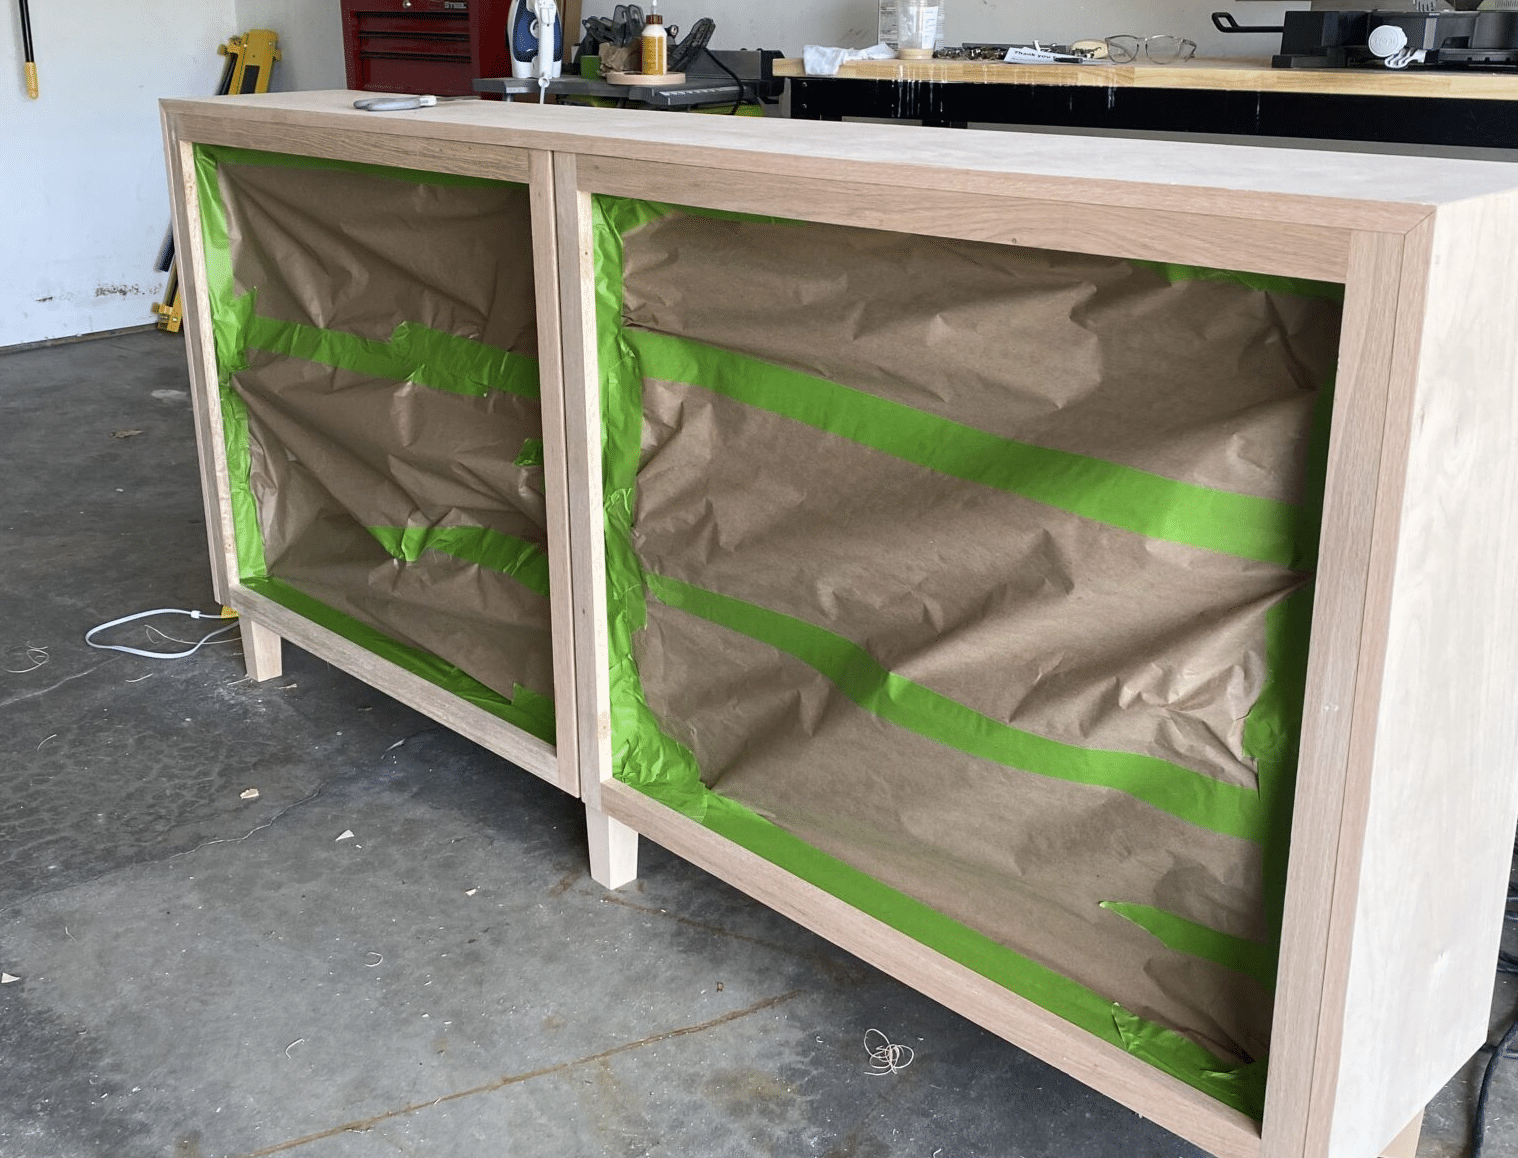
Your sideboard starts to shine in this step. Choose a finish that fits your style.
For best results:
- Start with clean wood
- Use proper primers
- Apply thin layers
- Sand between coats
- Let each coat dry
Remember: Good lighting helps spot missed spots.
Step 7: Finish with Flair – Adding the Hardware
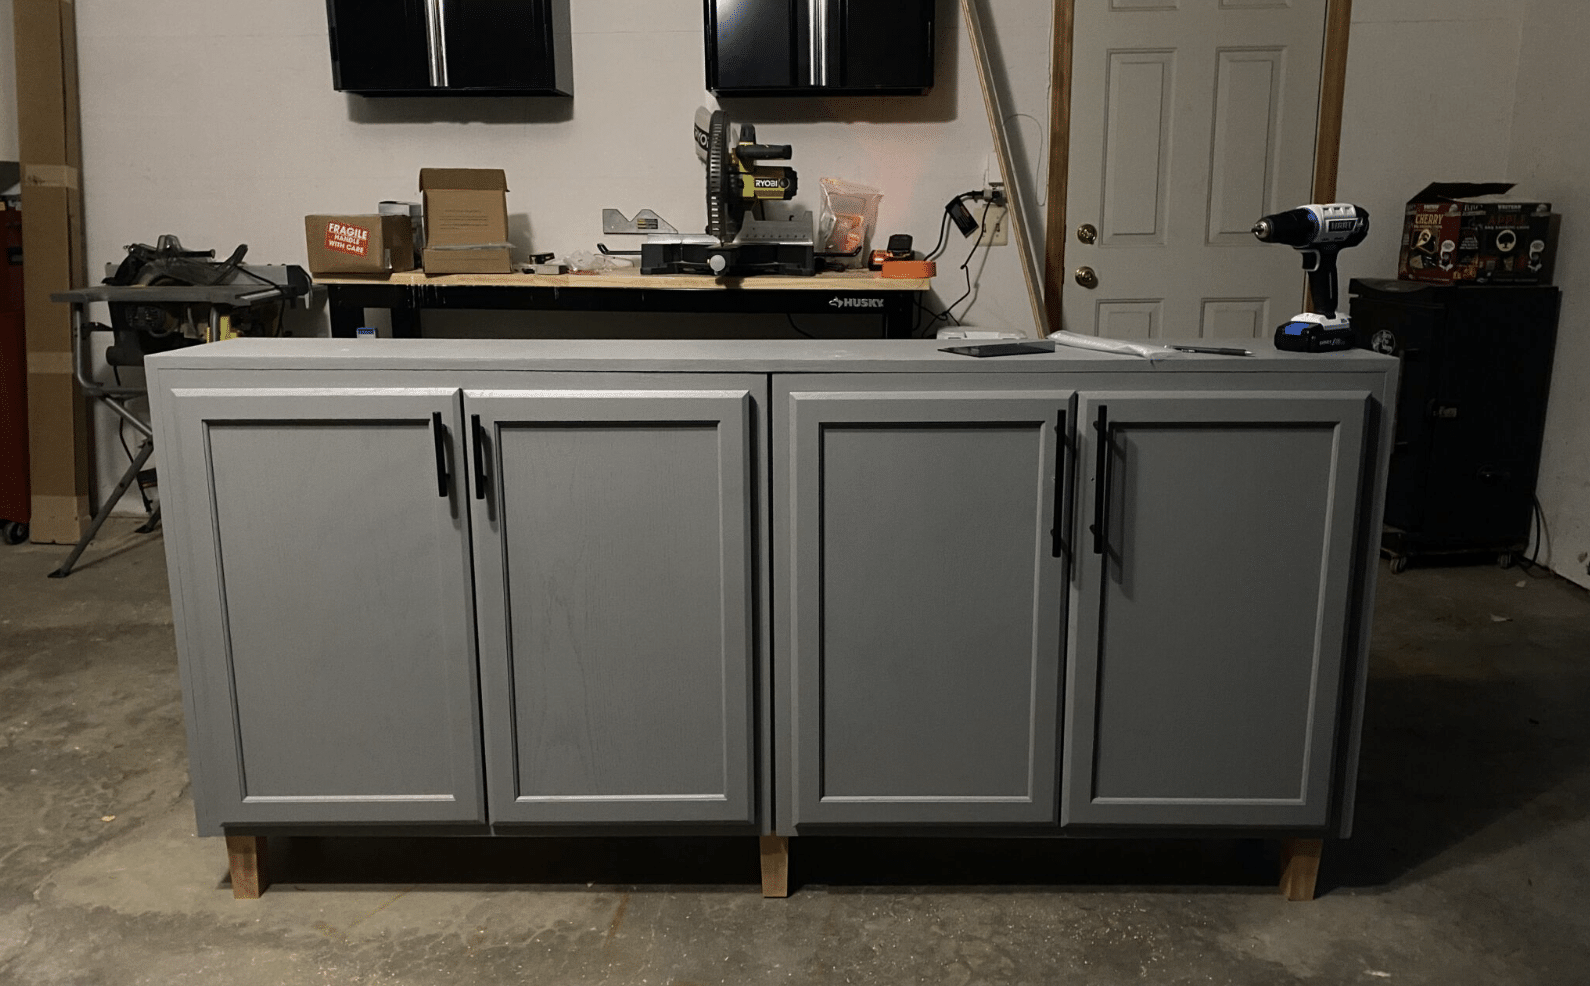
Hardware is like jewelry for your sideboard. It should match your style and feel good to use.
Installation tips:
- Create a template
- Mark all holes first
- Drill pilot holes
- Install pulls or knobs
- Test movement
Take time with measurements. Even spacing makes your work look professional.
Additional Tips for a Successful DIY Sideboard Project
Prepping Your Workspace
Success starts with a well-organized space. You’ll need about 10×10 feet of clear floor space to build your DIY sideboard comfortably. Pick a spot with good light and easy access to power outlets.
Set up a sturdy work table. Keep it clear except for the tools you need right now. Store your wood pieces nearby, sorted by size. Place your hardware in clear containers where you can see what’s inside.
Safety First
Safety comes before speed. Put on your safety glasses before you start any work. They protect your eyes from wood chips and dust. Work gloves guard your hands when handling rough wood or sharp tools.
Always wear a dust mask when cutting wood or sanding your DIY sideboard. Your lungs will thank you later. Ear protection helps when using loud power tools. Keep your work shoes on – no bare feet in the workshop.
Check your tools before you start. Make sure cords aren’t frayed. Keep your workspace clean as you go. Good light helps you see what you’re doing. Take breaks to stay alert.
Testing Your Finish on Extra Materials
Smart builders test their finishes first. Cut small pieces from your DIY sideboard materials and use them to try out different stains or paints. This will tell you exactly how your finish will look.
Test pieces help you learn drying times and determine the coats you need. Check your test pieces in different lights. The morning sun shows different colors than the evening light.
Write down what works. Note how you mixed colors and how long they took to dry. Test pieces save you from mistakes on your finished DIY sideboard. They also give you practice before working on the real thing.
DIY Sideboard Maintenance Tips
Let me share my experience keeping DIY sideboards looking their best. After building many pieces over the years, I’ve learned what works.
Cleaning and Care
Regular care makes your DIY sideboard last longer. Start with simple daily habits. Keep a soft cloth nearby to wipe dust and spots quickly. Place coasters under drinks to prevent water marks.
Weekly cleaning matters, too. First, remove everything from your sideboard. A slightly damp cloth works well for general cleaning. Make sure to dry the surface right away. This prevents water damage to your beautiful DIY sideboard.
Painted DIY sideboards clean up well with mild soap and water. Stay away from strong cleaners. They can damage the finish. Always pat the surface dry instead of rubbing. This keeps your paint looking fresh.
Touch-Ups and Repairs
Got scratches? Try a matching marker or wood fill stick first. Light marks often buff out, while deeper cuts need more work. Sand the area smooth, then match the finish to the rest of your DIY sideboard.
Steam helps with small dents. Put a damp cloth over the dent and touch it briefly with a warm iron. The wood often swells back to shape. Larger dents need a wood filler—sand it level when it dries.
Sometimes, a full refinish makes sense. Look for signs like watermarks that won’t fade or a dull finish. Many scratches in one area might need work. Changed wood color or rough spots tell you it’s time.
Stop problems before they start. Put felt pads under items that sit on top. Move things carefully. Clean with a light touch. Keep basic repair supplies handy.
DIY Sideboard Design Ideas for Inspiration
Are you looking for style ideas for your DIY sideboard? I’ve built several designs and picked some favorites to share with you.
1. Herringbone Door Buffet
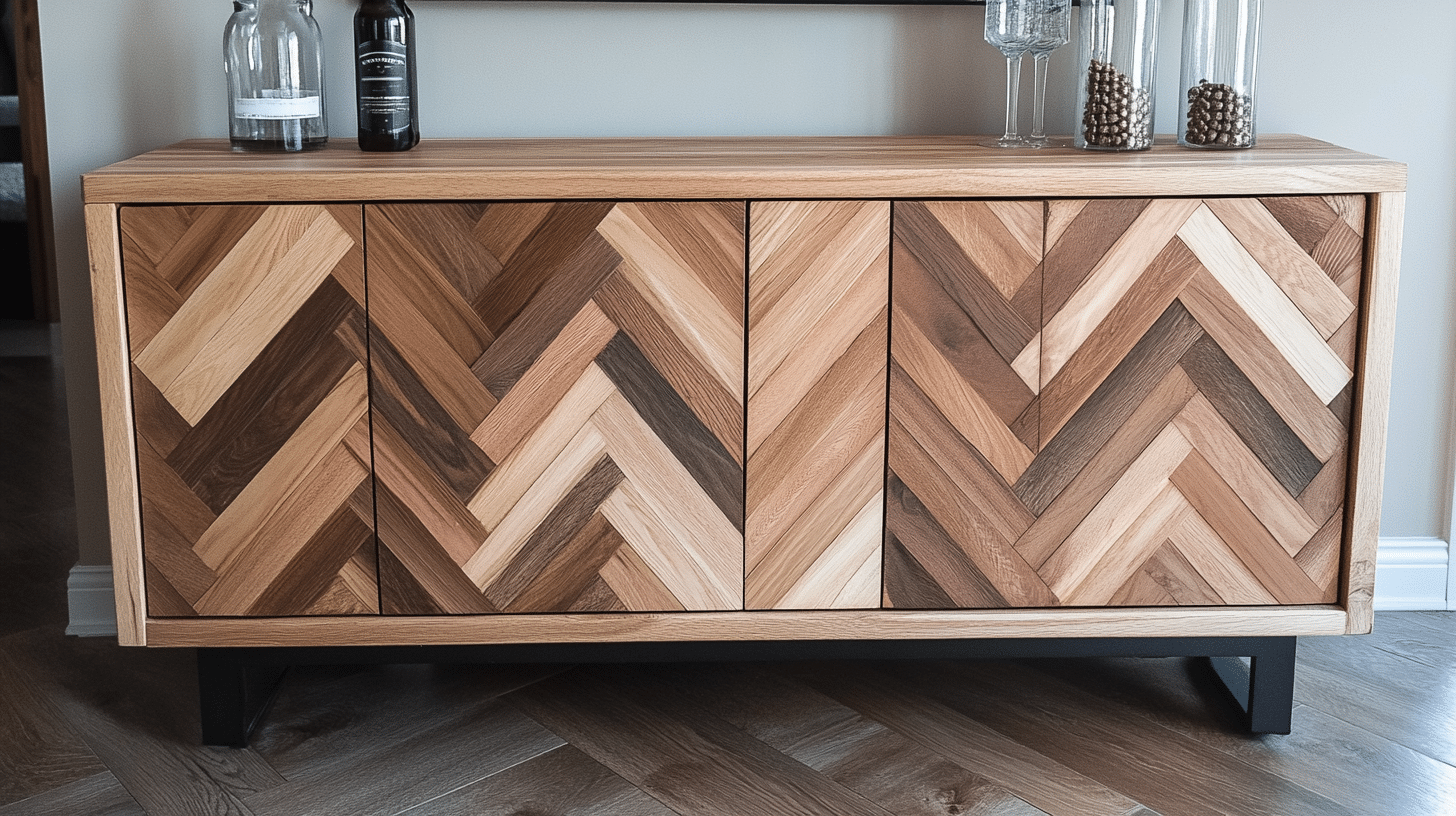
This pattern adds visual interest to your DIY sideboard. The herringbone design uses small wood pieces arranged at angles. I built one last spring, and it became the focal point of my kitchen.
Key features:
- Wood strips in V-patterns
- Natural wood tones
- Clean lines
- Hidden hinges
2. Buffet Sideboard With Circle Trim Doors
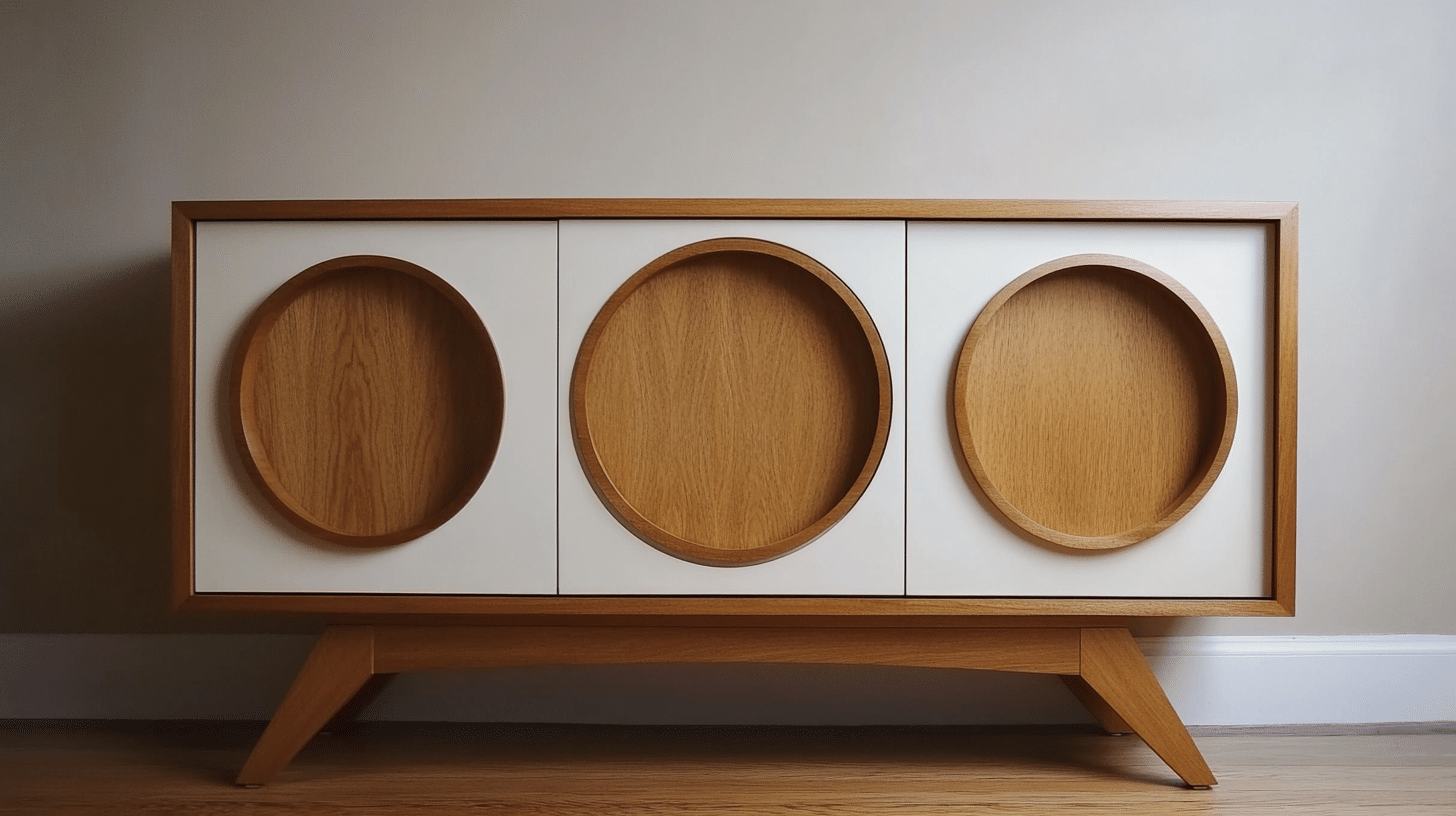
Want something unique? Add round trim to door panels. This style mixes classic and modern looks.
Main elements:
- Round wooden trim pieces
- Flat panel doors
- Simple hardware
- White or light finish options
3. Modern Farmhouse Buffet
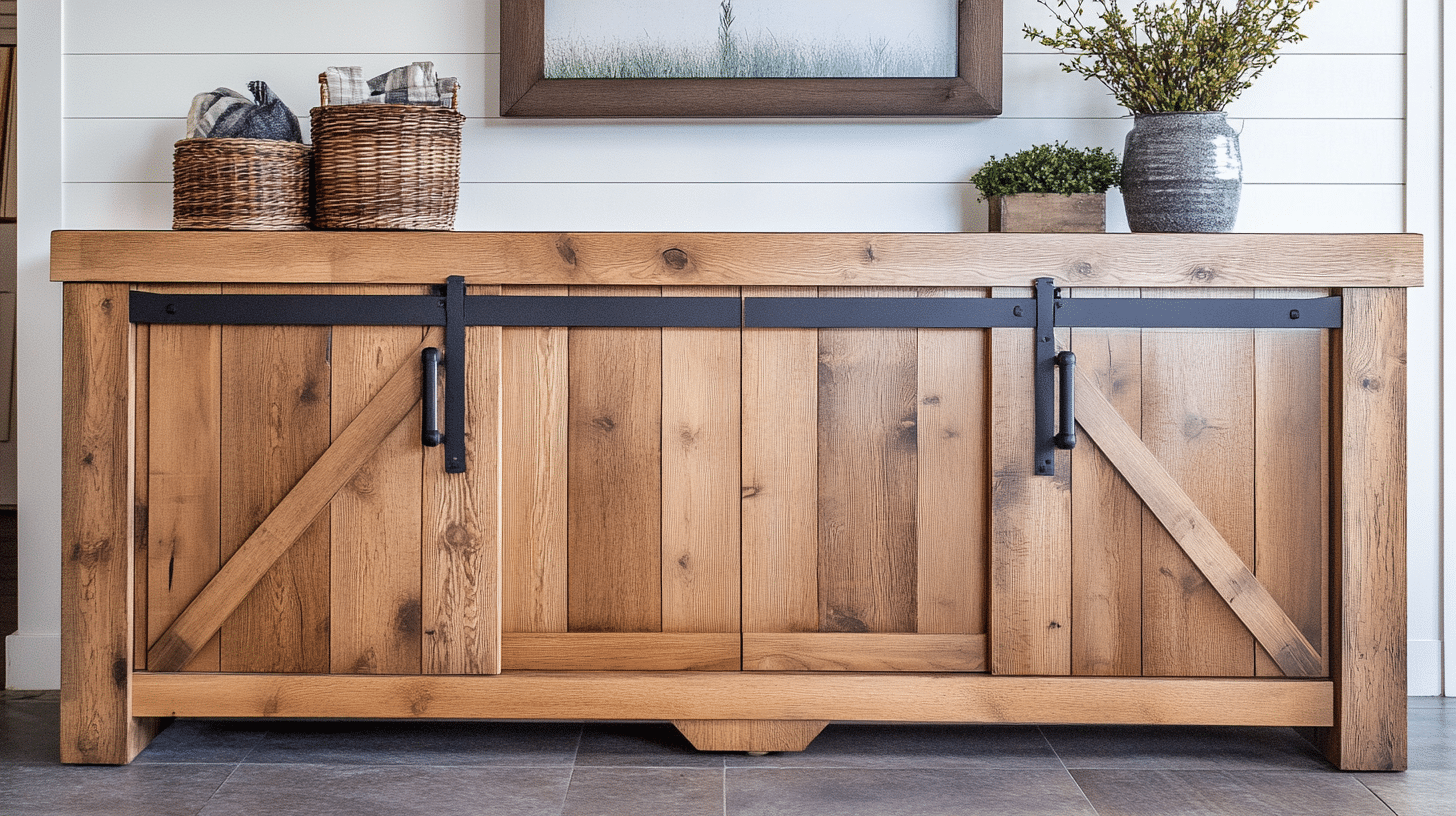
This DIY sideboard style fits both modern and traditional homes. It combines simple lines with rustic touches.
Features include:
- Plain front panels
- Black hardware
- Light wood tones
- Straight edges
4. DIY Shutter Sideboard
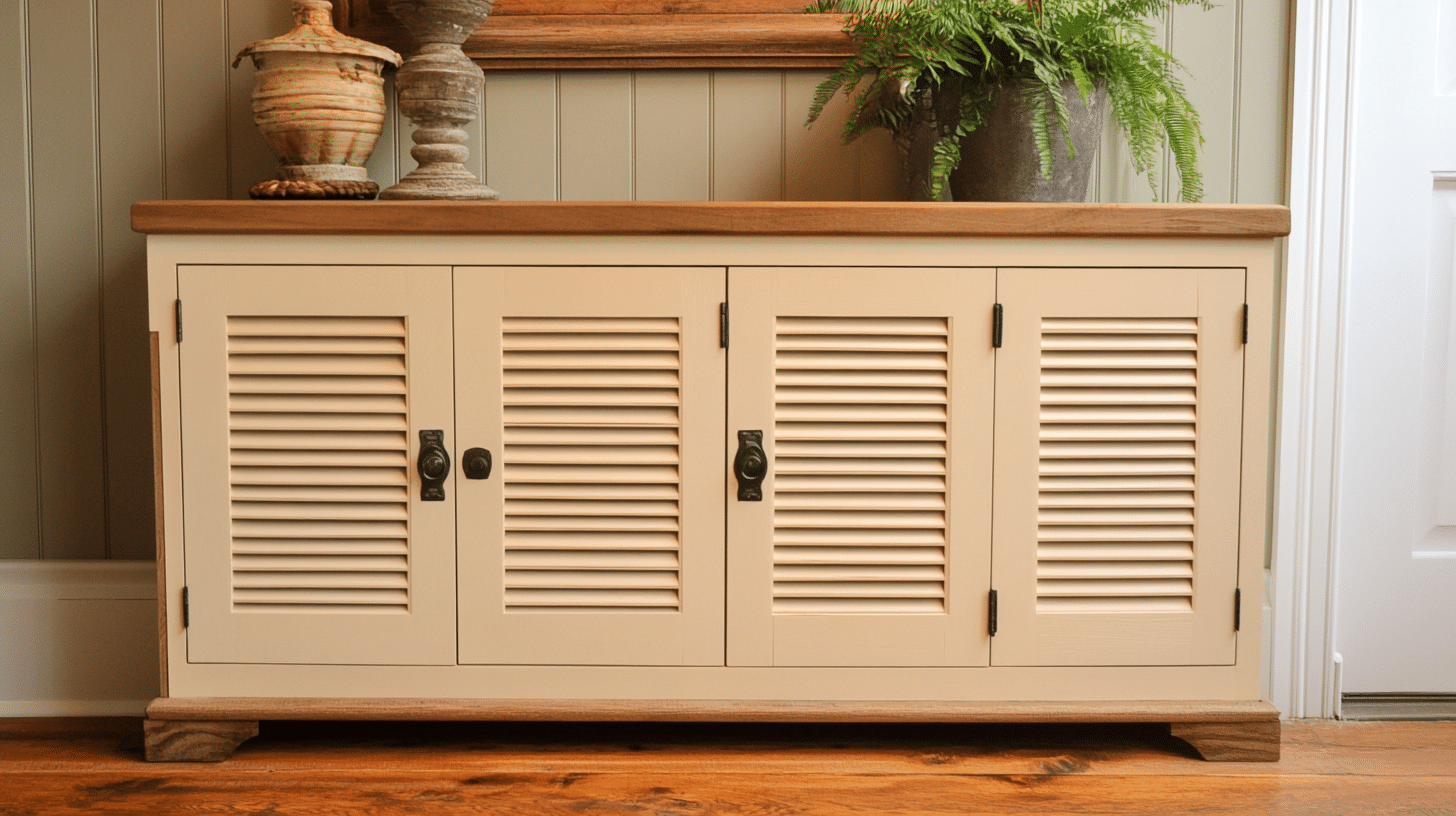
Shutters give your DIY sideboard a fresh look. They work well in coastal or country-style homes.
Design elements:
- Louvered doors
- Paint options
- Adjustable shelves
- Light, breezy feel
5. Floating Sideboard
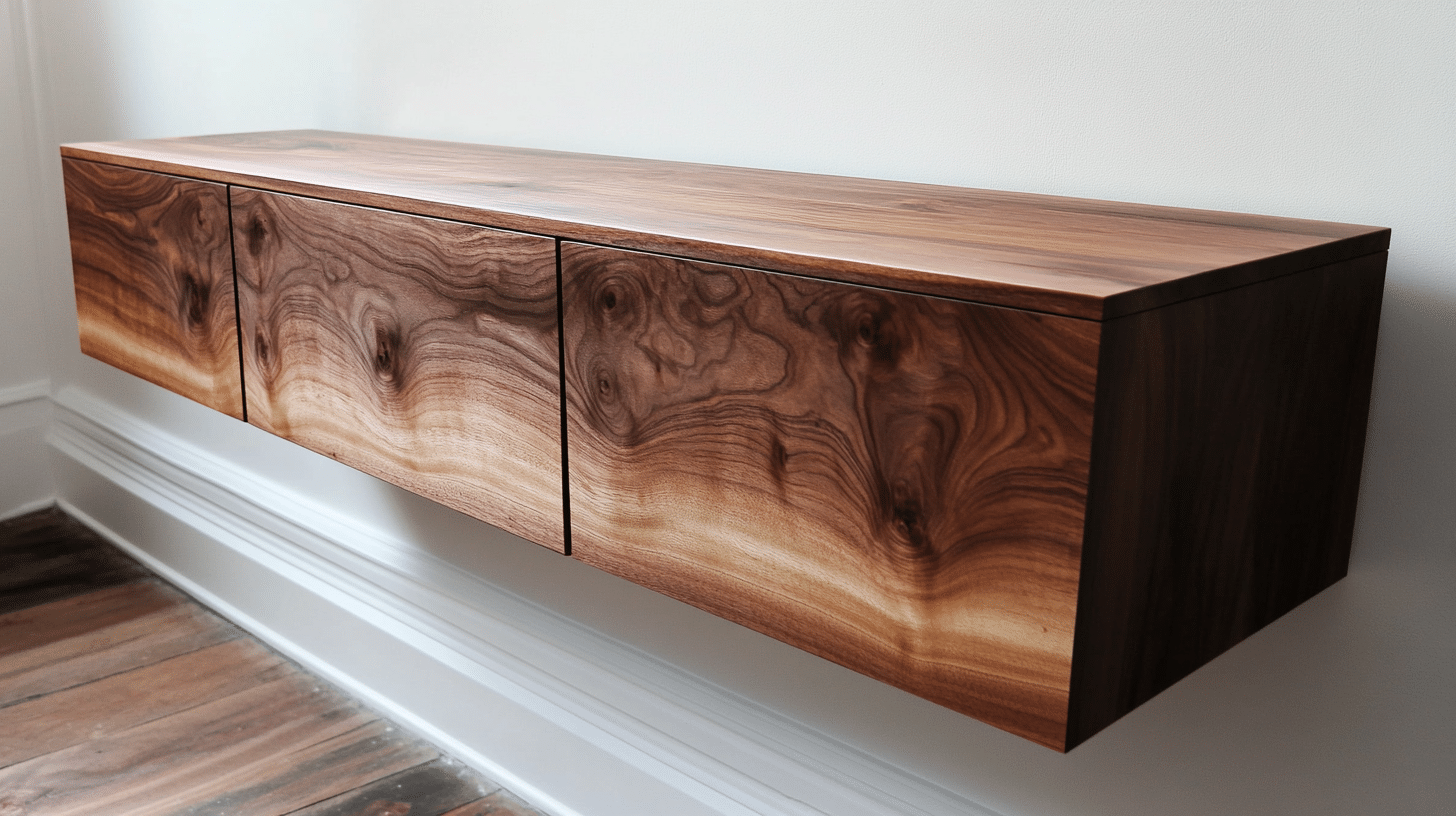
Want to save floor space? A wall-mounted DIY sideboard looks clean and opens up the room.
Important points:
- Strong wall mounting
- Sleek design
- Hidden storage
- Modern look
Conclusion
Building your sideboard opens up new skills and brings real satisfaction. As someone who’s made this journey, I can say the time spent measuring, cutting, and finishing pays off every time I use my piece.
Your DIY sideboard will tell a story – your story. Each small detail shows the care you put into making it. From picking the right wood to placing the final knob, you’ll create something that fits your home perfectly.
Remember, take your time with each step. Good work doesn’t need rushing. Your careful attention today means years of use tomorrow. And when friends ask about your sideboard, you’ll have the pleasure of saying, “I made this.”
Keep these steps handy as you build. Soon, you’ll have a beautiful piece of furniture that serves your needs exactly as you planned.

