Maximize Space and Style: Extending Kitchen Cabinets Made Easy
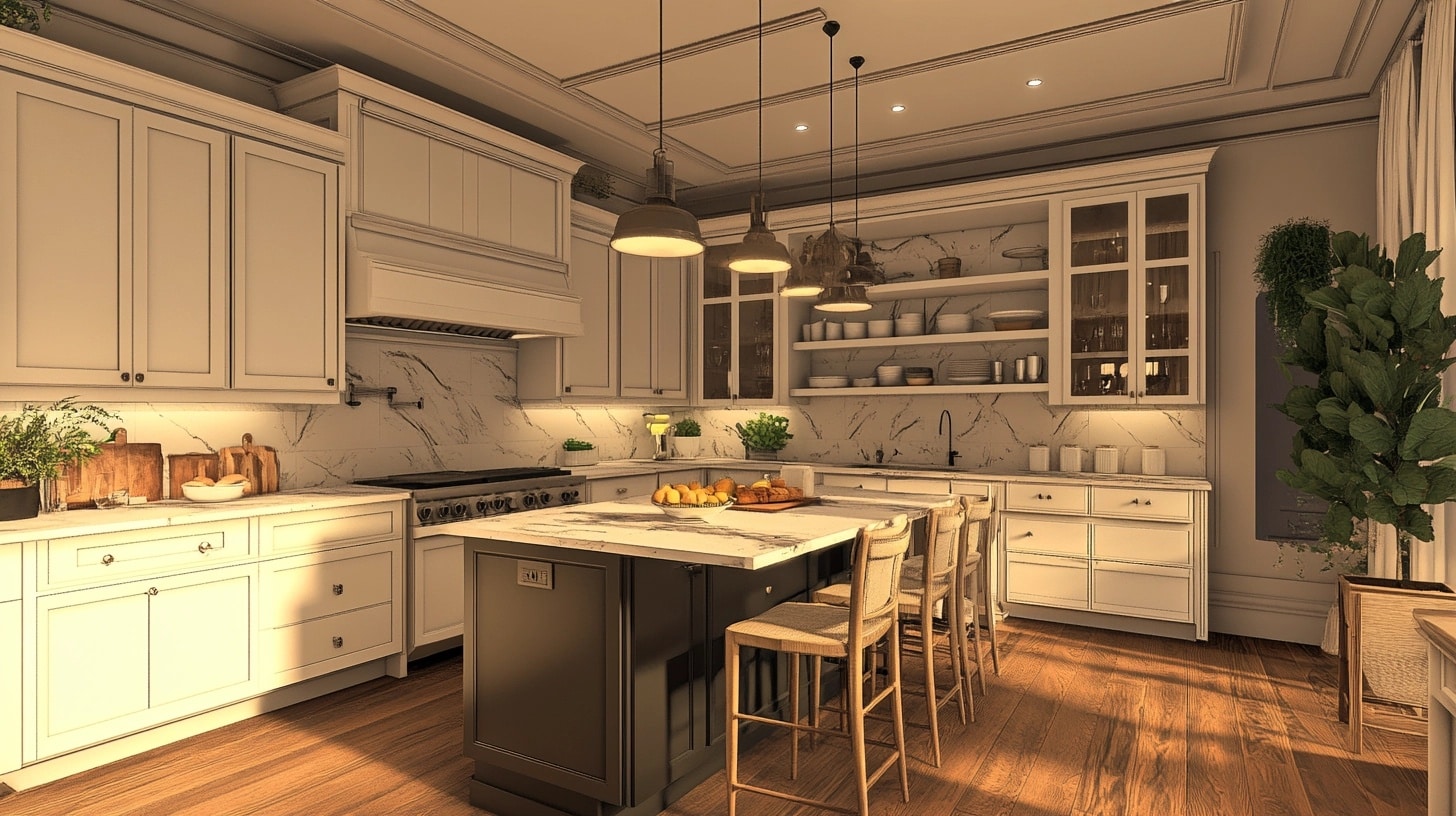
Looking for extra kitchen storage without a complete remodel? Kitchen cabinets that reach the ceiling can make your kitchen look bigger and give you extra storage space.
I found a way to create more space by extending cabinets to the ceiling – and I can show you how to do it too.
You’ll learn how to measure, build, and set up cabinet extensions that match your current kitchen design.
I’ll share tips to make the process simple, plus ideas for using that new storage area well.
This simple change not only doubled my storage but made my whole kitchen look taller and more put together.
Let’s turn that empty space above your cabinets into something useful.
Analyzing the Benefits of Extending Kitchen Cabinets to the Ceiling
When updating a kitchen, extending cabinets to the ceiling brings multiple benefits. Let’s examine the key advantages that make this update a practical choice for any home.
Increased Storage
- Small kitchens benefit most from vertical expansion.
- Extending cabinets to the ceiling adds 20-30% more storage space.
- This extra room is perfect for storing seasonal items, special occasion dishes, or large cookware.
- The added space helps keep counters clear and everyday items well-organized.
Modern and Sleek Aesthetics
- Cabinet extensions create a clean, unified look in any kitchen space.
- Older kitchens get an instant update with this modification.
- The continuous line from floor to ceiling makes rooms appear taller, while the smooth finish adds a custom-built quality to the space.
Reducing Dust and Maintenance
- The gap between standard cabinets and the ceiling often collects dust and grease.
- Cabinet extensions eliminate this hard-to-clean space.
- With no exposed tops, the kitchen stays cleaner with less effort.
- This practical improvement means less time cleaning and more time cooking.
Improved Resale Value
- Kitchens play a key role in home sales.
- Extended cabinets signal quality and smart design to potential buyers.
- Real estate professionals note that this upgrade often yields good returns during home appraisals, making it a worthwhile investment for the future.
Considerations Before You Begin
Taking time to plan helps avoid problems later. Here’s what to check before starting your cabinet extension project.
Assessing Your Kitchen Space
Measuring Requirements
- Get exact ceiling height at multiple spots
- Check space above current cabinets
- Note measurements near corners
- Account for light fixtures
- Document any pipes or vents
Potential Issues to Note
- Look for ceiling slopes
- Check existing molding placement
- Spot any wall irregularities
- Mark electrical outlet locations
- Watch for hanging light fixtures
Deciding Between DIY and Professional Help
Skills Assessment
- Basic carpentry knowledge needed
- Comfort with power tools required
- Experience with level and plumb lines
- Understanding of cabinet structure
- Ability to lift heavy items
Project Requirements
- Time: 2-4 days for average kitchen
- Basic tools: saw, level, drill
- Materials handling capability
- Helper for heavy lifting
- Work space for cutting and assembly
Cost Comparison
| Cost Factors | DIY Costs | Professional Costs |
|---|---|---|
| Materials | $300 – $600 | $400 – $800 |
| Tools | $100 – $200 (if needed) | N/A (included in labor) |
| Labor/Time Investment | 16 – 32 hours (personal time) | $500 – $1000 (1-2 days) |
| Total Estimated Costs | $400 – $800 | $900 – $1800 |
Remember: Sometimes paying a professional saves money by avoiding costly mistakes.
Common Challenges and How to Overcome Them
Every kitchen project comes with its own set of issues. Here are practical solutions to the most common problems when extending cabinets to the ceiling.
Gap Between Cabinets and Ceiling
Small gaps need smart fixes. Crown molding works well for spaces under 2 inches, adding a finished look while hiding the gap. For larger spaces, custom panels matched to your cabinet color create a smooth finish. Soffits offer another option, blending the extension with your ceiling while adding a built-in look.
Install tips:
- Use caulk in corners for a tight seal
- Paint or stain materials before installation
- Match existing cabinet finishes carefully
- Consider LED strip lighting for added style
Uneven Ceilings
Most homes have slight ceiling variations. Here’s how to handle them:
- Measure at multiple points along the wall
- Use scribe molding to follow ceiling curves
- Apply flexible trim pieces for major variations
- Create a straight border below uneven spots
For serious slopes, installing a level soffit below the ceiling often looks better than following the uneven line.
Older Cabinets
Before extending older cabinets, check these points:
- Cabinet box strength and stability
- Wall attachment security
- Material condition and quality
- Frame and door alignment
Strong, well-built older cabinets often support extensions well. However, cabinets with water damage, loose joints, or weak materials might need replacement. A quick test: if doors align properly and the structure feels solid, extension is usually possible.
Budget-Friendly Solutions for Extending Cabinets
Getting more storage space doesn’t mean spending too much. Let’s look at cost-effective ways to make your kitchen better.
Reusing Existing Materials
Smart use of current materials saves money:
- Keep existing cabinet boxes as bases
- Remove and reuse crown molding
- Save original doors for matching new ones
- Use spare wood pieces for fillers and trim
Time-saving tip: Take photos and label all pieces during removal for easier reassembly.
Cost-Effective Cabinet Extensions
Compare these options for the best value:
Ready-Made Options:
- Stock upper cabinets: $100-300 per unit
- Standard sizes fit most spaces
- Quick delivery and installation
- Easy to find matching pieces
Custom Solutions:
- Built to exact measurements
- Matches current cabinets perfectly
- Costs vary by material choice
- Takes longer but offers perfect fit
Money-saving tip: Buy during kitchen store sales, often around major holidays.
DIY Alternatives
Simple options when full extensions aren’t possible:
Open Storage Ideas:
- Floating shelves between cabinets
- Wall-mounted dish racks
- Pull-down storage units
- Glass-front display cases
Decorative Options:
- Simple box frames
- Basket storage systems
- Plant display areas
- Accent lighting setups
Installation tip: Start with one section to test your skills before doing the whole kitchen.
Design Inspiration: Creative Ideas for Extending Cabinets
1. Glass-Front Cabinets for Display
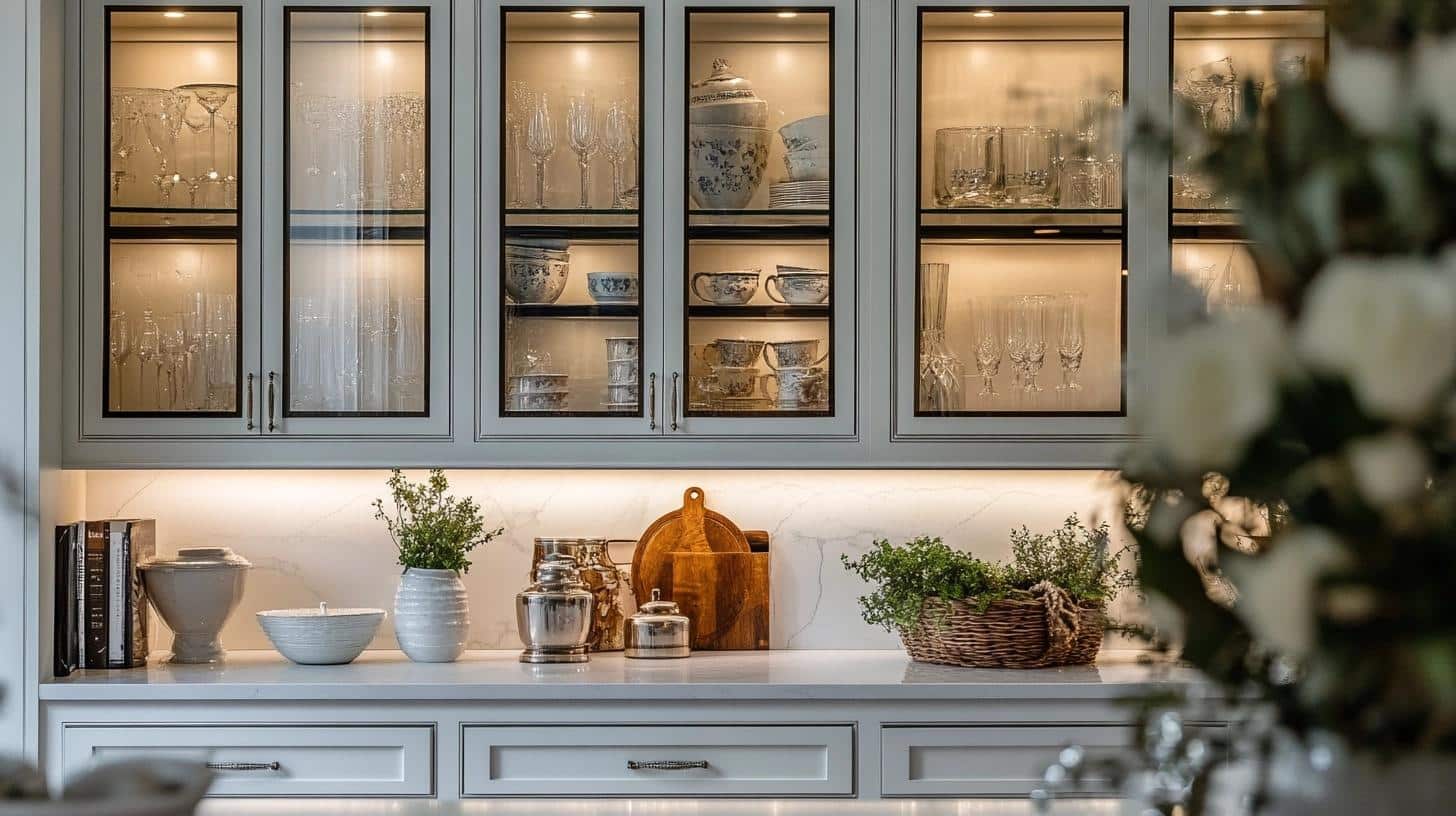
Glass-front cabinets extending to the ceiling create an open, airy atmosphere while offering a functional way to display decorative items. These cabinets add vertical storage without closing off the space, and the glass allows light to flow through, making the kitchen feel brighter and more spacious.
- Style Impact: Adds a modern, transparent element to the kitchen design.
- Best For: Displaying glassware, decorative dishes, or plants.
- Materials Needed: Glass cabinet doors, shelves, lighting (optional).
- Cost Consideration: Can vary depending on the glass type and lighting.
2. Open Shelves Above Cabinets
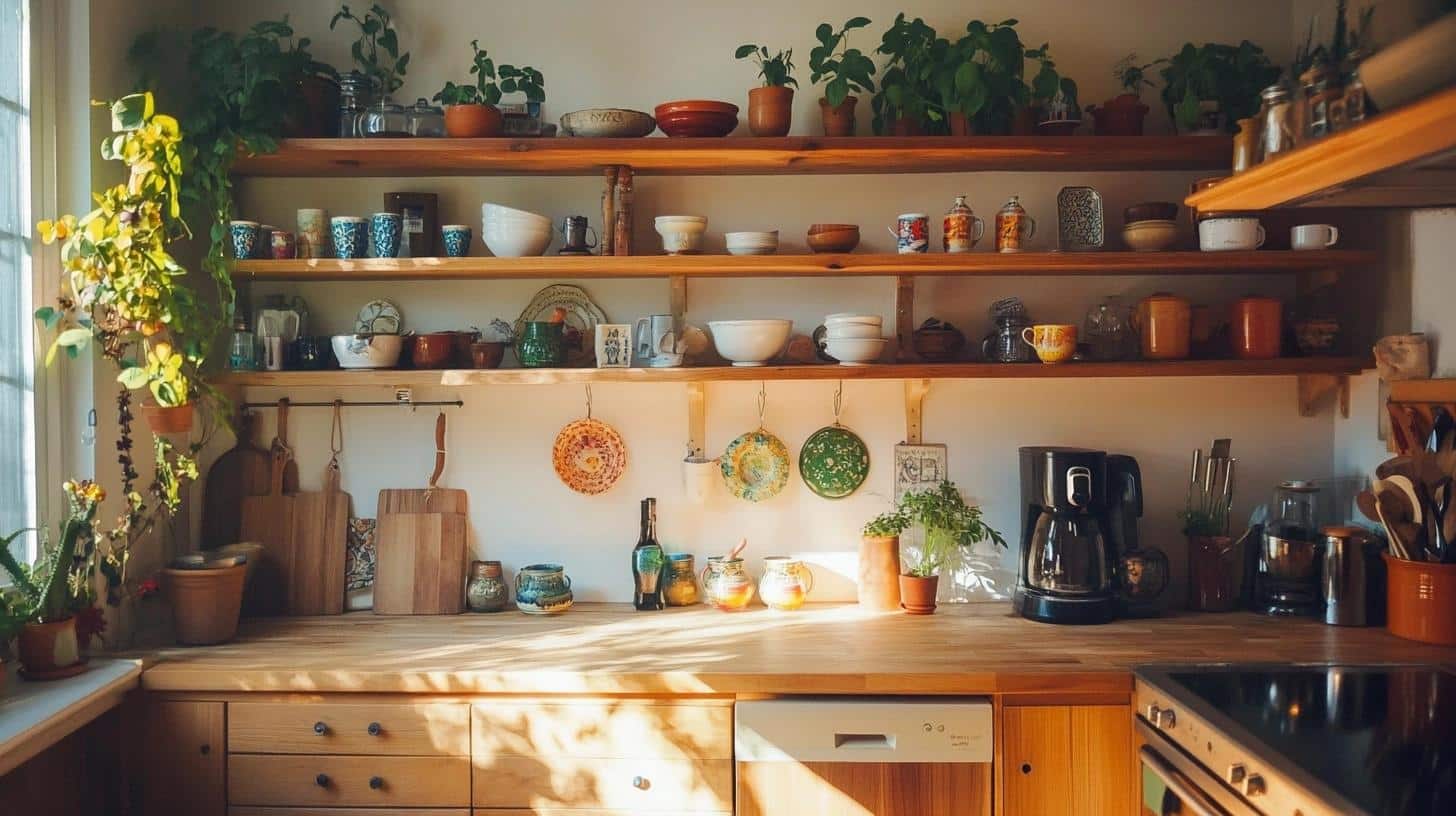
Adding open shelves above the existing cabinets is a simple and affordable way to extend cabinets to the ceiling. These shelves provide extra storage for decorative items or kitchen essentials, allowing for flexibility in styling while maintaining an open, accessible feel.
- Style Impact: Creates a casual, open look while maximizing space.
- Best For: Displaying cookbooks, kitchen accessories, or plants.
- Materials Needed: Wooden or metal shelves, brackets for support.
- Cost Consideration: Budget-friendly depending on material choice.
3. Contrasting Cabinet Colors
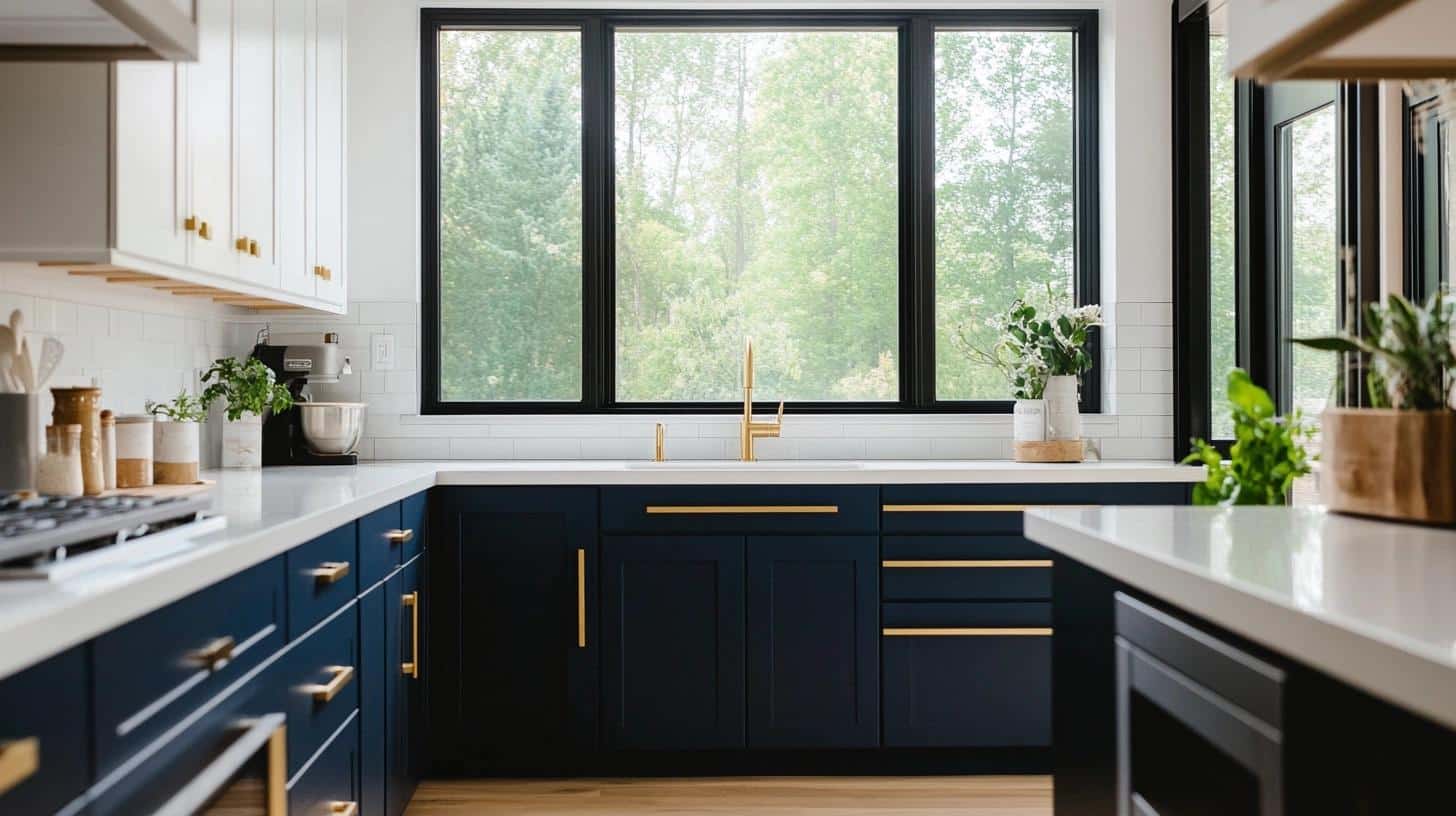
Using a different color for upper cabinets creates a striking visual effect. Extending them to the ceiling adds height, while the contrast with lower cabinets adds depth and character. This technique works well to define areas in open kitchens or to introduce bold, personal style choices.
- Style Impact: Bold, contrasting look enhances visual interest.
- Best For: Modern and contemporary kitchens with an emphasis on color.
- Materials Needed: Paint or new cabinet doors in contrasting colors.
- Cost Consideration: Moderate depending on paint or material choice.
4. Custom Paneling and Molding
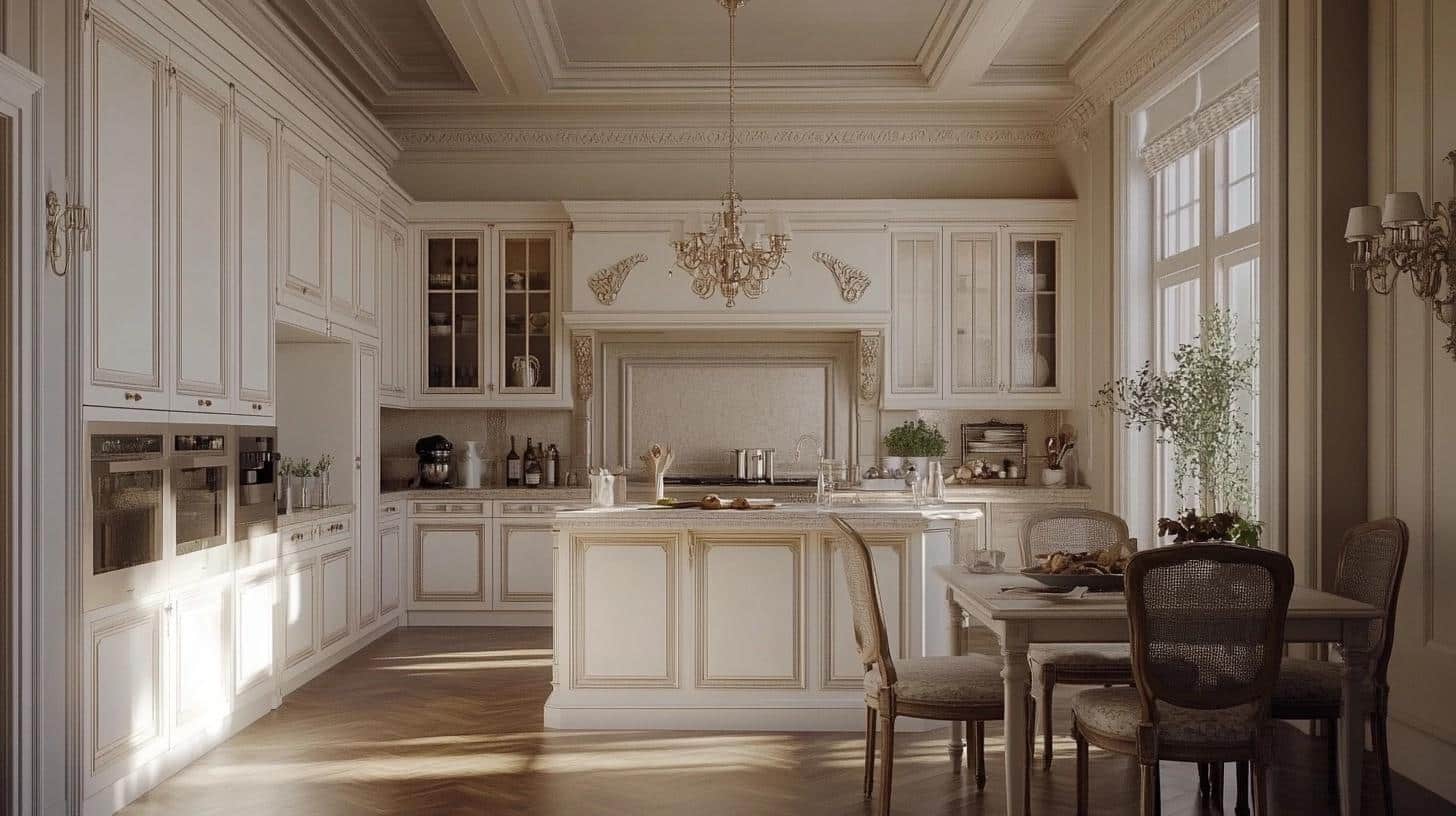
Custom paneling and molding extend cabinets to the ceiling with an elegant, seamless finish. This traditional approach gives the kitchen a unified and polished look. Crown molding fills the gap between cabinets and ceiling, adding a touch of luxury to the space.
- Style Impact: Traditional and refined, adds architectural detail.
- Best For: Kitchens aiming for a cohesive, classic design.
- Materials Needed: Custom panels, crown molding, paint or stain.
- Cost Consideration: Higher cost due to customization and labor.
5. Floating Decorative Cabinets
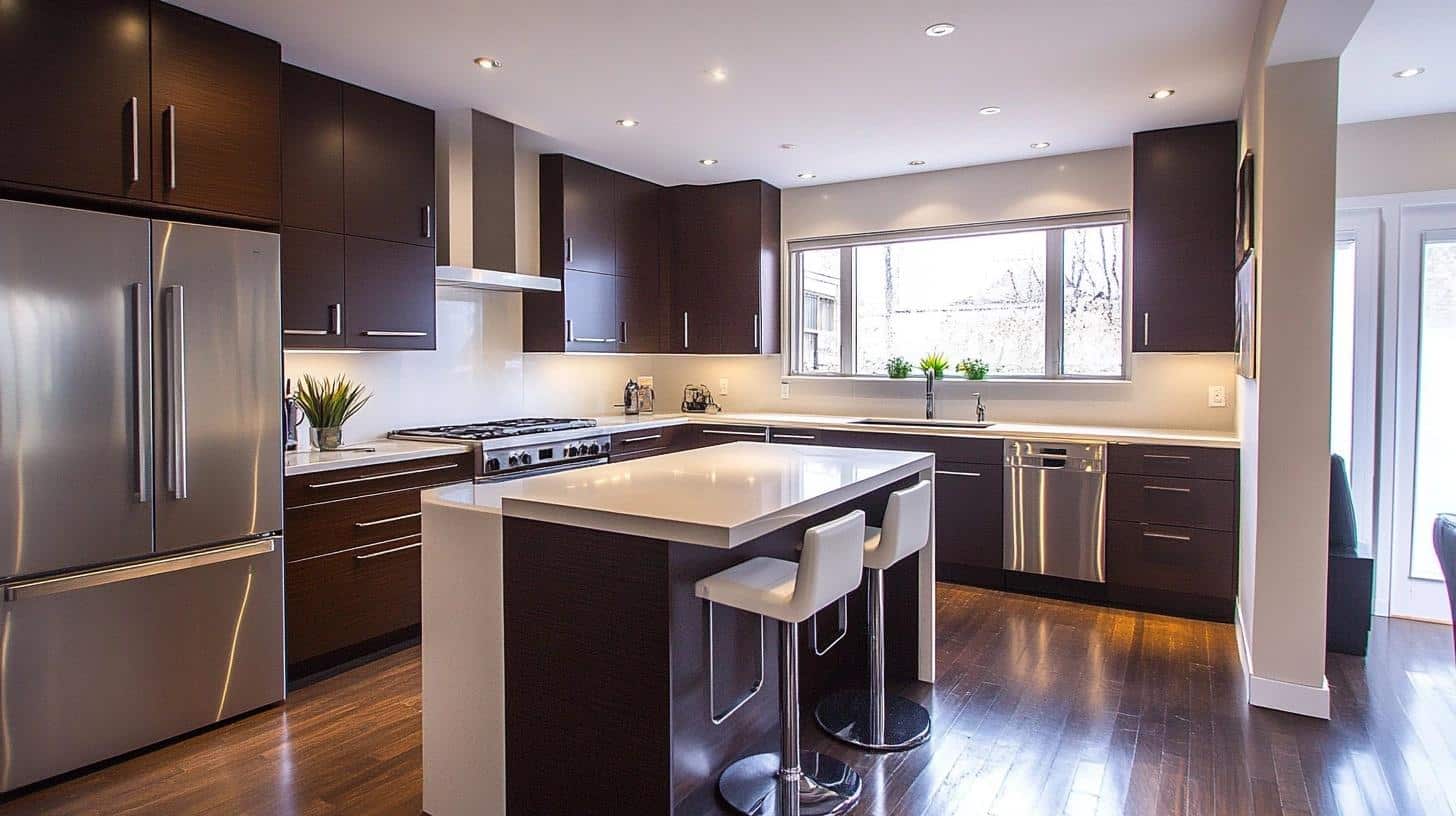
Floating decorative cabinets, installed above existing cabinetry, create a sleek, modern look. These cabinets provide extra space for light storage and keep the kitchen design minimalistic. Floating cabinets give the illusion of more space, making the kitchen feel open while offering storage.
- Style Impact: Minimalistic and modern, with a floating effect.
- Best For: Decorative storage and contemporary kitchen designs.
- Materials Needed: Lightweight cabinet materials, wall mounts.
- Cost Consideration: Moderate to high, depending on materials.
6. Textured Cabinet Extensions
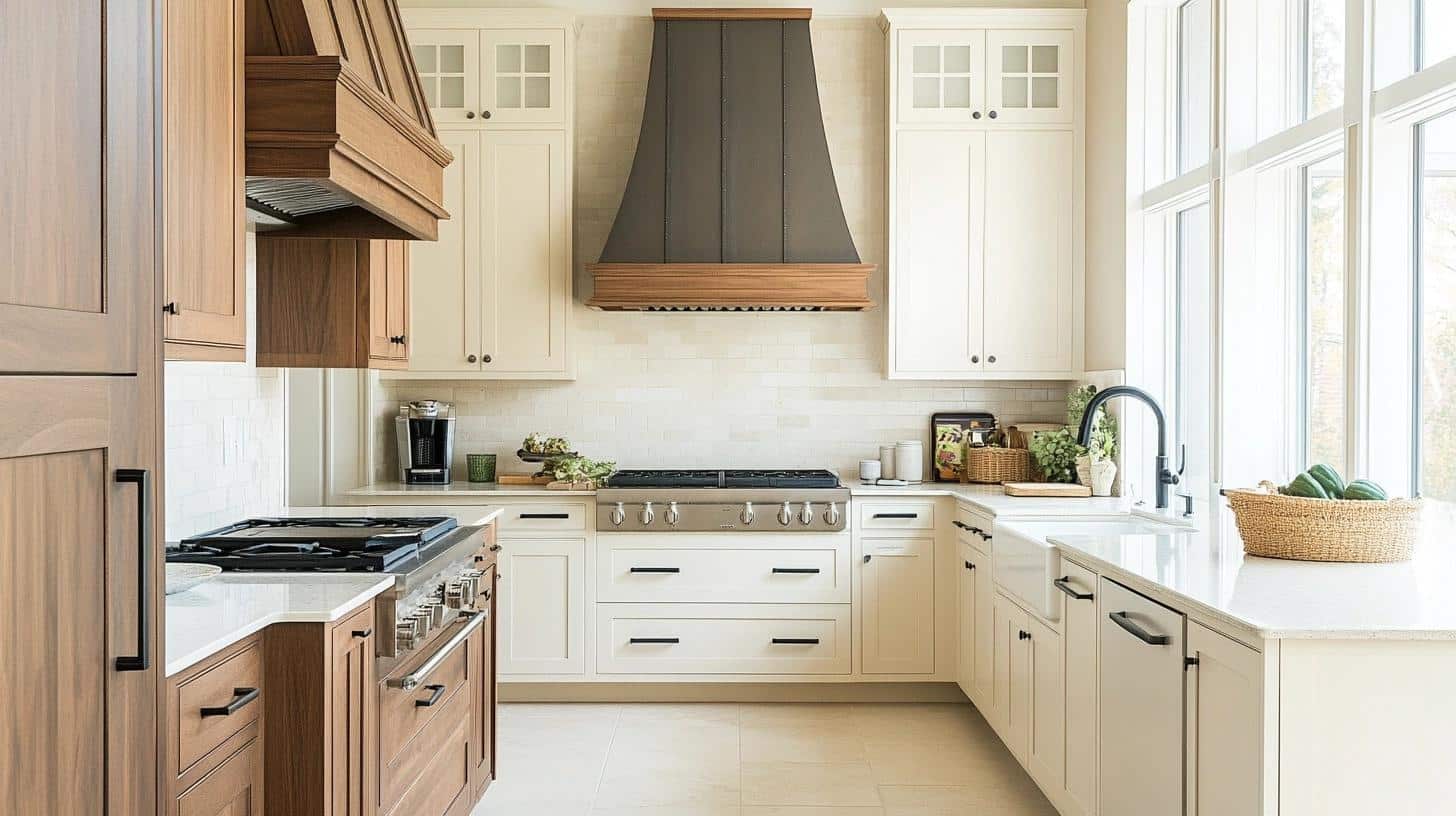
Extending cabinets to the ceiling with textured materials, like wood grain or patterned finishes, adds dimension and warmth to the kitchen. This approach provides a natural feel, elevating the aesthetic while offering practical storage.
- Style Impact: Adds texture and warmth to the overall kitchen design.
- Best For: Creating a cozy, organic feel in the kitchen.
- Materials Needed: Textured wood panels or other tactile materials.
- Cost Consideration: Varies depending on the texture and material.
7. Incorporating Windows or Light Panels
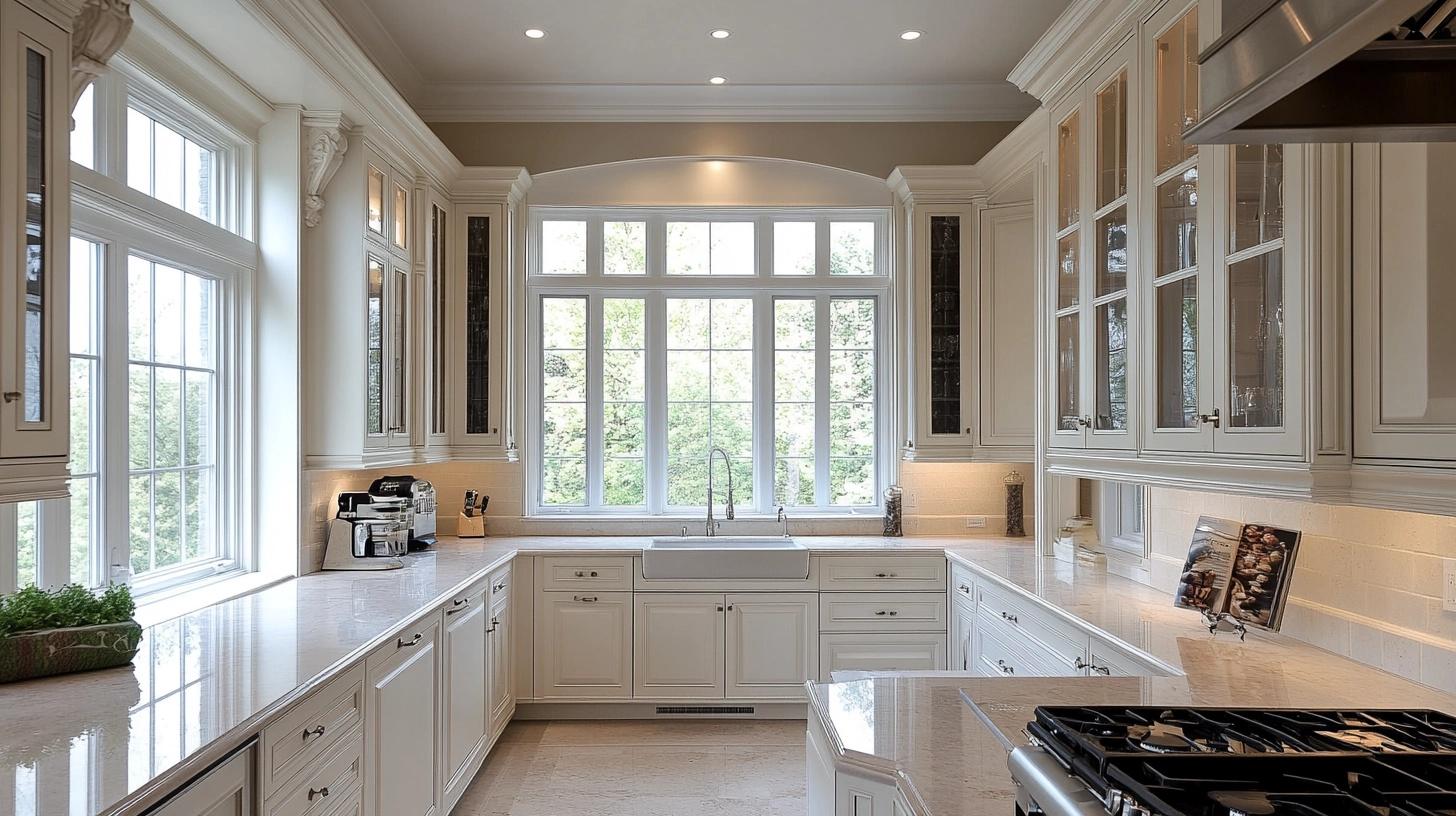
Integrating narrow vertical windows or light panels between upper cabinets and the ceiling maximizes natural light while extending cabinetry. This method brightens up the kitchen, making it feel more open and visually spacious without adding too much material.
- Style Impact: Brightens the space, adding light and openness.
- Best For: Small kitchens or those with limited natural light.
- Materials Needed: Glass panels or light fixtures.
- Cost Consideration: Moderate due to installation and materials.
8. Modular Cube Storage
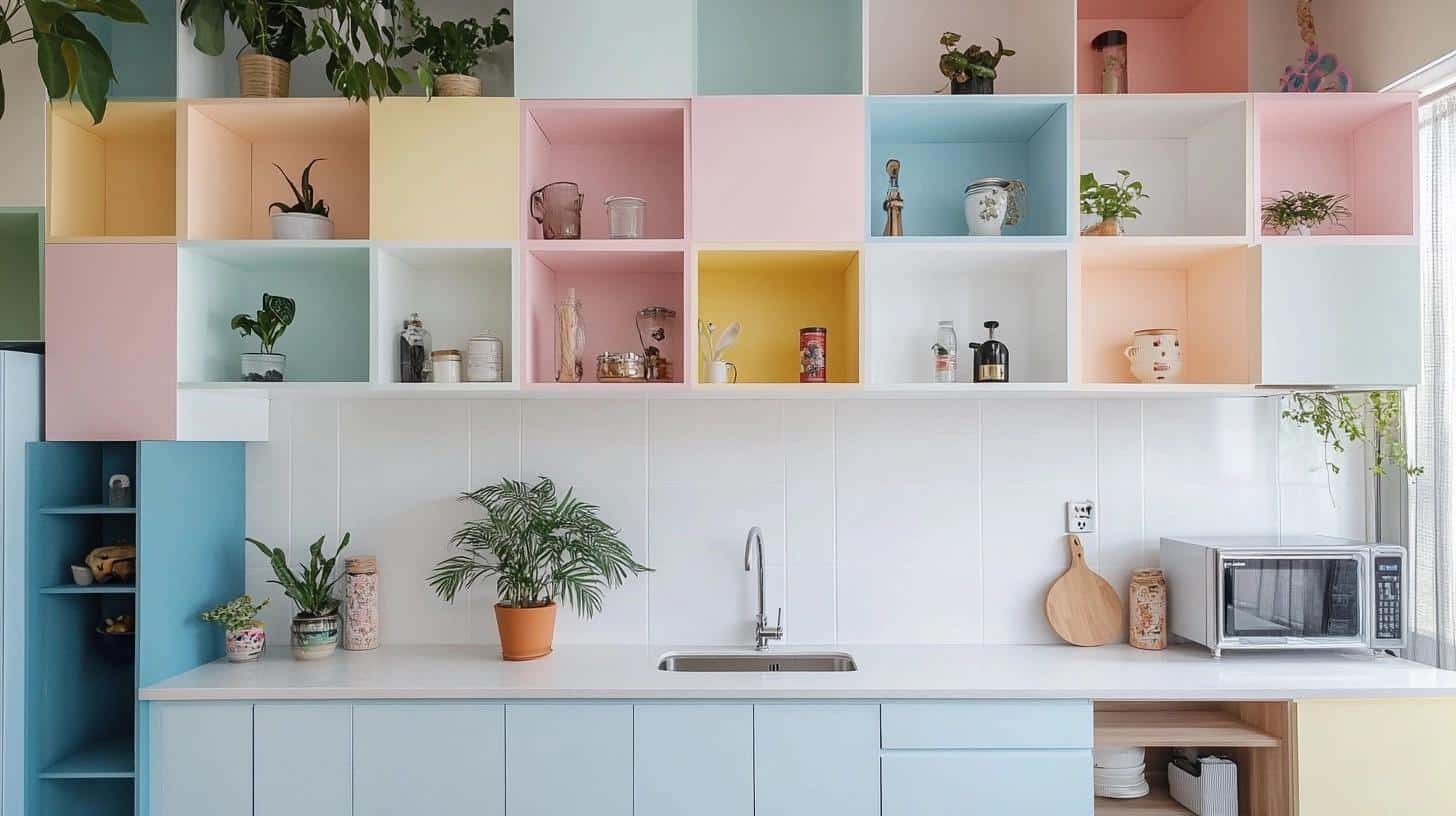
Modular cube storage units placed above existing cabinets offer flexibility and a modern design. These cubes can be used for storing kitchen items or decor, and they allow for creative arrangements while making the most of vertical space.
- Style Impact: Modular and flexible, adds a modern organizational touch.
- Best For: Flexible storage in modern or contemporary kitchens.
- Materials Needed: Modular storage cubes, brackets or mounts.
- Cost Consideration: Affordable to moderate, depending on customization.
9. Perforated Metal Cabinet Extensions
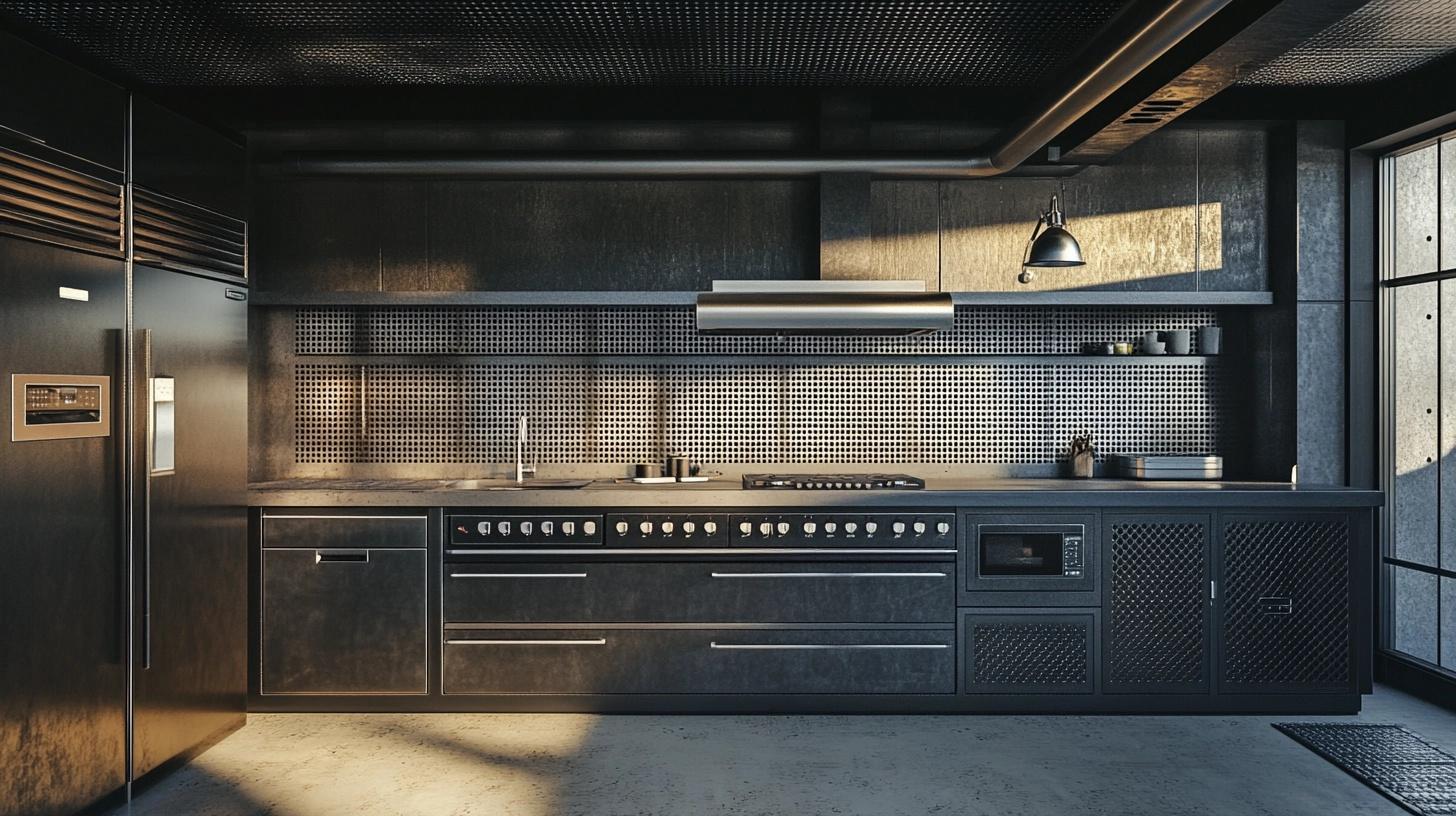
Using perforated metal panels to extend cabinets creates a sleek, industrial aesthetic. This design adds ventilation and texture to the kitchen, making it both functional and stylish, while allowing for lightweight, durable storage.
- Style Impact: Industrial, modern, and visually unique.
- Best For: Kitchens with an industrial or contemporary theme.
- Materials Needed: Perforated metal panels, mounting hardware.
- Cost Consideration: Moderate depending on metal type and installation.
10. Mirror-Backed Upper Cabinets
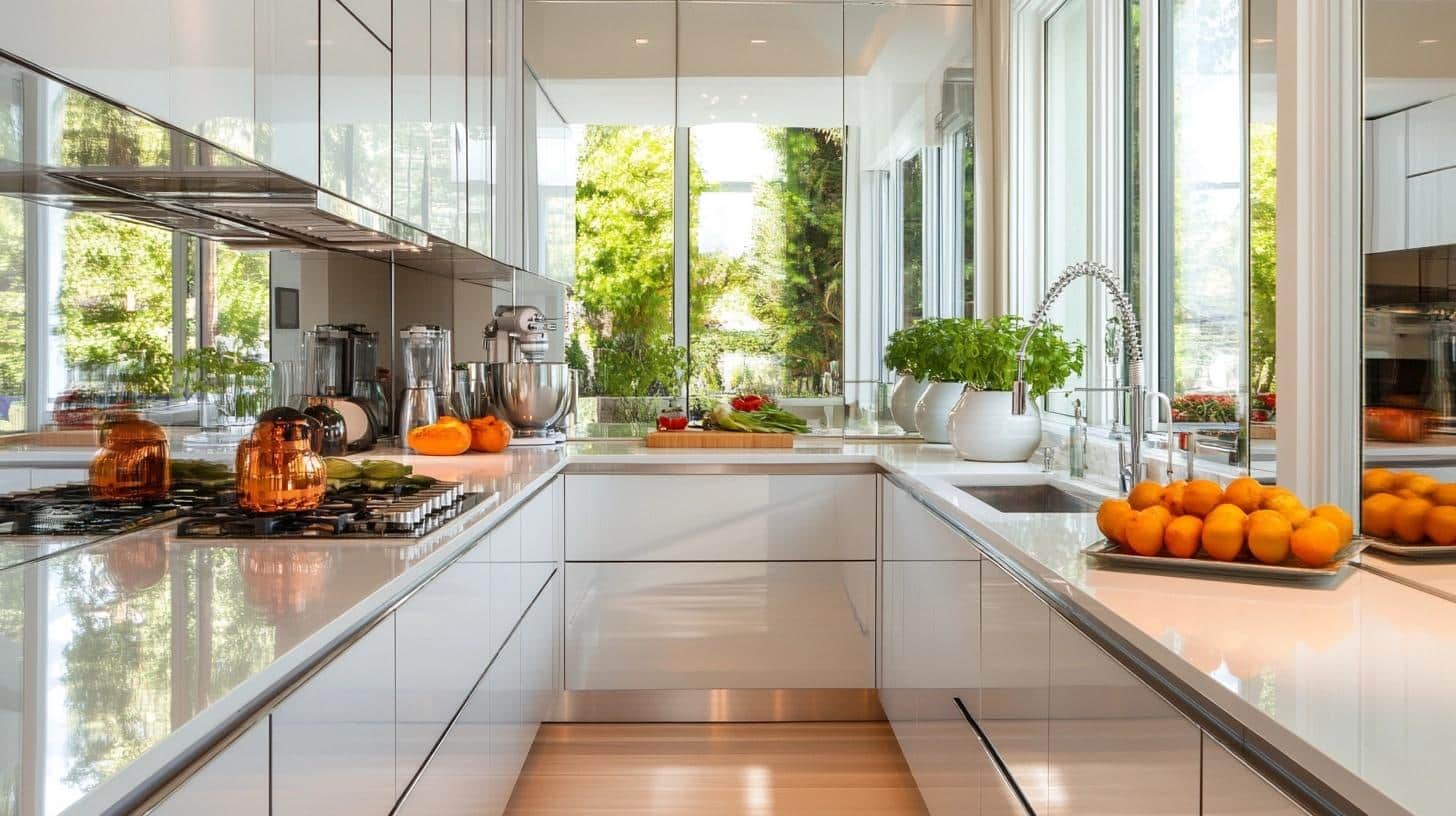
Extending cabinets with mirror-backed upper sections reflects light, making the kitchen feel larger. Mirrors give the illusion of more space, which is especially beneficial in smaller kitchens. This creates a bright and airy atmosphere while maintaining functionality.
- Style Impact: Reflects light, makes the space feel larger.
- Best For: Small kitchens needing more light and openness.
- Materials Needed: Mirrors, cabinet frames, adhesive.
- Cost Consideration: Moderate to high depending on mirror quality and installation.
Pros and Cons of Extending Kitchen Cabinets to the Ceiling
Before starting this project, let’s weigh the good and not-so-good points to help you make an informed choice.
Pros
More Storage Space
- Adds 20-30% extra storage area
- Keeps seasonal items out of the way
- Frees up lower cabinets for daily items
- Reduces clutter on countertops
Clean, Modern Look
- Creates smooth lines from floor to ceiling
- Makes kitchens look bigger
- Gives a custom-built appearance
- Updates older kitchen designs
Better Maintenance
- No dust collection on top
- Less time spent cleaning
- No grease buildup in gaps
- Better air quality in the kitchen
Cons
Cost Factors
- Stock cabinets: $100-300 per unit
- Custom work costs more
- Extra materials needed for proper fit
- Installation fees if not DIY
Access Issues
- Need step stools for top shelves
- Hard to reach daily-use items
- Safety concerns for shorter users
- May need special tools to grab items
Installation Challenges
- Might need expert help
- Takes more time than basic updates
- Requires precise measurements
- Could find unexpected issues
Money-saving tip: Start with ready-made units and see if they work before choosing custom options.
Safety note: Store rarely-used items in top cabinets and keep a sturdy step stool nearby.
Step-by-Step DIY Guide: How to Extend Your Cabinets
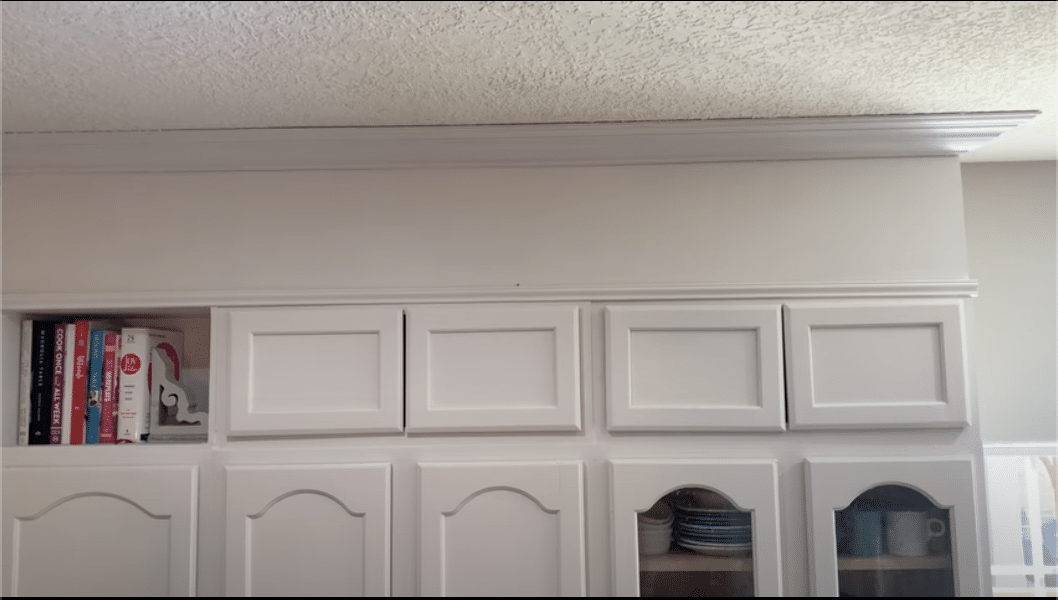
A well-planned approach makes this project smooth and successful. Follow these detailed steps to extend your kitchen cabinets correctly.
Required Materials and Tools
| Required Materials | Tools Needed |
|---|---|
| Unfinished stock cabinets | Drill and bits |
| MDF panels | Level |
| 1×4 lumber for frames | Measuring tape |
| Wood shims | Nail gun |
| Liquid nails | Saw |
| Crown molding | Putty knife |
| Wood putty | Paint brushes |
| Paint and supplies | Safety equipment (gloves, goggles, mask) |
| Screws and nails |
Step 1. Start with Stock Cabinets
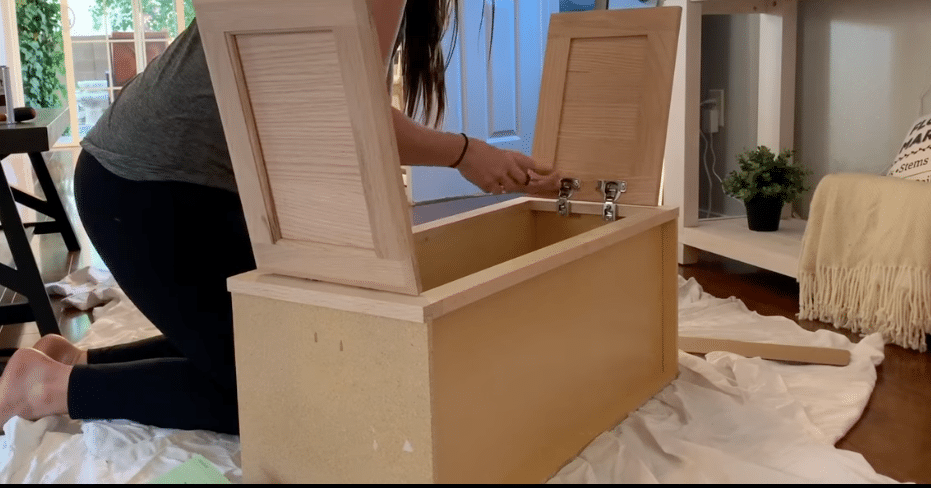
For the best results:
- Buy unfinished upper cabinets that match your current cabinet sizes
- Check each store’s stock options for best fit
- Consider building custom boxes for non-standard sizes
- Remove all hardware before starting
Step 2. Paint Preparation
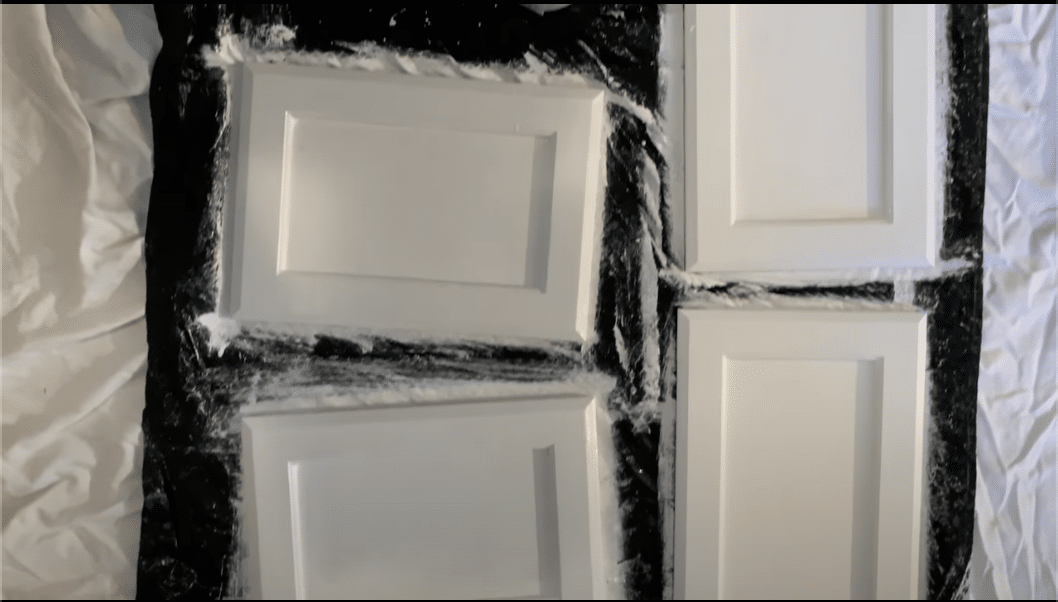
Essential painting steps:
- Choose paint that matches your existing cabinets
- Remove all cabinet hardware
- Clean surfaces thoroughly
- Paint each cabinet separately
- Allow proper drying time between coats
Step 3. Installation Process
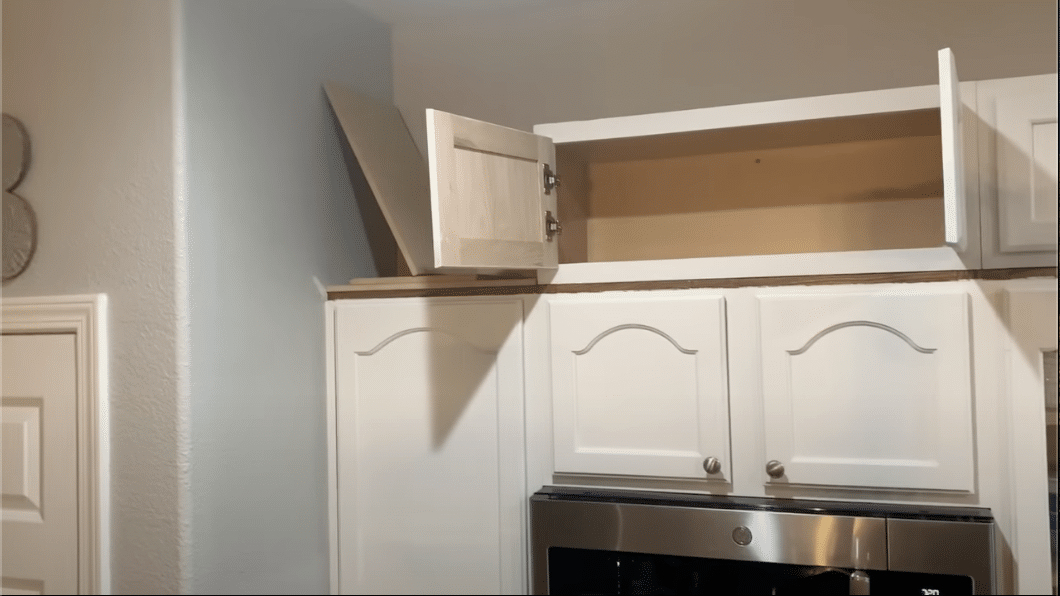
Key steps for secure mounting:
- Check walls for level surfaces
- Add wood shims where needed
- Find and mark wall studs
- Secure cabinets into wall studs
- Make sure fronts align perfectly
Step 4. Build Supporting Frame
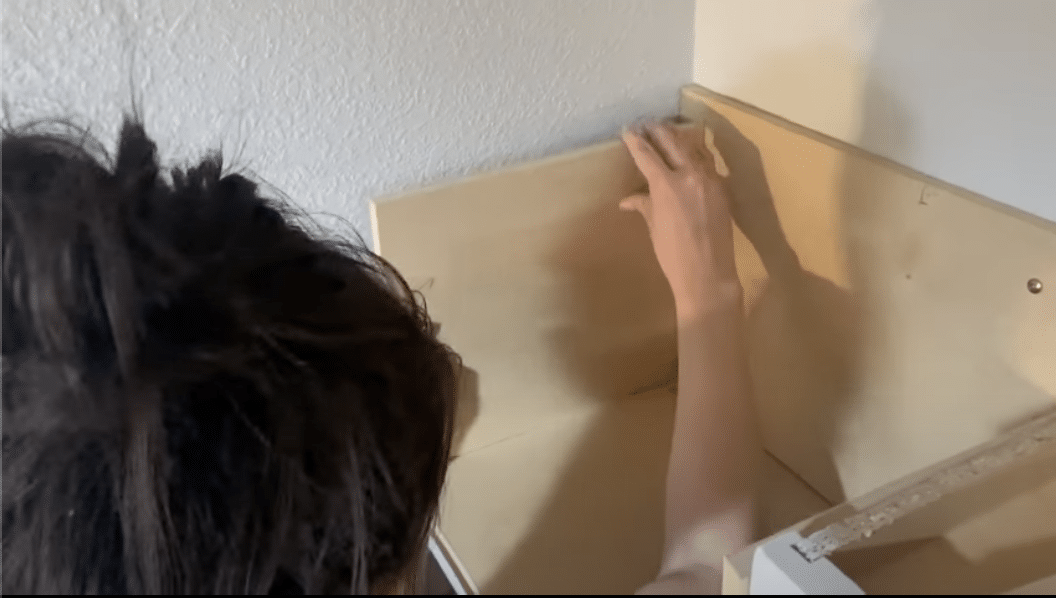
Create a solid structure:
- Use 1×4 boards from cabinet top to ceiling
- Build frames for each section
- Ensure frames are level and secure
- Add extra support where needed
Step 5. Add Panels and Trim
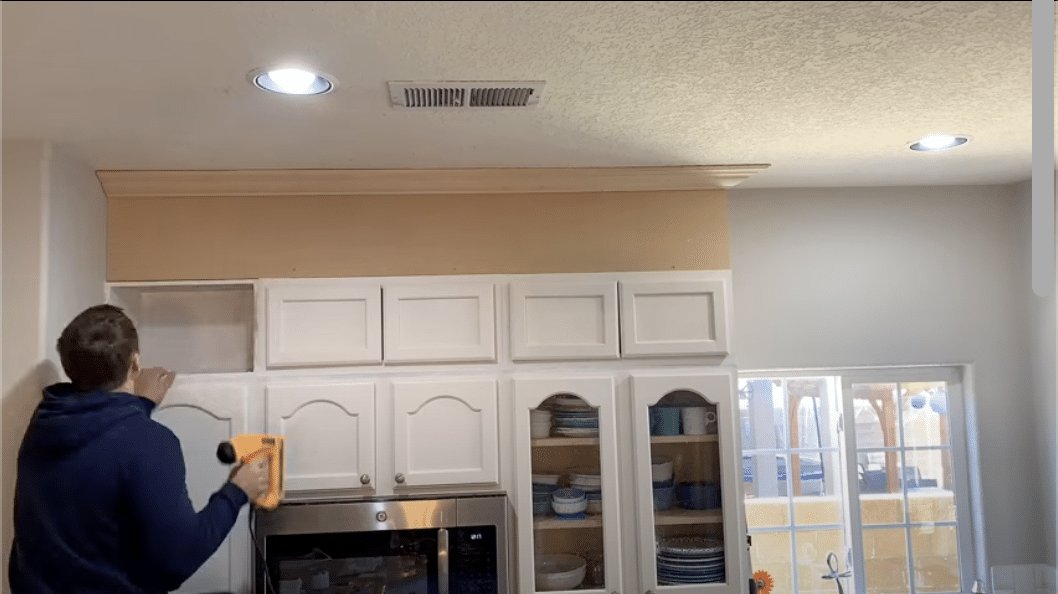
Final construction steps:
- Cut MDF panels to fit spaces
- Use liquid nails to hold panels
- Secure with regular nails
- Add crown molding at ceiling
- Install additional trim between cabinets and panels
Step 6. Finishing Work
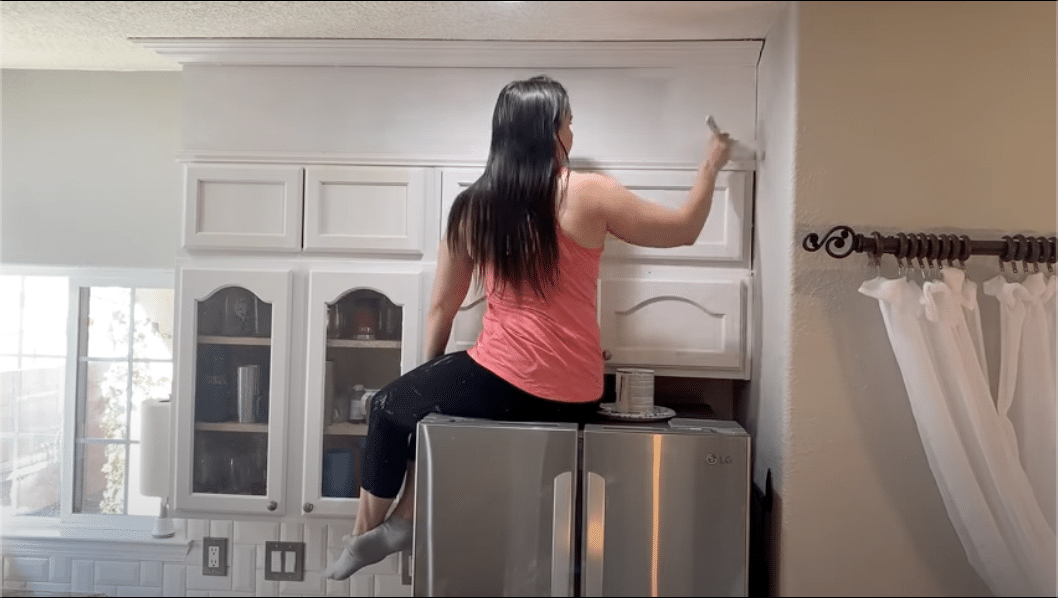
Complete these final touches:
- Fill seams with wood putty
- Cover nail holes
- Add paint touch-ups
- Clean all surfaces
- Check all joints and seams
For a more detailed look at the process, click here.
Is Extending Kitchen Cabinets Right for You?
Looking up at that empty space above your kitchen cabinets? Here’s what you need to know before making a decision.
What to Consider First
Your Kitchen’s Setup
- Height of current cabinets
- Quality of existing units
- How your ceiling looks
- Available wall space
Daily Kitchen Life
- Storage needs: what would go up there?
- Who uses the kitchen most often
- How you move in the space
- What bothers you now
Money Matters
- Stock units: simpler but limited options
- Custom work: perfect fit, higher cost
- DIY potential: skills vs. hiring help
- Long-term value benefits
Smart Planning Steps
Start here:
- Get out that measuring tape
- List what needs storage
- Write down your budget
- Take photos of problem spots
- Check local kitchen stores
Making it Happen
Small kitchen? Start with one wall. This lets you:
- Test the change
- Learn what works
- Stay within budget
- Build confidence
Remember: Good kitchens make homes better. Take time to plan, but don’t wait too long to start creating the space you want.
Conclusion
Extending kitchen cabinets to the ceiling does more than add storage – it creates a complete, well-designed kitchen that works better for you.
From saving time on cleaning to adding value to your home, this update offers real benefits for any kitchen size.
Before you start, check your cabinet condition, measure your space, and set a clear budget. Whether you choose stock units or custom work, the key is proper planning.
Not sure about taking on a full project? Try updating one section first. This lets you test the results and build your confidence.
Need expert input? Local kitchen specialists can evaluate your space and suggest the best options for your needs.
Take that first step today – grab your measuring tape and start planning your kitchen’s new look.
Frequently Asked Questions
Can I extend cabinets in a kitchen with high ceilings?
Yes. High ceilings offer more options. Use stacked cabinets or custom extensions. Keep top shelves for less-used items and install good lighting.
What if my cabinets have soffits?
You can remove soffits or work around them. Removal lets cabinets reach the ceiling. Working with soffits needs careful planning but costs less.
Do I need permits for this project?
Usually no. Cabinet extensions count as minor updates. But check local building codes, especially if you’re changing electrical or moving walls.
How much will this project cost?
Stock cabinets: $100-300 per unit plus installation. Custom work: $500-1000 per cabinet. Total cost varies by kitchen size and material quality.
Will the extension match my existing cabinets?
Stock units might look slightly different. Custom extensions offer better matches but cost more. Keep samples of your current finish for matching.

