
Step-by-Step Guide to Mesh Makeover of Bifold Closet Door
Are you tired of plain, boring bifold closet doors? Let’s turn them into eye-catching features that add charm to your space!
This guide will show you how to give your old doors a fresh look to make your home feel brand new.
We’ll walk you through changing standard bifold doors into beautiful cane-panel showstoppers.
This project is perfect for anyone who wants to add a touch of style to their home without spending a fortune.
Whether fixing a small pantry or updating bedroom storage, this makeover will work wonders.
Are you ready to roll up your sleeves and start this fun home improvement project? We’ll cover everything from picking materials to the final touches.
By the end, you’ll have the know-how to transform any bifold door in your house. Let’s get started on your door makeover journey!
Understanding the Basics Bifold Closet Door
Bifold doors are hinged panels that fold against each other when opened. They often save space for closets, pantries, and laundry areas.
These doors can swing out of the way, giving you full access to what’s inside.
Changing your door’s look can brighten up a room. A stylish door can turn a plain closet into a standout feature.
It’s not just about looks – a good makeover can make your door work better and last longer.
Before you start, think about what you want. Do you prefer a modern or classic style? What colors match your room?
We’ll use cane mesh to add texture and interest for this project. You’ll need to measure your door carefully and choose sturdy materials that fit your budget.
Remember, this makeover takes time, but the results are worth it!
Materials Needed for Makeover
Here’s what you’ll need for your door makeover:
- Bifold door (24 inch x 80 inch)
- Wood screen molding (1/4 inch x 3/4 inch x 96 inches, 3 pieces)
- Cane mesh (at least 48 inches)
- Paint of your choice
- New door knob
- Paintable caulk
- Wood filler
- Electric sander and sandpaper
- Drill
- Circular saw or jigsaw
- Nail gun
- Staple gun
Step-By-Step Guide for Makeover of Bifold Closet Door
Step 1: Prepare Your Workspace
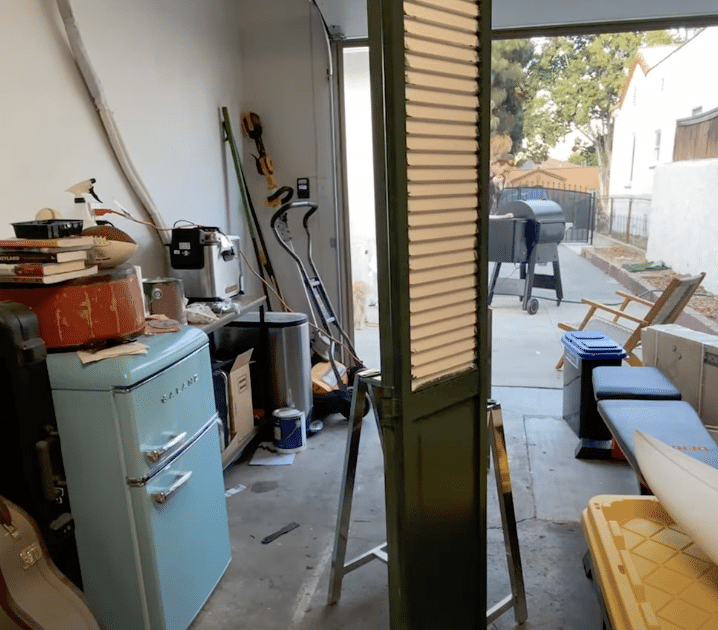
Clear a large, well-ventilated area. Lay down drop cloths to protect the floor. Set up your tools and materials within easy reach.
Step 2: Sand the Door
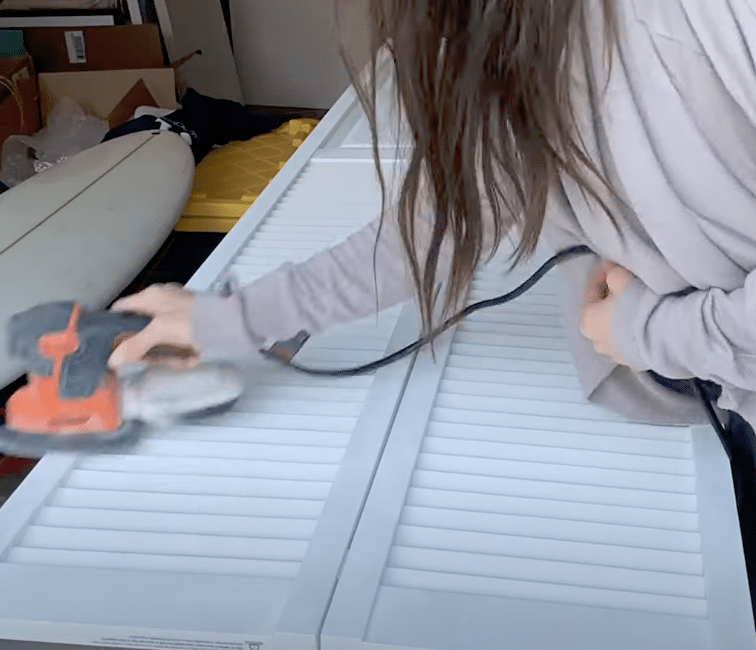
Using an electric sander, thoroughly sand all sides and edges. Start with coarse-grit sandpaper and finish with fine-grit for a smooth surface. Wipe away dust with a damp cloth.
Step 3: Check Door Fit
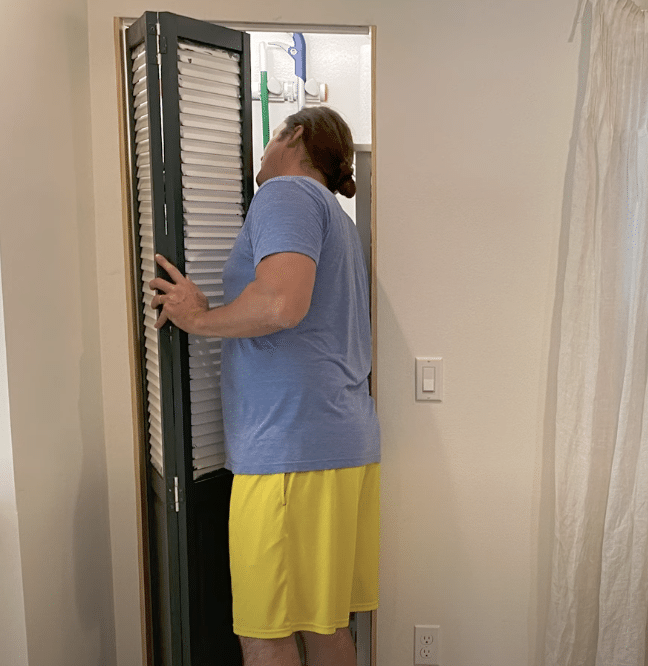
Hang the door in its opening to ensure it fits. If it’s too tall, mark where you need to trim. Take the door down for the next steps.
Step 4: Remove Louvers
Use a circular saw or jigsaw to cut down the middle of the louvers. Carefully pull them out, being mindful not to damage the door frame.
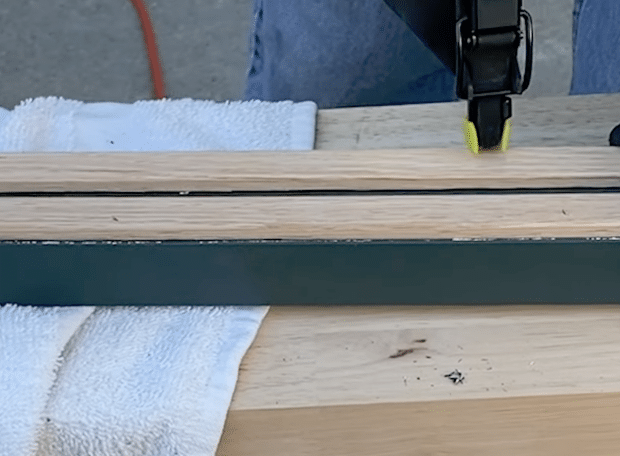
Step 5: Install Wood Screen Molding
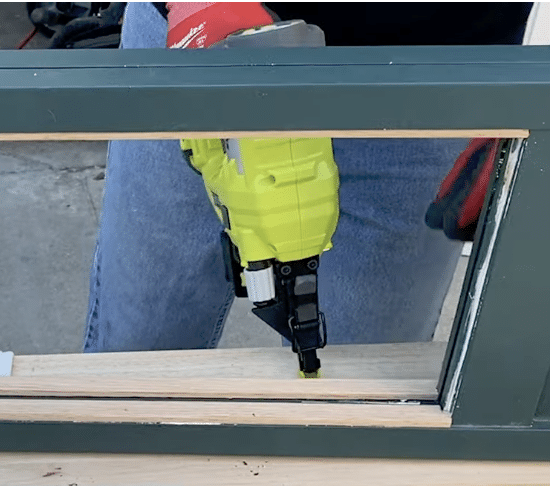
Cut wood screen molding to fit the louver holes. Use a nail gun to nail these pieces in place. Sand the newly installed molding to blend with the door.
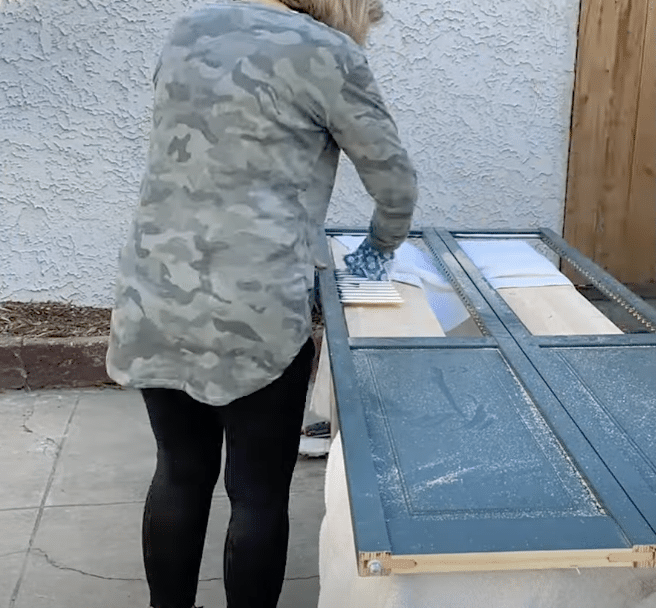
Step 6: Fill and Smooth
Apply paintable caulk to any gaps between the new molding and the door. Use wood filler to cover nail holes. Let dry completely, then sand these areas smooth.
Step 7: Paint the Door
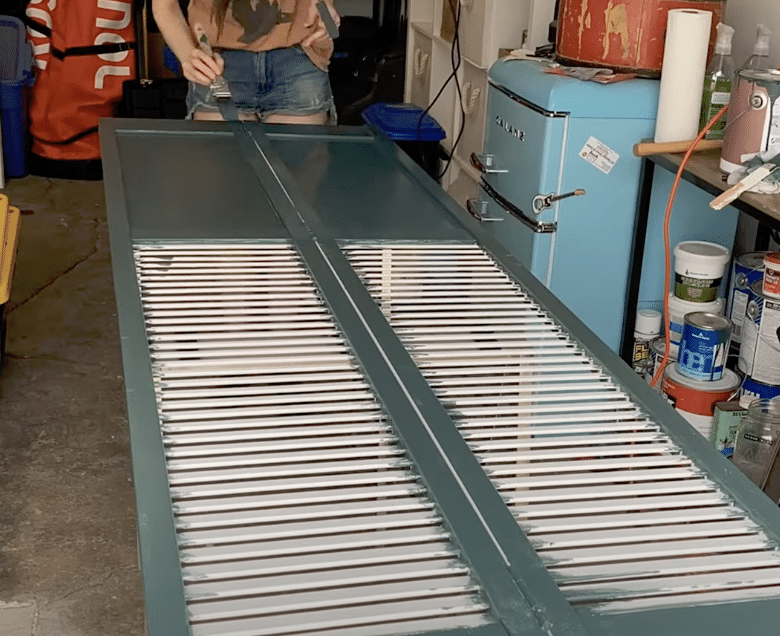
Apply your chosen paint color. Use thin, even coats and allow proper drying time between each coat. Paint all sides, including the thin edges.
Step 8: Prepare the Cane Mesh
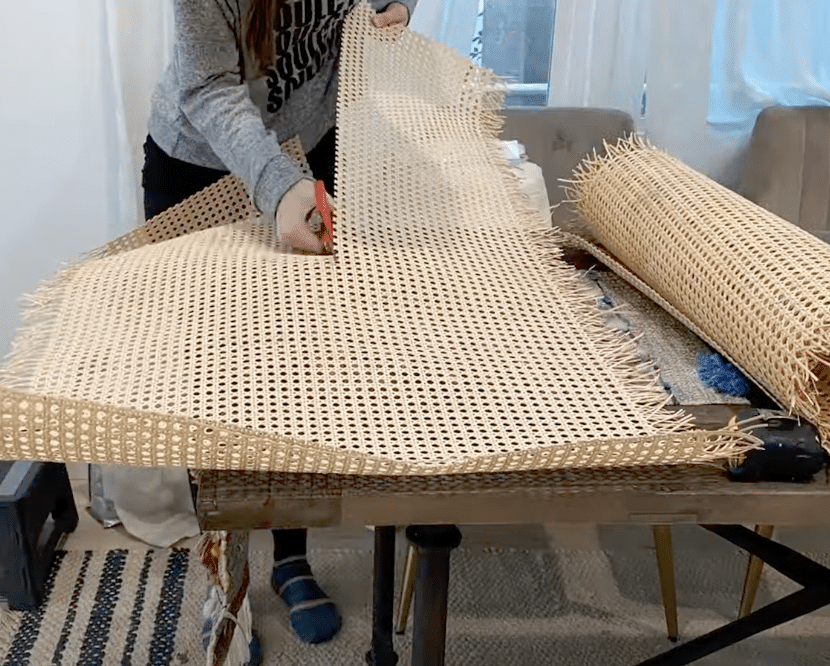
Measure the door openings carefully. Cut the cane mesh to size, leaving a small overlap for stapling.
Step 9: Install Cane Mesh
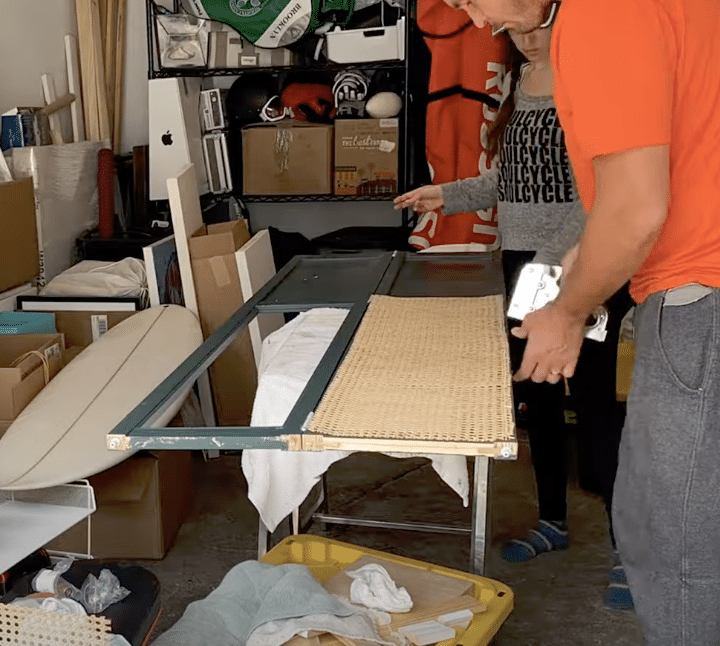
With a helper, pull the cane mesh taut across the back of the door. Staple it in place, working from the center outward to avoid wrinkles.
Step 10: Rehang the Door
Install the door hanging hardware if you haven’t already. Hang the door in the opening, making sure it operates smoothly.
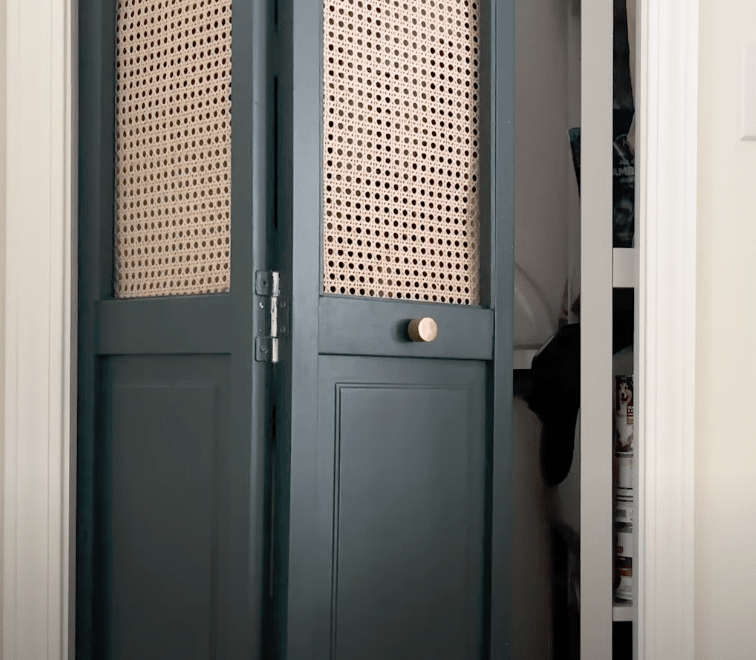
Step 11: Add Finishing Touches
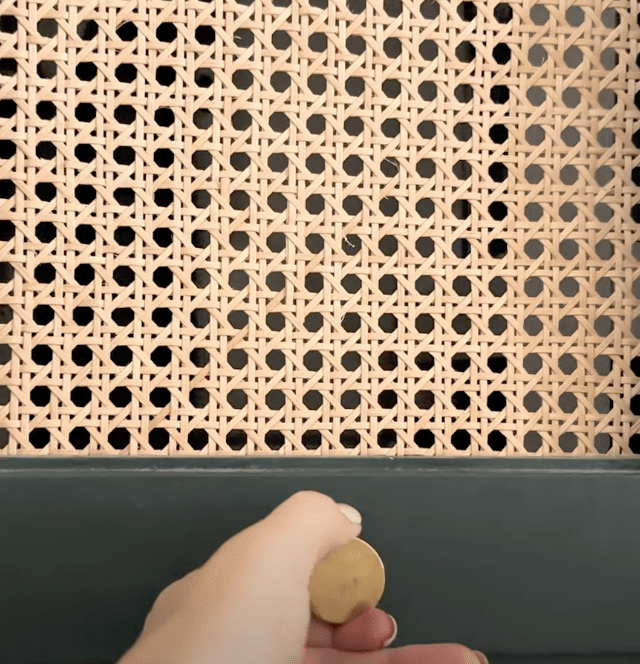
Install your new door knob. Touch up any paint if needed. Stand back and enjoy your newly transformed door!
Final Touches and Maintenance of Bifold Door
After completing your door makeover, it’s time for the final steps. Choose a paint that matches your door material and apply it in thin, even coats.
Use a foam roller for flat areas and a brush for details, letting each coat dry fully. For extra smoothness, sand lightly between coats.
Once the paint is dry, carefully rehang the door. Make sure it opens and closes smoothly, adjusting as needed.
To keep your new door looking great, clean it regularly with a soft, dry cloth. Check the hinges now and then, tightening them if they get loose.
A yearly drop of oil on the hinges can prevent squeaking. If you notice any paint chips, touch them up quickly to avoid moisture damage.
Sometimes, new issues might pop up. If the door starts to stick, look for paint buildup on the edges. If it’s not hanging straight, you might need to adjust the top pivot bracket.
For a door that won’t stay open or closed, the floor might not be level – a small shim under the frame can help. With a bit of care, your updated door will stay beautiful and work well for years to come.
Summing It Up
Your new bifold door makeover can truly change the feel of your room. A once dull closet is now a beautiful feature that adds charm and style to your space.
This project not only improves looks but also boosts your home’s value.
Taking on DIY projects like this can be rewarding. You get to see your hard work pay off every time you walk by your new door. Plus, you’ve saved money by doing it yourself – a win-win!
We’d love to see how your door makeover turns out. Why not share a photo of your finished project? Your success might inspire others to try their home updates.
Remember, every small change you make can greatly impact how you enjoy your living space. Happy DIYing!


