
12 DIY Bathroom Projects for a Weekend Makeover
Hey there, DIY enthusiasts and homeowners! Are you ready to roll up your sleeves and give your bathroom a fabulous makeover? Let’s dive into easy DIY projects that will turn your bathroom into a retreat like a spa. These projects are great for anyone looking to spruce up their space quickly and cheaply. So grab your tools, and let’s get started!
Floating Vanity

Are you feeling ambitious? Why not build your own floating bathroom vanity from scratch? Start by measuring your bathroom. Then, sketch out a design for your vanity. Next, gather your materials. You’ll need plywood, lumber, screws, and wood glue.
Cut the plywood to size with a circular saw. Then, use wood glue and screws to assemble the frame. Attach the plywood panels to make the top and sides of the vanity. Finally, install the vanity onto the wall. Use heavy-duty brackets. Make sure it’s level and secure.
Tip: Consider installing a vessel sink on the vanity to create a seamless look. You can also add a shelf or two underneath for extra storage.
Add Floating Shelves
Estimated Time: 2-3 hours
They are a stylish and practical addition. You can add them to any bathroom. To install them, use a stud finder to find the wall studs. Then, mark where you want your shelves. Use a level to ensure they’re straight. Then, drill pilot holes and insert wall anchors. Finally, attach the brackets and shelves, and you’re all set! Fill your new shelves with decorative items. These could include candles. They could also include succulents or baskets. They will add a chic finishing touch.
Consider using glass shelves. They are better than wooden ones and have a sleek, modern look. You can also add LED strip lights under the shelves. They will create a dramatic effect.
Install a Statement Mirror

A mirror can improve your bathroom, make a statement, and enhance its look. Start by measuring your mirror. Then, choose a frame that fits your bathroom decor. You can buy pre-made mirror frames at most home stores. You can also get creative and make your own using molding or trim. Glue or nail the frame onto the mirror. Then, you’ll have a custom piece that adds personality to your space.
Tip: Add a large mirror to make a small bathroom seem larger. It should span the width of the vanity. This will reflect light and create the illusion of more space.
Refresh Your Walls with Paint
Estimated Time: 4-6 hours (including drying time)
A fresh coat of paint can work wonders in any room, and the bathroom is no exception. Before you start painting, clean the walls. Fill in any holes or cracks with spackling paste. After prepping the walls, apply a coat of primer. Then, add your chosen paint color. Consider painting the ceiling the same color as the walls for a cohesive look. Once the paint is dry, step back and admire your work. A new coat of paint can amaze you with how much it can change things!
Try different painting techniques. Use sponging or ragging, which add texture and depth to your walls. You can also make a focal wall by painting it a different color. Or, you can add a stencil pattern.
Create a Spa-Like Shower Niche

A built-in shower niche is valuable and stylish. It provides handy storage. It adds luxury to your shower. First, measure the size of your desired niche. Then, mark the area with painter’s tape. Use a tile saw to cut out the niche opening. Be sure to wear safety goggles and gloves. Once you cut the opening, install the tile using a thin-set mortar. Make sure to keep the edges level and flush with the wall. Finish the project by grouting the tiles. Then, seal the edges for a pro finish.
Tip: Use the same tile for the niche as you do for the rest of the shower walls for a cohesive look. You can also add a decorative accent tile to the back of the niche to make it stand out.
Update Your Lighting Fixtures
Estimated Time: 2-4 hours
Good lighting is key in any bathroom, so why not use your fixtures to make a statement? First, turn off the bathroom’s power at the circuit breaker. Then, remove the existing light fixtures. If you’re adding new sconces, use a stud finder. It will locate the wall studs for proper anchoring. Once the fixtures are secure, connect the wiring. Then, attach the cover plates. Finally, turn the power back on. Admire your lit bathroom!
Consider a stylish pendant light above the mirror for a modern touch. This is a variation of traditional vanity lights. You can also add LED strip lighting underneath the vanity for a soft, ambient glow.
Install a Rainfall Showerhead
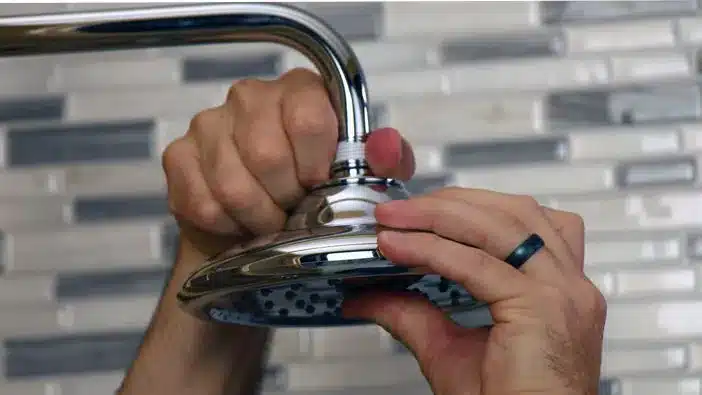 Estimated Time: 1-2 hours
Improve your shower. Use a luxurious rainfall showerhead. Start by removing the current showerhead. Use an adjustable wrench. Next, apply a layer of plumber’s tape to the shower arm threads to create a watertight seal. Screw the new showerhead onto the shower arm. Be careful not to screw it on too. Turn on the water to test for leaks, and adjust the angle of the showerhead to your liking. Then, step back and enjoy standing under a gentle rainfall. You can feel it every time you shower!
To get a spa-like experience, use many showerheads. They should be at different heights for a custom shower. You can also add a handheld showerhead. It will give you more flexibility.
Accessorize with Plants
Estimated Time: 1-2 hours
Put some plants in your bathroom. They will bring a touch of nature. Choose types that thrive in humid places. Some examples are ferns, spider plants, and peace lilies. Put them on windowsills, countertops, or shelves. They will add color and texture to your space. They will also improve air quality and create a calm atmosphere. This is for relaxation.
Tip: Hang plants from the ceiling. This gives you more counter space. You can also install a vertical garden on the wall. Or, use a plant stand to lift small plants off the floor.
Install a Towel Warmer
 Estimated Time: 2-3 hours
Add a touch of luxury to your bathroom with a towel warmer. It will keep your towels warm. It can also reduce moisture and mildew in your bathroom. To install a towel warmer, mount it on the wall using the provided hardware. Be sure to secure it to a stud for stability. Then, connect the wiring as the maker instructs. Turn on the power. You’ll soon be enjoying the comfort of warm towels every time you step out of the shower!
A tip: Look for a towel warmer with a built-in timer or programable settings.
Create a DIY Spa Bath Tray
Estimated Time: 1-2 hours
Transform your bathtub into a luxurious spa retreat with a DIY bath tray. Start by measuring the width of your bathtub and cutting a piece of wood to size. Sand the edges smooth and stain or paint the wood to your desired finish. Then, attach handles to the tray’s sides for easy carrying. Add non-slip grips to the bottom to prevent sliding. Finally, add candles, a book or tablet holder, and a glass of wine to your tray. This will create the ultimate relaxation experience.
Tip: Customize your bath tray with added features. These include a wine glass holder. It has a smartphone stand and a waterproof speaker.
Upgrade Your Toilet Seat

Upgrade your bathroom. Do it by replacing your old toilet seat with a new one. Choose a seat in a sleek modern design or a classic wood finish to match your bathroom decor. Installing it is easy. All you need is a screwdriver. Use it to remove the old seat and attach the new one. Tighten the screws well. This will stop wobbling or shifting.
Tip: Look for a toilet seat with extra features. These include hinges that close. They also have an antimicrobial coating. They also have built-in nightlights. They add comfort and convenience.
Install a Bidet Attachment
Estimated Time: 1-2 hours
Improve your bathroom hygiene with a bidet. A bidet is an attachment for your toilet. It provides a better and gentler clean than toilet paper alone. It can also cut toilet paper use and save money in the long run. Installing is simple. Attach the bidet to your toilet seat using the provided hardware. Then, connect it to the water supply with a flexible hose. Then, adjust the settings to your liking. Enjoy the benefits of a cleaner, more hygienic bathroom.
Tip: Look for a bidet attachment. It should have adjustable pressure and temperature settings for customized clean.
Final Thoughts
Try these twelve creative DIY bathroom projects you can do on a weekend, leaving your bathroom refreshed and rejuvenated. These projects will make your bathroom prettier and more functional. So grab your tools. Get ready to turn your space into a sanctuary of relaxation and style!


