The Best Way to Install Vinyl Windows
Regular windows have a life expectancy of roughly 20 years while premium vinyl windows ones can serve up to 30 years. One thing that you are sure to have to do at some point in time is to replace your windows and this is the best time to do it since you will be able to enhance the appearance of your home and also improve on the energy efficiency.
High-quality replacement windows can block out the drafts and insulate the heat transfer, thus reducing the cost of heating or cooling. Here, we will describe how to replace vinyl windows and when you may need the help of a professional.
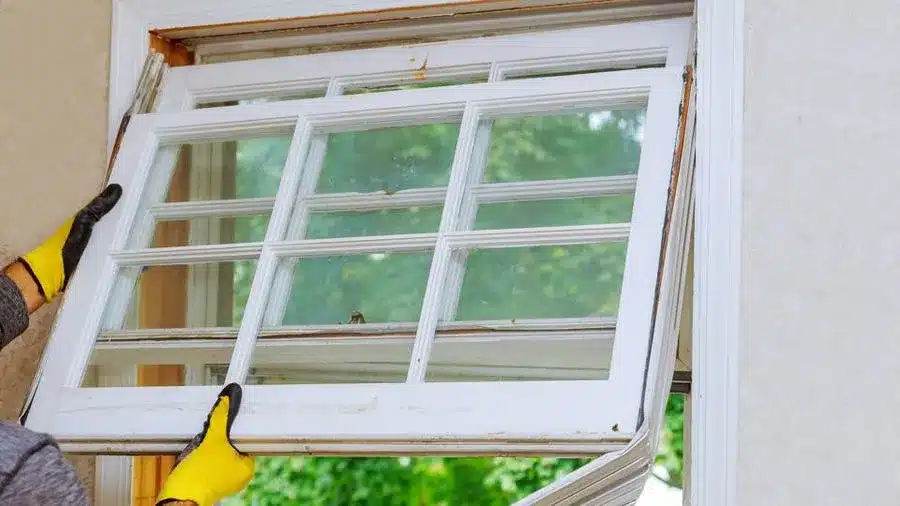
1. Removing the Old Window

To begin with, pry the indoor window stops off to get rid of the old window, as shown below: These are thin wooden strips fixed around the frame’s side and on top of the frame, so as to strengthen the frame and make it more rigid. Place them in different premises so that they can be redeployed once more.
It should be possible to open both sashes at the same time as well as without having to take out the exterior stops or the windowsill.
If the interior stops are not free, then it can be carried out using an oscillation multitool.
Also, remove the sash liners and springs, sash cord pulleys, and other things as well.
2. The Preparing of the Window Frame
Ensure that the frame is okay so that the structure of the house does not disappoint later on. There might be a lot of damage, rot, or mold, and there is no other option but to stop the job and replace the frame.
Clean up the frame to make sure that it does not have even the least stain of mildew, dirt or even grime.
Ensure that the frame is upright or horizontal so as to fit the new window and insert into the right position. To do this, measure the diagonals of the frame from the corner on the top to the corner at the bottom on the other end. Here in this case if the measurements are within a variation of ¼ inch then the frame is plumb.
If the frame is not plumb, the trim may then have to be taken-down and the width of the frame adjusted by the use of shims or narrow pieces of wood. If the difference is too large, however, the mere frame may need repair or even replacement.
3. Install the New Vinyl Windows Canada
Put the new pocket replacement window into the opening to ensure that it fits in the right position.
Once you are sure of the fit, go round the exterior window stops inside surfaces with the help of the caulking gun and put some silicone caulk.
Insert the new window in the frame and push it till it hits the exterior stops as far as possible. There should be some margin around the frame, but it has to be equal on every side of the picture. The only way to do that is to use a tape measure, which will give the right dimensions of the area.
If there are any gaps, they must be filled with shims and insulating material to fill the voids. The fit should be just right, and this means that it should be snug so as not to put pressure on the frames and, at the same time, not too tight that it affects the functioning of the window.
Open the window and make sure the position of the shims and then fasten them with the help of the mounting screws and fix them to the frame. Whenever you want to fasten the shims together, you should use your power drill to drill a pilot hole through the shims so that they do not split.
It is also important not to over-tighten the screws as it will allow the frame to be oriented to some degree.
4. Closing Off of The New Window
Depending on the location of the shims of the vinyl windows, there will be a few gaps which will require filling with insulating material such as expanding foam or backer rods. Loose insulation and fiberglass batts should not be used because they do not function as they are when compacted into tight quarters.
Sanding of the interior window stops should be done and if the old ones were in a poor condition then it is advised to replace them with new replacement stops.
If you are to paint the frame, a paintable latex caulk should be applied to any gap that may be present between the frame and the insert replacement. Swipe the lines with a wet fingertip to clean them and also to erase the sharpness from the surface of the lines.