Porch Conversions: Step-by-Step DIY Guide and Ideas
I used to look at my porch and think, “There’s got to be a better way to use this space.” If you’ve had that same thought, porch conversions might be exactly what you need.
Turning your porch into a functional room, like a cozy sunroom or a quiet workspace, can add serious comfort and value to your home.
Today I’m sharing what I’ve learned: clear steps to get started, how to avoid common mistakes, and plenty of ideas to match your style and budget.
If you’re ready to reimagine your porch and make it something you’ll actually use and love, keep reading. There’s a lot here that’ll help you make the most of it.
Why Consider a Porch Conversion?
I’ve always believed that every part of your home should work for you, not just sit there looking pretty. If your porch mostly collects dust or holds a couple of old chairs, it might be time to think bigger.
Porch conversions can turn that quiet, unused space into something that actually fits your day-to-day life. Maybe you’ve been craving a spot to sip your morning coffee in peace, or you’re short on room for work or hobbies. Your porch could be the answer.
You don’t need to knock down walls or take on a full renovation. With the right updates, your porch can do more, look better, feel cozier, and give your home a real boost in function and comfort.
Types of Porch Conversions
A porch conversion can completely change how you use the space. Here are some of the most common types to think about as you plan your project:
3-Season Rooms

3-season rooms are designed to provide comfort during spring, summer, and fall. These rooms typically have insulated walls and windows, keeping you sheltered from the weather without the need for heating or cooling.
They’re a great choice for areas with mild climates and are more affordable than full-season rooms. A 3-season room offers a space to enjoy the outdoors while being protected from rain, wind, and pollen.
4-Season Rooms

4-season rooms are perfect for year-round enjoyment, offering full insulation and the ability to heat and cool the space. These rooms are ideal for homes in colder climates or for homeowners looking to extend their living area through all seasons.
With features like better insulation and HVAC options, 4-season rooms offer all the comfort of an indoor space while giving you the benefit of an outdoor connection, no matter the weather.
Sunrooms

Sunrooms are designed with large glass windows or walls, making them the perfect way to bring the outdoors inside. These rooms allow you to enjoy natural light and outdoor views while being protected from the weather.
Sunrooms are especially great for warmer climates, though they can be adapted with proper insulation for cooler areas. They create an open, airy feel, letting you enjoy nature from the comfort of your home.
Screen Porches

A screen porch offers an open-air feel, allowing you to enjoy fresh air while being shielded from bugs and pollen. This type of porch is perfect for mild weather and outdoor relaxation, but not suited for extreme temperatures.
With a screen porch, you get the best of both worlds: the comfort of being outside while staying protected from insects and allergens. It’s a great option for those who want a breezy, relaxing space.
Porch Enclosures

Converting your porch into a home addition can turn an underused space into a valuable room, like a living room, office, or extra bedroom.
This conversion usually requires structural changes and permits, but it significantly increases your home’s usable square footage.
If you’re expanding your family or simply need more space, home additions are an investment that adds both functionality and value to your property.
Step-by-Step Guide to Converting Your Porch
Turning a porch into a space you’ll actually use takes some planning and smart material choices. When I went through it, I found a simple approach made all the difference. Here’s a guide to help you do the same:
Tools and Materials Required
Before you begin, gather the tools and materials you’ll need. These can vary depending on the type of space you’re building, but here’s a general list:
- Tape measure and level
- Hammer, screwdriver, and drill
- Saw (if cutting materials)
- Windows (glass, vinyl, or screen)
- Door (sliding or hinged)
- Insulation (for 4-season rooms)
- Flooring material (wood, tile, etc.)
- Trim and finish nails
- Caulk and sealant
- Safety gear (gloves, goggles)
Make sure everything is ready before you start to save time and avoid delays.
Step 1: Planning the Conversion

Start with a clear idea of what you want your porch to become. A relaxing sunroom? A reading nook? A small office?
Use a tape measure to check the porch’s width, length, and height. Write everything down.
Sketch a layout on paper or use a basic design app. This helps you figure out where windows, doors, and furniture will go.
Planning now makes building later much easier.
Step 2: Prepare the Space

Begin by removing everything from the porch: furniture, railings, screens, and old flooring.
Use a crowbar or a screwdriver to take out old materials. A broom or shop vacuum helps clean up dirt and dust.
Check the floor for damage. If needed, use a level to make sure it’s even. Repair cracks using patching material and a putty knife.
A clean, sturdy space is key before adding new features.
Step 3: Install Windows and Doors

Pick the type of windows that suit your design: vinyl 4-track, screens, or insulated glass.
Use a drill or screwdriver to secure the window frames. You may need a level to make sure everything sits straight.
For doors, go with a pre-hung option that fits your frame. Install it using screws and a cordless drill.
Seal all edges with weatherstripping and caulk to block out air and moisture.
Step 4: Add Insulation

If your goal is a 4-season room, this step is a must.
Use fiberglass batts or foam board to insulate the walls, ceiling, and floor. Cut pieces to size with a utility knife.
Place insulation between studs and joists. Secure it using a staple gun or adhesive spray, depending on the material.
This helps keep the space warm in winter and cool in summer.
Step 5: Finish with Flooring and Trim

Choose a flooring type that works well for indoor-outdoor use, like vinyl plank, ceramic tile, or pressure-treated wood.
Use a circular saw to cut boards or tiles as needed. Install using floor adhesive, nails, or screws, based on your material.
Once the floor is down, add trim around the windows, doors, and baseboards. Cut trim with a miter saw, then attach it using a nail gun or hammer.
This last step brings the whole space together with a finished look.
Step 6: Style and Enjoy Your New Space

Now that your porch is complete, it’s time to turn it into a space you love. This step is all about furnishing and adding the final touches.
Start by choosing furniture that fits your space and purpose. A cozy sofa and chairs work great for a sunroom. A small table and bench might suit a dining nook.
Add rugs, pillows, and curtains for comfort and color. Use indoor plants or hanging lights to bring in charm and warmth.
Make sure to keep walkways clear and furniture arranged for easy movement. This is your chance to make the space feel like home, calm, cozy, and truly usable.
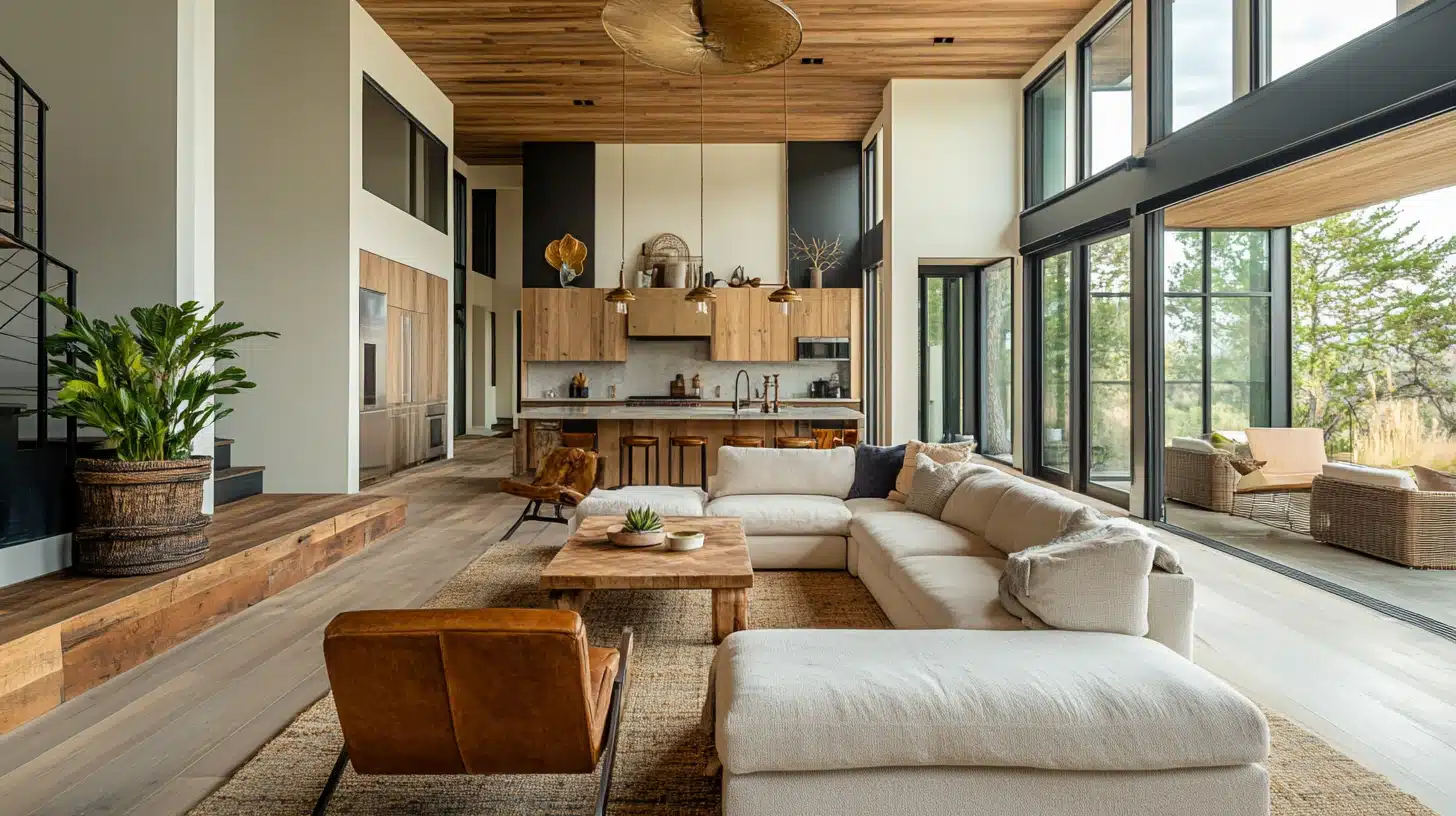
Inspiring Porch Conversion Ideas
I wanted my porch to feel both practical and inviting, so I looked at a few creative approaches. If you’re aiming for the same, these ideas can help you plan the perfect conversion to match your needs and personal style.
1. 3-Season Relaxing Sunroom

Convert your porch into a bright 3-season room using vinyl windows, comfy seating, and indoor plants. Add light curtains and soft rugs to keep it airy but cozy.
This type of enclosed porch is perfect for enjoying spring, summer, and fall without bugs or wind.
2. Home Office with a View

Turn your unused porch into a quiet workspace with a desk, bookshelves, and large windows. Use insulated glass and simple blinds to block glare and stay focused.
If you work from home, this porch conversion makes a big difference without taking over a bedroom.
3. Dining Porch with Natural Light

Add a small dining table, chairs, and overhead lighting to create a casual eating space. Use screens or 4-track windows to enjoy meals outside without pests.
This idea is great for families who love sharing meals in a fresh, bright setting.
4. Mudroom and Storage Zone

Enclose your front or side porch to make a drop zone for shoes, bags, and coats. Install wall hooks, benches with storage, and easy-clean flooring.
A mudroom porch conversion keeps your main entry clean and organized year-round.
5. Cozy Reading and Game Nook

Fill the space with a built-in bench, soft cushions, and low shelves for books and games. Use dimmable lighting and neutral colors for a peaceful vibe.
This small porch is perfect for relaxing evenings or quiet mornings.
Each of these porch conversion ideas can be adapted to your space, budget, and lifestyle. Start with one and make it your own.
DIY vs. Professional Porch Conversions
When I was weighing a porch conversion, I had to choose between tackling it myself or bringing in a pro. You’ll face the same decision. Here’s a breakdown of both options:
| Aspect | DIY Porch Conversion | Hiring a Contractor |
|---|---|---|
| Cost | Lower cost as you save on labor | Higher cost due to labor and contractor fees |
| Time | Takes longer, depending on skill and experience | Faster as professionals manage the work |
| Skill Required | Requires basic construction skills | No skill required, the contractor handles all work |
| Control Over Design | Full control, can make changes during the project | Limited control, as the contractor manages the design |
| Materials | You choose and buy materials | The contractor provides and sources materials |
| Quality | Can be good with effort, but may lack precision | High quality with expert knowledge and experience |
| Permits | You handle permits and regulations | The contractor handles permits and regulations |
If you choose to go DIY or hire a professional, both options have their benefits. Weigh the costs, time, and expertise needed to decide which works best for you and your porch conversion project.
Cost Breakdown of Porch Conversions
When I started looking into converting my porch, I quickly realized how important it was to understand the costs upfront. If you’re planning a similar project, you’ll want a clear idea of what to expect, so here’s a breakdown of the potential costs:
Material Costs
When converting a porch, the cost of materials can vary widely.
For windows, the national average is around $1,047 each, including installation, though basic vinyl or glass windows range from $500 to $700, while high-efficiency or architectural windows can go for $900 to $1,400.
Patio or French doors typically cost between $1,500 and $4,000, including installation, while basic interior doors are less expensive.
Insulation costs range from $0.30 to $4 per square foot, with professional installation bringing the total to $1,000–$2,400 for a typical space.
Flooring options vary greatly, from $1 to $20 per square foot, with vinyl and laminate being on the low end, and wood or tile on the higher end.
Cost of Hiring a Professional
Hiring a contractor typically includes both labor and material costs. Labor rates can range from $50 to $140 per hour, with overall project costs often falling between $3,000 and $15,000.
This range includes labor, materials, and service fees. The exact cost depends on the size of the project, whether you’re converting into a 3-season or 4-season room, and the contractor’s experience.
Additional Costs
Beyond materials and labor, additional costs may arise, such as permits ($50–$500) and structural work ($1,000–$3,000).
If you’re upgrading to a 4-season room, expect to pay extra for insulation ($1,000–$2,000) to make the space usable year-round.
These added costs are essential to keep in mind when planning your project.
Budget-Friendly Options
To save on costs, consider DIY options where you handle the work yourself, saving on labor fees. You can also look into reclaimed materials or negotiate with contractors for discounted materials.
Opting for a simpler design, like a 3-season room, can also cut down on insulation and structural requirements, making it a more affordable choice.
By understanding these costs and planning ahead, you can keep your porch conversion within budget while still getting the results you want.
Legal and Permit Information
Planning a porch conversion? In most parts of the U.S., you’ll need a building permit, especially if you’re adding walls, windows, HVAC, or electrical features.
When Permits Are Required
Permits are typically needed for:
- Structural changes (walls, roofing, or enclosures)
- Electrical work or lighting
- HVAC or plumbing extensions
- Turning the porch into a year-round living space
Simple upgrades like painting or replacing screens may not need permits, but always check with your local building office to be sure.
How It Works
You’ll submit your plans to your city or county’s permitting department, pay a fee (usually $50–$500), and schedule inspections at key stages of the project. Expect to provide drawings or a basic layout, especially for enclosed or insulated rooms.
Codes and Compliance
Each area has its own rules, but most follow some version of:
- Energy codes for 4-season rooms
- Zoning rules for porch size and placement
- Egress requirements if used as a bedroom
- Structural standards for added weight (walls, roofing)
If you’re hiring a contractor, they usually handle this for you. If you’re going DIY, the paperwork and compliance are up to you.
Why It Matters
Skipping permits can lead to fines, delays, or issues when selling your home. Permits ensure your porch is built safely, legally, and to code.
Finding a Porch Conversion Company
When searching for a porch conversion company, it’s essential to consider a few key factors. Start by researching top contractors like Porch Conversion Sunrooms in Wilmington, NC, or Patio Enclosures for nationwide options.
Once I had a few options in mind, I made sure to request quotes so I could get a clear picture of the cost. You’ll want to do the same, and don’t just focus on price. Compare each company’s experience, customer reviews, and overall value to make sure you’re choosing wisely.
Taking a little extra time here can go a long way in helping you find a contractor you can truly count on.
Common Mistakes to Avoid
I ran into a few hiccups during my own porch conversion, so I’ve learned what to watch out for. To help you avoid the same mistakes, here are some common pitfalls to steer clear of:
- Choosing the Wrong Materials: Make sure you choose materials that suit your climate and style.
- Skipping Permits: Don’t skip necessary permits. Failing to get them can lead to fines or issues when selling your home.
- Underestimating Costs: Always budget for unexpected expenses. Materials, labor, and permits can add up quickly.
- Not Considering Future Use: Think long-term about how the space will be used and what you’ll need in terms of heating, cooling, or furniture.
From my experience, planning ahead and steering clear of these common mistakes makes a big difference. It’ll set you up to create a space that’s both beautiful and functional.
Conclusion
Converting my porch completely changed how I use my home; it gave me a cozy, practical space I didn’t even realize I needed. If you’ve got an underused porch, porch conversions are a smart way to create more room without tearing down walls or starting from scratch.
We’ve gone over the most popular types, how to plan and build, what it might cost, and simple ways to make it your own. Whether you’re after comfort, extra storage, or a peaceful retreat, there’s a solution that fits.
If you’re ready to get started, stick around. You’ll find more easy-to-follow home improvement guides and ideas in my other blogs to help you keep building a home that works for you.