How to Paint a Room for Beginners in Budget
Want to give your room a fresh new look without hiring professionals? Painting it yourself is easier than you think, and it won’t drain your wallet either.
Many beginners worry about drips, uneven coverage, or buying the wrong supplies. But here’s the truth: with the proper steps and a little patience, anyone can paint a room that looks great.
This blog walks you through everything, including what supplies to buy, how to paint a room for beginners, and the best techniques for smooth coverage with a free printable checklist.
You’ll also learn how long it takes and what it costs, so you can plan your project confidently.
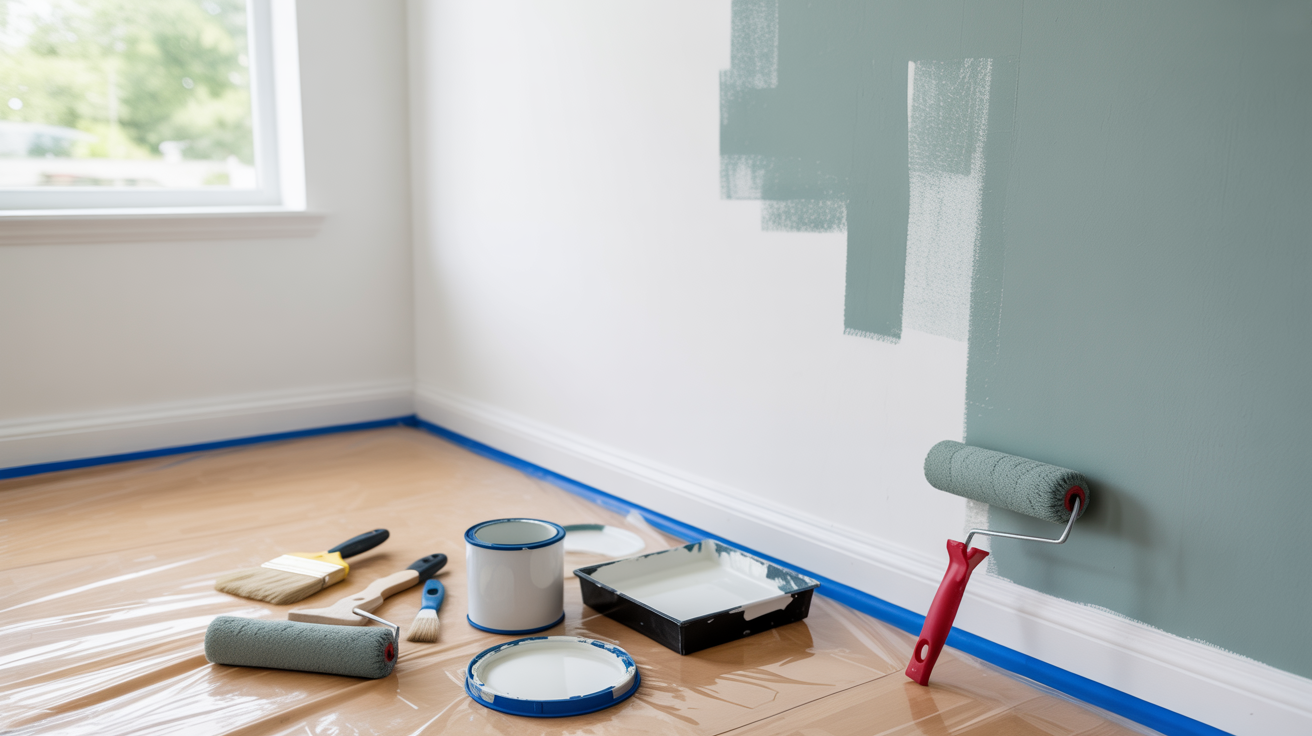
What You Need Before You Start
Getting your supplies ready makes the whole painting process smoother. You don’t want to run to the store halfway through when the paint is drying on your walls.
| Category | Items You’ll Need |
|---|---|
| Paint and Protection | Interior paint (enough for your room’s square footage), primer (for dark colors or bare walls), painter’s tape, drop cloths or plastic sheeting |
| Application Tools | Roller with extension pole, paint tray with liners, 2-inch angled brush, small detail brush |
| Prep Supplies | Putty knife and spackling paste, sandpaper (120-grit), screwdriver for outlet covers, sponge, and mild detergent |
| Other Essentials | Stir stick, rags or paper towels, ladder or step stool |
Stock up on everything before you begin. Running out of supplies mid-project creates visible lines and kills your momentum.
How to Paint a Room for Beginners (Simple DIY Steps)

Steps to Painting a Room Convert your space without breaking the bank. The process feels manageable once you know the right sequence and techniques.
Step 1: Clear and Prep the Room
Move furniture to the center and cover it with drop cloths. Remove outlet covers, switch plates, and any wall decorations.
Lay drop cloths or plastic sheeting on the floor along all walls.
Step 2: Clean and Repair the Walls
Wash walls with a sponge and mild detergent to remove dust and grime.
Fill any holes or cracks with spackling paste using a putty knife. Let it dry completely, then sand smooth with 120-grit sandpaper.
Step 3: Apply Painter’s Tape
Run painter’s tape along edges where walls meet the ceiling, baseboards, and trim. Press it down firmly to prevent paint from bleeding underneath.
Tape around door frames and window frames, too.
Step 4: Prime the Walls (If Needed)
Apply primer if you’re covering dark colors, painting bare drywall, or dealing with stains. Use the same technique you’d use for a paint roller for large areas and a brush for edges.
Step 5: Cut In the Edges
Dip your angled brush about 2 inches into the paint. Carefully paint a 2-3 inch strip along all edges, corners, and around trim.
This creates a border for your roller work.
Step 6: Roll the Walls
Pour paint into your tray and load the roller evenly. Start from the top and work down in overlapping W or M patterns.
Don’t press too hard; let the roller do the work. Maintain a wet edge to avoid visible lines.
Step 7: Apply Second Coat
Wait for the first coat to dry completely (check the paint can for timing). Apply a second coat using the same technique.
Two thin coats always beat one thick coat.
Step 8: Remove Tape and Clean Up
Pull off painter’s tape while the final coat is slightly damp for clean lines. Reattach outlet covers and switch plates.
Clean your brushes and rollers immediately, then step back and admire your freshly painted room.
Common Beginner Mistakes (and how To Avoid Them)
1. Rushing straight to painting.
Fix: Clean walls, fill holes, sand smoothly, and tape edges first.
2. Painting over dark colors or patches without primer.
Fix: Use primer for dark walls, stains, or fresh drywall.
3. Applying too much paint at once, causing drips.
Fix: Use thin, even coats and remove excess paint in the tray.
4. Letting sections dry before continuing.
Fix: Work in small areas and maintain a “wet edge.”
5. Using a roller that’s too thick or too thin.
Fix: Smooth walls = 1/4″–3/8″; textured walls = 1/2″–3/4″.
6. Removing tape after the paint dries fully.
Fix: Peel the tape while the paint is still slightly wet.
7. Brushing or rolling the same spot repeatedly.
Fix: Apply paint and move on; fix imperfections on the second coat.
How Long Does It Take to Paint a Room

For beginners, painting a standard bedroom-sized room usually takes 6–9 hours from start to finish. This covers prep, painting, drying, and cleanup.
- Prep (1–2 hours): Cleaning walls, patching holes, sanding, and taping edges. Good prep speeds up the rest of the process.
- Priming (1–2 hours if needed): Required for dark colors, stains, or new drywall. Includes application and drying time.
- Cutting In (30–60 minutes): Painting around edges, corners, windows, and trim before rolling.
- Rolling Each Coat (45–60 minutes per coat): Most rooms need two coats for smooth, even coverage.
- Drying Time Between Coats (2–4 hours): Essential to prevent streaks and peeling.
- Trim + Touch-Ups (20–40 minutes): Baseboards, door frames, and minor corrections.
- Cleanup (15–20 minutes): Washing tools and removing tape.
Total: 6–9 hours (most beginners can complete the room in one day)
If the room is large or heavily damaged, expect closer to 9–12 hours.
Budget Breakdown for Beginner Room Painting
| Item | Cost |
|---|---|
| Interior paint | $25–$60 per gallon |
| Primer (optional) | $15–$30 |
| Roller + covers | $10–$20 |
| Angled brush | $8–$15 |
| Paint tray + liners | $5–$10 |
| Painter’s tape | $5–$10 |
| Drop cloths | $5–$15 |
| Spackle and sandpaper | $5–$15 |
| Cleanup supplies | $3–$8 |
Total Budget:$60–$150
Final Beginner Checklist
Painting a room is much easier when you have a simple checklist to follow.
This beginner-friendly checklist helps you stay organized, avoid common mistakes, and ensure your paint job looks smooth and professional.
It includes everything you need to do before, during, and after painting, so you don’t forget any important steps.
Conclusion
Painting a room yourself isn’t as hard as it seems. With the right supplies, proper prep work, and patience, you can learn how to paint a room for under $200.
The secret is taking your time with each step. Don’t rush the prep or skip that second coat. These details make the difference between an amateur job and a professional-looking finish.
Start with a small room, like a bathroom, if you’re nervous. Once you finish your first project, you’ll have the confidence to tackle any room in your house.
Grab your supplies, clear your weekend, and get started. Your freshly painted room is waiting.


