How to Measure Room for Furniture the Right Way
Buying furniture without knowing your exact room size often leads to poor decisions that only show up later. Pieces may look right online or in-store, but behave very differently once placed in your space.
That’s why learning how to measure a room for furniture is one of the most useful skills before making any purchase. It helps you understand your space, plan layouts with intent, and avoid problems that are expensive to fix later.
In this guide, I’ll walk you through the full process, from basic measurements to planning and matching furniture correctly. Let’s start with the basics.
Why Measuring Your Room Properly Matters
Most people skip room measurements and assume things will work out. They order the furniture, wait for delivery day, and then realise something doesn’t fit. More often than not, it doesn’t go as planned.
A sofa that looks perfect in the store may be too wide for your living room. A bed frame that seems standard-sized may leave no space to open the wardrobe door.
Getting your measurements right before buying is the one step that prevents all of this. Taking a few minutes to measure your room properly makes a big difference. These are the things it helps you do:
- Prevents furniture from not fitting: you won’t discover a sofa is too wide only after it arrives
- Keeps walkways comfortable: the right clearance between pieces makes your room easy and pleasant to move around in
- Avoids costly returns: no paying to send things back or hiring help to rearrange a layout that doesn’t work
Spending five minutes measuring now can save you from a very expensive mistake later. It is the simplest thing you can do to make furniture shopping go right.
Common Problems Caused by Incorrect Measurements
- Furniture doesn’t fit the space: a piece even a few centimetres too wide can make the whole room feel stuffed and uncomfortable
- Delivery gets stuck: large sofas, wardrobes, or bed frames often can’t get through doorways or around tight staircase turns
- Walkways get blocked: without enough clearance around furniture, moving through your own room becomes a daily frustration
- The room looks off: wrong-sized furniture throws off the balance of the entire room, no matter how nice the piece is
Getting measurements wrong doesn’t just affect one thing, it affects how the whole room looks and feels. Most of these problems take significant time and money to undo.
How Proper Measuring Improves Layout Planning
Knowing your room’s exact size makes planning your layout much easier. You can work things out on paper before a single piece of furniture is moved.
You can try different arrangements without lifting anything. You can spot issues early, like a window that limits where a wardrobe can go. You can also pick furniture that fits your space and suits the way you use the room.
Good measurements mean fewer surprises and a layout that actually works. When you know your space well, every furniture decision becomes faster and more confident.
Tools You Need to Measure a Room
You don’t need to spend money on expensive equipment to measure a room well. A few basic tools, used carefully, are all it takes to get accurate numbers every time.
Start with the essentials:
- Steel tape measure: at least 5 to 8 metres long with a locking mechanism to avoid the stretching that fabric tapes cause
- Pencil and notepad: use these to sketch the room shape and write down every measurement as you go
For trickier spaces, these optional tools help:
- Laser distance measurer: gives instant, accurate readings and is especially useful for ceiling heights or measuring large rooms alone
- Graph paper: lets you draw the room to scale so you can visualise furniture size against actual room dimensions
- Room planning apps: tools like IKEA Place let you place virtual furniture into a floor plan using your measurements
- Smartphone camera: a quick photo of each wall captures outlet positions and other details that are easy to forget
Step-by-Step Guide to Measure a Room for Furniture
Measuring a room is straightforward when you follow a clear order. Work through each step below and record everything as you go.
Step 1: Draw a Rough Sketch of the Room
Start with a simple freehand outline of the room before you measure anything. This gives you a working document to fill in with numbers at each step.
- Draw the basic shape of the room and mark where the doors and windows are located
- Label each wall A, B, C, D, so recording measurements later becomes easier and less confusing
- Note the direction each door swings; this affects where nearby furniture can be placed
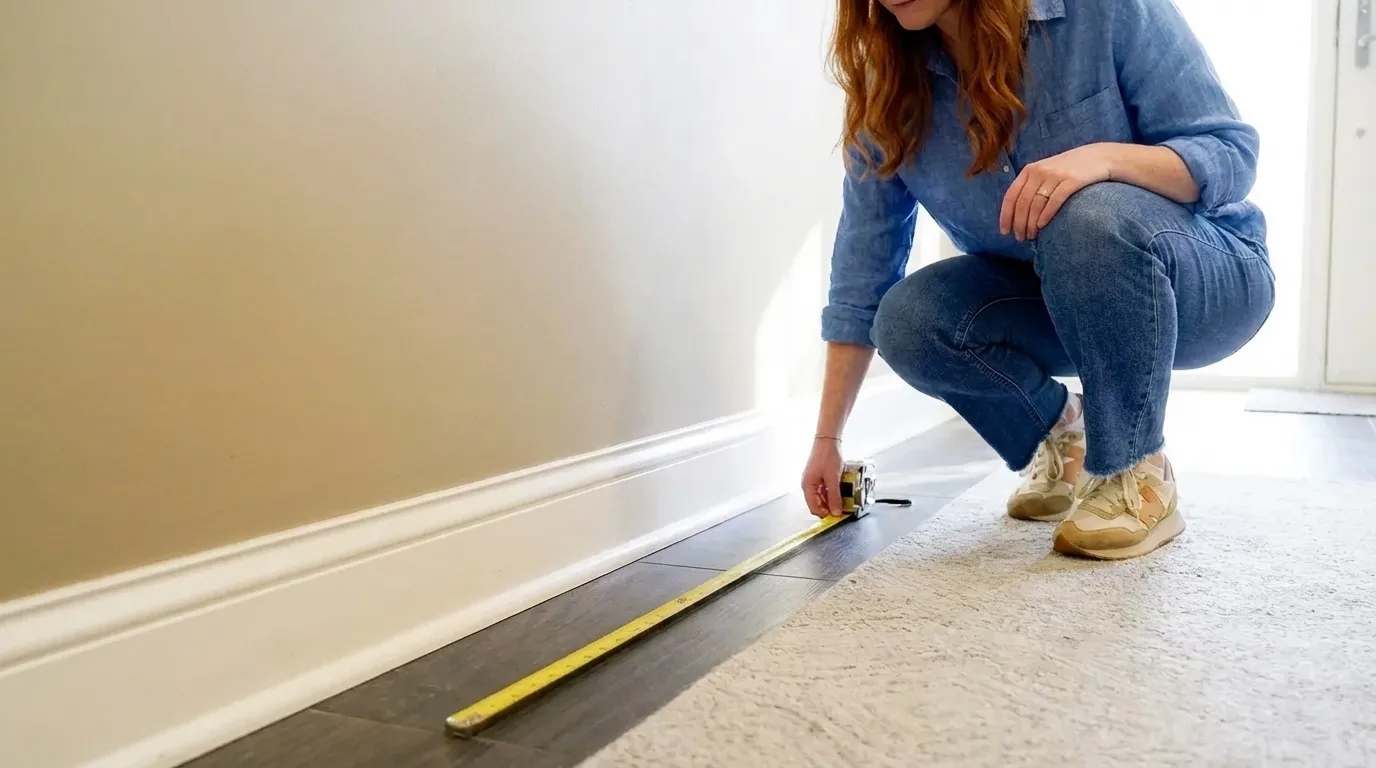
Step 2: Measure the Length and Width of Each Wall
Measure each wall from corner to corner at floor level and write the number on your sketch. Always record the full measurement; small differences add up when fitting furniture.
- Measure each wall at floor level first, then again at around 90 cm height
- Use the smaller of the two readings to account for any uneven or slightly leaning walls
- Double-check each wall before moving on to avoid errors that are hard to catch later
Step 3: Measure Ceiling Height
Ceiling height tells you what furniture is practical for the space. Measure in at least two spots since corners can differ from the centre.
- Measure from the floor to the ceiling at two or more different points in the room
- Record the lowest measurement to make sure tall furniture like wardrobes will actually fit
- A laser measurer makes this step much faster and more accurate than a standard tape
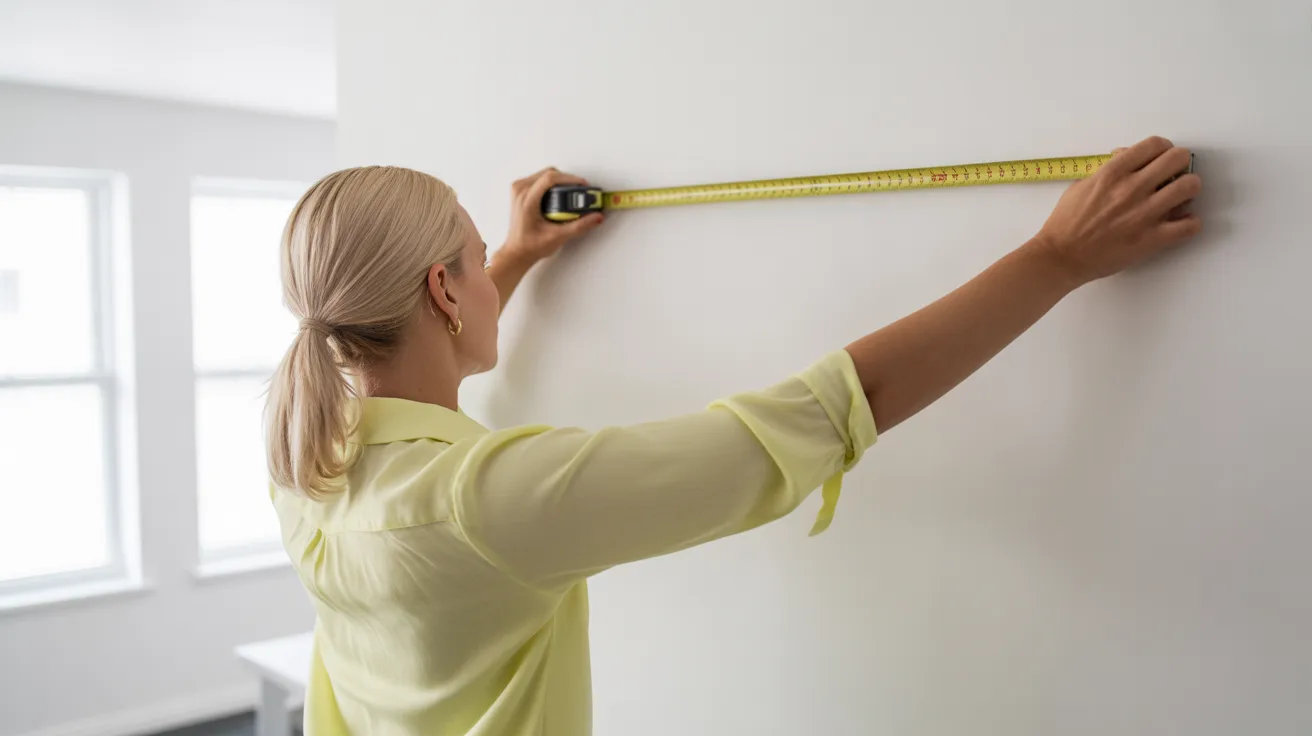
Step 4: Measure Doors, Windows, and Openings
Every door and window affects where furniture can go and how much light the room gets. These are easy to overlook but make a big difference in planning.
- Measure each door frame for width and height, and note which direction it opens
- For windows, record the width, height, and how high the sill sits from the floor
- Mark all these measurements on your sketch so nothing gets missed or forgotten later
Step 5: Note Fixed Elements (Outlets, Vents, Radiators)
Fixed elements limit where furniture can go and are easy to forget until something is already blocking them. A quick walk around the room to mark these saves a lot of trouble later.
- Mark the position of all electrical outlets and light switches on your room sketch
- Note where radiators sit, furniture placed too close blocks heat and causes airflow problems
- Identify any air vents, alcoves, or chimney breasts that affect usable floor and wall space
Step 6: Measure Pathways (Hallways, Staircases, Entry Points)
The room measurement is only half the picture, your furniture needs to get there first. Measuring the full delivery route prevents one of the most common furniture mistakes.
- Measure the front door width and the narrowest point along the full delivery route
- Note staircase width and ceiling height above the stairs for furniture going to upper floors
- Check tight corners using diagonal space to see whether large items can be tilted through
Once you have worked through all six steps, you will have everything you need to shop with confidence. No guessing, no surprises, just the right furniture in the right space.
How to Plan Furniture Placement Using Measurements
Having the right measurements is only useful if you know how to apply them. It’s time to turn those numbers into a layout that actually works.
Start with walking clearance. Leave at least:
- 90 cm for main walkways
- 60 to 75 cm on either side of the bed
- 90 cm around a dining table so chairs can be pulled out easily.
These are minimums; more space always feels better.
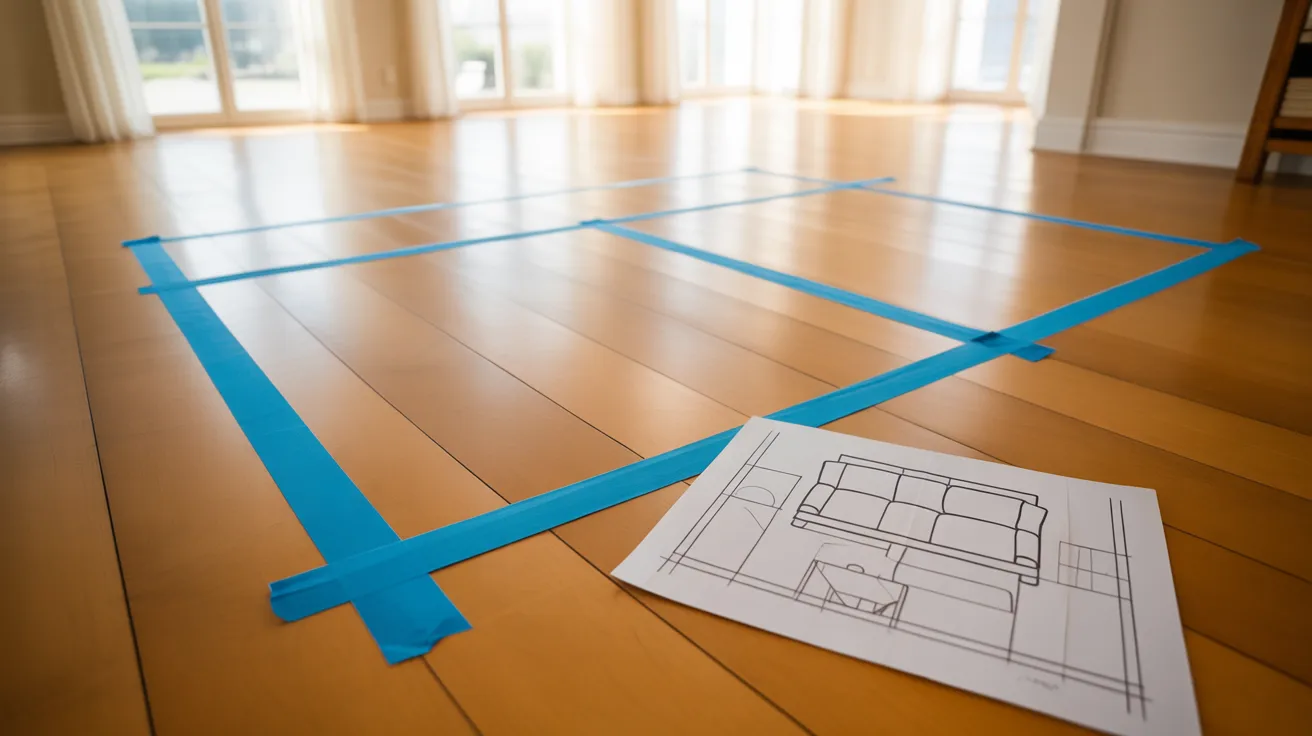
Before moving any furniture, use masking tape on the floor to mark out the footprint of each piece. Walk around it, open nearby doors, and see how the space actually feels.
This simple step reveals problems that numbers on paper often miss.
Always account for door swing and drawer pull-out space too. A door that opens into a room carves out a zone no furniture can occupy. Factor this in before finalising any placement decisions.
Key Measurement Tips for Better Accuracy
Small measuring mistakes are easy to make and hard to spot until it’s too late. These quick tips help you get accurate numbers every time:
- Measure twice at different heights: Walls aren’t always straight, so measure at floor level and again at 90 cm.
- Include skirting boards and trim: These project from the wall and push furniture further out than you expect.
- Stick to one unit throughout: Mixing centimetres and inches mid-project is a reliable way to introduce costly errors.
- Take photos as you go: A quick photo of each wall captures details like outlet positions that are easy to forget later.
- Never eyeball a space: Even experienced designers physically measure every room before making any furniture decisions.
Getting these small details right makes a big difference to the final result. A little extra care at this stage means you shop with confidence and avoid expensive mistakes down the line.
How to Measure Furniture to Match Your Room
Measuring your room is only part of the job. Before buying any large piece, you also need to check the furniture dimensions against both the room and the delivery path.
Step 1: Write Down the Furniture Dimensions
Check the product listing or measure the item yourself. Note these four dimensions:
- Width
- Depth
- Height
- Diagonal
Width tells you how much wall or floor space the piece will take. Depth shows how far it will project into the room. Height matters for tall pieces like wardrobes and bookcases. Diagonal helps you judge whether the item can be tilted through a doorway or around a corner.
Step 2: Compare the Size With Your Floor Plan
Place the furniture dimensions onto your room sketch or mark the footprint on the floor with masking tape.
This helps you see whether the piece fits the space without blocking walkways, doors, drawers, or windows.
Step 3: Check Clearance Around the Furniture
Do not stop at whether the piece physically fits.
Make sure you also have enough space to:
- walk around it comfortably
- open doors nearby
- pull out drawers fully
- use the room without feeling cramped
A sofa or bed can fit on paper and still make the room awkward in daily use.
Step 4: Measure the Full Delivery Route
Before buying, measure every point the furniture must pass through:
- front door
- entryway
- hallway
- staircase
- landings
- tight corners
Many delivery problems happen because the furniture fits the room but cannot get through the house.
Step 5: Compare the Tightest Access Point With the Furniture
Use the narrowest doorway, hallway, or turn as your main checkpoint.
If the furniture width is close to that limit, check the diagonal too. This tells you whether the piece can be angled through safely during delivery.
Step 6: Confirm the Piece Works in Real Use
Once the item fits the room and the delivery path, do one last check.
Ask whether the size makes sense for how you actually use the space. A piece should not just fit. It should leave the room comfortable, balanced, and easy to move through.
Common Mistakes to Avoid When Measuring a Room
Even careful people make the same measuring mistakes. Knowing what they are makes them easy to avoid before they cost you time and money.
- Ignoring doorways and delivery paths: measuring only the room and forgetting the route in is one of the most common and costly errors people make
- Forgetting clearance space: a piece may physically fit in a spot but leave no room to open drawers, pull out chairs, or move around comfortably
- Not accounting for irregular walls: older rooms especially can have walls that aren’t perfectly straight, leading to furniture that doesn’t sit flush or fit as expected
- Guessing instead of measuring: eyeballing a space feels quicker but regularly leads to errors of 20 cm or more, enough to make a piece completely unsuitable
None of these mistakes are hard to avoid. Measure every time, check the full delivery route, and always plan for movement, not just fit. A few extra minutes of careful measuring upfront is all it takes to sidestep every one of these problems.
Quick Checklist Before Buying Furniture
Before you place any order, run through this checklist. It takes two minutes and saves you from the most common furniture-buying mistakes.
| # | Check | Done? |
|---|---|---|
| 1 | Room dimensions recorded: all walls, ceiling height, and fixed features noted | ☐ |
| 2 | Entry paths measured: front door, hallway, and staircase widths confirmed | ☐ |
| 3 | Furniture size compared: width, height, depth, and diagonal checked against room | ☐ |
| 4 | Layout visualised: footprint marked with tape or plotted on a floor plan | ☐ |
Conclusion
Measuring a room is not just about numbers. It is about making sure every piece you bring in works with your space, not against it.
Once you understand how to measure a room for furniture, you remove guesswork from every buying decision. You can plan layouts clearly, avoid delivery issues, and create a space that feels comfortable to use every day.
The process is simple, but the impact is significant. Take the time to measure properly, follow the steps, and check your layout before buying.
Read more blogs on the website to plan your space better and make smarter furniture decisions.


