How to Make Drawers Slide Easier?
Stuck drawers can turn simple tasks into battles.
You pull, but the drawer won’t move. You tug harder, and it jerks open with a screech.
Sounds familiar?
I’m a woodworker with years of fixing drawer problems.
In this guide, You’ll learn:
- Ways to clean and maintain drawer slides
- Tips to check if you need new slides
- Steps to pick the right replacement parts
No special tools are needed – just basic household items you likely have.
These methods work for kitchen drawers, dressers, and office furniture.
By the end of this guide, you’ll know exactly how to fix those annoying drawer problems and keep them running smoothly for years.
The best part?
Most fixes are simple enough for anyone to do, even if you’ve never touched a tool before.
Essential Tools You’ll Need for the Job
Let me walk you through what you’ll need to fix those drawer problems.
Don’t worry – these aren’t fancy tools, and you might already have most of them at home.
Basic Tools
- A flat-head screwdriver
- A Phillips-head screwdriver
- Medium-grit sandpaper (120-150 grit)
- Clean rags or paper towels
- Soap and warm water
- Wire brush or old toothbrush
Lubricants
Here’s what works best for different drawer types:
- Wooden drawers: Candle wax or paraffin
- Metal slides: Silicone spray or dry lubricant
- Plastic parts: Soap bar or dry lubricant
Extra Items You Might Need
- Measuring tape (for replacement slides)
- Pliers (to remove old hardware)
- New drawer slides
A Note About Lubricants: Don’t use WD-40 on wooden drawers – it can soak into the wood and cause problems later.
Stick with dry lubricants or wax for wood. They work better and last longer.
Keep these tools within reach as you work.
Having everything ready makes the job much easier and faster.
Step-by-Step Guide: How to Fix Stiff Drawer Slides
Let me show you how to get those stuck drawers working smoothly again.
Take each step slowly and check your work as you go.
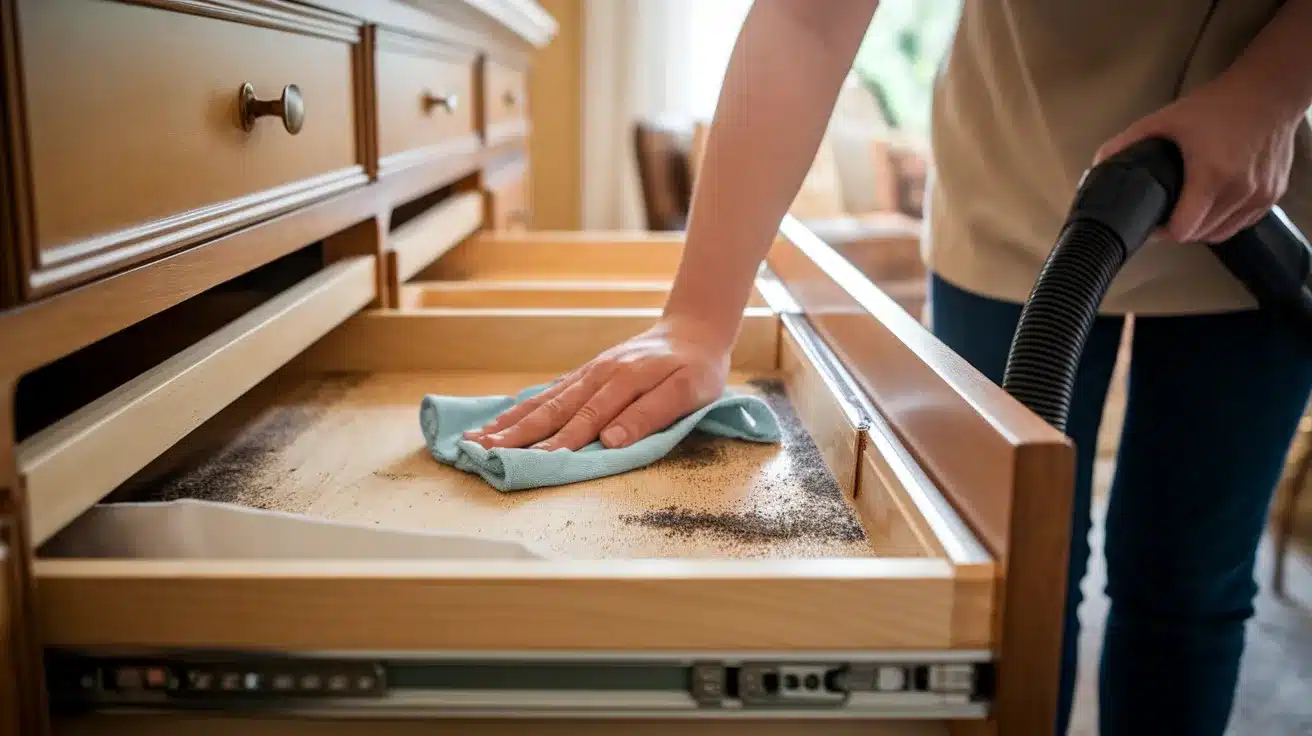
Step 1: Clean the Drawer Tracks
Pull the drawer out completely. Look closely at the tracks—you’ll often find dust, food bits, or small objects stuck in them.
Use your brush to clean both the drawer slides and the cabinet tracks thoroughly.
Wipe everything with a damp cloth, then make sure it’s completely dry.
Step 2: Check for Problems
Run your fingers along the slides.
You want to feel for any loose screws that need tightening.
Notice if there are bent metal parts or rough spots on the wood.
Pay attention to areas where parts don’t match up well.
This careful check helps you spot issues you might miss by just looking.
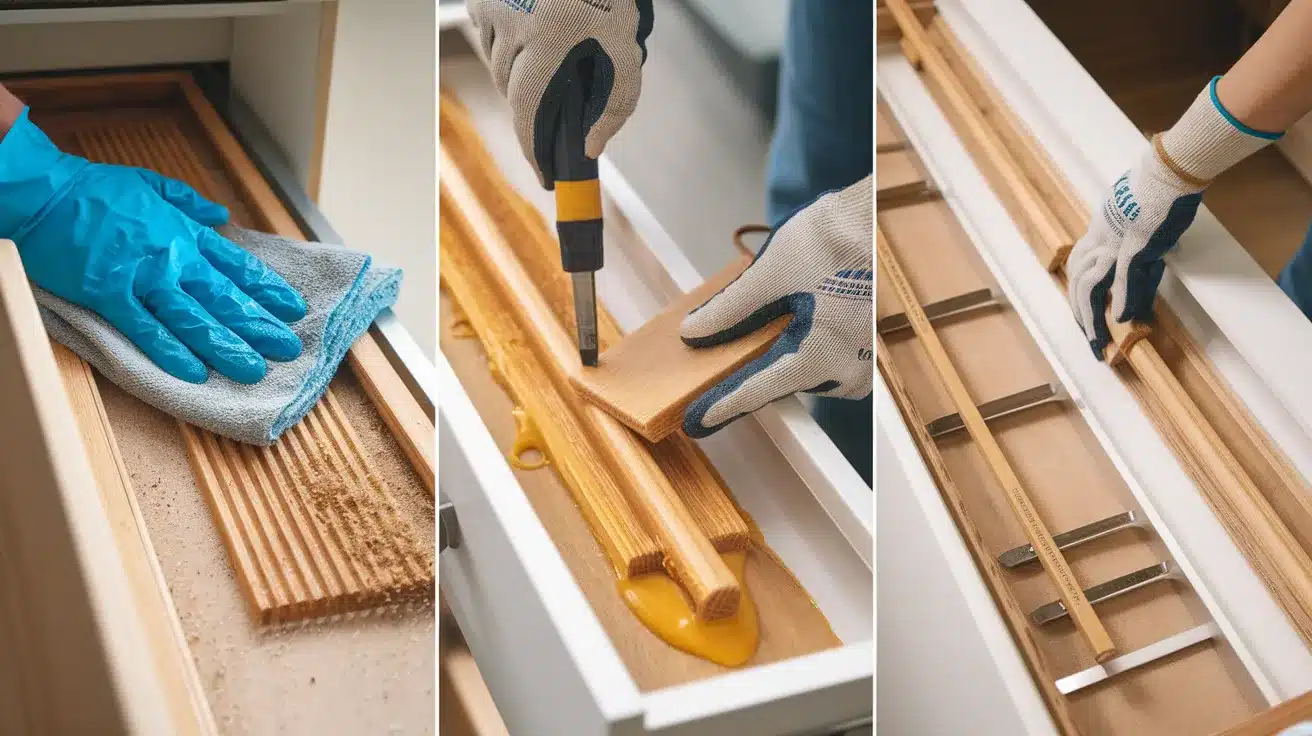
Step 3: Put on Lubricant
Now, it’s time to add the lubricant.
For wooden drawers, rub wax along the edges where they meet the cabinet.
If you have metal slides, spray a light coat of silicone on the tracks.
With plastic parts, run a dry soap bar along the rails. Don’t overdo it – a thin layer works best.
Step 4: Fix Any Misalignment
Start by tightening all loose screws you found earlier.
Use your pliers to straighten any bent metal parts carefully.
Make sure the drawer sits level in the opening.
Check that both sides line up properly when you push the drawer in. Good alignment is key to smooth sliding.
Step 5: Work on Wooden Edges
For wooden drawers, take your sandpaper and gently smooth any rough spots.
Get rid of splinters if you find them.
Slightly round off sharp edges that might catch.
When you’re done, brush away all the sawdust so it doesn’t cause problems later.
Step 6: Try It Out
Open and close the drawer several times.
It should now move freely without sticking.
If you still feel it is catching somewhere, return to the step needing more attention.
Sometimes, it takes a couple of tries to get everything just right.
Remember: Take your time with each step.
Fast work often means you’ll need to fix it again soon.
When to Replace Drawer Slides: Signs to Look For
Sometimes, fixing old drawer slides isn’t enough.
Based on my experience working with furniture, here are clear signs that it’s time for new slides.
Worn Out Beyond Repair
You’ll see rust spots eating through the metal, or parts of the slide might be cracked or broken.
When metal starts flaking off or holes appear in the tracks, no amount of cleaning or lubricant will help.
These slides need to be replaced.
Still Stuck After Fixes
You’ve cleaned, lubricated, and adjusted everything perfectly, yet the drawer still sticks or won’t slide right.
This means the slides have likely lost their shape or smooth surface.
New slides are your best option here.
Shaky and Unstable
Your drawer wobbles from side to side or feels loose when you pull it.
If tightening screws doesn’t solve the problem, the slide mechanism itself has worn down.
This can lead to the drawer falling out – it is better to replace the slides now.
Making Bad Noises
Listen for metal grinding against metal or loud squeaking that won’t go away with oil.
These sounds mean the slides have serious wear.
When you hear crunching or scraping, that’s metal parts rubbing where they shouldn’t.
Time for new slides.
Preventive Maintenance: Keeping Your Drawers Sliding Smoothly
A little care goes a long way in keeping your drawers working well.
Let me share some simple tips I’ve learned to prevent drawer problems before they start.
1. Regular Cleaning Matters
Take five minutes every few months to clean your drawer tracks.
Wipe them down with a dry cloth first, then use a slightly damp one to remove stuck-on dirt.
Make sure to dry the tracks well after cleaning.
This simple step stops dirt from building up and causing problems.
2. Keep Them Slick
Mark your calendar to add lubricant every six months.
For wooden drawers, run a candle or wax block along the slides.
Metal tracks need just a light spray of silicone lubricant.
Don’t skip this step – it keeps everything moving smoothly.
3. Watch The Weight
Heavy drawers wear out their slides faster.
Spread heavy items across different drawers instead of putting them all in one.
When you fill a drawer, make sure you can lift it easily with one hand – if you can’t, it’s too heavy.
4. Check The Hardware
Once every few months, open each drawer and look at the screws.
Give any loose ones a quick tighten with your screwdriver.
This keeps the slides properly lined up and prevents wobbling.
Alternative Solutions for Stubborn Drawers
Sometimes,, the usual fixes are ineffective. Here are some other methods that work well for tricky drawer problems.
1. Stick-On Felt Pads
Place small felt pads on the drawer corners where they rub against the frame.
These work like magic for wooden drawers that catch or stick.
If the pads are too big, cut them to fit.
The smooth felt surface helps the drawer glide instead of drag.
2. Natural Wax Solutions
Regular candle wax works fine, but paraffin or beeswax lasts longer.
Rub the wax block firmly along the drawer edges and tracks.
These natural options work better than oil-based products because they don’t get sticky over time.
Plus, they’re safe to use on any wood finish.
3. Drawer Slide Tape
This special tape has a slick surface that helps drawers move easily.
Put it along the bottom edges where the drawer meets the frame.
The tape is thin but strong, and it keeps working even after years of use.
Make sure to clean the surface well before you stick it on.
4. Switch to Metal Slides
If you’re tired of wooden slides giving you trouble, think about changing to metal ones.
While this takes more work upfront, metal slides last much longer.
They also let you pull the drawer out all the way, which makes it easier to reach things in the back.
Just pick one method to start with – trying too many fixes at once makes it hard to know what really helped.
Start simple, then move to bigger changes if needed.
DIY Tips for Enhancing Drawer Glide Without Overhauling

You don’t need fancy tools or major changes to make your drawers work better. Here are some quick fixes I use for common drawer problems.
1. Simple Soap and Wax Tricks
Take a plain bar of soap or an old candle and run it along the drawer tracks.
Don’t press too hard – you want a thin layer that lets the wood slide smoothly.
Rub it where the drawer touches the frame. This creates a slick surface that lasts for months.
2. Nylon Tape Fix
Get some nylon tape from your local hardware store.
Put it on spots where the drawer rubs or catches.
The slippery surface of the tape helps the drawer move like new.
Cut the tape to fit exactly where you need it. This fix takes just minutes but works great.
3. Gentle Hammer Work
If your drawer slides look a bit bent, grab a rubber mallet.
Tap very gently to straighten metal parts that aren’t lined up right.
Work slowly and check often – small taps work better than hard hits.
This can fix slides that seem broken but just need reshaping.
4. Better Slides for Smooth Motion
Ready for a bigger change?
Ball-bearing slides make drawers feel as smooth as silk.
Soft-close slides stop drawers from slamming shut.
While these cost more than the other fixes, they make your drawers work like new ones.
You can add them without replacing the whole drawer.
Conclusion
Stuck drawers don’t have to stay that way.
Start with simple fixes like cleaning and lubricating.
With basic care and the right tools, most drawer problems can be solved.
Remember to clean the tracks often, and don’t overload your drawers.
Try felt pads or nylon tape before buying new slides if the simple fixes don’t work.
These quick solutions often solve the problem for just a few dollars.
What’s worked for you?
Share your drawer-fixing stories in the comments below.
Did you try any of these methods?
How did they work out? I’d love to hear about your experiences, and I’ll help if you have questions about fixing your specific drawer problems.
Keep your drawers running smoothly, and they’ll serve you well for years to come.
Frequently Asked Questions
How Long Do Drawer Slides Typically Last?
With proper care, quality drawer slides last 5-10 years.
Heavy use, excess weight, and lack of maintenance can cut this time in half.
What Size Drawer Slides Should I Buy?
Measure the drawer depth and choose slides that are 2 inches shorter than this measurement for proper fit and function.
Can I Mix Different Types of Drawer Slides?
No, always use matching pairs of slides.
Mixing different types or brands can cause uneven movement and damage your drawers.
Why Does My Drawer Fall Out When Fully Extended?
This happens when the drawer stop is broken or missing.
Install new drawer stops or replace the slides with ones that have built-in stops.
Is It Normal for New Drawer Slides to Feel Stiff?
Yes, new slides often need a break-in period.
Gently open and close the drawer about 10-15 times to help them loosen up.